
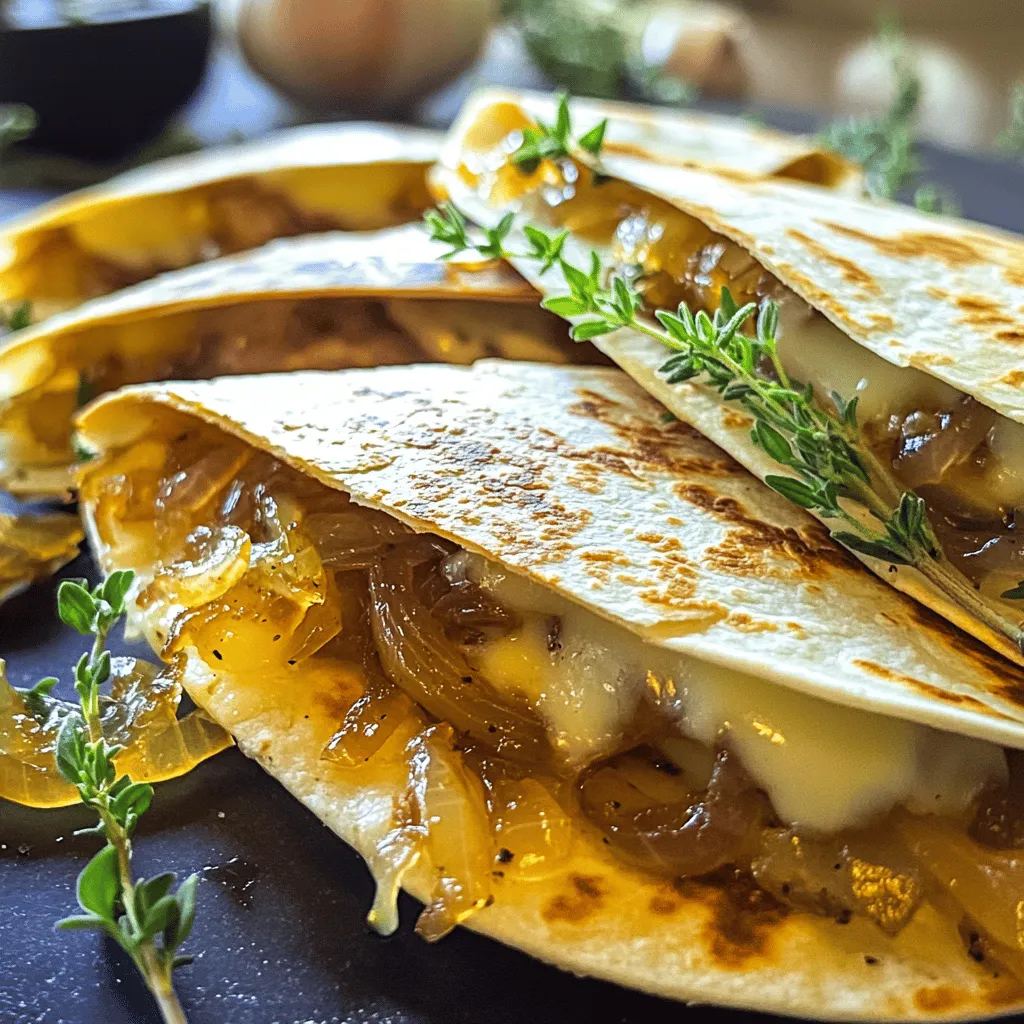
If you’re looking for a delicious twist on classic quesadillas, you’ve come to the right place! Caramelized Onion Gruyere Quesadillas are a perfect treat for any meal. The sweet, rich flavor of caramelized onions pairs perfectly with the creamy Gruyere cheese, making each bite a delight. Ready to impress your family and friends? Let’s dive into the ingredients and steps to create this mouthwatering dish!
Ingredients
Main Ingredients for Caramelized Onion Gruyere Quesadillas
– 2 large onions, thinly sliced
– 2 cups Gruyere cheese, shredded
– 4 large flour tortillas
Essential Seasonings
– 2 tablespoons olive oil
– 1 tablespoon unsalted butter
– 1 teaspoon balsamic vinegar
– 1 teaspoon garlic powder
– Salt and freshly ground black pepper to taste
Optional Garnishes
– Fresh thyme leaves
– Salsa or guacamole
Caramelized onion Gruyere quesadillas are easy to make and so tasty. You start with onions. Thinly slice two large onions. The onions need to cook slowly until they are golden brown and sweet. Gruyere cheese adds a rich flavor and melts perfectly. You need four large flour tortillas to hold all this goodness.
Now, let’s talk about the seasonings. You will need two tablespoons of olive oil and one tablespoon of unsalted butter. This mixture helps the onions caramelize nicely. Balsamic vinegar adds a touch of sweetness. Don’t forget salt and pepper to enhance the taste. A teaspoon of garlic powder adds even more flavor.
For garnishes, you can use fresh thyme leaves for a pop of color and taste. You might also want to serve your quesadillas with salsa or guacamole. These extras make the dish even more fun.
Step-by-Step Instructions
Caramelizing the Onions
To start, grab a large skillet. Add two tablespoons of olive oil and one tablespoon of unsalted butter. Heat this mixture over medium heat until the butter melts. Once the oil and butter are hot, add two large, thinly sliced onions. Stir them gently to coat. Cook slowly, stirring every few minutes. This helps the onions caramelize evenly.
You want to watch them closely. After about 15 to 20 minutes, they should turn golden brown and soft. Near the end, add one teaspoon of balsamic vinegar. This adds a nice sweetness. Don’t forget to sprinkle in some salt and freshly ground black pepper. Stir well to mix everything. When done, take them off the heat and set them aside.
Assembling the Quesadillas
Now, it’s time to put together your quesadillas. Take a clean skillet and add a little olive oil to lightly coat the bottom. Heat this over medium heat. Grab a large flour tortilla and place it on a clean surface. Sprinkle one cup of shredded Gruyere cheese over half of the tortilla.
Next, add a generous scoop of your caramelized onions on top. Don’t skimp here; the more, the better! Then, add another cup of Gruyere cheese on top of the onions. Now, carefully fold the tortilla in half. Press it down gently to avoid spills.
Cooking the Quesadillas
Place the folded quesadilla in the preheated skillet. Cook it for about 3 to 4 minutes on one side. Check for a nice golden brown color. Then flip it over and cook the other side for another 3 to 4 minutes. You want the tortilla crispy and the cheese gooey. If it browns too fast, lower the heat a bit.
Once cooked, remove it from the skillet. Use a sharp knife or pizza cutter to slice it into wedges. Enjoy these warm and hot!
Tips & Tricks
Perfecting the Flavor and Texture
To make great caramelized onions, use medium heat. This heat allows onions to soften without burning. Stir the onions every few minutes. This helps them cook evenly. If they start to brown too fast, lower the heat. You want a rich, deep brown color for the best flavor. Add a pinch of salt early to help draw out moisture. This makes the onions sweet and soft.
Additional Flavor Enhancements
You can add spices to your quesadillas for extra flavor. Try a pinch of smoked paprika or a dash of cumin. Fresh herbs can also boost taste. Chopped parsley or cilantro offer fresh notes. If you want to switch cheeses, use mozzarella or sharp cheddar. Each will give a unique twist to your dish.
Serving Suggestions
For a nice presentation, serve quesadillas on a bright platter. Cut them into wedges for easy eating. Add a sprinkle of garlic powder on top for extra flavor. Fresh thyme leaves can add a pop of color. For dips, salsa and guacamole are perfect. They add freshness and creaminess to each bite.

Variations
Alternative Fillings
You can mix things up by adding proteins. Try cooked chicken or beef for a hearty bite. If you prefer a vegetarian option, mushrooms or spinach work great too. Just sauté them before adding to enhance their flavor. This flexibility makes your quesadilla fun and unique.
Different Cheese Options
Gruyere cheese shines in this dish, but don’t stop there! You can experiment with other cheeses like mozzarella or cheddar. Each cheese brings its own taste. For even more flavor, combine different cheeses. This mix adds depth and makes every bite richer.
Serving Styles
Get creative with how you serve your quesadillas. Roll them up for kids; they love the fun shape. Cut them into triangles for a classic look. You can also make quesadilla nachos! Simply slice the quesadillas and layer them on a platter. Top with salsa and guacamole for a party hit. This adds a festive touch to any gathering.
Storage Info
Refrigerating Leftovers
To store your quesadillas in the fridge, place them in an airtight container. This keeps them fresh and tasty. You can also wrap each quesadilla in foil or plastic wrap. This method helps prevent them from drying out. Your quesadillas will stay good for about 3 to 4 days. After that, they might lose flavor and texture.
Reheating Instructions
When reheating, you want to keep that nice crispiness. The best way is to use a skillet. Heat it on medium and add a little oil. Place the quesadilla in the skillet for about 2 to 3 minutes on each side. This gets it warm and crispy. If you prefer a quicker method, you can use the microwave. Just be careful, as it can make the quesadilla soft. Heat it for about 30 seconds to 1 minute.
Freezing Quesadillas
You can freeze quesadillas for later. If you freeze before cooking, wrap each one in foil or plastic wrap. Place them in a freezer bag. They can last up to 2 months this way. If you want to freeze them after cooking, let them cool first. Then, wrap and place them in a bag. To thaw, take them out and let them sit in the fridge overnight. You can also use the microwave to defrost them quickly. Just remember to reheat in a skillet for that crispy finish.
FAQs
What is the best way to caramelize onions?
To caramelize onions, you need to cook them low and slow. Start by heating olive oil and butter in a skillet over medium heat. Add thinly sliced onions and stir them often. This helps them cook evenly. It usually takes about 15-20 minutes for them to turn golden brown and soft. Near the end, add a splash of balsamic vinegar and a pinch of salt and pepper. This adds a nice flavor. Remember, patience is key for sweet, rich taste.
Can I make these quesadillas ahead of time?
Yes, you can prepare these quesadillas ahead. Cook the caramelized onions and store them in the fridge. When ready to eat, assemble the quesadillas. You can also cook them in advance. Just store cooked quesadillas in an airtight container. When it’s time to eat, reheat them in a skillet. This keeps them crispy. Make sure to reheat on low heat for even warming.
What are some good sides to serve with quesadillas?
Quesadillas pair well with many sides. Here are a few tasty options:
– Salsa: Fresh or chunky adds a nice kick.
– Guacamole: Creamy and rich, it balances the flavors.
– Sour cream: A cool dip that complements the heat.
– Salad: A fresh side brings crunch and color.
– Chips: Tortilla chips add a fun crunch element.
Feel free to mix and match these sides to find your favorite combination!
To make delicious caramelized onion Gruyere quesadillas, start with fresh ingredients and seasonings. I shared tips on caramelizing onions and assembling quesadillas for the best flavors. Remember to consider optional garnishes and variations to personalize your dish.
These quesadillas are easy to store and reheat, ensuring a tasty meal anytime. With just a few modifications, you can impress your family and friends. Enjoy creating this satisfying dish and feel free to get creative!
