Craving a sweet treat that’s both simple to make and incredibly creamy? These No-Bake Biscoff Cheesecake Bars are the answer. With just a few key ingredients, you can whip up a dessert that packs bold flavor with each bite. Follow my easy steps to create a delicious treat that impresses friends and family. Ready to indulge? Let’s dive into the recipe and make dessert magic happen!
Ingredients
Here’s what you need for your no-bake Biscoff cheesecake bars:
– 200g Biscoff cookies, finely crushed
– 100g unsalted butter, melted and slightly cooled
– 300g cream cheese, softened to room temperature
– 250ml heavy whipping cream, chilled
– 100g powdered sugar, sifted
– 100g Biscoff spread (plus extra for drizzling)
– 1 teaspoon pure vanilla extract
– A pinch of salt
– Extra Biscoff cookies, crushed, for garnish (optional)
Each ingredient plays a key role in making these bars creamy and delicious. The Biscoff cookies form a rich, buttery crust that adds a nice crunch. Cream cheese gives the filling its smooth texture, while heavy cream adds lightness. The Biscoff spread brings in that signature flavor, making every bite a delight.
Make sure your cream cheese is at room temperature. This helps it blend smoothly. Chill your heavy cream well; it whips better when cold. If you want to add a touch of flair, consider garnishing with crushed cookies or a drizzle of extra Biscoff spread. This adds a lovely look and taste.
Gather these ingredients, and you are ready to create a dessert that’s sure to impress!
Step-by-Step Instructions
Preparing the Crust
To start, take your Biscoff cookies and crush them finely. You can use a food processor or a plastic bag and a rolling pin. Aim for a fine crumb that resembles sand. Next, melt your unsalted butter and let it cool a little. In a mixing bowl, combine the crushed Biscoff cookies with the melted butter. Mix well until the texture feels like wet sand.
Now, it’s time to form the base. Grab an 8×8-inch baking pan lined with parchment paper. Firmly press the cookie mixture into the bottom of the pan. Make sure it’s even and compact. This forms the perfect crust for your bars. Once done, place the pan in the refrigerator to chill while you prepare the cheesecake filling.
Making the Cheesecake Filling
For the cheesecake mixture, take your softened cream cheese and place it in a separate bowl. Use an electric mixer to beat it until it’s completely smooth. You want a creamy texture with no lumps. This step is key for a nice filling.
Now, add the sifted powdered sugar, Biscoff spread, vanilla extract, and a pinch of salt into the smooth cream cheese. Mix well until everything is combined. The mixture should be rich and creamy, making your cheesecake filling delicious.
In another bowl, whip the chilled heavy cream using a hand mixer. Beat it until stiff peaks form. This step adds lightness to your cheesecake filling.
Carefully fold the whipped cream into the cream cheese mixture using a spatula. Be gentle here to keep the airiness. Mix until you see no streaks of whipped cream.
Assembling and Setting the Bars
Now it’s time to assemble the bars. Pour the luscious cheesecake filling over the chilled cookie crust. Use a spatula to smooth the top and create an even layer.
Cover the pan and place it in the refrigerator. Chill for at least 4 hours. For the best results, letting it set overnight is ideal.
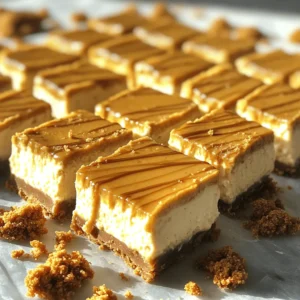
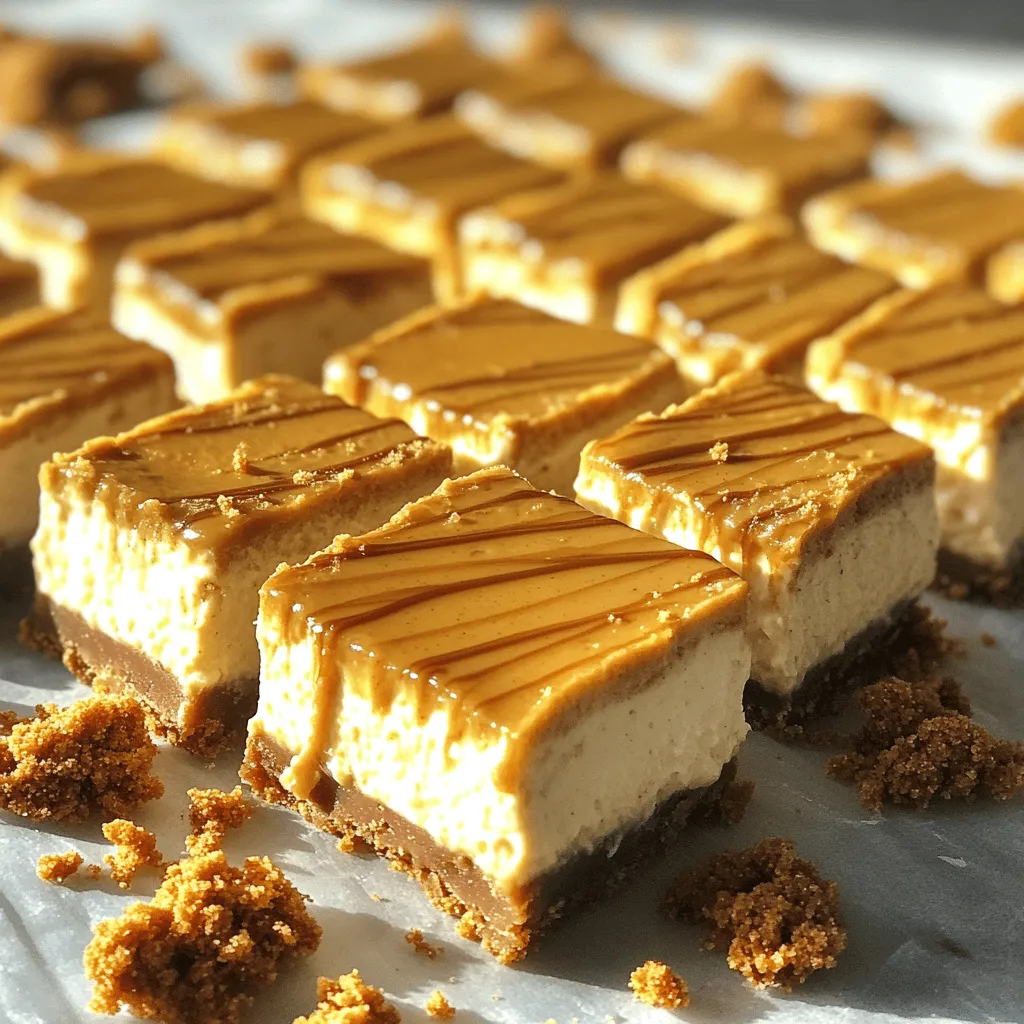
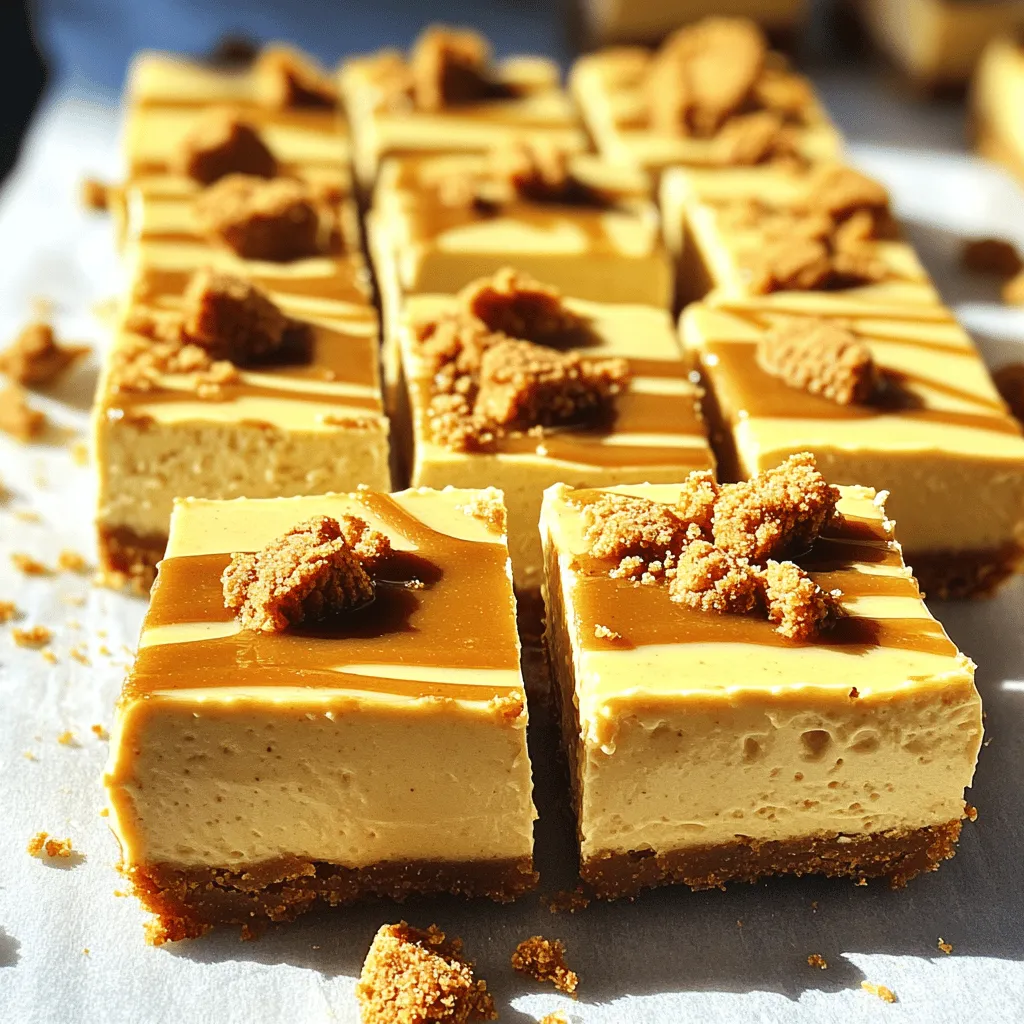
Once the cheesecake has fully set, carefully lift it out of the pan using the parchment paper. Cut into 9 bars for perfect portions. If you want to add an extra touch, drizzle warm Biscoff spread over each bar. You can also sprinkle crushed Biscoff cookies on top for added sweetness and crunch. Enjoy your creamy treat!
Tips & Tricks
Ensuring the Perfect Texture
To make the best no-bake Biscoff cheesecake bars, start with room temperature cream cheese. Cold cream cheese makes it hard to mix. It can leave lumps in your filling. Let the cream cheese sit out for about 30 minutes before using it.
When whipping the cream, use a chilled bowl and beaters. This helps the cream whip up nicely. Beat it until stiff peaks form. You will know it’s ready when you can turn the bowl upside down and the cream stays in place. This adds lightness to your cheesecake.
Serving Suggestions
Presentation matters! Serve your cheesecake bars on a pretty platter. You can drizzle warm Biscoff spread on top for extra flavor. Sprinkle crushed Biscoff cookies around the edges for a fun touch.
These cheesecake bars pair well with fresh fruit like strawberries or raspberries. A dollop of whipped cream on the side also adds a nice touch. Enjoy every bite of this creamy treat!
Variations
Flavor Modifications
You can easily change the taste of your No-Bake Biscoff Cheesecake Bars. Here are some fun ideas:
– Adding chocolate or caramel essence: Stir in a bit of chocolate or caramel syrup to your cheesecake mix. This adds a rich layer of flavor. Just a tablespoon or two can make a big difference!
– Alternative spreads or toppings: Try using Nutella or peanut butter instead of Biscoff spread. You can also top the bars with fresh fruit or a swirl of whipped cream. These changes can make your bars unique and exciting.
Dietary Alternatives
Making this dessert fit special diets is simple!
– Gluten-free options with cookie substitutions: Swap Biscoff cookies with gluten-free cookies. Many brands offer gluten-free options that taste great. Just ensure your butter is also gluten-free.
– Vegan adaptations for non-dairy ingredients: For a vegan version, use a dairy-free cream cheese and coconut cream in place of heavy cream. Almond or cashew cream works well, too. Make sure your cookie choice is also vegan!
These variations keep your No-Bake Biscoff Cheesecake Bars fun and inclusive for everyone. Feel free to experiment and find your favorite twist!
Storage Info
Best Practices for Storing Cheesecake Bars
To keep your no-bake Biscoff cheesecake bars fresh, store them in the fridge. Use an airtight container to prevent them from absorbing smells. You can also cover the pan tightly with plastic wrap. This keeps the bars moist and tasty.
If you want to keep them longer, freezing is a great option. Wrap each bar in plastic wrap, then place them in a freezer bag. This helps protect them from freezer burn. Make sure to label the bag with the date.
Shelf Life Expectancy
In the fridge, these cheesecake bars will stay good for about five days. If you freeze them, they can last for up to three months. When you’re ready to eat, just thaw them in the fridge overnight. Enjoy the creamy goodness!
FAQs
Can I use a different type of cookie for the crust?
Yes, you can! If you want to swap the Biscoff cookies, here are some tasty options:
– Graham crackers: These give a classic cheesecake flavor.
– Oreos: Chocolate lovers will enjoy this twist.
– Digestive biscuits: These add a nice crunch.
– Sugar cookies: A sweet and soft alternative.
Feel free to mix and match based on your taste. Each cookie brings its own charm!
How do I know when the cheesecake is set?
You can tell when your cheesecake is set by looking for these signs:
– Firm edges: The edges should feel firm to the touch.
– Slight jiggle: The center can have a slight jiggle but not be liquid.
– Chilled time: Chill for at least 4 hours, overnight is best.
Proper chilling makes the bars creamy and easy to slice.
What can I do if my cheesecake mixture is too runny?
If your cheesecake mixture is too runny, don’t worry! Here are some tips to fix it:
– Add more cream cheese: Blend in a bit more to thicken the mixture.
– Whip it longer: Make sure to whip the cream to stiff peaks.
– Chill longer: Sometimes, extra chilling helps it set up more.
Adjusting these elements will help you achieve that perfect creamy texture.
You now know how to make delicious Biscoff cheesecake bars. We covered the key ingredients, step-by-step instructions, and storage tips. Remember to use room temperature cream cheese for the best texture and try different flavors or diets to make it your own. These bars are not just tasty; they also look great and store well. Enjoy your homemade treat!