WANT TO SAVE THIS RECIPE?
Are you ready to indulge in a sweet treat that’s both fun and easy to make? Key Lime Pie Bars are the perfect dessert for any occasion, brimming with zesty flavors that refresh your taste buds. In this article, I’ll walk you through simple steps and essential tips to create these delightful bars. Whether you’re hosting a gathering or just treating yourself, get ready to whip up a dessert that everyone will love!

Why I Love This Recipe
- Refreshing Flavor: The zesty key lime filling provides a delightful burst of citrus flavor that is both refreshing and invigorating, perfect for summer gatherings.
- Easy to Make: This recipe is straightforward, requiring minimal ingredients and steps, making it accessible even for novice bakers.
- Perfectly Portionable: These bars are easy to cut into squares, making them ideal for serving at parties or potlucks where guests can enjoy a perfect portion.
- Garnish Appeal: The addition of whipped cream and lime slices not only enhances the flavor but also elevates the visual presentation, making them irresistible.
Ingredients
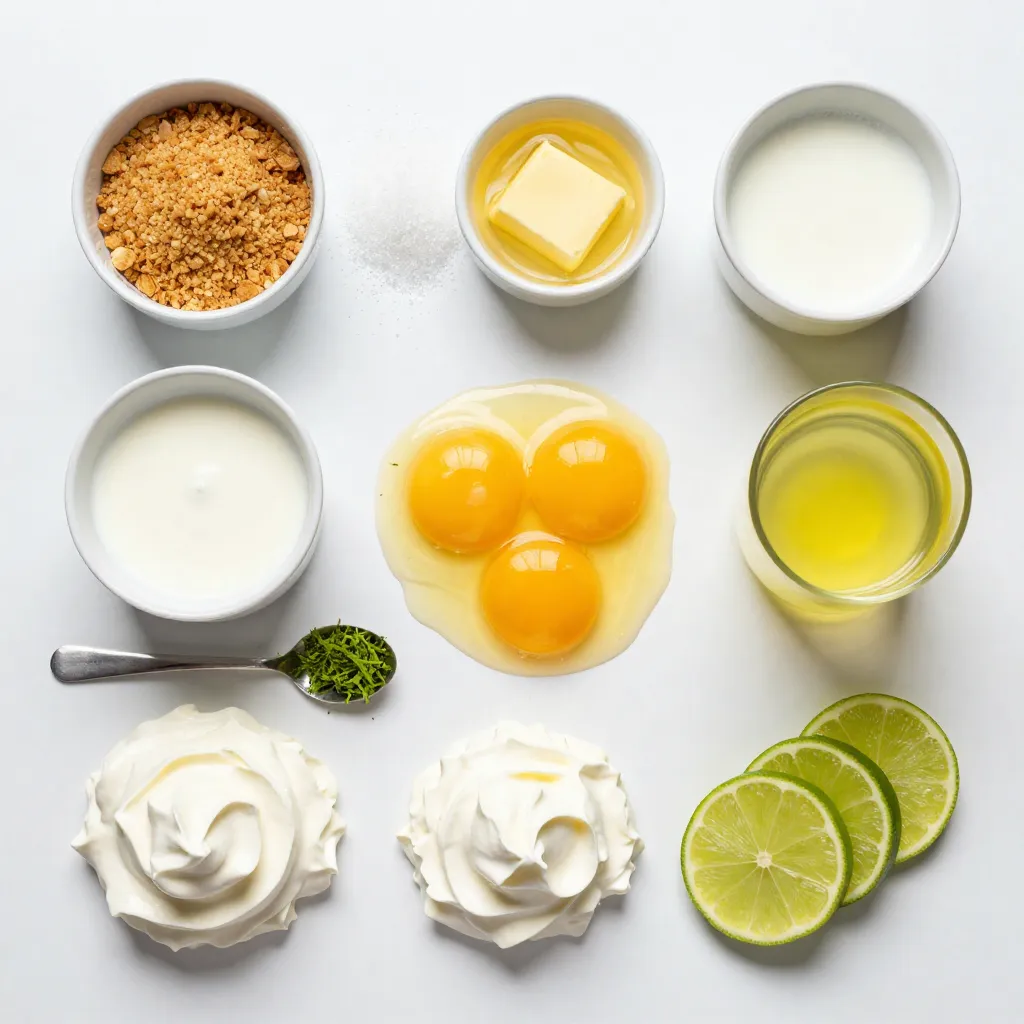
Essential Ingredients for Key Lime Pie Bars
– 1 cup graham cracker crumbs
– 1/4 cup granulated sugar
– 1/2 cup unsalted butter, melted
– 2 cups sweetened condensed milk
– 3/4 cup fresh key lime juice (approximately 12-15 limes)
– 1 tablespoon finely grated lime zest
– 3 large egg yolks
– Whipped cream, for topping
– Thin lime slices, for garnish
For key lime pie bars, you need simple yet key ingredients. First, the crust needs graham cracker crumbs. The crumbs give a nice crunch and flavor. You mix them with sugar and melted butter. This mix makes a tasty base.
Next comes the filling. Sweetened condensed milk brings sweetness and creaminess. Fresh key lime juice adds that zesty kick. You will need about 12-15 limes for the juice. Grated lime zest adds more lime flavor. The egg yolks help bind everything together.
Finally, for serving, whipped cream is a must. It balances the tartness of the pie. Thin lime slices make the bars look pretty and fresh. Each ingredient plays a big part in making these bars special.
Step-by-Step Instructions
Prepping the Oven and Baking Dish
First, preheat your oven to 350°F (175°C). This step ensures your bars bake evenly. Next, grab an 8×8 inch baking dish. Line it with parchment paper. Let the edges hang over the sides. This makes it easy to lift out the bars later.
Making the Graham Cracker Crust
In a medium bowl, combine 1 cup of graham cracker crumbs and 1/4 cup of granulated sugar. Stir well to mix them. Then, pour in 1/2 cup of melted unsalted butter. Mix until the mixture looks like wet sand. Pack this graham cracker mixture firmly into the bottom of your baking dish. Make sure it is even and well-pressed. Bake the crust for 10 minutes. It should look lightly golden when done.
Preparing the Key Lime Filling
In a large mixing bowl, whisk together 2 cups of sweetened condensed milk, 3/4 cup of fresh key lime juice, and 1 tablespoon of finely grated lime zest. Add 3 large egg yolks to the bowl. Mix until everything is smooth and fully blended. This filling is where the magic happens!
Baking the Key Lime Bars
Once your crust has cooled, pour the key lime filling over it. Spread the mixture evenly with a spatula. Place the baking dish back in the oven. Bake for 15 to 18 minutes. The filling should be set but still have a slight jiggle in the center. When the baking time is up, take the dish out. Let the bars cool to room temperature. After that, refrigerate them for at least 2 hours. This ensures they set properly and chill nicely.
Tips & Tricks
Achieving the Perfect Crust
To make a great crust, pack it evenly in the dish. Use your hands or the back of a measuring cup to press it down firmly. Bake the crust until it is lightly golden, about 10 minutes. This step gives it a nice crunch and stops it from being soggy.
Key Lime Filling Consistency
For the best texture, mix the sweetened condensed milk, lime juice, zest, and egg yolks until smooth. This ensures a creamy filling. If you like it sweeter, add a bit more sugar. Taste the filling before baking to make sure it’s just right.
Serving Suggestions
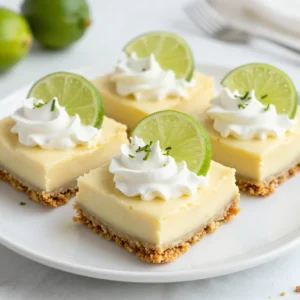
For a fun presentation, cut the bars into squares and place them on a pretty platter. Top each bar with a dollop of whipped cream. Add a thin lime slice on top for a bright look. You could also sprinkle extra lime zest around the bars for a pop of color.
Pro Tips
- Use Fresh Limes: For the best flavor, always use fresh key limes instead of bottled juice. The freshness makes a significant difference in taste.
- Chill Thoroughly: Allow the bars to chill for at least 2 hours after baking. This ensures they set properly and makes cutting easier.
- Adjust Sweetness: If you prefer a tangier flavor, feel free to reduce the amount of sweetened condensed milk slightly to balance the tartness of the key limes.
- Garnish Creatively: Besides whipped cream, consider adding toasted coconut or crushed graham crackers as an alternative garnish for added texture.
Variations
Vegan Key Lime Pie Bars
To make vegan key lime pie bars, I switch out the dairy and eggs. For the crust, use coconut oil instead of butter. This gives a nice flavor and texture. For the filling, replace sweetened condensed milk with coconut cream. Use flax eggs as a substitute for regular eggs. Mix one tablespoon of ground flaxseed with three tablespoons of water. Let it sit for five minutes until it thickens. This works well in many recipes.
Gluten-Free Key Lime Pie Bars
For gluten-free key lime pie bars, I use gluten-free graham crackers. Many brands offer these tasty options. Just make sure to check the label. The rest of the recipe stays the same. You can still enjoy that zesty flavor without any gluten. This makes it perfect for those with gluten sensitivities.
Mini Key Lime Pie Bars
I love making mini key lime pie bars for parties. To do this, simply use a mini muffin tin instead of an 8×8 inch dish. Press the crust into the bottom of each cup. Fill them with the key lime mixture just like the larger bars. Bake them for about 12-15 minutes. Once they cool, you can pop them out easily. These bite-sized treats are fun and great for sharing!
Storage Info
Best Practices for Storing Bars
To keep your Key Lime Pie Bars fresh, store them in the fridge. Place the bars in an airtight container. This helps maintain their zesty flavor and creamy texture. If you need to freeze them, wrap each bar tightly in plastic wrap. Then, put them in a freezer-safe bag. This will help them last longer and keep them tasty.
Shelf Life of Key Lime Pie Bars
These bars can stay fresh in the fridge for about a week. After that, you might notice a change in flavor or texture. Signs of spoilage include a sour smell, discoloration, or a watery appearance. If you see any of these signs, it’s best to toss the bars. Always trust your senses when it comes to food safety!
FAQs
Can I use regular limes instead of key limes?
Yes, you can use regular limes. However, key limes have a unique taste. They are more tart and fragrant. This makes your bars taste fresh and zesty. Regular limes are less tart and can taste a bit bitter. You may need to adjust the sugar if you use them. Key limes are the star of this dish, so try to use them if you can.
How long do Key Lime Pie Bars need to chill?
Key Lime Pie Bars need at least 2 hours to chill. This time helps them set up well. If you want them extra firm, chill them longer. Chilling helps the flavors blend nicely and gives them the right texture. Be patient! The wait is worth it when you take that first bite.
Can I make the bars in advance?
Absolutely! You can make these bars a day ahead. Just follow the recipe and chill them. They store well in the fridge. If you want to freeze them, wrap them tightly. When you are ready to serve, let them thaw in the fridge. This makes it easy for parties or gatherings. Enjoy the convenience of a great dessert ready to go!
Key lime pie bars combine a tasty crust, a creamy filling, and fresh lime zest. You learned how to make the crust, fill it, and bake it just right. I shared tips for perfect bars and fun variations, like vegan and gluten-free options. Remember to store your bars well for the freshest taste. Enjoy this bright, zesty treat anytime! You’ll impress your friends and family with these simple steps. Happy bakin
Zesty Key Lime Pie Bars
A refreshing dessert with a tangy key lime filling on a graham cracker crust, topped with whipped cream.
Prep Time 15 minutes mins
Cook Time 28 minutes mins
Total Time 2 hours hrs 55 minutes mins
Course Dessert
Cuisine American
Servings 16
Calories 150 kcal
- 1 cup graham cracker crumbs
- 1/4 cup granulated sugar
- 1/2 cup unsalted butter, melted
- 2 cups sweetened condensed milk
- 3/4 cup fresh key lime juice
- 1 tablespoon finely grated lime zest
- 3 large egg yolks
- to taste whipped cream, for topping
- to taste thin lime slices, for garnish
Begin by preheating your oven to 350°F (175°C). Take an 8x8 inch baking dish and line it with parchment paper, allowing the edges to hang over the sides for easy removal after baking.
In a medium mixing bowl, combine the graham cracker crumbs and granulated sugar. Pour in the melted butter and stir until the mixture attains a sandy texture, resembling wet sand.
Firmly press the graham cracker mixture into the bottom of the prepared baking dish, ensuring it is even and well-packed to form the crust. Bake this crust in the oven for 10 minutes, then carefully remove it and let it cool slightly.
Meanwhile, in a large mixing bowl, whisk together the sweetened condensed milk, fresh key lime juice, lime zest, and egg yolks until the mixture is smooth and thoroughly blended.
After the crust has cooled, pour the key lime filling over it, spreading the mixture evenly across the surface.
Place the baking dish back in the oven and bake for an additional 15-18 minutes. The filling should be set but may still have a slight jiggle in the center, indicating that it is perfectly cooked.
Once done, allow the bars to cool to room temperature. Then, refrigerate them for a minimum of 2 hours to ensure they are fully set and chilled.
After chilling, gently lift the bars out of the baking dish using the overhanging parchment paper. Cut into squares or rectangles for serving.
To serve, top each bar with a generous dollop of whipped cream, and adorn with a thin slice of lime for a delightful garnish.
For an attractive display, arrange the bars on a decorative serving platter and sprinkle extra lime zest on top.
Keyword bars, dessert, key lime
WANT TO SAVE THIS RECIPE?