FREE DINNER EBOOK! Get your copy!
  • Cookie Policy
  • GDPR Policy
  • Disclaimer
  • Terms Of Use
  • Visit my other site: Fun Cookie Recipes
meal plan mapper
  • Home
  • Dinner
  • Desserts
  • Drinks
  • Appetizers
  • Contact
  • About
  • Privacy Policy
  • Home
  • Dinner
  • Desserts
  • Drinks
  • Appetizers
  • Contact
  • About
  • Privacy Policy
  • Cookie Policy
  • GDPR Policy
  • Disclaimer
  • Terms Of Use
Visit my other site: Fun Cookie Recipes

HOME / CATEGORIES /

Latest

- 3 cans of refrigerated biscuit dough - 2 medium apples (Granny Smith or Honeycrisp) - 1 cup granulated sugar - 2 teaspoons ground cinnamon - ½ cup unsalted butter, melted - ½ cup packed brown sugar - 1 teaspoon vanilla extract - ½ cup chopped pecans or walnuts - 1 tablespoon powdered sugar (for dusting) The base of this recipe is simple and fun. We start with three cans of refrigerated biscuit dough. This dough provides a soft and fluffy texture. You can use Granny Smith or Honeycrisp apples. They bring a great balance of sweet and tart. The mix of sugar and cinnamon adds warmth and depth. Melted butter is key. It helps the dough balls stick together and adds flavor. The optional brown sugar gives a nice caramel touch. Vanilla extract adds a hint of sweetness. Chopped nuts give a crunchy contrast if you choose to add them. Using powdered sugar for dusting makes it look extra special. These ingredients come together to create a delicious treat that everyone will love. Now, let’s get ready to bake! First, preheat your oven to 350°F (175°C). This step is key for even baking. Next, grease your Bundt pan well. Use cooking spray or butter to coat every inch. This ensures the monkey bread releases easily. In a medium bowl, mix together the granulated sugar and ground cinnamon. Stir until they blend well. Open the cans of biscuit dough and cut each biscuit into quarters. Use a sharp knife or pizza cutter for this. Roll each piece into a small ball. Then, coat each ball in the cinnamon-sugar mix until it’s fully covered. Now, start layering your monkey bread in the Bundt pan. Place half of the dough balls in the bottom first. Next, add half of the diced apples. If you like nuts, sprinkle half of them in too. Drizzle half of the melted butter over this layer. This adds moisture and flavor. Repeat this process. Add the rest of the dough balls, apples, and nuts. Finish this layer with another drizzle of melted butter. In a small bowl, mix packed brown sugar and vanilla extract. Drizzle this syrup over the top layer of dough balls. Place the Bundt pan in the oven. Bake for 30-35 minutes. The top should turn golden brown. To check if it’s done, insert a toothpick into the center. If it comes out clean, it’s ready. Once baked, take the pan out and let it cool for 10 minutes. This helps it set. Now, to serve, carefully invert the pan onto a plate. The monkey bread should fall out easily. To finish, lightly dust the top with powdered sugar. Serve warm for the best taste. Enjoy every bite! To make the best monkey bread, focus on two key areas: coating and apple choice. - Ensuring even coating of dough balls: When you cut the biscuit dough, roll each piece into a ball. Then, coat them evenly in the cinnamon-sugar mix. This step is crucial. It helps each piece absorb that sweet flavor. Avoid clumps to get a perfect taste in every bite. - Using the right type of apples for sweetness and texture: For this recipe, I recommend Granny Smith or Honeycrisp apples. They both add a nice tartness and crunch. This contrast makes the monkey bread delightful. The sweetness from the sugar will balance the tartness nicely. Now, let's talk about how to serve this sweet treat. - Best served warm with dips: Serve your monkey bread fresh out of the oven. It tastes best warm and gooey. You can pair it with a side of caramel sauce or cream cheese icing. These dips add a rich flavor that everyone will love. - Garnishing options for an appealing presentation: A light dusting of powdered sugar adds charm. You can also sprinkle some diced apples or a dash of cinnamon on top. This touch makes your dish look as good as it tastes. {{image_4}} You can make your apple cinnamon monkey bread even better by adding spices. Try using nutmeg for a warm taste or allspice for a hint of zest. Both spices mix well with your apples and cinnamon. You can also explore different fruits. If you want a twist, add pears or cherries. These fruits bring new flavors and make the dish unique. Mix them in with the apples for a fun surprise. If you need a gluten-free option, use gluten-free biscuit dough. Many brands offer this, so you can still enjoy the treat. For vegan cooks, substitute butter with coconut oil or a plant-based butter. Use coconut sugar instead of granulated sugar to keep it vegan. These changes help everyone enjoy this sweet delight without missing out! To keep your apple cinnamon monkey bread fresh, store it properly. For short-term storage, place any leftovers in an airtight container. Keep the container in the fridge for up to three days. This will help maintain its flavor and texture. If you want to save it for a longer time, freezing is a great option. Wrap the monkey bread tightly in plastic wrap or aluminum foil. Place the wrapped bread in a freezer-safe bag or container. It can last up to three months in the freezer. When you're ready to enjoy it, let it thaw in the fridge overnight. To reheat your monkey bread, the oven is the best choice. Preheat the oven to 350°F (175°C). Place the monkey bread on a baking sheet. Cover it with aluminum foil to keep it moist. Heat for about 10-15 minutes, or until warmed through. You can also use the microwave for a quick option. Place a piece of monkey bread on a microwave-safe plate. Microwave on medium for 20-30 seconds. Check the warmth, and add more time if needed. Enjoy your delicious treat just like fresh! Can you use frozen biscuit dough instead? Yes, you can use frozen biscuit dough. Just thaw it first. This helps the dough rise and bake evenly. How do you know when it’s fully baked? You can tell it’s done when the top is golden brown. Also, insert a toothpick in the center. If it comes out clean, it’s ready. What can I use instead of apples? You can use pears, peaches, or even berries. Each fruit adds a new flavor. Just make sure they are chopped small. How long can I store this monkey bread? Store it in an airtight container for 2-3 days. You can also freeze it for up to 2 months. Just make sure to wrap it well. You can create a tasty apple cinnamon monkey bread with simple steps and great ingredients. We covered everything from preparing your dough to baking it perfectly. You can mix in your favorite flavors and try different fruits, too. Remember to store any leftovers well and reheat them properly to enjoy later. This recipe is fun to make and share. You'll impress friends and family with your delicious creation. Enjoy baking, tasting, and sharing your monkey bread!

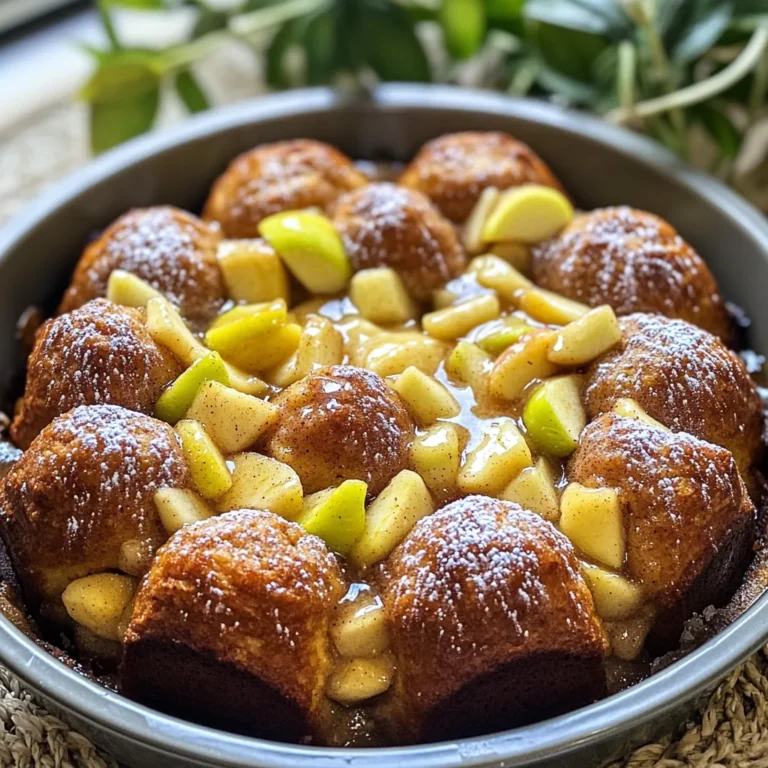
Irresistible Apple Cinnamon Monkey Bread Recipe

- 1 pound beef chuck roast, cut into 1-inch cubes - 1 cup pearl barley, thoroughly rinsed - 4 cups low-sodium beef broth - 2 cups water - 1 medium onion, finely chopped - 3 large carrots, diced - 2 celery stalks, diced - 3 cloves garlic, minced - 1 teaspoon dried thyme - 1 teaspoon dried rosemary - 2 bay leaves - Salt and freshly ground black pepper to taste - 1 cup frozen peas - Chopped fresh parsley for garnish In this recipe, I use beef chuck roast. It’s tender and full of flavor. The pearl barley adds a nice chewy texture to the soup. I choose low-sodium beef broth to control the salt level. The water helps balance the broth and keeps it light. For vegetables, I use onion, carrots, and celery. They provide a base of taste. Garlic adds a strong, rich flavor. I love using thyme and rosemary for their earthy aroma. Bay leaves give a deep flavor that makes the soup special. I always taste and adjust the salt and pepper for the best flavor. Frozen peas are optional but add a pop of color and sweetness. I like to garnish with fresh parsley. It brightens up the dish and adds a fresh taste. Each ingredient plays a role, making this soup both hearty and comforting. Start by heating 2 tablespoons of olive oil in a large skillet over medium-high heat. Once the oil is hot, add 1 pound of beef chuck roast, cut into 1-inch cubes. Sear the beef in a single layer, turning occasionally for about 5 to 7 minutes. This browning step builds a deep flavor in the meat. When the beef is nicely browned on all sides, carefully transfer it to the slow cooker. Now, it’s time to add more flavor. Add 1 medium onion, finely chopped, 3 large carrots, diced, and 2 diced celery stalks into the slow cooker with the beef. Don't forget the 3 cloves of minced garlic! These veggies bring sweetness and depth to the soup. Next, stir in 1 cup of pearl barley that you rinsed thoroughly. Then, pour in 4 cups of low-sodium beef broth and 2 cups of water. Add 1 teaspoon each of dried thyme and dried rosemary, along with 2 bay leaves. Finally, season with salt and freshly ground black pepper to taste. Cover the slow cooker with its lid. Set it to cook on low for 6 to 8 hours or on high for 3 to 4 hours. The goal is for the beef to become tender and for the barley to cook fully. About 30 minutes before serving, you can stir in 1 cup of frozen peas if you like. This adds a nice pop of color! Once it's done, don't forget to remove the bay leaves. Taste the soup and adjust the seasoning with salt and pepper as needed. Ladle the soup into bowls and garnish with chopped fresh parsley for a burst of freshness! Searing the beef is key. This step adds depth and richness to your soup. When you brown the meat, it creates a nice crust. This crust holds in juices and makes the beef tender. Use medium-high heat and olive oil for best results. After searing, transfer the beef to the slow cooker. Adjust the seasonings to your taste. Start with salt and pepper. You can always add more later. Taste your soup before serving to ensure the flavor is just right. Make sure the barley is cooked well. Pearl barley should be tender but not mushy. It adds a nice chewiness to the soup. Let it cook fully with the beef and vegetables. This will create a hearty texture. Add frozen peas about 30 minutes before serving. This keeps them bright green and fresh. The peas also add a nice pop of color to your dish. Serve the soup with crusty bread. A good sourdough or baguette works great for dipping. The bread complements the rich soup. For garnish, sprinkle chopped fresh parsley on top. This adds a bright touch and enhances the look. You can also add a dash of freshly cracked black pepper for some extra flavor. {{image_4}} You can switch up the beef cut for this soup. Try using brisket or stew meat. These options add unique flavors. Some folks even use ground beef for a different texture. Instead of pearl barley, consider using farro or quinoa. Both grains add a nutty taste. If you prefer legumes, try lentils or chickpeas. They cook fast and add protein. Feel free to add more veggies to make it your own. Mushrooms bring an earthy flavor. Spinach or kale boosts nutrition and color. You can also toss in zucchini or bell peppers for a fresh touch. For a seasoning twist, add cumin or smoked paprika. These spices change the soup’s flavor profile. A dash of hot sauce can add warmth too. To make the soup gluten-free, skip the barley. Use rice or gluten-free grains. They work well and keep the soup hearty. If you need low-sodium options, pick low-sodium broth. You can also reduce the salt you add. Fresh herbs like parsley or cilantro add flavor without extra salt. To store your soup, let it cool first. Use an airtight container for best results. This keeps the soup fresh and tasty. You can store it in the fridge for up to three days. When you want to eat it again, simply reheat it on the stove or in the microwave. Freezing the soup works great too! Portion it into freezer-safe bags or containers. Make sure to leave some space at the top since liquids expand when frozen. Your soup can stay good for about three months in the freezer. When you're ready to eat, thaw it overnight in the fridge. Reheat it on low heat, stirring often, until it’s hot throughout. Leftovers are a chance to get creative! You can serve the soup with a side of crusty bread or over rice for a different meal. If you want to jazz it up, add some fresh herbs or a squeeze of lemon. When reheating, do it slowly to keep all the flavors just right. Enjoy your tasty soup in new ways! Yes, you can use different types of barley. The most common ones are pearl and hulled barley. Pearl barley cooks faster and is softer. Hulled barley is chewier and takes longer to cook. You can also use barley flakes for a quick option. Just note that cooking times will change with each type. You can store cooked beef barley soup in the fridge for about three days. Keep it in an airtight container to maintain freshness. For longer storage, you can freeze it. The soup lasts well in the freezer for up to three months. Just remember to thaw it in the fridge before reheating. Yes, you can skip browning the meat. However, browning adds great flavor. If you don't sear the beef, the soup will still taste good but may be less rich. The meat will also be softer but won’t have that nice color. I recommend browning for the best taste and texture. This blog covered how to make delicious beef barley soup from scratch. You learned about key ingredients, step-by-step instructions, and useful tips for flavor and texture. Remember to choose fresh vegetables and seasonings to boost the taste. Play with variations to make it your own, and don’t forget about storage tips for leftovers. Enjoy this comforting dish with friends and family, as it’s sure to please everyone. Cooking at home brings joy, and this soup makes it easy!

Slow Cooker Beef Barley Soup Comforting and Hearty Dish

- 4 medium russet potatoes - 3 tablespoons extra virgin olive oil - 4 cloves garlic, finely minced - 1 teaspoon garlic powder - 1 teaspoon onion powder - 1 teaspoon dried Italian seasoning - ½ cup freshly grated Parmesan cheese - Salt and pepper to taste - Fresh parsley, finely chopped (for garnish) To make these Air Fryer Garlic Parmesan Potato Wedges, you need a few key ingredients. First, choose 4 medium russet potatoes. They are perfect for wedges because of their texture. Next, gather 3 tablespoons of extra virgin olive oil. This adds flavor and helps with crispiness. You will need 4 cloves of garlic, finely minced. Fresh garlic brings a rich taste. Also, grab 1 teaspoon each of garlic powder and onion powder for extra flavor. Add 1 teaspoon of dried Italian seasoning to give it a nice herb blend. Don't forget the cheese! Use ½ cup of freshly grated Parmesan cheese. This will melt beautifully on top of your wedges. Lastly, season with salt and pepper to taste. For a pop of color, use fresh parsley, finely chopped, as a garnish. These ingredients combine to create a crunchy, savory treat. The flavors mix perfectly in the air fryer. You will enjoy every bite of these delicious potato wedges! First, wash and scrub the russet potatoes under running water. This step removes dirt and impurities. Next, cut each potato into equal wedges. Aim for about eight wedges per potato. Keep the skin on for added texture and flavor. Soaking potato wedges is key for crispiness. Place the cut wedges in a large bowl of cold water. Let them soak for about 30 minutes. This process helps remove excess starch and enhances the crunch when cooked. After soaking, drain the wedges and pat them dry with paper towels. This ensures they are moisture-free. In a mixing bowl, whisk together olive oil, minced garlic, garlic powder, onion powder, Italian seasoning, salt, and pepper. Toss the dried potato wedges in the bowl until each wedge is well-coated with the seasoning mix. Set your air fryer to preheat at 400°F (200°C) for around 5 minutes. Preheating is crucial. It helps achieve that perfect crispy texture on your potato wedges. Place the seasoned wedges in the air fryer basket in a single layer. Avoid overcrowding the basket; if needed, cook in batches. Air fry for 15-20 minutes. Shake the basket halfway through to ensure even cooking. When the wedges are golden and crispy, sprinkle grated Parmesan cheese over them. Return the wedges to the air fryer for another 2-3 minutes. This melts the cheese and gives it a lovely golden color. Carefully take the potato wedges out of the air fryer. Garnish with finely chopped fresh parsley for a pop of color. Serve the hot wedges with your favorite dip, like ranch or marinara. Enjoy your crunchy treat! Soaking your potato wedges is key. This step removes excess starch. It helps the wedges crisp up nicely. I recommend soaking for 30 minutes in cold water. After soaking, pat the wedges dry with paper towels. This helps remove moisture, which can lead to soggy fries. Set your air fryer to 400°F (200°C). Preheating for about 5 minutes makes a big difference. It ensures the wedges cook evenly and get that desired crunch. Feel free to get creative with your seasonings. You can add chili flakes for heat or smoked paprika for a smoky flavor. Try mixing in some cumin or coriander for an earthy twist. Don’t limit yourself to just Parmesan cheese. Cheddar or mozzarella also works well. You can even mix different cheeses for a unique taste. Cleaning your air fryer after use is vital. Food can stick if you don’t clean it well. Allow it to cool, then wipe down the basket with a damp cloth. To prevent sticking, use a light coat of oil before cooking. This simple step helps your wedges slide out easily. Remember, a clean air fryer cooks better! {{image_4}} You can add a kick to your potato wedges. Mix in chili flakes or cayenne pepper. Start with a pinch and taste as you go. This heat pairs well with the garlic and cheese. If you like it hot, feel free to add more. This easy change brings a new flavor to the dish. Fresh herbs make these wedges even better. Try using rosemary or thyme. Chop the herbs finely and mix them into the seasoning. This adds a nice aroma and taste. You can use a mix or just one type of herb. Each choice brings its own charm to your potato wedges. If you want to switch up the cheese, try cheddar or mozzarella. Both cheeses melt well and add a different flavor. Use the same amount as the Parmesan. For a richer taste, mix cheeses together. This gives the wedges a fun twist and keeps them exciting. To keep your leftover wedges fresh, let them cool completely. Place them in an airtight container. You can store them in the fridge for up to three days. Make sure to separate layers with paper towels to absorb moisture. This will help keep them crispy. When you are ready to enjoy your leftover wedges, use the air fryer for reheating. Preheat the air fryer to 375°F (190°C). Place the wedges in the basket in a single layer. Heat them for about 5-7 minutes. This will help restore their crunch. Avoid using the microwave, as it makes them soggy. If you want to freeze your wedges, here's how to do it. First, flash freeze them before storing. Spread uncooked wedges on a baking sheet. Freeze for about an hour until firm. Then, transfer them to a freezer bag. They can stay frozen for up to three months. When ready to cook, no need to thaw. Just air fry them straight from the freezer! Yes, you can use other potatoes. I suggest Yukon Gold or sweet potatoes. They both add different flavors. Yukon Gold has a buttery taste, while sweet potatoes give a hint of sweetness. Soak the potatoes for about 30 minutes. This step helps remove excess starch. With less starch, the wedges turn out crispier. You can soak them longer if you like, but 30 minutes works great. Some tasty sauces are ranch, marinara, and garlic aioli. Ranch is creamy and tangy, while marinara adds a nice tomato flavor. Garlic aioli gives an extra garlic kick that matches well with the wedges. To make them healthier, you can use less oil. You could also try cooking them in the oven instead of an air fryer. Baking at a high temperature gives a nice crunch without as much oil. Another option is using a cooking spray instead of pouring oil. These garlic Parmesan potato wedges offer a tasty and crispy side dish. We covered the ingredients, step-by-step instructions, and tips to ensure perfect wedges. Remember to soak the potatoes for best results and experiment with different flavors. You can customize the recipe and even store leftovers easily. Enjoy these wedges with your favorite dipping sauces for a satisfying snack or side. Try making them your own, and have fun in the kitchen!

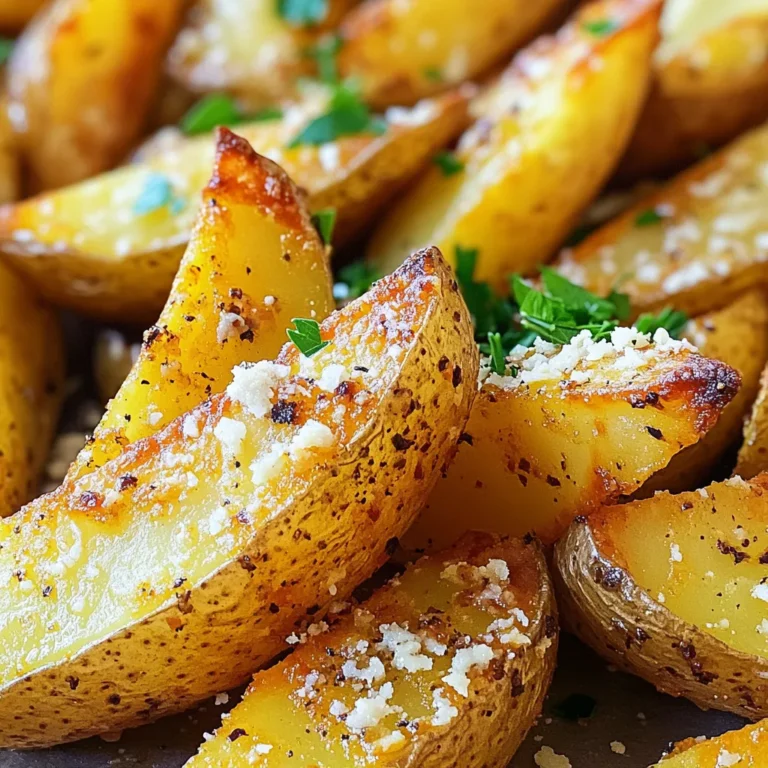
Air Fryer Garlic Parmesan Potato Wedges Crunchy Treat

- Fresh strawberries - Ripe mango - Small red onion - Jalapeño pepper - Fresh cilantro - Lime juice - Salt and black pepper You need precise amounts for great taste. Use 1 cup of fresh strawberries, hulled and diced. This gives the salsa a sweet base. Next, take 1 ripe mango and peel it. Dice it into small cubes. Ripe mango adds a soft texture and sweetness. For a balanced flavor, add 1 small red onion, finely chopped. This onion brings a nice sweetness. Don’t forget the 1 jalapeño pepper, deseeded and minced. This pepper adds a kick, but you can adjust it to your liking. You will also need 1/4 cup of fresh cilantro, roughly chopped. This herb brightens the salsa. Use 2 tablespoons of freshly squeezed lime juice for tanginess. Finally, season with salt and a pinch of black pepper. Using ripe fruit is key. Ripe fruits have more flavor and sweetness. They also help the salsa taste fresh and vibrant. Enjoy mixing these fresh ingredients for a salsa that bursts with summer flavor! {{ingredient_image_2}} How to hull and dice strawberries To hull strawberries, grab a small, sharp knife. Insert the knife at the top of the berry and cut around the green leaves. Pull the leaves off. Next, slice the berries into quarters, then dice them into bite-sized pieces. How to peel and cube a mango Start by cutting off the sides of the mango. Avoid the pit in the center. Use a peeler to remove the skin. Then, slice the mango into small cubes. Be careful as mangoes can be slippery! Mince jalapeño pepper properly First, cut off the stem of the jalapeño. Slice it in half lengthwise and remove the seeds for less heat. Use a sharp knife to finely chop the pepper. The smaller the pieces, the better the salsa will blend. Order of addition in mixing bowl In a medium mixing bowl, place the diced strawberries and mango first. Then, add the chopped red onion and minced jalapeño. This order helps layer the flavors nicely. Folding technique to mix salsa without mashing Use a spatula or spoon to gently fold the ingredients together. Start from the bottom and lift the mixture to the top. This way, you avoid mashing the fruit and keep the salsa fresh and chunky. Adjusting seasoning based on taste After mixing, taste your salsa. If it needs more flavor, add a pinch of salt or a splash of lime juice. Adjust until it suits your taste buds perfectly. Time for flavors to meld Let the salsa sit for about 15-20 minutes at room temperature. This resting time allows the flavors to blend beautifully. Enjoy the burst of fresh taste when you serve it! To select ripe strawberries, look for bright red color and slight softness. The aroma should be sweet. For mangoes, choose ones that yield slightly when pressed. They should smell fragrant. Both fruits need to be fresh to make the salsa pop. Adjusting spice levels is easy. If you love heat, add more jalapeño. If you prefer mild flavors, use less or skip it. Always taste as you go. This way, you ensure the salsa fits your preference. Strawberry mango salsa pairs well with many dishes. Try it with grilled chicken or fish for a fresh twist. It's also great with tacos or as a dip with tortilla chips. For parties, serve it in a colorful bowl. Add a sprig of cilantro on top for flair. You can also use small cups for individual servings. This makes it easy for guests to enjoy. Pro Tips Choose Ripe Fruits: Make sure your strawberries and mangoes are perfectly ripe for the best flavor and sweetness in your salsa. Adjust the Heat: If you prefer a milder salsa, consider using less jalapeño or opting for a bell pepper instead. Rest for Flavor: Allowing the salsa to sit for 15-20 minutes before serving helps the flavors meld and develop a more cohesive taste. Experiment with Add-ins: Feel free to add other ingredients like diced bell peppers or mango for an extra layer of flavor and texture. {{image_4}} You can change the heat level of your salsa. If you want less spice, try using bell pepper instead of jalapeño. It adds crunch without the burn. You can also blend in fruits like pineapple or peach. These fruits add a different taste and keep it sweet. Want to spice things up? Add cumin or chili powder for a warm kick. These spices give your salsa a whole new flavor. You can also use fresh herbs like mint or basil instead of cilantro. This change can give your salsa a fresh twist that surprises your taste buds. To keep your Strawberry Mango Salsa fresh, store it in an airtight container. This prevents air from spoiling the flavors. Place it in the refrigerator right after making it. It stays good for about 3 days. After that, the fruit may start to lose its texture and taste. Always check for any off smells before using leftovers. Yes, you can freeze Strawberry Mango Salsa! Use a freezer-safe container or bag. Remove as much air as possible before sealing. This helps keep the salsa fresh for about 2-3 months. When it’s time to eat, thaw it in the fridge overnight. To keep the texture nice, avoid using a microwave. Instead, let it thaw slowly. Can I make this salsa ahead of time? Yes, you can make Strawberry Mango Salsa a few hours ahead. The flavors will blend well if you let it sit. Just keep it covered in the fridge until you're ready to serve. What can I serve with Strawberry Mango Salsa? You can serve this salsa with many dishes. It pairs well with crispy tortilla chips. Try it on grilled chicken or fish for a fresh twist. It even works great on tacos! How long does Strawberry Mango Salsa last? Strawberry Mango Salsa lasts about 2-3 days in the fridge. Keep it in an airtight container to keep it fresh. Nutritional benefits of key ingredients - Strawberries are high in vitamin C and antioxidants. - Mangoes provide vitamin A and fiber. - Red onions add flavor and may help with heart health. - Jalapeños can boost metabolism and add a kick. - Cilantro is rich in vitamins K and C. Caloric content per serving One serving of Strawberry Mango Salsa has about 50 calories. This makes it a healthy and tasty option for any meal. Making Strawberry Mango Salsa is easy and fun. We explored fresh ingredients like strawberries and mangoes. Using ripe fruits ensures great flavor. The step-by-step prep makes it simple to create a tasty mix. I shared tips to perfect your salsa and ideas for serving. You can even try different ingredients for unique flavors. In the end, this salsa is a delicious addition to any meal. So, gather your ingredients and enjoy making this fresh and vibrant dish!

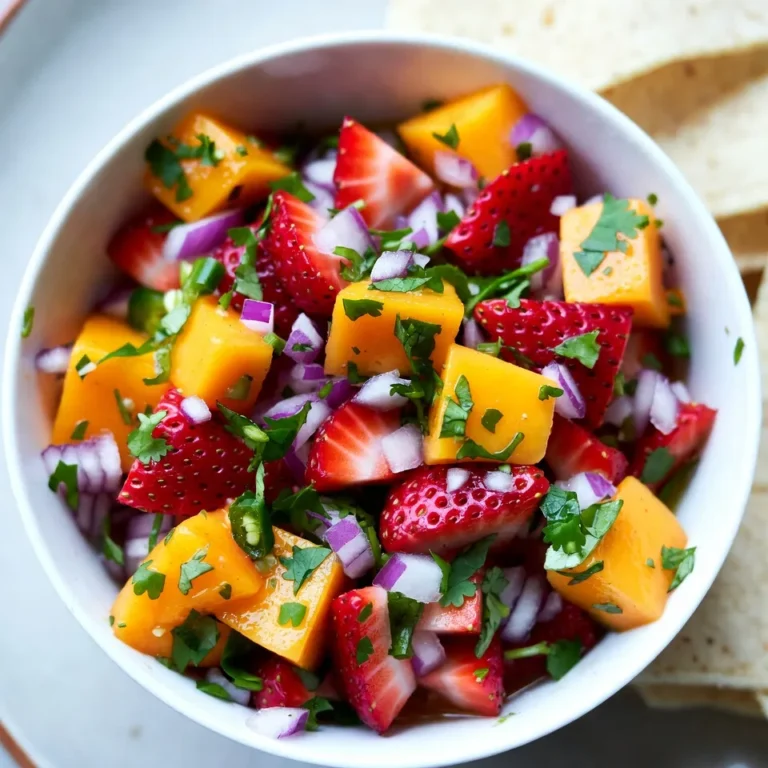
Strawberry Mango Salsa Refreshing Summer Flavor

- 1 cup rolled oats - 2 cups almond milk (or any milk of your choice) - 2 tablespoons unsweetened cocoa powder - 3 tablespoons creamy peanut butter - 2 tablespoons maple syrup (adjust based on sweetness preference) - 1 teaspoon pure vanilla extract - A pinch of fine sea salt - Chopped dark chocolate - Banana slices - Chopped peanuts The ingredients for Chocolate Peanut Butter Overnight Oats are simple and easy to find. First, you need rolled oats. They give your oats the right texture and chew. Next, choose almond milk or any milk you like. It adds creaminess to the dish. Unsweetened cocoa powder gives your oats a rich chocolate flavor. Creamy peanut butter brings in that nutty taste we all love. Maple syrup acts as a sweetener, and you can adjust it to your taste. Pure vanilla extract adds a lovely aroma. A pinch of fine sea salt rounds out the flavors nicely. For optional toppings, you can get creative! Chopped dark chocolate adds more chocolate goodness. Fresh banana slices bring in natural sweetness. Chopped peanuts give a nice crunch. You can mix and match these toppings to make your oats even more delightful. {{ingredient_image_2}} In a large bowl, combine 1 cup of rolled oats, 2 tablespoons of cocoa powder, and a pinch of fine sea salt. Stir well until they mix evenly. This step ensures a chocolatey base for your oats. In another bowl, whisk together 2 cups of almond milk, 3 tablespoons of creamy peanut butter, 2 tablespoons of maple syrup, and 1 teaspoon of pure vanilla extract. Mix until smooth and all ingredients blend well. This mixture adds richness and sweetness to the oats. Gradually pour the wet mixture into the dry ingredients. Stir until all oats are coated with the chocolate-peanut butter blend. Once mixed, divide the mixture into two jars or airtight containers. Pack it slightly to reduce air gaps for better soaking. Seal the jars tightly and place them in the fridge. Refrigerate overnight or for at least 4 hours. This soaking time helps the oats absorb all those tasty flavors. In the morning, take the jars out of the fridge. Stir the oats well to mix everything together. If you like a creamier texture, add a splash more almond milk and mix again. Top with chopped dark chocolate, banana slices, and chopped peanuts for extra flavor and crunch. Enjoy this delightful treat! You can change the sweetness of your oats. If you want it sweeter, add more maple syrup. If you like it less sweet, use less. This simple tweak makes a big difference in taste. To make your oats creamier, just add more almond milk. Mixing in a splash more will give your oats a smooth texture. Play around with the milk until you find your perfect creaminess. Serve your oats in clear jars. This makes them look pretty and shows off the layers. You can also drizzle more peanut butter on top for a nice touch. It adds color and makes it even more inviting. Pro Tips Store in Glass Jars: Using glass jars not only looks appealing but also helps in keeping the oats fresh and allows you to see the delicious layers. Experiment with Milk Alternatives: Feel free to substitute almond milk with coconut, oat, or soy milk for different flavor profiles and nutritional benefits. Adjust Sweetness: Customize the level of sweetness by varying the amount of maple syrup or using honey or agave nectar for a different taste. Add Protein: Boost the protein content by mixing in some Greek yogurt or a scoop of your favorite protein powder before refrigerating. {{image_4}} You can switch things up by using different nut butters. Try almond butter or cashew butter for a tasty twist. Flavored protein powders also add a fun kick. Chocolate or vanilla protein powder blends well with the oats, enhancing both taste and nutrition. Experiment with what you love! For a vegan option, simply replace the almond milk with any plant-based milk. Use maple syrup as your sweetener; it’s vegan-friendly too. If you’re gluten-free, ensure your oats are certified gluten-free. There are many ways to enjoy this treat while sticking to your diet. Seasonal fruits can elevate your oats. In summer, fresh berries like strawberries or blueberries add sweetness. In fall, try diced apples with a sprinkle of cinnamon. These toppings not only look pretty but also boost flavor and nutrition. You can always adapt your toppings to match the season! To keep your Chocolate Peanut Butter Overnight Oats fresh, store them in the fridge. Use airtight jars or containers. This helps lock in moisture and flavor. Make sure to seal them well. If you have toppings, store them separately. This keeps them crunchy and fresh. You can eat these oats cold right out of the fridge. Many people enjoy them this way. If you prefer warm oats, heat them gently in the microwave. Add a splash of almond milk to keep them creamy. Stir well before eating. For the best taste, eat your overnight oats within three days. After that, they may lose flavor and texture. If you notice any off smell or changes, it’s best to toss them out. Enjoy your delicious breakfast while it’s fresh! Yes, you can easily make this recipe vegan. To do this, swap the creamy peanut butter for any nut or seed butter. Use maple syrup as your sweetener, which is plant-based. For milk, choose almond milk, oat milk, or soy milk. Each of these options keeps the oats creamy and tasty. Overnight oats stay good in the fridge for up to five days. Store them in airtight containers to keep them fresh. If you add fresh fruit, eat them within a day or two. The oats might become softer over time, but they still taste great. You can use quick oats, but the texture and flavor will change. Quick oats soak up liquid faster, making the mixture creamier. However, they can become mushy if left too long. Rolled oats provide a chewier bite and keep their shape better. You learned how to make tasty overnight oats with simple ingredients and steps. We covered essential items like rolled oats, cocoa powder, and peanut butter. You saw tips for added flavor and how to store leftovers for freshness. Remember, you can switch up toppings and variations to match your taste. These oats will keep you fueled and satisfied. Enjoy creating your own delicious and healthy breakfast!

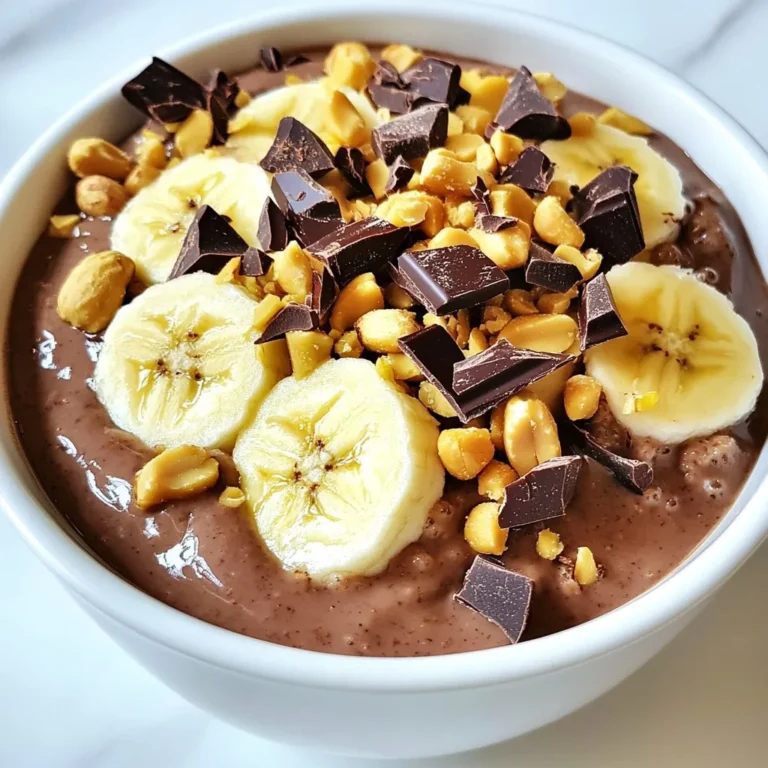
Chocolate Peanut Butter Overnight Oats Delight

- 1 lb ground beef - ½ cup breadcrumbs - 1 small onion, finely chopped - 1 large egg - 2 cloves garlic, minced The main ingredients set the stage for your savory slow cooker Salisbury steak meatballs. I use ground beef for its rich flavor and juiciness. Breadcrumbs help bind the meatballs and give them a nice texture. Onions bring sweetness and depth, while the egg acts as a binder. Garlic adds a punch of flavor that elevates the dish. - 1 teaspoon Worcestershire sauce - 1 teaspoon dried thyme - 1 cup beef broth - 2 tablespoons ketchup - 1 tablespoon soy sauce Seasonings and sauces are key to crafting a tasty dish. Worcestershire sauce gives a tangy umami kick. Dried thyme offers earthy notes that complement the beef. Beef broth keeps the meatballs moist and adds richness. Ketchup brings a hint of sweetness, while soy sauce adds depth and saltiness. - 2 tablespoons cornstarch - 3 tablespoons cold water - Fresh parsley, chopped, for garnish Thickeners and garnish finish the dish nicely. Cornstarch mixed with cold water creates a smooth slurry to thicken the sauce. Fresh parsley adds a burst of color and freshness, making your meal visually appealing. This simple touch makes a big difference in presentation and flavor. {{ingredient_image_2}} - Mixing the ingredients First, grab a large mixing bowl. Add 1 pound of ground beef, ½ cup of breadcrumbs, 1 small onion (finely chopped), 1 large egg, and 2 cloves of minced garlic. Pour in 1 teaspoon of Worcestershire sauce and sprinkle in 1 teaspoon of dried thyme. Add salt and pepper to taste. Use your hands to mix everything until it is well combined. This step is key for good flavor. - Shaping the meatballs Now, take the meat mixture and form it into about 12 meatballs. Each meatball should be around 1.5 inches wide. Make sure they are compact. This helps them cook evenly and hold their shape during cooking. - Arranging meatballs in the slow cooker Carefully place the shaped meatballs into the slow cooker. Arrange them evenly so they cook well. Don’t stack them on top of each other. This allows for even heat and better flavor. - Preparing the sauce In a separate bowl, whisk together 1 cup of beef broth, 2 tablespoons of ketchup, and 1 tablespoon of soy sauce. Mix until the sauce is smooth. Pour this sauce over the meatballs in the slow cooker. Make sure all meatballs are coated with the sauce for maximum flavor. - Stirring in the cornstarch slurry After cooking for 6-8 hours on low or 3-4 hours on high, the meatballs will be tender. To thicken the sauce, mix 2 tablespoons of cornstarch with 3 tablespoons of cold water in a small bowl. Stir this slurry into the sauce in the slow cooker. Cook on high for an extra 30 minutes. This will make your sauce thick and rich. - Adjusting seasoning and serving Once thickened, taste the sauce. Add more salt or pepper if needed. Serve the Salisbury steak meatballs over creamy mashed potatoes or fluffy rice. Garnish with freshly chopped parsley for a burst of color and flavor. Enjoy your meal! To keep your meatballs tender, mix the ingredients gently. Overmixing makes them tough. Use your hands to combine everything well but don’t squish it too much. When shaping the meatballs, make them compact but not too tight. This helps them cook evenly and stay juicy. You can customize the sauce flavor to suit your taste. Add extra Worcestershire sauce for a bolder taste or a splash of hot sauce for some heat. If you want a thicker sauce, mix cornstarch with cold water. Stir this into the sauce as it cooks. This will give you a nice, rich texture. Salisbury steak meatballs go well with creamy mashed potatoes or fluffy rice. Both soak up the sauce beautifully. For a pop of color, garnish with fresh parsley. You can also add seasonal vegetables on the side. This makes your meal colorful and nutritious. Pro Tips Use Fresh Ingredients: The fresher your ingredients, the better the flavor of your meatballs. Opt for fresh herbs and quality ground beef for a more delicious outcome. Let the Meatballs Rest: After shaping the meatballs, let them rest for about 10 minutes before cooking. This helps them hold their shape better during cooking. Adjust the Sauce: Feel free to tweak the sauce ingredients to your taste. Adding a splash of balsamic vinegar or a hint of hot sauce can elevate the flavor profile. Pair with Vegetables: Serve your meatballs with seasonal vegetables like green beans or carrots to enhance the meal's nutritional value and add color to your plate. {{image_4}} You can switch ground beef for ground turkey or chicken. These meats are leaner. They still give great flavor. Just keep in mind that they may need a bit more seasoning. For a gluten-free option, use gluten-free breadcrumbs. Many stores offer these now. They will work well in this recipe. This way, everyone can enjoy the meal! Want to mix it up? Try adding mushrooms or bell peppers to your meatball mix. They add a nice texture and taste. Just chop them finely so they blend well. If you like it spicy, add some hot sauce to the sauce mix. This will give your dish a nice kick. Adjust the amount to your taste. If you don't have a slow cooker, try using an Instant Pot. Cook the meatballs for about 10 minutes under high pressure. This method saves time while keeping the meatballs tender. Another option is to bake the meatballs in the oven. Shape them and place them on a baking sheet. Bake at 375°F for about 20-25 minutes. They will still be delicious and easy to make! To keep your meatballs fresh, store them in an airtight container. Place them in the fridge within two hours of cooking. This helps prevent bacteria growth. For best taste, enjoy them within three to four days. Make sure to cover the meatballs well in sauce to keep them moist. You can freeze these meatballs and sauce for later. First, let them cool completely. Then, place them in a freezer-safe bag or container. Seal it tightly to avoid freezer burn. These meatballs can last up to three months in the freezer. When you’re ready to eat, thaw them in the fridge overnight. Reheat them gently on the stove or in the microwave. Make sure they are hot all the way through before serving. Preparing meals ahead of time saves you stress during busy weeknights. You can make these meatballs and sauce in advance. Portion them into single servings for easy meals. Store each portion in separate containers. This way, you can grab a meal whenever you need one. It’s a great way to enjoy delicious food without the hassle! To check the meatballs, use a meat thermometer. Insert it into the center of a meatball. The safe internal temperature is 160°F (71°C). If you don't have a thermometer, cut a meatball in half. The meat should be brown without any pink. The juices should run clear. This shows they are fully cooked and safe to eat. Yes, you can make this recipe ahead of time. You can prepare the meatballs and store them in the fridge for up to 24 hours before cooking. Simply cover them well. To save time, you can also freeze the raw meatballs. They can last in the freezer for up to three months. When you’re ready to cook, thaw them in the fridge overnight. Then follow the cooking steps as usual. If you need a substitute for breadcrumbs, try crushed crackers or oats. You can also use cooked rice or quinoa. These options work well to bind the meat. Just make sure they are finely crushed or chopped. This will help the meatballs hold their shape while cooking. This blog post covered how to make Salisbury steak meatballs. We discussed key ingredients like ground beef, breadcrumbs, and seasonings. I provided step-by-step instructions for preparing and cooking the meatballs in a slow cooker. Tips helped you perfect your meatballs and suggested variations for flavors and cooking methods. In the end, you have all the tools to create a great dish. Enjoy your meatballs and share this recipe with others! Cooking can be fun and rewarding.

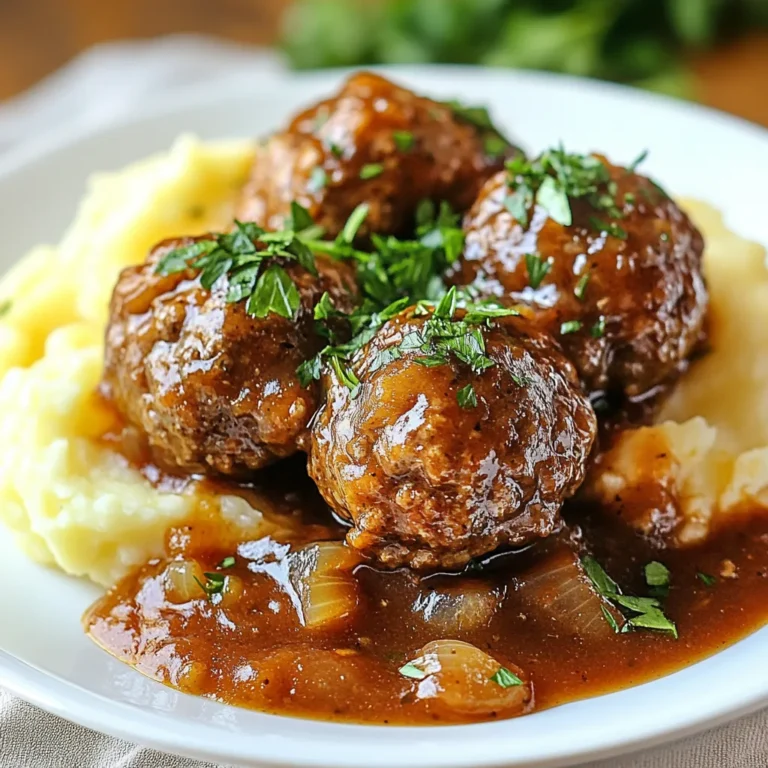
Savory Slow Cooker Salisbury Steak Meatballs Recipe

- 2 cups cooked chickpeas (or 1 can, drained and rinsed) - 1 medium onion, finely chopped - 2 cloves garlic, minced - 1 large carrot, diced - 1 red bell pepper, diced - 1 zucchini, diced - 1 can (14 oz) diced tomatoes - 2 cups vegetable broth - 1 tablespoon olive oil - 2 teaspoons ground cumin - 1 teaspoon ground coriander - 1 teaspoon smoked paprika - 1 teaspoon turmeric - 1/2 teaspoon cinnamon - Salt and pepper to taste - 1/4 cup dried apricots, chopped - Fresh cilantro or parsley for garnish - Cooked couscous or quinoa for serving (optional) When you gather your ingredients, think about the flavors you want. The chickpeas are the star of this stew. They add protein and a nice texture. Use cooked chickpeas for ease. Canned works too; just rinse them well. Fresh veggies bring life to the dish. The onion and garlic give it a strong base. Carrots and bell peppers add sweetness, while zucchini adds a nice crunch. Spices are vital. Cumin and coriander create warmth. Smoked paprika adds depth, while turmeric and cinnamon give it an exotic twist. Don't forget salt and pepper to balance everything. Liquid helps cook the stew. Vegetable broth is perfect, while diced tomatoes add more flavor. If you want a touch of sweetness, toss in chopped dried apricots. They blend beautifully with the spices. For a finishing touch, fresh herbs like cilantro or parsley add brightness. Serve the stew over couscous or quinoa for a filling meal. This blend of ingredients makes the Moroccan chickpea stew a savory delight. Start by heating 1 tablespoon of olive oil in a medium skillet over medium heat. Add 1 medium onion, finely chopped, and 2 cloves of minced garlic. Sauté these for about 3-5 minutes until the onion softens and turns translucent. Once done, transfer this mixture to your slow cooker. This adds a nice depth to the stew. Next, you will add the main ingredients into the slow cooker. Incorporate 2 cups of cooked chickpeas or 1 can, drained and rinsed. Then, toss in 1 large diced carrot, 1 diced red bell pepper, and 1 diced zucchini. Don't forget to add 1 can of diced tomatoes with their juices and 2 cups of vegetable broth. Stir everything together to mix well. Now, it’s time to add flavor. In a small bowl, combine the spices: 2 teaspoons of ground cumin, 1 teaspoon of ground coriander, 1 teaspoon of smoked paprika, 1 teaspoon of turmeric, and 1/2 teaspoon of cinnamon. Add salt and pepper to taste. Mix this spice blend well, then stir it into the slow cooker along with the vegetables and chickpeas. For a touch of sweetness, add 1/4 cup of chopped dried apricots. This will balance the spices and bring a unique flavor to the stew. Make sure everything is evenly mixed. Now, cover your slow cooker. You have two options for cooking: you can set it to low heat for 6-8 hours or high heat for 3-4 hours. If you choose low heat, it allows the flavors to meld beautifully. If you're in a hurry, high heat works well too. Check the stew for readiness. It is ready when the vegetables are tender, and the flavors are combined. Before serving, taste the stew and adjust the seasoning as needed. Serve your Moroccan chickpea stew hot, garnished with fresh cilantro or parsley. For a complete meal, ladle the stew over cooked couscous or quinoa, adding a delightful texture to your dish. To boost flavor, you can add extra spices. Try a pinch of cayenne for heat. You can also sprinkle in some ground ginger for warmth. Always taste your stew before serving. Adjust the salt and pepper to your liking. Ensure even cooking by chopping vegetables into similar sizes. This way, they cook at the same rate. I recommend using the low setting for 6-8 hours. If you are in a rush, you can use the high setting for 3-4 hours. Just check that the veggies are tender before serving. {{image_4}} You can change the chickpeas to other legumes. Try lentils or kidney beans for a twist. Each legume brings its own flavor and texture. This keeps the stew exciting and fresh. Adding seasonal vegetables is another great way to mix things up. In spring, toss in asparagus or peas. In winter, use root veggies like sweet potatoes or parsnips. Each season offers new tastes to enjoy. To add sweetness, consider using honey or maple syrup. This balances the spices well. If you like heat, add red pepper flakes or fresh chili. These options can make your stew more exciting. Different herbs can lift your stew's flavor, too. Instead of cilantro, try parsley or mint for a fresh twist. Each herb adds a unique touch. Experiment to find your favorite combination! To keep your Moroccan chickpea stew fresh, follow these tips: - Refrigeration: Cool the stew to room temperature. Place it in an airtight container. Store it in the fridge for up to 4 days. - Freezing: For long-term storage, freeze the stew in a freezer-safe container. Use it within 3 months for the best taste. Leave space at the top to allow for expansion. When it’s time to enjoy the stew again, here’s how: - Methods: Reheat the stew on the stove over low heat. Stir it often to warm evenly. You can also use the microwave in short bursts, stirring in between. - Texture and Flavor: To keep the stew’s texture, add a splash of vegetable broth if it seems thick. Taste it again and add more seasoning if needed. You can enjoy this stew with various sides. Here are some tasty options: - Couscous - Quinoa - Rice - Fresh pita bread - A simple green salad These sides add great texture and flavor to your meal. Yes, this stew is vegan-friendly. All the ingredients are plant-based. You can use canned chickpeas or cook them yourself. The vegetable broth and spices keep it flavorful and hearty. This dish fits well in a vegan diet. Cooking times depend on your slow cooker settings. On low heat, it takes about 6-8 hours. If you choose high heat, it cooks in 3-4 hours. The stew is ready when the veggies are tender and the flavors mix well. This blog post covered how to make a delicious Moroccan chickpea stew. We discussed key ingredients like chickpeas, fresh veggies, and spices. I provided step-by-step instructions for cooking in a slow cooker, along with tips to enhance flavor. You can swap ingredients or adjust seasonings to suit your taste. Finally, I shared storage tips to help keep your stew fresh. With these simple steps, you can enjoy a tasty meal that is easy to make.

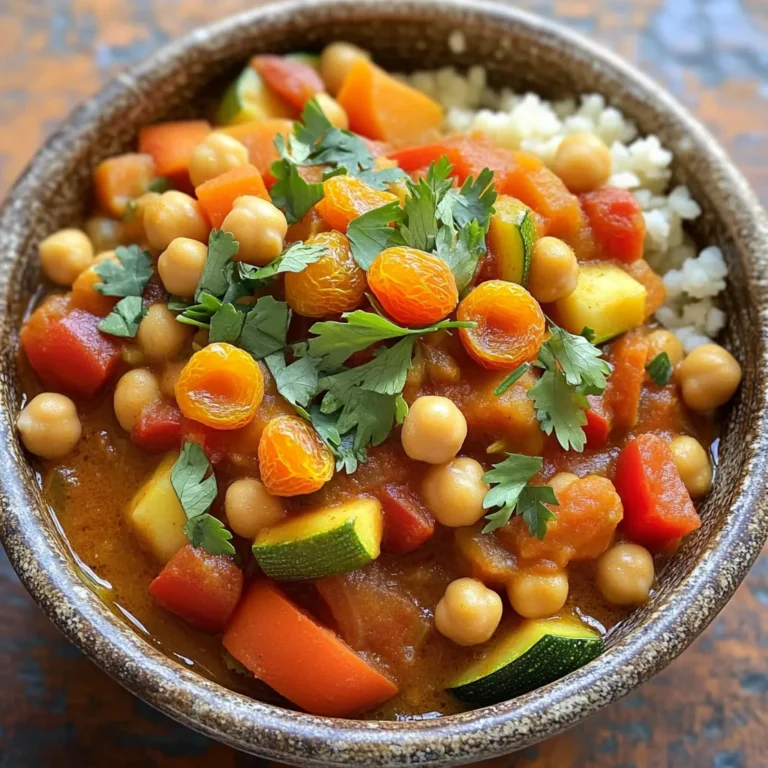
Slow Cooker Moroccan Chickpea Stew Savory Delight

- 1 cup rolled oats - 1/2 cup natural peanut butter - 1/4 cup honey or maple syrup - 1/4 cup mini chocolate chips - 1/4 cup chopped nuts (almonds or walnuts) - 1/2 teaspoon vanilla extract - A pinch of salt Gathering the right ingredients is key for no-bake peanut butter oatmeal cups. Start with rolled oats. They give a nice texture and help bind the cups. Natural peanut butter is best. It adds creaminess and flavor. Honey or maple syrup serves as a sweetener. Use whichever you prefer. Next, mini chocolate chips bring a sweet surprise. Chopped nuts like almonds or walnuts add crunch. Don’t forget the vanilla extract! It boosts the flavor. Finally, a pinch of salt enhances the taste. - Calories per serving: Approximately 120 - Breakdown of macronutrients: - Protein: 4g - Carbohydrates: 13g - Fats: 6g Each serving has about 120 calories. They offer a good balance of protein, carbs, and healthy fats. This makes them a great snack or treat. Plus, they are packed with energy! Enjoy them as a quick pick-me-up. Mixing the dry ingredients Start by taking a large mixing bowl. Add 1 cup of rolled oats and a pinch of salt. Stir these together well. This helps the salt blend into the oats. Melting the peanut butter and honey Next, grab a microwave-safe bowl. Combine 1/2 cup of natural peanut butter and 1/4 cup of honey (or maple syrup). Microwave this mixture for 20 to 30 seconds. Check it often to avoid overheating. Stir it until smooth and creamy. Incorporating the peanut butter mixture with oats Pour the smooth peanut butter mixture into the bowl with oats. Use a spatula to mix them together. Make sure all the oats are coated well with the peanut butter mixture. Folding in chocolate chips and nuts Now, gently fold in 1/4 cup of mini chocolate chips and 1/4 cup of chopped nuts. Mix until everything is evenly distributed. This adds texture and flavor to your cups. Filling the muffin tin with the mixture Line a muffin tin with cupcake liners. Evenly scoop the oat mixture into each liner. Press down firmly to shape them nicely. This ensures they hold their form. Refrigeration time and tips Place the muffin tin in the fridge. Let the cups chill for at least 30 minutes. This helps them firm up. Once set, carefully remove them from the tin. Enjoy your tasty no-bake oatmeal cups! To get the right texture, make sure to mix the oats and peanut butter well. If the mix is too dry, add a splash of milk to help it stick. For sweeteners, honey gives a nice flavor, but maple syrup works too. Each sweetener changes the taste slightly, so try both! For a fun presentation, place the oatmeal cups on a bright plate. Add a drizzle of honey over the top and a sprinkle of nuts or chocolate chips. This makes them look fancy! Pair these cups with a cold glass of milk or a warm cup of tea for a nice treat. If you need to change things up, you can swap the peanut butter for almond or sunflower butter. This is great for allergies! You can also add chocolate chips, coconut flakes, or dried fruit to make new flavors. Mix and match to find your favorite combination! {{image_4}} For those who need gluten-free options, you can use certified gluten-free oats. This choice ensures that you avoid any cross-contamination. It’s an easy switch that keeps your treat safe and tasty. If you want to make these cups vegan, swap honey for maple syrup. Use plant-based chocolate chips to keep everything vegan-friendly. These small changes help everyone enjoy these yummy treats. To add a twist, try adding spices like cinnamon or nutmeg. A dash of cinnamon can bring warmth, while nutmeg adds a hint of spice. Experiment with these to find what you like best. You can also use different nut butters. Almond butter or cashew butter works well. Each nut butter adds its unique flavor, making your cups exciting each time you make them. Mixing in dried fruits or seeds can enhance your oatmeal cups. Consider adding raisins, cranberries, or sunflower seeds. Each adds a different texture and nutritional boost to the cups. If you love chocolate, try using dark chocolate chips or chunks. You can also mix nuts like pecans or hazelnuts for extra crunch. These additions make the cups even more delicious and satisfying. To keep your no-bake peanut butter oatmeal cups fresh, store them in the fridge. Place the cups in an airtight container. This helps keep them moist and tasty. If you have a muffin tin, you can cover it with plastic wrap too. Make sure to separate layers with parchment paper to avoid sticking. You can freeze the oatmeal cups for longer storage. First, wrap each cup in plastic wrap. Place the wrapped cups in a freezer-safe bag. This keeps them fresh for about three months. When you want to eat them, take out the cups and let them thaw in the fridge overnight. You can also leave them at room temperature for about an hour before serving. In the fridge, these oatmeal cups last about one week. If you freeze them, they can stay good for up to three months. Just remember to check for any signs of freezer burn before eating. Enjoy your tasty treats knowing they stay fresh and flavorful! If you need a nut-free option, try sunbutter. Sunbutter comes from sunflower seeds. It has a similar taste and texture. You can also use soy nut butter or pumpkin seed butter. These give great flavor and are safe for nut allergies. Yes, you can skip the honey. Maple syrup works well too. You might also try agave nectar or brown rice syrup. These natural sweeteners will keep your cups tasty and sweet. Absolutely! These oatmeal cups are great for kids. They have healthy oats, healthy fats from peanut butter, and a bit of sweetness. The mix of ingredients offers energy and nutrition. Plus, kids love the chocolate chips! Making oatmeal cups is simple and fun. You use rolled oats, peanut butter, honey, and add chocolate chips and nuts. These ingredients create a tasty treat that’s good for you. In this post, I shared how to mix everything, mold them, and chill. You learned tips for the right texture and delicious serving ideas. You can tweak recipes for diets or flavors. Now, you can enjoy these cups fresh or store them for later. They are quick to make and perfect for snacks. Happy cooking!

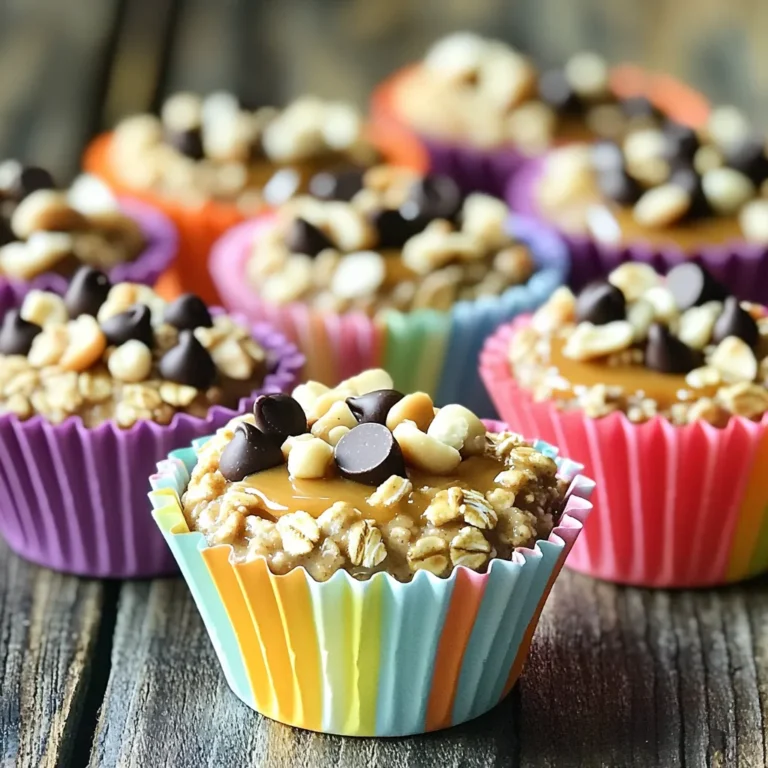
No-Bake Peanut Butter Oatmeal Cups Easy and Tasty Treat

- 4 large whole wheat or spinach tortillas - 1 cup hummus (store-bought or homemade) - 1 cup shredded carrots - 1 cup fresh baby spinach leaves - 1 cup bell peppers (a mix of red, orange, and yellow), thinly sliced - 1 cucumber, thinly sliced - 1 cup purple cabbage, finely shredded - Fresh herbs such as cilantro or parsley for garnish - Salt and freshly ground pepper, to taste To make Rainbow Veggie Pinwheels, gather these vibrant ingredients. Start with large tortillas; whole wheat or spinach works great. Next, grab a cup of hummus. You can buy it or make it at home. Now, let’s add some crunch! Shred one cup of carrots. Fresh baby spinach adds color and nutrition. Slice bell peppers—red, orange, and yellow—to create a rainbow effect. Don’t forget one cucumber, sliced thin for that refreshing bite. Add a cup of purple cabbage, finely shredded. It gives a beautiful pop of color and a nice crunch. For the finishing touch, use fresh herbs like cilantro or parsley. Finally, season your veggies with salt and pepper. With these fresh ingredients, you set the stage for a tasty and colorful snack! {{ingredient_image_2}} Start by placing a tortilla flat on a clean surface. This helps with rolling later. Use a spatula or spoon to spread hummus on the tortilla. Cover the entire surface, leaving a half-inch border around the edge. This border keeps the filling from spilling out. Next, take your shredded carrots and place them on one half of the tortilla. Follow this with fresh baby spinach leaves. Then, add thin slices of bell peppers in red, orange, and yellow. Next, layer in cucumber slices and finish with finely shredded purple cabbage. This colorful mix makes your pinwheels look vibrant. Sprinkle a pinch of salt and freshly ground pepper on the veggies. You can also add fresh herbs like cilantro or parsley for extra flavor. Now, it’s time to roll the tortilla. Start at the edge with the filling and roll it tightly. Keep all the ingredients tucked inside as you roll. Once you reach the end, the tortilla should be fully rolled. Use a sharp knife to slice the rolled tortilla into 1-inch thick rounds. You should have beautiful, bite-sized pinwheels. Repeat these steps with the remaining tortillas and filling. Arrange the sliced pinwheels on a serving platter to show off their bright colors. To make your pinwheels pop, use a bright plate. Arrange the pinwheels in a circular pattern. This creates a fun and inviting look. You can also shape them into a rainbow for a festive touch. Add fresh herbs on top for color and aroma. Serve a small bowl of extra hummus for dipping. This adds a nice touch and keeps things tasty. You can prepare these pinwheels a few hours in advance. Simply wrap them tightly in plastic wrap. This keeps them fresh and prevents them from drying out. Store them in the fridge until you’re ready to serve. If you make them the night before, enjoy them cold. They taste great chilled and are easy to grab. For added flavor, sprinkle a little lemon juice over the veggies. This brightens up the taste. You can also mix in a dash of garlic powder or smoked paprika for a twist. Fresh herbs like cilantro or parsley enhance the flavor profile nicely. Experiment with different spices to find your favorite blend. Just remember to taste as you go! Pro Tips Use Fresh Ingredients: Fresh veggies not only enhance the flavor but also add crunch and vibrant colors to your pinwheels. Experiment with Spreads: Try different spreads like cream cheese or avocado to mix up the flavors while keeping it healthy. Chill Before Slicing: Refrigerate the rolled pinwheels for about 10-15 minutes before slicing to keep them intact and make cutting easier. Customize Your Fillings: Feel free to add or substitute with other vegetables or proteins like shredded chicken, turkey, or feta cheese for added variety. {{image_4}} You can switch up the veggies based on what you like. Try adding sliced avocado for creaminess. Roasted red peppers give a sweet flavor. You can also use shredded zucchini for extra crunch. Radishes add a spicy kick. Get creative with seasonal vegetables for fun colors and tastes. Want to boost the protein? Shredded chicken works well and adds heartiness. You can use diced tofu if you prefer a plant-based option. Hummus has some protein, but adding a protein source makes it more filling. Sliced turkey or ham also pair nicely with the veggies. The spread makes a big difference in flavor. Cream cheese gives a rich, smooth taste. You can mix herbs into the cream cheese for added flavor. Guacamole adds creaminess and a fresh taste. Try pesto for a burst of herbal flavor. Each spread adds a unique twist to your pinwheels. To store any leftover Rainbow Veggie Pinwheels, wrap them tightly in plastic wrap. This keeps them fresh and prevents them from drying out. Place the wrapped pinwheels in an airtight container. They stay good in the fridge for up to three days. If you notice any veggies wilting, eat them sooner. You can freeze the pinwheels for later enjoyment. First, wrap each pinwheel in plastic wrap. Then, place them in a freezer-safe bag or container. They can stay frozen for up to three months. When you're ready to enjoy them, thaw them overnight in the fridge. This keeps the flavors intact. If you want to enjoy warm pinwheels, reheating is easy. You can use a microwave or a skillet. For the microwave, heat them for 30 seconds to one minute. Check that they are warm throughout. For the skillet, heat on low for a few minutes, flipping occasionally. This adds a nice crisp to the tortilla. Always ensure they are heated evenly for the best taste. You can make these pinwheels healthier by using low-fat hummus. Choose whole grain tortillas for extra fiber. Add more veggies like zucchini, kale, or radishes. You can also reduce the amount of salt or skip it entirely. Finally, consider using herbs instead of salt for extra flavor. Yes, you can prepare these pinwheels in advance. Make them a few hours ahead of time and store them in the fridge. Wrap the pinwheels in plastic wrap to keep them fresh. Just slice them right before serving for the best look and taste. These pinwheels are great for many occasions. Serve them at birthday parties, picnics, or family gatherings. They also make a fun snack for kids after school. You can even use them as appetizers for holiday dinners. Their colors and flavors appeal to everyone! These pinwheel snacks are easy to make and fun to eat. We covered the key ingredients, like whole wheat tortillas and fresh veggies, and went through simple steps to prepare them. You can add proteins or alternate spreads for extra flavor. I shared tips for serving and storing to keep them fresh. Overall, these pinwheels are great for any occasion. They are tasty, healthy snacks. Enjoy making your own creations!

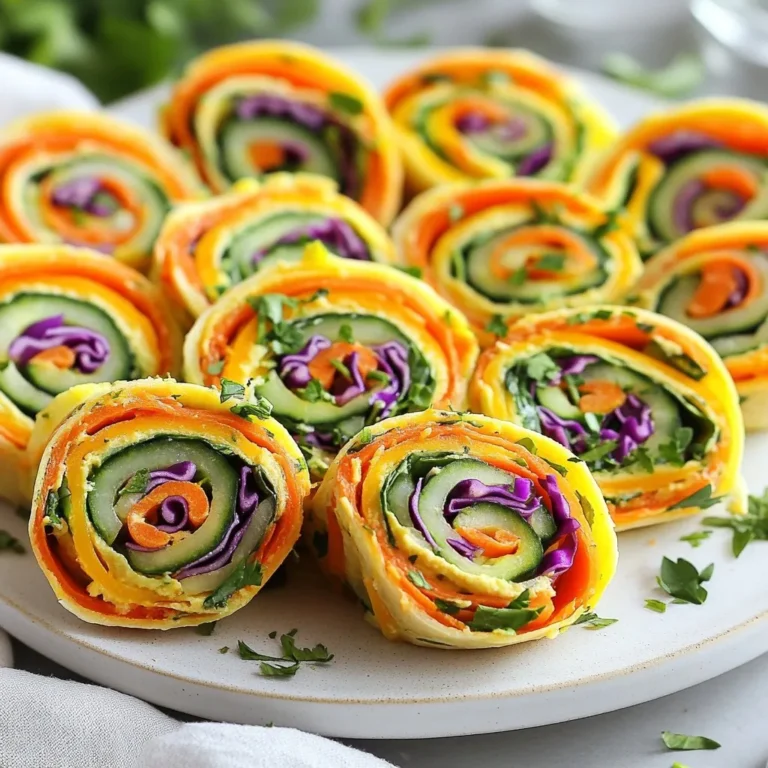
Rainbow Veggie Pinwheels Colorful and Tasty Snack

- 2 cups of Rice Krispies - 1 cup of creamy peanut butter - 1 cup of powdered sugar - 1 teaspoon of pure vanilla extract - 1 cup of milk chocolate chips - ½ cup of mini chocolate chips (for topping) - A pinch of sea salt These six items form the heart of your Peanut Butter Chocolate Rice Krispie Bars. Each ingredient plays a key role in flavor and texture. The Rice Krispies add crunch. Creamy peanut butter offers richness. Powdered sugar brings sweetness. Vanilla extract enhances flavor. Milk chocolate chips provide smoothness, while mini chocolate chips are for a delightful topping. - Substitute with chunky peanut butter - Add nuts or dried fruit for texture Feel free to customize! If you like crunch, use chunky peanut butter. You can also mix in nuts or dried fruit for added texture. These options can make your bars even more exciting. - Mixing bowl - Electric mixer or spatula - 8x8 inch baking dish - Microwave-safe bowl Using the right tools makes cooking easier. A mixing bowl helps combine ingredients. An electric mixer or a spatula ensures a smooth mix. The 8x8 inch baking dish shapes the bars. Lastly, a microwave-safe bowl melts chocolate perfectly. - In a large bowl, add 1 cup of creamy peanut butter. - Sift in 1 cup of powdered sugar. - Mix until smooth and creamy. This should take a few minutes. - Next, fold in 1 teaspoon of pure vanilla extract. - Now, add 2 cups of Rice Krispies. - Ensure every piece is coated well with the peanut butter mix. - Line an 8x8 inch baking dish with parchment paper. - Leave some paper hanging over the edges for easy removal. - Press the mixture firmly into the dish with a spatula. - Place 1 cup of milk chocolate chips in a microwave-safe bowl. - Microwave in 30-second intervals, stirring after each. - Stop when fully melted and smooth, usually about 1-2 minutes. - Pour the melted chocolate over the Rice Krispies layer. - Use a spatula to spread it evenly across the top. - Sprinkle ½ cup of mini chocolate chips while the chocolate is warm. - Add a pinch of sea salt to enhance the flavor. - Put the baking dish in the refrigerator for at least 30 minutes. - Once set, lift the bars out using the parchment paper. - Cut into squares and enjoy your delicious treat! - Ensure all Rice Krispies are coated. This step is key for flavor. - Press the mixture firmly to avoid crumbling. A strong base keeps bars together. - Use low power settings in the microwave. This helps prevent burning. - Stir frequently to prevent hot spots. Mix well after each interval for smooth chocolate. - Drizzle melted chocolate on top for a fun look. It adds a nice touch. - Serve with decorative garnishes like sprinkles or nuts. They make the bars pop! {{image_4}} You can easily boost the flavor of your Peanut Butter Chocolate Rice Krispie Bars. - Add a pinch of cinnamon for warmth. This spice brings a nice depth. - Incorporate mini marshmallows for chewiness. They add a fun texture and sweetness. If you have dietary needs, there are great options. - Use almond butter instead of peanut butter for nut allergies. It works well and tastes great. - Substitute sugar-free options if needed. This way, everyone can enjoy the treat. Changing the toppings can make your bars even better. - Try white chocolate chips for a twist. They add a sweet contrast to the peanut butter. - Top with crushed candies or sprinkles. This makes the bars festive and fun! To keep your Peanut Butter Chocolate Rice Krispie Bars fresh, store them in an airtight container. This helps keep moisture out and preserves their taste. It’s best to keep them in the refrigerator. The cool temperature will keep the chocolate firm and the bars tasty. These bars last up to one week in the fridge. If you want to keep them longer, you can freeze them. Just wrap them tightly in plastic wrap before placing them in a freezer-safe bag. They can last for up to three months in the freezer. If you have any bars left, don’t worry! You can break them up and crumble them on top of ice cream. This adds a nice crunch and flavor. You can also use the bars in dessert parfaits. Layer them with yogurt and fruit for a fun treat! Yes, you can make these bars vegan. Use a plant-based creamy peanut butter. For the chocolate, choose dairy-free chocolate chips. Replace powdered sugar with a vegan-friendly alternative, like coconut sugar. You can also use almond milk in place of regular milk. To make these bars nut-free, swap the peanut butter for sunflower seed butter. This option provides a similar taste and texture without nuts. You can also use soy nut butter or any other nut-free spread. If you want to change the base cereal, try using crispy rice cereal. You can also use corn flakes or puffed rice. These options will give you a similar crunch and texture in your bars. Yes, you can add protein powder. Use a mild flavor, like vanilla. Start with one scoop and mix it into the peanut butter and powdered sugar. Make sure to adjust the amount of powdered sugar to keep the texture right. This post outlined how to make delicious Rice Krispie peanut butter bars. You learned the main ingredients, the steps for mixing and assembling, and storage tips to keep them fresh. We also covered simple ways to customize the recipe to fit your taste. These bars are easy to make and fun to eat. They’re perfect for snacks or dessert. Try different toppings or flavors to make them your own. Enjoy your sweet treat, and don't forget to share with friends!

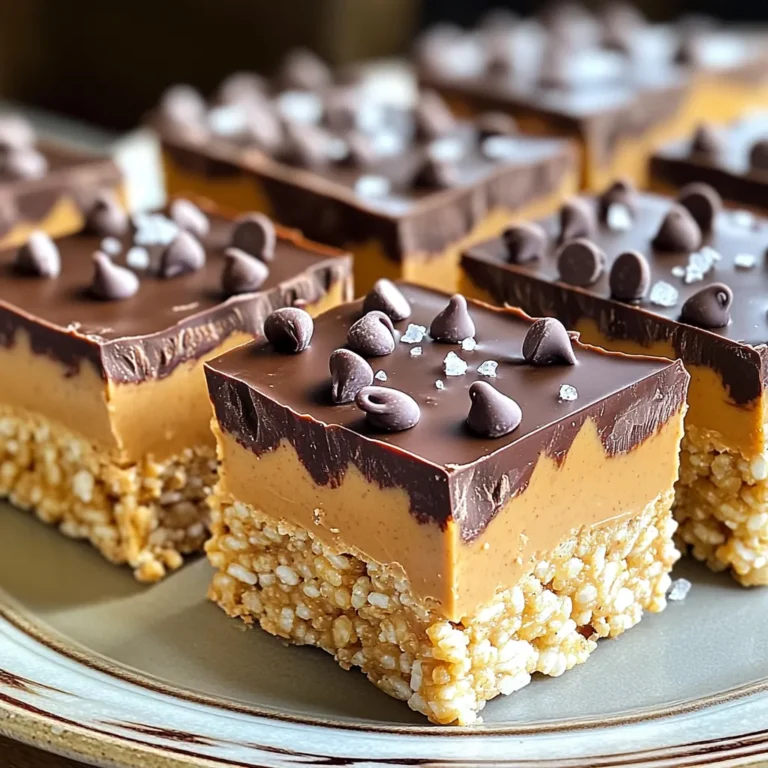
Peanut Butter Chocolate Rice Krispie Bars No Bake Treat

PREV 1 … 10 11 12 … 48 NEXT
meal plan mapper

explore

DessertsDinnerAppetizersDrinks

Our Policies

  • Cookie Policy
  • Copyright Policy
  • Disclaimer
  • GDPR Policy
  • Terms Of Use
Back to Top
  • About
  • Contact Us
  • Privacy Policy
© 2025 meal plan mapper