FREE DINNER EBOOK! Get your copy!
  • Cookie Policy
  • GDPR Policy
  • Disclaimer
  • Terms Of Use
  • Visit my other site: Fun Cookie Recipes
meal plan mapper
  • Home
  • Dinner
  • Desserts
  • Drinks
  • Appetizers
  • Contact
  • About
  • Privacy Policy
  • Home
  • Dinner
  • Desserts
  • Drinks
  • Appetizers
  • Contact
  • About
  • Privacy Policy
  • Cookie Policy
  • GDPR Policy
  • Disclaimer
  • Terms Of Use
Visit my other site: Fun Cookie Recipes

HOME / CATEGORIES /

Latest

- 2 cans (15 oz each) chickpeas, drained and rinsed - 1 red bell pepper, diced into bite-sized pieces - 1 medium zucchini, sliced into half-moons - 1 red onion, cut into wedges - 1 cup cherry tomatoes, halved - 3 tablespoons extra-virgin olive oil - 1 teaspoon garlic powder - 1 teaspoon smoked paprika - 1 teaspoon dried oregano - Salt and freshly ground black pepper to taste The main ingredients form a colorful and healthy base. Chickpeas add protein, while the fresh vegetables bring crunch and flavor. The olive oil and spices enhance the dish, making each bite delightful. - 2 cups cooked quinoa or couscous (either works beautifully) Quinoa and couscous are great options for the base. Quinoa is nutty and full of protein. Couscous is light and fluffy. You can choose either based on your taste or what you have on hand. - Fresh parsley, chopped, for a vibrant garnish - Lemon wedges for a zesty finish Garnishing with fresh parsley adds color and freshness. Lemon wedges let you add a bright, tangy kick. This final touch elevates the dish and makes it even more enjoyable. 1. Preheat your oven to 400°F (200°C). 2. On a large baking sheet, combine the chickpeas, red bell pepper, zucchini, onion, and cherry tomatoes. This colorful mix will give your dish vibrancy. 1. Drizzle the mix with extra-virgin olive oil. Then, sprinkle garlic powder, smoked paprika, dried oregano, salt, and pepper on top. 2. Toss the ingredients with your hands or a spatula. Make sure everything is coated well. Spread the mixture evenly on the baking sheet for even roasting. 1. Cook your quinoa or couscous according to the package instructions. 2. After cooking, fluff it up with a fork for a light texture. This method ensures a tasty and easy meal. Enjoy each step as you create this delightful dish! To ensure even cooking, spread the chickpeas and veggies in a single layer. This helps them roast well without steaming. Stir the mixture halfway through cooking. This will encourage caramelization and prevent burning. Keep an eye on them; they should be golden brown and tender when done. For the best flavor, try adding cumin or coriander. These spices add warmth and depth. You can also mix in some feta cheese or olives for a salty kick. Want something spicy? Add a pinch of red pepper flakes. When assembling your bowls, start with a scoop of quinoa or couscous. Layer the roasted chickpeas and veggies on top. For a vibrant display, use wide bowls. Add a sprinkle of fresh parsley for color. Serve with lemon wedges on the side. A squeeze of lemon gives a zesty finish. {{image_4}} To make your Mediterranean chickpea bowls even heartier, you can add protein. For meat lovers, grilled chicken or shrimp works well. Simply season and cook them before adding to your bowls. If you prefer plant-based options, try adding tofu or tempeh. Both soak up flavors nicely and add texture. Feel free to swap in seasonal veggies. Bell peppers, zucchini, and cherry tomatoes are classic. However, you can also use asparagus, eggplant, or broccoli. All taste great when roasted. If you have extra veggies, you can freeze them. Just chop and store in bags. They will keep for a few months. While quinoa and couscous are great bases, other grains can work too. Try bulgur or farro for a different texture. If you need gluten-free options, consider rice or millet. Each grain adds its unique flavor, making your bowls fun and varied. Store your Mediterranean Chickpea Bowls in airtight containers. This keeps them fresh and prevents spills. They will last about 3-4 days in the fridge. If you notice any strange smells or colors, it’s time to toss them. To reheat in the oven, preheat to 350°F (175°C). Spread the mixture on a baking sheet. Heat for about 10-15 minutes until warm. Stir halfway through for even warmth. For the microwave, place the bowl in the microwave. Heat on high for 1-2 minutes. Check and stir to ensure even heat. Be careful, as the bowl can get hot. To freeze, let the bowls cool completely. Transfer the mixture into freezer-safe bags or containers. Remove as much air as possible. Label with the date. They will keep well for about 2-3 months. When you’re ready to enjoy, take them out and thaw overnight in the fridge. For a quicker option, run cold water over the sealed bag until thawed. Yes, this recipe is vegan! All the ingredients are plant-based. You use chickpeas, fresh veggies, and quinoa or couscous as a base. Just check the type of couscous if you choose it. Some brands offer different grains, so look for vegan options. You can also add more veggies or nuts for extra flavor and texture. This recipe is flexible and perfect for a vegan meal. You can change the spices to suit your taste. Try cumin for a warm flavor. If you like heat, add cayenne pepper or chili flakes. For a fresh note, use lemon zest. You can also mix in Italian herbs like basil or thyme. Experimenting with spices makes the dish exciting and personal. To get crispy chickpeas, follow these tips: - Dry well: Pat the chickpeas dry with a towel before cooking. - Space them out: Spread them evenly on the baking sheet. - Use enough oil: Drizzle enough olive oil to coat them lightly. - Stir halfway: Toss the mixture halfway through roasting so they crisp evenly. These steps will help you achieve that perfect crunch with every bite. This recipe blends chickpeas and fresh vegetables for a tasty meal. You learned how to prepare and roast them and add grains like quinoa or couscous as a base. I shared tips for flavor and presentation, plus some fun variations. You can store leftovers easily and enjoy them later. Explore all the options for your perfect dish, whether you're vegan or love protein. Cooking is about creativity, so have fun with your food. Enjoy bringing these flavors to your table!

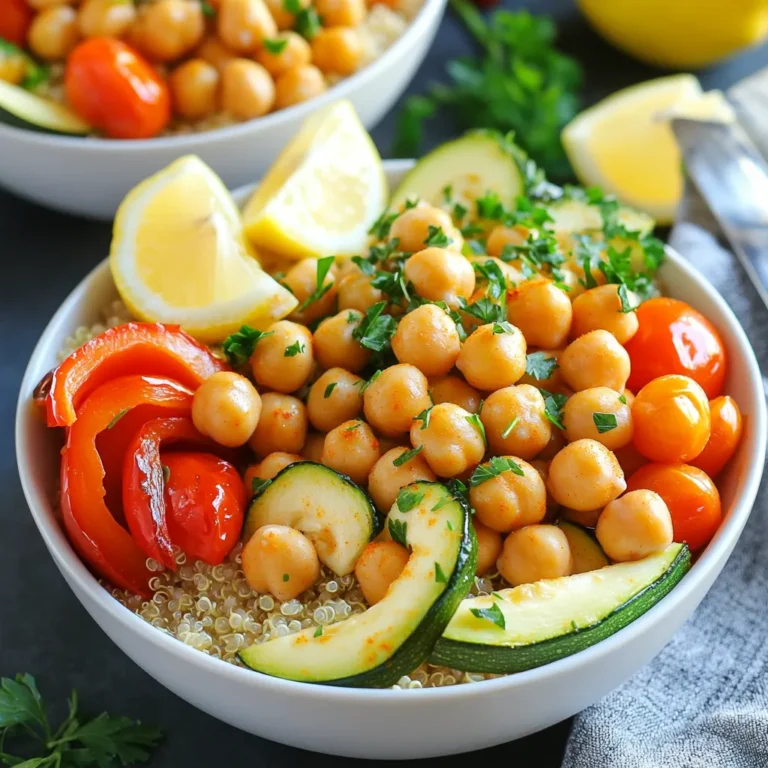
Mediterranean Chickpea Bowls Sheet Pan Delight

- 1 ripe mango, peeled and diced - 1 cup coconut milk (preferably canned for a creamier texture) - 1 medium frozen banana - 1/2 cup Greek yogurt (substitute with dairy-free yogurt if preferred) - 2 tablespoons honey or maple syrup (optional, for added sweetness) - 1/4 cup unsweetened shredded coconut - 1 tablespoon chia seeds - Fresh mango slices and mixed berries (such as strawberries and blueberries) for topping - Fresh mint leaves for a fragrant garnish To make this bowl, I use a ripe mango. If you can't find one, try using frozen mango chunks. They work well and keep the smoothie cold. For coconut milk, canned gives the best creaminess. If you're dairy-free, use dairy-free yogurt instead of Greek yogurt. You can swap honey for maple syrup if needed. Chia seeds add fiber, but if you don't have them, you can skip them. - Mango: Rich in vitamins A and C, mango helps boost your immune system. - Coconut milk: This creamy milk provides healthy fats that keep you full longer. - Frozen banana: Adds natural sweetness and potassium, good for your heart. - Greek yogurt: Packed with protein, it supports muscle health and digestion. - Honey or maple syrup: These natural sweeteners give you energy without refined sugars. - Shredded coconut: Contains fiber and healthy fats, which support gut health. - Chia seeds: Full of omega-3 fatty acids, these seeds help with brain function. - Mixed berries: These fruits are high in antioxidants, which fight free radicals. - Mint leaves: They add fresh flavor and can help with digestion. {{ingredient_image_2}} Start with a high-speed blender. Add the diced mango, coconut milk, frozen banana, and Greek yogurt. Blend on high until creamy and smooth. Make sure there are no lumps. Taste the mix. If you want it sweeter, add honey or maple syrup. Blend again to mix in the sweetener. Take a bowl and pour in the smoothie. Make sure it looks bright and colorful. Use a spoon to create a nice swirl if you like. This will make it look even better. Next, sprinkle the shredded coconut and chia seeds evenly on top. This adds texture and flavor. You can add extra toppings for more flavor. Try fresh mango slices or mixed berries like strawberries and blueberries. These add color and taste. For a fresh twist, add mint leaves either on top or to one side. This gives your bowl a nice look and aroma. Enjoy your smoothie bowl right away! To make a smooth and creamy bowl, use frozen fruit. Frozen bananas work well. They add creaminess and chill your smoothie. Use a high-speed blender for the best results. Blend until no lumps remain. If it’s too thick, add a bit more coconut milk. If it's too thin, add more frozen fruit. Taste your smoothie base before adding sweetener. Ripe mangoes are naturally sweet. You may not need extra sweeteners. If you like it sweeter, add honey or maple syrup. Start with one tablespoon, then blend and taste again. Adjust until it’s just right for you. Pour your smoothie into a bowl for a nice look. Top it with fresh mango slices and mixed berries. Add shredded coconut and chia seeds for texture. Mint leaves add a pop of color and flavor. Serve with a spoon and enjoy right away! Pro Tips Choose a Ripe Mango: A ripe mango will provide the best flavor and sweetness. Look for one that is slightly soft to the touch and has a fragrant aroma. Freeze Your Banana: Using a frozen banana adds creaminess and chill to your smoothie bowl. Peel and slice bananas before freezing for easy blending. Experiment with Toppings: Feel free to customize your toppings! Try adding granola, nuts, or seeds for extra crunch and nutrition. Blend in a High-Speed Blender: A high-speed blender will ensure your smoothie is perfectly smooth and creamy. If you don’t have one, blend in smaller batches to avoid lumps. {{image_4}} You can change the mango to many other fruits. Try using ripe bananas or juicy peaches. Pineapple adds a nice tropical twist too. For toppings, consider adding nuts like almonds or walnuts. Sliced kiwi and pomegranate seeds also look great. Mix and match to find your favorite combo! To make this smoothie bowl dairy-free, swap Greek yogurt for a plant-based yogurt. Coconut yogurt works well, giving a rich flavor. You can also skip honey and use agave syrup instead. This keeps your bowl vegan and just as tasty. Use seasonal fruits for a fresh taste. In spring, add strawberries or raspberries. Summer is perfect for peaches or cherries. In fall, consider using apples or pumpkin puree for a warm flavor. Each season brings new options, so get creative! If you have any smoothie bowl left, store it in an airtight container. This keeps it fresh. It’s best to eat it within one day. The longer it sits, the less tasty it becomes. If you see any separation, just stir it well before eating. You can freeze any leftover smoothie for later. Pour it into ice cube trays for easy use. Once frozen, pop out the cubes and store them in a bag. This way, you can blend them again for a quick treat. Just add a little coconut milk or water to your blender when you’re ready. I don’t recommend reheating smoothie bowls. They taste best when cold and fresh. If your smoothie is too thick after freezing, add more coconut milk or yogurt. Blend it until it’s smooth again. You’ll have a refreshing treat ready to enjoy! To make your smoothie bowl vegan, swap Greek yogurt for dairy-free yogurt. Use almond, soy, or coconut yogurt. Also, replace honey with maple syrup or agave syrup. This keeps the bowl sweet and plant-based. Yes, you can use fresh fruit! However, using frozen bananas helps give a creamier texture. If you choose fresh, add ice to keep the bowl cold. The bowl will still taste great and be refreshing. You can replace Greek yogurt with any dairy-free yogurt. Almond, coconut, or cashew yogurt works well. If you want a thicker texture, use a nut-based yogurt. This adds creaminess and keeps the flavor bright. This blog post covered all you need for the perfect smoothie bowl. I shared ingredient details, tips for blending, and ideas to enhance your drink. You learned about variations and how to store leftovers, too. Smoothie bowls are fun and healthy. Use this guide to enjoy your own creations. Experiment with flavors and textures. Soon, you’ll make the best smoothie bowl. Remember, the right ingredients and techniques make a big difference!

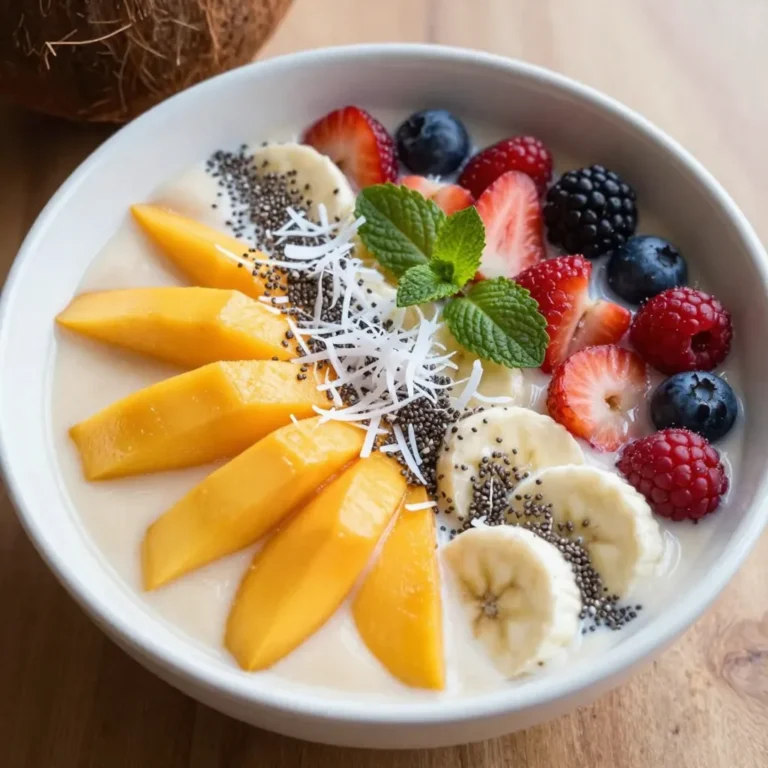
Coconut Mango Smoothie Bowl Healthy and Refreshing Treat

- 2 ripe bananas, thoroughly mashed - 1 cup rolled oats - 1/4 cup almond butter (or substitute with peanut butter) - 1/4 cup honey or maple syrup - 1/2 teaspoon pure vanilla extract - 1/2 teaspoon ground cinnamon These core ingredients bring the bars together. Ripe bananas add natural sweetness and moisture. They work well with rolled oats, giving a nice texture. Almond or peanut butter adds healthy fat and flavor. Honey or maple syrup sweetens the mix. Cinnamon and vanilla give a warm, inviting taste. - 1/4 cup chopped nuts (choose between walnuts or almonds) - 1/4 cup dark chocolate chips (optional, but recommended for a sweet touch) - A pinch of salt These add-ins can elevate your bars. Chopped nuts add crunch and healthy fats. Dark chocolate chips offer a delightful sweetness in every bite. A pinch of salt enhances the flavor of the bars. You can mix and match these add-ins to suit your taste. Experimenting with them can make your energy bars unique! {{ingredient_image_2}} - Preheat your oven to 350°F (175°C). - Line an 8x8-inch baking dish with parchment paper. Make sure the paper hangs over the edges. This helps lift the bars out later. - In a large bowl, combine 2 ripe bananas, 1/4 cup almond butter, and 1/4 cup honey or maple syrup. - Add 1/2 teaspoon pure vanilla extract. - Use a fork or whisk to mix until everything is smooth and uniform. - Gently fold in 1 cup rolled oats and 1/2 teaspoon ground cinnamon. - Add a pinch of salt. - Stir well to combine all the dry and wet ingredients. - If you like, fold in 1/4 cup chopped nuts and 1/4 cup dark chocolate chips. Mix until evenly spread. - Pour the mixture into your prepared baking dish. - Use a spatula to spread it evenly. - Bake for 20-25 minutes. Check if the edges are lightly golden and the center is set before removing it from the oven. - Let the bars cool in the pan for about 10 minutes. - Carefully lift the bars out using the parchment paper. - Transfer them to a cutting board. - Allow them to cool completely before slicing into bars or squares. To make sure your bars turn out great, start by fully mashing the bananas. This helps mix them well with other ingredients. You want a smooth texture. Next, use fresh ingredients for the best taste. Fresh oats and nut butter make a big difference. Feel free to substitute different nut butters. Almond butter works well, but peanut or cashew butter adds a new twist. You can also adjust the sweetness to your taste. If you like it sweeter, add more honey or maple syrup. If you prefer less, cut back a bit. For a pretty display, neatly arrange the bars on a plate. You want them to look as good as they taste. Add some garnishes like extra nuts or chocolate chips on top. This not only adds flair but also makes them more tempting. Pro Tips Choose Ripe Bananas: The riper your bananas, the sweeter and more flavorful your energy bars will be. Look for bananas with brown spots for the best results. Customization Options: Feel free to mix in your favorite nuts, seeds, or dried fruits to personalize your energy bars. This adds variety and boosts nutrition. Perfect Storage: To maintain freshness, store your energy bars in an airtight container. For longer shelf life, consider refrigerating them. Serving Suggestions: Serve your energy bars with a side of yogurt or fruit for a balanced snack or breakfast option. This enhances flavor and adds extra nutrients. {{image_4}} You can easily change the flavor of your banana oatmeal energy bars. Adding dried fruit gives a fruity twist. Think about using raisins, cranberries, or apricots. These fruits add sweetness and texture. You can also try mixing in spices. Nutmeg or cardamom can change the taste in fun ways. Just a pinch can bring warmth to every bite. If you need gluten-free options, use certified gluten-free rolled oats. They work just as well as regular oats. For those who follow a vegan diet, you can swap honey for maple syrup. This keeps the bars sweet and plant-based. Almond butter can also be replaced with any nut or seed butter. This makes the bars fit for everyone. These energy bars are super versatile. You can pair them with yogurt for a tasty snack. The creaminess of yogurt complements the chewiness of the bars. They also work great in smoothies. Just chop them up and toss them in for added texture. If you need a pre-workout snack, grab one before you hit the gym. They give you energy without weighing you down. You can store your banana oatmeal energy bars at room temperature. Use an airtight container to keep them fresh. Place a piece of parchment paper between layers to avoid sticking. These bars stay tasty for about a week at room temperature. Just keep them away from direct sunlight and heat. For longer freshness, refrigerate your energy bars. They can last up to two weeks in the fridge. Wrap each bar in plastic wrap or foil for better protection. This helps maintain their taste and texture. If you want to save them for later, freezing is a great option. Place the bars in a freezer-safe bag or container. You can freeze them for up to three months. To enjoy, simply let them thaw at room temperature or warm them slightly in the microwave. To make these energy bars gluten-free, use certified gluten-free oats. Regular oats may contain gluten from cross-contamination during processing. Certified gluten-free oats ensure you avoid any gluten-related issues. They provide the same texture and taste, making your bars just as delicious. Yes, you can substitute the sweetener in this recipe. Some great alternatives include maple syrup, agave nectar, or coconut sugar. Each option gives a unique flavor. Choose what you like best, keeping in mind the sweetness level may change slightly with each. Banana oatmeal energy bars last up to a week at room temperature when stored in an airtight container. For longer freshness, refrigerate them. In the fridge, they can last for two weeks. If you want to keep them for months, consider freezing them. Yes, you can add protein powder to the recipe. Start with 1/4 cup of your favorite protein powder. Mix it in with the dry ingredients. This addition boosts the protein content, making your bars even more filling and nutritious. You can create delicious banana oatmeal energy bars with simple ingredients. We explored essential ingredients like ripe bananas and rolled oats. I shared step-by-step instructions for mixing, baking, and slicing. You can customize flavors with add-ins or dietary alternatives. Remember to store your bars properly for freshness. These energy bars are not just tasty; they are healthy, too. Enjoy making your own snacks that boost energy! Happy baking!

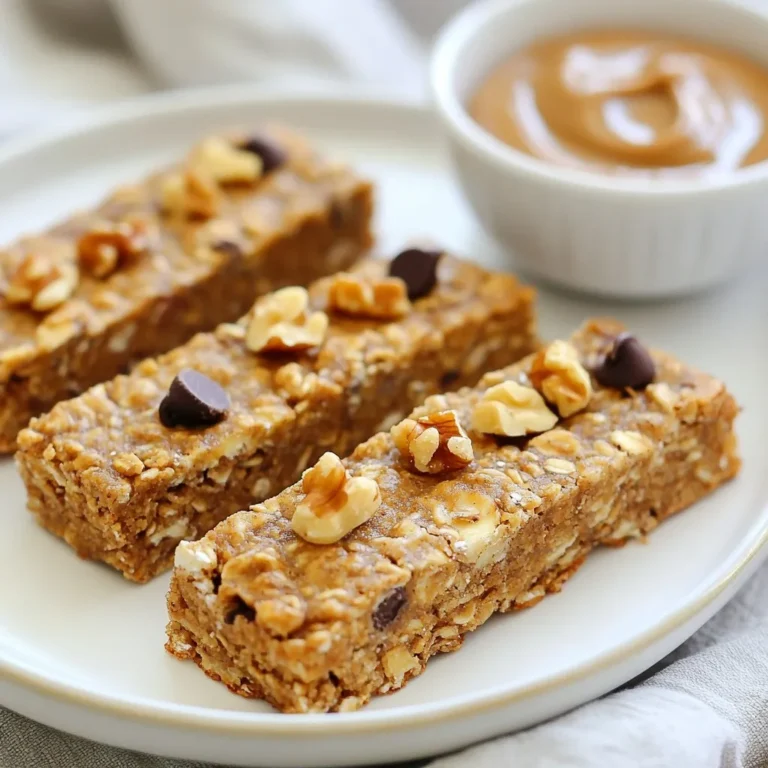
Banana Oatmeal Energy Bars Simple and Tasty Snack

- 1 lb boneless, skinless chicken thighs - Olive oil, salt, and pepper for seasoning - 1 medium onion, diced - 2 carrots, diced - 2 celery stalks, diced - 3 cloves garlic, minced - 4 cups chicken broth - 1 teaspoon dried thyme - 1 teaspoon smoked paprika - Salt and freshly cracked pepper to taste - 1 cup frozen peas - 2 cups all-purpose flour - 1 tablespoon baking powder - 1/2 teaspoon salt - 3/4 cup milk - 1/4 cup unsalted butter, melted Gather these simple ingredients, and let’s create a warm and hearty meal. The chicken thighs bring a rich flavor, while the veggies add crunch and sweetness. The broth, seasoned with thyme and paprika, makes each bite comforting. The dumplings, fluffy and light, sit on top like little pillows of joy. This dish feels like a hug on a plate. First, heat 1 tablespoon of olive oil in a large cast-iron skillet over medium heat. Once the oil is hot, add 1 pound of boneless, skinless chicken thighs. Season the chicken with salt and pepper. Sauté the chicken for about 5 to 7 minutes. You want it browned and cooked all the way through. When done, remove the chicken from the skillet and set it aside on a plate. In the same skillet, toss in the diced vegetables. Add 1 medium onion, 2 diced carrots, and 2 diced celery stalks. Sauté these for about 5 to 6 minutes until they become soft and fragrant. Next, add 3 cloves of minced garlic and sauté for an extra minute. This will enhance the flavor of your dish. Pour in 4 cups of chicken broth into the skillet, stirring well. Return the cooked chicken to the skillet. Add 1 teaspoon of dried thyme, 1 teaspoon of smoked paprika, and a cup of frozen peas. Mix everything well and bring it to a gentle simmer. This step melds all the flavors together, making it delicious. While the chicken mixture simmers, let's prepare the dumpling batter. In a medium mixing bowl, whisk together 2 cups of all-purpose flour, 1 tablespoon of baking powder, and 1/2 teaspoon of salt. Gradually stir in 3/4 cup of milk and 1/4 cup of melted unsalted butter. Mix until just combined. Be careful not to overmix, or the dumplings will turn out tough. Now, it's time to cook the dumplings. Using a spoon, drop generous dollops of the batter onto the simmering chicken mixture. Cover the skillet with a lid. Allow the dumplings to steam for about 12 to 15 minutes. They should puff up and be fully cooked in the center. After the time is up, remove the lid and taste the sauce, adjusting the seasoning with salt and pepper as needed. If you want a thicker sauce, let it simmer uncovered for a few more minutes. To make the best dumplings, mix the batter gently. Overmixing can make them tough. You want them soft and fluffy. Use a spoon to drop the batter onto the simmering chicken. This helps them cook evenly. Make sure the heat is just right. Too high can burn them, while too low may leave them raw. Seasoning is key to a great broth. Start with good chicken broth. Add salt and pepper to taste. Dried thyme and smoked paprika add depth. For extra flavor, try adding herbs like parsley or dill. You can even toss in a splash of lemon juice for brightness. Taste as you go to get it just right. A cast-iron skillet is a chef's best friend. It retains heat well, giving you even cooking. After each use, clean it with warm water and a soft sponge. Avoid soap, as it can strip the seasoning. Dry it completely to prevent rust. Occasionally, rub a little oil on the surface to maintain its non-stick quality. This care will help your skillet last for years. {{image_4}} You can make chicken and dumplings even better by adding veggies. Fresh or frozen, they boost flavor and nutrition. Here are some ideas: - Green beans: They add a nice crunch. - Corn: Sweet corn gives a pop of color and taste. - Bell peppers: Use any color for sweetness and crunch. - Zucchini: It cooks quickly and adds moisture. Feel free to mix and match based on the season. Spring brings peas and asparagus, while fall may inspire you to add squash or root veggies. While chicken thighs are great, you can switch things up. Here are some options: - Chicken breasts: They cook faster and are leaner. - Turkey: This works well, especially around holidays. - Duck or goose: Rich and flavorful, these can impress guests. - Tofu: For a vegetarian option, it absorbs flavors well. Each protein brings its unique taste and texture to the dish. Adjust cooking times based on what you choose. Enhancing flavor is key to a rich dish. Here are some ways to do this: - Fresh herbs: Add parsley, thyme, or rosemary for a fresh touch. - Spices: Try cumin or coriander for warmth. - Hot sauce: A dash can add a spicy kick. - Soy sauce or Worcestershire: These deepen the sauce flavor. Mix and match these ingredients to create your signature dish. Test and adjust until you find what you love. Store chicken and dumplings in an airtight container. This helps keep flavors fresh. Place leftovers in the fridge. They stay good for about 3-4 days. If you need to store them longer, consider freezing. To reheat, use the stovetop for best results. Place the chicken and dumplings in a skillet. Add a splash of chicken broth or water. Heat over low heat and stir gently. This keeps the dumplings soft and fluffy. To freeze, let the dish cool completely. Then, portion it into freezer-safe containers. Seal tightly to avoid freezer burn. When ready to eat, thaw it overnight in the fridge. Reheat on the stovetop for a tasty meal. Chicken and dumplings can last about 3 to 4 days in the fridge. Store them in an airtight container. This keeps them fresh and safe to eat. Make sure to cool them to room temperature before putting them in the fridge. This prevents moisture build-up, which can spoil your meal faster. Yes, homemade chicken broth adds great flavor! Using your own broth is better than store-bought. You control the salt and spices. Plus, it can make the dish taste richer. If you have time, simmer some chicken bones with veggies for a few hours. This gives you a tasty base for your chicken and dumplings. Tough dumplings often happen from overmixing. Mix the dough just until combined. Another reason could be cooking them too long. Always follow the steaming time in the recipe. If your dumplings are tough, try adding a little more milk next time. This can keep them soft and fluffy. Yes, you can prepare parts of this dish ahead of time. Cook the chicken and veggies, and store them in the fridge. Make the dumpling batter fresh when you are ready to cook. For reheating, warm the chicken mixture on low heat. Then, add the dumplings, cover, and steam as directed. This keeps the flavors fresh and the dumplings soft. In this post, we explored a simple chicken and dumplings recipe. I shared key ingredients, easy steps, and helpful tips. Cooking your own meal builds confidence and warms hearts. Remember, you can mix in your favorite veggies and try different meats. Storing leftovers properly keeps them fresh. This dish can adapt to fit your taste and needs. Now you can create a cozy meal any day. Enjoy your cooking adventure!

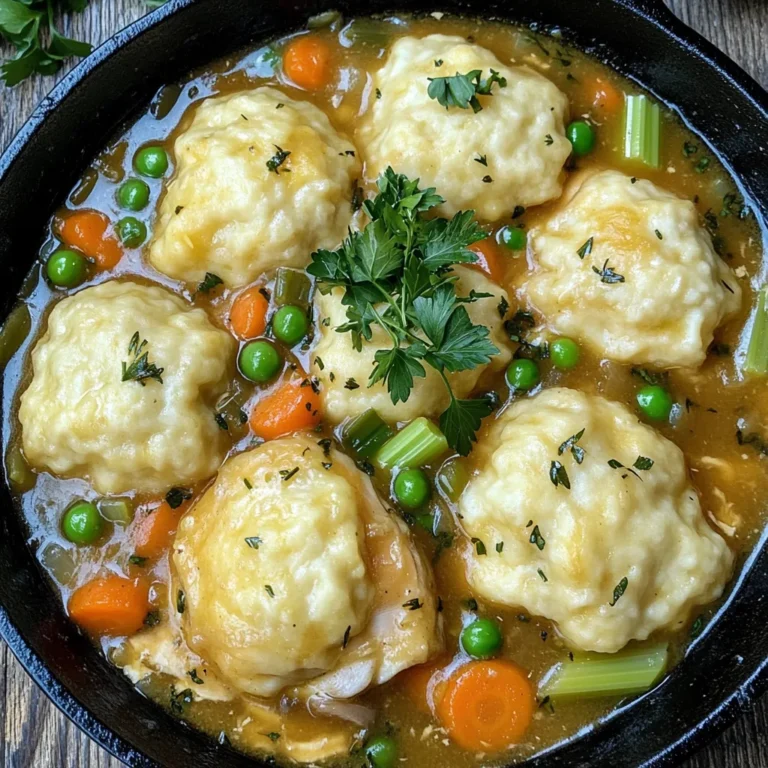
Chicken and Dumplings Cast-Iron Skillet Delight

To make Air Fryer Parmesan Asparagus Fries, gather these simple ingredients: - 1 lb fresh asparagus, trimmed and ends snapped off - 1/2 cup freshly grated Parmesan cheese - 1/2 cup panko breadcrumbs (for extra crunch) - 2 large eggs - 1 teaspoon garlic powder - 1 teaspoon onion powder - 1/2 teaspoon fine sea salt - 1/4 teaspoon freshly ground black pepper - Cooking spray or olive oil spray for crisping Fresh asparagus is best for this recipe. It gives a nice crunch and flavor. Frozen asparagus can work, but it may turn mushy. If you use frozen, thaw it first and pat it dry. This helps keep the fries crispy. I recommend using freshly grated Parmesan cheese. It has better flavor and melts nicely. Pre-grated cheese often has fillers that can affect taste and texture. For a bolder flavor, try Parmigiano-Reggiano. It can take your fries to the next level! Start by preheating your air fryer to 400°F (200°C). This step is key. Let it heat for about 5 minutes. A hot air fryer cooks the asparagus evenly and gives it a nice crunch. Next, get 1 pound of fresh asparagus. Trim the ends and snap them off. This helps in getting rid of the tough parts. Make sure the asparagus is tender yet firm. You want a good bite in each fry. In a shallow bowl, crack and whisk 2 large eggs. Make sure they are frothy. In another bowl, mix 1/2 cup of freshly grated Parmesan cheese, 1/2 cup of panko breadcrumbs, 1 teaspoon of garlic powder, 1 teaspoon of onion powder, 1/2 teaspoon of fine sea salt, and 1/4 teaspoon of black pepper. Stir well until blended. Take one asparagus spear, dip it in the eggs, and coat it well. Then roll it in the cheese-breadcrumb mix. Press gently to help it stick. Repeat this for all the spears. Now, lay the coated asparagus in the air fryer basket. Make sure they are in a single layer to cook evenly. Avoid crowding the basket. Lightly spray them with cooking spray or olive oil. Air fry them for 8 to 10 minutes. Flip each spear halfway through. This helps them brown evenly and stay crispy. When done, take out the asparagus fries and serve them hot. They taste great with a dipping sauce like marinara or aioli. To make it look fancy, serve them on a rustic platter. You can sprinkle extra Parmesan and add a lemon wedge for zest. Enjoy your healthy snack! To get that perfect crispy bite, the air fryer must be really hot. Preheat it to 400°F (200°C). This step is key. Use panko breadcrumbs for extra crunch. They are light and airy. Lightly spray the fries with cooking spray before frying. This helps them get golden and crisp. Flip the asparagus halfway through cooking. This ensures all sides get crispy. One big mistake is overcrowding the air fryer basket. It can steam the fries instead of crisping them. Always arrange the asparagus in a single layer. Another mistake is not preheating the air fryer. This can lead to uneven cooking. Be sure to coat the asparagus well with the mixture. If the coating is too thin, it may fall off during cooking. For a tasty dip, try marinara sauce. It adds a nice, tangy flavor. Aioli is another great choice. Its creamy texture pairs well with the crispy fries. You can also make a simple yogurt dip with herbs. This adds a fresh twist. Feel free to mix and match sauces to find your favorite! {{image_4}} You can switch up the cheese in this recipe. Instead of Parmesan, try Pecorino Romano for a sharper taste. Cheddar cheese gives a creamy, rich flavor. If you want something milder, Mozzarella works well too. Each cheese adds its unique twist to the dish. Want to spice things up? Add a pinch of cayenne pepper for heat. You can also mix in some smoked paprika for a smoky flavor. Fresh herbs like thyme or rosemary add freshness. Experiment with your favorite spices to make these fries your own. If you prefer a vegan option, use nutritional yeast instead of cheese. For the egg wash, try unsweetened plant milk mixed with a bit of flour. This creates a good coating for the asparagus. You can still enjoy crispy, flavorful fries without dairy. If you have extra asparagus fries, let them cool first. Place them in an airtight container. Keep them in the fridge for up to three days. This helps maintain their flavor and texture. To reheat, use the air fryer again. Set it to 350°F (175°C). Cook for about 5 minutes. This will help restore their crispiness. You can also use an oven at the same temperature. You can freeze these asparagus fries, but it's best to freeze them before cooking. Lay them in a single layer on a baking sheet. Once frozen, transfer them to a freezer bag. They will keep for up to three months. When ready to cook, no need to thaw; just air fry them for a few extra minutes. Yes, you can use regular breadcrumbs. However, panko gives a crunchier texture. Regular breadcrumbs may not provide the same crispiness. If you want extra crunch, stick with panko. Asparagus fries are done when they turn golden brown. They should be crispy on the outside. You can also check if they are tender by poking one with a fork. If it’s easy to pierce, they are ready. Yes, you can prepare the asparagus fries ahead of time. Coat them in the breadcrumb mix and store them in the fridge. Just air fry them when you’re ready to eat. This makes it easy to enjoy a quick snack! This post covered everything you need for crispy air fryer asparagus fries. We talked about the best ingredients, like fresh asparagus and the right cheese. I walked you through the steps for cooking, plus tips for perfect crunch. You learned about variations, storage, and answered common questions. Enjoy making these fries at home. You now have the tools to impress your family and friends. Simple changes can elevate your dish and keep things fun in the kitchen.

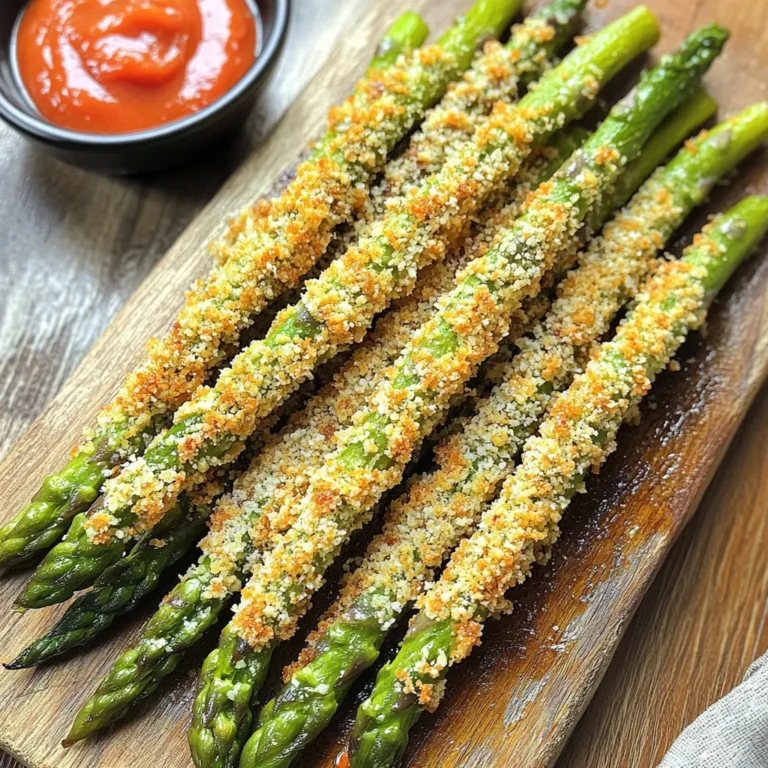
Air Fryer Parmesan Asparagus Fries Healthy Snack Option

To make the easiest lasagna ever, you need some key items. Here is what you will need: - 9 lasagna noodles (choose no-boil or regular, cooked al dente) - 2 cups creamy ricotta cheese - 2 cups shredded mozzarella cheese (plus some for extra topping if desired) - 1 cup grated Parmesan cheese - 2 cups marinara sauce (store-bought or homemade) - 1 large egg, beaten - 1 teaspoon dried Italian herbs (a blend of oregano, basil, and thyme works well) - Salt and black pepper to taste - Fresh basil leaves for a vibrant garnish These ingredients come together to create a rich and comforting dish. Cheese plays a huge part in lasagna. Each type adds its own magic. - Ricotta cheese: This cheese gives a creamy texture. It also adds richness to the layers. - Mozzarella cheese: This is the star of the show! It melts beautifully and gives that gooey pull we all love. - Parmesan cheese: This cheese adds a salty and nutty flavor. It gives a nice crunch on top when baked. Using a mix of these cheeses makes your lasagna taste amazing! Choosing the right noodles is key for a great lasagna. You have two main options: - No-boil noodles: These are super easy. Just layer them straight from the box. They soak up the sauce while baking. - Regular noodles: If you use these, cook them al dente first. This means they should be firm but not hard. Both types work well in this recipe. Choose what fits your style! {{ingredient_image_2}} Start by gathering all your ingredients. You need: - 9 lasagna noodles - 2 cups creamy ricotta cheese - 2 cups shredded mozzarella cheese - 1 cup grated Parmesan cheese - 2 cups marinara sauce - 1 large egg, beaten - 1 teaspoon dried Italian herbs - Salt and black pepper - Fresh basil leaves Next, preheat your oven to 375°F (190°C). This step is key to getting the cheese nice and bubbly later. In a mixing bowl, combine the ricotta cheese, beaten egg, dried herbs, and a pinch of salt and pepper. Mix until everything blends well. This creamy mix adds richness to your lasagna. Now, let’s build the layers. Pour about 1 cup of marinara sauce into the bottom of a 9x13 inch baking dish. Spread it evenly. This helps prevent the noodles from sticking. Place three lasagna noodles over the sauce in a single layer. Make sure they do not overlap. Next, take half of the ricotta mixture and spread it over the noodles. Now sprinkle 1 cup of shredded mozzarella on top. Drizzle with half a cup of marinara sauce. The sauce adds moisture and flavor. Repeat this layering. Place three more noodles down, then add the rest of the ricotta mix, another cup of mozzarella, and another half cup of marinara sauce. For your final layer, add the last three noodles. Cover these with the remaining marinara sauce. Top it off with the last cup of mozzarella and all the Parmesan cheese. This will create a tasty golden crust. Cover your baking dish tightly with aluminum foil. Make sure the foil doesn’t touch the cheese. This keeps the cheese from sticking. Bake in your preheated oven for 25 minutes. After 25 minutes, carefully remove the foil. Bake for another 15 minutes, until the cheese is bubbling and lightly golden. Once done, let the lasagna cool for 10 minutes before slicing. This helps it set up better. Serve it with fresh basil leaves on top for a nice touch. To make lasagna prep easy, use no-boil noodles. They save time and effort. You can also buy pre-made marinara sauce. This cuts down on cooking time. Mix your cheeses and herbs in one bowl. It keeps things tidy and quick. For the best melt, use fresh mozzarella. It melts beautifully and tastes great. Grate your Parmesan cheese instead of using pre-shredded. Fresh cheese melts better and adds depth. Cover your lasagna with foil for the first part of baking. This helps the cheese melt evenly without burning. Use a sharp knife to cut your lasagna. This ensures neat slices. Let it rest for 10 minutes before serving. This helps it hold its shape. Garnish with fresh basil for color and flavor. Serve with a side salad for a complete meal. Pro Tips Perfect Noodle Choice: If you're using regular noodles, make sure to cook them al dente to prevent a mushy lasagna. No-boil noodles can save time and are a great option as well! Cheese Blends: For a richer flavor, consider mixing in some cottage cheese or cream cheese with the ricotta for added creaminess and taste. Layering Technique: Ensure even cooking by layering your ingredients symmetrically. This helps the lasagna cook evenly and makes for beautiful slices. Resting Time: Don’t skip the resting time after baking! Allowing the lasagna to sit for 10 minutes helps it set and makes slicing easier without falling apart. {{image_4}} You can easily make this lasagna vegetarian. Start with your favorite veggies. Spinach, zucchini, and mushrooms add great flavor. Sauté them lightly to soften before layering. Mix these veggies into the ricotta, or layer them between the noodles. This adds nutrients and color. You can also use roasted peppers or eggplant for a deeper taste. For a gluten-free version, choose gluten-free lasagna noodles. Many brands offer tasty options. Be sure to check the cooking instructions. Some need boiling while others can go straight into the dish. You can also use thin slices of zucchini or eggplant as noodles. This keeps it light and adds a fresh twist. Want to add protein? Ground beef, turkey, or sausage works well. Brown the meat first, then mix it with the marinara sauce. Layer it just like the cheese and veggies. If you prefer plant-based protein, try lentils or crumbled tofu. Both options offer great flavor and texture. You can store leftover lasagna in an airtight container. Let it cool first. Once cool, cover it tightly. This keeps it fresh. You can keep it in the fridge for up to five days. Label the container with the date. This helps you track how long it has been stored. If you want to freeze lasagna, use a freezer-safe dish. Cut it into portions for easy use. Wrap each portion tightly in plastic wrap. Then, place them in a freezer bag. Remove as much air as possible. You can freeze lasagna for up to three months. When ready to eat, just thaw it in the fridge overnight. To reheat lasagna, preheat your oven to 350°F (175°C). Place the lasagna in an oven-safe dish. Cover it with foil to keep it moist. Heat for 25 to 30 minutes. Check if it’s hot all the way through. If you want a bubbly top, uncover it for the last 10 minutes. Enjoy every bite as if it’s fresh from the oven! Yes, you can make lasagna ahead of time. Prepare it up to the baking step. Cover it tightly with plastic wrap or foil. Store it in the fridge for up to 24 hours. When ready to bake, remove the cover and bake as directed. You may need to add a few extra minutes to the cooking time. If you don’t have ricotta cheese, try cottage cheese. Blend it until smooth for a similar texture. You can also use cream cheese or Greek yogurt. Both offer a creamy feel, but they change the taste a bit. Adjust the seasonings to match your dish. Your lasagna is done when the cheese is golden and bubbling. The sauce should be hot and the noodles tender. Insert a knife in the center; it should slide in easily. Let it sit for about 10 minutes before slicing. This helps the layers hold together better when you serve it. You now know how to make the easiest lasagna ever. We covered ingredients, steps, and tips. You learned about cheese types, noodle options, and preparing layers. Remember to use variations for different diets. Whether you want to freeze leftovers or reheat, you have the right info. Making lasagna can be fun and simple. Enjoy creating your meal, and don’t stress about perfection. Each bite will be delicious!

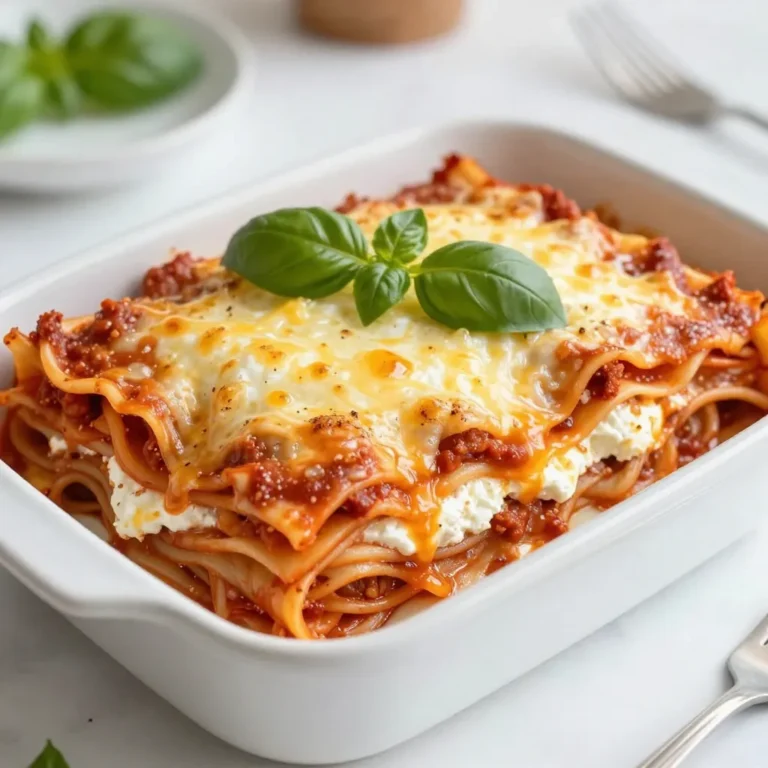
Easiest Lasagna Ever Quick and Delicious Meal Recipe

To make a tasty vegan coconut lentil curry, you will need the following: - 1 cup red lentils, well-rinsed - 1 can (13.5 oz) creamy coconut milk - 2 cups vegetable broth - 1 medium onion, finely chopped - 3 cloves garlic, minced - 1 inch fresh ginger, peeled and grated - 1 medium carrot, diced into small cubes - 1 bell pepper (your choice of color), diced - 2 cups fresh spinach leaves, washed - 1 tablespoon curry powder - 1 teaspoon ground cumin - 1 teaspoon ground turmeric - 1 tablespoon extra virgin olive oil - Salt and freshly cracked pepper to taste These ingredients create a rich, creamy flavor. The lentils provide protein and fiber. The coconut milk adds creaminess, while the spices bring warmth and depth. To elevate your dish, consider these garnishes: - Fresh cilantro leaves for a burst of freshness - Lime wedges to add zest and balance the flavors Serving suggestions include fluffy basmati rice or crusty bread. Both options soak up the curry well and enhance the meal. You can swap some ingredients if needed: - Use green or brown lentils instead of red lentils. - Substitute coconut milk with almond or oat milk for a lighter dish. - For a spicier kick, add chili powder or fresh chili peppers. Feel free to mix and match based on what you have. These swaps help personalize the curry to your taste. {{ingredient_image_2}} Start by rinsing 1 cup of red lentils until the water runs clear. This step removes dust and debris. Next, chop 1 medium onion finely. Mince 3 cloves of garlic and grate 1 inch of fresh ginger. Dice 1 medium carrot and 1 bell pepper into small cubes. These veggies add color and taste to your curry. In a large pot, heat 1 tablespoon of extra virgin olive oil over medium heat. Once the oil shimmers, add the chopped onion. Sauté for about 5 minutes, or until the onion is soft and translucent. Then, add the minced garlic and grated ginger. Cook for 1 more minute. The smell will be amazing! Now, it's time to add the diced carrot and bell pepper to the pot. Cook these for 3 to 4 minutes, until they begin to soften. Next, sprinkle in 1 tablespoon of curry powder, 1 teaspoon of ground cumin, and 1 teaspoon of ground turmeric. Stir the spices well into the vegetables. This step is key, as it helps the spices release their flavors. Pour in the rinsed lentils, 1 can of creamy coconut milk, and 2 cups of vegetable broth. Stir everything together until well mixed. Bring the mixture to a gentle boil. After it boils, reduce the heat to low and cover the pot. Let it simmer for 20 to 25 minutes. Stir occasionally to keep the lentils from sticking. Once the lentils are tender, fold in 2 cups of fresh spinach leaves. Stir until the spinach wilts slightly. This adds a nice green touch and extra nutrients. Season your curry with salt and freshly cracked pepper to taste. Serve the curry hot in deep bowls. Garnish with fresh cilantro leaves. Add lime wedges on the side for a zesty kick. For a complete meal, pair it with fluffy basmati rice or crusty bread. Enjoy this flavorful and simple vegan coconut lentil curry! To boost the flavor of your curry, start with fresh ingredients. Use ripe vegetables and herbs. Fresh ginger and garlic add a strong taste. You can also add a pinch of salt while cooking. This helps the flavors meld together. For extra depth, try a splash of lime juice. This adds brightness and balances the richness of coconut milk. You can also play with spices. Adding a bit more curry powder or cumin can change the flavor profile. Cooking lentils right is key for a great curry. Rinse your lentils well before cooking. This removes any dust or impurities. When you add them to the pot, make sure they are submerged in liquid. This helps them cook evenly. Keep the heat low once it simmers. Stir occasionally to prevent sticking. Cook until they are tender but not mushy. This usually takes about 20 to 25 minutes. For a beautiful presentation, serve the curry in deep bowls. Ladle the creamy curry generously. Add a bright sprinkle of fresh cilantro on top. You can also place a wedge of lime beside it. This adds color and invites people to squeeze it over their dish. For a complete meal, serve with fluffy basmati rice or warm bread. This gives a nice contrast to the creamy curry. An appealing dish makes every bite more enjoyable! Pro Tips Soak Lentils: For extra creaminess and quicker cooking, soak the red lentils for about 30 minutes before rinsing and adding them to the pot. Adjust Spice Levels: If you prefer a spicier curry, consider adding a pinch of cayenne pepper or some chopped fresh chili along with the other spices. Flavor Enhancement: For a deeper flavor, add a splash of soy sauce or tamari during the simmering stage. Storage Tips: This curry can be stored in an airtight container in the fridge for up to 4 days, and it freezes well for up to 3 months. {{image_4}} To make your coconut lentil curry spicy, add some heat. You can use red chili flakes or fresh chili peppers. Start with a small amount. Taste and adjust until it’s just right for you. Spice can enhance flavors and make each bite exciting. I also like to add fresh jalapeños for a zesty kick. You can boost the nutrition of your curry by adding more veggies. Think about adding zucchini, sweet potatoes, or peas. These veggies add color and texture. They also provide vitamins and minerals. Just chop them into small pieces for even cooking. Add them when you sauté the onions. This way, they will cook perfectly and blend well with the lentils. If you want more protein, consider adding tofu or tempeh. Cut them into cubes and sauté them before adding the lentils. You can also use chickpeas for a delicious twist. They add a nice texture and complement the curry well. These options make the meal more filling and satisfying. After you enjoy your Vegan Coconut Lentil Curry, save any leftovers. Let the curry cool first. Use an airtight container to keep it fresh. Store it in the fridge for up to four days. Make sure to label the container with the date. This way, you know when you made it! When you are ready to eat the leftovers, reheating is key. Pour the curry into a pot over low heat. Stir often to prevent sticking. You may need to add a splash of water or broth. This helps get the right consistency again. If you use the microwave, cover it with a lid. Heat in short bursts, stirring in between. This keeps the flavor rich and creamy. Freezing is great for meal prep. To freeze, let the curry cool completely. Then, pour it into freezer-safe bags or containers. Be sure to leave some space for expansion. Label the bags with the date and type of dish. You can freeze it for up to three months. When ready to enjoy, thaw it in the fridge overnight. Reheat as mentioned before for the best taste. Lentils are very good for you. They are high in protein and fiber. This helps keep you full and satisfied. Lentils also have many vitamins and minerals. They contain iron, which boosts energy. Folate in lentils is great for your heart. Eating lentils can help with digestion too. Plus, they are low in fat, making them a healthy choice. Yes, you can make this curry ahead of time. It tastes even better the next day. Just let it cool down before you store it. Place it in an airtight container in the fridge. It will stay fresh for up to four days. When you're ready to eat, just reheat it on the stove or in the microwave. Coconut milk adds creaminess and flavor to the curry. While you can use other milk, coconut milk gives a unique taste. If you don’t have it, almond or soy milk can work. However, the texture may change. For best results, stick with coconut milk. To change the spice level, you can add or reduce spices. If you like it hot, add more curry powder or some chili flakes. For a milder curry, cut back on these spices. You can also add a touch of sugar. This helps balance the heat and makes the dish tasty. This blog post covered how to make a tasty vegan coconut lentil curry. We explored essential ingredients, step-by-step cooking instructions, and useful tips. I shared ways to add flavor, enhance nutrition, and present your dish beautifully. You also learned how to store leftovers and answered common questions about the recipe. I hope you feel ready to create this delightful dish. Enjoy cooking and savor every bite!

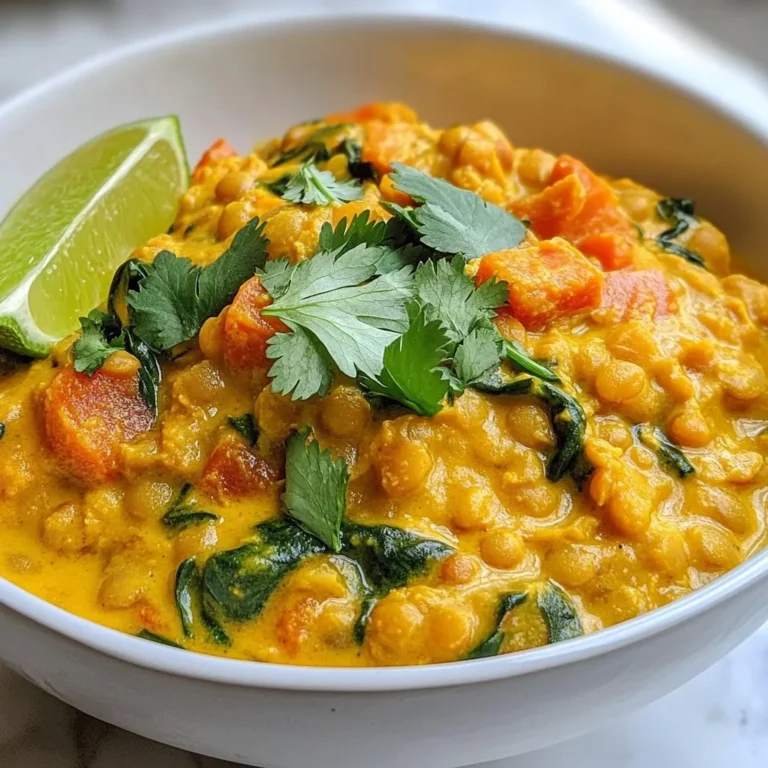
Vegan Coconut Lentil Curry Flavorful and Simple Recipe

- 1 ½ cups all-purpose flour - 1 teaspoon baking powder - ½ teaspoon baking soda - ½ teaspoon salt - 1 teaspoon ground cinnamon - ½ teaspoon ground nutmeg - ½ cup granulated sugar - ½ cup brown sugar, packed - ½ cup vegetable oil - 2 large eggs - 1 cup canned pumpkin puree - 1 teaspoon vanilla extract - 1 package (8 oz) cream cheese, softened - ⅓ cup powdered sugar - ½ teaspoon vanilla extract (for cream cheese filling) - ½ cup rolled oats - ¼ cup cold butter, cubed - ¼ cup brown sugar (for streusel) - ½ teaspoon cinnamon (for streusel) Gluten-free alternatives: You can use a gluten-free flour blend instead of all-purpose flour. Look for a brand that works well in baking. Sugar substitutes: If you want to cut sugar, try using stevia or monk fruit sweetener. Adjust the amount based on the brand you choose. Dairy-free options: Swap cream cheese with vegan cream cheese. Use a plant-based milk for the wet ingredients if needed. - Preheat the Oven: Start by preheating your oven to 350°F (175°C). This step is key for even baking. Line a standard muffin tin with paper liners to prepare for baking. - Mix Dry Ingredients: In a large bowl, whisk together 1 ½ cups all-purpose flour, 1 teaspoon baking powder, ½ teaspoon baking soda, and ½ teaspoon salt. Add in 1 teaspoon ground cinnamon and ½ teaspoon ground nutmeg. Mix well and set aside. - Combine Wet Ingredients: In another bowl, blend ½ cup granulated sugar, ½ cup packed brown sugar, and ½ cup vegetable oil until smooth. Crack in 2 large eggs and add 1 cup canned pumpkin puree along with 1 teaspoon vanilla extract. Mix thoroughly until you have a smooth batter. - Incorporate Dry Ingredients: Gradually add the dry mixture to the wet mixture. Use a spatula to fold the two together gently. Be careful not to overmix; this keeps the muffins light and fluffy. - Prepare Cream Cheese Filling: In a small bowl, beat 1 package (8 oz) softened cream cheese with ⅓ cup powdered sugar and ½ teaspoon vanilla extract. Mix until creamy and smooth. Set this tasty filling aside. - Create the Streusel Topping: In another bowl, combine ½ cup rolled oats, ¼ cup cold cubed butter, ¼ cup packed brown sugar, and ½ teaspoon cinnamon. Use your fingers or a fork to mix until you get a crumbly texture. - Assemble the Muffins: Take the muffin liners filled with the pumpkin batter. Add about ⅓ of the batter to each liner. Place about 1 teaspoon of cream cheese filling in the center. Top with more batter until the liners are about ¾ full. - Top with Streusel: Generously sprinkle the streusel topping over each muffin. This adds a delightful crunch to each bite. - Bake the Muffins: Place the muffin tin in the preheated oven. Bake for 18-22 minutes. To check if they are done, insert a toothpick into the center of a muffin. It should come out clean when they are ready. - Cooling: Once baked, let the muffins cool in the tin for 10 minutes. After that, transfer them to a wire rack to cool completely. This helps them stay moist and fluffy. - Avoiding Overmixing: Mix the batter gently. You want to combine the wet and dry ingredients just until you see no dry flour. Overmixing can make your muffins tough. - Ensuring Even Baking: To bake evenly, use a muffin tin with the same size cups. Rotate the tin halfway through baking. This helps muffins cook evenly and rise nicely. - Adding nuts or chocolate chips: You can swirl in chopped nuts or chocolate chips for added texture. Just fold them in gently before baking. - Using different spices: Try adding a pinch of ginger or cloves for more warmth. This can give your muffins a unique twist. - Decorating with cinnamon: After baking, sprinkle a little cinnamon on top. This adds flavor and makes your muffins look great. - Serving ideas for special occasions: Serve your muffins on a pretty plate. Pair them with hot coffee or tea for a delightful treat. A small decorative pumpkin can also add a lovely touch to your display. {{image_4}} You can change the flavor of your pumpkin cream cheese muffins for fun twists. Here are two tasty ideas: - Chocolate Pumpkin Cream Cheese Muffins: Add semi-sweet chocolate chips to your batter. This will give a rich taste that pairs well with pumpkin. Just fold in about 1 cup of chocolate chips after mixing your wet and dry ingredients. - Apple Cinnamon Streusel Muffins: For a fruity spin, mix in diced apples. Use about 1 cup of peeled and chopped apples. This adds moisture and a nice crunch. You can also sprinkle some extra cinnamon in the batter for more flavor. You can easily modify the recipe to fit specific diets. Here are two options: - Vegan Pumpkin Muffins: Replace eggs with flax eggs. To make one flax egg, mix 1 tablespoon of ground flaxseed with 2.5 tablespoons of water. Let it sit for about five minutes until it gels. Use plant-based milk instead of cream cheese filling, like cashew cream. - Low-carb alternatives: Use almond flour in place of all-purpose flour. This keeps the muffins low in carbs. Also, substitute sugar with a low-carb sweetener like erythritol. This way, you can enjoy your muffins while keeping your carb count down. To keep your pumpkin cream cheese muffins fresh, store them at room temperature. Place them in an airtight container. They can stay good for about three days. If you want them to last longer, consider refrigeration. In the fridge, they can stay fresh for about a week. Just remember to seal them well to prevent drying out. To freeze your muffins, first let them cool completely. Then, wrap each muffin tightly in plastic wrap. Place the wrapped muffins in a freezer-safe bag or container. This keeps them fresh for up to three months. When you want to enjoy a muffin, take it out of the freezer. Let it thaw in the fridge overnight. If you want it warm, reheat it in the microwave for about 15-20 seconds. You can also warm it in an oven set to 350°F for about 10 minutes. This way, your muffins will taste fresh and fluffy! How long do Pumpkin Cream Cheese Muffins last? Pumpkin Cream Cheese Muffins stay fresh for about 3 days at room temperature. Store them in an airtight container to keep them moist. Can I make these muffins ahead of time? Yes, you can prepare the batter a day prior. Store it in the fridge overnight. Just remember to bake them fresh in the morning for best results. What can I substitute for cream cheese in the filling? You can use mascarpone cheese or Greek yogurt as a cream cheese alternative. Both options provide a creamy texture and mild flavor. Are these muffins okay to freeze? Absolutely! These muffins freeze well. Wrap them tightly in plastic wrap and place them in a freezer bag. They can last up to 3 months in the freezer. This blog post gave a clear recipe for making delicious Pumpkin Cream Cheese Muffins. It covered ingredients, preparation steps, baking tips, and storage methods. Adding variations and dietary options lets you customize these treats easily. You can enjoy baking and sharing these muffins with friends and family. With this guide, you will bake muffins that impress everyone. Remember, the joy in baking comes from trying new flavors and sharing your creations. Enjoy the process and savor every bite!

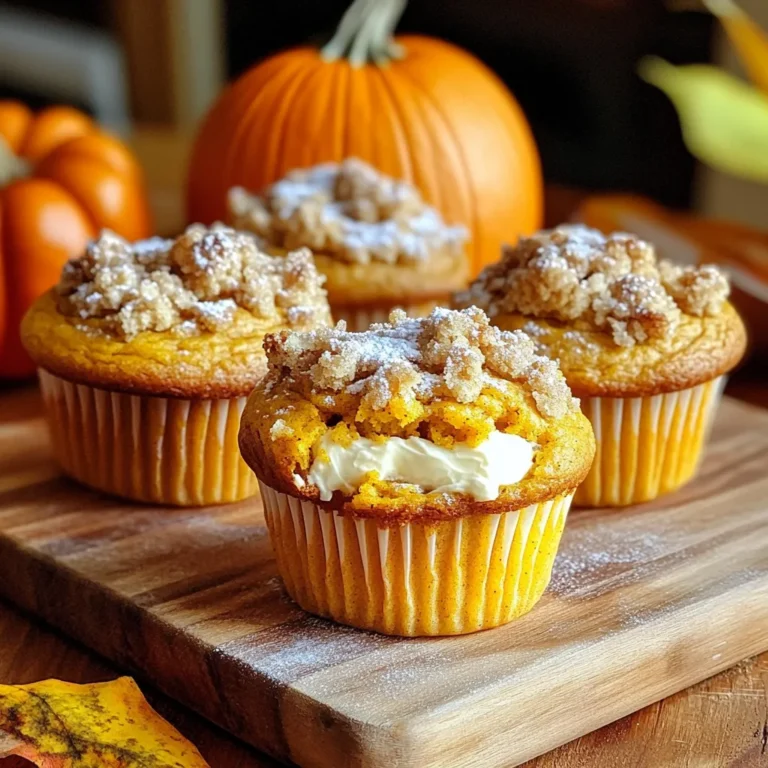
Pumpkin Cream Cheese Muffins with Streusel Delight

- 1 pound Italian chicken sausage, sliced into 1-inch pieces - 2 cups Brussels sprouts, trimmed and halved - 2 medium sweet potatoes, peeled and diced into 1-inch cubes - 1 red onion, cut into wedges - 1 crisp apple, cored and sliced into thin wedges - 4 cloves garlic, minced - 3 tablespoons extra-virgin olive oil - 1 teaspoon dried thyme - 1 teaspoon smoked paprika - Salt and freshly ground black pepper, to taste - Fresh parsley, finely chopped Gather these ingredients before you start. Using fresh produce makes a big difference in taste. Choose a good quality sausage for the best flavor. Sweet potatoes add warmth, while Brussels sprouts add crunch. A crisp apple provides a nice sweet touch. Don't skip the garlic; it brings everything together with its rich aroma. Using extra-virgin olive oil helps the veggies roast perfectly. The thyme and smoked paprika give depth to the dish. Salt and pepper are key to enhance the flavors. Finally, fresh parsley adds color and a refreshing finish. Enjoy the process of preparing these ingredients; it sets the stage for a delightful meal! - Preheat the oven to 425°F (220°C). A hot oven helps the food cook well. - Gather your ingredients: slice the sausage, halve the Brussels sprouts, dice the sweet potatoes, cut the onion, and slice the apple. Don’t forget to mince the garlic! - In a large bowl, combine the sausage, Brussels sprouts, sweet potatoes, onion, apple, and garlic. - Drizzle olive oil over the mixture. Add thyme, smoked paprika, salt, and pepper. Use your hands to mix everything well. Make sure every piece gets coated. - Line a baking sheet with parchment paper. Spread the sausage and veggies evenly on the sheet. This helps them roast nicely. - Roast in the oven for 25-30 minutes. Halfway through, stir the mixture for even cooking. The dish is ready when the sausage is cooked and the veggies are tender and caramelized. - Swap sausage types: Feel free to try different sausages. Turkey sausage works well for a lighter dish. Chorizo adds a spicy kick. - Incorporate different vegetables: Use seasonal veggies like carrots or parsnips instead of sweet potatoes. Squash can add a nice sweetness, too. - Avoid overcrowding the pan: Spread your sausage and veggies in one even layer. Overcrowding leads to steaming instead of roasting. This affects the texture and flavor. - How to know when it’s done: Check that the sausage is no longer pink and the veggies are tender. They should have a nice golden-brown color. - Rustic serving style: Serve directly from the sheet pan. This keeps it casual and fun. You can let everyone dig in. - Pairing with sides or sauces: A simple green salad pairs well. A drizzle of balsamic glaze adds a nice touch. Enjoy the meal with crusty bread to soak up the juices. {{image_4}} You can change the veggies based on the season. In winter, try root vegetables like carrots and parsnips. Their sweetness pairs well with the sausage. In spring, use fresh greens like asparagus or snap peas. They add color and crunch to your dish. Want more flavor? Add a pinch of chili flakes for some heat. This gives the dish a nice kick. You can also swap dried herbs for fresh ones. Fresh thyme or rosemary will make your meal pop with flavor. If you want a lighter option, use turkey sausage. It has great flavor and is leaner. For a plant-based dish, try using vegan sausage. It cooks well and still gives you that hearty feel. To store leftovers, let the dish cool first. Place it in an airtight container. This keeps the flavors fresh. You can store it in the fridge for up to three days. The best container types are glass or BPA-free plastic. These materials help maintain taste and texture. You can reheat in the oven or microwave. The oven gives a better texture. Preheat it to 350°F (175°C). Spread the food on a baking sheet. Heat for about 10-15 minutes until warm. If using a microwave, place food in a microwave-safe dish. Cover it with a lid or wrap. Heat in short bursts, stirring in between. This helps prevent hot spots. Yes, this dish is great for freezing. Allow it to cool completely. Place portions in freezer bags or containers. Remove as much air as possible. This helps prevent freezer burn. For thawing, move it to the fridge overnight. Reheat it in the oven or microwave as mentioned. Enjoy your meal just as delicious as the first time! The total cooking duration for this dish is about 40 minutes. This includes 15 minutes for prep and 25-30 minutes for roasting. Preheating the oven to 425°F (220°C) ensures even cooking. I recommend checking the mixture halfway through to stir, which helps everything cook nicely. Yes, you can use other vegetables! Some great substitutes include carrots, parsnips, or butternut squash. Feel free to mix and match based on what you have. Just keep in mind that cook times may vary. Thicker veggies may need more time, while softer ones cook faster. This dish is quite healthy! It features lean Italian chicken sausage and a variety of colorful veggies. Sweet potatoes add fiber and vitamins, while Brussels sprouts are packed with nutrients. Each serving offers protein, healthy fats from olive oil, and lots of vitamins. Enjoy this meal guilt-free, knowing it's nutritious and tasty! This post shared a simple yet tasty recipe with chicken sausage, veggies, and spices. You learned how to prepare, mix, and roast these ingredients for a delicious meal. Remember the tips for variations and storage to keep it fresh. Cooking can be flexible, so try your own ideas! You can enjoy this dish any season by swapping ingredients. Now, gather your ingredients and enjoy a healthy, homemade dish that brings comfort and flavor to your table.

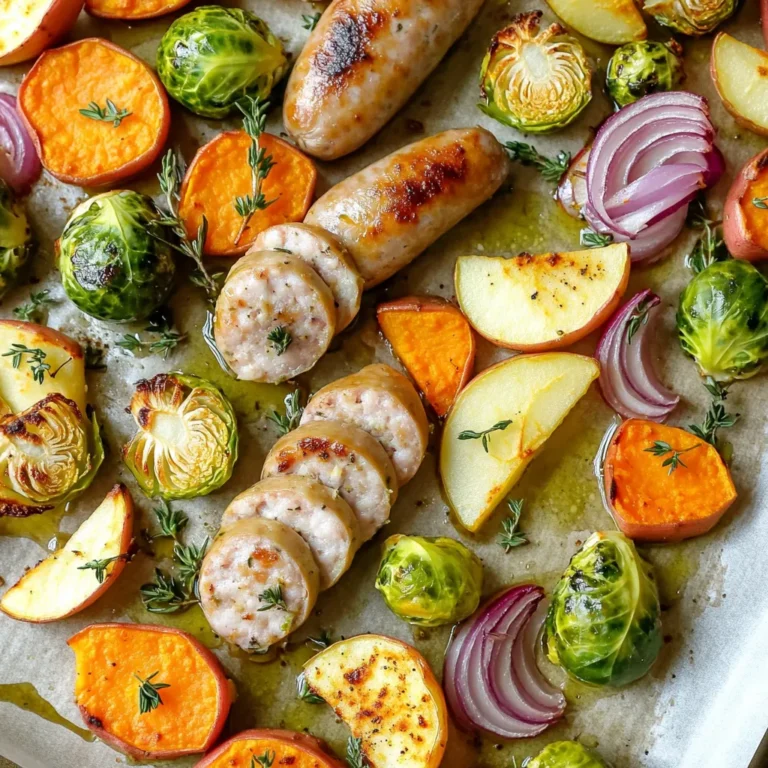
Sheet-Pan Roasted Sausage and Fall Veggies Delight

- 1 pound Italian sausage (choose sweet or spicy) - 1 medium onion, diced - 3 cloves garlic, minced - 4 cups chicken broth - 1 can (14.5 oz) diced tomatoes (with juices) - 1 cup baby spinach, roughly chopped - 1 cup heavy cream - 2 carrots, sliced - 2 celery stalks, diced The main ingredients form the base of your soup. The Italian sausage adds rich flavor. Onions and garlic give a sweet and savory kick. The chicken broth and diced tomatoes create a hearty liquid. Carrots and celery add crunch and color. Finally, the spinach and heavy cream turn the soup creamy. - 1 teaspoon dried oregano - 1 teaspoon dried basil - Salt and pepper to taste Herbs and seasonings elevate your soup. Oregano and basil give it that Italian flair. Salt and pepper help bring out the flavors. Adjust these to suit your taste. - 1 cup shredded Parmesan cheese Parmesan cheese adds a nice touch. It melts into the soup, making it creamy and rich. This cheese also enhances the savory notes. You can add more if you love cheese. Enjoy the mix of flavors and textures in this delicious soup. It’s a cozy meal that warms you up! To start, heat a large skillet over medium heat. Add the Italian sausage and cook it. Use a wooden spoon to break it apart. Cook until it turns brown, about 5 to 7 minutes. This step adds great flavor. After browning, drain any extra fat. Transfer the sausage to your slow cooker. Now, it’s time to layer your ingredients. First, add the browned sausage to the slow cooker. Next, toss in the diced onion and minced garlic. Then, add the sliced carrots and diced celery. These veggies bring color and nutrition. Finally, pour the chicken broth over everything. Include the can of diced tomatoes, juices and all. Stir to mix. Cover the slow cooker with its lid. You can choose to cook on low for 6 to 7 hours. This makes the soup rich and tasty. If you're short on time, set it to high for 3 to 4 hours. Both options work well, but low heat gives better flavor. About 30 minutes before serving, it's time for the finishing touches. Stir in the chopped spinach and heavy cream. This makes the soup creamy and vibrant. Mix well to combine all flavors. Cover and let it cook for 30 more minutes. Right before serving, add the shredded Parmesan cheese. Stir until it melts into the soup. Taste and adjust with salt and pepper if needed. To boost flavor, consider adding white wine. Just a splash can make a big difference. You can also toss in a bay leaf while cooking. This adds depth to the soup. After cooking, remove the bay leaf before serving. If you like heat, add red pepper flakes for a spicy kick. Fresh herbs like basil or parsley can enhance the dish's aroma and taste. Don't skip tasting as you go. Adjust salt and pepper to suit your preferences. For a beautiful presentation, ladle the soup into bowls. Top each bowl with extra Parmesan cheese. A sprinkle of fresh basil or parsley adds color. You can also serve this soup with crusty bread. This combination creates a hearty meal. A simple side salad pairs nicely too. It balances the flavors and adds freshness. Watch out for overcooking the soup. If you cook it too long, the vegetables can turn mushy. Stir the soup gently to keep the veggies intact. Don't forget to drain excess fat from the sausage. This keeps the soup creamy, not greasy. Lastly, remember to check the seasoning before serving. This step ensures the flavors shine bright. {{image_4}} You can change the sausage for turkey or chicken sausage. This keeps the soup light but tasty. If you don’t have chicken broth, vegetable broth works well too. You can even use water, but add more herbs for flavor. If you need a gluten-free soup, use gluten-free sausage. Check the broth too, as some brands add gluten. For a dairy-free soup, swap heavy cream for coconut milk. This adds a sweet touch and keeps it creamy. Do you like heat? Choose spicy Italian sausage for a kick. You can also add red pepper flakes if you want. For a milder soup, stick with sweet sausage. Adding fresh herbs like basil or parsley can brighten the dish. Try rosemary or thyme for a different twist. To store leftovers of your soup, let it cool first. Divide the soup into airtight containers. This helps keep it fresh. Store it in the fridge for up to three days. When reheating, check that it is hot throughout before serving. This ensures safety and keeps the flavors intact. To freeze the soup, use freezer-safe containers. Make sure to leave some space at the top, as the soup will expand. Seal the containers well to prevent freezer burn. You can freeze the soup for up to three months. When ready to eat, thaw it in the fridge overnight for best results. Reheat the soup either in the microwave or on the stovetop. For the microwave, use a microwave-safe bowl. Heat in short bursts, stirring in between. This helps it heat evenly. For stovetop, pour the soup into a pot over medium heat. Stir often until it’s hot. Both methods work well, but the stovetop may keep the texture better. Yes, you can use frozen ingredients in this soup. Frozen Italian sausage works well. Just remember to thaw it first for even cooking. For vegetables, frozen carrots and spinach are great options. They add flavor and nutrition without the need for chopping. If you use frozen veggies, add them later in the cooking process. This keeps them from getting mushy. This soup lasts about 3 to 4 days in the fridge. Make sure to store it in an airtight container. When you want to eat it again, check for any signs of spoilage. If it smells or looks off, it’s best to throw it out. Reheating is easy. Just warm it on the stove or in the microwave until hot. You can make this soup on the stovetop too! Start by browning the sausage in a large pot. After that, add the onion, garlic, carrots, and celery. Cook until soft. Next, pour in the chicken broth and tomatoes. Bring it to a boil. Then, lower the heat and let it simmer for about 30 minutes. Finally, stir in the spinach, cream, and cheese just like in the slow cooker version. This blog post covered all the key steps to make a delicious Italian sausage soup. We discussed ingredients like Italian sausage, fresh veggies, and flavorful herbs. You learned how to brown the sausage, combine everything in a slow cooker, and add that special touch with cream and cheese. Remember the tips on serving and common mistakes to avoid. Cooking can be fun, and this soup is easy to make. With a few tweaks, you can make it your own. Enjoy your cooking journey and savor every bowl!

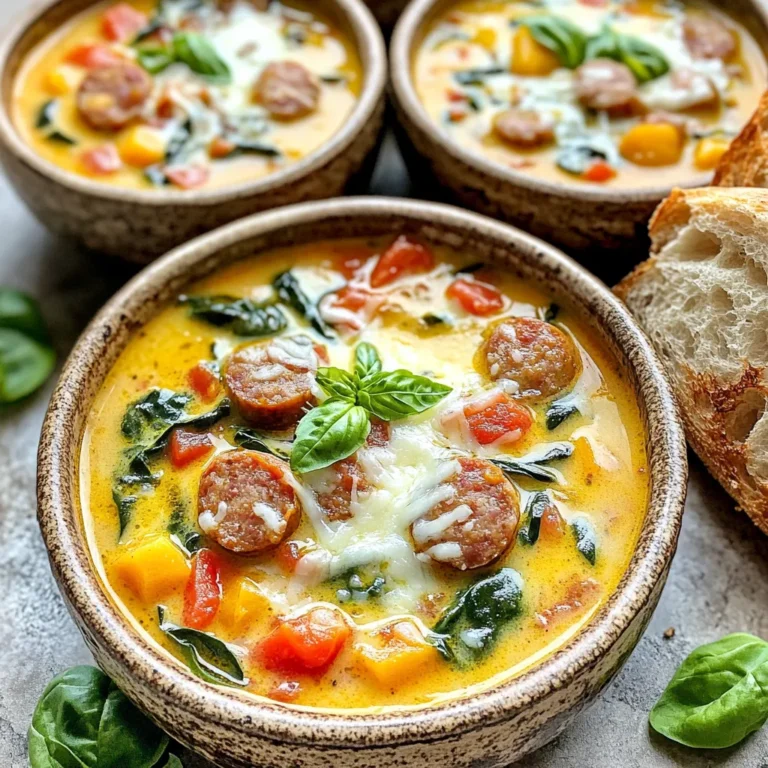
Slow Cooker Creamy Tuscan Sausage Soup Delight

PREV 1 … 11 12 13 … 48 NEXT
meal plan mapper

explore

DessertsDinnerAppetizersDrinks

Our Policies

  • Cookie Policy
  • Copyright Policy
  • Disclaimer
  • GDPR Policy
  • Terms Of Use
Back to Top
  • About
  • Contact Us
  • Privacy Policy
© 2025 meal plan mapper