FREE DINNER EBOOK! Get your copy!
  • Cookie Policy
  • GDPR Policy
  • Disclaimer
  • Terms Of Use
  • Visit my other site: Fun Cookie Recipes
meal plan mapper
  • Home
  • Dinner
  • Desserts
  • Drinks
  • Appetizers
  • Contact
  • About
  • Privacy Policy
  • Home
  • Dinner
  • Desserts
  • Drinks
  • Appetizers
  • Contact
  • About
  • Privacy Policy
  • Cookie Policy
  • GDPR Policy
  • Disclaimer
  • Terms Of Use
Visit my other site: Fun Cookie Recipes

HOME / CATEGORIES /

Latest

- 1 pound potato gnocchi (store-bought or homemade) - 4 cloves garlic, finely minced - 1 cup cherry tomatoes, halved - 1 cup fresh baby spinach - 1 teaspoon dried oregano - 1 teaspoon red pepper flakes (optional) - Salt and freshly ground black pepper, to taste - Fresh basil leaves, torn, for garnish - 2 tablespoons extra virgin olive oil - 1 cup freshly grated Parmesan cheese Gathering your ingredients is key to a great dish. Start with the gnocchi. You can buy it or make it at home. If you choose to make it, the taste will be even better. Next, you need garlic. The more minced, the better the flavor. Use fresh cherry tomatoes to add sweetness. Fresh baby spinach adds a nice green touch. For seasoning, dried oregano brings warmth. Red pepper flakes can add a kick, but skip them if you prefer mild. Salt and freshly ground black pepper help bring all the flavors together. You will also need extra virgin olive oil. It adds richness and helps the gnocchi crisp up. Lastly, don’t forget the Parmesan cheese. Freshly grated cheese melts beautifully and gives the dish a creamy finish. Keep these ingredients handy, and you’ll be ready to create a delightful meal. - Preheat oven to 425°F (220°C). - Prepare the baking sheet with parchment paper. This helps with easy cleanup. - Combine gnocchi, olive oil, and garlic in a bowl. - Add cherry tomatoes and spinach, then toss gently. Make sure everything is well coated. - Season with oregano, red pepper flakes, salt, and pepper. - Spread the mixture on the sheet pan. Bake for 15-20 minutes until golden. - Sprinkle Parmesan cheese over the baked gnocchi. Bake for an additional 5 minutes. - Garnish with torn basil leaves before serving. This adds a fresh flavor. To get the best texture, spread the gnocchi evenly on the baking sheet. This helps them cook uniformly. If they are too crowded, some may become mushy. Keep an eye on the baking time. You want them golden brown and slightly crispy around the edges. Check often during the last few minutes. To boost the flavor, think about adding other vegetables. Bell peppers and zucchini make great choices. They add color and crunch. Fresh herbs can also enhance the taste. Consider using basil or parsley for a fresh aroma. A sprinkle of herbs right before serving can make a big difference. Serving directly from the sheet pan creates a fun, family-style meal. It invites everyone to dig in. For a touch of extra flavor, drizzle with olive oil or balsamic glaze before serving. This adds richness and makes the dish even more appealing. You can also garnish with torn basil leaves for a lovely finish. {{image_4}} You can change the cheese for fun. Substitute Parmesan with mozzarella, feta, or goat cheese. Each option gives a new taste. If you want more flavor, blend different cheeses. Try mixing Parmesan with mozzarella for a creamy delight. Want a heartier meal? Toss in cooked chicken, sausage, or shrimp. These add protein and make the dish more filling. For a vegetarian option, use chickpeas or tofu. Both choices add texture and flavor. Spice it up! Try different herbs like thyme or rosemary. These herbs will give the dish a fresh kick. If you like heat, adjust the red pepper flakes. You can increase or decrease them based on your taste. Allow your Sheet-Pan Garlic Parmesan Gnocchi Bake to cool completely before storing. Once cooled, transfer it to an airtight container. This helps keep the flavors fresh. You can refrigerate it for up to three days. Make sure to seal the container well to avoid any dry spots. To reheat, I suggest using the oven for the best taste and texture. Preheat it to 350°F (175°C) and place the gnocchi bake inside. Heat for about 10-15 minutes or until it is warm throughout. If you're in a hurry, you can use a microwave. However, this may change the texture, making it less crispy. If you want to save some for later, you can freeze the gnocchi bake. Freeze it before adding cheese. It can last up to two months in the freezer. When you’re ready to eat, thaw it in the refrigerator overnight. After it’s thawed, you can add the cheese and bake as per the recipe. Yes, frozen gnocchi can be used. Just adjust the cooking time. Frozen gnocchi may need a few extra minutes to cook through. Make sure they are fully heated and slightly crispy when done. All ingredients are naturally vegetarian. Just ensure that your cheese is vegetarian-friendly. Some cheeses use animal rennet, so check the label. This dish still packs flavor without meat. A light salad or garlic bread pairs well with this recipe. A fresh green salad adds crunch and balance. Garlic bread complements the cheesy, rich flavors perfectly. Yes, you can prep ingredients ahead. You can chop veggies and measure spices. However, it’s best to bake just before serving. This keeps the gnocchi crisp and fresh. Enjoy the warm, cheesy goodness right from the oven! This recipe highlights simple ingredients like gnocchi, garlic, and fresh veggies. You learned how to mix, bake, and add cheese for a tasty meal. Remember, you can switch ingredients or add proteins to fit your tastes. By trying new flavors and textures, you can customize this dish each time. Also, manage storage and reheating well for easy bites later. Enjoy exploring this delicious, easy-to-make dish!

Sheet-Pan Garlic Parmesan Gnocchi Bake Delight

- 2 cups cooked white rice - 2 cups cooked, shredded chicken - 1 cup broccoli florets, steamed - 1 cup carrots, diced - 1 cup celery, diced - 1 small onion, finely chopped - 2 cloves garlic, minced - 2 cups chicken broth - 1 cup cream of mushroom soup - 1 teaspoon dried thyme - 1 teaspoon paprika - 1 cup shredded cheddar cheese - Salt and pepper to taste - 2 tablespoons olive oil - Fresh parsley, chopped (optional) I recommend using rotisserie chicken for quick prep. It saves time and adds rich flavor. For the vegetables, steam the broccoli until bright green. This keeps it tender and vibrant. Sauté the onion and garlic together to build a strong flavor base. Cook them until the onion is soft and fragrant. Then, add the carrots and celery. Stir until they are tender but still crisp. This adds texture to your casserole. If you want to switch things up, you can use brown rice instead of white rice. It adds a nutty flavor and more fiber. For a creamier base, try using cream of chicken soup instead of cream of mushroom soup. If you are looking for a lighter option, you can use low-fat cheese. And if you have a veggie lover at home, replace chicken with chickpeas or tofu. This gives the dish a plant-based twist without losing flavor. {{ingredient_image_2}} Start by preheating your oven to 350°F (175°C). This ensures your casserole cooks evenly. While the oven heats, gather all your ingredients. You need cooked white rice, shredded chicken, broccoli, carrots, celery, onion, garlic, chicken broth, cream of mushroom soup, thyme, paprika, cheese, olive oil, salt, and pepper. Having everything ready will streamline the cooking process. In a large skillet, pour in 2 tablespoons of olive oil and heat it over medium heat. Once the oil is hot, add 1 small chopped onion and 2 minced garlic cloves. Sauté for about 3 minutes until the onion turns translucent and fragrant. Next, toss in 1 cup of diced carrots and 1 cup of diced celery. Cook these for another 5 minutes, stirring often. You want the veggies tender but still crisp. In a large mixing bowl, combine 2 cups of cooked rice, 2 cups of shredded chicken, and 1 cup of steamed broccoli florets. Add the sautéed veggies, 2 cups of chicken broth, and 1 cup of cream of mushroom soup. Season this mixture with 1 teaspoon of dried thyme, 1 teaspoon of paprika, salt, and pepper. Mix everything well until evenly combined. Carefully transfer this mix into a greased 9x13 inch baking dish. Spread it out evenly. Next, sprinkle 1 cup of shredded cheddar cheese on top. Cover the dish tightly with aluminum foil. Place it in the preheated oven and bake for 30 minutes. After that, remove the foil and bake for another 15 to 20 minutes until the cheese is bubbly and golden. Let it cool for 5 minutes before serving, and enjoy your savory chicken and rice casserole! To get the best rice, use long-grain white rice. It stays fluffy and separate. Rinse the rice before cooking. This removes excess starch and helps prevent stickiness. Use a 1:2 rice to water ratio. Bring the water to a boil, then cover and reduce to low heat. Let it simmer for 18 minutes, then let it sit off heat for 5 minutes. Fluff with a fork before adding it to the casserole. To keep your casserole moist, use enough liquid. The chicken broth and cream of mushroom soup help here. Do not skip the cover when baking. It traps steam, keeping the dish juicy. After the first 30 minutes, remove the foil. This helps the cheese melt and brown without drying out the chicken and rice. Cheddar cheese is a classic choice for this dish. Sharp cheddar adds a bold flavor, while mild cheddar is creamy and soft. You can also try mozzarella for a gooey texture. For a twist, use pepper jack for a little heat or gouda for a smoky flavor. Whatever you choose, ensure it melts well for the best top layer. Pro Tips Use Rotisserie Chicken: For convenience and maximum flavor, opt for store-bought rotisserie chicken. It saves time and adds a delicious depth to your dish. Customize Your Veggies: Feel free to mix and match vegetables based on your preference or what's in season. Bell peppers, peas, or spinach can also work beautifully in this bake. Cheese Variations: Experiment with different types of cheese such as mozzarella for a milder flavor or pepper jack for a spicy kick. Mixing cheeses can also create a more complex flavor profile. Make Ahead: This dish can be prepared in advance and stored in the refrigerator. Just reheat it in the oven before serving for an easy weeknight dinner. {{image_4}} You can swap ingredients in chicken and rice casserole. This change keeps the dish fresh. Use different types of meat, like turkey or ham. For a lighter option, try using chicken thighs instead of breasts. You can also change the rice. Brown rice or quinoa adds a nutty flavor. Mixing in different vegetables is also fun. Peas, corn, or bell peppers work well. These swaps add color and taste. If you want a vegetarian version, replace the chicken with hearty veggies or beans. Use chickpeas or black beans for protein. Tofu works great as well. It soaks up flavors nicely. You can also add mushrooms for a meaty texture. Use vegetable broth instead of chicken broth. This keeps the dish rich and tasty. Boost the flavor with spices and herbs. Try adding cumin or curry powder for warmth. Fresh herbs like basil or oregano add a nice touch. You can also use lemon zest for brightness. A dash of hot sauce adds heat if you like spice. Experiment with different combinations to find your favorite! To keep your chicken and rice casserole fresh, let it cool first. Once it’s cool, cover it tightly with plastic wrap or aluminum foil. You can also use an airtight container. Store it in the fridge for up to three days. This keeps the flavors intact and helps maintain its texture. When you’re ready to enjoy your leftovers, preheat your oven to 350°F (175°C). Place the casserole in a baking dish and cover it with foil. This keeps moisture in while it reheats. Bake for about 20 to 25 minutes. If you like a crispy top, remove the foil for the last five minutes. For long-term storage, you can freeze this casserole. After it cools, place the casserole in a freezer-safe container. Make sure to cover it tightly with foil or plastic wrap. It can last up to three months in the freezer. When you’re ready to eat, thaw it in the fridge overnight before reheating. This method helps keep it tasty and delicious. Yes, you can use leftover chicken. Shredded rotisserie chicken works great. It saves time and adds flavor. Just make sure the chicken is cooked and cool before mixing. This recipe is perfect for using up extra chicken from dinner. To make it dairy-free, swap the cream of mushroom soup for a dairy-free version. You can also use a plant-based cheese for the topping. Check labels to find a suitable product. Using vegetable broth instead of chicken broth helps too. Chicken and rice casserole pairs well with simple salads or steamed veggies. A fresh green salad adds crunch. Roasted asparagus or green beans also work great on the side. These sides balance the meal and add color to your plate. You have all the tools to make a tasty chicken and rice casserole. We covered key ingredients, cooking methods, and ingredient swaps. I shared steps to prep, cook, and assemble your dish. Remember the tips to get fluffy rice and a moist casserole. You can explore variations for different tastes or diets. Plus, I included storage and reheating tips to keep leftovers yummy. With this guide, you can enjoy a warm, comforting meal anytime. Happy cooking!

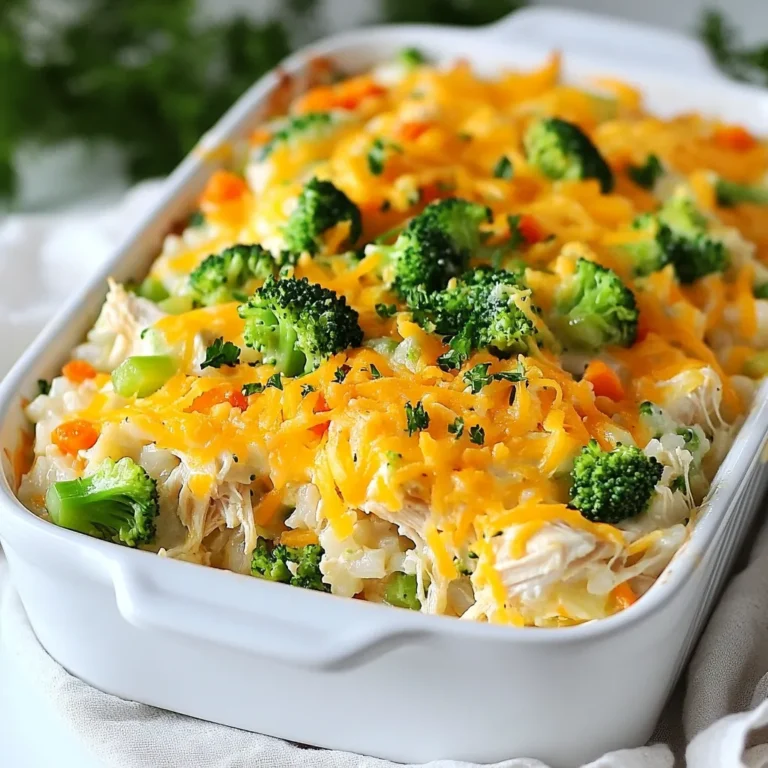
Savory Best Chicken and Rice Casserole Recipe

- 2 medium sweet potatoes, peeled and cut into 1-inch cubes - 1 can (15 oz) black beans, thoroughly drained and rinsed - 1 can (15 oz) diced tomatoes, undrained - 1 medium onion, finely chopped - 2 cloves garlic, minced - 1 bell pepper (red or yellow), diced Sweet potatoes are the star here. They add a sweet taste and creamy texture. Black beans bring protein and fiber, making this dish hearty. Diced tomatoes add a tangy note and moisture, while onion and garlic create a fragrant base. Finally, the bell pepper adds crunch and color. - 1 tablespoon chili powder - 1 teaspoon ground cumin - ½ teaspoon smoked paprika - Sea salt and freshly ground black pepper, to taste Chili powder gives heat and depth. Ground cumin adds warmth and earthiness, while smoked paprika offers a subtle smokiness. Don't forget the sea salt and black pepper; they enhance all the flavors in the pot. - Fresh cilantro leaves, for garnish - Sliced avocado, for garnish (optional) - Lime wedges Garnishes make your chili pop! Fresh cilantro adds brightness and a fresh taste. Sliced avocado brings creaminess, while lime wedges add a zesty kick. These finishing touches elevate your dish and make it more fun to eat. - Sautéing Onion and Bell Pepper Start by heating 1 tablespoon of extra virgin olive oil in a large pot over medium heat. Add 1 medium onion, finely chopped, and 1 diced bell pepper. Sauté these for 5 minutes. You want the onion to be soft and clear. This base gives your chili great flavor. - Adding Garlic for Flavor Next, add 2 cloves of minced garlic to the pot. Stir it in for about 1 minute. The garlic will become fragrant and give the dish a rich taste. - Incorporating Sweet Potatoes and Black Beans Now, it’s time to add the main ingredients. Toss in 2 medium sweet potatoes, peeled and cut into 1-inch cubes. Include 1 can of black beans, drained and rinsed. Also, add 1 can of diced tomatoes without draining, and 1 cup of corn. This mix will create a hearty texture. - Adding Broth and Seasonings Pour in 2 cups of vegetable broth. Then, sprinkle in 1 tablespoon of chili powder, 1 teaspoon of ground cumin, and ½ teaspoon of smoked paprika. Don’t forget a pinch of sea salt and freshly ground black pepper. Stir well to blend all the flavors together. - Boiling and Simmering the Chili Raise the heat to bring the chili to a boil. Once it boils, lower the heat to let it simmer. Cover the pot and let it cook for 25 to 30 minutes. The sweet potatoes should be tender, and the flavors will mix beautifully. - Adjusting Thickness and Seasoning Stir occasionally while it cooks. Taste the chili to see if you need to add more salt or spices. If you find the chili too thick, add more vegetable broth until you reach your desired consistency. Let it rest for 5 minutes after cooking to allow the flavors to deepen before serving. To get the best sweet potato texture, cut them into 1-inch cubes. This size cooks evenly. Boil the chili until the sweet potatoes become fork-tender. You want them soft but not mushy. Stir the chili while it cooks. This helps the sweet potatoes break down a bit, adding a nice thickness. To build deep flavors, sauté the onion and bell pepper first. This takes about five minutes. Make sure they become soft and fragrant. Then, add minced garlic to boost the taste. Use high-quality spices like chili powder and smoked paprika. These bring warmth and a subtle smokiness. Don't forget to taste and adjust the seasonings. This step is key to making your chili pop with flavor. Serve the chili in bright bowls. Top each serving with fresh cilantro leaves and slices of avocado. This adds color and a creamy texture. You can also add lime wedges on the side. A squeeze of lime brightens the dish and enhances the flavors. Pair the chili with crusty bread or warm tortillas. These sides are great for dipping. You can also serve it with a side salad for a fresh crunch. Consider topping the chili with shredded cheese or sour cream for extra creaminess. Each addition can make your meal unique! {{image_4}} You can change this chili by adding more veggies. Try carrots or zucchini for extra flavor and color. You can also add spinach for a fresh touch. Each veggie brings its own taste and makes it unique. If you want more protein, think about meat or tofu. Ground turkey or beef works well. For a plant-based option, use firm tofu or tempeh. Just sauté them with the onion and bell pepper. This adds a hearty vibe to your chili. For those who love heat, add more peppers. Jalapeños or serranos give a nice kick. You can also use chipotle peppers for a smoky flavor. Just chop them up and mix them in with the other ingredients. Alternative spice blends can also change the game. Try adding cayenne pepper for heat or smoked chili powder for depth. A pinch of cinnamon can add warmth too. Adjust the spices until you find your perfect balance. To store your Sweet Potato Black Bean Chili, let it cool first. Use an airtight container for best results. This helps keep the flavors fresh and the texture intact. - Best Practices for Storing Leftovers: Divide leftovers into smaller portions. This makes it easier to reheat only what you need. Label the containers with the date to track freshness. - How Long It Lasts in the Fridge: Properly stored, the chili lasts about 4 to 5 days. If you notice any off smells or colors, it’s best to discard it. Freezing is a great option if you want to save some chili for later. Make sure to package it well to prevent freezer burn. - Proper Packaging for Freezing: Use freezer-safe bags or containers. Remove as much air as possible from bags to keep the chili fresh. Label them with the date for easy reference. - Reheating Tips for Frozen Chili: To reheat, thaw the chili in the fridge overnight. You can warm it on the stove or in the microwave. Stir well and check for seasoning, as flavors may change after freezing. These tips will help you enjoy your chili well beyond its first meal! Is Sweet Potato Black Bean Chili Vegan? Yes, this chili is vegan. It uses sweet potatoes, black beans, and plant-based broth. All the ingredients are free from animal products. You can enjoy this dish without worry. Can I make this chili in a slow cooker? Yes, you can! Simply add all the ingredients to your slow cooker. Cook on low for 6-8 hours or on high for 3-4 hours. Stir occasionally if you can. What are the health benefits of sweet potatoes and black beans? Sweet potatoes are rich in vitamins A and C. They support your immune system and eye health. Black beans offer fiber and protein, which aid digestion. Together, they make this dish healthy and filling. Caloric content and dietary considerations This chili has about 300 calories per serving. It is low in fat and high in fiber. This makes it a good option for many diets, including plant-based ones. Can I use other types of beans? Yes! You can use pinto beans, kidney beans, or even chickpeas. Each will change the taste slightly, but they all work well. Alternatives for the vegetable broth If you don't have vegetable broth, use water or chicken broth. You can also make your own broth with leftover veggie scraps. This adds flavor and cuts waste. This blog post walked you through making a tasty Sweet Potato Black Bean Chili. We covered key ingredients, including sweet potatoes, black beans, and spices. You learned step-by-step instructions for cooking and tips for serving. Variations let you change it up with different veggies or proteins. Plus, we provided storage advice to keep leftovers fresh. Enjoy exploring the flavors and options. You can create your own unique chili that fits your taste! Happy cooking!

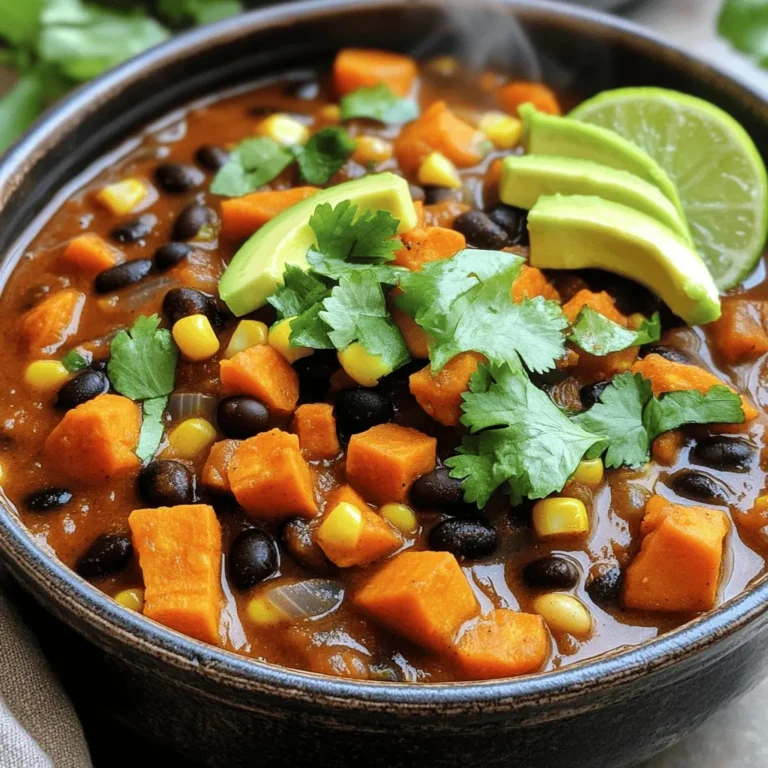
Bold Sweet Potato Black Bean Chili Recipe for Flavor

- 1 cup white chocolate chips - 1/4 cup coconut oil - 2 tablespoons matcha green tea powder - 1/2 cup crushed digestive biscuits - 1/4 cup unsweetened shredded coconut (optional) - 1/4 cup chopped nuts (almonds or pistachios) - Pinch of sea salt To make these no-bake matcha white chocolate bars, you need simple ingredients. First, gather 1 cup of white chocolate chips. These will give your bars a sweet and creamy base. Next, grab 1/4 cup of coconut oil. This helps the chocolate melt and adds a nice flavor. Matcha powder is essential. You will need 2 tablespoons to get that bright green color and earthy taste. For texture, use 1/2 cup of crushed digestive biscuits. They add crunch and a bit of sweetness. If you like, you can add 1/4 cup of unsweetened shredded coconut. This is optional, but it gives more texture. Chopped nuts are great too. Use 1/4 cup of almonds or pistachios for extra crunch and taste. Finally, a pinch of sea salt brings out all the flavors. Make sure to have all these ingredients ready. It makes the process smoother and more fun! Use a medium microwave-safe bowl. Add 1 cup of white chocolate chips and 1/4 cup of coconut oil. Microwave in 20-second intervals. Stir vigorously between each interval. This method helps prevent burning. The mixture should be smooth and fully melted. Once the chocolate is melted, sprinkle in 2 tablespoons of matcha green tea powder. Use a whisk to blend until smooth and vibrant. Make sure there are no clumps left behind. This step gives the bars their green color and rich flavor. Now, add 1/2 cup of crushed digestive biscuits. If you want, include 1/4 cup of unsweetened shredded coconut for more texture. Next, add 1/4 cup of chopped nuts, like almonds or pistachios. Don’t forget a pinch of sea salt! Stir gently and thoroughly until all ingredients are evenly coated in the matcha chocolate blend. Take an 8x8 inch square baking pan. Line it with parchment paper for easy removal. Leave some edges hanging over. This creates handles for lifting the bars out later. It makes serving much simpler. Carefully pour the matcha mixture into the lined baking pan. Use a spatula to spread it evenly. Press down firmly to compact the mixture. This helps it hold together once set. Next, place the pan in the refrigerator. Let the bars chill for at least 2 hours, or until they feel firm to the touch. After the bars are set, lift them out using the overhanging parchment paper. Place them on a cutting board and slice into squares or rectangles. Enjoy your delightful no-bake matcha white chocolate bars! Microwaving chocolate can be tricky. I recommend using short bursts. Heat the mixture in 20-second intervals. After each interval, stir it well. This method helps to avoid burning the chocolate. Stirring also helps the heat spread evenly. It ensures a smooth and creamy texture. To make sure your bars hold together, compact the mixture well. After mixing in all the ingredients, pour it into your lined pan. Use a spatula to spread it evenly. Then, press down firmly. This will help the bars stay together when you cut them. A good compacting will make a big difference. For serving, choose a nice plate. You can add a sprinkle of matcha on top for color. Drizzling melted white chocolate over the bars adds flair. It makes them look special and festive. Consider serving these bars with fresh fruit for a pop of color. {{image_4}} You can change the nuts in this recipe easily. Almonds and pistachios are great, but try others too. Walnuts, pecans, or even sunflower seeds add unique flavors. Each nut gives a different crunch. Feel free to mix and match for variety. Spices can boost the flavor of your bars. Try adding cinnamon for warmth or cardamom for a floral note. A few drops of vanilla extract can add sweetness without extra sugar. If you want a zing, add a bit of ginger powder. Each spice brings its own twist to this treat. If you want a dairy-free option, choose dairy-free white chocolate. Many brands offer tasty choices that melt well. Coconut oil is a great base. You can also use nut butter instead of coconut oil for added flavor. These swaps keep the bars creamy and delicious while meeting dietary needs. To keep your no bake matcha white chocolate bars fresh, store them in airtight containers. This prevents air and moisture from ruining their texture. If you don’t have a container, wrap the bars tightly in plastic wrap. Make sure they are completely cool before storing. This step helps lock in their great flavor. These tasty bars will last in the fridge for up to a week. For the best taste, try to eat them within the first few days. As time goes on, the bars may lose some of their vibrant matcha flavor. Always check for any signs of spoilage before enjoying. Yes, you can use other types of chocolate. Brown or dark chocolate works well. Swap the white chocolate with these options. Keep in mind that dark chocolate has a more intense flavor. You may need to adjust the sugar if you switch. Dark chocolate also pairs nicely with the matcha. To reduce sweetness, use less white chocolate. You can cut the amount by half or more. Try adding more matcha powder for a stronger flavor. Using unsweetened nuts will also help. Consider omitting the coconut if you find it too sweet. These small changes can balance the taste to your liking. If the bars don’t set, check the chocolate mixture. Ensure you melted it fully. If it’s too warm, it may not firm up. You can put the pan back in the fridge for a longer time. If they still don’t set, you may need to add more coconut oil. This will help with firmness. You learned how to make delicious matcha bars. We covered the key ingredients, including white chocolate and crushed biscuits. I shared easy steps for mixing and melting. Remember to chill the bars to set them right. Feel free to swap nuts or chocolate types to make it your own. Store them in airtight containers for freshness. Enjoy sharing these tasty treats with friends and family. You now have all the tools to create your own matcha bars!

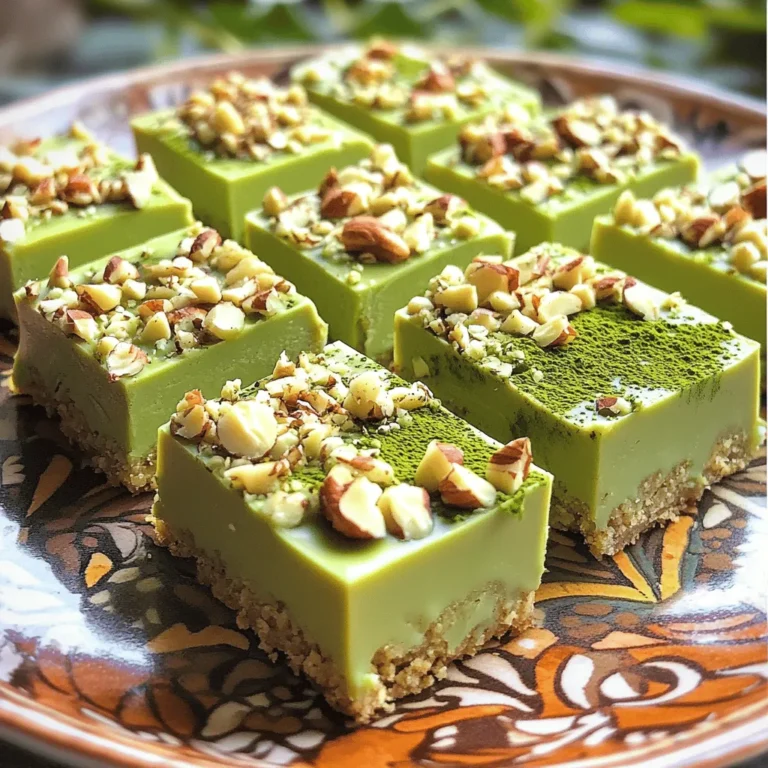
No Bake Matcha White Chocolate Bars Delightful Treat

- 200g pasta (penne or fusilli) - 200g block of feta cheese - 400g cherry tomatoes (a vibrant mix of colors is ideal) - 4 cloves of garlic, finely minced - 1/4 cup extra virgin olive oil - 1 teaspoon dried oregano - Salt and freshly cracked black pepper, to taste - 2 cups fresh spinach, roughly chopped - Fresh basil leaves for garnish - Zest of 1 lemon, for brightness For this recipe, you will need some simple yet flavorful ingredients. First, choose your pasta. Penne or fusilli works best. Both shapes hold the sauce well. Next, grab a block of feta cheese. It melts beautifully and adds creaminess. Cherry tomatoes are key. Use a mix of colors for a vibrant look. You’ll also need garlic for flavor. Mince four cloves finely for the best taste. Extra virgin olive oil brings richness. Add one-fourth cup to your dish. Dried oregano adds a nice touch. Just one teaspoon will do. Season with salt and black pepper to taste. Fresh spinach will add nutrition and color; about two cups chopped will work great. For garnish, use fresh basil leaves. They add aroma and flavor. Lastly, lemon zest brightens the dish, making it pop. Make sure to gather everything before you start. This will make cooking smooth and easy. Enjoy the process of bringing these ingredients together! Preheating your oven is key for even baking. When the oven is hot, it cooks food properly. Set your oven to 400°F (200°C) now. This step helps the feta and tomatoes roast perfectly. In a large, oven-safe baking dish, mix the following: - 400g cherry tomatoes - 4 cloves garlic, finely minced - 1 teaspoon dried oregano - 1/4 cup extra virgin olive oil - Salt and freshly cracked black pepper, to taste Stir well until the tomatoes are coated with oil and seasonings. This mixture adds great flavor to the dish. Make a small nest in the center of the tomatoes. Place the block of feta cheese in this spot. Now, put the dish in your preheated oven. Bake for 25-30 minutes. Look for blistered tomatoes and soft feta with a golden hue. While the feta and tomatoes bake, cook 200g of pasta. I recommend penne or fusilli. Boil the pasta according to package directions until it is al dente. This means it should be firm but cooked through. Drain and set aside. When the baking time is up, take the dish out of the oven. Use a fork to mash the baked feta into the tomatoes. Mix them into a creamy sauce. Then, add the cooked pasta and 2 cups of roughly chopped fresh spinach to the dish. Toss everything together until the pasta is well-coated with the sauce. Serve the dish right from the baking dish for a rustic look. For an elegant touch, plate individual servings. Top with fresh basil leaves and a sprinkle of lemon zest. This brightens the dish and adds a nice finish. Enjoy your meal! Choosing the right ingredients is key to great flavor. Start with fresh tomatoes. Look for ripe, juicy cherry tomatoes. Their sweetness shines in the dish. A mix of colors adds beauty, too. Next, pick good-quality feta cheese. A block of creamy feta melts perfectly, giving a rich taste. Avoid crumbled feta; it lacks the same creaminess. Fresh ingredients elevate your meal and make a big difference. Want to add your twist? Spices are your best friend. Try adding red pepper flakes for heat. A dash of smoked paprika offers a nice depth. You can also toss in fresh herbs like thyme or oregano. For a zesty kick, add lemon juice or zest. If you like garlic, add more cloves for a stronger flavor. Feel free to experiment; make it your own! The right creaminess is vital for this dish. When you mash the baked feta into the tomatoes, mix well. Aim for a smooth, rich sauce. If it feels too thick, add a splash of pasta water for balance. Incorporating fresh spinach helps with texture and adds nutrients. Toss everything gently to coat the pasta. This creates a luscious, creamy experience that you’ll love! {{image_4}} You can easily make this dish vegan. Just swap the feta cheese for a plant-based option. Look for brands that mimic the creamy texture of feta. You can also make a homemade version using blended tofu, lemon juice, and nutritional yeast. This gives you the salty flavor without dairy. Feel free to jazz up your baked feta tomato pasta with extra veggies. Seasonal choices work best. Try adding zucchini, bell peppers, or asparagus. Just chop them up and mix them in with the tomatoes. They will roast nicely and add more color and taste. Want to make this dish heartier? Add some protein! You can toss in cooked chicken or shrimp. They add great flavor and make the meal more filling. If you prefer plant-based options, try adding canned beans like chickpeas or white beans. They blend well and boost the nutrition. To store leftovers, let the dish cool first. Then, transfer it to an airtight container. This helps keep the flavor fresh. Place it in the fridge for up to three days. When you want to eat it again, just remember to check for any signs of spoilage first. To reheat, you can use the oven or microwave. For the oven, preheat it to 350°F (175°C). Place the pasta in an oven-safe dish. Add a splash of water or olive oil to keep it moist. Cover it with foil and heat for about 15 minutes. In the microwave, heat in short bursts of 1-2 minutes. Stir in between to avoid uneven heating. Yes, you can freeze this dish! First, let it cool completely. Then, pack it in a freezer-safe container or bag. Remove as much air as possible before sealing. It can last up to three months in the freezer. When you’re ready to eat, thaw it in the fridge overnight. Reheat it following the methods above for best taste. You can use many types of pasta for this dish. I recommend penne or fusilli. These shapes hold sauce well and add texture. You could also try farfalle or rotini. They are fun shapes that mix nicely with the sauce. Yes, you can use dried herbs. Dried oregano works well, but the flavor might change. Use about one-third of the amount of dried herbs compared to fresh. This is because dried herbs are more concentrated. You might miss the bright taste of fresh herbs, but it will still be tasty. To make Baked Feta Tomato Pasta gluten-free, choose gluten-free pasta. Many brands offer options like brown rice or chickpea pasta. They cook well and taste great. Just follow the package instructions for cooking times. This dish pairs well with a simple salad. A green salad with lemon vinaigrette is fresh and light. You can also serve crusty bread for dipping in the sauce. Garlic bread is another great choice to soak up the yummy flavors. This blog covered a tasty pasta dish with baked feta and tomatoes. You learned about key ingredients, step-by-step cooking, and helpful tips. Remember to choose fresh items for the best taste. You can modify flavors or make a vegan version too. This dish is easy to store and reheat, so enjoy leftovers. Try different pasta shapes and herbs to mix things up. With these ideas, you can make a meal everyone will love. Happy cooking!

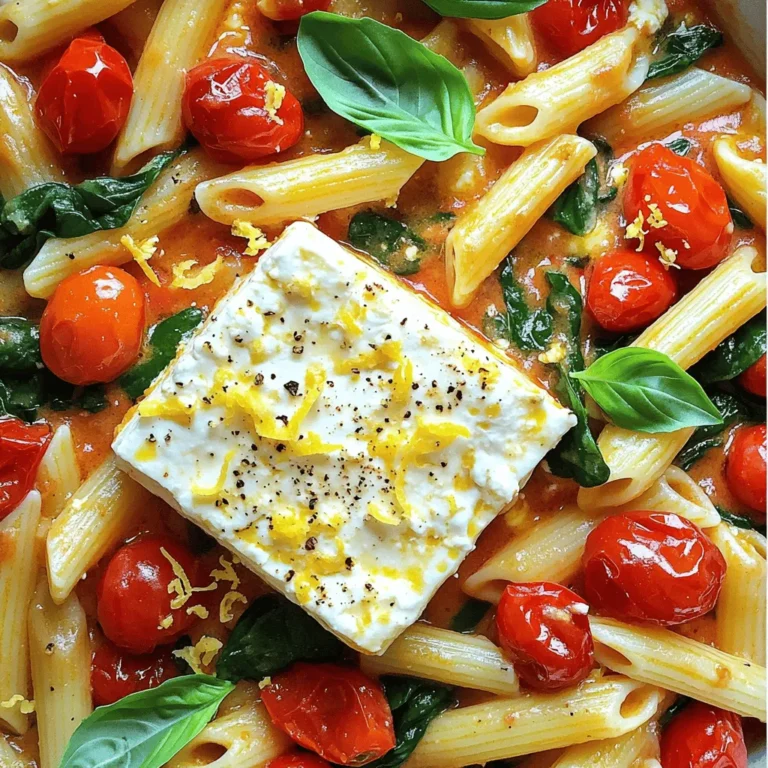
Baked Feta Tomato Pasta TikTok Style Simple Recipe

To make spiced mulled cider, you will need: - 4 cups apple cider - 1 large orange, thinly sliced - 5-6 whole cloves - 2-3 star anise pods - 2-3 cinnamon sticks - 1 tablespoon freshly grated ginger - 1 tablespoon brown sugar (or to taste) - A pinch of freshly grated nutmeg - Fresh apple slices and/or cranberries for garnish You can tweak your mulled cider with these extras: - 1-2 tablespoons maple syrup for sweetness - A splash of vanilla extract for warmth - Dried fruit like raisins or figs for added flavor - A dash of cayenne pepper for heat The best apple cider for this drink should be fresh and unfiltered. Look for: - Sweet cider for a rich taste - Spiced cider for an extra kick - Organic cider for a clean finish Using quality cider makes a big difference in flavor. Choose what you enjoy most! Making spiced mulled cider is simple and fun! You will need just a few tools. Grab a large pot and a fine sieve. Gather your ingredients first. This will help you move smoothly through the steps. 1. Start by pouring 4 cups of apple cider into your large pot. Set the pot on medium heat. 2. Warm the cider until it begins to simmer. You will notice its lovely scent filling your kitchen. 3. Next, add the sliced orange, whole cloves, star anise pods, and cinnamon sticks into the pot. 4. Stir in 1 tablespoon of freshly grated ginger and 1 tablespoon of brown sugar. Mix gently to dissolve the sugar. 5. Taste your cider. If you want it sweeter, add more brown sugar. 6. Lower the heat and let the mixture simmer for 15-20 minutes. This helps the spices blend well with the cider. 7. After simmering, remove the pot from heat. 1. Use a fine sieve to strain the cider into another pot or bowl. This will remove the spices and orange slices. 2. Pour the warm cider into mugs for serving. 3. For a lovely garnish, add fresh apple slices and a few cranberries. This makes your drink look even more inviting! To make your spiced mulled cider even better, try these tips: - Use fresh spices: Fresh spices give a stronger flavor. Choose whole cloves and cinnamon sticks. - Add a splash of juice: Orange juice or cranberry juice adds a nice sweetness. - Experiment with herbs: Rosemary or thyme can add a unique twist to the drink. - Sweeten wisely: Start with a little brown sugar and taste as you go. You can always add more. - Let it steep: Allow the cider to simmer longer for a deeper flavor. Avoid these common errors when making mulled cider: - Boiling the cider: Keep the heat low. Boiling can change the flavor. - Not straining properly: Use a fine sieve to remove spices. This keeps the drink smooth. - Over-sweetening: Too much sugar can mask the spices. Start small and taste often. - Ignoring the garnish: Fresh apple slices and cranberries not only look good but also add flavor. - Skipping the simmering time: Don’t rush it. Letting the spices infuse is key. Garnishing your mulled cider makes it look and taste better. Here are some ideas: - Fresh apple slices: Thinly slice apples to float on top. They add color and a fresh taste. - Cranberries: Toss in a few whole cranberries for a pop of color. - Cinnamon sticks: Place a stick in each mug for a rustic touch and extra spice. - Orange slices: Add a thin slice of orange to enhance the citrus flavor. - Herbs: A sprig of rosemary or thyme can add a lovely aroma. These tips and tricks will help you create a delicious spiced mulled cider that everyone will love! {{image_4}} You can easily add a kick to your mulled cider. One great option is to mix in a splash of rum or bourbon. Just add about 1 cup of your chosen spirit after you strain the cider. This will warm you up and enhance the flavors. Another option is to use hard cider instead of regular apple cider. This adds a nice depth and a bit of fizz to your drink. You still follow the same recipe, just swap the cider. You can change up the spices based on the season. In fall, add a few allspice berries or a pinch of cardamom for warmth. In winter, try using a bit of vanilla bean for a sweet twist. Each change transforms the cider into a new experience. You might also want to add seasonal fruits. In the fall, try pears or cranberries. In winter, consider pomegranates or even a few berries. These will give the cider a fresh, bright flavor. For a fun non-alcoholic version, keep the recipe as is! You can also add sparkling water for a fizzy treat. Just mix in the sparkling water right before serving. This keeps the drink light and refreshing. Another option is to use herbal teas. Brew a strong apple or chai tea and use it as a base for your cider. This adds unique flavors and is a great choice for kids or anyone avoiding alcohol. To store leftover spiced mulled cider, let it cool first. Pour it into a clean jar or airtight container. Seal it tightly and place it in the fridge. This way, the flavors stay fresh and tasty. When you’re ready to enjoy your cider again, pour it into a pot. Heat it on medium until it warms up. Stir gently to mix the spices. You can also use a microwave. Just heat it in a microwave-safe cup for 1-2 minutes. Stored in the fridge, your cider lasts about 3-5 days. If you want to keep it longer, consider freezing it. Pour the cider into freezer-safe bags or containers, leaving some space for expansion. It can last up to 3 months in the freezer. Thaw in the fridge before reheating. The best cider for mulled cider is fresh, unfiltered apple cider. This type has a rich, bold flavor. Look for cider labeled "fresh" or "unpasteurized" at your local store. You can also use sweet cider for a more sugary drink. Avoid cider with added flavors or preservatives. They can change the taste of your drink. Spiced mulled cider has a warm, inviting spice flavor. The blend of cinnamon, cloves, and star anise creates a cozy taste. You can adjust the spice level by adding or removing spices. If you love ginger, add more for a stronger kick. If you prefer a milder drink, use fewer spices. Yes, you can easily make spiced mulled cider in a slow cooker. Just pour the apple cider into the slow cooker. Add all the spices and orange slices as you would in the pot. Set it to low heat for 2 to 3 hours. This method allows the flavors to blend beautifully. You can serve it warm right from the slow cooker. We explored the key ingredients for mulled cider, from basic to optional flavors. I shared step-by-step instructions for preparation, cooking, and serving. Helpful tips and common mistakes ensure great taste. We also looked at fun variations, including alcoholic and non-alcoholic options, and how to store any leftovers. Remember, making mulled cider is easy and can be fun. Enjoy experimenting with spices and flavors! Your perfect cup awaits.

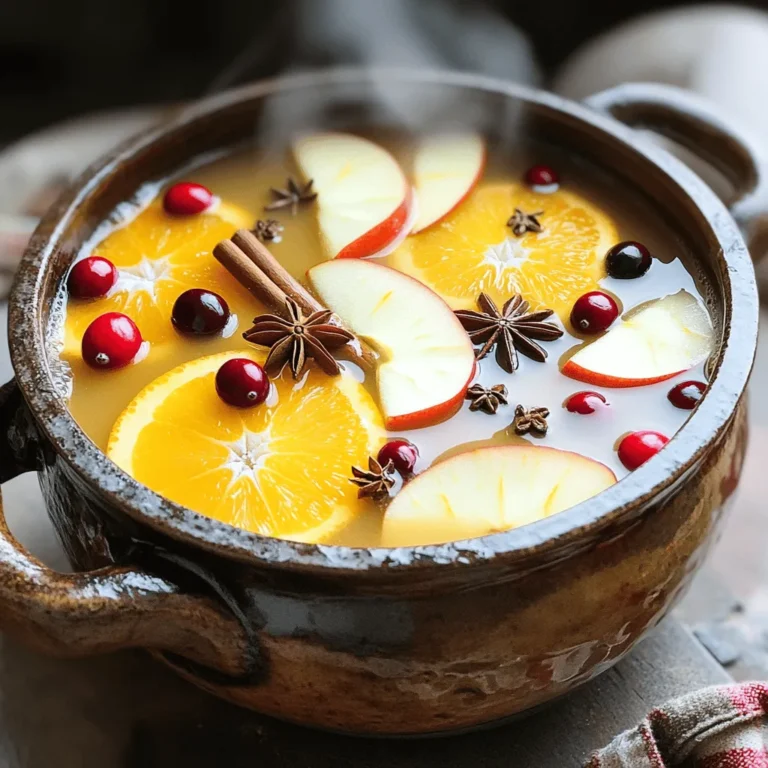
Spiced Mulled Cider Warm and Inviting Beverage Recipe

- 1 cup unsalted butter - 2 cups granulated sugar - 4 large eggs - 1 teaspoon vanilla extract - 1 cup all-purpose flour - 1 cup unsweetened cocoa powder - 1/2 teaspoon baking powder - 1/2 teaspoon salt - 1 cup semi-sweet chocolate chips - 1 cup chopped pecans - 1 cup caramel sauce I love using these ingredients to make Chocolate Turtle Brownies. Each one plays a key role. The butter gives the brownies a rich base. Sugar brings all the sweetness you crave. Eggs help to bind everything together and add moisture. Vanilla extract adds a lovely aroma. Flour and cocoa powder create that chocolatey goodness. Baking powder makes the brownies rise just right, while salt balances the sweetness. The semi-sweet chocolate chips and chopped pecans add texture and flavor. Caramel sauce? That’s the cherry on top, giving a gooey, indulgent layer. - For a dairy-free option, use coconut oil or vegan butter. - Gluten-free? Replace all-purpose flour with almond or oat flour. - Want less sugar? Try using a sugar substitute like stevia or monk fruit. These substitutions can help you enjoy brownies without missing out. They keep the taste and texture close to the original recipe. - Baking pan - Mixing bowls - Spatula - Whisk - Parchment paper Having the right tools makes baking easier. A baking pan helps shape the brownies. Mixing bowls are great for combining ingredients. A spatula ensures you get every bit of batter into the pan. A whisk mixes everything smoothly. Parchment paper helps with easy removal after baking. {{ingredient_image_2}} - Preheat your oven to 350°F (175°C). - Lightly grease a 9x13-inch baking pan. - Line the pan with parchment paper, leaving overhang for easy lifting. - In a medium saucepan, melt 1 cup of unsalted butter over low heat. - Once melted, take it off heat and stir in 2 cups of granulated sugar. - Add 4 large eggs to the mixture, one at a time. - Stir vigorously after each egg until mixed well. - Pour in 1 teaspoon of vanilla extract and combine everything. - In another bowl, mix 1 cup of all-purpose flour, 1 cup of cocoa powder, 1/2 teaspoon of baking powder, and 1/2 teaspoon of salt. - Gradually fold this dry mix into the wet mix. Be careful not to overmix. - Pour half of the brownie batter into the prepared pan. - Spread it evenly across the bottom with a spatula. - Drizzle half of 1 cup of caramel sauce over this layer. - Pour the rest of the brownie batter on top, covering the caramel. - Drizzle the remaining caramel sauce over the top. - Use a knife to gently swirl the caramel into the batter. - Bake for 30-35 minutes in the preheated oven. - Check doneness with a toothpick; it should have a few moist crumbs. - Once baked, let the brownies cool in the pan for 15 minutes. - Lift them out using the parchment paper and cool completely on a wire rack. To bake perfect brownies, you need to ensure even baking. Start by preheating your oven to 350°F (175°C). Use a dark, shiny pan for best results. This helps the brownies to bake evenly. If you use a glass pan, lower the temperature by 25°F. This prevents over-baking. To check for doneness, insert a toothpick into the center. It should come out with a few moist crumbs. If it’s too wet, bake a few more minutes. Do not overbake, or the brownies will become dry. Not overmixing is key for a fudgy brownie. When you mix the dry and wet ingredients, do it gently. Mix just until combined. This keeps the brownies dense and chewy. Cooling is also important. Let the brownies cool in the pan for 15 minutes. Then, lift them out using parchment paper. Transfer to a wire rack to cool completely. This helps retain moisture and improves texture. For a great presentation, cut the brownies into squares. Dust them lightly with powdered sugar. Drizzle some extra caramel sauce on top. A sprinkle of sea salt enhances the sweet flavor. Pair these brownies with vanilla ice cream or whipped cream. This adds a creamy contrast to the rich chocolate. Enjoy these treats at parties or family gatherings. They are sure to impress! Pro Tips Use Room Temperature Ingredients: Make sure your eggs and butter are at room temperature before starting. This helps create a smoother batter and results in better texture. Don’t Overmix: When combining the dry and wet ingredients, mix just until incorporated. Overmixing can lead to tough brownies. Test for Doneness: Insert a toothpick into the center; it should come out with a few moist crumbs attached, but not wet batter. This ensures fudgy brownies. Let Them Cool: Allow the brownies to cool completely in the pan before cutting. This helps them set and makes for cleaner slices. {{image_4}} You can change the taste of your brownies easily. Try different nuts like walnuts or almonds. These add crunch and flavor. You can also use toppings like sea salt or chocolate shavings. Each adds a special twist. Using different kinds of chocolate creates new flavors too. Dark chocolate gives a rich taste. Milk chocolate adds sweetness. You can mix them for a unique treat. Experiment with flavors you love to find your favorite mix. Want vegan chocolate turtle brownies? Replace eggs with flaxseed meal or applesauce. Use coconut oil instead of butter. Choose dairy-free chocolate chips and caramel sauce. This keeps all the yummy taste without animal products. For low-sugar or sugar-free options, use sugar substitutes like stevia or erythritol. These sweeteners can help you enjoy brownies with fewer calories. Just check the package for the right amount to use. The taste will still be rich and delicious. Add seasonal spices to your brownies for extra flavor. Cinnamon or nutmeg works well in fall. During winter, try peppermint extract for a holiday touch. These spices can change your brownies into a festive delight. You can also decorate them for holidays. Use colored sprinkles for birthdays or red and green candies for Christmas. This makes your brownies look fun and festive. Don't be afraid to get creative with your designs! To keep your brownies fresh, store them in an airtight container. This method keeps moisture in and prevents them from drying out. If you want to stack them, place parchment paper between layers. Brownies last about 3 to 5 days at room temperature. If your kitchen is warm, consider refrigerating them. In the fridge, they can last up to a week. Just remember to let them cool before slicing for the best texture. Freezing brownies is perfect for longer storage. First, let the brownies cool completely. Then, wrap them tightly in plastic wrap. For extra protection, add a layer of aluminum foil. They can last up to three months in the freezer. When you're ready to enjoy them, take them out and let them thaw at room temperature. For a warm treat, pop them in the microwave for a few seconds. Got leftover brownies? Use them in fun ways! Crumble them over ice cream for a delicious sundae. You can also mix brownie scraps into milkshakes for a rich flavor. Another idea is to layer them in a trifle with whipped cream and chocolate sauce. These creative options make sure nothing goes to waste while keeping dessert exciting. How do I know when brownies are done? To check if your brownies are done, insert a toothpick into the center. If it comes out with a few moist crumbs, they are ready. The edges should look set, while the center may still be a bit soft. Remember, they will continue to cook a bit after you take them out. Can I make these brownies in advance? Yes, you can make these brownies ahead of time. Once they cool, store them in an airtight container. They will stay fresh for about three days at room temperature. For longer storage, you can freeze them for up to three months. Just remember to wrap them well. Can I add extra caramel or chocolate? Absolutely! Feel free to add more caramel or chocolate chips to the batter. This will make your brownies even richer and more decadent. Just keep the balance in mind so the brownies remain moist and do not overflow during baking. What should I do if the batter is too thick? If your brownie batter seems too thick, add a splash of milk or water. This will help loosen it up. Stir gently until you reach the desired consistency. Be careful not to add too much liquid, or the brownies may not set well. What occasions are these brownies perfect for? Chocolate turtle brownies suit many events. They are great for birthday parties, potlucks, or family gatherings. They also make a lovely treat for movie nights or game days. Their rich flavors please both kids and adults. How can I make a larger batch for a party? To make a larger batch, you can double the recipe. Use a larger baking pan, like a half-sheet pan. Keep an eye on the baking time, as it may take longer to cook through. Ensure you check for doneness using the toothpick method. In this post, we explored making delicious Chocolate Turtle Brownies. We covered the key ingredients, tools, and step-by-step instructions to create them. We also shared helpful tips for baking and serving these treats. In summary, you can enjoy endless variations and ways to store these brownies. Put your own twist on the recipe and savor the rich flavors. Happy baking with your new chocolate creation!

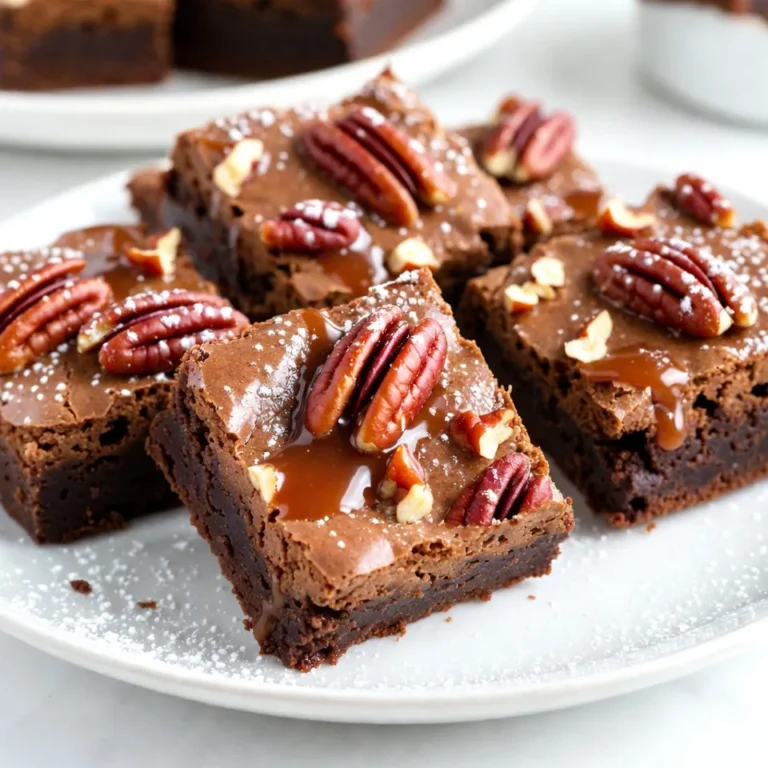
Chocolate Turtle Brownies Irresistibly Decadent Treat

To make the Caramel Apple Coffee Cake, you need a few key ingredients. Each one plays an important role in creating that perfect flavor and texture. Here’s what you’ll need: - 2 medium apples, peeled and diced into small cubes - 1 cup brown sugar, packed - 1/2 cup granulated sugar - 1/2 cup unsalted butter, softened to room temperature - 2 large eggs - 1 teaspoon pure vanilla extract - 2 cups all-purpose flour - 1 teaspoon baking powder - 1/2 teaspoon baking soda - 1/2 teaspoon fine salt - 1 teaspoon ground cinnamon - 1/2 cup sour cream - 1/2 cup caramel sauce (store-bought or homemade) - 1/2 cup chopped pecans or walnuts (optional for added crunch) - Extra cinnamon sugar for topping Each ingredient adds a unique touch to the cake. The apples provide moisture and sweetness. The sugars bring out a rich flavor. Butter adds creaminess, while eggs help the cake rise. Vanilla extract gives a lovely aroma. Flour and baking essentials create the cake's structure. Sour cream adds tang and moisture. Caramel sauce brings that delicious, gooey sweetness. If you like nuts, they add a nice crunch. Finally, the topping of cinnamon sugar creates a sweet crust. Gather these ingredients before you start baking. This will make the process smoother and more enjoyable. Happy baking! First, set your oven to 350°F (175°C). Grab a 9x13 inch baking dish. Grease it with butter, or line it with parchment paper. This helps with easy removal later. In a bowl, mix the softened butter, brown sugar, and granulated sugar. Use an electric mixer to beat them on medium speed. Keep mixing until it looks light and fluffy. This should take about 3 to 4 minutes. Add the eggs one at a time to your mixture. Make sure to mix well after each egg. Once all the eggs are in, pour in the pure vanilla extract. Stir until everything is blended together. In another bowl, whisk the all-purpose flour, baking powder, baking soda, fine salt, and ground cinnamon. Make sure they are well mixed. This step is key for a nice rise in your cake. Gradually add the dry ingredients to your butter mixture. Do this slowly, mixing in sour cream as you go. Start and end with the dry mix. Be careful not to overmix! Then, gently fold in the diced apples. If you want, add chopped nuts too. Pour half of the batter into your prepared baking dish. Spread it evenly. Next, drizzle half of the caramel sauce over this layer. Let it seep into the batter a bit. Pour the rest of the batter on top, and drizzle the remaining caramel sauce. Use a knife to gently swirl the caramel into the batter. This creates a lovely marbled look. Place your dish in the oven and bake for 40 to 45 minutes. Check if it's done by inserting a toothpick in the center. It should come out clean or with a few moist crumbs. Let the cake cool in the pan for about 10 minutes. After that, move it to a wire rack to cool completely before slicing. For this cake, I recommend using firm apples. Good choices are Granny Smith, Honeycrisp, or Fuji. These apples hold their shape and provide great flavor in each bite. Avoid soft apples like Red Delicious, as they turn mushy when baked. To get that beautiful swirl, drizzle the caramel sauce gently over the batter. Use a knife or skewer to swirl it in. Be careful not to overmix; you want to see the caramel ribbons. This adds a lovely visual and a burst of flavor. - Overmixing: Mix just until combined. Overmixing makes the cake tough. - Wrong Oven Temp: Always preheat your oven. A hot oven helps the cake rise. - Not Greasing the Pan: Grease or line your pan. This ensures easy removal. For a stunning presentation, serve slices drizzled with extra caramel. Add a dollop of whipped cream or a scoop of vanilla ice cream for fun. You can also sprinkle chopped nuts on top for added crunch. Enjoy the look and flavors! {{image_4}} You can easily adjust this recipe for nut-free or gluten-free needs. For a nut-free version, simply skip the chopped pecans or walnuts. For gluten-free options, replace the all-purpose flour with a 1:1 gluten-free flour blend. Make sure your baking powder is gluten-free too. This way, everyone can enjoy the cake! Want to jazz up your coffee cake? You can add in extra flavors. Try mixing in chocolate chips for a sweet twist. A half cup of mini chocolate chips works great. You can also add more spices like nutmeg or ginger for a cozy vibe. Just remember, a little goes a long way! While caramel sauce is a must-have, you can get creative with toppings. A simple glaze made with powdered sugar and milk adds a nice touch. You could also top it with whipped cream or a scoop of ice cream for a treat. For crunch, consider adding toasted coconut or crushed cookies on top. This cake can be a new dessert every time! After enjoying your caramel apple coffee cake, store leftovers in an airtight container. This keeps the cake moist and fresh. Make sure to let the cake cool completely before sealing it. You can keep it at room temperature for up to three days. If you want to keep it longer, refrigeration is a good option. Just remember, the cake can dry out in the fridge. To freeze your cake, first, cut it into slices. Wrap each slice tightly in plastic wrap. Then, place the wrapped slices into a freezer-safe bag or container. This protects the cake from freezer burn. You can freeze it for up to three months. When you’re ready to eat, let the slices thaw in the fridge overnight. Reheating your caramel apple coffee cake is easy. To warm it, preheat your oven to 350°F (175°C). Place the slices on a baking sheet and cover them with aluminum foil. Heat for about 10-15 minutes. For a quick option, you can use a microwave. Warm each slice for about 15-20 seconds, but be careful not to overheat. Enjoy your cake warm, and the caramel will melt slightly, making it even more delightful! This cake is special because it combines sweet apples with rich caramel. The blend of flavors creates a warm, comforting taste. The cinnamon adds spice, making every bite delightful. Plus, the crunchy topping adds texture. It is perfect for sharing with friends or family. Yes, you can use different types of apples. Each variety brings its own flavor and texture. For a sweet taste, try Honeycrisp or Fuji apples. For a tart flavor, use Granny Smith apples. Mixing varieties can make the cake even better! To make homemade caramel sauce, you need sugar, butter, and cream. Start by melting sugar in a pan until it turns golden brown. Then, add butter and stir until melted. Finally, slowly mix in cream until smooth. Let it cool before using. This recipe contains gluten and dairy, so it may not suit everyone. For gluten-free options, use a gluten-free flour blend. For dairy-free needs, substitute the butter with a non-dairy alternative and use plant-based sour cream. Always check labels for hidden ingredients. The cake stays fresh for about 3-4 days at room temperature. Store it in an airtight container to keep it moist. You can also refrigerate it for up to a week. For longer storage, freeze slices for up to three months. This blog post covered a delicious Caramel Apple Coffee Cake recipe. You learned about the key ingredients like apples, butter, and caramel. I shared step-by-step instructions to make it easy. Plus, I included helpful tips on baking, serving, and storing. You also found variations for different diets. In conclusion, baking this cake can be fun and rewarding. Enjoy this treat with loved ones or savor it solo. You now have all the tools to create a delightful dessert. Happy baking!

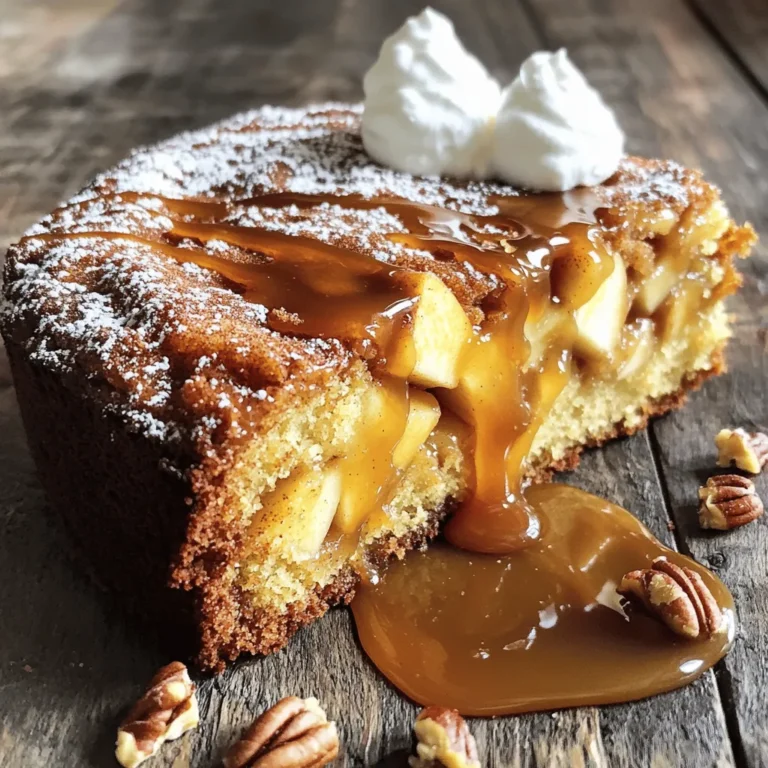
Caramel Apple Coffee Cake Irresistible and Simple Recipe

To create the tasty Spinach Mushroom Lasagna Roll Ups, you will need the following ingredients: - 9 lasagna noodles - 2 cups fresh spinach, roughly chopped - 1 cup mushrooms, finely diced - 1 cup ricotta cheese - 1 cup mozzarella cheese, shredded - 1/2 cup Parmesan cheese, finely grated - 1 egg, lightly beaten - 2 cloves garlic, minced - 1 teaspoon Italian seasoning - Salt and pepper to taste - 2 cups marinara sauce - Fresh basil leaves for garnish (optional) Each ingredient plays a key role in making these roll-ups special. The lasagna noodles hold everything together, while the spinach adds color and nutrients. Mushrooms bring a nice, earthy flavor. The cheeses create a creamy filling that melts beautifully. The egg helps bind the filling, giving it a nice texture. Garlic and Italian seasoning add rich flavor, while marinara sauce gives a delicious base. Don’t forget fresh basil for a pop of color and taste! 1. Preheat the Oven: Start by preheating your oven to 375°F (190°C). A hot oven helps the roll-ups cook evenly. 2. Cook the Noodles: In a large pot, boil salted water. Add the lasagna noodles and cook them until they are al dente. This usually takes about 8-10 minutes. After cooking, drain the noodles and rinse them under cold water. This step prevents sticking. 3. Sauté the Vegetables: Heat olive oil in a large skillet over medium heat. Add minced garlic and cook for about 1 minute until fragrant. Then, add diced mushrooms and sauté for around 5 minutes. Once soft, stir in chopped spinach and cook until wilted. Season with Italian seasoning, salt, and pepper. 1. Combine Ricotta and Vegetable Mixture: In a mixing bowl, combine ricotta cheese with half of the shredded mozzarella. Then, add the sautéed vegetable mixture. Stir well to mix. 2. Incorporate Egg and Mozzarella: Next, add the lightly beaten egg into the bowl. Mix until everything is well combined. This mixture will be the filling for your roll-ups. 1. Spread Marinara Sauce in the Baking Dish: Pour a thin layer of marinara sauce along the bottom of a 9x13 inch baking dish. This helps keep the noodles from sticking. 2. Roll Up the Noodles and Arrange in the Dish: Take one cooked noodle and spread about 2-3 tablespoons of the filling on it. Carefully roll the noodle from one end to the other. Place it seam side down in the baking dish. Repeat with the rest of the noodles and filling. 3. Top with Remaining Marinara and Cheeses: Pour the remaining marinara sauce over the rolled noodles. Make sure they are well-covered. Sprinkle the rest of the mozzarella and grated Parmesan cheese on top. 4. Bake to Perfection: Cover the baking dish loosely with aluminum foil. Place it in the oven and bake for 25 minutes. After that, remove the foil and bake for another 10-15 minutes. The cheese should be bubbly and golden. - How to ensure noodles don’t stick To keep your lasagna noodles from sticking, rinse them under cold water after cooking. This cools them quickly and washes off excess starch. For extra safety, add a bit of olive oil to the water before boiling. - Best way to sauté mushrooms and spinach Heat olive oil in a skillet over medium heat. Start with minced garlic for flavor, then add mushrooms. Sauté them for about 5 minutes until soft. Finally, add spinach and cook until it wilts. This keeps the veggies tasty and colorful. - Serving suggestions for a beautiful display For a stunning look, serve your roll-ups on a rustic wooden board. Place a small bowl of marinara sauce beside them for dipping. This adds a fun touch to the meal. - Garnishes that enhance flavor and appearance Add fresh basil leaves on top of the roll-ups. They add color and a burst of flavor. A sprinkle of freshly grated Parmesan also looks great and tastes delicious. {{image_4}} You can change the veggies in this dish for a new taste. Try adding bell peppers or zucchini for a fresh twist. Broccoli or kale also work well and add nutrients. If you want a richer flavor, swap out the ricotta for goat cheese. This cheese adds a tangy kick that pairs nicely with spinach and mushrooms. You can also mix in some feta cheese for a Mediterranean flair. If you need gluten-free options, use gluten-free lasagna noodles. They cook well and keep the dish together. Look for brands that hold up during baking. For a vegan version, replace the ricotta with cashew cream or tofu. You can use nutritional yeast to add a cheesy flavor without dairy. Also, swap the egg for flaxseed meal mixed with water to bind your filling. These swaps keep your meal tasty and satisfying. Store any leftover spinach mushroom lasagna roll-ups in an airtight container. They will last in the fridge for about three to four days. When you are ready to reheat, simply place the roll-ups on a baking dish. Add a splash of marinara sauce to keep them moist. Cover the dish with foil and heat in the oven at 350°F (175°C) until warm. This usually takes about 20 minutes. You can also use the microwave for a quicker option, but the oven helps keep them nice and cheesy. To freeze assembled lasagna roll-ups, place them in a single layer on a baking sheet. Make sure they are not touching each other. Freeze them for about two hours, then transfer to a freezer bag. This method prevents them from sticking together. They can last in the freezer for up to three months. When you are ready to bake from frozen, remove them from the freezer. Place the roll-ups in a baking dish and cover with marinara sauce. Bake at 375°F (190°C) for about 45-50 minutes, or until hot and bubbly. You may need to cover them with foil for the first 30 minutes to keep them from drying out. Can I prepare this dish in advance? Yes, you can prepare these roll-ups ahead of time. Make them up to a day before. Just cover them in the fridge. When you are ready to bake, add a bit more sauce on top and heat them in the oven. What can I serve with Spinach Mushroom Lasagna Roll Ups? These roll-ups pair well with a fresh salad. You can also serve garlic bread for a tasty side. A light soup can make it a full meal too. How do I know when the roll-ups are fully cooked? You will know they are done when the cheese is melted and bubbly. A nice golden top shows they are ready. You can use a fork to check the center for warmth. Why did my lasagna roll-ups fall apart? Roll-ups can fall apart if the noodles are overcooked. Always cook them until they are al dente. Letting them cool slightly before rolling helps too. How to avoid soggy noodles? To avoid soggy noodles, be sure to drain them well after cooking. Rinse them with cold water to stop the cooking process. Using enough sauce on top while baking also helps keep them firm. In this post, we covered how to make tasty Spinach Mushroom Lasagna Roll-Ups. We examined the ingredients, step-by-step preparation, and handy tips for cooking and presentation. Additionally, we explored variations and storage methods to help you enjoy this dish longer. Keep these pointers in mind for your next cooking adventure. This lasagna is easy, fun, and sure to impress. Enjoy your meal!

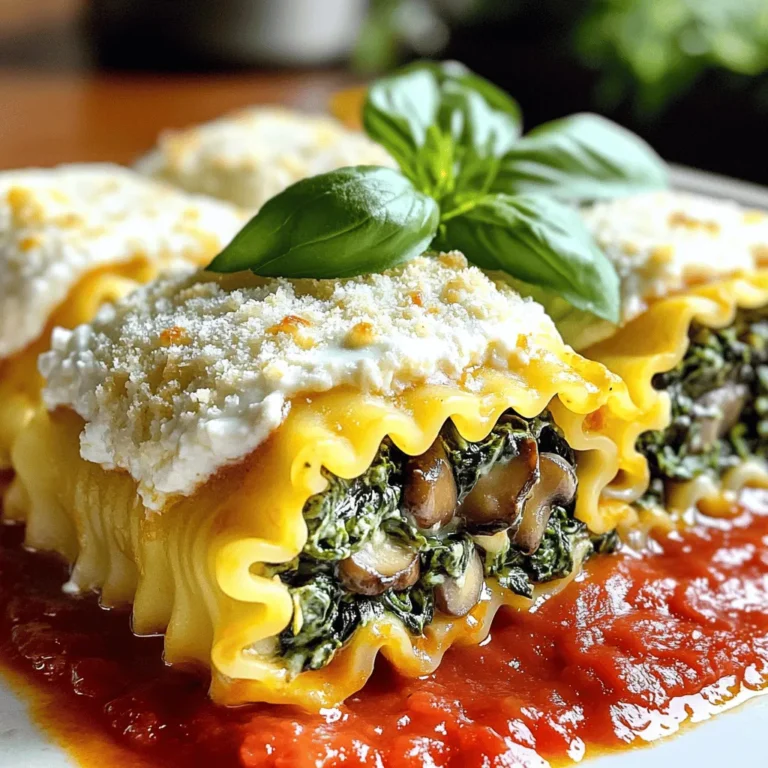
Spinach Mushroom Lasagna Roll Ups Simple Comfort Meal

To make Cheddar Jalapeño Cornbread, you need simple ingredients that pack flavor. Here’s what you will need: - 1 cup cornmeal - 1 cup all-purpose flour - 1/4 cup granulated sugar - 1 tablespoon baking powder - 1/2 teaspoon salt - 1 cup buttermilk - 2 large eggs - 1/4 cup unsalted butter, melted - 1 cup sharp cheddar cheese, shredded - 1-2 fresh jalapeños, finely chopped - Optional: 1/4 cup green onions, chopped These ingredients mix together to create a soft, tasty cornbread. The cornmeal gives it a nice texture, while the cheese adds richness. Jalapeños bring heat, and sugar balances it out. You can adjust the number of jalapeños based on how spicy you want your cornbread. Adding green onions is optional but gives a fresh taste. Enjoy gathering these items, and get ready for a great baking adventure! {{ingredient_image_2}} Start by preheating your oven to 400°F (200°C). This step is key for even baking. While the oven heats, grease an 8-inch square baking dish or a cast-iron skillet. Use a bit of butter or oil to coat the bottom and sides. This helps the cornbread come out easily after baking. Next, gather a large bowl. In this bowl, mix the cornmeal, flour, sugar, baking powder, and salt. Use a whisk to blend everything well. Mixing these dry ingredients ensures an even taste throughout the cornbread. In a separate bowl, combine the buttermilk, eggs, and melted butter. Whisk these together until the mixture is smooth. This step is important for a rich, creamy texture in your cornbread. Now, slowly pour the wet mixture into the bowl of dry ingredients. Use a spatula or wooden spoon to mix gently. Focus on combining them without overmixing. It’s okay if the batter is slightly lumpy. Overmixing can make the cornbread tough, and we want it to be soft. Carefully fold in the shredded cheddar cheese and finely chopped jalapeños. If you like a bit more flavor, add some chopped green onions too. Make sure everything is mixed evenly. This adds delicious bursts of flavor in every bite. Pour the batter into your prepared baking dish. Spread it out evenly with a spatula. Place it in the preheated oven and bake for 20-25 minutes. Keep an eye on it. The top should turn golden brown and a toothpick should come out clean when inserted in the center. Once baked, take the cornbread out of the oven. Let it cool in the pan for a few minutes. After that, slice it into squares. Serve it warm and add a dollop of butter on top. For a fun touch, garnish with extra sliced jalapeños or green onions. You can also drizzle honey over each slice for added sweetness. Enjoy your flavorful cornbread! To get the best texture, mix your dry and wet ingredients separately. When you combine them, stir gently. Overmixing can make the cornbread tough. You want some lumps in the batter; they help keep it light. Bake until the top is golden brown. A toothpick should come out clean when it's ready. Adjust the spice by changing the jalapeño amount. For mild flavor, use just one jalapeño. For more heat, add two or even three! Remove the seeds for less heat. You can also try other peppers, like poblano or serrano, for different flavors. Serve cornbread warm for the best taste. Cut it into squares and add a pat of butter on top. For a colorful look, sprinkle chopped green onions or extra jalapeños. Drizzle with honey to enhance the sweetness. This adds a nice contrast to the spicy cheese. Toppings can take your cornbread to the next level. Try adding a dollop of sour cream or a sprinkle of cheese. You can also serve it with chili or soup. A side of honey butter makes it even better. Get creative and experiment with your favorites! Pro Tips Use Fresh Jalapeños: For the best flavor, opt for fresh jalapeños instead of jarred. Adjust the quantity based on your heat preference for a personalized touch. Let the Batter Rest: Allowing the cornbread batter to rest for about 10 minutes before baking can enhance the texture and flavor. Experiment with Cheese: Feel free to mix different types of cheese, like pepper jack or gouda, for a unique flavor profile that complements the jalapeños. Check for Doneness: Since ovens vary, keep an eye on the cornbread as it bakes. A toothpick inserted into the center should come out clean when it’s done. {{image_4}} You can switch out the sharp cheddar for other cheeses. Try pepper jack for a spicy kick. If you want a milder taste, use Monterey Jack. A mix of cheeses adds depth to your cornbread. For added nutrition, add vegetables to your batter. Corn kernels bring sweetness and texture. Bell peppers can add color and crunch. You can even toss in some spinach for a twist. Just chop them small so they blend well. You can make your cornbread sweeter. Add a bit more sugar or some honey. Diced fruits like blueberries or peaches are great too. For a savory twist, add herbs like thyme or rosemary. Each change will give you a new flavor. To make gluten-free cornbread, swap all-purpose flour for gluten-free flour. Look for a blend that includes xanthan gum. This will help keep the texture right. You can still use cornmeal for that classic taste. To keep your cornbread fresh, let it cool first. Once cool, wrap it in plastic wrap or foil. Store it in an airtight container at room temperature for up to three days. If you notice it getting dry, you can add a slice of bread to the container. This helps keep the cornbread moist. Freezing cornbread is simple. Slice your cornbread into squares. Wrap each piece tightly in plastic wrap. Then, place the wrapped slices in a freezer bag. Be sure to label the bag with the date. Cornbread can last up to three months in the freezer. When you’re ready to eat it, just thaw it in the fridge overnight. Reheating cornbread is easy. You can use the oven, microwave, or stovetop. For the oven, preheat to 350°F (175°C). Place the cornbread on a baking sheet and cover it with foil. Heat for about 10-15 minutes. If using the microwave, put a slice on a plate and cover it with a damp paper towel. Heat for about 20-30 seconds. For the stovetop, place the slice in a skillet over low heat. Cover with a lid and warm for 3-5 minutes. Enjoy your cornbread warm with butter or honey! Yes, you can use regular milk. Buttermilk gives a nice tang. If you use regular milk, add 1 tablespoon of vinegar or lemon juice to sour it. Let it sit for five minutes before using. To change the heat, adjust the number of jalapeños. Use one for mild spice. For more heat, add two or three. You can also remove the seeds before chopping to lower the spice level. This cornbread pairs well with chili, soups, or grilled meats. You can also serve it with honey or butter on top. Try it with a fresh salad for a great meal. Check the top for a golden brown color. Insert a toothpick into the center. If it comes out clean, the cornbread is ready. If it sticks, bake for a few more minutes. Yes, you can make cornbread ahead. Just store it in an airtight container. It stays fresh for two days at room temperature. For longer storage, freeze it for up to three months. This blog post covered the key ingredients and step-by-step instructions to make cheddar jalapeño cornbread. I shared tips for texture and spice levels, plus fun variations. You can even store and reheat your cornbread easily. With this knowledge, you can create a tasty treat for any meal. Enjoy experimenting with flavors and variations. Cornbread is simple to make and sure to please everyone.

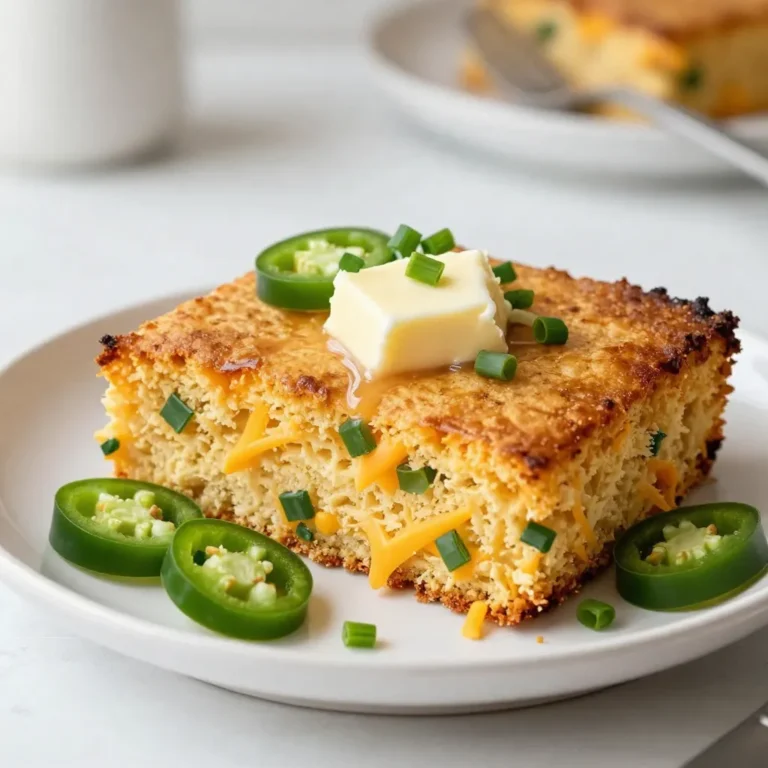
Cheddar Jalapeño Cornbread Easy and Flavorful Recipe

PREV 1 … 12 13 14 … 48 NEXT
meal plan mapper

explore

DessertsDinnerAppetizersDrinks

Our Policies

  • Cookie Policy
  • Copyright Policy
  • Disclaimer
  • GDPR Policy
  • Terms Of Use
Back to Top
  • About
  • Contact Us
  • Privacy Policy
© 2025 meal plan mapper