FREE DINNER EBOOK! Get your copy!
  • Cookie Policy
  • GDPR Policy
  • Disclaimer
  • Terms Of Use
  • Visit my other site: Fun Cookie Recipes
meal plan mapper
  • Home
  • Dinner
  • Desserts
  • Drinks
  • Appetizers
  • Contact
  • About
  • Privacy Policy
  • Home
  • Dinner
  • Desserts
  • Drinks
  • Appetizers
  • Contact
  • About
  • Privacy Policy
  • Cookie Policy
  • GDPR Policy
  • Disclaimer
  • Terms Of Use
Visit my other site: Fun Cookie Recipes

HOME / CATEGORIES /

Latest

- 1 ½ cups all-purpose flour - ½ cup granulated sugar - ½ cup brown sugar, tightly packed - 1 teaspoon baking powder - ½ teaspoon baking soda - ½ teaspoon salt - 1 teaspoon ground cinnamon - 1 large egg - ½ cup plain yogurt - ¼ cup milk, preferably whole - ½ cup unsalted butter, melted and allowed to cool slightly - 1 teaspoon pure vanilla extract - ¾ cup chopped walnuts or pecans When making coffee cake muffins, the right balance of ingredients is key. For the dry ingredients, use all-purpose flour. This creates a fluffy base. Both granulated and brown sugar add sweetness and depth. Baking powder and baking soda help the muffins rise. Salt enhances flavor, while ground cinnamon gives a warm spice. For the wet ingredients, I like to add a large egg. This helps bind everything. Plain yogurt keeps the muffins moist and tender. Whole milk adds richness. Melted unsalted butter brings flavor and a nice texture. Don’t forget pure vanilla extract for that lovely aroma. If you want some crunch, add chopped walnuts or pecans. They add great texture and flavor. Each ingredient plays a role in making these muffins moist and delicious. {{ingredient_image_2}} - Preheat oven to 350°F (175°C) - Prepare muffin tin with liners or non-stick spray First, I set my oven to 350°F. This step ensures even baking. While the oven heats, I take my muffin tin and line each cup with paper liners. If I don’t have liners, I spray each cup with non-stick spray. This helps the muffins release easily after baking. - Combine flour, sugars, baking powder, baking soda, salt, and cinnamon In a big bowl, I mix the dry ingredients. I add 1 ½ cups of all-purpose flour, ½ cup of granulated sugar, and ½ cup of brown sugar. Next, I toss in 1 teaspoon of baking powder, ½ teaspoon of baking soda, ½ teaspoon of salt, and 1 teaspoon of ground cinnamon. I whisk it all together until it’s well combined and fluffy. - Beat egg and mix with yogurt, milk, melted butter, and vanilla Now, I grab another bowl. I crack one large egg and beat it lightly. Then, I add ½ cup of plain yogurt, ¼ cup of milk, ½ cup of melted butter, and 1 teaspoon of pure vanilla extract. I stir this mixture until it’s smooth and creamy. - Fold wet ingredients into dry ingredients, avoiding overmixing - If desired, fold in chopped nuts Next, I gently pour the wet mixture into the dry ingredients. Using a spatula, I fold them together. I make sure not to overmix; a few lumps are fine. If I want some crunch, I can fold in ¾ cup of chopped walnuts or pecans at this stage. - Fill muffin cups and sprinkle with brown sugar and cinnamon - Bake for 18-20 minutes, then cool I scoop the batter into the prepared muffin cups. I fill them about ¾ full to leave room for rising. For a sweet touch, I sprinkle a little brown sugar and cinnamon on top. I then place the muffin tin in the oven and bake for 18-20 minutes. When they are golden brown, I check with a toothpick. If it comes out clean, they are done. I let them cool in the tin for about 5 minutes before moving them to a wire rack. To get the best texture in your muffins, avoid overmixing the batter. When you mix too much, you make the muffins dense. A few lumps are okay; they mean a light muffin. Use room temperature ingredients like eggs and milk. This helps the batter mix better and rise nicely. Add yogurt and milk for a rich flavor. Yogurt keeps the muffins moist and adds a slight tang. Always cool your melted butter slightly before mixing. Hot butter can cook the egg, which isn’t what we want. Dust your muffins lightly with powdered sugar for a sweet look. Pair them with a dollop of whipped cream for extra delight. Enjoy these treats warm with your favorite coffee or tea. They make a perfect snack or breakfast option! Pro Tips Use Room Temperature Ingredients: Ensure your egg and yogurt are at room temperature for better emulsification, which will result in a lighter muffin texture. Don’t Overmix: Stir until just combined to keep the muffins tender and fluffy. A few lumps are perfectly fine! Customize Your Nuts: Feel free to swap out walnuts or pecans for other nuts or even chocolate chips for a different flavor profile. Store Properly: Keep the muffins in an airtight container at room temperature for up to 3 days, or freeze for longer storage to maintain freshness. {{image_4}} You can easily change the flavor of your coffee cake muffins. Adding chocolate chips gives a sweet twist. They melt and create gooey pockets of joy. You can also use dried fruits like raisins or cranberries. These add a nice chew and fruity flavor. Just mix them in when you combine the wet and dry ingredients. Nuts can enhance the texture and taste of your muffins. While walnuts or pecans are popular, you can try almonds or hazelnuts too. Chopped nuts bring a lovely crunch. Just fold them in gently to keep the muffins light and fluffy. If you need a gluten-free option, it’s easy to make a swap. Use gluten-free flour instead of all-purpose flour. Make sure to check if it has a binding agent. This helps maintain the muffin's structure. Your muffins will still be moist and tasty. Enjoy your delicious muffins without the gluten! To keep your coffee cake muffins fresh, store them in an airtight container. This keeps them moist and tasty for longer. Place a piece of parchment paper between layers if you stack them. This prevents them from sticking together. If you want to save some muffins for later, freezing is a great choice. Let the muffins cool completely before freezing. Wrap each muffin tightly in plastic wrap. Then, place them in a freezer-safe bag. They can last up to three months in the freezer. When you want to eat one, just thaw it in the fridge overnight. To reheat your muffins and keep them moist, use the oven. Preheat it to 350°F (175°C). Place the muffins on a baking sheet and heat for about 10 minutes. You can also use a microwave. Heat a muffin for about 15-20 seconds, but cover it with a damp paper towel to keep it from drying out. Enjoy your warm muffins! Yes, you can use whole wheat flour. It adds a nutty flavor and more fiber. Just keep in mind that the muffins may be denser. You might need to adjust liquid for the best texture. Coffee cake muffins last for about 3-5 days at room temperature. Store them in an airtight container to keep them fresh. If you want them to last longer, freeze them. Yes, you can make the batter ahead of time. Store it in the fridge for up to 24 hours. Just remember to stir it lightly before baking. You can use sour cream as a substitute for yogurt. But, you can also use buttermilk or a non-dairy yogurt if you prefer. Each option offers a unique flavor. Yes, you can replace the egg. Use ¼ cup of unsweetened applesauce or a flax egg (1 tablespoon ground flaxseed mixed with 2.5 tablespoons water). These options will keep your muffins moist. In this blog post, we explored how to make delicious muffins from basic ingredients. We started with the key dry and wet components, then walked through each step from mixing to baking. I shared tips for texture and flavor, along with variations to suit your taste. Storing and reheating methods help keep your muffins fresh. Remember, with a few simple tweaks, you can make this recipe your own and enjoy the results! Now, it's time to bake and enjoy your creation!

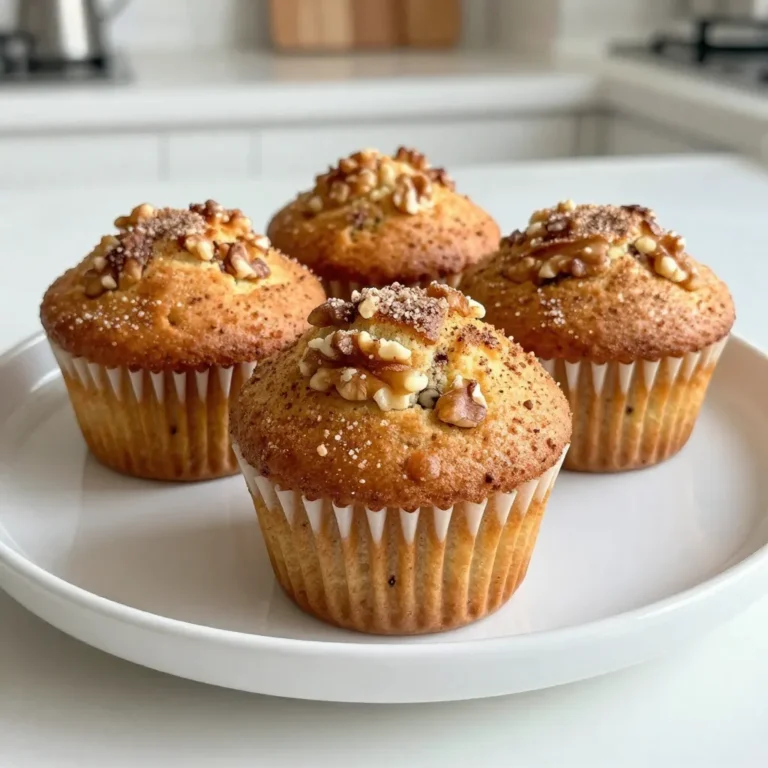
Coffee Cake Muffins Moist and Flavorful Delight

To make white chocolate cranberry blondies, you need some key ingredients. Each one plays a big role in flavor and texture. Here’s what you will need: - 1 cup (2 sticks) unsalted butter, melted - 1 1/2 cups packed light brown sugar - 2 large eggs, at room temperature - 2 teaspoons pure vanilla extract - 2 cups all-purpose flour, sifted - 1/2 teaspoon baking powder - 1/4 teaspoon sea salt - 1 cup white chocolate chips - 1 cup dried cranberries - Zest of 1 orange (optional, for a citrusy brightness) Using unsalted butter gives you control over salt levels. Light brown sugar adds a nice caramel flavor. The eggs help bind everything. Pure vanilla extract brings warmth. All-purpose flour forms the base, while baking powder helps it rise. Sea salt balances sweetness. White chocolate chips melt into creamy pockets, and dried cranberries add texture and tartness. Orange zest brightens the dish, but it's optional. Gather these ingredients to start your baking adventure! {{ingredient_image_2}} To start, preheat your oven to 350°F (175°C). Next, prepare a 9x13 inch baking pan. You can grease it lightly with butter or line it with parchment paper. If you use parchment, leave some overhang. This will help you lift the blondies out easily. In a large mixing bowl, combine 1 cup of melted butter and 1 1/2 cups of packed light brown sugar. Stir until the mixture is smooth and creamy, with no lumps left. Next, add 2 large eggs, one at a time. Mix well after each egg to blend them in completely. Then, stir in 2 teaspoons of pure vanilla extract until the mixture is uniform. In a separate bowl, whisk together 2 cups of sifted all-purpose flour, 1/2 teaspoon of baking powder, and 1/4 teaspoon of sea salt. This helps ensure that the dry ingredients mix well. Gradually add the dry mix to the wet ingredients. Fold gently with a spatula until just combined. Be careful not to overmix. This keeps the blondies tender. Now it's time to add some fun! Gently fold in 1 cup of white chocolate chips and 1 cup of dried cranberries. If you want a citrusy kick, add the zest of 1 orange. Make sure everything is evenly distributed in the batter. Pour the batter into your prepared baking pan. Use a spatula to spread the batter evenly across the pan. Bake in the preheated oven for 25-30 minutes. The edges should turn a golden brown. To check doneness, insert a toothpick into the center. It should come out mostly clean with a few moist crumbs. Once baked, let the blondies cool in the pan for at least 15 minutes. After that, carefully lift them out using the parchment overhang. Slice into even squares for serving. For a nice touch, serve them warm or at room temperature. Dust lightly with powdered sugar for elegance, or pair with vanilla ice cream for extra indulgence. To make perfect blondies, avoid overmixing the batter. When you combine the dry and wet ingredients, mix just until you see no flour. This keeps your blondies soft and chewy. How do you know when they’re done? Look for golden edges and a slightly soft center. Insert a toothpick into the middle. If it comes out with a few moist crumbs, they’re ready! Want to boost the flavor? Try adding nuts like walnuts or pecans for crunch. You can also mix in dark chocolate chips for a richer taste. When using fresh or frozen cranberries, be sure to chop them first. This helps spread the tart flavor evenly. If using frozen cranberries, toss them in flour first. This prevents them from sinking in the batter. Experiment with these tips to create your own twist on these delicious blondies! Pro Tips Use Room Temperature Eggs: Room temperature eggs mix more easily into the batter and help create a smoother texture for your blondies. Don’t Overmix: Gently fold the dry ingredients into the wet mixture to keep the blondies tender. Overmixing can lead to a dense texture. Check for Doneness: Every oven is different. Start checking your blondies at 25 minutes. They’re done when the edges turn golden and a toothpick comes out with a few moist crumbs. Enhance Flavor with Zest: Adding orange zest brightens the flavor profile of these blondies, giving them a delightful citrusy note. Don’t skip it! {{image_4}} You can switch up the flavors in your blondies easily. Here are some fun ideas: - Nuts or chocolate variations: Try adding chopped nuts like walnuts or pecans. They add a nice crunch. You can also use dark chocolate or milk chocolate chips instead of white chocolate. This change gives a rich taste. - Seasonal fruit additions: Fresh fruit like raspberries or cherries can shine in these blondies. They add a tartness that balances the sweetness. You can even use dried fruits like apricots for a chewy texture. If you have special dietary needs, don't worry! You can still enjoy blondies. - Gluten-free substitutes: Use a gluten-free flour blend instead of all-purpose flour. This will keep your blondies soft and tasty. Just check the blend for good results. - Vegan alternatives: To make vegan blondies, swap eggs for flax eggs. Mix one tablespoon of ground flaxseed with three tablespoons of water. Let it sit for a few minutes until it thickens. Use a plant-based butter for a creamy texture. These changes keep the blondies delicious and friendly for all diets. You can store your blondies at room temperature. Just place them in an airtight container. They will stay fresh for about 3 days. If you live in a warm area, consider refrigerating them. This keeps them from drying out. Wrap them tightly in plastic wrap or foil for best results. Freezing blondies is a great way to save some for later. Cut them into squares before freezing. This makes it easy to grab a piece whenever you want. Place the squares in a single layer on a baking sheet. Freeze them for about 1-2 hours. Once frozen, transfer them to a freezer bag. Remove as much air as you can to avoid freezer burn. They’ll last up to 3 months in the freezer. When you want to enjoy a blondie, take it out of the freezer. Place it in the fridge overnight to thaw. If you're in a hurry, you can leave it at room temperature for a few hours. Enjoy your treat fresh! Yes, you can use regular chocolate chips. Dark or milk chocolate chips work well too. Just remember, this will change the flavor. White chocolate adds a creamy touch that contrasts with cranberries. If you prefer less sweetness, dark chocolate is a good choice. To check if blondies are underbaked, look at the edges. They should be golden brown. Insert a toothpick in the center. It should come out with a few moist crumbs, not wet batter. If it’s wet, they need more time. Watch closely after 25 minutes, as ovens can vary. These blondies pair well with vanilla ice cream. A dollop of whipped cream adds a nice touch. You can also serve them with fresh berries. For a fun twist, drizzle some caramel sauce on top. Each choice enhances the treat's sweet and tart flavors. If stored properly, blondies last about 4-5 days. Keep them in an airtight container at room temperature. For longer storage, you can refrigerate them for up to a week. If you freeze them, they can last up to three months. Just remember to wrap them well to avoid freezer burn. You learned how to bake delicious white chocolate cranberry blondies. We covered important ingredients and detailed steps for mixing and baking. I shared tips to help you achieve the perfect texture and flavor. You also discovered ways to modify the recipe for different diets. Good storage practices keep your blondies fresh longer. Enjoy making these treats and share them with friends or family. Happy baking!

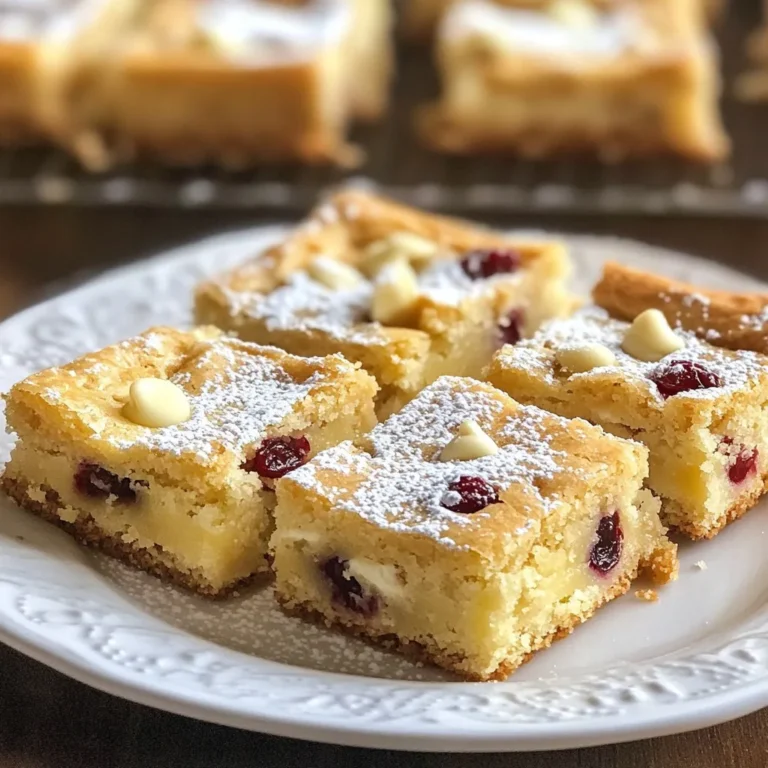
White Chocolate Cranberry Blondies Delightful Treat

- 2 cups cottage cheese (low-fat or regular) - 1/4 cup unsweetened cocoa powder - 1/4 cup honey or maple syrup (adjust for sweetness) - 1/2 teaspoon vanilla extract - 1/2 cup milk (dairy or plant-based) - A pinch of salt These ingredients are key for a rich, creamy ice cream. Cottage cheese gives protein and a smooth texture. Cocoa powder adds that deep chocolate flavor you crave. Sweeteners like honey or maple syrup bring balance to the chocolate. Vanilla enhances the taste, while milk gives a creamy base. The pinch of salt rounds out the flavors perfectly. - Dark chocolate chips - Chopped nuts - Fresh berries Toppings take this dessert to the next level. Dark chocolate chips add richness and crunch. Nuts give a tasty and satisfying texture. Fresh berries add a burst of color and flavor. You can mix and match, so get creative! - Agave syrup - Stevia - Coconut sugar If you want to change the sweetness, try different options. Agave syrup is a great choice for a lower glycemic index. Stevia is a zero-calorie option if you want to cut calories. Coconut sugar offers a more caramel-like taste. Adjust the amount based on your sweetness level. Always taste to find your perfect balance! To start, take 2 cups of cottage cheese and put it in a blender. You can use low-fat or regular cottage cheese based on your taste. Next, add 1/4 cup of unsweetened cocoa powder for that rich chocolate flavor. Then, pour in 1/4 cup of honey or maple syrup. Adjust this amount if you like your ice cream sweeter. Now, add 1/2 teaspoon of vanilla extract. This will enhance the chocolate taste. Pour in 1/2 cup of milk. You can choose dairy or a plant-based milk. Finally, sprinkle in a pinch of salt. This helps to bring out all the flavors. Blend everything on high until it's smooth and creamy. Don't forget to stop and scrape down the sides for an even mix. Once blended, taste the mixture. If you want a stronger chocolate taste, stir in an extra tablespoon of cocoa powder. After you’re happy with the flavor, transfer the mixture to an airtight container. Make sure it is sealed tightly to keep the ice cream fresh. Place the container in the freezer for about 2-3 hours. This first freeze helps to set the ice cream. After the initial freeze, take the container out. Use a fork to stir the mixture. This step breaks up any ice crystals, making your ice cream creamier. Then, return it to the freezer for another 2-3 hours, or until it reaches your desired consistency. Before you serve, let the ice cream sit at room temperature for about 5 minutes. This softens it slightly, making it easier to scoop. For serving, use colorful bowls to make it look great. You can also add toppings like dark chocolate chips, chopped nuts, or fresh berries. These add flavor and texture, making your dessert more fun! To make your ice cream even better, try these tips. First, use good-quality cocoa powder. This choice boosts the chocolate taste. You can add a bit more vanilla extract for a richer flavor. If you want a creamier texture, blend longer. Make sure everything is smooth before freezing. Stir the mixture after the first freeze. This breaks ice crystals and improves texture. Avoid using too much sweetener. It can make the ice cream too sweet and hard. Also, don’t skip the salt. It helps balance the flavors. If you forget to stir while it freezes, the ice cream can become icy. Lastly, don’t rush the freezing time. Let it sit long enough for the best results. Serve your ice cream in colorful bowls. This adds fun to your dessert. You can top it with dark chocolate chips for crunch. Fresh berries add color and taste. Chopped nuts give a nice texture. A sprig of mint can make it look fancy. Enjoy your tasty treat! {{image_4}} To make this ice cream dairy-free, swap the cottage cheese for silken tofu. Silken tofu blends well and gives a creamy texture. Use almond milk or coconut milk instead of regular milk. For sweetener, maple syrup works great. You can enjoy a tasty vegan treat that packs protein while being kind to your diet. Want a richer chocolate flavor? Add an extra tablespoon of cocoa powder when blending. You can also mix in chocolate protein powder for added nutrition. For a fun twist, try adding a touch of espresso powder. It enhances the chocolate and gives a unique taste. Fruits and nut butters can elevate your ice cream. Add ripe bananas or frozen cherries during blending for natural sweetness. A scoop of almond or peanut butter adds creaminess and flavor. You can even mix in some chopped nuts for crunch. These additions make the ice cream fun and full of flavor. Store any leftover ice cream in an airtight container. Make sure it is sealed well. This keeps out air and prevents freezer burn. You can also cover the top with plastic wrap for extra protection. If you follow these steps, your ice cream will stay fresh longer. When freezing the ice cream, wait until it is fully set. This usually takes about 4-6 hours. If you want a creamier texture, stir it every few hours. To thaw, take it out of the freezer and let it sit for about 5 minutes. This makes it easier to scoop. Avoid using a microwave to thaw, as it can change the texture. Your high-protein chocolate cottage cheese ice cream can last for about 1 month in the freezer. However, it is best to eat it within 2 weeks for the best flavor and texture. Over time, ice crystals may form, affecting the creaminess. Always check for any off smells or changes in color before serving. Yes, you can use flavored cottage cheese. Flavored options can add extra taste. However, be careful with added sugars or strong flavors. Choose flavors that pair well with chocolate, like vanilla or even strawberry. Always taste the mix to check if the flavors fit your liking. To cut calories, swap honey or maple syrup for a sugar-free sweetener. You can also use low-fat cottage cheese instead of regular. If you prefer, reduce the amount of cocoa powder. This change keeps the chocolate taste but lowers calories. Cottage cheese is rich in protein, making this ice cream a filling treat. It has calcium, which is good for bones. Using it in ice cream means you get a sweet dessert that helps you feel full longer. It also has fewer carbs than regular ice cream. Yes, you can use an ice cream maker! After blending the ingredients, pour the mix into your machine. Follow the maker’s instructions for freezing time. This method may give you a creamier texture, as it churns the mix as it freezes. Enjoy your homemade ice cream! This blog post covered how to make high-protein chocolate cottage cheese ice cream. We talked about main ingredients, optional toppings, and variations for sweeteners. I shared step-by-step instructions to blend, freeze, and achieve the perfect texture. You also learned tips to enhance flavor and avoid common mistakes. Exploring dairy-free and vegan options broadened your choices. Lastly, we discussed storing the ice cream for the best taste and freshness. Now, you can enjoy a delicious treat without sacrificing health. Dive in and make this ice cream your own!

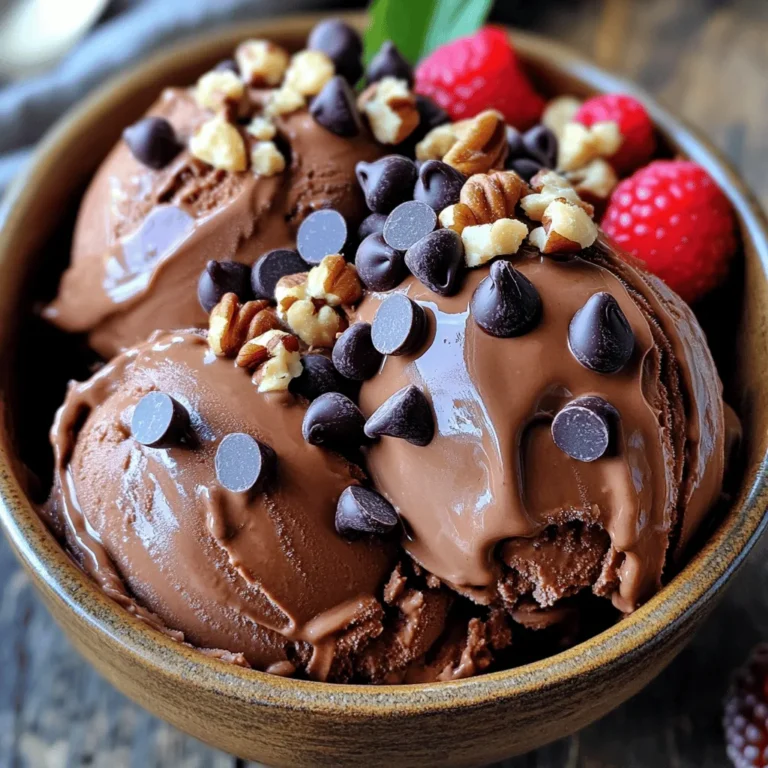
High-Protein Chocolate Cottage Cheese Ice Cream Recipe

To make the Pumpkin Spice Cream Cheese Roll Cake, gather these main ingredients: - 1 cup all-purpose flour - 1 teaspoon baking powder - 1 teaspoon baking soda - 1 teaspoon ground cinnamon - 1/2 teaspoon ground nutmeg - 1/2 teaspoon ground ginger - 1/4 teaspoon salt - 3 large eggs - 1 cup granulated sugar - 2/3 cup canned pumpkin puree - 1 teaspoon vanilla extract - Powdered sugar for dusting These ingredients create a moist and flavorful cake base. The spices provide warmth and depth, making it perfect for fall. Now, let's prepare the cream cheese filling. You will need: - 8 oz cream cheese, softened - 1/4 cup unsalted butter, softened - 1 cup powdered sugar - 1 teaspoon vanilla extract - 1 tablespoon milk (add more as needed) This filling adds a rich and creamy layer to the cake. It balances the spices with its sweet, smooth texture. For optional toppings, consider adding: - Extra powdered sugar for dusting - A sprinkle of cinnamon - A dollop of whipped cream These toppings enhance the look and taste. They add a touch of elegance and flavor to each slice. Enjoy making your cake! First, set your oven to 375°F (190°C). This step is key for a perfect bake. Next, grab a 15x10 inch jelly roll pan. Line it with parchment paper and spray it lightly with cooking spray. This will help the cake come out easily later. In a medium bowl, whisk together the dry ingredients. You will need: - 1 cup all-purpose flour - 1 teaspoon baking powder - 1 teaspoon baking soda - 1 teaspoon ground cinnamon - 1/2 teaspoon ground nutmeg - 1/2 teaspoon ground ginger - 1/4 teaspoon salt Mix them well until they are fully combined. Once mixed, set this bowl aside for later. In a large bowl, beat 3 large eggs and 1 cup of granulated sugar with an electric mixer. Mix on medium speed for about 3 to 5 minutes. The mixture should be light and fluffy. Now, add 2/3 cup of canned pumpkin puree and 1 teaspoon of vanilla extract. Mix until everything is smooth. Slowly fold the dry mixture into the pumpkin mixture using a spatula. Be careful not to overmix. Pour this batter into the prepared pan. Spread it evenly with your spatula. Place the pan in the oven and bake for 15 to 20 minutes. The cake should spring back when lightly touched and look golden around the edges. Once baked, take the cake out and flip it onto a clean kitchen towel dusted with powdered sugar. Carefully peel off the parchment paper. While the cake is still warm, start rolling it up in the towel from one of the short ends. This helps the cake keep its shape. Let it cool in the towel for about an hour. In a mixing bowl, beat 8 oz of softened cream cheese and 1/4 cup of softened unsalted butter until smooth. Gradually add in 1 cup of powdered sugar, mixing well. Then, add 1 teaspoon of vanilla extract and 1 tablespoon of milk. Keep beating until you reach a creamy filling. If the filling is too thick, add more milk as needed. After the cake has cooled, gently unroll it from the towel. Spread the cream cheese filling evenly on the cake, leaving a small space around the edges. Finally, re-roll the cake without the towel and place it seam-side down on a serving platter. Dust the top with powdered sugar before slicing. Enjoy each bite of this delightful treat! Rolling the cake correctly is key to a great pumpkin spice cream cheese roll. Use a clean kitchen towel dusted with powdered sugar. This helps prevent sticking. When the cake comes out of the oven, flip it onto the towel right away. Start rolling from one short end while the cake is still warm. This keeps the cake shape. Let it cool in the towel for about an hour. To avoid cracks, don’t skip the cooling step. Rolling the warm cake helps it stay flexible. If your cake cracks, don’t worry. You can hide cracks with the cream cheese filling. Just spread it well across the surface. A thicker layer can cover small cracks easily. Presentation makes your cake shine! Slice the roll into neat pieces. Serve on pretty dessert plates. Dust the top with more powdered sugar for a sweet touch. A sprinkle of cinnamon or a dollop of whipped cream adds color and flavor. You can also add a few pecans or walnuts for crunch. These small details make your cake look and taste amazing! {{image_4}} You can make a gluten-free version of this cake. Simply swap the all-purpose flour with a gluten-free blend. Make sure the blend has xanthan gum for the best texture. This change keeps the cake soft and moist. While the cream cheese filling is amazing, you can try other flavors. For a chocolate twist, use cocoa powder in the filling. You can also mix in crushed nuts or dried fruit. For a fruity flavor, add some puree or zest from citrus fruits. Each option gives the cake a unique taste. Toppings can make your cake even more fun! Try adding a drizzle of caramel or chocolate sauce. You can also top it with fresh whipped cream. For a fall touch, sprinkle chopped pecans or walnuts. A dash of cinnamon on top adds extra flavor and looks great, too! To store leftover cake, wrap it tightly in plastic wrap. Make sure it’s sealed well to keep air out. You can also use an airtight container if you prefer. This helps keep the cake moist and fresh. Store it in the fridge for best results. You can freeze this cake for later. First, let the cake cool completely. Then, wrap it in plastic wrap and foil to prevent freezer burn. Place it in a freezer-safe bag or container. This way, it stays fresh for up to three months. When you’re ready to eat it, thaw it in the fridge overnight. The cake lasts about 3 to 5 days in the fridge. After that, it may start to dry out. If you freeze it, it can last for up to three months. Always check for any signs of spoilage before eating. Enjoy your pumpkin spice cream cheese roll cake at its best! Yes, you can use fresh pumpkin. Start by carving and peeling a pumpkin. Cut it into chunks and steam or roast until soft. Then mash the pumpkin until smooth. Use this fresh puree in the same amount as canned pumpkin. It may add a bit more moisture, so watch the batter's consistency. Fresh pumpkin has a lively flavor that can enhance your cake. If you want a different filling, you can use mascarpone cheese. It has a rich, creamy texture. You can also use Greek yogurt for a lighter option. Just make sure to drain any excess liquid. Other choices include silken tofu for a dairy-free filling or a nut-based cream cheese. Adjust the sugar to balance the flavors. If your cake cracks, don’t worry! You can still fix it. First, try to roll it gently. Use a clean towel to help. If it cracks, use cream cheese filling to patch it up. Spread a little over the crack and roll it back. This way, the filling hides the crack. Remember, small cracks can add character to your dessert! This blog post covered all you need for a delicious Pumpkin Spice Cream Cheese Roll Cake. We explored main ingredients, step-by-step instructions, tips for success, creative variations, and storage advice. Remember, baking is fun and simple with the right guidance. Apply these tips, and enjoy your tasty treat with friends and family. Don’t hesitate to experiment with flavors and toppings. Happy baking!

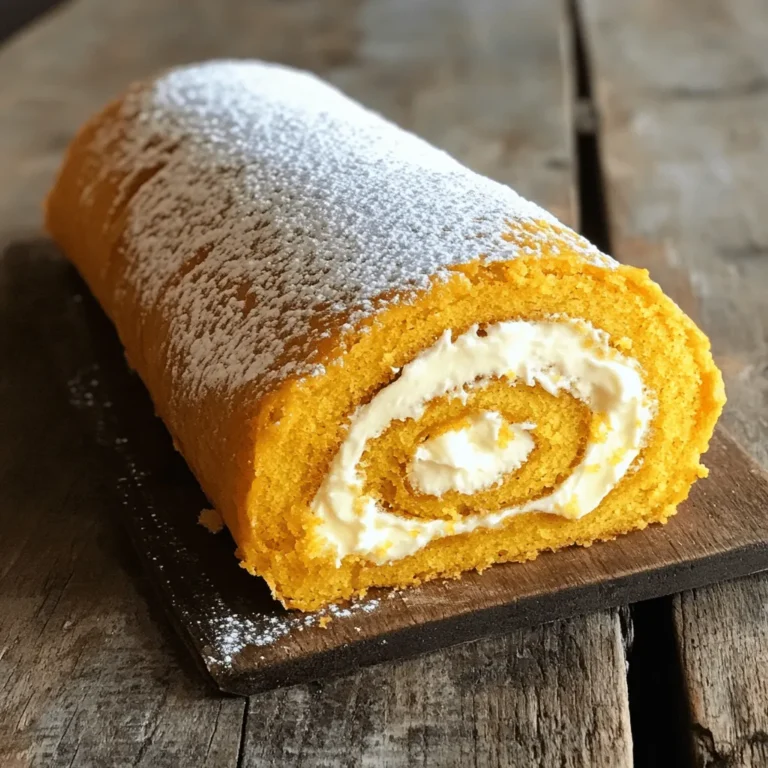
Pumpkin Spice Cream Cheese Roll Cake Delightful Recipe

To make this cozy Maple Brown Sugar Oatmeal Bake, gather these simple items: - 2 cups rolled oats - 1/2 cup packed brown sugar - 1 teaspoon baking powder - 1/2 teaspoon salt - 1 teaspoon ground cinnamon - 2 cups almond milk (or regular milk) - 1/4 cup pure maple syrup - 1 large egg - 1 teaspoon vanilla extract - 1 medium ripe banana, mashed - 1/2 cup chopped nuts (like walnuts or pecans) - 1/2 cup fresh or dried fruit (such as blueberries, raisins, or sliced apples) You can change a few ingredients to suit your taste or needs: - Milk: Use oat milk or coconut milk instead of almond milk. - Egg: Replace the egg with 1/4 cup of applesauce for a vegan option. - Sweetener: Try honey or agave syrup instead of maple syrup. - Fruits: Use any seasonal fruit you like, such as strawberries or peaches. To make your oatmeal bake even tastier, consider these toppings: - Drizzle with extra maple syrup for added sweetness. - Sprinkle ground cinnamon on top for added flavor. - Add slices of fresh banana or a handful of berries for a pop of color. - Top with a dollop of yogurt for creaminess and contrast. These simple choices can elevate your dish and make it even more delightful! To start, gather your ingredients. You will need: - 2 cups rolled oats - 1/2 cup packed brown sugar - 1 teaspoon baking powder - 1/2 teaspoon salt - 1 teaspoon ground cinnamon - 2 cups almond milk (or regular milk) - 1/4 cup pure maple syrup - 1 large egg - 1 teaspoon vanilla extract - 1 medium ripe banana, mashed - 1/2 cup chopped nuts (like walnuts or pecans) - 1/2 cup fresh or dried fruit (blueberries, raisins, or sliced apples) First, preheat your oven to 350°F (175°C). Then, prepare a 9x9-inch baking dish. Lightly grease it with butter or cooking spray. In a large bowl, mix the rolled oats, brown sugar, baking powder, salt, and cinnamon. Make sure everything blends well. In another bowl, whisk the almond milk, maple syrup, egg, vanilla, and mashed banana until smooth. Next, pour the wet mix into the dry mix. Stir gently until combined. Be careful not to overmix. Then, fold in your chopped nuts and fruit. Now, transfer the mixture into your prepared baking dish. Use a spatula to spread it evenly. For extra crunch, sprinkle a bit of brown sugar and nuts on top. Place the dish in your preheated oven. Bake for about 30 to 35 minutes. It’s done when the top looks golden brown. You can check by inserting a toothpick in the center; it should come out clean. After baking, let the dish cool for a few minutes. This makes it easier to cut. Slice the oatmeal bake into squares. Serve it warm. Drizzle some extra maple syrup on top. You can also add a sprinkle of cinnamon or garnish with banana slices and berries for a lovely touch. Enjoy your delicious Maple Brown Sugar Oatmeal Bake! To get that perfect texture in your Maple Brown Sugar Oatmeal Bake, follow these tips: - Use rolled oats instead of instant oats. Rolled oats hold their shape better. - Mix dry and wet ingredients separately before combining them. This helps with an even bake. - Don’t overmix the batter. Stir gently until just combined to keep the bake fluffy. Here are some common mistakes that can affect your bake: - Skipping the baking powder. This ingredient adds lift and helps the bake rise. - Not greasing your baking dish. A greased dish prevents sticking and makes serving easier. - Adding too many fruits or nuts. Too many can make the bake dense and soggy. To elevate the flavor of your oatmeal bake, try these tips: - Use fresh spices. Ground cinnamon loses flavor over time, so fresh is best. - Add a pinch of salt. It enhances sweetness and rounds out the flavors. - Drizzle extra maple syrup on top before serving. It adds a delicious touch of sweetness. {{image_4}} You can easily change the taste of your Maple Brown Sugar Oatmeal Bake. Seasonal fruits add fresh flavors. In spring, try strawberries or rhubarb. In summer, mix in peaches or cherries. In fall, apples and pears work great. In winter, use dried fruits like cranberries or figs. Nuts add crunch and taste. Walnuts and pecans are popular, but almonds or hazelnuts can also shine. For spices, cinnamon is nice, but nutmeg or ginger can give a warm touch. Feel free to mix and match! If you need a gluten-free version, swap rolled oats for certified gluten-free oats. This keeps the dish safe for those with gluten allergies. You can also choose dairy-free milk, like almond or oat milk. This way, the oatmeal bake stays creamy and rich without dairy. For a vegan option, replace the egg with a flax egg. Just mix one tablespoon of flaxseed meal with three tablespoons of water. Let it sit for five minutes to thicken. This keeps the bake moist and fluffy. Serve your oatmeal bake warm for the best taste. Drizzle extra maple syrup on top for a sweet touch. A sprinkle of cinnamon can add a nice look and flavor. Adding fresh fruits like bananas or berries can make the dish even more colorful. Pair this dish with yogurt for creaminess. It also goes well with a cup of coffee or tea. Enjoy this bake not only as breakfast but also as a snack or dessert! To store leftovers, let your oatmeal bake cool. Cut it into squares and place them in an airtight container. Store the container in the fridge. This keeps the bake fresh for up to five days. You can also cover it tightly with plastic wrap if you prefer. You can freeze Maple Brown Sugar Oatmeal Bake for later. First, let it cool completely. Then, wrap each square in plastic wrap. Place the wrapped squares in a freezer-safe bag or container. Label the bag with the date. It will stay fresh for about three months in the freezer. To reheat the oatmeal bake, take out the amount you want. If it's frozen, let it thaw in the fridge overnight. Microwave it for about one to two minutes until warm. You can also reheat it in the oven at 350°F (175°C) for 10-15 minutes. Drizzle with more maple syrup before serving for extra sweetness. Yes, you can make this dish ahead. Prepare it the night before and store it in the fridge. Just mix the wet and dry ingredients, then pour them into your baking dish. This way, you save time in the morning. When ready, bake it straight from the fridge. It may need a few extra minutes in the oven. To serve more people, you can double the recipe. Use a larger baking dish, like a 9x13-inch pan. Increase all the ingredients proportionally. Make sure to watch the baking time. It might take longer to bake. Check for doneness by using a toothpick in the center. It should come out clean. If you need an egg substitute, you have options. Use 1/4 cup unsweetened applesauce for each egg. You can also use 1/2 ripe banana, mashed. Another choice is a flax egg. To make it, mix 1 tablespoon of ground flaxseed with 2.5 tablespoons of water. Let it sit for a few minutes until it thickens. These substitutes work well and keep the bake moist. In this article, we explored the key ingredients, preparation steps, and storage tips for an oatmeal bake. You learned about alternative ingredients and toppings to make it your own. I shared tricks for perfect texture and flavor enhancements. Don’t forget to try different variations, like seasonal fruits and dietary options. With these tips and our FAQs, you’re set to create a delicious bake at home. Enjoy experimenting with recipes and making them your own!

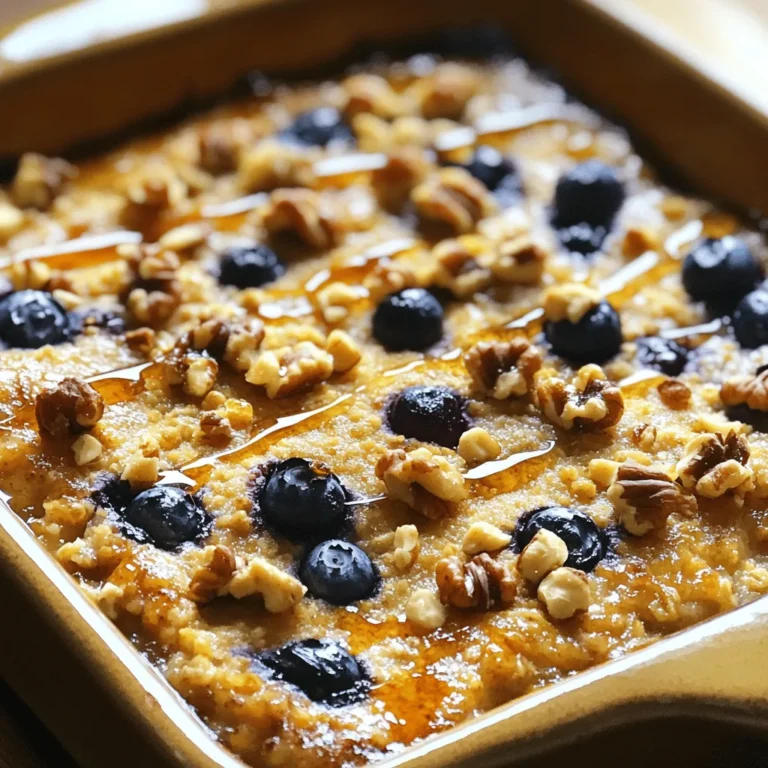
Maple Brown Sugar Oatmeal Bake Tasty and Simple Dish

For this dish, you need a few key items to make it shine: - 1 pound large shrimp, peeled and deveined - 1 tablespoon cornstarch - 2 tablespoons sesame oil, divided - 1 red bell pepper, diced - 1 green bell pepper, diced - 1/2 cup unsalted roasted peanuts - 3 green onions, sliced thinly - 3 cloves garlic, minced - 1-inch piece fresh ginger, minced - 2 tablespoons soy sauce - 1 tablespoon rice vinegar - 1 tablespoon hoisin sauce - 1 tablespoon chili paste - Salt and freshly ground black pepper to taste - Cooked white rice or quinoa for serving These ingredients work together to create a crunchy, flavorful dish. The shrimp provide protein, while the peppers add color and crunch. Peanuts give a nice texture and taste. You can make this dish your own. Consider adding: - Broccoli florets for extra greens - Sliced carrots for sweetness - Snap peas for a fresh crunch - Water chestnuts for a unique texture These options can help you tailor the dish to your taste. Feel free to mix and match! If you're missing an ingredient, don't worry. Here are some swaps: - Use chicken or tofu instead of shrimp for a different protein. - Swap sesame oil for vegetable oil if needed. - Tamari can replace soy sauce for a gluten-free option. - Use apple cider vinegar instead of rice vinegar for a tangy twist. These substitutes help keep the dish accessible. You can still enjoy a great meal even if you don’t have every item on hand. Start by getting your shrimp ready. In a medium bowl, add 1 pound of large shrimp. Sprinkle 1 tablespoon of cornstarch over the shrimp. Toss the shrimp gently until they are lightly coated. This will help them get a nice, crispy texture when you cook them. Next, heat a large skillet or wok on medium-high heat. Pour in 1 tablespoon of sesame oil. Once the oil is hot, add the shrimp in a single layer. Cook for about 2-3 minutes, stirring often. You want them to turn pink and opaque. After that, take the shrimp out and set them aside on a plate. In the same skillet, add the remaining tablespoon of sesame oil. Toss in 3 cloves of minced garlic and 1 inch of minced ginger. Sauté for about 30 seconds until you smell the aroma. Be careful not to burn them. Add 1 diced red bell pepper and 1 diced green bell pepper next. Stir-fry these for about 3-4 minutes until they are tender, but still have a bit of crunch. Now, mix in the white parts of 3 sliced green onions. Pour in 2 tablespoons of soy sauce, 1 tablespoon of rice vinegar, 1 tablespoon of hoisin sauce, and 1 tablespoon of chili paste. Let this cook for another minute, stirring to mix all the flavors well. Finally, return the cooked shrimp to the skillet. Add ½ cup of unsalted roasted peanuts as well. Gently toss everything together until the shrimp and peanuts are coated with the sauce and heated through. Season with salt and freshly ground black pepper to taste. To serve, spoon the Kung Pao Shrimp over a bed of cooked white rice or quinoa. For a nice touch, garnish with the green parts of the green onions. Enjoy your colorful and tasty dish! To get the best texture for your Kung Pao shrimp, start with cornstarch. Coat the shrimp lightly with it before cooking. This helps make them crispy. When you cook, use high heat and don’t overcrowd the pan. This keeps the shrimp from steaming. Cook them just until they turn pink and opaque. This usually takes about 2-3 minutes. Spice level is key to making this dish your own. The chili paste in the recipe gives it a nice kick. If you like it hotter, add more chili paste. If you prefer less heat, start with half a tablespoon. Taste as you go. You can always add more, but it’s hard to take spice away once it’s in the dish. Presentation makes a big difference in how the dish feels. Serve the Kung Pao shrimp in a nice bowl. Sprinkle extra roasted peanuts on top for crunch. Use the green parts of the green onions for a splash of color. Adding a lime wedge on the side is great too. It gives guests a chance to add a zesty touch before they dig in! {{image_4}} You can easily make Kung Pao Shrimp vegan. Simply swap the shrimp for tofu or tempeh. Use extra-firm tofu for the best texture. Cut it into cubes and follow the same steps as the shrimp. Coat it in cornstarch for a crispy finish. It will soak up the sauce, giving you great flavor. Feel free to add more veggies to your dish. Zucchini, carrots, and snap peas work well. Chop them into small pieces and stir-fry them with the bell peppers. This adds color and nutrients. You could also try adding broccoli or mushrooms. These variations will keep your dish fresh and exciting. If you want to switch up the protein, chicken or beef are great choices. Cut them into small pieces and cook them like the shrimp. You can also use seitan for a plant-based option that mimics meat. Each protein brings its own flavor and texture. Experiment with what you like best! To keep your Kung Pao Shrimp fresh, place it in an airtight container. Make sure it cools down before sealing. Store it in the fridge for up to three days. This method helps keep the shrimp and veggies crisp and tasty. If you want to save it longer, consider freezing. When you're ready to enjoy the leftovers, use the stovetop for best results. Heat a skillet over medium heat. Add a splash of water or a bit of oil to keep it moist. Stir the Kung Pao Shrimp for about five minutes. This will warm it through and help retain its flavor and texture. To freeze Kung Pao Shrimp, place it in a freezer-safe container or bag. Remove as much air as possible before sealing. It will last for up to three months in the freezer. When you're ready to eat, take it out and thaw it in the fridge overnight. Reheat as mentioned above for a delicious meal. You can keep Kung Pao Shrimp in the fridge for up to three days. Store it in an airtight container to keep it fresh. The shrimp may lose some crunch, but the flavors will stay good. Just reheat it on the stove or in the microwave before serving. Yes, you can make Kung Pao Shrimp without peanuts. If you have nut allergies or dislike peanuts, try using cashews or sunflower seeds instead. You can also skip the nuts entirely for a lighter dish. The recipe will still taste great. Serve Kung Pao Shrimp over cooked white rice or quinoa for a filling meal. You can also pair it with steamed broccoli or sautéed bok choy for added greens. For a fun twist, try serving it with fried rice or noodles. This adds a nice texture and flavor contrast. In this blog post, we explored how to make Kung Pao Shrimp. You learned about key and optional ingredients, plus substitutions. We broke down the cooking steps, so you can follow along easily. I shared tips for perfecting texture, adjusting spice, and serving. We also covered variations, storage, and frequently asked questions. Kung Pao Shrimp is versatile and fun to make. Now you can customize it to your taste. Enjoy trying new ideas in your kitchen!

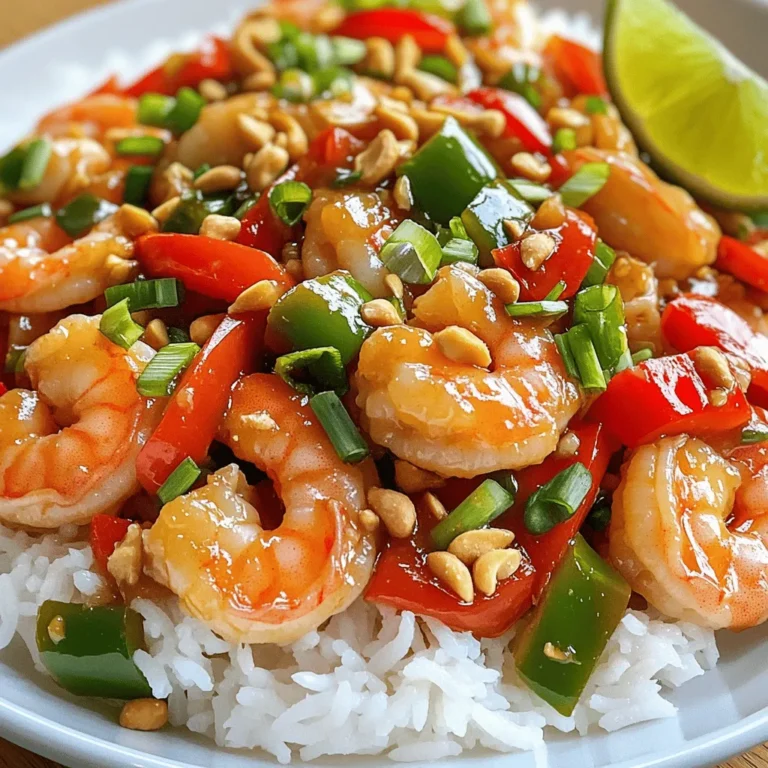
Kung Pao Shrimp Better Than Takeout Delight

- 1 pound Brussels sprouts, halved - 4 tablespoons unsalted butter - 4 cloves garlic, minced - 1 teaspoon sea salt - ½ teaspoon black pepper - ½ teaspoon red pepper flakes (optional) - 2 tablespoons freshly grated Parmesan cheese - Fresh parsley, chopped Brussels sprouts are the star of this dish. Their unique taste shines when you roast them. I use fresh, firm sprouts for the best flavor. If they look sad or wilted, they won’t taste good. Unsalted butter adds richness. It helps the garlic and seasonings stick to the sprouts. I love using fresh garlic because it gives a strong, bold taste. It browns as it cooks, adding a lovely aroma. For seasonings, sea salt enhances the flavor. Black pepper adds a slight kick. If you enjoy heat, add red pepper flakes. They give a nice spicy twist. Garnishing with Parmesan cheese is a must. It melts perfectly onto the hot sprouts. Fresh parsley adds color and freshness. It makes the dish look inviting and lively. Set your oven to 400°F (200°C). This is key for roasting the sprouts to crispiness. First, wash the Brussels sprouts under running water. This helps remove dirt. Next, trim any dry ends. Then, slice each sprout in half lengthwise. Halving them ensures even cooking. In a large bowl, melt the unsalted butter. You can do this in the microwave or on the stovetop. Make sure it’s just melted and not browned. After that, add minced garlic, sea salt, black pepper, and red pepper flakes if you want spice. Mix it well. Carefully add the halved Brussels sprouts to the garlic butter mixture. Toss them until every sprout is coated. Now, spread the coated sprouts on a baking sheet lined with parchment paper. This step helps them get crispy. Put the baking sheet in the preheated oven. Roast for 25-30 minutes. Halfway through, toss the sprouts again for even cooking. You want them crispy on the outside and tender inside. When the Brussels sprouts are done, take them out of the oven. Quickly sprinkle freshly grated Parmesan cheese on top while they’re hot. The cheese will melt slightly. Finally, add chopped fresh parsley for color and freshness before serving. To get those Brussels sprouts nice and crispy, spread them in a single layer on the baking sheet. This helps the hot air flow around each sprout. If they are too close together, they will steam instead of crisp up. Halfway through roasting, toss the sprouts. This ensures they cook evenly and become crispy all around. Look for bright green sprouts with tight leaves. Avoid any that have yellow or brown spots. Fresh sprouts feel firm and heavy. The size matters too; smaller sprouts cook quicker and taste sweeter. When you pick quality sprouts, your dish will shine. Serve your Brussels sprouts in a rustic bowl or on a wooden platter for an inviting look. For added flavor, drizzle leftover garlic butter from the baking sheet over the sprouts. This not only enhances taste but also makes your dish visually appealing. A sprinkle of Parmesan and fresh parsley on top adds color and a gourmet touch. {{image_4}} You can change the flavor of your Crispy Garlic Butter Brussels Sprouts with ease. If you like heat, add more red pepper flakes. This gives your dish a spicy kick that makes it exciting. You can also add fresh herbs like thyme or rosemary. These herbs add depth and richness to the dish. Just remember, start with a little and taste as you go. Want to try something new? Use an air fryer! It cooks Brussels sprouts quickly and makes them crispier. Just toss them in the garlic butter mixture and place them in the air fryer. Cook at 375°F for about 15 minutes. Shake the basket halfway to get an even cook. If you prefer stovetop cooking, sautéing is a great option. Heat some butter in a large pan. Add the coated Brussels sprouts and cook on medium heat. Stir them often until they turn brown and crispy. This method gives you control over the cooking process and lets you keep an eye on the sprouts. If you want a vegan dish, skip the cheese or use a vegan substitute. Nutritional yeast adds a cheesy flavor without dairy. You can also try vegan Parmesan cheese for a similar taste. If you want to stick with dairy, explore different cheese types. Goat cheese or feta can add a tangy twist. Creamy cheeses like gouda can enhance the flavor as well. To store your crispy garlic butter Brussels sprouts, first let them cool down. Place them in an airtight container. This keeps them fresh and helps avoid moisture buildup. You can store them in the fridge for up to three days. Just remember, the longer they sit, the less crispy they become. When it’s time to eat leftovers, you have two good options: the microwave or the oven. The microwave is quick but may make the sprouts soft. The oven keeps them crispier. Preheat your oven to 350°F (175°C). Spread the sprouts on a baking sheet and heat for about 10 minutes. This way, they stay crunchy and tasty. If you want to save some for later, you can freeze the Brussels sprouts. First, let them cool completely. Then, place them in a freezer-safe bag or container. Try to remove as much air as possible before sealing. They can last up to three months in the freezer. When you’re ready to eat them, thaw them in the fridge overnight. Reheat in the oven for the best texture. Yes, you can use frozen Brussels sprouts. First, thaw them in the fridge overnight. If you’re short on time, place them in warm water for about 15 minutes. After thawing, drain them well. Frozen sprouts may have extra moisture, so dry them thoroughly with a kitchen towel. This step helps them crisp up in the oven. Follow the same cooking method as fresh sprouts. You may need to adjust the roasting time slightly. Keep an eye on them to ensure they reach the perfect crispness. To make this recipe vegan, swap the unsalted butter with a plant-based butter. There are many great options on the market. For the Parmesan cheese, you can use a vegan cheese alternative or nutritional yeast. Nutritional yeast adds a cheesy flavor without using dairy. This way, you can enjoy the crispy garlic butter Brussels sprouts while keeping them plant-based. The taste will still be rich and satisfying. You won't miss the dairy at all! Crispy garlic butter Brussels sprouts make a great side dish. They pair well with roasted chicken or grilled fish. You can also serve them with a hearty grain dish, like quinoa or farro. For a vegetarian option, try them alongside a rich mushroom risotto. The flavors of the sprouts balance beautifully with these dishes. They add a nice crunch and depth to your meal. Don't forget to drizzle any leftover garlic butter over your main dish for added flavor! In this post, I shared how to make delicious crispy garlic butter Brussels sprouts. I detailed each step, from preheating the oven to roasting and garnishing. You now have a clear guide to enjoy this dish with friends or family. Don’t forget to try the tips for crispy sprouts and variations to suit your taste. With simple ingredients and easy methods, this recipe fits any meal. Enjoy your cooking, and don’t hesitate to explore new flavors!

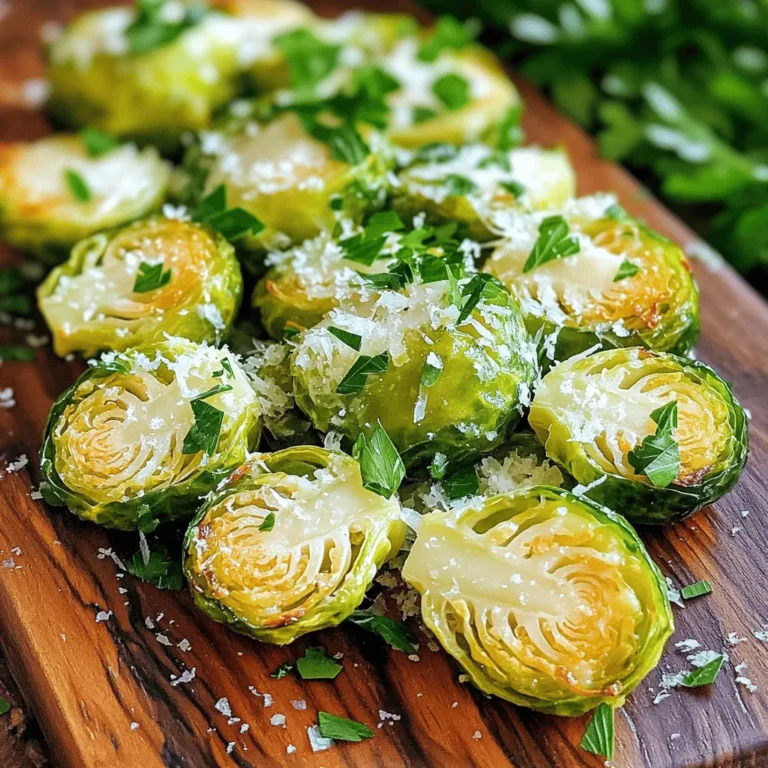
Crispy Garlic Butter Brussels Sprouts Delightful Side

- 1 cup creamy peanut butter - 1 cup rolled oats - 1/2 cup honey or maple syrup - 1/2 cup mini chocolate chips - 1 teaspoon vanilla extract - 1/4 teaspoon salt - Optional: 1/4 cup shredded coconut or chopped nuts for added texture To make the No-Bake Peanut Butter Chocolate Chip Bites, gather these simple ingredients. The creamy peanut butter gives a rich base. Rolled oats add texture and fiber. Honey or maple syrup sweetens the bites perfectly. Mini chocolate chips bring a delightful surprise in every bite. Vanilla extract adds warmth, while salt enhances the flavors. You can add shredded coconut or chopped nuts for an extra crunch. This easy list makes it fun to prepare. First, gather your mixing bowl. Add 1 cup of creamy peanut butter and 1/2 cup of honey (or maple syrup). Blend them together. You want a smooth mix. Next, stir in 1 teaspoon of vanilla extract and 1/4 teaspoon of salt. This adds great flavor to our bites. Now, it’s time for the dry stuff. Gradually add 1 cup of rolled oats to the peanut butter mix. Stir well until the oats get fully mixed in. Then fold in 1/2 cup of mini chocolate chips. If you like, add 1/4 cup of shredded coconut or chopped nuts for extra crunch. Make sure everything is combined nicely. Once your mixture is ready, use your hands to roll it into small balls. Aim for about 1 inch in size. Place the balls on a parchment-lined baking sheet. This helps keep them from sticking. Next, put the baking sheet in the fridge. Let the bites chill for at least 30 minutes. This helps them hold their shape. After they chill, transfer the bites to an airtight container. They can stay fresh in the fridge for up to one week. Enjoy your tasty treats as a quick snack! To get the right sweetness, try adjusting your honey or maple syrup. If you want a different flavor, use alternative nut butters like almond or cashew. Each nut butter brings its own taste to the bites. You can serve these bites in fun ways. Try putting them in a pretty jar or on a nice platter. For an extra treat, add a drizzle of melted chocolate on top. This touch makes each bite feel special. You can also sprinkle more chocolate chips or shredded coconut on top for decoration. If you want to save time, prepare these bites in bulk. You can make a large batch and freeze some for later. They freeze well and are perfect for quick snacks when you're busy. Just grab a few from the freezer, and they'll be ready in no time! {{image_4}} You can easily change the flavor of your no-bake bites. Try adding different mix-ins to the base. Dried fruits like cranberries or raisins add a sweet chew. Seeds like chia or pumpkin seeds bring nice crunch and nutrition. If you want a twist, switch up the nut butter. Almond butter or cashew butter can replace peanut butter. Each nut butter gives a unique taste and texture. You can even use sunbutter for a nut-free option. Making these bites fit your diet is simple. For a vegan version, just swap honey with maple syrup. This change keeps the bites sweet without animal products. If you want lower sugar, use less honey or maple syrup. You can also use sugar-free chocolate chips. These options help keep the bites sweet without added sugar. No matter how you adapt the recipe, these bites stay delicious and satisfying! To keep your no-bake peanut butter chocolate chip bites fresh, store them in an airtight container. This helps prevent air and moisture from ruining their taste and texture. You can choose between refrigeration and freezing. - Refrigeration: If you store the bites in the fridge, they stay fresh for about one week. It's the best choice for short-term storage. - Freezing: For longer storage, freeze them. Place the bites in a single layer on a baking sheet. Once they are frozen solid, transfer them to a freezer-safe bag or container. They can last up to three months in the freezer. These bites stay fresh for about a week in the fridge. If you freeze them, they can last up to three months. Look for signs that the bites have gone bad. If they have an off smell, strange color, or mold, it’s time to toss them. Keeping an eye on these details helps ensure you enjoy every bite! Yes, you can use crunchy peanut butter. It changes the texture and taste. Crunchy peanut butter adds little bits of peanuts. This gives a nice crunch to each bite. Some people may prefer this texture over creamy peanut butter. It can also add a richer flavor. So, if you like a bit of crunch, go for it! To make these bites allergy-friendly, you can swap out some ingredients. If you need a nut-free option, use sun butter. For a gluten-free choice, make sure to use gluten-free oats. Instead of honey, maple syrup works well for a vegan option. You can also skip the chocolate chips or use dairy-free ones. These swaps keep the bites tasty while catering to dietary needs. Yes, you can make these without oats. Instead of oats, try using ground flaxseed or almond flour. These options will change the texture a bit. Ground flaxseed will add fiber and a nutty flavor. Almond flour will make the bites softer. Adjust the amount of sweetener if you use almond flour, as it can absorb moisture. Making these changes keeps the recipe flexible and fun! In this post, I broke down how to make easy and tasty no-bake peanut butter bites. We covered the ingredients, step-by-step instructions, and handy tips to perfect your treats. I also shared variations to fit different diets and preferences. Remember, you can experiment with flavors and textures to make these treats your own. Enjoy creating and sharing these bites with friends and family for a quick snack, and have fun along the way!

No-Bake Peanut Butter Chocolate Chip Bites Delight

- 1 lb (450g) chicken breast, cut into bite-sized pieces - 2 tablespoons peanut oil - 1 medium onion, diced - 3 cloves garlic, minced - 1-inch piece of fresh ginger, grated - 1 red bell pepper, sliced into strips - 1 cup broccoli florets - ½ cup unsweetened creamy peanut butter - 2 tablespoons low-sodium soy sauce - 1 tablespoon honey (or maple syrup for a vegan option) - 1 tablespoon rice vinegar - 1 teaspoon sriracha (adjust to your spice preference) - ¼ cup chicken broth or water - 4 green onions, thinly sliced (for garnish) - Crushed peanuts (for garnish) - Cooked jasmine rice or quinoa (for serving) This dish shines because of its fresh ingredients. You need quality chicken for a tasty meal. I like to use chicken breast. Cut it into bite-sized pieces for even cooking. You can't forget the vegetables. They add crunch and flavor. I use onion, garlic, ginger, red bell pepper, and broccoli. Each brings its own taste to the dish. Don't overlook the peanut sauce. It’s the star! The sauce has peanut butter, soy sauce, honey, rice vinegar, sriracha, and chicken broth. This mix makes a creamy, tangy sauce that coats the chicken and veggies perfectly. Make sure to have fresh green onions and crushed peanuts ready for garnish. They add a nice touch at the end. Serve the dish with jasmine rice or quinoa for a complete meal. {{ingredient_image_2}} - Heat the peanut oil in a large skillet over medium-high heat until it shimmers. - Carefully add the chicken pieces in a single layer. Sauté them for about 5-7 minutes, stirring now and then. Cook until the chicken turns golden brown and is fully cooked. Remove the chicken and set it aside on a plate. - In the same skillet, add the diced onion, minced garlic, and grated ginger. Cook for about 2-3 minutes. Stir often until the onion becomes translucent and smells great. - Next, add the sliced red bell pepper and broccoli florets. Stir and cook for another 5 minutes. This keeps the veggies tender but still a bit crisp. - In a medium bowl, whisk together peanut butter, soy sauce, honey, rice vinegar, sriracha, and chicken broth. Mix until smooth and well blended. - Bring the cooked chicken back to the skillet with the sautéed veggies. Pour the peanut sauce over everything. Gently stir to coat all the ingredients in the sauce. Allow it to cook for an extra 2-3 minutes until heated through. - Serve your peanut chicken skillet over a bed of jasmine rice or fluffy quinoa for a filling meal. - For a tasty garnish, sprinkle sliced green onions and crushed peanuts on top for extra flavor and crunch. To keep your chicken juicy, start with fresh, high-quality breast. Cut the chicken into bite-sized pieces for even cooking. I suggest marinating it briefly with soy sauce. This adds flavor and moisture. When you cook, make sure your skillet is hot. This helps to sear the chicken and lock in juices. You can adjust the spice level by adding more sriracha. If you want a milder dish, use less. Sriracha not only adds heat, but also depth. For a twist, try using different sauces. You can swap the peanut butter for almond butter for a new taste. Avoid overcrowding your skillet. If you add too much, the chicken may steam instead of sear. Cook in batches if needed. For your vegetables, time is key. Add them after the chicken is browned. Cook until they are tender but still crisp. This way, you keep the bright colors and nutrients. Pro Tips Use Fresh Ingredients: Fresh vegetables and chicken will enhance the flavors in this dish, making it even more delicious! Adjust Spice Levels: Feel free to modify the amount of sriracha based on your spice tolerance. You can also add chili flakes for extra heat. Peanut Butter Consistency: For a smoother sauce, use creamy peanut butter. If you prefer a chunkier texture, crunchy peanut butter can add an interesting twist. Meal Prep Friendly: This dish can be made in advance and stored in the refrigerator for up to 3 days. Just reheat and enjoy! {{image_4}} You can swap chicken for tofu or tempeh. Both options absorb flavors well. Choose firm tofu for a good texture. Cut it into bite-sized pieces. Cook it in the skillet until golden brown. For a vegan sauce, use maple syrup instead of honey. This keeps it plant-based while still sweet. Feel free to mix in various vegetables. Carrots and snap peas add crunch and color. Seasonal veggies like zucchini or bell peppers can also brighten the dish. Just chop them small to cook evenly. You can use whatever you have on hand. This way, you make it your own. For those avoiding nuts, you can make tasty substitutions. Try sunflower seed butter or tahini for the sauce. Both provide creamy textures without peanuts. You can also use chicken or turkey as protein options. This keeps the meal hearty and satisfying while being nut-free. To keep your leftover peanut chicken skillet fresh, store it in the fridge. Place it in an airtight container. This helps prevent it from drying out or absorbing odors. Leftovers will last for three to four days in the refrigerator. You can reheat your peanut chicken skillet in two ways: microwave or stovetop. For the microwave, place the dish in a safe bowl and cover it. Heat in short bursts, stirring between, until warm. For stovetop, use a skillet over medium heat. Add a splash of water or chicken broth to keep it moist. Stir until heated through. This helps maintain the food's texture and flavor. If you want to freeze your peanut chicken skillet, let it cool first. Then, place it in a freezer-safe container or a zip-top bag. Squeeze out the air to prevent freezer burn. It can stay in the freezer for up to three months. When you're ready to eat, thaw it in the fridge overnight. You can also use the microwave for a quick thaw. After thawing, reheat as mentioned above. This keeps the dish tasting fresh and delicious. To add more heat, use extra sriracha. Start with one teaspoon and taste. You can also include chopped fresh chilies, like jalapeños or bird's eye peppers. If you like a smoky flavor, try smoked paprika. Sprinkle this in during the cooking. Adjust the spice a little at a time to find your perfect heat level. Yes, you can prepare this meal ahead of time. Cook the chicken and veggies, then store them in an airtight container. Keep the peanut sauce separate. This helps keep the texture great. When you’re ready to eat, just reheat everything in a skillet. You can also microwave it, but use a low setting to avoid overcooking. This dish pairs well with jasmine rice or fluffy quinoa. Both grains soak up the sauce nicely. You can also serve it with a simple green salad for freshness. For drinks, try a light iced tea or a crisp white wine. These choices enhance the meal's flavors without overpowering them. This Peanut Chicken Skillet is a flavorful and fun dish. We covered the key ingredients, like chicken, fresh veggies, and a tasty peanut sauce. I shared steps to cook everything just right and tips to enhance flavors. You learned about several variations, great for different diets. Storing leftovers and reheating tips ensure your meal stays fresh. Use these ideas to enjoy your cooking and experiment. This dish can thrill taste buds any night of the week. Dive in and make it your own!

Peanut Chicken Skillet Flavorful One-Pan Delight

- 2 medium-sized apples (Granny Smith or Honeycrisp) - 1 cup all-purpose flour - 1 teaspoon ground cinnamon - 1/2 teaspoon ground nutmeg - 1/4 cup granulated sugar - 1/2 cup milk (dairy or non-dairy) - 1/2 cup breadcrumbs (preferably panko) - Cooking spray - Optional: caramel sauce for dipping To make these apple fries, you’ll need just a few simple ingredients. Choose fresh, crisp apples like Granny Smith or Honeycrisp. Their tartness pairs well with the sweetness of the sugar and spices. Be sure to have flour, cinnamon, nutmeg, and granulated sugar ready. The flour gives a nice base, while the cinnamon and nutmeg add warmth and flavor. The milk helps the breading stick. For that extra crunch, panko breadcrumbs work best. Finally, cooking spray adds crispiness to each fry. You can serve them with caramel sauce for a sweet dip. {{ingredient_image_2}} First, set your air fryer to 375°F (190°C). Preheating helps the apple fries cook evenly. This step is key for that crispy texture we all love! In a shallow bowl, mix these dry ingredients: - 1 cup all-purpose flour - 1 teaspoon ground cinnamon - 1/2 teaspoon ground nutmeg - 1/4 cup granulated sugar Stir until well combined. This mix adds great flavor and sweetness to your apple fries. Next, take your apple wedges. Dip each wedge into the flour mix first. Make sure it’s covered well. Then, dip it into 1/2 cup of milk. Let any extra milk drip off. Lastly, roll the wedge in breadcrumbs. Press gently to coat it well. This creates a crunchy outer layer. Now, arrange the breaded apple fries in a single layer in the air fryer basket. Don’t overcrowd them; they need space to crisp up. Lightly spray the fries with cooking spray for extra crunch. Cook the apple fries for 10-12 minutes. Flip them halfway through for even browning. Keep an eye on them until they turn golden brown. Once done, remove them from the air fryer and let them cool for a minute before serving. To get the best crispiness, use cooking spray. This helps the fries turn golden and crunchy. Spray them lightly before cooking. Flipping the fries halfway through is key. This step ensures even cooking on both sides. Not all apples work well for frying. I recommend Granny Smith or Honeycrisp apples. Granny Smith offers a tart taste, while Honeycrisp is sweet and juicy. Both types have the right texture for frying. Their firmness keeps them from turning mushy. Presentation makes a big difference. Serve the apple fries on a rustic wooden board or a stylish plate. Drizzle caramel sauce over the fries for a sweet touch. A light sprinkle of cinnamon adds color and flavor. This will impress your guests and make the dish look more appealing. Pro Tips Choose the Right Apples: Opt for tart apples like Granny Smith or Honeycrisp for the best flavor and texture in your fries. Get Creative with Coatings: Try adding different spices like ginger or allspice to the flour mixture for a unique flavor twist. Don’t Overcrowd the Air Fryer: Cook in batches to ensure each apple fry gets enough hot air circulation for optimal crispiness. Serve Immediately: For the best texture, serve the apple fries right after cooking while they are still warm and crispy. {{image_4}} You can make air fryer apple fries even tastier! Try adding a few drops of vanilla extract to the milk. This will add a sweet, warm flavor that pairs well with apples. You can also sprinkle in some extra spices. A pinch of cloves or ginger can give your fries a cozy twist. Experiment with flavors that you love! If you want a healthier version, consider using whole wheat flour instead of all-purpose flour. Whole wheat flour adds fiber and nutrients. You can also try using almond flour or oat flour for a gluten-free option. These alternatives still give you that crunchy texture while being better for your health. Caramel sauce is great, but there are more options! How about a yogurt dip? Mix plain yogurt with a bit of honey for sweetness. You can also try a fun peanut butter dip. Just blend peanut butter with a splash of milk until smooth. If you like chocolate, melt some chocolate chips for a rich treat. The choice is yours, so have fun with it! To keep your apple fries fresh, place them in an airtight container. Make sure they cool down before sealing. Store them in the fridge for up to three days. If you want them crispy later, avoid stacking them too high in the container. You can also place a paper towel at the bottom to absorb extra moisture. This will help maintain their crunch. To reheat your apple fries, use your air fryer. This method keeps them crispy. Set your air fryer to 350°F (175°C). Place the apple fries in the basket in a single layer. Heat them for about 5 minutes. Check to see if they are warm and crispy. If not, add another minute or two. Enjoy your tasty treat just like when they were fresh! Using frozen apples is not ideal for this recipe. Frozen apples lose their crunch and can turn mushy when cooked. Fresh apples, like Granny Smith or Honeycrisp, work best. They stay firm and crisp during cooking. If you only have frozen apples, try to thaw and drain them first. To keep your apple fries crispy, coat them well. Use the coating mix of flour, cinnamon, nutmeg, and sugar. Make sure to dip each wedge in milk and then in breadcrumbs. Spray them lightly with cooking spray before air frying. Cooking them in a single layer helps too. Flip them halfway through cooking for even crispiness. You can prepare the apple wedges in advance. Bread them and keep them in the fridge for a few hours. When ready to cook, just pop them in the air fryer. Avoid coating them too early, as they may get soggy. It’s best to cook them fresh for that crispy bite. You can use various fruits in the air fryer. Try pears, bananas, or peaches. These fruits also get soft and sweet when cooked. Just remember to adjust cooking times. For a fun twist, you can even coat them like apple fries. Enjoy the flavors of different fruits in your air fryer! You now have a simple and tasty recipe for air fryer apple fries. We covered ingredient choices, step-by-step cooking instructions, and helpful tips. Remember to pick the right apples for the best flavor and texture. Experiment with different spices and dips to make this dish your own. Whether you're serving them for a snack or dessert, these apple fries are sure to please. Enjoy your crispy treats and share this recipe with friends!

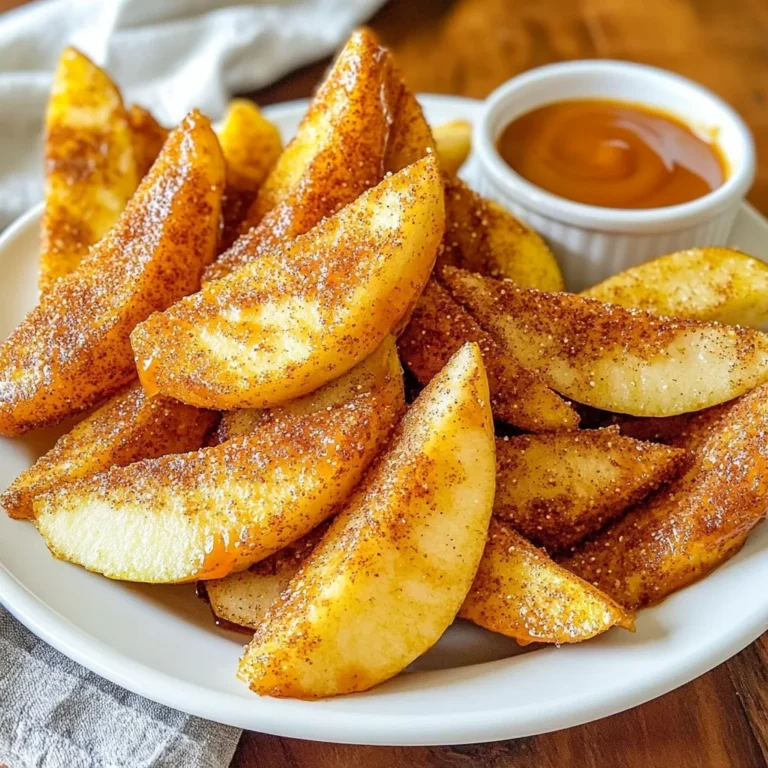
Air Fryer Apple Fries Crispy and Sweet Treat

PREV 1 … 16 17 18 … 48 NEXT
meal plan mapper

explore

DessertsDinnerAppetizersDrinks

Our Policies

  • Cookie Policy
  • Copyright Policy
  • Disclaimer
  • GDPR Policy
  • Terms Of Use
Back to Top
  • About
  • Contact Us
  • Privacy Policy
© 2025 meal plan mapper