FREE DINNER EBOOK! Get your copy!
  • Cookie Policy
  • GDPR Policy
  • Disclaimer
  • Terms Of Use
  • Visit my other site: Fun Cookie Recipes
meal plan mapper
  • Home
  • Dinner
  • Desserts
  • Drinks
  • Appetizers
  • Contact
  • About
  • Privacy Policy
  • Home
  • Dinner
  • Desserts
  • Drinks
  • Appetizers
  • Contact
  • About
  • Privacy Policy
  • Cookie Policy
  • GDPR Policy
  • Disclaimer
  • Terms Of Use
Visit my other site: Fun Cookie Recipes

HOME / CATEGORIES /

Latest

- 6 medium apples (Granny Smith or Honeycrisp) - 1 cup packed brown sugar - 1 cup rolled oats - 1 cup all-purpose flour - 1 teaspoon ground cinnamon - 1/2 teaspoon ground nutmeg - 1/4 teaspoon salt - 1/2 cup unsalted butter, melted - 1/2 cup butterscotch chips - 1/4 cup chopped pecans (optional) - Vanilla ice cream, for serving To create the perfect Slow Cooker Butterscotch Apple Crisp, we start with the main ingredients. You need six medium apples. Granny Smith or Honeycrisp work best. Peel, core, and slice them to bring out their natural sweetness. Next, you need one cup of packed brown sugar. This adds a rich, caramel flavor that pairs well with the apples. You'll also need one cup of rolled oats and one cup of all-purpose flour. These will form the base of your crumbly topping. Now, let's move to the spices. One teaspoon of ground cinnamon gives a warm, cozy taste. The 1/2 teaspoon of ground nutmeg adds depth. Don't forget the 1/4 teaspoon of salt to balance the sweetness. For the topping, melt half a cup of unsalted butter. This helps bind the topping together. You can also mix in 1/2 cup of butterscotch chips for that extra sweetness. If you love a bit of crunch, add 1/4 cup of chopped pecans. Finally, serve it warm with a scoop of vanilla ice cream. This dessert is a warm hug in a bowl! First, peel, core, and slice six medium apples. I like to use Granny Smith or Honeycrisp for a nice balance of sweet and tart. In a big bowl, toss the apple slices with 1/2 cup of brown sugar, 1 teaspoon of ground cinnamon, 1/2 teaspoon of ground nutmeg, and 1/4 teaspoon of salt. Make sure all the apples are well coated. This mixture smells amazing! Set it aside while you make the topping. In another bowl, mix the remaining 1/2 cup of brown sugar with 1 cup of rolled oats and 1 cup of all-purpose flour. This will give your topping a great texture. Pour in 1/2 cup of melted unsalted butter and stir until everything combines into a crumbly mix. For added flavor, I like to fold in 1/2 cup of butterscotch chips and 1/4 cup of chopped pecans. It adds a nice crunch. Now it’s time to layer your dish. Put the apple mixture evenly at the bottom of your slow cooker. Make sure it fills the base well. Then, spoon the crumbly topping over the apples, covering them completely. This helps the apples soak up all the flavors. Secure the lid on your slow cooker and set it to cook on low for 4 to 5 hours. You’ll know it’s ready when the apples are soft and the topping is golden brown. After cooking, let it rest for about 15 minutes. This helps the flavors meld together. Enjoy the warm, sweet aroma as you serve it! To make a great apple crisp, start with the right apples. I love using Granny Smith or Honeycrisp apples. They give a nice sweet and tart flavor. Their firm texture holds up well while cooking. You want apples that won’t turn mushy. Next, let’s talk about the topping. You should aim for a crumbly texture. Mix rolled oats, flour, and melted butter until it looks like wet sand. If you want more crunch, add butterscotch chips and chopped pecans. This mix adds layers of flavor and texture. When it comes to serving, warm apple crisp tastes best. A scoop of vanilla ice cream on top is a must. The cold ice cream melts into the warm crisp, making it extra tasty. For an extra treat, drizzle some butterscotch sauce over the ice cream. This adds a sweet touch that pairs well with the crisp's flavors. You can also sprinkle some chopped pecans on top for added crunch and a pop of flavor. Enjoy your delicious creation! {{image_4}} If you want a nut-free option, simply leave out the pecans. This keeps the dish safe for those with nut allergies. The crisp will still taste great without them. You can enjoy the same warm, gooey filling and crunchy topping. To make your apple crisp even tastier, consider adding spices. Ginger adds a warm kick, while cloves bring a sweet depth. These spices can transform the dish into something special. You can also experiment with sweeteners. Try maple syrup or honey for a unique twist. Each sweetener offers a different flavor profile, making your crisp stand out. You can also bake this crisp in the oven. Set your oven to 350°F. Spread the apple mixture in a baking dish and top it with the crumbly mix. Bake for about 40 minutes until golden brown. For a quicker method, use an Instant Pot. Layer the apples and topping, then cook on high pressure for 15 minutes. This will give you a nice, warm dessert in no time. To keep your butterscotch apple crisp fresh, store it in an airtight container. This will help the flavors stay intact. Place the container in the fridge right after it cools. The crisp will last for about 3 to 4 days in the fridge. If you want to keep it longer, consider freezing it. To reheat your apple crisp, the best method is to use an oven. Preheat the oven to 350°F (175°C). Place the crisp in an oven-safe dish. Cover it with foil to keep it moist. Heat for about 15 to 20 minutes, or until warm. For extra crunch, remove the foil for the last 5 minutes. You can also microwave it, but this may make the topping soft. Enjoy your warm treat with a scoop of vanilla ice cream. Yes, you can prep this recipe ahead. Just slice the apples and mix them with sugar and spices. Store this mix in the fridge for a day. You can also prepare the crumbly topping and keep it separate. Just layer and cook it in the slow cooker when you're ready to enjoy. To adjust the sweetness, you can change the brown sugar amount. If you prefer less sweetness, use less sugar in the apple mix. You can also swap some brown sugar with unsweetened applesauce. This keeps the flavor but cuts back on sugar. You can use many fruits in this recipe. Pears are a great choice and add a nice flavor. Peaches or berries also work well, giving a twist to your crisp. Just make sure the fruits are ripe and sweet for the best taste. Yes, you can freeze the butterscotch apple crisp. Allow it to cool completely first. Then, place it in an airtight container or freezer bag. It can last for up to three months. When ready to eat, thaw it in the fridge and reheat in the oven. In this post, we explored how to make a delicious butterscotch apple crisp. We covered the key ingredients, from fresh apples to warm spices. You learned step-by-step instructions for preparing the apples and making the crumbly topping. We also shared tips for perfecting the dish and exciting variations to try. Remember, you can mix things up based on your tastes. Enjoy serving this warm treat with ice cream. Your friends and family will love it!

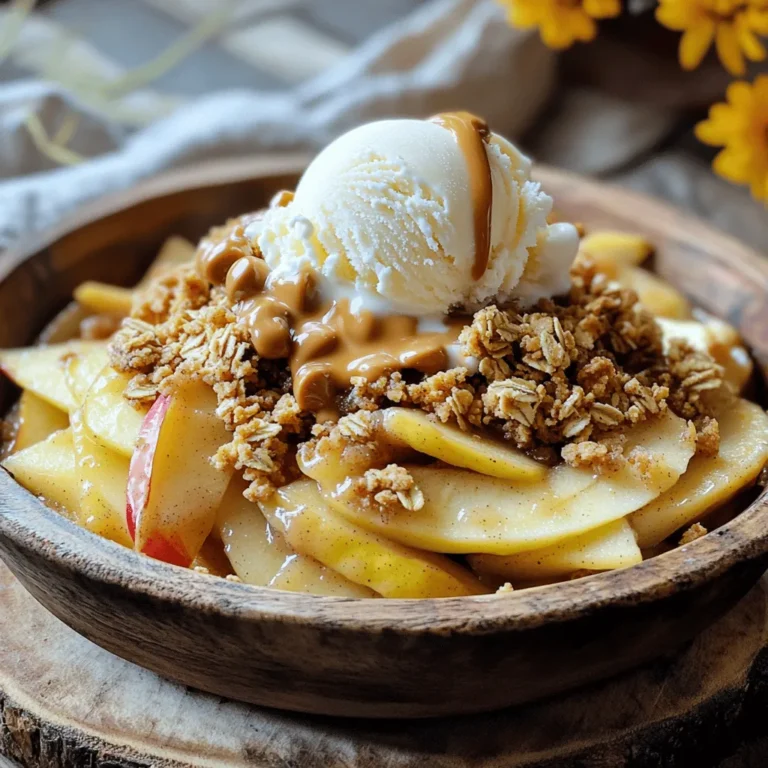
Slow Cooker Butterscotch Apple Crisp Delightful Treat

- 1 lb spicy chicken sausage, sliced into 1/2-inch rounds - 2 cups mixed bell peppers (red, yellow, green), sliced into strips - 1 medium red onion, sliced into wedges - 2 cups fresh broccoli florets - 3 tablespoons extra virgin olive oil - 1 tablespoon pure honey - 1 teaspoon smoked paprika - 1 teaspoon garlic powder - 1/2 teaspoon red pepper flakes (adjust to personal heat preference) - Salt and pepper, to taste The main ingredients bring great flavor and fun colors to the dish. The spicy chicken sausage adds a nice kick. The sweet honey balances it out. Fresh veggies bring crunch and health. This mix makes a meal both tasty and good for you. - Fresh parsley, finely chopped Adding fresh parsley gives a burst of color. It also adds a fresh taste to each bite. You can also squeeze fresh lemon juice over the dish before serving. This will brighten the flavors even more. - Large mixing bowl - Sheet pan - Whisk - Knife - Cutting board These tools help make cooking easier. A large mixing bowl is great for tossing all the ingredients. A good knife and cutting board help you chop veggies quickly. A sheet pan ensures even cooking in the oven. Start by preheating your oven to 400°F (200°C). This heat helps cook everything evenly. While the oven warms up, get your ingredients ready. Slice the spicy chicken sausage into 1/2-inch rounds. Next, cut the mixed bell peppers into strips. Chop the red onion into wedges, and break the broccoli into florets. This prep makes cooking faster and easier. In a large mixing bowl, add the sliced sausage, bell peppers, onion, and broccoli. Make sure to mix them well. You want all the veggies and sausage together for great flavor. This step is key for even cooking and taste. In a small bowl, combine the extra virgin olive oil, honey, smoked paprika, garlic powder, and red pepper flakes. Add a pinch of salt and pepper for taste. Whisk everything together. This marinade adds a sweet and spicy kick to the dish. It’s the secret to making your meal pop with flavor. Drizzle the flavorful marinade over the sausage and veggie mix. Toss everything until well-coated. Now, spread the mixture out on a large sheet pan in a single layer. This helps it roast evenly. Place the pan in your preheated oven. Bake for 20-25 minutes, stirring halfway through. This ensures even browning, and the veggies will become tender. When done, the sausage should look caramelized. After removing it from the oven, let it cool a bit. Sprinkle fresh parsley on top for a colorful finish. Enjoy your delightful meal! To get great results, set your oven to 400°F (200°C). This temp helps the sausage brown and the veggies soften. A hot oven cooks the food evenly and keeps flavors bright. Remember to preheat for about 10-15 minutes before you start roasting. Cut your veggies into similar sizes. This helps them cook at the same rate. For bell peppers, slice them into strips about 1 inch wide. For the onion, cut it into wedges. Broccoli florets should be about the same size as the sausage rounds. This way, everything roasts evenly and tastes great. To change the heat of your dish, tweak the red pepper flakes. If you like it mild, use less. For a spicier kick, add more. You can also add other spices or hot sauce if you want. Taste before serving to get it just right! {{image_4}} You can easily change the sausage for other types. Try turkey sausage for a leaner choice. Chicken sausage gives a lighter flavor. If you prefer meat-free, use plant-based sausage. Each option brings its own taste. This keeps the dish fresh and exciting. Seasonal veggies can change the taste of your meal. Use zucchini or asparagus in the spring. In the summer, try corn or cherry tomatoes. Fall is great for butternut squash or Brussels sprouts. Winter brings hearty vegetables like carrots or parsnips. These swaps keep your dish colorful and nutritious. For gluten-free, check the sausage label for gluten. Use cauliflower instead of broccoli for a low-carb swap. You can also use bell peppers as a base. They add crunch and taste without the carbs. This way, everyone can enjoy the meal without worry. You can store the Spicy Honey Sausage Veggie Sheet Pan in the fridge. Place leftovers in an airtight container. It stays fresh for about 3 to 4 days. Make sure to cool it to room temperature before sealing. This helps avoid excess moisture that can make your dish soggy. You can freeze this dish for longer storage. Allow it to cool completely first. Then, transfer it to a freezer-safe container. It can last for up to 3 months in the freezer. When you're ready to eat, thaw it in the fridge overnight. This keeps the flavors intact and ensures even reheating. To reheat, preheat your oven to 350°F (175°C). Spread the leftovers on a baking sheet. Cover it with foil to keep moisture in. Heat for about 15-20 minutes, or until warmed through. Stir halfway to ensure even heating. If you prefer, you can also use the microwave. Just heat in short intervals and stir often to prevent hot spots. Enjoy it as if it was freshly made! It takes about 20 to 25 minutes to cook this dish. Preheat your oven to 400°F (200°C). Once your sheet pan is ready, roast until the veggies are tender and the sausage is caramelized. Yes, you can make this dish ahead of time. Prepare it, then store it in the fridge. Just reheat before serving. You can serve this meal with rice or quinoa for a complete dinner. A fresh salad pairs well too. Absolutely! This dish is perfect for meal prep. You can portion it out for easy lunches or dinners throughout the week. Spicy chicken sausage works best for this recipe. You can also use turkey sausage or any spicy sausage you enjoy. This recipe for Spicy Honey Sausage Veggie Sheet Pan is simple and tasty. We covered key ingredients, tools, and easy steps to make this dish. You learned how to roast veggies just right and control spice levels. With variations and storage tips, you can enjoy this meal your way. Trust me; you’ll love how the flavors blend. Now, gather your ingredients and start cooking; a delicious meal awaits!

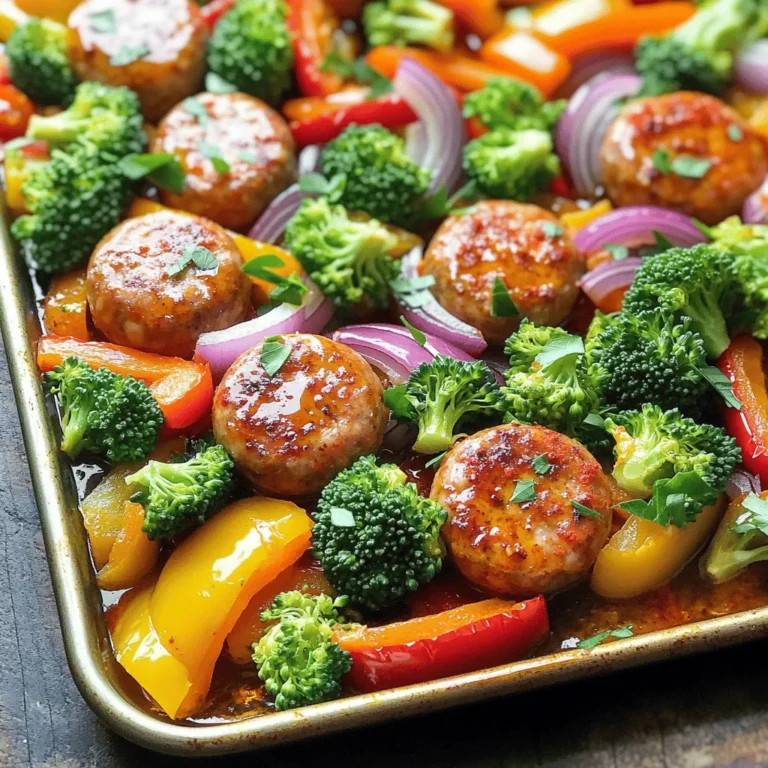
Spicy Honey Sausage Veggie Sheet Pan Delightful Meal

- 1 cup all-purpose flour - 1 cup granulated sugar - 1/2 cup unsalted butter, softened - 2 large eggs - 1/2 cup buttermilk - Zest of 1 lemon (about 1 tablespoon) - 2 tablespoons freshly squeezed lemon juice - 1 teaspoon baking powder - 1/2 teaspoon baking soda - 1/4 teaspoon salt - 1 cup fresh strawberries, finely diced - 1/4 cup homemade strawberry puree Each ingredient plays a vital role in the recipe. - All-purpose flour gives structure. It helps the cupcakes rise and hold their shape. - Granulated sugar adds sweetness, making each bite delightful. It also helps create a light texture when creamed with butter. - Unsalted butter adds rich flavor and moisture. Softening it is key to getting a fluffy batter. - Eggs bind the ingredients and add moisture. They also help with rising. - Buttermilk keeps the cupcakes moist. It also gives a slight tang, enhancing the flavor. - Lemon zest adds a bright flavor. It lifts the taste of both the lemon juice and strawberries. - Baking powder and baking soda are leavening agents. They create the perfect rise for light cupcakes. - Salt balances the sweetness. It enhances all the flavors in the cupcakes. - Fresh strawberries add bursts of flavor and color. They make each bite extra special. - Strawberry puree adds moisture and enhances the strawberry flavor. You can adjust the recipe to fit your taste. - Frosting: Try lemon or cream cheese frosting for a tasty finish. - Other fruits: Swap in raspberries or blueberries for a mix of flavors. - Nuts: Add chopped nuts like almonds for extra crunch. - Coconut: Fold in shredded coconut for a tropical twist. - Gluten-free flour: Use a gluten-free blend if needed. Experiment with these options to find your favorite combination! {{ingredient_image_2}} First, set your oven to 350°F (175°C). This heat is perfect for our cupcakes. While the oven warms up, line a 12-cup muffin tin with fun, colorful cupcake liners. This step not only keeps the cupcakes from sticking but also makes them look great. To make strawberry puree, take about 1/2 cup of fresh strawberries. Place them in a blender. Blend until smooth. This puree adds a tasty burst of flavor to your cupcakes. Set it aside for later. In a large bowl, add 1/2 cup of softened butter and 1 cup of granulated sugar. Use an electric mixer to beat them until light and fluffy. This will take about 3-4 minutes. Next, add 2 large eggs, one at a time. Mix well after each egg. Then, pour in 1/2 cup of buttermilk, the zest of 1 lemon, and 2 tablespoons of fresh lemon juice. Mix everything until smooth. In another bowl, whisk together 1 cup of all-purpose flour, 1 teaspoon of baking powder, 1/2 teaspoon of baking soda, and 1/4 teaspoon of salt. Slowly add this dry mix to the wet ingredients. Mix on low speed until just combined. Be careful not to overmix! Now, gently fold in the diced strawberries and the strawberry puree. This ensures even flavor in every bite. Spoon the batter into the prepared cupcake liners. Fill each one about two-thirds full. This allows space for rising. Place the muffin tin in the oven. Bake for 18-20 minutes. To check if they are done, insert a toothpick into the center. If it comes out clean, they are ready! Let the cupcakes cool in the tin for about 5 minutes. Then, carefully move them to a wire rack to cool completely. Once they are cool, you can frost them if you like. A lemon or strawberry frosting works great. For a lovely touch, garnish with a slice of fresh strawberry and a sprinkle of lemon zest. Enjoy your delicious treats! When making strawberry lemonade cupcakes, avoid these common mistakes: - Overmixing the Batter: This can lead to tough cupcakes. Mix just until combined. - Skipping the Lemon Zest: The zest adds a bright flavor. Don’t skip it! - Not Measuring Ingredients: Accurate measurements ensure the best results. Use measuring cups. - Underbaking: Check for doneness with a toothpick. It should come out clean. To keep your cupcakes moist and delicious, try these tips: - Use Room Temperature Ingredients: Ensure butter, eggs, and buttermilk are at room temperature. This helps them mix well. - Don’t Overfill the Liners: Fill each liner only two-thirds full. This allows room for rising. - Check Oven Temperature: Use an oven thermometer. An incorrect temperature can dry out your cupcakes. - Add Strawberries Gently: Folding in strawberries carefully keeps them intact, adding moisture. Keeping your cupcakes fresh is easy with these storage tips: - Cool Completely Before Storing: Let them cool on a wire rack before covering. This prevents sogginess. - Use an Airtight Container: Store in an airtight container at room temperature. This keeps them soft. - Add a Slice of Bread: Place a slice of bread in the container. It helps maintain moisture. - Freeze for Longer Storage: If you need to store them for longer, freeze them. Wrap each cupcake tightly in plastic wrap. Pro Tips Use Room Temperature Ingredients: Make sure your butter and eggs are at room temperature for a smoother batter and better rise. Fresh Strawberries for Flavor: Always use fresh strawberries for the best flavor and texture; frozen berries can make the batter too wet. Don't Overmix: Mix the batter until just combined to keep the cupcakes light and fluffy; overmixing can lead to dense cupcakes. Cool Completely Before Frosting: Allow the cupcakes to cool completely on a wire rack before adding frosting to prevent it from melting. {{image_4}} You can change the flavor of your cupcakes with different frostings. A classic lemon buttercream adds a bright zing. To make it, mix softened butter, powdered sugar, lemon juice, and zest. You can also try cream cheese frosting. The tangy flavor pairs well with strawberry and lemon. For a fun twist, consider a strawberry whipped cream. This light frosting is easy to spread and tastes fresh. These cupcakes are great for mixing in other fruits. You can swap out strawberries for raspberries or blueberries. Both fruits give a sweet and tart taste. For a tropical flair, add crushed pineapple to the batter. This will make your cupcakes even more refreshing. You can also layer in peaches for a summer vibe. Each fruit brings its own unique flavor to the mix. You can easily adapt this recipe for gluten-free or vegan diets. For gluten-free cupcakes, use a gluten-free flour blend. Be sure to check for one that works well in baking. For a vegan version, replace the eggs with flaxseed meal or applesauce. Use plant-based butter and non-dairy milk for the moist base. These swaps keep the cupcakes tasty while meeting dietary needs. To keep your strawberry lemonade cupcakes fresh, store them in an airtight container. This helps prevent them from drying out. If you have leftover cupcakes, place them at room temperature for a day. If you want to keep them longer, refrigeration works well. Just remember to seal them tight to keep the moisture in. When stored properly, these cupcakes last about 2 to 3 days at room temperature. In the fridge, they can stay fresh for up to a week. Just make sure not to leave them out in the open. They can get stale quickly if exposed to air. If you want to freeze your cupcakes, wrap each one in plastic wrap. Then, place them in a freezer-safe bag. They can last for up to 3 months in the freezer. When you are ready to eat them, thaw them at room temperature. They will taste just as good as fresh! Yes, you can use frozen strawberries. Just make sure to thaw them first. Drain any extra liquid to avoid a watery batter. Frozen strawberries may be softer than fresh ones, but they still add great flavor. To make homemade strawberry puree, take about 1/2 cup of fresh strawberries. Cut off the stems and place them in a blender. Blend until smooth. You can strain it for a finer texture, but that’s up to you. Use this puree in your cupcake batter for a fresh taste. You can easily substitute buttermilk with milk and vinegar. Mix 1/2 cup of milk with 1/2 tablespoon of vinegar or lemon juice. Let it sit for about 5 minutes. This mixture will mimic buttermilk’s tangy flavor and acidity. You can also use plain yogurt or sour cream mixed with water for a similar effect. In this blog post, I covered everything you need to bake delicious strawberry cupcakes. We looked at key ingredients, step-by-step instructions, and helpful tips for perfect results. You can make tasty variations too, like different frostings or fruit flavors. Plus, I shared smart ways to store your cupcakes so they stay fresh. Remember, with simple steps and creativity, you can enjoy these treats anytime!

Strawberry Lemonade Cupcakes Fresh and Flavorful Treat

- 2 cups fresh or frozen cranberries - 1 cup granulated sugar - 1 cup water - 1 teaspoon vanilla extract - 1/2 teaspoon ground cinnamon - 1 cup dark chocolate chips - 2 tablespoons coconut oil (or vegetable oil) - Flaky sea salt for garnish - Fresh cranberries for decoration - Mint sprigs for a fresh touch - You can swap coconut oil for vegetable oil if needed. - Use white chocolate chips instead of dark chocolate for a sweeter taste. - If you want a different flavor, try using almond extract in place of vanilla. - For a lower-sugar option, you can use a sugar substitute. This list makes it easy to gather what you need for these tasty bites. Each ingredient plays a key role in making the flavors pop. {{ingredient_image_2}} First, rinse the fresh cranberries under cold water. Make sure to wash them well. If you use frozen cranberries, you can skip thawing. Just grab them from the freezer. Using fresh or frozen works well, so choose what you have! Grab a medium saucepan. In it, mix the cranberries, sugar, water, vanilla extract, and ground cinnamon. Turn the heat to medium. Stir often to stop the mixture from sticking. When it starts to boil, reduce the heat to low. Let it simmer for about 10 to 15 minutes. You will see the cranberries burst and release their juice. This makes the sauce thick and yummy. When done, remove the pan from heat. Allow it to cool for a few minutes. Now, transfer the sauce to a mixing bowl. Let it cool to room temperature. After that, chill it in the fridge for at least an hour. This helps it firm up. Once it’s ready, use a small cookie scoop or spoon to make mounds on a parchment-lined baking sheet. Next, melt the chocolate. In a microwave-safe bowl, mix dark chocolate chips and coconut oil. Heat it in the microwave for 30 seconds at a time. Stir between heats until it’s all melted. Now for the fun part! Take each mound of cranberry sauce and dip it in the melted chocolate. Make sure it's fully coated. Lift it out and let the extra chocolate drip off. Place it back on the baking sheet. Before the chocolate sets, sprinkle a bit of flaky sea salt on top. This adds a nice flavor twist. Finally, put the baking sheet back in the fridge for about 30 minutes. This lets the chocolate harden and form a nice shell. Enjoy your sweet treat! To melt chocolate well, start with good quality chocolate chips. Use dark chocolate for a rich flavor. Combine the chocolate chips with coconut oil in a microwave-safe bowl. Heat in short bursts of 30 seconds. Stir the mixture after each burst. This helps avoid burning the chocolate. If the chocolate looks lumpy, keep stirring. It will become smooth as you mix. When cooking the cranberry sauce, you want it to thicken nicely. After boiling, lower the heat and let it simmer. Stir it occasionally, so it doesn’t stick to the pan. The cranberries will burst and release their juices. You’ll know it’s ready when it coats the back of a spoon. If it’s too thick, add a bit of water. If it’s too thin, simmer a bit longer. To impress guests, arrange the chocolate-dipped cranberry bites on a pretty platter. A tiered stand works well for a fancy look. You can also garnish the plate with fresh cranberries and mint leaves. This adds color and a festive touch. For a fun twist, drizzle extra melted chocolate on top. It makes the bites look even more tempting! Pro Tips Use Fresh Cranberries: For the best flavor and texture, opt for fresh cranberries when available. They provide a vibrant tartness that enhances the overall taste of the bites. Chocolate Tempering: If you want a shiny finish on your chocolate, consider tempering it. This process ensures the chocolate sets with a glossy appearance and a satisfying snap. Experiment with Flavors: Feel free to add spices like nutmeg or ginger to the cranberry sauce for a unique twist. You can also try different types of chocolate, such as milk or white chocolate. Presentation Matters: Elevate your serving by arranging the bites on a beautiful platter and adding decorations like edible flowers or seasonal greens for a festive touch. {{image_4}} You can boost the taste of your chocolate-dipped cranberry sauce in fun ways. Try adding zest from an orange or lemon for a bright twist. A splash of almond extract can also add a warm, nutty flavor. If you love spice, a pinch of cayenne or ginger can give it a kick. Mix in chopped nuts like walnuts or almonds for added crunch. Each addition brings a new layer of flavor that makes these bites special. If you want a vegan option, just swap the dark chocolate for a dairy-free chocolate. Look for brands that use cocoa butter and no milk. For gluten-free bites, ensure your chocolate is certified gluten-free. The rest of the ingredients in this recipe are naturally gluten-free and safe for anyone avoiding gluten. This way, everyone can enjoy this sweet treat. For a different look and taste, you can use other chocolates. White chocolate brings a creamy, sweet flavor that pairs well with cranberries. Milk chocolate adds a rich, sweet layer that many love. Melt them just like dark chocolate, and dip your cranberry bites as you would normally. Each chocolate type gives a unique taste, letting you customize your treats to your liking. Store your chocolate-dipped cranberry bites in an airtight container. Keep them in the fridge for up to one week. This helps maintain their freshness and flavor. If you place layers of parchment paper between the bites, they won't stick together. To freeze, first let the bites cool completely. Place them on a baking sheet in a single layer. Freeze for about two hours, then transfer them to a freezer-safe bag. You can store them for up to three months. When you want to enjoy them, thaw in the fridge overnight. You don’t really need to reheat these bites. If they get too firm, let them sit at room temperature for a few minutes. This will help soften the chocolate. If you want to make them warm again, place them on a plate in the microwave for a few seconds. Keep an eye on them to avoid melting the chocolate. You can store chocolate-dipped cranberry sauce in the fridge for about one week. Make sure to place the bites in an airtight container. This keeps them fresh and safe to eat. If you want to keep them longer, you can freeze them. They will last for about three months in the freezer. Just let them thaw in the fridge before enjoying! Yes, you can use frozen cranberries! They work great in this recipe. There is no need to thaw them first. Just toss them into the saucepan with the other ingredients. They will cook down nicely and create a tasty sauce. Frozen cranberries often have a similar taste to fresh ones, making them a good choice. The best way to melt chocolate is in the microwave. Use a microwave-safe bowl and add your dark chocolate chips and coconut oil. Heat it in 30-second bursts, stirring in between. This way, the chocolate melts evenly and does not burn. You can also use a double boiler. Just place the chocolate over simmering water and stir until smooth. Both methods work well! To sum up, we covered all you need for chocolate-dipped cranberry bites. We discussed ingredients, cooking steps, and handy tips. You learned how to store and freeze these treats, plus fun variations to try. With this guide, you can make delicious bites that fit any diet. Enjoy crafting these tasty snacks and impress your friends with your skills. You'll find endless joy in sharing them at gatherings or keeping them for yourself. Dive in and start creating your perfect bites today.

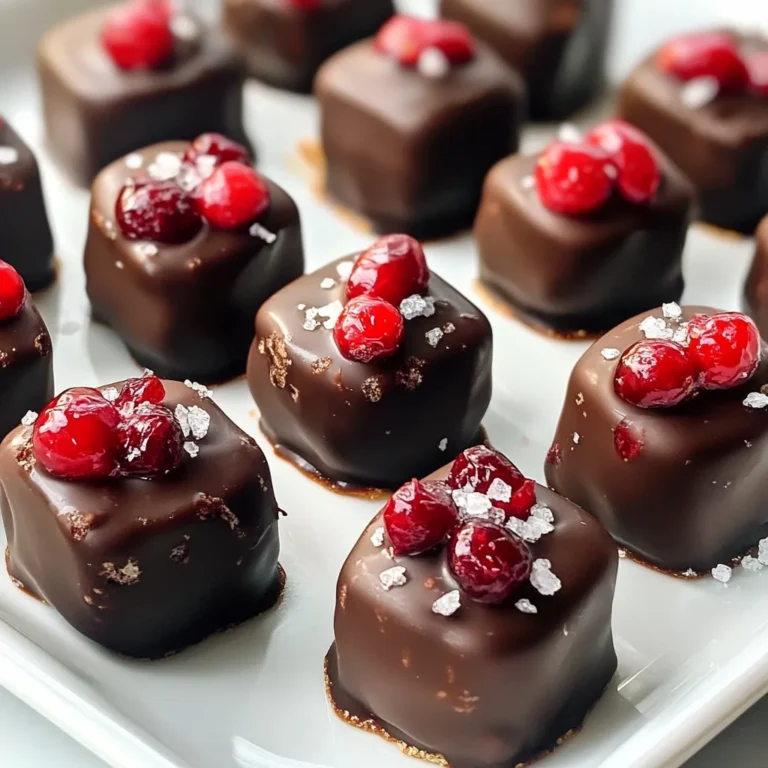
Chocolate Dipped Cranberry Sauce Simple and Sweet Treat

- 2 cups all-purpose flour - 1/2 cup packed brown sugar - 1/2 cup granulated sugar - 1/2 cup unsalted butter, melted - 1 teaspoon baking powder - 1/2 teaspoon baking soda - 1/4 teaspoon salt - 1 large egg - 2 teaspoons vanilla extract - 3 medium-sized apples, peeled, cored, and diced (approximately 3 cups) - 1 tablespoon lemon juice - 1 tablespoon ground cinnamon - 1 tablespoon cornstarch When measuring flour, spoon it into a cup and level it off. This method keeps your bars from becoming dry. For brown sugar, pack it tightly in the cup. This ensures a sweet and moist texture. Use a kitchen scale for more accuracy if you have one. You can swap all-purpose flour with a gluten-free blend if needed. For a different flavor, use light brown sugar instead of dark. Apples can be replaced with pears or peaches for a fresh twist. If you want a dairy-free option, use coconut oil in place of butter. Start by gathering all your ingredients. You will need basic items like flour, sugars, butter, and apples. Preheat your oven to 350°F (175°C). You can use a 9x9-inch baking pan for these bars. Grease it lightly or line it with parchment paper. This helps in removing the bars easily later. In a medium bowl, mix together the flour, brown sugar, granulated sugar, baking powder, baking soda, and salt. Stir until everything is well combined. Next, add the melted butter, egg, and vanilla to the dry mix. Stir until you see a soft dough. It should not have any dry flour spots. Take about two-thirds of the dough and press it into the bottom of your pan. This creates a nice base for your apple filling. In another bowl, mix the diced apples with lemon juice, cinnamon, and cornstarch. Toss well so each apple piece is coated. Spread the apple mixture evenly over the dough in the pan. Crumble the rest of the dough on top of the apples. This gives a rustic look and lets some apples peek through. Bake the pan in your preheated oven for 25-30 minutes. Look for a golden-brown top and tender apples. Once your bars are baked, let them cool in the pan for about 15 minutes. Use the parchment paper to lift the bars out of the pan. This makes cutting much easier. Slice them into squares. For a special touch, you can dust them with powdered sugar before serving. Enjoy these warm or at room temperature! To make the best dough, mix your dry ingredients first. This helps blend the flavors. When you add melted butter, mix until it forms a soft dough. If your dough feels too sticky, add a little flour. If it’s too dry, add a splash of water. This balance is key to a chewy texture. To achieve even baking, spread the dough evenly in the pan. Press it down firmly to create a solid base. Keep an eye on the oven. Rotate the pan halfway through baking for even heat. Check the bars a bit early; you want a golden top, not a burnt one. These bars shine when served warm. Dust with powdered sugar for a sweet touch. You can add whipped cream or vanilla ice cream for richness. For a fun twist, drizzle caramel sauce over each piece. These simple steps make your dessert even more delightful! {{image_4}} You can swap apples with other fruits. Try pears for a sweet twist. Peaches add a juicy flair. Cherries bring a tart kick. Berries mix well and brighten the flavor. Each fruit changes the pie bars' taste and texture. To make these bars gluten-free, use a gluten-free flour blend. Look for one that measures cup-for-cup like regular flour. The result will be just as tasty without the gluten. This way, many can enjoy these treats. Enhance the flavor by adding nuts. Chopped walnuts or pecans give crunch. You can also mix in a pinch of nutmeg for warmth. A splash of maple syrup boosts sweetness. Experiment with these ideas to find your favorite! To keep your Brown Sugar Cinnamon Apple Pie Bars fresh, store them in an airtight container. Place parchment paper between layers to prevent sticking. They will last up to 3 days at room temperature. If you want them to last longer, store them in the fridge. They can stay fresh for about a week in the fridge. You can freeze these bars for later enjoyment. First, let them cool completely. Then, wrap each bar tightly in plastic wrap and place them in a freezer bag. Make sure to remove as much air as possible. These bars can be frozen for up to three months. When you’re ready to eat them, just thaw in the fridge overnight. To reheat your bars, preheat your oven to 350°F (175°C). Place the bars on a baking sheet and cover them with foil. Heat for about 10-15 minutes. This will help restore their soft texture. You can also microwave them for about 15-20 seconds. Enjoy them warm with a scoop of ice cream or a dollop of whipped cream! Yes, you can use other apples. I like Granny Smith for tartness. Honeycrisp adds sweetness. You can mix varieties for a great taste. Make sure to peel and core them first. Dice them into small pieces for even cooking. To make these bars vegan, swap the egg for flaxseed meal. Mix 1 tablespoon of flaxseed meal with 2.5 tablespoons of water. Let it sit for 5 minutes to thicken. Use vegan butter instead of regular butter. This keeps the rich flavor while making it plant-based. To reheat leftovers, use an oven at 350°F. Place the bars on a baking sheet. Cover them with foil to prevent drying out. Heat for about 10-15 minutes. You can also use a microwave. Heat each bar for 20-30 seconds. Enjoy warm for the best taste! This blog post covered how to create delicious baked goods from scratch. We discussed the key ingredients, their measurements, and substitutions. You learned step-by-step instructions for preparation and baking. Tips and tricks helped you perfect dough texture and even baking. We explored variations for flavors and dietary needs, plus how to store and reheat leftovers. Now you can confidently make these treats and share them with others. Enjoy your baking journey!

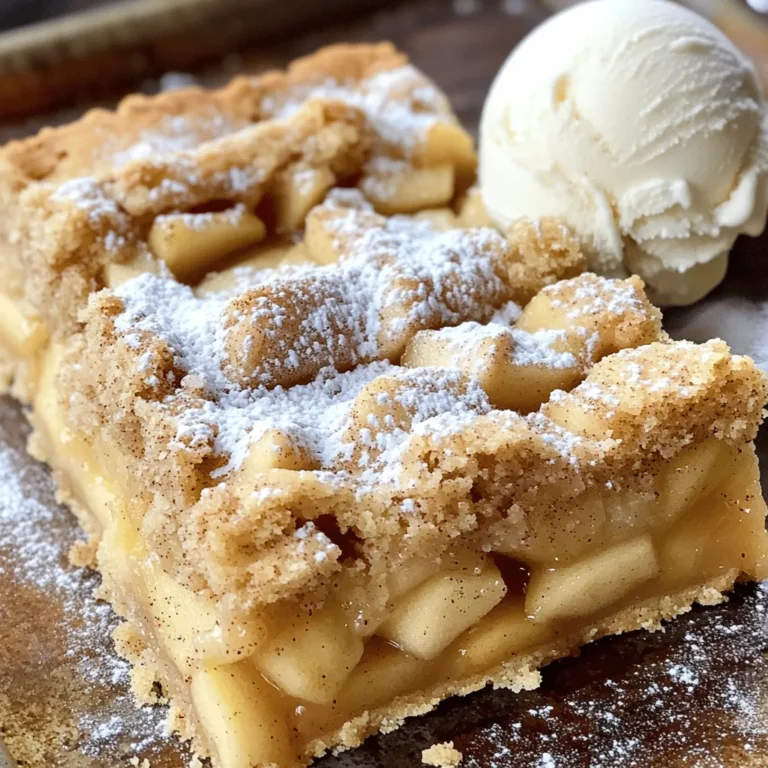
Brown Sugar Cinnamon Apple Pie Bars Delightful Treat

- Ground meat options: You can use 1 pound of ground beef or turkey. Both are tasty and work well. Choose the one you prefer. - Bread crumbs and Parmesan cheese: Use 1/2 cup of plain breadcrumbs. Add in 1/4 cup of finely grated Parmesan cheese. This adds flavor and helps hold the meatballs together. - Egg and garlic details: You need 1 large egg, lightly beaten. Also, use 2 cloves of garlic, minced very fine. The egg binds the meatballs, while the garlic gives them a strong taste. - Seasoning specifics: Add 1 teaspoon of dried oregano and 1 teaspoon of onion powder. Season with salt and freshly cracked black pepper to your liking. These spices boost the overall flavor. - Honey garlic sauce components: Mix together 1/2 cup of honey, 1/4 cup of low-sodium soy sauce, and 1 tablespoon of rice vinegar. You can add 1/2 teaspoon of crushed red pepper flakes for a spicy kick. This sauce makes the dish sweet and tangy. These ingredients make honey garlic meatballs a flavorful delight that everyone will enjoy. To start, grab a large mixing bowl. Add 1 pound of ground meat. You can use beef or turkey; both work well. Next, mix in 1/2 cup of plain breadcrumbs and 1/4 cup of finely grated Parmesan cheese. This adds great flavor. Then, add 1 large beaten egg, 2 cloves of minced garlic, 1 teaspoon of dried oregano, and 1 teaspoon of onion powder. Don’t forget salt and pepper to taste. Use your hands or a spoon to mix everything well. You want it all evenly combined. Now, shape the mixture into small meatballs. Aim for about 1 inch in diameter. This should give you around 20 to 25 meatballs. Now, it’s time for the sauce. In a separate bowl, whisk together 1/2 cup of honey, 1/4 cup of low-sodium soy sauce, and 1 tablespoon of rice vinegar. If you like a little heat, add 1/2 teaspoon of crushed red pepper flakes. Whisk until everything is well blended. This sauce is sweet and savory, perfect for meatballs. For cooking, carefully place your meatballs in the slow cooker. Layer them in a single layer if possible. Pour the honey garlic sauce over the top. Make sure each meatball gets a nice coat of sauce. Now, close the lid. Set your slow cooker to low for 4 to 5 hours. If you’re short on time, you can set it to high for 2 to 3 hours. Your meatballs will be tender and flavorful when done. Once they are cooked, gently stir the meatballs in the slow cooker. This helps ensure they are all evenly coated in sauce. Before serving, sprinkle some chopped fresh parsley on top. This adds a nice pop of color and freshness to your dish. Enjoy your tasty honey garlic meatballs! To make great meatballs, focus on texture and flavor. Here are some tips: - Use fresh ingredients: Fresh garlic and herbs boost flavor. - Don't overmix: Mix just enough to combine. Overmixing makes meatballs tough. - Chill the mixture: Let the meatball mix chill for 15-30 minutes. This helps them hold shape. For even cooking in the slow cooker, follow these tricks: - Form uniform meatballs: Aim for 1-inch balls. This ensures they cook evenly. - Layer carefully: Place meatballs in a single layer. This helps them cook through without steaming. - Avoid crowding: Don’t stack them too high. This keeps the sauce from covering all meatballs. You can easily adjust the sauce to fit your taste. Here’s how: - To alter sweetness: Add more honey for a sweeter dish or reduce it for a less sweet flavor. - For spiciness: Stir in more crushed red pepper flakes for extra heat. Start with a little, then taste. For adding more flavors, consider these options: - Fresh herbs: Add basil or cilantro for fresh notes. - Citrus zest: A little lemon or lime zest brightens the dish. - Ginger: A touch of minced ginger adds warmth and spice. Experiment with these tips to make your honey garlic meatballs just right! {{image_4}} You can switch up the proteins in honey garlic meatballs for fun. Ground chicken works well and stays juicy. If you want a plant-based option, use lentils or chickpeas. Just mash them up and mix with breadcrumbs. This gives you a tasty meatball that everyone can enjoy. Gluten-free options: You can make these meatballs gluten-free easily. Use gluten-free breadcrumbs instead of regular ones. Check the soy sauce for a gluten-free brand too. This way, you keep the flavor without gluten. Low-carb or keto modifications: If you're watching carbs, skip the breadcrumbs. Instead, use almond flour or crushed nuts. This helps keep the meatballs moist. You can also reduce the honey and use a sugar substitute. This keeps the sweet flavor while lowering the carbs. After cooking your honey garlic meatballs, let them cool to room temperature. Then, place them in an airtight container. This keeps the meatballs fresh. Store them in the fridge for up to four days. Make sure to label the container with the date. This helps you track how long they have been stored. To freeze your meatballs, first, let them cool completely. Arrange the meatballs in a single layer on a baking sheet. Place the sheet in the freezer for about one hour. Once they are firm, transfer the meatballs to a freezer-safe bag. Remove as much air as possible before sealing. You can freeze them for up to three months. Just remember to label the bag with the date. To reheat your meatballs, use the microwave or oven. If using the microwave, place them on a microwave-safe plate. Heat in short bursts, stirring in between. This keeps them juicy. If you prefer the oven, preheat it to 350°F (175°C). Place the meatballs in a baking dish, covering them with foil. Heat for about 15-20 minutes. This method keeps the flavors intact and warms them evenly. Honey garlic meatballs last about 3 to 4 days in the fridge. Store them in an airtight container to keep them fresh. If you want to extend their life, consider freezing them. Yes, you can make these meatballs ahead of time. Here’s how: - Mix the ingredients: Prepare the meat mixture as described in the recipe. - Shape the meatballs: Form the meatballs and place them on a baking tray. - Chill: Cover the tray with plastic wrap and chill in the fridge for up to 24 hours. - Cook later: When ready to cook, add the meatballs to the slow cooker and pour over the sauce. You can serve these meatballs with a variety of sides. Here are some ideas: - Rice: Steamed white or brown rice absorbs the sauce well. - Noodles: Try serving with egg noodles or rice noodles for a fun twist. - Vegetables: Pair with stir-fried or roasted veggies for a balanced meal. - Salad: A fresh garden salad adds crunch and lightness to your plate. In this blog post, we covered making delicious honey garlic meatballs. We discussed the key ingredients and detailed how to mix, shape, and cook them in a slow cooker. I shared tips for the best flavor and texture and provided ideas for variations and dietary needs. These meatballs are easy to make and fun to enjoy. You can adapt them to fit your tastes. Save time by preparing and freezing them for later. Happy cooking!

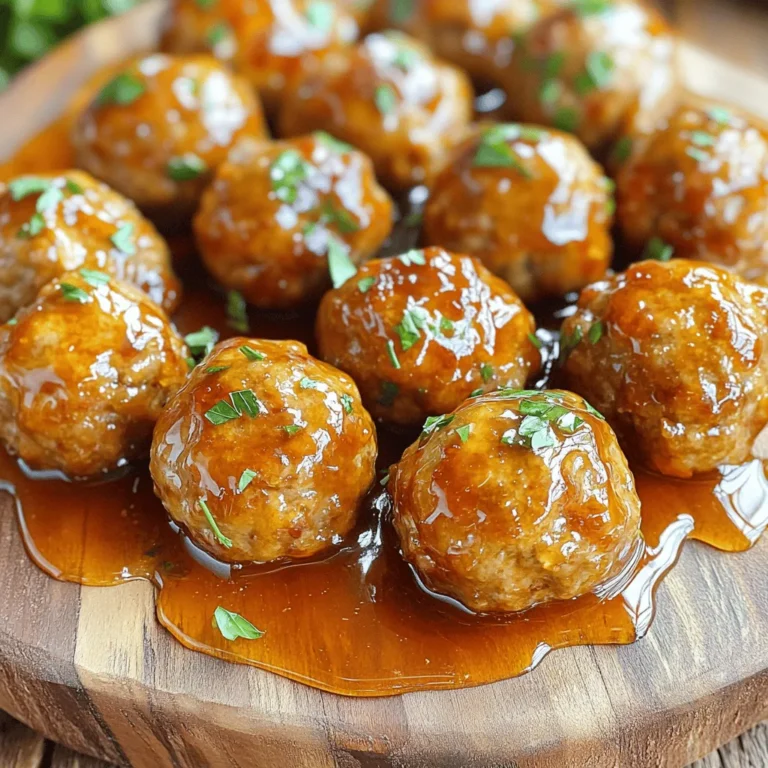
Honey Garlic Meatballs Slow Cooker Flavorful Delight

- 2 large whole wheat flatbreads - 1 cup fresh mozzarella cheese, sliced into rounds - 1/4 cup grated Parmesan cheese - 1 cup San Marzano tomatoes, crushed - 1 clove garlic, finely minced - 1 tablespoon extra-virgin olive oil - A handful of fresh basil leaves - Sea salt and freshly ground black pepper to taste These main ingredients create a classic Margherita flatbread pizza. Whole wheat flatbreads offer a hearty base. Fresh mozzarella melts beautifully, providing a rich texture. San Marzano tomatoes bring a sweet and tangy flavor. Garlic adds depth, while basil gives freshness. - Balsamic glaze (for drizzling) - Red pepper flakes (for heat) - Different cheese blends (like goat cheese or fontina) - Sliced olives or artichokes (for extra flavor) These optional ingredients allow you to make the pizza your own. A drizzle of balsamic glaze adds sweetness. Red pepper flakes can spice it up. Mixing different cheeses gives unique flavors. Adding olives or artichokes brings in more taste. - Gluten-free flatbreads (for a gluten-free option) - Vegan mozzarella cheese (for a vegan option) - Nutritional yeast (for a cheesy flavor without dairy) For those needing gluten-free or vegan options, choose gluten-free flatbreads. Vegan mozzarella melts nicely and keeps the dish plant-based. Nutritional yeast adds a cheesy taste if you want to skip dairy. This selection of ingredients makes this Margherita flatbread pizza simple and fresh. Feel free to mix, match, and customize to suit your taste! {{ingredient_image_2}} Start by preheating your oven to 425°F (220°C). This step is key for a crispy crust. A hot oven helps melt the cheese and bake the flatbreads evenly. In a small bowl, mix together the crushed San Marzano tomatoes, minced garlic, and olive oil. Add a pinch of sea salt and a dash of black pepper. Stir until everything blends well. This sauce is simple, but it packs a lot of flavor. On a baking sheet lined with parchment paper, lay out the whole wheat flatbreads. Spread a generous layer of your tomato sauce on each flatbread. Leave about half an inch around the edges for the crust. Next, place the fresh mozzarella slices evenly over the sauce. Sprinkle grated Parmesan cheese on top for extra flavor. Now, slide the baking sheet into the preheated oven. Bake the flatbread pizzas for about 10 to 12 minutes. Keep an eye on them. You want the cheese to melt and bubble, while the edges turn golden brown. Once done, take them out and let them cool for a minute. Top each pizza with fresh basil leaves. If you like, drizzle some balsamic glaze on top for a sweet touch. Then, slice and serve! For a classic Margherita flatbread, fresh mozzarella is the star. It melts beautifully and has a mild flavor. You can also try burrata for a creamy touch. If you want more depth, add grated Parmesan. It gives a nice salty kick. Use a mix of these cheeses for a richer taste. To get a crispy crust, start with a hot oven. Preheat it to 425°F (220°C). Bake the flatbreads on a baking sheet lined with parchment. This helps with even cooking. Avoid thick layers of sauce, as it can make the crust soggy. A light spread allows the flatbread to crisp up nicely. To serve your Margherita flatbreads, use a rustic wooden board. Slice them into wedges for easy sharing. Add some fresh basil leaves on top for color. If you have balsamic glaze, place it in a small bowl on the side. This invites guests to drizzle it on their slices. Enjoy the vibrant look and delicious taste! Pro Tips Use Fresh Ingredients: The quality of your tomatoes and cheese can significantly impact the flavor of your flatbread pizza. Opt for fresh mozzarella and high-quality canned tomatoes for the best results. Experiment with Herbs: While fresh basil is traditional, feel free to add other herbs like oregano or thyme to the tomato sauce for a unique twist on flavor. Watch the Baking Time: Keep an eye on your flatbreads while they bake, as oven temperatures can vary. You want the cheese to be bubbly and the edges golden brown without burning. Customize Your Toppings: Don't hesitate to add your favorite toppings such as olives, arugula, or even sliced tomatoes to make the pizza your own. {{image_4}} To make a gluten-free Margherita flatbread, simply swap the whole wheat flatbreads for gluten-free ones. Look for brands made with rice flour or almond flour. These options taste great and keep the dish light. You can follow the same steps to prepare the pizza. The flavors will shine through just as well. For a vegan version, replace the mozzarella with dairy-free cheese. Many brands offer tasty vegan mozzarella that melts nicely. You can also create a rich sauce by blending soaked cashews with nutritional yeast. This adds creaminess and a cheesy flavor without dairy. Don't forget to check that your flatbreads are also vegan-friendly! You can get creative with toppings to bring new tastes to your Margherita flatbread. Here are some fun ideas: - Roasted vegetables: Try adding bell peppers, zucchini, or mushrooms. - Artichoke hearts: These add a unique flavor and nice texture. - Olives: Black or green olives can bring a briny touch. - Red pepper flakes: For a little heat, sprinkle some on top. - Fresh arugula: Add this after baking for a peppery crunch. These variations let you customize each flatbread to your taste. Have fun experimenting! To keep leftover flatbreads fresh, place them in an airtight container. You can also wrap them in plastic wrap. This method helps prevent them from drying out. Store the container in the fridge for up to three days. If you want to enjoy them later, try freezing. To reheat your flatbreads, preheat your oven to 350°F (175°C). Place the flatbreads on a baking sheet and cover them with foil. This keeps them from becoming too dry. Heat for about 10-15 minutes. You can also use a skillet for a quick reheat. Just warm each side for about 2-3 minutes. If you want to freeze your flatbreads, wrap each one tightly in plastic wrap. Then, place them in a freezer-safe bag. You can store them for up to three months. When ready to enjoy, thaw in the fridge overnight. Reheat as described above for the best taste. Margherita Pizza comes from Naples, Italy. It dates back to the late 1800s. Legend says Queen Margherita of Savoy loved this pizza. The colors of the toppings (red tomatoes, green basil, and white mozzarella) represent the Italian flag. This simple dish became famous for its fresh flavors and quality ingredients. Yes, you can use different flatbreads. Try naan, pita, or even lavash. Each type adds its own flavor. Thin crusts work best for crispy results. Just keep the baking time in mind. Adjust as needed to get that perfect crunch. To spice up your pizza, add red pepper flakes. You can also include sliced jalapeños or spicy sausage. Another option is to drizzle hot sauce on top after baking. Adjust the heat to your taste for a kick that excites your palate. San Marzano tomatoes are the best choice for this pizza. They have a sweet, rich flavor. If you can’t find them, use any high-quality canned tomatoes. Look for those labeled “whole peeled” or “crushed.” Always taste before adding to your sauce for the best flavor. In this blog post, I covered how to make delicious Margherita flatbread pizza. We explored the key ingredients, from the main ones to gluten-free and vegan options. I outlined clear steps to guide you through the process. Tips for the best cheese and crust were shared, along with fun variations. Finally, I provided helpful storage and reheating methods. Have fun creating your pizza masterpiece! Enjoy your tasty flatbread at any meal.

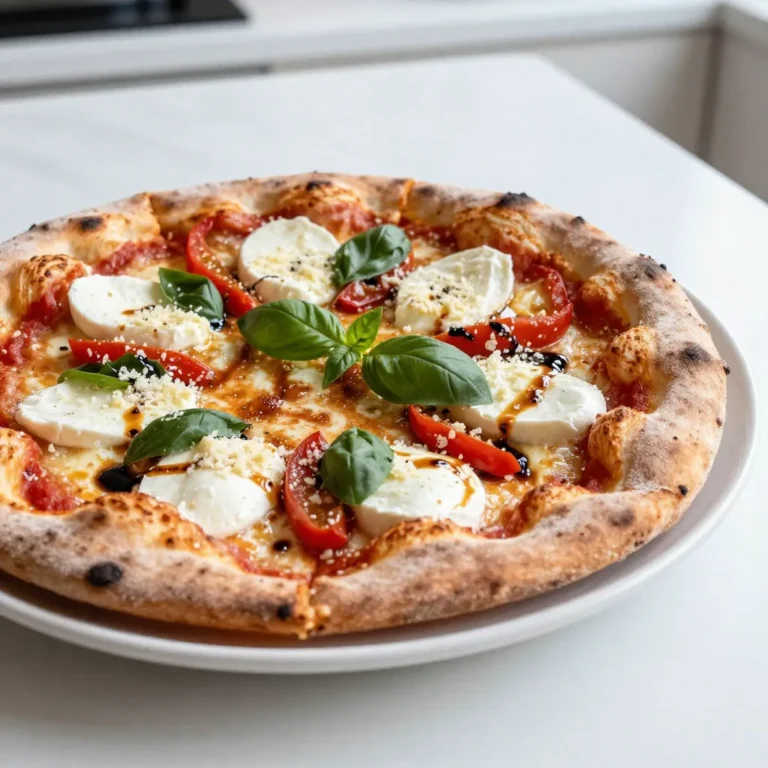
Margherita Flatbread Pizza Simple and Fresh Delight

- 20 store-bought potstickers (choose between chicken or vegetable) - 6 cups of chicken or vegetable broth - 1 tablespoon sesame oil - 2 cloves garlic, finely minced - 1 tablespoon fresh ginger, finely grated - 1 medium carrot, julienned - 1 cup bok choy, roughly chopped - 1 cup shiitake mushrooms, thinly sliced - 2 green onions, sliced - Fresh cilantro leaves - 1 tablespoon soy sauce (or tamari for a gluten-free option) Potsticker soup is a warm hug in a bowl. The mix of flavors is rich yet comforting. You get tender potstickers swimming in a savory broth. This dish is simple but filled with tasty ingredients. For the main ingredients, I use store-bought potstickers to save time. You can choose chicken or vegetable. The broth adds depth. I prefer using chicken broth for a richer flavor, but vegetable works great too. The sesame oil, garlic, and ginger create a fragrant base. They give the soup a warm, inviting aroma. Next come the vegetables. I like to add julienned carrots for color and crunch. Bok choy is a must for its leafy goodness. Shiitake mushrooms add umami and texture. They soak up the broth’s flavor beautifully. Finally, the garnishes make the soup pop. Sliced green onions add a fresh bite. Fresh cilantro brings brightness. A splash of soy sauce or tamari can enhance the taste. You can adjust it to your liking. Gather these ingredients, and you are ready to make a delightful potsticker soup that warms your heart and home. {{ingredient_image_2}} First, heat 1 tablespoon of sesame oil in a large pot over medium heat. Once hot, add 2 cloves of minced garlic and 1 tablespoon of grated ginger. Sauté for about 1-2 minutes. You want to smell the lovely aroma. Next, pour in 6 cups of chicken or vegetable broth. Turn up the heat and bring the mixture to a gentle simmer. Once the broth is simmering, it's time to add some color. Add 1 medium julienned carrot and 1 cup of thinly sliced shiitake mushrooms. Cook these for about 5 minutes. You want the veggies tender but still a bit crisp. This keeps the soup exciting. Now, it’s time for the star of the show—potstickers! Carefully introduce 20 store-bought potstickers to the pot. Make sure to handle them gently. Let them cook in the broth for 8-10 minutes. This heats them through perfectly. After that, stir in 1 cup of roughly chopped bok choy and 1 tablespoon of soy sauce. Cook for an extra 2-3 minutes. You’ll see the bok choy wilt and turn bright green. Taste the soup and add salt and pepper as you like. Now, you’re ready to enjoy your potsticker soup! To make your potsticker soup shine, focus on seasoning. Start with salt and pepper. Taste as you go. This lets you find the right balance. For more depth, try adding a splash of soy sauce. It brings out the umami in the broth. Also, consider adding a bit of vinegar or lime juice for brightness. These small tweaks can transform your soup into a flavorful delight. Handling potstickers can be tricky. To keep them intact, gently introduce them to the broth. Use a spoon to lower each potsticker slowly. This avoids breaking them. When cooking, keep the broth at a gentle simmer. A rolling boil can make potstickers fall apart. Stir carefully to maintain their shape. Serving your soup beautifully makes it even more inviting. Use deep, colorful bowls to enhance the look. Ladle the soup in, ensuring each bowl has a few potstickers. For a finishing touch, drizzle sesame oil over the top. This adds a glossy finish and rich flavor. Finally, garnish with sliced green onions and fresh cilantro. These toppings not only taste great but also add a pop of color. Pro Tips Prepare Ahead: You can prep the vegetables in advance and store them in the fridge, making the cooking process quicker when you're ready to make the soup. Potsticker Choice: Experiment with different types of potstickers such as pork or shrimp for a unique flavor twist in your soup. Broth Variations: For a richer flavor, consider using homemade broth or adding a splash of mirin or rice vinegar to the store-bought broth. Extra Garnish: Adding a few drops of chili oil or a sprinkle of sesame seeds just before serving can elevate the soup's flavor profile. {{image_4}} You can switch out store-bought potstickers for homemade ones. Making potstickers from scratch gives you control over the filling. Use ground pork, chicken, or tofu. You can also create them with a mix of veggies for a fun twist. Want to go meat-free? Try a vegetarian or vegan potsticker. Fill them with mushrooms, cabbage, or carrots. These options keep the soup tasty and satisfying. If you want to change the flavor, consider using flavored broths. Miso broth adds depth and umami. You can also use bone broth for extra richness. For gluten-free diets, use tamari instead of soy sauce. Ensure your broth is gluten-free too. This way, everyone can enjoy a warm bowl of potsticker soup without worry. Add other vegetables to boost nutrition and flavor. Snow peas or spinach work well in this soup. You can also use bell peppers for color and crunch. Seasonal veggies are great too. In spring, try asparagus or peas. In fall, add butternut squash. The possibilities are endless, and these choices make your soup even more delightful. To keep your potsticker soup fresh, refrigerate it right away. Let it cool first, then transfer it to a container. Use an airtight container to prevent spills and keep flavors locked in. This soup stays good in the fridge for up to three days. When you want to warm up your soup, use a pot on medium heat. Stir gently to avoid breaking the potstickers. You can also use the microwave. Heat it in short bursts, stirring in between, to keep the texture nice. To freshen up leftovers, add a splash of broth or a bit of water. This will bring back some of the soup's original flavor. If you want to freeze your soup, wait for it to cool completely. Pour it into freezer-safe containers or bags. Leave some space at the top for expansion. You can freeze it for about three months. When ready to eat, thaw it in the fridge overnight. Reheat it gently on the stove or in the microwave, as mentioned above, for the best taste. Yes, you can use homemade potstickers! They add a personal touch. Homemade potstickers often taste fresher than store-bought ones. You can control the flavors and fillings. Plus, making them lets you choose healthier ingredients. If you enjoy cooking, this is a fun option. You can serve many dishes with potsticker soup. Here are some great sides: - Steamed rice for a filling meal. - A light salad with sesame dressing. - Crispy spring rolls for extra crunch. - Pickled vegetables for a tangy contrast. To add spice to your soup, try these ideas: - Add red pepper flakes while cooking. - Mix in a spoon of chili paste. - Include sliced jalapeños for fresh heat. - Serve with hot sauce on the side. Yes, this soup is excellent for meal prep! Here’s how: - Cook and cool the soup before storing. - Use airtight containers for easy storage. - Store soup for up to three days in the fridge. - Reheat gently on the stove to keep potstickers intact. This potsticker soup comes together with simple ingredients and easy steps. You can enjoy tasty store-bought potstickers, rich broth, and fresh veggies. Use sesame oil, garlic, and ginger for bold flavor. Remember to garnish with green onions and cilantro for a bright finish. As you try this recipe, don't hesitate to make it your own. Adjust flavors, add different veggies, or even change the broth. Cooking should be fun and personal, so enjoy every bite!

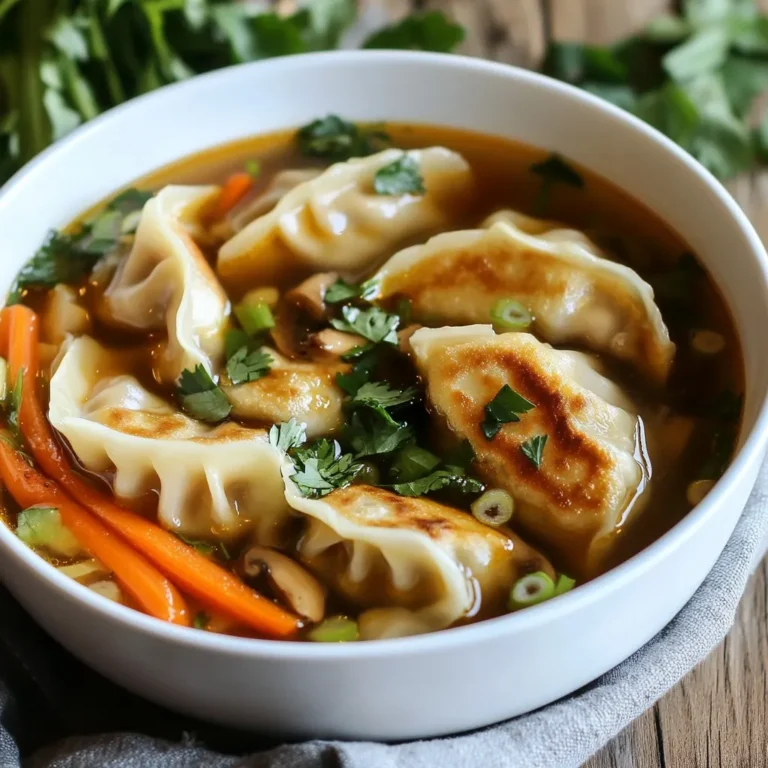
Potsticker Soup Delightful and Easy Comfort Food

- Chicken and Base Ingredients - 1 lb boneless, skinless chicken breasts - 1 tablespoon olive oil - 1 medium onion, finely diced - 3 cloves garlic, minced - 2 cans (15 oz each) white beans (cannellini or navy beans), drained and rinsed - 1 can (4 oz) diced green chilies - 2 cups chicken broth - 1 cup corn kernels (fresh, frozen, or canned) - Spices and Seasonings - 1 teaspoon ground cumin - 1 teaspoon chili powder - ½ teaspoon smoked paprika - Salt and pepper to taste - Optional Garnishes and Serving Suggestions - 1 cup heavy cream - Fresh cilantro, chopped (for garnish) - Lime wedges (for serving) When I think about making creamy white chicken chili, I start with the right ingredients. The base is simple: chicken, beans, and broth. I love using boneless, skinless chicken breasts. They cook quickly and shred easily. Next, I add olive oil to a pot and heat it up. The onion and garlic bring a lot of flavor. You can’t go wrong with these two. They form a great base for the chili. Now, let's talk about spices. Ground cumin and chili powder add warmth. Smoked paprika gives it a nice smoky flavor. Don’t forget to season with salt and pepper to bring out all the goodness. For creaminess, heavy cream is key. It makes the chili rich and smooth. Finally, I love adding fresh cilantro and lime. They add a pop of freshness at the end. Gather these ingredients, and you’re on your way to a delicious meal! {{ingredient_image_2}} First, heat the olive oil in a large pot over medium heat. When the oil shimmers, add the diced onion. Cook the onion for about 3-4 minutes. It should be soft and fragrant. Next, add the minced garlic. Sauté it for 1-2 minutes, stirring often. You want the garlic to be aromatic, not brown. Now, season the chicken breasts with salt and pepper. Place them in the pot with the onions and garlic. Pour in the chicken broth, making sure the chicken is submerged. Bring this mixture to a gentle simmer. Then, reduce the heat to low and cover the pot. Let it simmer for about 20 minutes. The chicken should reach an internal temperature of 165°F. Carefully remove the chicken and let it rest for a few minutes. After the chicken cools, shred it using two forks. While you do this, return to the pot. Add the rinsed white beans, diced green chilies, ground cumin, chili powder, smoked paprika, and corn. Stir well to mix everything together. Continue to simmer uncovered for 5-10 minutes. This lets all the flavors meld nicely. When the chili is hot and fragrant, stir in the heavy cream. Add the shredded chicken back into the pot. Heat it for another 5 minutes, stirring gently. Avoid boiling to keep the cream from separating. Taste your chili and add more salt or pepper if needed. Now, it’s ready to serve! Enjoy it hot, garnished with chopped cilantro and lime wedges for extra zest. How to Achieve Perfectly Shredded Chicken To get the best shredded chicken, cook it until it reaches 165°F. After cooking, let it rest for a few minutes. Use two forks to pull the chicken apart gently. This method gives you nice, even pieces. Best Practices for Using Heavy Cream When adding heavy cream, do it at the end of cooking. Stir it in gently and avoid boiling. Boiling can cause the cream to separate, ruining the texture. Use fresh heavy cream for the best taste. Adjusting Flavors and Spice Levels Taste your chili before serving. If you want it spicier, add more chili powder or diced green chilies. For a milder flavor, reduce the spices. You can also balance heat with a bit of lime juice or extra cream. Ideal Pairings for Creamy White Chicken Chili This chili pairs well with cornbread or tortilla chips. You can serve it with a fresh salad for a light meal. A cold drink like iced tea or lemonade complements the dish nicely. Recommended Toppings for Extra Flavor Add toppings to enhance flavor. Fresh cilantro adds a nice pop. Lime wedges bring brightness. You can also sprinkle cheese or diced avocado on top for creaminess. Pro Tips Use Rotisserie Chicken: For a quicker option, substitute cooked rotisserie chicken instead of raw chicken breasts. Just shred it and add it to the pot after sautéing the onions and garlic. Adjust the Spice Level: If you prefer a spicier chili, add more diced green chilies or a pinch of cayenne pepper. Adjust according to your taste! Make it Dairy-Free: To make a dairy-free version, replace the heavy cream with coconut milk or a plant-based cream alternative. Garnish Creatively: Experiment with garnishes like avocado slices, jalapeño rings, or crispy tortilla strips for added texture and flavor! {{image_4}} You can swap chicken for turkey if you want a leaner option. For a different taste, try using shredded pork or cooked shrimp. Each protein adds unique flavor and texture to your chili. For a healthier choice, use low-fat milk instead of heavy cream. Greek yogurt can also add creaminess while boosting protein. If you want to cut carbs, use cauliflower rice instead of beans. To make this dish vegan, replace chicken with chickpeas or tofu. Use vegetable broth instead of chicken broth. For creaminess, coconut milk works well. You still get a rich flavor without any animal products. You can add more veggies to boost nutrition. Consider bell peppers, zucchini, or spinach. These veggies add color, texture, and flavor. Plus, they make the dish even healthier! If you like heat, add jalapeños or cayenne pepper. For a smoky flavor, use chipotle peppers. Adjust the spice to match your taste. Remember, you can always start with a little and add more as needed! How do you store leftovers? After you enjoy your creamy white chicken chili, let it cool first. Then, place it in an airtight container. You can keep it in the fridge for up to four days. What are the best containers for storage? Glass containers are great for storing chili. They are easy to clean and don’t absorb odors. Plastic containers work too, just make sure they are BPA-free. What are some tips for freezing? If you want to save chili for later, freezing is a good option. Use freezer-safe bags or containers. Be sure to leave some space at the top for expansion. This chili can last for about three months in the freezer. How do you thaw and reheat chili? To thaw, move the chili from the freezer to the fridge the night before. This way, it will thaw slowly and safely. When ready to serve, reheat in a pot over medium heat. Stir it often until it's hot. If it seems thick, add a splash of chicken broth or water to help. Yes, you can use frozen chicken! Just add an extra 10-15 minutes to the cooking time. Make sure the chicken reaches 165°F to ensure safety. If you use frozen chicken, it may release more water. Adjust your broth accordingly to keep the chili creamy. If you want a lighter option, use half-and-half or whole milk. A non-dairy option is coconut milk, which adds a slight sweetness. You can also use Greek yogurt for creaminess but add it at the end to prevent curdling. This chili has a mild spice level. The diced green chilies add a gentle heat. If you like more spice, add extra chili powder or diced jalapeños. You can also serve hot sauce on the side for those who want a kick. Cannellini or navy beans are the best choices. They are creamy and hold their shape well in the chili. If you want a different texture, you can also use great northern beans. The key is to drain and rinse them before adding to the pot. This blog post covered how to make creamy white chicken chili. We went over the key ingredients, steps to cook, and tips for the best results. You learned about variations, storage, and answered common questions. Making this dish is fun and easy. Feel free to experiment and adjust it to your taste. Enjoy your chili with friends and family, and remember, the best meals are shared with those you love.

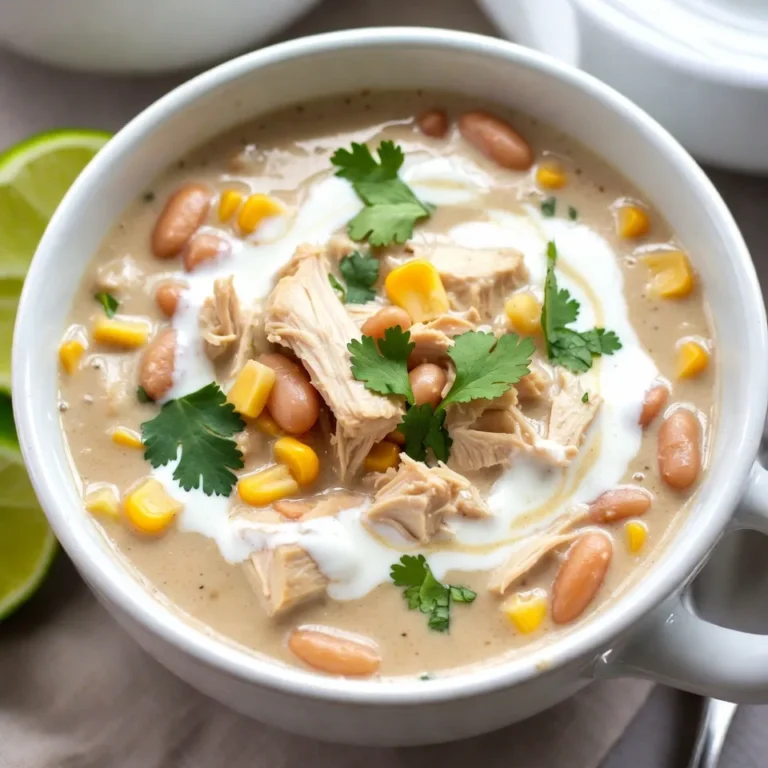
Creamy White Chicken Chili Flavorful and Simple Dish

To make crispy air fryer sweet potato chips, you'll need the following ingredients: - 2 medium sweet potatoes - 2 tablespoons extra virgin olive oil - 1 teaspoon garlic powder - 1 teaspoon smoked paprika - 1/2 teaspoon ground cumin - Salt and freshly cracked black pepper to taste These ingredients come together to create a flavorful snack that is both healthy and satisfying. Sweet potatoes offer natural sweetness and are packed with nutrients. The olive oil helps the chips crisp up nicely, while the spices add depth and warmth. Using fresh ingredients is key. Choose firm sweet potatoes with smooth skin. This ensures a better taste and texture. You can adjust the seasonings to fit your palate. For a spicy kick, add cayenne pepper or chili powder. If you prefer a milder flavor, you can skip the smoked paprika. With just a few simple ingredients, you’re on your way to a delicious treat! {{ingredient_image_2}} Start by washing the sweet potatoes well. This step removes dirt and debris. Next, peel the sweet potatoes using a vegetable peeler. Now, slice them thinly. Aim for about 1/8 inch thickness. You can use a mandoline slicer or a sharp knife. Consistent slices help the chips cook evenly. Soaking is key for crispy chips. It helps remove extra starch that makes them soggy. Place your sliced sweet potatoes in a bowl filled with cold water. Let them soak for about 30 minutes. This soaking time is critical for achieving that perfect crunch. After soaking, drain the sweet potato slices. Pat them dry with a clean towel. This step removes moisture, which is important. Next, place the dried slices in a large bowl. Drizzle 2 tablespoons of olive oil over them. Toss gently to coat each slice evenly. Now it's time to add flavor. Sprinkle garlic powder, smoked paprika, ground cumin, salt, and freshly cracked black pepper over the slices. Toss again to make sure every chip is seasoned well. Preheat your air fryer to 350°F (175°C). This step ensures even cooking. Once it's hot, arrange the sweet potato slices in a single layer in the basket. Avoid overcrowding, as this can lead to soggy chips. Air fry the chips for about 12 to 15 minutes. Halfway through, shake the basket for even crispiness. Keep an eye on them near the end to reach your desired crunch. When they turn golden and crispy, carefully remove them. Let them cool on a wire rack for a few minutes. The chips will get even crispier as they cool. To get that perfect crunch, slice your sweet potatoes about 1/8 inch thick. Thin slices cook better and get crispier. If the slices are too thick, they will be chewy instead of crunchy. It’s also key to keep an eye on the cooking time. Air fry for 12 to 15 minutes, shaking the basket halfway. This helps them cook evenly. Check them often at the end to make sure they don’t burn. I love to use garlic powder, smoked paprika, and cumin for a tasty kick. These spices make the sweet potato chips pop with flavor. You can also try other seasonings like chili powder for heat or cinnamon for a sweet touch. Mixing and matching helps you find your favorite blend. For the best experience, pair your sweet potato chips with dips. Creamy hummus or zesty avocado dip works great. They add a nice contrast to the crunchy chips. You can also garnish the chips with fresh herbs like parsley or cilantro for a pop of color. This makes your snack look as good as it tastes! Pro Tips Slice Uniformly: Ensuring all sweet potato slices are of equal thickness will promote even cooking and crispiness. Soak for Crispiness: Soaking the sweet potato slices in cold water helps to remove excess starch, leading to crunchier chips. Don’t Overcrowd: Arrange the chips in a single layer in the air fryer to allow proper air circulation for maximum crispiness. Watch Closely: Keep an eye on the chips in the last few minutes of cooking to achieve your desired level of crunch without burning. {{image_4}} You can make sweet potato chips sweet or savory. For sweet chips, use cinnamon and a bit of brown sugar. This gives a tasty treat that kids love. For savory chips, I like smoked paprika and garlic powder. This mix adds bold flavor and a nice crunch. When using fresh herbs, chop them finely. You can mix them into the seasoning or sprinkle them on top after cooking. Fresh herbs like rosemary or thyme brighten up the chips. They add color and flavor that make your snack even better. If you cannot find sweet potatoes, regular potatoes work well too. Just slice them thin and follow the same steps. White or yellow potatoes give a classic chip taste. You can also try other root vegetables. Beets, carrots, or parsnips are great choices. Each adds its own unique flavor and color. Just remember to slice them thin for even cooking. They’ll all crisp up nicely in the air fryer. To keep your sweet potato chips fresh, store them in an airtight container. This helps keep moisture out and maintains their crunch. You can use a glass jar or a plastic container with a tight lid. If you have a lot of chips, consider separating layers with parchment paper. This prevents sticking and keeps them crispy. For the best taste, consume them within three days. To reheat your chips and keep them crispy, the air fryer is the best choice. Set the air fryer to 350°F (175°C) and heat for about 3 to 5 minutes. This method revives their crunch and flavor. You can also use the oven, but it may take longer. Preheat the oven to 350°F (175°C) and bake for 5 to 7 minutes. Keep an eye on them to avoid burning. Enjoy your tasty snack just like fresh! Air fryer sweet potato chips can last about 3 to 5 days. Store them in an airtight container. Keep them in a cool, dry place to maintain crispness. If they lose their crunch, you can reheat them in the air fryer for a few minutes. Yes, you can make sweet potato chips in the oven. Slice the sweet potatoes thinly. Toss them with olive oil and seasonings. Spread them on a baking sheet in a single layer. Bake at 400°F (200°C) for about 20-25 minutes. Flip them halfway through to get even crispness. To make sure your chips are crispy, follow these steps: - Cut sweet potatoes into even slices, about 1/8 inch thick. - Soak the slices in cold water for 30 minutes to remove excess starch. - Pat the slices dry with a towel to eliminate moisture. - Don’t overcrowd the air fryer basket. Cook in batches if needed. - Shake the basket halfway through cooking for even crisping. Avoiding these common mistakes helps achieve perfect, crispy chips! In this post, you learned how to make crispy sweet potato chips with simple ingredients and steps. We covered the prep work, soaking for extra crunch, and the air frying process. Plus, I shared tips for flavor and storage. Remember, the right slice thickness and monitoring cooking time make a big difference. Use your favorite seasonings to customize the taste. Enjoy these chips as a snack or with dips. They are tasty and healthy. Now, grab those sweet potatoes and start cooking!

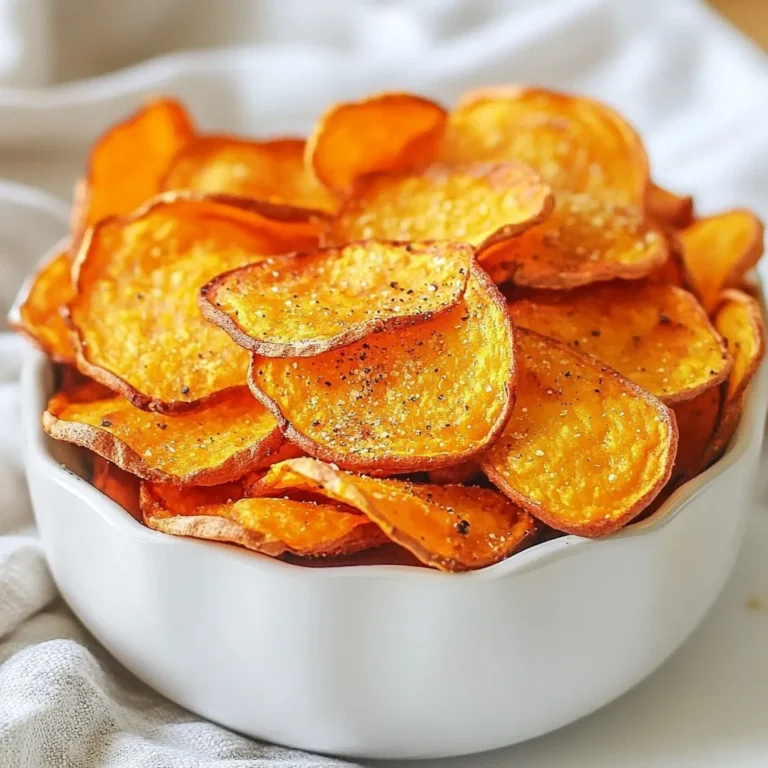
Air Fryer Sweet Potato Chips Crispy and Flavorful Snack

PREV 1 … 17 18 19 … 48 NEXT
meal plan mapper

explore

DessertsDinnerAppetizersDrinks

Our Policies

  • Cookie Policy
  • Copyright Policy
  • Disclaimer
  • GDPR Policy
  • Terms Of Use
Back to Top
  • About
  • Contact Us
  • Privacy Policy
© 2025 meal plan mapper