FREE DINNER EBOOK! Get your copy!
  • Cookie Policy
  • GDPR Policy
  • Disclaimer
  • Terms Of Use
  • Visit my other site: Fun Cookie Recipes
meal plan mapper
  • Home
  • Dinner
  • Desserts
  • Drinks
  • Appetizers
  • Contact
  • About
  • Privacy Policy
  • Home
  • Dinner
  • Desserts
  • Drinks
  • Appetizers
  • Contact
  • About
  • Privacy Policy
  • Cookie Policy
  • GDPR Policy
  • Disclaimer
  • Terms Of Use
Visit my other site: Fun Cookie Recipes

HOME / CATEGORIES /

Latest

- 4 salmon fillets (6 oz each) Fresh salmon fillets are the star of this dish. Look for fillets with bright color and firm texture. This ensures great flavor and a nice presentation. - 1/4 cup pure maple syrup - 2 tablespoons Dijon mustard - 2 tablespoons low-sodium soy sauce - 1 tablespoon extra virgin olive oil - 2 cloves garlic, finely minced - 1 teaspoon fresh ginger, finely grated - Salt and freshly ground black pepper to taste This glaze is a blend of sweet and savory. The maple syrup gives a rich sweetness. The Dijon mustard adds a nice tang. Soy sauce brings umami, while garlic and ginger add depth. Use fresh ingredients for the best taste. - Lemon wedges - Freshly chopped parsley Garnishes can elevate your dish. Lemon wedges add a bright, zesty kick. Chopped parsley gives a pop of color and freshness. These simple touches make your meal look and taste amazing. Start by preheating your oven to 400°F (200°C). This step is key for even cooking. While the oven heats, line a baking sheet with parchment paper. This helps the salmon not stick and makes cleanup easy. In a small bowl, mix the glaze ingredients. You need: - 1/4 cup pure maple syrup - 2 tablespoons Dijon mustard - 2 tablespoons low-sodium soy sauce - 1 tablespoon extra virgin olive oil - 2 cloves garlic, finely minced - 1 teaspoon fresh ginger, finely grated Whisk everything together until it’s smooth. This glaze gives the salmon a sweet and tangy flavor. Place your salmon fillets skin-side down on the lined baking sheet. Sprinkle each fillet lightly with salt and pepper. This will enhance the taste. Now, take the glaze and brush it generously over the salmon. Make sure each piece is well-coated. Save a bit of glaze for later. Slide the baking sheet into your preheated oven. Bake the salmon for 12-15 minutes. It’s done when it flakes easily with a fork and the glaze is bubbly and caramelized. Keep an eye on it to avoid overcooking. In the last two minutes of baking, pull the salmon out briefly. Brush on the reserved glaze for extra flavor. This step really brings out the taste and makes it shiny. Once baked, take the salmon out of the oven. Let it rest for a couple of minutes. This helps keep the fish moist and lets the flavors mix well. Serve the salmon on plates with lemon wedges and a sprinkle of fresh parsley. The lemon adds a zesty touch, while the parsley makes it look great. Enjoy your delicious maple Dijon glazed salmon! When choosing salmon, look for bright color. Fresh salmon should have a deep hue. It should smell like the ocean, not fishy. The flesh should be firm to the touch. Avoid any fillets with brown spots or dry edges. If you can, buy salmon from a trusted source. Wild-caught salmon often has better flavor and quality than farmed. To make a thick glaze, mix all wet ingredients well. Combine maple syrup, Dijon mustard, soy sauce, olive oil, garlic, and ginger in a bowl. Whisk until smooth. If your glaze feels too runny, add more mustard for thickness. You want it to cling to the salmon without dripping off. Brush it on the fillets evenly for the best taste. Cooking time can change based on the thickness of your fillets. For salmon that is about 1 inch thick, bake for 12-15 minutes. Thinner fillets may need only 10 minutes. For thicker cuts, check at 15-20 minutes. The salmon is ready when it flakes easily with a fork. Always keep an eye on it to avoid overcooking. {{image_4}} You can add herbs to your glaze for extra flavor. Try mixing in fresh dill, thyme, or parsley. These herbs pair well with salmon. Chop them finely and stir into the glaze before applying it. This twist brings a garden-fresh taste to each bite, making your meal even more delightful. Grilling gives salmon a smoky flavor that is hard to beat. To make a grilled version, follow the same steps for the glaze. Preheat your grill to medium heat. Brush the glaze on your salmon fillets and place them directly on the grill. Cook for about 5-7 minutes per side. Keep an eye on them so they don't overcook. The grill adds a nice char and deepens the maple flavor. Choosing the right sides can turn this meal into a feast. Here are some great options: - Roasted Vegetables: Carrots, zucchini, or bell peppers add color and nutrients. - Quinoa Salad: A light salad with herbs and lemon complements the salmon well. - Steamed Asparagus: This green veggie adds a fresh crunch. - Garlic Mashed Potatoes: Creamy potatoes are always a crowd-pleaser. These sides balance the rich taste of the maple Dijon salmon and create a complete meal. After you enjoy your maple Dijon glazed salmon, you might have leftovers. Store the salmon in an airtight container. Place it in the fridge right away. It will stay fresh for up to three days. Be sure to keep the glaze separate if you can. This helps maintain the flavor and texture of the fish. When you want to reheat your salmon, do it gently. A microwave can dry it out. Instead, use the oven. Preheat it to 275°F (135°C). Place the salmon on a baking sheet. Cover it with foil to keep moisture in. Heat for about 15 minutes, or until warm. This method keeps the salmon tender and juicy. If you want to save your salmon for later, freezing is a great option. Wrap each fillet tightly in plastic wrap. Then, put them in a freezer bag. Make sure to remove as much air as possible. Label the bag with the date. You can freeze them for up to three months. When ready to eat, thaw it in the fridge overnight. This helps keep the flavor intact. Yes, you can use other mustards. Try yellow mustard for a milder taste. Honey mustard adds sweetness. Spicy brown mustard brings heat. Each choice changes the flavor a bit. Keep in mind the balance of sweet and tangy. You can tell when salmon is done by checking its color. The flesh should turn opaque and easily flake. Use a fork to test if it breaks apart. The internal temperature should reach 145°F (63°C). If you don’t have a thermometer, look for a firm texture. Yes, making the glaze ahead is easy. Simply mix the ingredients and store them in the fridge. Use it within three days for best flavor. Just remember to give it a good stir before using. Many side dishes pair well with salmon. Here are some great options: - Steamed broccoli - Roasted Brussels sprouts - Quinoa salad - Garlic mashed cauliflower - Mixed green salad with vinaigrette These sides add color and nutrients to your meal. They balance the rich flavor of the salmon. This blog post covered the key steps to make delicious Maple Dijon Salmon. I shared the right ingredients, detailed instructions, and helpful tips. You learned about variations and storage for leftovers. By following this guide, you can create a tasty meal that impresses everyone. Cooking doesn’t have to be hard—just use fresh ingredients and enjoy. Try different flavors to make it your own. Get cooking and enjoy your Maple Dijon Salmon today!

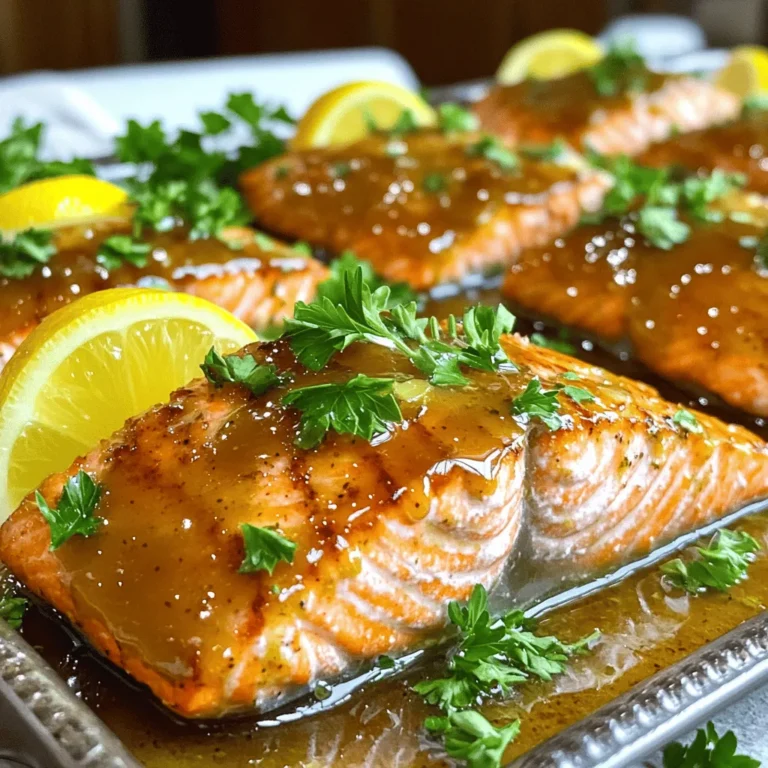
Maple Dijon Glazed Salmon Flavorful and Easy Recipe

- 2 cups all-purpose flour - 1/2 cup powdered sugar - 1 cup unsalted butter, softened - 1/2 teaspoon pure almond extract - 1/4 teaspoon fine salt - 1 cup fresh raspberries - 1/4 cup sliced almonds - 1 tablespoon granulated sugar The main ingredients are pretty simple yet delightful. The flour forms the base of the shortbread. The powdered sugar adds a gentle sweetness. Using unsalted butter gives you control over salt levels. The almond extract adds a rich flavor, making these bars special. The raspberries bring a bright, fruity taste, while the sliced almonds add crunch. - Alternative flours (gluten-free options): You can swap all-purpose flour with gluten-free flour blends. These blends often work well in shortbread. - Vegan butter alternatives: For a vegan option, use coconut oil or a vegan butter. Both can create a similar texture and taste. - Using frozen vs. fresh raspberries: You can use frozen raspberries if fresh ones aren't available. Just thaw them and drain any extra moisture. This keeps your bars from getting soggy. - 9x9 inch baking pan - Electric mixer - Parchment paper - Mixing bowls and measuring cups You’ll need a 9x9 inch baking pan to shape the bars. An electric mixer helps cream the butter and sugar nicely. Parchment paper makes it easy to lift the bars out after baking. Mixing bowls and measuring cups are essential for gathering ingredients. Having the right tools makes the process smooth and fun! - Preheat the oven to 350°F (175°C). - Grease a 9x9 inch baking pan with butter. - Line the pan with parchment paper, leaving some overhang. - In a large bowl, beat softened butter and powdered sugar together. - Mix for about 2-3 minutes until fluffy. - Gradually add flour, almond extract, and salt. - Mix on low speed until just combined; the dough should be crumbly but hold together when pressed. - Take two-thirds of the dough and press it into the pan evenly. - Spread fresh raspberries evenly over the pressed dough. - Crumble the remaining dough on top of the raspberries. - Sprinkle sliced almonds and granulated sugar on top for a sweet crunch. - Bake for 25-30 minutes or until edges are golden brown. - Cool the pan on a wire rack for about 30 minutes. - Once cool, lift the bars out using the parchment paper. - Cut into squares or bars as desired. To get the right texture in your bars, you want a crumbly dough. This dough should hold together when you squeeze it. If your dough is too dry, add a little butter. If it feels too wet, add a bit more flour. Mix just until combined; overmixing makes the bars tough. You can boost the flavor of these bars by adding lemon zest. This gives a bright, fresh taste. You can also try using different sweeteners, like honey or maple syrup. A pinch of cinnamon or nutmeg can bring warmth and depth to the flavor. For a lovely display, serve the bars on a nice platter. Add fresh raspberries on top for color. A light dusting of powdered sugar makes them look extra special. These bars go well with tea or coffee. They also pair nicely with a scoop of vanilla ice cream for a fun treat. {{image_4}} You can change the flavor of raspberry almond shortbread bars in fun ways. One easy option is to add chocolate chips or chunks. Just mix them in with the dough before pressing it into the pan. This adds a rich twist to every bite. You can also try using other fruits, like blueberries. Just swap out the raspberries and layer them like before. Blueberries give a unique taste and color. If you need a gluten-free version, use gluten-free flour. This will work well in place of all-purpose flour. You'll still get that nice shortbread texture. For those who want a vegan option, use plant-based butter instead of regular butter. Make sure any chocolate you add is dairy-free if you go vegan. Both changes make these bars fit for everyone. Seasonal fruits can add a fresh touch. In summer, try using strawberries or peaches. These fruits bring a bright flavor and lovely colors. For the holidays, consider adding a pinch of cinnamon to the dough. This warms up the flavor and makes it special for festive occasions. Each twist keeps the bars exciting and new, no matter the season. To keep your Raspberry Almond Shortbread Bars fresh, use an airtight container. Line the container with parchment paper for extra protection. You can store them at room temperature for up to three days. If you live in a warm area, put them in the fridge. This helps maintain their texture and flavor. To freeze the bars, allow them to cool completely. Then, wrap each bar in plastic wrap. Place the wrapped bars in a freezer-safe bag or container. They can last in the freezer for up to three months. When you're ready to enjoy them, thaw the bars in the fridge overnight. For a quick thaw, leave them at room temperature for a few hours. At room temperature, these bars stay fresh for about three days. If you keep them in the fridge, they can last up to a week. Watch for signs of spoilage, like a change in smell or texture. If the bars look dry or hard, it’s time to toss them out. Always check before you dig in! Yes, you can make these bars ahead of time. Before baking, store the dough in the fridge. Wrap it in plastic wrap or place it in an airtight container. You can keep it for up to two days. After baking, let the bars cool completely. Store them in a sealed container at room temperature. They will stay fresh for about a week. If you want a dairy-free option, use coconut oil instead of butter. It works well and adds a nice flavor. You can also try vegan butter. Look for brands that are solid at room temp. Applesauce can be an option too, but it will change the texture. Use half the amount of applesauce compared to butter. You can tell the bars are done when the edges turn golden brown. The top should look slightly browned too. Insert a toothpick into the center. If it comes out clean or with a few crumbs, the bars are ready. If you see wet batter, bake a little longer. Yes, you can use frozen raspberries! Thaw them first and drain any excess moisture. This helps keep the bars from becoming soggy. Spread them evenly over the dough for great taste in every bite. In this post, I shared how to make delicious raspberry bars. You learned about main ingredients and easy substitutions. We covered key steps, tips for the best texture, and fun variations. These bars are simple and tasty, perfect for any occasion. With a few tweaks, you can match any diet. Enjoy baking and share these treats with friends. Have fun in your kitchen!

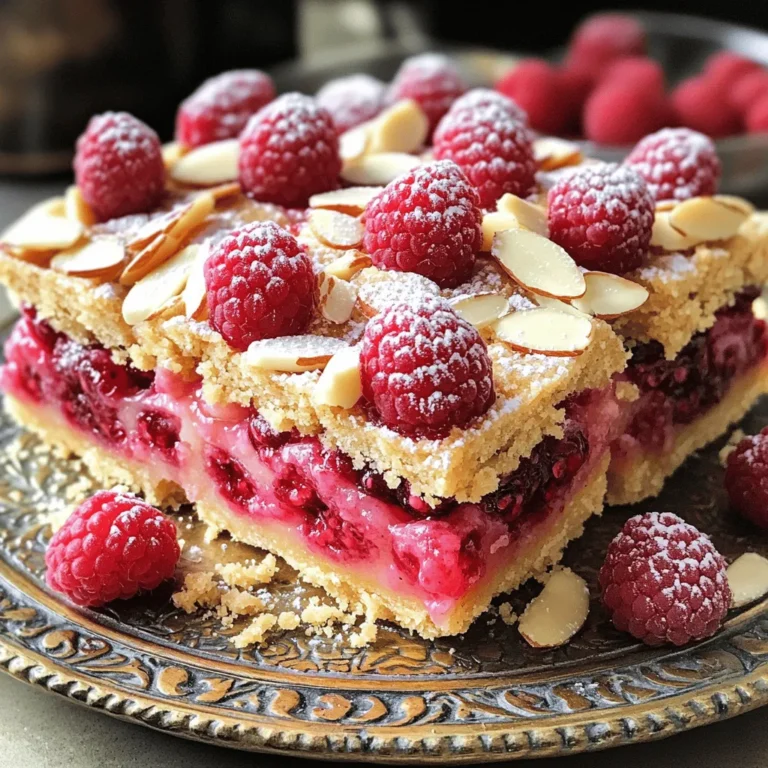
Raspberry Almond Shortbread Bars Delightful Treat Recipe

- 1 whole chicken (4-5 lbs) - 1/2 cup unsalted butter, softened - 8 cloves garlic, finely minced - 2 tablespoons fresh rosemary, finely chopped - 2 tablespoons fresh thyme, finely chopped - 1 tablespoon fresh parsley, finely chopped - Zest of 1 lemon - Juice of 1 lemon - Salt and black pepper, to taste - 1 medium onion, cut into quarters - 1 lemon, cut into wedges - 4 cups assorted root vegetables (carrots, potatoes, parsnips), chopped When measuring butter, make sure it’s soft. This helps it mix well with herbs. Use a measuring cup for liquids like lemon juice. For zest, use a fine grater. Chop herbs finely for the best flavor. Use a kitchen scale for the chicken to ensure it’s the right size. Fresh ingredients make a big difference. Fresh herbs add bright flavors that dried herbs can't match. Fresh garlic has a stronger taste than pre-minced. A good chicken is key to this dish. It cooks evenly and stays juicy. Using fresh vegetables gives you better texture and taste. Always look for quality ingredients to make your meal shine. {{ingredient_image_2}} Start by preheating your oven to 425°F (220°C). This heat is key for a crispy skin. Next, grab your whole chicken and pat it dry using paper towels. Dry skin helps the chicken roast better. Carefully lift the skin over the chicken breast and thighs. Make small pockets under the skin. This lets the herb butter seep into the meat for great flavor. In a medium bowl, mix the softened butter with 8 minced garlic cloves, 2 tablespoons of finely chopped rosemary, 2 tablespoons of thyme, and 1 tablespoon of parsley. Add the zest and juice of one lemon. Stir until it is smooth and well-blended. This herb butter is what makes your chicken really tasty. Rub half of the herb butter under the skin of the chicken. Then, spread the rest all over the outside. Season the chicken with salt and freshly ground black pepper. Next, stuff the cavity with the quartered onion and lemon wedges. This adds moisture and flavor as it cooks. In a large roasting pan, add 4 cups of chopped root vegetables, such as carrots and potatoes. Drizzle with olive oil and season with salt and pepper. Toss them gently to coat. Lay the chicken on top, breast side up. Roast for about 1 hour and 15 minutes. Use a meat thermometer to check that it reaches 165°F (75°C). Baste the chicken with pan juices halfway through for extra moisture. After roasting, let the chicken rest for 10-15 minutes before carving. This helps keep it juicy and tender. To roast chicken well, start with a hot oven. Preheat to 425°F (220°C). This will help the skin crisp up nicely. Always dry the chicken with paper towels before seasoning. Moisture can prevent crisp skin. Season well with salt and pepper, as this enhances the flavor. Placing the chicken on root vegetables allows them to soak up juices. Basting keeps the chicken moist and adds flavor. Halfway through roasting, use a spoon to collect pan juices. Gently pour the juices over the chicken. This step helps the skin to become golden and flavorful. Repeat basting every 20 minutes for best results. Just be careful when opening the oven! For crispy skin, rub herb butter all over the chicken. The butter helps create a golden crust as it roasts. Be sure to spread some butter under the skin, too. This step adds flavor directly to the meat. Letting the chicken rest after cooking helps the skin stay crispy. If you skip this, the skin may get soggy. Enjoy that perfect crunch on every bite! Pro Tips Resting is Key: Allow the chicken to rest after roasting. This helps the juices redistribute, ensuring each slice is juicy and tender. Use a Meat Thermometer: Invest in a reliable meat thermometer to check the chicken's internal temperature. It should read 165°F (75°C) for safe consumption. Flavor Boost: For added flavor, marinate the chicken in the herb butter mixture for a few hours or overnight before roasting. Vegetable Variety: Feel free to mix and match your root vegetables based on seasonal availability or personal preference for a colorful and nutritious side dish. {{image_4}} You can change the flavor of your chicken by adding citrus or spices. Try using orange or lime zest alongside lemon. This brings a sweet and bright taste. For spices, add paprika or cayenne pepper for a kick. These simple changes can make your dish feel new and exciting. Just mix them into the herb butter before spreading it on the chicken. If you want to try cooking your chicken differently, use a grill or a slow cooker. Grilling gives the chicken a nice char and smoky flavor. Set the grill to medium heat. Cook the chicken for about 1 hour, turning often for even cooking. A slow cooker is great for busy days. Just place the chicken in, add the vegetables, and let it cook on low for 6-8 hours. Both methods yield tender, juicy chicken with great taste. You can mix up the vegetables you use with your chicken. While root vegetables like carrots and potatoes are great, don't stop there! Consider adding bell peppers, zucchini, or Brussels sprouts for added color and flavor. Just chop them into similar sizes for even cooking. This not only makes your meal more vibrant but also adds various nutrients and tastes. Feel free to get creative and use what you have on hand! After you enjoy your Garlic Herb Butter Roast Chicken, store leftovers safely. Allow the chicken to cool to room temperature. Place the chicken in an airtight container. You can also wrap it tightly in plastic wrap. This will keep the chicken fresh for up to three days in the fridge. For the best flavor, try to eat the leftovers within two days. Reheating your roast chicken is easy. Preheat your oven to 350°F (175°C). Place the chicken in a baking dish. Cover it with aluminum foil to prevent it from drying out. Heat for about 20-25 minutes or until the chicken is warm throughout. If you like crispy skin, remove the foil for the last five minutes of reheating. You can also reheat in the microwave, but this may make the skin less crispy. If you have more leftovers, freezing is a great option. Cut the chicken into portions for easier thawing later. Wrap each piece tightly in plastic wrap, then place in a freezer bag. Make sure to squeeze out as much air as you can. Label the bag with the date. Frozen chicken can last up to three months. When you’re ready to eat, thaw it overnight in the fridge before reheating. You should roast a whole chicken for about 1 hour and 15 minutes. This time works well for a chicken weighing 4-5 lbs. Make sure to check the chicken's internal temperature. It should reach 165°F (75°C) for safe eating. If the chicken is larger, you may need to add more time. Using frozen chicken is not the best choice for this dish. It’s better to thaw the chicken first. Thawing ensures even cooking and helps the herb butter soak into the meat. You can thaw it overnight in the fridge or in cold water. This will help keep your chicken juicy and tasty. I love serving Garlic Herb Butter Roast Chicken with a mix of roasted root vegetables. Carrots, potatoes, and parsnips make great choices. You can also add a fresh salad or some garlic bread. These sides balance the rich flavors of the chicken. For a fun twist, a lemony quinoa or couscous works well too! This blog post offers a full guide to roasting a chicken. We covered key ingredients, their importance, and tips for perfect cooking. I shared step-by-step instructions and helpful tricks to get crispy skin. You can also explore fun flavor ideas and cooking methods. Finally, I provided easy ways to store leftovers. Roasting a chicken doesn't have to be hard. Use fresh items for great taste and enjoy your dinners!

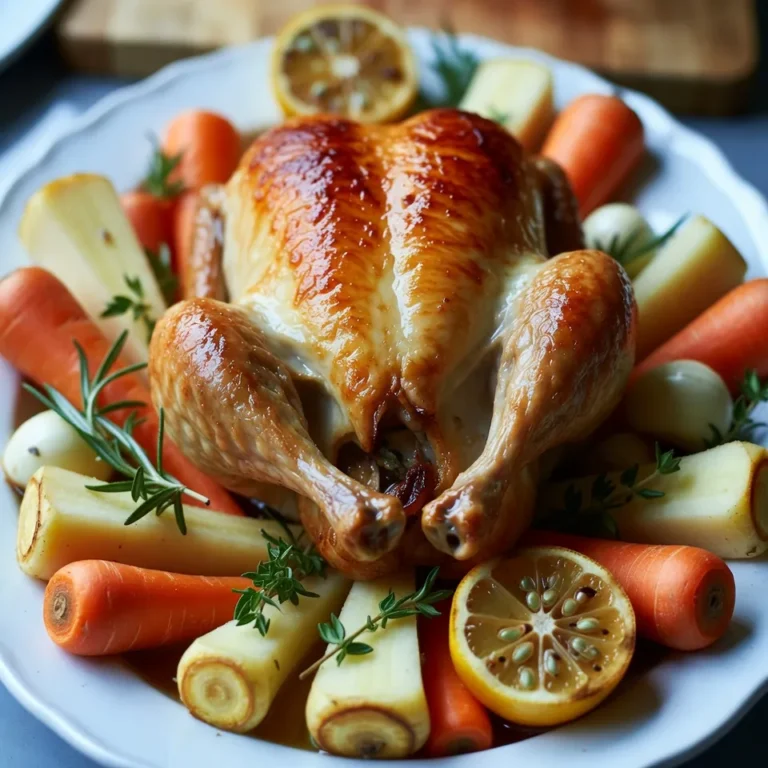
Garlic Herb Butter Roast Chicken Flavorful Dinner Delight

- 1 lb chicken breast, cut into bite-sized pieces - 1 cup creamy coconut milk - Zest of 1 fresh lime - Juice from 2 juicy limes The main ingredients create a fresh and tropical flavor. Chicken breast provides protein, while coconut milk adds creaminess. Lime juice and zest give that bright, zesty kick that makes this dish stand out. - 2 tablespoons honey for sweetness - 2 cloves garlic, finely minced - 1 teaspoon ground ginger for warmth Honey balances the tangy lime with sweetness. Garlic gives a savory note, while ginger adds a warm spice. These flavors work together to make each bite pop. - 1 tablespoon soy sauce (or coconut aminos for a gluten-free option) - 1 teaspoon salt - ½ teaspoon freshly ground black pepper Soy sauce or coconut aminos adds umami depth. Salt enhances all the flavors, and black pepper adds a mild heat. Together, they make a perfect marinade that soaks into the chicken. {{ingredient_image_2}} Start by making the marinade. In a large bowl, whisk together these ingredients: - 1 cup creamy coconut milk - Zest of 1 fresh lime - Juice from 2 juicy limes - 2 tablespoons honey - 1 tablespoon soy sauce - 2 cloves garlic, minced - 1 teaspoon ground ginger - 1 teaspoon salt - ½ teaspoon black pepper Whisk until smooth. Now, add the chicken breast pieces. Make sure each piece gets coated well in the marinade. Cover the bowl with plastic wrap. Put it in the fridge for at least one hour. If you have time, let it marinate overnight. This helps the flavors soak into the chicken. If you use wooden skewers, soak them in water for about 30 minutes. This stops them from burning on the grill. While the skewers soak, preheat your grill or grill pan. Set it to medium-high heat. This gets it hot enough to cook the chicken perfectly. Now, it's time to skewer the chicken. Take the marinated pieces and thread them onto the skewers. Leave small gaps between the pieces. This helps them cook evenly. When your grill is hot, place the skewers on it. Grill for about 10-12 minutes. Turn them often for even cooking. Use a meat thermometer to check the chicken’s internal temperature. It should reach 165°F (75°C) for safe eating. Marinating chicken adds flavor and moisture. It makes each bite burst with taste. Aim to marinate the chicken for at least one hour. For the best results, let it sit overnight. This extra time helps the flavors soak in deeply. You can use glass, plastic, or even zip-top bags for marinating. Make sure the chicken stays fully covered in the marinade. This helps each piece get the same yummy taste. To ensure an even cook, space the chicken pieces well on the skewers. This allows heat to circulate around them. Grill the skewers over medium-high heat. This gives the chicken a nice, juicy texture. Achieving the perfect char takes practice. Turn the skewers every few minutes. This helps create that beautiful golden crust. Always check that the chicken reaches an internal temperature of 165°F (75°C). This keeps your meal safe and tasty. Presentation matters when serving your skewers. Arrange them on a bright platter. Add lime wedges and fresh cilantro for color and aroma. Sprinkle extra lime zest or toasted coconut flakes on top for a fun touch. For side dishes, try coconut rice or a fresh salad. These pair well with the skewers. They add balance to your meal and keep it light and refreshing. Pro Tips Marinate Longer for More Flavor: For the best taste, marinate the chicken overnight. This allows the flavors to deeply penetrate the meat, resulting in a juicier and more flavorful dish. Use Fresh Ingredients: Opt for fresh limes and garlic to enhance the overall flavor profile. Fresh ingredients provide a vibrant taste that dried or bottled alternatives cannot match. Check Doneness with a Thermometer: To ensure the chicken is safely cooked, use a meat thermometer. The internal temperature should reach 165°F (75°C) for safe consumption. Experiment with Veggies: Feel free to add colorful vegetables like bell peppers, onions, or zucchini to the skewers. They not only add flavor but also make for a more visually appealing dish! {{image_4}} You can swap chicken for other proteins. Tofu works well for a plant-based meal. Shrimp is another great choice if you want a seafood option. Both alternatives soak up the flavors nicely. If you want a dairy-free option, you can use other plant milks. Almond milk or oat milk can work, but they will change the taste. Coconut milk gives a creamy touch that enhances the dish. To boost the taste, add spices like paprika or cayenne pepper. Fresh herbs like cilantro or mint can brighten the dish. You can also mix in some crushed red pepper for heat. For a sweet and spicy twist, try adding mango or pineapple. A bit of chili sauce can also add a kick. These changes can make your skewers unique and fun. If you don't want to grill, you can bake or broil the skewers. Preheat your oven to 400°F (200°C) for baking. Place the skewers on a baking sheet and cook for about 15-20 minutes. Another option is skillet cooking. Heat some oil in a pan over medium heat. Cook the skewers for 10-12 minutes, turning them to brown all sides. This method gives you a nice crust and flavor. To keep your Coconut Lime Chicken Skewers fresh, follow these steps: - Refrigeration: Place leftover skewers in the fridge within two hours of cooking. - Containers: Use airtight containers or wrap them tightly in plastic wrap. This keeps the chicken moist and prevents odors. When it comes time to enjoy your leftovers, here are the best ways to reheat: - Oven: Preheat to 350°F (175°C). Place skewers on a baking sheet and heat for about 10-15 minutes. - Microwave: Heat on medium power for 1-2 minutes. Check to avoid overcooking. Always ensure the chicken is heated to 165°F (75°C) to be safe. For long-term storage, freezing is a great option: - Uncooked Skewers: Freeze the marinated chicken on the skewers. Wrap them tight in plastic and place in a freezer bag. They can last up to three months. - Cooked Skewers: Cool completely, then wrap and freeze. They will also last for about three months. Thawing Instructions: Thaw in the fridge overnight. You can reheat directly from frozen, but cooking time will be longer. Yes, you can prepare Coconut Lime Chicken Skewers in advance. Marinate the chicken a day before. This gives time for the flavors to soak in. Store the marinated chicken in the fridge. Keep it covered with plastic wrap or in a sealed container. When you are ready to grill, simply thread the chicken onto skewers. If you use wooden skewers, remember to soak them in water for 30 minutes. This helps prevent burning while grilling. Coconut Lime Chicken Skewers pair well with many sides. Here are some great options: - Coconut Rice: It adds a creamy, tropical flavor. - Fresh Salad: A light salad with lime vinaigrette brightens the meal. - Grilled Veggies: Bell peppers and zucchini add color and taste. - Chips and Salsa: A fun, crunchy side that complements the skewers. - Cold Beverages: Try coconut water or a light beer for refreshment. To ensure your chicken is safe to eat, check its internal temperature. The chicken should reach 165°F (75°C). Use a meat thermometer for the best results. You can also look for visual cues. The chicken should be opaque and the juices should run clear. If you see any pink inside, it needs more cooking time. Always prioritize food safety when grilling. Coconut lime chicken skewers are easy and tasty. You learned about ingredients, marinating, and grilling. Remember to soak your skewers and check the chicken's temperature. You can tweak the recipe with different meats or cooking methods. Store leftovers in the fridge and reheat carefully. This dish shines when garnished and served with sides. Enjoy making these skewers and impress your family and friends!

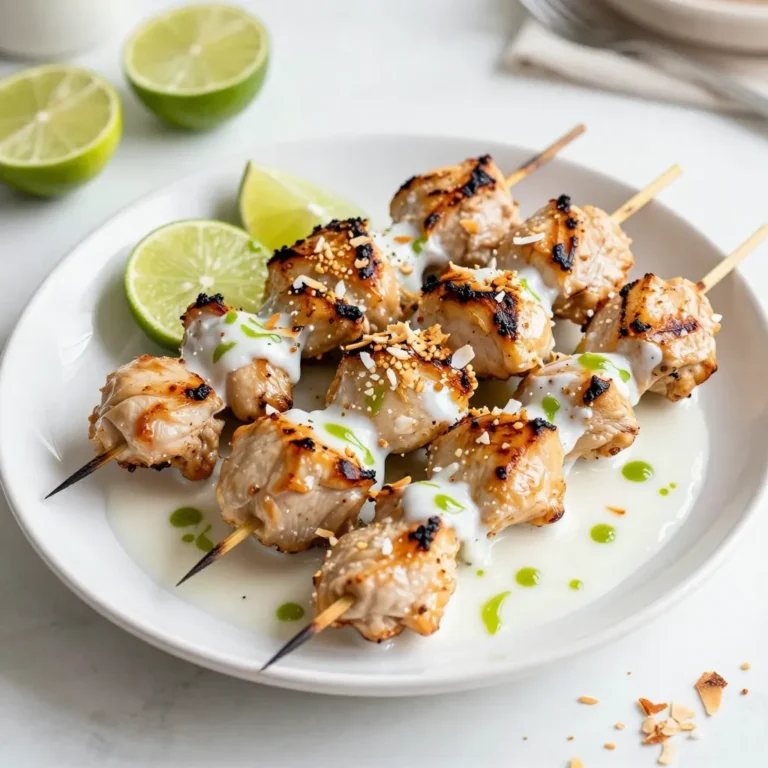
Coconut Lime Chicken Skewers Savory Grilling Delight

To make this tasty dish, you need: - 1 cup rolled oats - 1 cup almond milk (or any milk you like) - 2 tablespoons unsweetened cocoa powder - 2 tablespoons natural peanut butter (smooth or crunchy) - 1 tablespoon honey or maple syrup (to taste) - 1/2 teaspoon vanilla extract - 1/4 teaspoon salt - 1/4 cup Greek yogurt (optional) You can swap ingredients for special diets. If you are vegan, use maple syrup and skip Greek yogurt. For nut allergies, try sun butter instead of peanut butter. Use oat milk or coconut milk if you need a dairy-free option. Top your oats with fun extras. I love using: - Sliced bananas - Chopped nuts - Chocolate chips - Shredded coconut These add flavor and texture. You can mix and match to find your perfect combination. Enjoy your creamy oats! To make chocolate peanut butter overnight oats, start with a mixing bowl. Add 1 cup of rolled oats and 1 cup of almond milk. Mix in 2 tablespoons of unsweetened cocoa powder and 2 tablespoons of natural peanut butter. You can use smooth or crunchy peanut butter. Then, add 1 tablespoon of honey or maple syrup for sweetness. If you want a little extra flavor, stir in 1/2 teaspoon of vanilla extract and 1/4 teaspoon of salt. Whisk everything together until it's smooth. If you want creamier oats, fold in 1/4 cup of Greek yogurt. This step is optional but adds a nice tang. Once mixed, pour the oats into mason jars or airtight containers. Make sure the lids are on tight to keep them fresh. When blending, use a whisk for best results. It helps break up lumps of peanut butter. If the mix seems too thick, add a splash of milk. This helps everything come together well. Remember to taste the mix before closing the jars. Adjust the sweetness if needed. You can add more honey or syrup if you like it sweeter. For the best results, soak the oats overnight. This gives them time to soften and soak up all the flavors. If you’re short on time, let them sit for at least 4-6 hours. The longer they soak, the better the texture and taste will be. Enjoy your tasty treat in the morning! To make your overnight oats smooth and creamy, choose the right milk. I recommend almond milk, but any milk you prefer works well. Be sure to whisk your mixture until it’s well blended. If you want more creaminess, add Greek yogurt. This step makes a big difference in texture. You can easily change up the flavor. Try adding spices like cinnamon or nutmeg for warmth. Want more chocolate? Increase the cocoa powder or add chocolate chips on top. You can also swap the peanut butter for almond or cashew butter for a different taste. Fresh fruits like berries or apples can add freshness and color. One common mistake is not letting the oats soak long enough. Always soak them for at least 4-6 hours or overnight. This gives the oats time to absorb the liquid and flavors. Another mistake is adding too much sweetener. Start with a little honey or maple syrup, and taste as you go. Adjust based on your preference for sweetness. {{image_4}} To make your overnight oats vegan and dairy-free, swap regular milk for almond milk or oat milk. Both options add a nice flavor. Use maple syrup instead of honey for sweetness. This keeps your oats plant-based and tasty. If you need nut-free oats, use sunflower seed butter. It gives a nice creamy feel. For gluten-free, check that your oats are certified gluten-free. This way, you can enjoy your dish without worry. You can switch peanut butter for almond or cashew butter. Each nut butter offers a different taste. Try adding chia seeds or flaxseeds for extra nutrition. You can also mix in dried fruits like raisins or cranberries for a fun twist. You can store your chocolate peanut butter overnight oats in mason jars or airtight containers. Keep the jars sealed tightly to lock in freshness. This helps maintain the creamy texture and rich flavor. Always place them in the fridge as soon as you prepare them. This way, they stay cool and safe to eat. Your overnight oats can last up to five days in the fridge. After that, they may lose taste and texture. To enjoy them warm, take the jar out and heat it in the microwave. Remove the lid and cover the jar with a paper towel. Heat for about 30 seconds. Stir and check the temperature, then heat longer if needed. You can freeze your overnight oats if you want to make them last longer. To do this, place your oats in freezer-safe containers. Leave some space at the top for expansion. They can stay frozen for up to three months. To eat, move them to the fridge for a day to thaw. After thawing, stir well and add a little milk if they seem thick. You can keep your overnight oats in the fridge for up to five days. After this time, the oats may lose their freshness. I recommend enjoying them within three days for the best taste and texture. Yes, you can use quick oats. They will absorb liquid faster, so your oats may be softer. If you prefer a bit of chewiness, stick with rolled oats. They provide a nice texture and hold up well overnight. You can make your oats fun with various toppings. Here are some ideas: - Sliced bananas - Chopped nuts - Chocolate chips - Shredded coconut - Fresh berries - A drizzle of honey or maple syrup Mix and match to find your favorite blend! You can easily adjust the sweetness in your oats. Try adding more honey or maple syrup if you like it sweeter. If you want less sweetness, reduce the amount you use. Taste the mix before soaking to find your perfect balance. Chocolate peanut butter overnight oats are simple and fun to make. We explored all the ingredients, from the main list to tasty toppings. I shared step-by-step instructions to guide you through, ensuring creamy results. We discussed tips for customizing flavors and avoiding common mistakes. In conclusion, these oats are versatile and perfect for breakfast. With many variations and storage tips, you can enjoy them fresh or frozen. Now, you can easily make and love your own overnight oats!

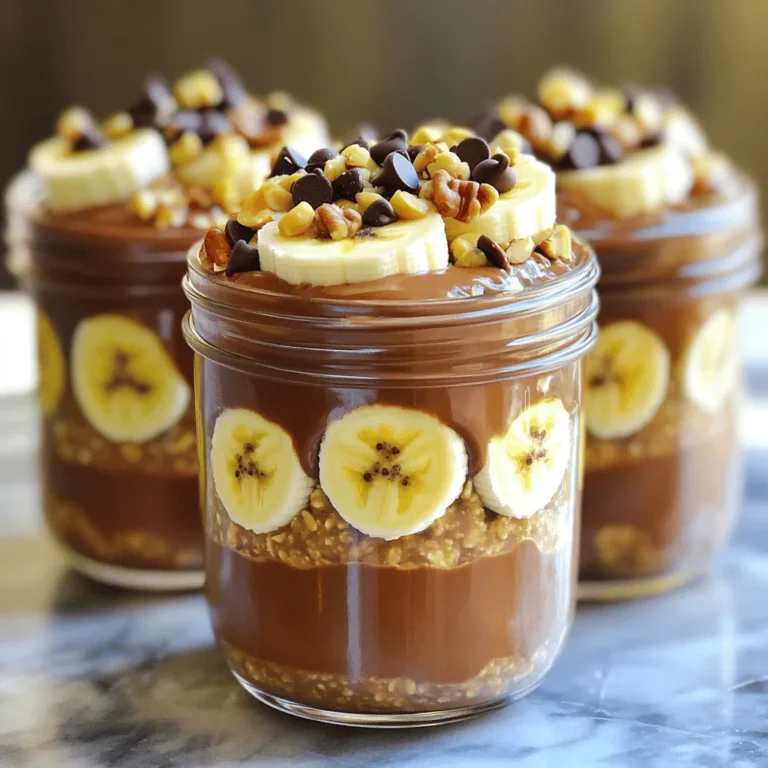
Chocolate Peanut Butter Overnight Oats Easy Recipe

- 2 tablespoons extra virgin olive oil - 1 medium onion, finely chopped - 2 cloves garlic, minced - 1 jalapeño pepper, seeded and diced - 1 red bell pepper, diced - 2 cups rotisserie chicken, shredded - 4 cups low-sodium chicken broth - 1 can (14 oz) diced tomatoes with green chilies - 1 teaspoon ground cumin - 1 teaspoon chili powder - Salt and black pepper to taste - 1 cup corn kernels - 1 cup heavy whipping cream - Juice of 1 fresh lime - Tortilla strips, for garnish - Fresh cilantro leaves, for garnish - 1 ripe avocado, diced, for garnish Gathering the right ingredients makes all the difference. The extra virgin olive oil gives the soup a rich base. The onion adds sweetness, while garlic brings depth. The jalapeño and red bell pepper add a nice kick and color. Using rotisserie chicken saves time and adds flavor. The low-sodium chicken broth keeps the soup light but tasty. Diced tomatoes with green chilies add both texture and zest. Ground cumin and chili powder are key for that warm, earthy flavor. Adjust salt and pepper to your taste. Corn kernels bring a sweet crunch, while heavy whipping cream makes it creamy and dreamy. Fresh lime juice brightens every bite. Don’t forget the tortilla strips, cilantro, and avocado for a nice finish. They add texture and freshness to your soup. - Large heavy-bottomed pot - Measuring cups and spoons - Cutting board and knife Having the right tools makes cooking easier. A large pot helps hold all your wonderful ingredients. Measuring cups and spoons ensure you use just the right amounts. A cutting board and knife are a must for chopping veggies quickly and safely. With these ingredients and tools ready, you're on your way to making a delicious Creamy Chicken Tortilla Soup! - Heat 2 tablespoons of extra virgin olive oil in a large pot over medium heat. - Add 1 medium onion, finely chopped. Sauté for 3-4 minutes until soft. - Now, add 2 cloves of minced garlic, 1 diced jalapeño, and 1 diced red bell pepper. Cook for 2-3 minutes until fragrant. - Stir in 2 cups of shredded rotisserie chicken, 4 cups of low-sodium chicken broth, and 1 can of diced tomatoes with green chilies. - Season with 1 teaspoon of ground cumin, 1 teaspoon of chili powder, and salt and black pepper to taste. Mix well. - Bring the soup to a boil, then reduce the heat to low. - Let it simmer uncovered for about 15 minutes to blend the flavors. - After that, stir in 1 cup of corn kernels and 1 cup of heavy whipping cream. Mix well and simmer for another 5 minutes. - Squeeze the juice of 1 fresh lime into the soup. Adjust the seasoning as needed before serving. To make this soup shine, you can adjust the seasoning. If you like more heat, add extra chili powder or some cayenne pepper. Fresh herbs can really lift the dish. Try adding chopped cilantro or parsley just before serving. Their bright flavors will make the soup pop. You can personalize your soup by adding beans or veggies. Black beans or kidney beans work well. You might also choose to add zucchini or bell peppers for extra crunch. If you want it spicier, toss in some diced serrano peppers. Adjust the spice to match your taste. Garnishing makes your soup look great and taste better. Top each bowl with crispy tortilla strips for crunch. Add diced avocado for creaminess and fresh cilantro for color. Serve in warm bowls to keep the soup hot. This will make each bite a joy! {{image_4}} To make a vegetarian version, simply substitute the chicken with plant-based protein. You can use soy crumbles, chickpeas, or lentils. These options add great texture. For the broth, use vegetable broth instead of chicken broth. For creaminess, switch to coconut cream or a plant-based cream. This keeps it rich without dairy. If you love heat, add spice elements to the soup. You can use more jalapeños or even serrano peppers. For a smoky flavor, try adding chipotle peppers in adobo sauce. You can also sprinkle in some cayenne pepper or red chili flakes. Adjust the amount based on your taste. Need a faster meal? Simplify your prep. Use pre-cooked rotisserie chicken or canned chicken. You can also use canned corn instead of fresh for less hassle. Skip roasting or sautéing steps by adding all ingredients at once. This way, you still enjoy tasty soup in no time. To store your leftover creamy chicken tortilla soup, cool it to room temp first. Then, transfer it to an airtight container. This keeps it fresh for up to three days. For best taste, eat it within two days. When reheating, add a splash of broth to keep it creamy. You can freeze this soup for later. First, let it cool completely. Then, pour it into freezer-safe bags or containers. Make sure to leave space at the top, as it will expand. It can last for about three months in the freezer. When you're ready to eat, thaw it in the fridge overnight. Reheat gently on the stove, stirring often, until hot. In the fridge, the soup stays good for about three to four days. If frozen, it’s best used within three months. Check for signs of spoilage before eating. If you see any mold or the soup smells off, it’s time to toss it out. Always prioritize your health and safety! You can add heat with a few simple steps. - Use more jalapeño or add diced serrano peppers. - Stir in cayenne pepper or crushed red pepper flakes. - Add a splash of hot sauce for an extra kick. These options let you control the spice level to fit your taste. Yes, you can prep this soup in advance. - Cook the soup and let it cool. - Store it in an airtight container in the fridge. - It will stay fresh for up to three days. When you are ready, just reheat on the stove. If you want a lighter version, use these alternatives: - Coconut milk gives a creamy texture and a hint of flavor. - Greek yogurt adds creaminess and protein. - Silken tofu blended until smooth is another great option. These swaps help meet dietary needs while keeping your soup rich. To thicken your soup, try these techniques: - Add more corn or pureed beans for a thicker base. - Mix in a slurry of cornstarch and water. - Simmer the soup longer to reduce it. These methods will help you reach the perfect consistency. This soup pairs well with several side dishes: - Warm, crusty bread or fresh tortillas are great choices. - A simple green salad adds freshness to the meal. - Top with cheese, sour cream, or avocado for extra flavor. These sides can enhance your dining experience. You can find the full recipe in the "Full Recipe" section above. It has detailed instructions to guide you through each step. This way, you will create a delicious, creamy chicken tortilla soup with ease. This blog explored making a rich and tasty Creamy Chicken Tortilla Soup. We covered ingredients, step-by-step cooking guides, storage tips, and variations. You can adjust flavors and spice levels to fit your taste. Experiment with toppings for added flair. Enjoy the warmth and comfort this soup brings. It's perfect for gatherings or just a cozy night. Remember to check the FAQs for extra tips. Your journey into cooking can be fun and rewarding. Dive in and make your own delicious soup!

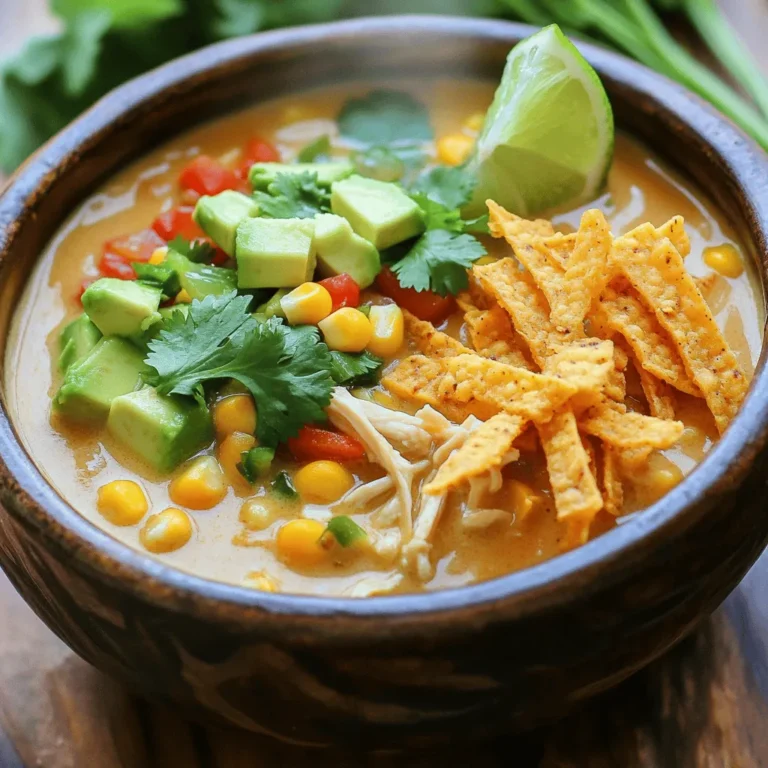
Creamy Chicken Tortilla Soup Flavorful and Filling Recipe

- 4 bone-in, skin-on chicken thighs - 2 tablespoons extra virgin olive oil - 1 tablespoon smoked paprika - 1 teaspoon garlic powder - 1 teaspoon onion powder - 1 teaspoon dried thyme - 1 teaspoon sea salt - ½ teaspoon freshly ground black pepper - 1 lemon, thinly sliced - Fresh rosemary sprigs for garnish These simple yet flavorful ingredients come together to create the best baked chicken. The chicken thighs provide rich flavor and juicy meat. The olive oil helps crisp the skin, while the spice blend adds depth. To make this dish, you will need: - Oven - Baking dish - Mixing bowl - Measuring spoons - Cooking thermometer - Paper towels These tools help you achieve the perfect baked chicken. A cooking thermometer ensures you cook the chicken to the right temperature for safety and taste. You can easily swap some ingredients based on your needs. For a lower-fat option, use skinless chicken thighs. If you like more heat, add cayenne pepper to the spice mix. You can also replace olive oil with avocado oil for a different flavor. For a vegan version, try tofu or tempeh, using the same spices for flavor. {{ingredient_image_2}} First, preheat your oven to 425°F (220°C). This heat gives you crispy skin. While the oven warms, gather your ingredients. You will need chicken thighs, olive oil, and spices. Next, make your spice blend. In a small bowl, mix together: - 1 tablespoon smoked paprika - 1 teaspoon garlic powder - 1 teaspoon onion powder - 1 teaspoon dried thyme - 1 teaspoon sea salt - ½ teaspoon freshly ground black pepper Stir well until combined. This blend adds great flavor to the chicken. Take your chicken thighs and pat them dry with paper towels. This step is key for crispy skin. Place the thighs in a large bowl. Drizzle 2 tablespoons of extra virgin olive oil over them. Use your hands to coat each thigh evenly. Then, sprinkle your spice mixture all over the chicken. Rub it in well to cover all sides. Now, place the seasoned chicken in a baking dish in a single layer. Add lemon slices on top and around the chicken. The lemons will add fresh flavor as it bakes. Put the dish in the preheated oven and roast for 35-40 minutes. Check that the chicken reaches 165°F (74°C) for safe eating. The skin should look crispy and golden brown. Once cooked, take the chicken out of the oven and let it rest for about 5 minutes. This helps the juices settle, making the meat juicy. Before serving, add fresh rosemary sprigs on top for a nice touch. You can also serve extra lemon slices for a pop of color. To get crispy skin on your chicken, start with dry thighs. Pat them with paper towels. This step is key! A dry surface helps the skin crisp up nicely. Next, use olive oil. It helps the skin brown and adds flavor. Don't skip the spice blend! Generously coat the chicken for extra crunch. Bake at 425°F (220°C). This high heat gives you that golden color and texture. Seasoning is vital for tasty chicken. Start with a good spice mix. I like smoked paprika, garlic powder, and thyme. These flavors work well. Rub the spices all over the chicken. Make sure every part is covered. This way, you get flavor in every bite. Lemon slices add freshness. Place them around the chicken for a hint of citrus. Resting your chicken is crucial. After baking, let it rest for 5 minutes. This step lets the juices settle. If you cut too soon, you lose moisture. Resting means juicy, tender meat. It also makes for better flavor. Trust me; this small wait pays off. Serve your chicken with care, and enjoy the results! Pro Tips Pat Dry for Crispiness: Make sure to pat the chicken thighs dry with paper towels before seasoning. This removes excess moisture, allowing the skin to become crispy during roasting. Use Fresh Herbs: For an added layer of flavor, consider using fresh herbs instead of dried. Thyme, rosemary, or even parsley can elevate the dish significantly. Rest Before Serving: Allow the chicken to rest for at least 5 minutes after roasting. This step ensures the juices redistribute, resulting in more succulent and flavorful meat. Experiment with Spices: Don't hesitate to mix up the spice blend! Adding a pinch of cayenne pepper for heat or a dash of cumin for earthiness can give your chicken a unique twist. {{image_4}} You can switch up the spice blend for new flavors. Try using cayenne pepper for heat. If you love herbs, mix in dried oregano or basil. For a sweet touch, add brown sugar. Each choice changes the taste and keeps things fun. Baking gives you crispy skin and juicy meat. Air frying cooks faster and uses less oil. Both methods work well, but air frying can save time. If you want a healthy option, choose air frying. You can still get crunchy skin and great flavor. Serve baked chicken with roasted veggies for a balanced meal. Try pairing it with rice or quinoa for a filling side. A fresh salad adds color and crunch. Don't forget to drizzle lemon juice over everything for a bright touch. This makes the dish pop! To store your baked chicken, let it cool first. Place it in a shallow container. Cover it tightly with a lid or plastic wrap. This keeps the chicken fresh and safe. If you have leftover lemon slices, store them separately. They can lose their flavor if left with the chicken. When reheating, aim to keep the chicken moist. You can use an oven for best results. Preheat your oven to 350°F (175°C). Place the chicken on a baking sheet. Add a splash of water or broth to keep it juicy. Cover it with foil to lock in moisture. Heat for about 15-20 minutes or until warm. You can store baked chicken in the fridge for up to 3-4 days. If you freeze it, it can last up to 4 months. Make sure to label the container with the date. This helps you keep track of how long it’s been stored. Always check for any off smells or changes in texture before eating. Baked chicken should reach an internal temperature of 165°F (74°C). This temperature ensures that the chicken is safe to eat. Use a meat thermometer for accuracy. Insert it into the thickest part of the thigh. Always check near the bone, as it takes longer to cook. Yes, you can use boneless chicken thighs. They cook faster than bone-in thighs. Adjust the cooking time to about 25-30 minutes. Check for the same internal temperature of 165°F (74°C) to ensure they are cooked through. Use a meat thermometer to check the temperature. If you do not have one, look for clear juices when you cut into the chicken. If the juices run clear, it is likely done. The meat should no longer be pink inside. The skin should also look golden brown and crispy. Baked chicken is a great source of protein. It helps with muscle growth and repair. It is lower in fat when compared to fried chicken. Baked chicken also contains essential vitamins and minerals. These include B vitamins, iron, and zinc. Using herbs and spices adds flavor without extra calories. In this post, we explored how to make the best-baked chicken. We covered essential ingredients, cooking tools, and substitutions. I shared step-by-step instructions from prep to plating. We looked at tips for crispy skin and ways to change up the flavors. Lastly, I discussed storage and reheating methods. Baked chicken is easy to perfect. With practice, you’ll cook delicious meals your way. Enjoy experimenting with new flavors and techniques that work best for you.

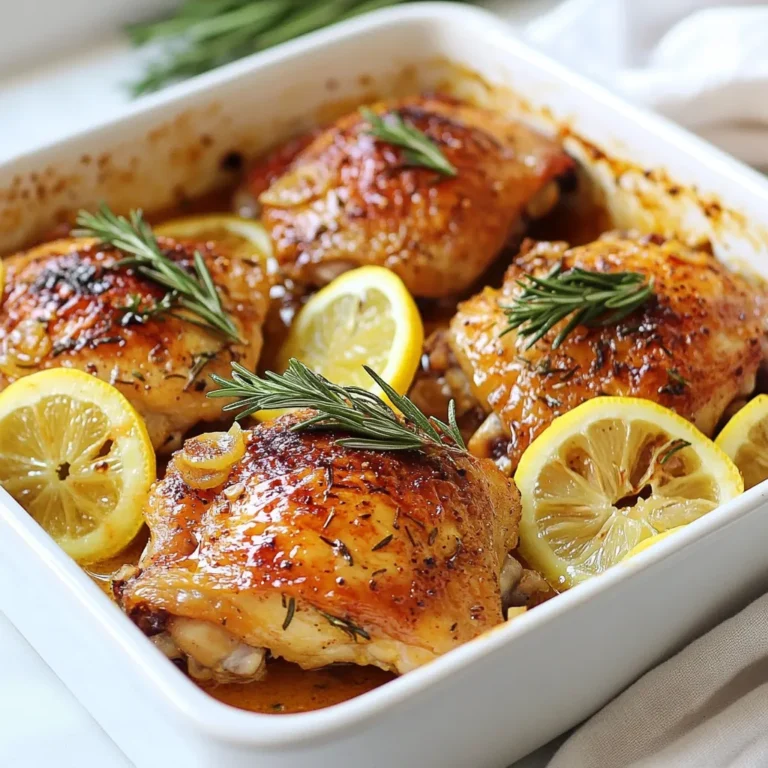
The Best Baked Chicken Flavorful and Simple Recipe

- 4 cups fresh baby spinach, washed and thoroughly dried - 2 cups fresh strawberries, hulled and sliced - 1/2 cup feta cheese, crumbled into small pieces - 1/4 cup red onion, very thinly sliced I love using fresh baby spinach for this salad. It adds a nice crunch and a light taste. Fresh strawberries bring sweetness and color. They brighten up the whole dish. I suggest using ripe strawberries for the best flavor. Feta cheese adds a salty and creamy touch. I prefer crumbling it by hand for texture. Thin slices of red onion give a mild sharpness without overpowering the salad. - 1/4 cup pecans, roughly chopped and toasted - 1/4 cup poppy seeds Pecans add a rich, nutty flavor. Toasting them brings out their natural oils and enhances their taste. I like to use a dry skillet for toasting. Just a few minutes is all you need. Poppy seeds add a unique crunch and a hint of nuttiness. They also make the salad look beautiful with their speckled appearance. - 1/3 cup extra virgin olive oil - 1/4 cup apple cider vinegar - 2 tablespoons honey or maple syrup for a vegan alternative - Freshly ground salt and pepper to taste The dressing is key to this salad. I use extra virgin olive oil for its rich flavor. Apple cider vinegar adds a tangy kick that balances the sweetness. You can use honey or maple syrup, depending on your taste. Both work well to sweeten the dressing. I always add salt and pepper to enhance all the flavors. Adjust the seasoning based on your preference for a perfect finish. {{ingredient_image_2}} First, rinse 4 cups of fresh baby spinach under cold water. Make sure to wash it well to remove any dirt. Next, dry the spinach thoroughly. You can use a clean kitchen towel or a salad spinner for this. After drying, place the spinach in a large salad bowl. Now, let’s prepare the strawberries. Take 2 cups of fresh strawberries. Remove the green tops, a process called hulling. Then, slice the strawberries into quarters or halves, depending on their size. Place these beautiful strawberry pieces into the bowl with the spinach. The bright red strawberries add a lovely color and sweetness. Toasting pecans brings out their rich flavor. Grab 1/4 cup of roughly chopped pecans. Place them in a dry skillet over medium heat. Toast them for about 3 to 5 minutes. Stir them frequently. You want them golden brown and fragrant. Keep a close eye, as nuts can burn quickly. After toasting, remove them from heat and let them cool for a few minutes. Now, it’s time to make the dressing. In a small mixing bowl, add 1/3 cup of extra virgin olive oil, 1/4 cup of apple cider vinegar, and 2 tablespoons of honey or maple syrup. You can choose maple syrup for a vegan option. Next, sprinkle in 1/4 cup of poppy seeds. Whisk these ingredients together until they blend well and thicken slightly. Taste your dressing and add salt and pepper to your liking. Once your dressing is ready, drizzle it over the salad. Use your hands or tongs to gently toss everything together. Make sure each piece is coated with that tasty dressing. Enjoy your fresh and healthy Strawberry Spinach Poppyseed Salad! How to choose the best strawberries Look for strawberries that are bright red and firm. They should have a sweet smell. Avoid any that are dull or have green spots. Fresh strawberries should be plump and have shiny skin. Tips for fresh spinach Choose baby spinach that is bright green and crisp. Avoid any leaves that look wilted or yellow. Fresh spinach should feel smooth and not slimy. Always wash and dry it well to keep it crunchy. Making a thicker dressing For a thicker poppyseed dressing, add more honey or maple syrup. You can also whisk in a bit of Greek yogurt. This will give the dressing a creamy texture. Adjusting sweetness and tanginess Taste the dressing as you mix. If it is too sweet, add more apple cider vinegar. If it is too tangy, add a bit more honey. Adjust until it tastes just right for you. Serving style Serve your salad in a large, shallow bowl. This makes it easy for everyone to serve themselves. A wide bowl lets the colors show beautifully. Garnishing ideas For a pretty touch, sprinkle extra poppy seeds on top. You can also add whole strawberries for color. This simple garnish makes the salad look fresh and inviting. Pro Tips Freshness is Key: Always use fresh, crisp baby spinach and ripe strawberries for the best flavor and texture in your salad. Customizable Ingredients: Feel free to swap out feta cheese for goat cheese or omit it entirely for a dairy-free option. Toast Your Nuts: Toasting pecans enhances their flavor and adds a delightful crunch to the salad. Make Ahead Dressing: Prepare the poppyseed dressing in advance and store it in the refrigerator; just shake it well before using. {{image_4}} To make this salad vegan, you can swap out honey. Use maple syrup instead. It adds sweetness without animal products. For cheese, try using a dairy-free feta. Look for brands made from nuts or soy. They melt well and taste great in salads. You can add proteins to make the salad heartier. Grilled chicken or tofu works well. They both soak up flavors nicely. Nuts can also add crunch. Consider using walnuts or almonds for a different taste. You can mix in other fruits too. Blueberries, raspberries, or sliced peaches provide a fun twist. Change the berries based on the season. In summer, use blackberries or raspberries. In fall, try diced apples or pears. You can also add seasonal veggies. Chopped cucumbers or bell peppers add color and crunch. This keeps your salad fresh and exciting all year long! To keep your salad fresh, store it in an airtight container. This prevents air from wilting your spinach. Place the spinach and strawberries in a separate container from the dressing. This way, the salad stays crunchy. If you combine it all, the leaves may get soggy. Always refrigerate leftovers right away to keep them safe to eat. You can prepare your salad in advance by washing and drying the spinach. Slice your strawberries and toast your pecans ahead of time. However, keep the dressing separate until you are ready to serve. This keeps everything fresh and tasty. Store each component in its own container for easy access. The salad will last for about three days in the fridge. After that, the spinach may start to wilt. Check for signs of freshness, like bright green leaves and firm strawberries. If the spinach turns brown or slimy, it’s time to toss it out. Always trust your senses; if it smells off, don’t eat it! Yes, you can prepare the salad ahead of time. I suggest making the salad base and dressing separately. This keeps the salad fresh. You can mix the spinach and strawberries in a bowl. Store them in the fridge for up to 2 hours before serving. Just add the dressing right before you eat. This will keep everything crisp. If you want a dairy-free option, try tofu or cashew cheese. Both options taste great and add creaminess. You can also use a vegan feta, which is tasty and fits well in this salad. These substitutes keep the dish flavorful while meeting dietary needs. To thicken the poppyseed dressing, try adding more honey or maple syrup. This adds sweetness and makes it thicker. You can also blend in a little more olive oil. If you want a creamier texture, mix in some Greek yogurt. This keeps the taste rich and satisfying. You can create a delicious Strawberry Spinach Poppyseed Salad using fresh ingredients and simple steps. Start with baby spinach, strawberries, and feta cheese for a tasty base. Toast pecans and whip up a quick dressing to finish it off. Remember to choose fresh ingredients for the best flavor. You can also adapt the salad for vegan diets or seasonal changes. With the right storage tips, your salad stays fresh. This easy recipe brings vibrant flavors to your table. Enjoy experimenting with variations to suit your taste!

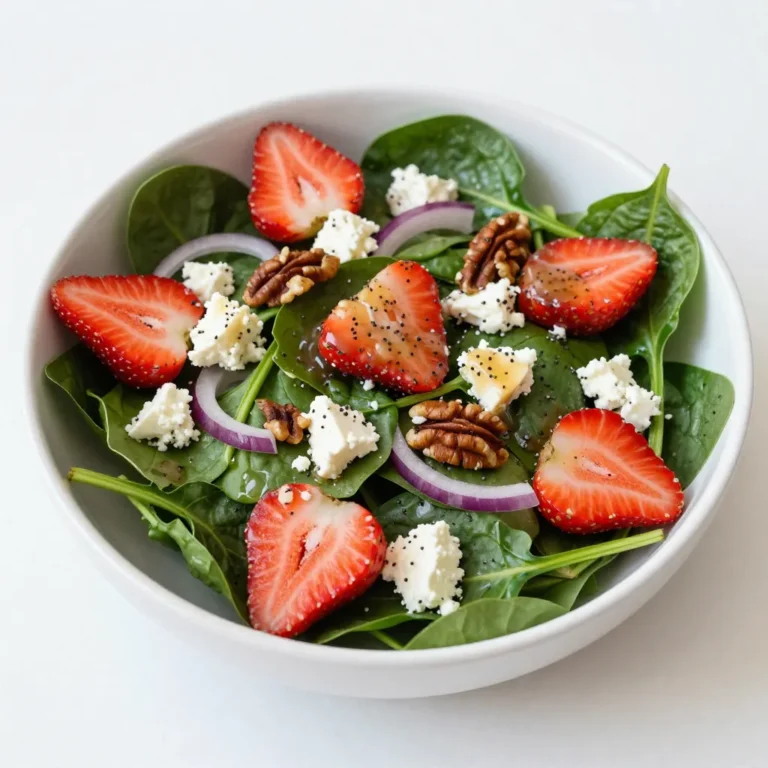
Strawberry Spinach Poppyseed Salad Fresh and Tasty

- 1 pound ground chicken or turkey - 1/2 cup breadcrumbs (preferably panko) - 1/4 cup chopped green onions - 1 teaspoon garlic powder - 1 teaspoon ground ginger - 1/2 cup teriyaki sauce - 1 cup pineapple chunks - 1 tablespoon sesame oil - Garnish: sesame seeds When you make teriyaki pineapple meatballs, you want to start with fresh, quality ingredients. Ground chicken or turkey works well for this dish. I prefer ground chicken for its juicy texture. Next, I always choose panko breadcrumbs. They add a wonderful crunch that enhances the meatballs. Chopped green onions add a burst of flavor. The green parts are best for this recipe. Now, let's talk about the seasonings. Garlic powder gives depth to the meatballs. Ground ginger adds a nice warmth. Teriyaki sauce ties everything together with its sweet and savory notes. Don’t forget the pineapple! Pineapple chunks bring sweetness and acidity, balancing the dish. Sautéing them in sesame oil enriches their flavor and adds a lovely golden color. Finally, sprinkle sesame seeds as a garnish. This small touch adds texture and makes the dish look inviting. Each ingredient plays a role, creating a delightful balance of flavors in your teriyaki pineapple meatballs. {{ingredient_image_2}} In a large bowl, combine the ground chicken, breadcrumbs, chopped green onions, and diced bell pepper. Then, add the egg, garlic powder, ground ginger, and a pinch of salt and pepper. I like to mix with my hands. This way, all the ingredients blend well. Aim for a smooth and cohesive mixture. Next, preheat your oven to 400°F (200°C). With wet hands, shape the mixture into small meatballs, about 1 inch wide. Place them on a lined baking sheet. This helps with cleanup later. Bake the meatballs for about 20 minutes. They should turn golden brown and reach 165°F inside. While the meatballs bake, heat sesame oil in a large skillet over medium heat. Add the pineapple chunks and sauté them for 3-4 minutes. You want them to caramelize a bit, which boosts their flavor. Once the meatballs are done, gently add them to the skillet with the pineapple. Pour teriyaki sauce over everything and stir to coat. Cook for another 2-3 minutes until the sauce thickens. This creates a delicious glaze for your dish. To make great meatballs, use cold hands. This helps you shape them easily. Warm hands can make the mixture stick. Also, avoid overmixing. Mix just enough to combine all items. This keeps the meatballs tender. Want more flavor? Try adding spices like chili flakes. They bring a nice kick. You can also marinate the meatball mixture for a few hours. This step helps the flavors blend well. Just keep it simple; let the ingredients shine. For a complete meal, pair your meatballs with rice, noodles, or a fresh salad. Each option complements the teriyaki sauce. When serving, think about garnishes. Toasted sesame seeds and chopped green onions add color and taste. They make your dish pop! Pro Tips Use Fresh Pineapple: Opt for fresh pineapple for the best flavor and sweetness. Canned pineapple, while convenient, can lack the vibrant taste that fresh provides. Adjust Spice Levels: Feel free to add some red pepper flakes or a dash of hot sauce to the meatball mixture for an extra kick. Experiment with Sauces: While teriyaki sauce is traditional, try using hoisin or a sweet chili sauce for a different flavor profile. Make Ahead: Prepare the meatballs in advance and freeze them. When ready to serve, simply bake from frozen and add to the sautéed pineapple and sauce. {{image_4}} You can easily swap ground chicken for turkey, beef, or even plant-based meat. Each choice brings its own flavor and texture. Ground turkey offers a lighter taste, while beef gives a rich, hearty bite. If you want a plant-based option, try using lentils or chickpeas. Mixing different meats can also create unique flavors. For example, blending chicken and beef can make your meatballs extra juicy. Making a homemade teriyaki sauce can elevate your dish. Use soy sauce, honey, and sesame oil as a base. Add fresh ginger or pineapple juice for a burst of flavor. If you want a spicier kick, try adding crushed red pepper. You can also mix in a splash of rice vinegar for tang. This way, you can create a teriyaki sauce that perfectly suits your taste. Adding vegetables to your meatball mixture is a smart way to boost nutrition. Grated carrots or zucchini not only add health benefits but also keep the meatballs moist. You can also play with bell pepper colors for a fun twist. Red, yellow, and green peppers each bring their own sweetness. This makes your teriyaki pineapple meatballs not just tasty, but colorful and appealing too. Store leftover teriyaki pineapple meatballs in an airtight container. They will stay fresh for about 3 to 4 days in the fridge. Make sure to let them cool down before sealing to prevent extra moisture. To freeze meatballs, place them in a single layer on a baking sheet. Freeze until solid, then transfer them to a freezer-safe bag. They can last up to 3 months in the freezer. When ready to use, defrost overnight in the fridge for best results. This helps keep the flavor and texture intact. You can reheat meatballs in different ways. For the oven, preheat to 350°F (175°C) and warm for 10 to 15 minutes. In the microwave, heat in 30-second intervals until warm. On the stovetop, heat in a skillet on medium heat for a few minutes. To keep them saucy, add a splash of water if needed. Avoid drying them out for the best taste. Yes, ground turkey, pork, or beef can be used as alternatives. Each option brings its unique taste. If you use turkey, it stays moist and light. Pork adds a rich flavor, while beef offers a hearty bite. Feel free to mix and match based on your taste! To make this dish gluten-free, use gluten-free breadcrumbs. Many brands offer great options that still provide crunch. Also, check the teriyaki sauce label. Some sauces contain gluten. Look for ones marked gluten-free to keep your dish safe and tasty. The meatballs take about 20 minutes to cook at 400°F (200°C). You want them to reach an internal temperature of 165°F. This ensures they are fully cooked and safe to eat. They should be golden brown and firm to the touch. If you have a meat thermometer, that’s the best way to check! In this post, we explored a tasty recipe for teriyaki pineapple meatballs. We covered ingredients, cooking steps, tips for the best texture, and variations. You can swap proteins or try different sauces for unique flavors. Remember to store leftovers properly and feel free to get creative with your meals. These meatballs are easy to make and perfect for any occasion. Enjoy cooking and sharing them with others!

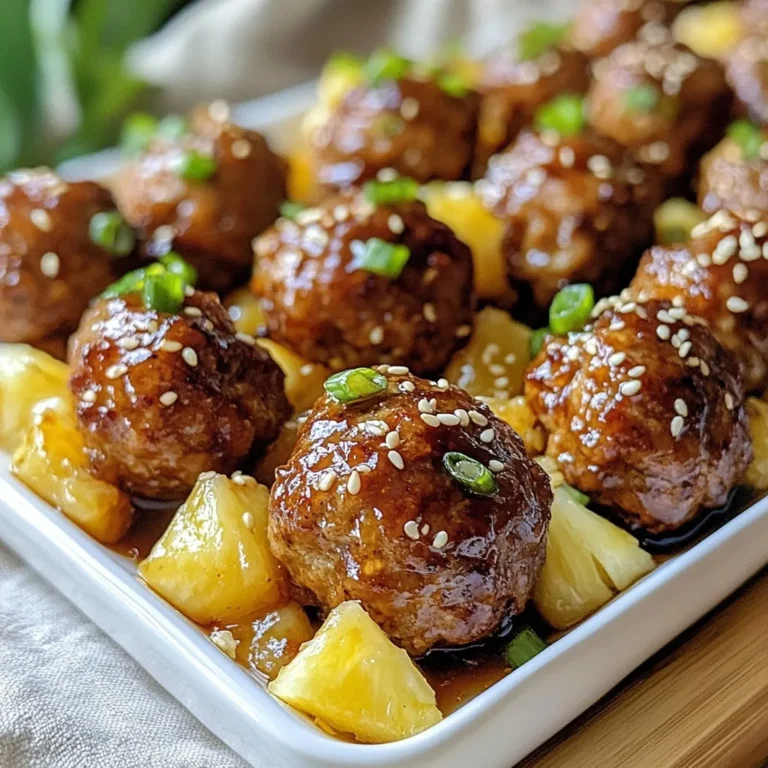
Teriyaki Pineapple Meatballs Flavorful and Easy Recipe

- 2 cups shelled edamame (fresh or frozen) - 3 tablespoons extra virgin olive oil - 4 cloves garlic, finely minced - 1 tablespoon red pepper flakes (or adjust to your spice preference) - 2 tablespoons low-sodium soy sauce - 1 tablespoon toasted sesame oil - 1 tablespoon freshly squeezed lemon juice - Sea salt, to taste These main ingredients create a bold and tasty dish. Edamame brings protein and a nice green color. Olive oil adds richness, while garlic gives depth and warmth. The red pepper flakes bring heat, so adjust them to your liking. Soy sauce adds umami, and sesame oil gives a nutty flavor. Lemon juice brightens everything up. - 2 green onions, thinly sliced (for garnish) - Toasted sesame seeds, for garnish Green onions add a sharp bite that contrasts well with the edamame. Sesame seeds provide a crunchy texture and nutty flavor. These garnishes make your dish look fancy and inviting. If you can't find edamame, you can swap in green peas. They offer a similar texture and taste. For olive oil, you can use canola oil or avocado oil. If you need a gluten-free option, use tamari instead of soy sauce. You can also adjust the spicy level by using less red pepper flakes or adding fresh chili for more heat. {{ingredient_image_2}} Start with shelled edamame. If you use frozen, boil them. Follow the package instructions. Usually, it takes about 4 to 5 minutes. They should be tender and bright green. Drain the edamame well and set them aside. This step is simple, but it sets the stage for flavor. Next, heat 3 tablespoons of extra virgin olive oil in a large skillet. Keep the heat at medium until the oil shimmers. Add 4 cloves of finely minced garlic. Sauté for about 1 minute. You want the garlic to smell great and turn golden. Be careful not to burn it. Then, add 1 tablespoon of red pepper flakes. Stir for another 30 seconds to enhance the flavor. Now, add the cooked edamame to the skillet. Pour in 2 tablespoons of low-sodium soy sauce and 1 tablespoon of toasted sesame oil. Toss everything together quickly. Make sure the edamame is well-coated in the spicy garlic mix. Drizzle 1 tablespoon of freshly squeezed lemon juice on top. Stir well and taste. Adjust sea salt if needed. Finally, transfer your dish to a serving plate. Garnish with thinly sliced green onions and toasted sesame seeds. Enjoy your colorful and tasty creation! To adjust the spice, you can change the red pepper flakes. Start with one teaspoon for a mild kick. If you love heat, add more flakes until you reach your desired level. You can also add a dash of hot sauce for extra flavor. Want more flavor? Try adding a splash of rice vinegar. It adds a nice tang. You can also mix in a teaspoon of honey for sweetness. This balance of flavors makes the dish pop. Fresh herbs like cilantro or basil can brighten the taste too. Serve your Spicy Garlic Edamame in a bright bowl. This makes the dish stand out. Use toothpicks for easy snacking. To show off your dish, sprinkle extra sesame seeds on top. A small bowl of chili oil on the side adds a fun touch and lets guests add more heat. Pro Tips Fresh Ingredients: Use fresh edamame whenever possible for the best flavor and texture. Frozen edamame is a good alternative if fresh is not available, but be sure to cook them properly. Adjusting Spice Levels: Feel free to adjust the amount of red pepper flakes based on your heat tolerance. Start with a small amount and gradually add more to find your perfect spice level. Perfectly Sautéed Garlic: Keep an eye on the garlic while sautéing; it can burn quickly. Remove it from heat as soon as it turns golden to avoid a bitter taste. Garnishing for Flavor: Don’t skip the garnishes! Green onions and toasted sesame seeds add not only a visual appeal but also a delightful crunch and extra flavor to the dish. {{image_4}} You can change the flavor of your spicy garlic edamame easily. Try adding lime juice instead of lemon. This will give a bright, zesty twist. For a sweet touch, mix in a teaspoon of honey or maple syrup. You could also use different oils, like chili oil, for a richer flavor. Experiment with herbs too! Fresh cilantro or parsley can add a nice touch. Want to make this dish heartier? Add protein like shrimp or chicken. Cook them in the skillet before adding garlic and edamame. Tofu is a great option for a plant-based boost. Simply cube it and sauté until golden. You can even sprinkle cooked bacon pieces on top for a smoky flavor. These additions will make your dish filling and tasty. This recipe is already vegan and can be gluten-free! Use tamari instead of soy sauce for a gluten-free option. Always check labels when buying sauces. For a nutty twist, add a splash of almond or peanut sauce. You can also include fresh veggies like bell peppers or snap peas to enhance nutrition. Enjoy your spicy garlic edamame with these simple tweaks! To keep your Spicy Garlic Edamame fresh, store leftovers in an airtight container. Make sure the dish cools to room temperature first. Place it in the fridge and enjoy it within three days for the best flavor. To reheat, you can use the microwave or stovetop. If using the microwave, heat for about 1-2 minutes. Stir halfway through to warm evenly. If you choose the stovetop, add a splash of water in a skillet and heat over low heat. Stir often until hot. You can freeze Spicy Garlic Edamame for later use. First, let it cool completely. Then, place it in a freezer-safe bag or container. Remove as much air as possible. It will stay fresh for up to three months. When ready to eat, thaw in the fridge overnight and reheat. Cooking frozen edamame takes about 4 to 5 minutes. Boil them in salted water until they are tender. Once cooked, drain the edamame well. This quick cook time keeps the beans bright and tasty. Yes, you can prepare Spicy Garlic Edamame ahead of time. Cook the edamame and mix in the garlic sauce. Store it in the fridge for up to two days. Reheat it in a skillet before serving. The flavors will blend nicely as it sits. Spicy Garlic Edamame pairs well with various dishes. Try serving it with sushi, rice bowls, or grilled meats. It also makes a great snack when served with cocktails or beer. Add some chili oil on the side for extra spice. Spicy Garlic Edamame is simple and delicious. You learned about key ingredients, cooking steps, and helpful tips. I showed you how to adjust flavors and even try new variations. Storing and reheating tips ensure you enjoy leftovers too. Remember, cooking is fun, so don’t be afraid to experiment. Each bite should bring joy and excitement. Enjoy your cooking journey with this tasty dish!

Spicy Garlic Edamame Flavorful and Easy Recipe

PREV 1 … 21 22 23 … 48 NEXT
meal plan mapper

explore

DessertsDinnerAppetizersDrinks

Our Policies

  • Cookie Policy
  • Copyright Policy
  • Disclaimer
  • GDPR Policy
  • Terms Of Use
Back to Top
  • About
  • Contact Us
  • Privacy Policy
© 2025 meal plan mapper