FREE DINNER EBOOK! Get your copy!
  • Cookie Policy
  • GDPR Policy
  • Disclaimer
  • Terms Of Use
  • Visit my other site: Fun Cookie Recipes
meal plan mapper
  • Home
  • Dinner
  • Desserts
  • Drinks
  • Appetizers
  • Contact
  • About
  • Privacy Policy
  • Home
  • Dinner
  • Desserts
  • Drinks
  • Appetizers
  • Contact
  • About
  • Privacy Policy
  • Cookie Policy
  • GDPR Policy
  • Disclaimer
  • Terms Of Use
Visit my other site: Fun Cookie Recipes

HOME / CATEGORIES /

Latest

- 500g flank steak, thinly sliced against the grain - 2 tablespoons cornstarch - 1 tablespoon soy sauce - 1 tablespoon sesame oil - 1 red bell pepper, thinly sliced - 1 green bell pepper, thinly sliced - 2-3 green onions, finely chopped - 3 garlic cloves, minced - 1 inch piece of fresh ginger, minced - 2 tablespoons chili paste (adjust to taste for spice level) - 1 tablespoon honey - Salt and freshly ground black pepper to taste - Vegetable oil, for frying - Sesame seeds, for garnish You can add more veggies for extra crunch. Try snap peas, carrots, or broccoli. If you love heat, add sliced fresh chilies. For a sweeter touch, toss in more honey or use a sweet chili sauce. The chili paste gives this dish a nice kick. Start with two tablespoons if you like it spicy. Want it milder? Use one tablespoon or even less. Adjust salt and pepper to your taste as well. Remember, you can always add more spice later, but you can't take it away! {{ingredient_image_2}} Start by slicing the flank steak thinly against the grain. This helps keep the meat tender. In a mixing bowl, combine the beef with soy sauce, sesame oil, salt, and pepper. Let it marinate for 15-20 minutes. This step is key for flavor. The longer you let it sit, the more taste it will absorb. After marination, sprinkle cornstarch over the beef. Use your hands to coat each piece well. This layer of cornstarch is crucial. It gives the beef that perfect crispy crunch when frying. Make sure every slice has a nice, even coating. Next, heat vegetable oil in a pan until it shimmers. This shows it's ready for frying. Carefully add the beef in batches. Fry for 3-4 minutes on each side until golden brown. Avoid overcrowding the pan. Once done, place the beef on paper towels to drain excess oil. In the same pan, remove some oil, keeping about a tablespoon. Add minced garlic and ginger, sautéing for 30 seconds. Then, toss in sliced bell peppers and stir-fry for 2-3 minutes. They should be tender yet crisp. Return the crispy beef to the pan, adding chili paste and honey. Stir everything to coat well and cook for another minute. Finally, mix in chopped green onions and adjust seasoning to taste. Enjoy the flavor explosion! To get that perfect crispiness, start with dry beef. Pat the flank steak slices with paper towels before marinating. This helps the cornstarch stick better. When you coat the beef, use enough cornstarch. A good, even layer is key. Fry in small batches. Too much beef in the pan can lower the oil temperature. This will make the beef soggy. Fry until golden brown, which takes about 3-4 minutes per side. Crispy Chilli Beef is all about balance. You can control the spice with chili paste. If you prefer less heat, use less paste. Add more honey for sweetness if the spice is strong. Taste as you go. This way, you can find the perfect mix for your palate. Fresh ingredients like garlic and ginger add depth. Don’t forget to adjust salt and pepper to enhance the flavors. Use a large frying pan or wok for even cooking. The wider surface allows for better heat distribution. A thermometer can help you check the oil temperature. Aim for about 350°F (175°C) when frying. If you have a splatter guard, use it. It helps keep your kitchen clean while frying. Lastly, a good slotted spoon is handy. It helps you remove the crispy beef and let excess oil drain off. Pro Tips Marinate for Flavor: Allowing the beef to marinate for at least 15-20 minutes enhances its flavor and tenderness. For even more depth, consider marinating it longer, up to a few hours in the refrigerator. Perfectly Crispy Coating: Ensure each piece of beef is evenly coated with cornstarch. This will create a crispy texture when frying, so don’t skip this step! Control the Heat: When frying, maintain medium-high heat to achieve that golden brown color without burning the beef. If the oil is smoking, it’s too hot; lower the heat slightly. Customize Your Spice: Adjust the amount of chili paste based on your spice preference. Start with less, and taste as you go to find your perfect balance. {{image_4}} You can easily swap beef for other proteins. Try chicken, pork, or tofu. Each option brings its own flavor and texture. For chicken, use thinly sliced breast or thigh. Pork tenderloin works well, too. If you choose tofu, use firm or extra-firm tofu. Press it to remove excess moisture, then slice. This helps achieve that crispy texture. For a vegetarian twist, consider using seitan or tempeh. Seitan has a chewy texture, making it a great meat substitute. Tempeh is nutty and full of protein. Slice either into thin strips, marinate, and prepare just like the beef. You can also use a mix of colorful veggies like eggplant or mushrooms for extra flavor. If you're allergic to soy, try coconut aminos instead of soy sauce. It has a similar taste but is soy-free. For gluten-free needs, check cornstarch and use a gluten-free soy sauce. Honey can be swapped with maple syrup or agave for a vegan option. Always adjust spice levels based on your taste and dietary needs. These variations make the dish versatile and fun. You can create a meal that fits your lifestyle while still enjoying that crispy chili flavor. To keep your crispy chilli beef fresh, follow these steps: - Allow the dish to cool to room temperature. - Store leftovers in an airtight container. - Refrigerate within two hours of cooking. - Consume within three days for the best flavor and texture. Reheating your leftover crispy chilli beef can be tricky. Here’s how to do it right: - Preheat your oven to 375°F (190°C). - Spread the beef on a baking tray in a single layer. - Bake for about 10-15 minutes until heated through and crispy. - Avoid microwaving, as this can make the beef soggy. Freezing can extend the life of your dish. Here’s what to do: - Cool the beef completely before freezing. - Use a freezer-safe container or bag. - Label with the date and contents for easy tracking. - Consume within three months for the best taste. - Thaw in the fridge overnight before reheating. The best cut of beef for this dish is flank steak. It has great flavor and tenderness. When you slice it against the grain, it becomes even more tender. This cut also crisps up nicely when cooked. To reduce the spice, you can adjust the chili paste. Start with half the amount you plan to use. You can also add more honey to balance the heat. Adding some extra vegetables, like bell peppers, will help too. They add flavor without heat. Yes, you can prepare some parts in advance. Marinate the beef up to a day ahead. You can also slice your veggies beforehand. However, I recommend frying the beef right before serving. This keeps it crispy and fresh. Crispy Chilli Beef pairs well with steamed rice or noodles. You can also serve it with a light salad for balance. For extra flavor, add some soy sauce or sesame oil on the side. This makes your meal delicious and fun! Crispy Chilli Beef combines fun flavors and techniques to create a delicious dish. We explored marinating, seasoning, and cooking methods to achieve the perfect crispy texture. With optional ingredients and variations, you can customize it to your taste. Remember to store leftovers properly to keep them tasty. Whether you love spice or prefer mild, this dish is easy to adjust. Embrace the joy of making your own Crispy Chilli Beef and share it with friends and family. Happy cooking!

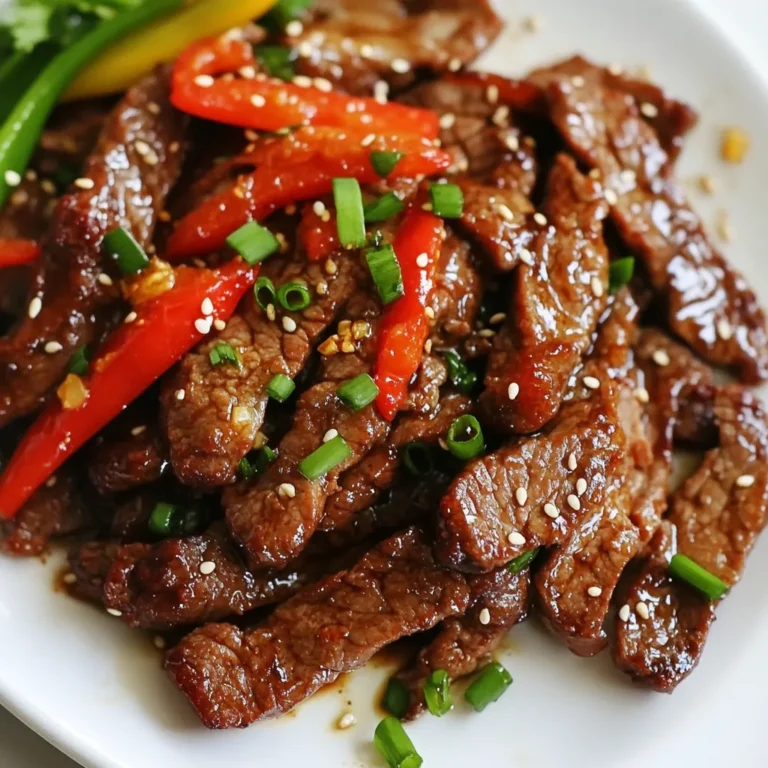
Crispy Chilli Beef Irresistible Flavor Explosion

- 1 cup unsalted butter, melted - 1 cup packed brown sugar - 1/2 cup granulated sugar - 2 large eggs, at room temperature - 2 teaspoons pure vanilla extract - 2 cups all-purpose flour - 1 teaspoon baking powder - 1/2 teaspoon baking soda - 1 teaspoon ground cinnamon - 1/2 teaspoon fine salt - 1/4 cup granulated sugar (for topping) - 2 teaspoons ground cinnamon (for topping) I love using simple measures for easy baking. Here, you need 1 cup of melted butter. It adds richness. Brown sugar and granulated sugar blend well at 1 cup and 1/2 cup. Eggs bring moisture; use 2 large ones. For flavor, 2 teaspoons of vanilla extract work wonders. The base is 2 cups of flour. A mix of 1 teaspoon baking powder and 1/2 teaspoon baking soda helps it rise. Use 1 teaspoon of cinnamon for that snickerdoodle taste and 1/2 teaspoon salt for balance. Lastly, a topping of 1/4 cup granulated sugar and 2 teaspoons cinnamon gives a sweet crust. You can swap unsalted butter with coconut oil for a dairy-free treat. Use light brown sugar if dark is not on hand. Granulated sugar can be replaced with coconut sugar for a twist. If you want egg-free blondies, use 1/4 cup unsweetened applesauce per egg. All-purpose flour can be swapped for a gluten-free blend, but check the ratios. For a different flavor, try almond extract instead of vanilla. First, preheat your oven to 350°F (175°C). This step is key for even baking. While the oven heats, grab a 9x13 inch baking pan. Lightly grease it or line it with parchment paper. This makes it easy to lift out the blondies once they are baked. In a large mixing bowl, add 1 cup of melted unsalted butter. Then, mix in 1 cup of packed brown sugar and 1/2 cup of granulated sugar. Use a whisk or electric mixer to blend these until smooth. This creates a creamy base. Next, crack in 2 large eggs, one at a time. Beat well after each egg. Finally, stir in 2 teaspoons of pure vanilla extract. In a separate bowl, whisk together 2 cups of all-purpose flour, 1 teaspoon of baking powder, 1/2 teaspoon of baking soda, 1 teaspoon of ground cinnamon, and 1/2 teaspoon of fine salt. Gradually add this dry mix to your wet mix. Stir gently until just combined. A few lumps are okay; do not overmix. Pour the thick batter into your prepared baking pan. Use a spatula to spread it evenly. In a small bowl, mix 1/4 cup of granulated sugar with 2 teaspoons of ground cinnamon for the topping. Sprinkle this blend over the batter. Bake in your preheated oven for 20-25 minutes. Test for doneness with a toothpick. It should come out clean or with a few moist crumbs. Once baked, let the blondies cool in the pan for about 15 minutes. Then slice them into squares for serving. To get the best texture, follow these steps: - Use room temperature eggs. They mix in better. - Do not overmix the batter. A few lumps are okay. - Bake until the edges are golden. This helps keep the center soft. Here are some mistakes to avoid: - Forgetting to measure ingredients correctly. This can change the taste. - Not preheating the oven. This affects how evenly they bake. - Opening the oven too soon. It can cause them to sink. Add-ins can make your blondies more fun: - Try adding chocolate chips for extra sweetness. - Nuts can add a nice crunch. Walnuts or pecans work well. - Dried fruits, like raisins or cranberries, add a chewy texture. {{image_4}} You can make chocolate chip snickerdoodle blondies by adding chocolate chips. Use about one cup of semi-sweet or milk chocolate chips. Stir them into the batter after mixing in the dry ingredients. The sweet chocolate adds a nice twist to the classic flavor. You get a soft and chewy treat with each bite. For nutty snickerdoodle blondies, add your favorite nuts. Chopped walnuts or pecans work great. Use about half a cup, and fold them into the batter at the same time as the dry ingredients. The nuts provide a crunchy texture that contrasts with the soft blondies. This makes each bite more exciting and flavorful. To make gluten-free snickerdoodle blondies, swap all-purpose flour for a gluten-free blend. Look for a blend that works well in baking. Measure it out the same way as regular flour. Follow the same recipe steps, and you will have a tasty treat for everyone. These blondies stay soft and delicious, even without gluten. To keep your snickerdoodle blondies fresh and tasty, follow these simple steps: - Let them cool completely before storing. - Use an airtight container to stop air from getting in. This keeps them soft. - Layer parchment paper between the blondies if stacking to avoid sticking. Store your blondies at room temperature for easy access. A cool, dry place works best. Snickerdoodle blondies can last for about 4 to 5 days when stored correctly. If you keep them in an airtight container, they stay soft longer. Always check for any signs of spoilage before eating. You can freeze snickerdoodle blondies for longer storage. Here’s how: - Wrap the cooled blondies tightly in plastic wrap or foil. - Place them in a freezer-safe bag or container. - Label with the date so you know when you made them. They can last up to 3 months in the freezer. To enjoy, just thaw them in the fridge or at room temperature. Blondies and brownies share some traits, yet they differ in key ways. Blondies use brown sugar, giving them a sweet, caramel flavor. Brownies, on the other hand, often use cocoa powder, making them chocolatey. Blondies are lighter in color. Brownies usually have a rich, dark hue. Yes, you can make Snickerdoodle Blondies ahead of time. Bake them and let them cool completely. Once cooled, cut them into squares. Store them in an airtight container. They stay fresh at room temperature for up to five days. You can also refrigerate them for longer shelf life. To check if your blondies are done, insert a toothpick into the center. If it comes out clean or with a few moist crumbs, they are ready. Avoid overbaking, as this can lead to dry blondies. The edges should be slightly golden, and the top may look set. We explored the ingredients, steps, and tips for making perfect Snickerdoodle Blondies. You can customize your blondies with tasty variations like chocolate chip or nutty options. Remember to store them correctly to enjoy them longer. With these tips, you can bake with confidence. Whatever your choice, these blondies will impress. Happy baking!

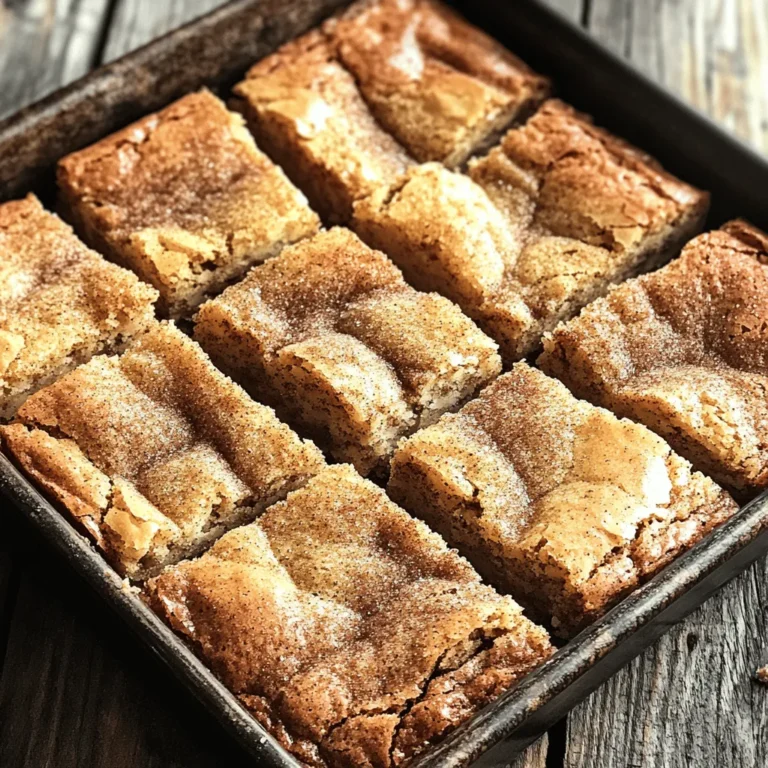
Snickerdoodle Blondies Easy and Tasty Treat Recipe

- 1 pound Brussels sprouts, trimmed and halved - 4 cloves garlic, minced - 3 tablespoons extra virgin olive oil - 1 teaspoon sea salt - ½ teaspoon freshly ground black pepper - 1 teaspoon crushed red pepper flakes (optional) - ¼ cup finely grated Parmesan cheese - 1 tablespoon freshly squeezed lemon juice - 2 tablespoons fresh parsley, chopped - If you want to skip Parmesan, try nutritional yeast for a cheesy flavor. - Fresh herbs like thyme or rosemary add great taste to the sprouts. - You can use any oil you like; avocado oil works well too. - If you prefer a different cheese, consider feta or goat cheese. - Add a splash of balsamic vinegar for a tangy twist. - Preheat your oven to 425°F (220°C). This high heat makes the sprouts crisp. - Trim and halve 1 pound of Brussels sprouts. Make sure they are fresh. - In a large bowl, combine the halved sprouts and 4 cloves of minced garlic. - Drizzle 3 tablespoons of olive oil over the mixture. - Add 1 teaspoon of sea salt, ½ teaspoon of black pepper, and optional red pepper flakes. - Toss everything together until the Brussels sprouts are well coated. - Prepare a baking sheet with parchment paper. This helps with easy cleaning. - Spread the sprouts on the baking sheet in a single layer. Place cut sides down. - Roast in the oven for 20-25 minutes. Toss them halfway for even cooking. - In the last 5 minutes, sprinkle ¼ cup of grated Parmesan cheese on top. - Return them to the oven until the cheese melts and bubbles. - Once golden and fragrant, drizzle 1 tablespoon of lemon juice over the sprouts. - Toss gently to mix the lemon juice with the sprouts. - Garnish with 2 tablespoons of chopped parsley for a fresh touch. - Serve in a stylish bowl for a beautiful presentation. Enjoy your dish! To get that crispy outer layer, start by cutting the Brussels sprouts in half. Place them cut-side down on the baking sheet. This helps achieve a nice caramelization. Use a hot oven set to 425°F (220°C). This high heat works wonders for crispiness. Make sure to toss them halfway through cooking. This ensures all sides get equal love and crunch. Spacing matters too. Keep the Brussels sprouts in a single layer. If they touch, they will steam instead of roast. This means less crunch and more mush. Want to kick up the flavor? Try adding spices like garlic powder or paprika. Fresh herbs like thyme or rosemary can bring new life to your dish. You might also add a dash of balsamic vinegar for a sweet twist. It pairs well with the cheese. These sprouts make a great side for meats like chicken or steak. They also shine alongside a hearty grain salad. Their bold flavors complement many main dishes. Overcrowding the baking sheet is a big no-no. When they are too close, they won’t roast properly. Instead, they will steam, leaving you with soggy sprouts. Don’t forget to season well before roasting. A little salt and pepper can go a long way. If you skip this step, your sprouts may taste bland. Always taste before serving to ensure they are just right. {{image_4}} You can switch up the cheese to fit your taste. Feta cheese gives a tangy kick. Cheddar adds a rich, creamy texture. If you're vegan, try a plant-based cheese. Each option brings a new flavor. Experiment to find your favorite! Don’t stop at Brussels sprouts! Add seasonal veggies for a colorful mix. Carrots, sweet potatoes, or bell peppers work well. This medley adds different textures and flavors. You can roast them all together for a tasty side dish. Change the flavor to suit your mood. For an Italian touch, add herbs like oregano and basil. They pair well with the garlic and cheese. Want some heat? Drizzle chili sauce on top before serving. This adds a spicy kick to the dish. Explore these options to make your meal unique! To keep your Garlic Parmesan Roasted Brussels sprouts fresh, let them cool first. Place the sprouts in an airtight container. This method helps maintain their taste and texture. Store them in the fridge for up to three days. Beyond that, they start losing flavor and crunch. When it’s time to enjoy leftovers, you have options. You can use an oven or a microwave. For the oven, preheat it to 350°F (175°C). Place the sprouts on a baking sheet and cover them with foil. Heat for about 10-15 minutes. This method keeps them crispy. If you choose the microwave, place the sprouts in a microwave-safe dish. Heat them in short bursts, around 30 seconds at a time. Check if they are hot enough. Microwaving may make them a bit soggy, so use it as a last resort. Enjoy your tasty sprouts again! You can pair these Brussels sprouts with many tasty dishes. They go well with: - Grilled chicken or salmon - Beef or pork tenderloin - Quinoa or rice salads - Mixed greens salads with vinaigrette These sides add great flavors and textures to your meal. Yes, you can prep the Brussels sprouts in advance. Trim and halve them a day before. Store them in the fridge in an airtight container. When you're ready, just roast them fresh. Look for a golden-brown color. They should be crispy on the outside and tender on the inside. A fork should pierce them easily. Give them a toss halfway through for even cooking. Absolutely! Store cooled Brussels sprouts in a container. They can last up to four days in the fridge. To reheat, use an oven for crispiness. Enjoy them as a side or in salads! This blog post covered how to make delicious Garlic Parmesan Roasted Brussels sprouts. You learned about important ingredients, easy steps, and helpful tips for the best results. Remember to adjust flavors with your favorite spices and cheese options. Try adding other vegetables to make it your own. With proper storage and reheating, you can enjoy these sprouts multiple times. Use this guide to impress friends or family. Cooking can be fun and rewarding. Enjoy the process and the tasty outcome!

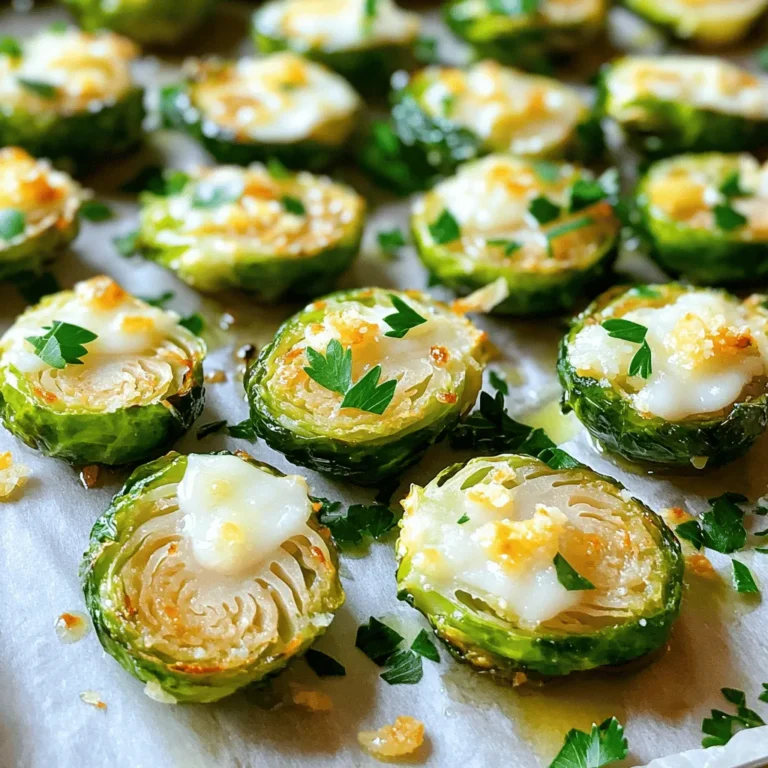
Garlic Parmesan Roasted Brussels Sprouts Delight

To create a delicious Grilled Peach Burrata Salad, you need these fresh ingredients: - 2 ripe peaches, halved and pitted - 200g burrata cheese, at room temperature - 4 cups mixed greens (a combination of arugula, spinach, and frisée) - 1/4 cup walnuts, lightly toasted and roughly chopped - 1/4 cup balsamic glaze for drizzling - 2 tablespoons extra virgin olive oil - Sea salt and freshly cracked black pepper, to taste - A handful of fresh basil leaves, for garnish These ingredients combine to create a fresh and flavorful treat. The juicy peaches add sweetness, while the creamy burrata adds richness. The mixed greens offer a crisp base, and toasted walnuts provide a nice crunch. Balsamic glaze adds a tangy touch that ties everything together. The sea salt and black pepper enhance all the flavors. Fresh basil elevates the dish with its aromatic notes. Enjoy this salad as a light meal or a side dish. First, preheat your grill to medium-high heat. This step is key for perfect grilling. A hot grill gives the peaches nice char marks. While the grill heats up, take your ripe peaches. Lightly brush the cut sides with extra virgin olive oil. This helps them grill evenly and adds flavor. Then, sprinkle a pinch of sea salt and a few cracks of black pepper on the peaches. This seasoning enhances their natural sweetness. Now, it's time to place the peaches on the grill. Set them cut side down on the grates. Grill the peaches for about 4 to 5 minutes. You want to see beautiful char marks. The peaches should feel slightly tender when you touch them. If they feel too soft, they may be overcooked. While the peaches are grilling, grab a large bowl. Add the mixed greens to create a fresh base. Once the peaches are ready, remove them from the grill. Let them cool for a few minutes. Slice the grilled peaches into wedges for easier mixing. Now, gently add the sliced peaches and toasted walnuts to the greens. Toss everything together to combine. Next, take the burrata cheese. Tear it into rustic pieces and place it on top. This creamy cheese is the star of the salad. Drizzle the balsamic glaze over everything. Season your salad with more sea salt and black pepper to taste. Finally, add fresh basil leaves for a pop of color and flavor. Serve immediately and enjoy the warm peaches with the creamy burrata! How do I check for ripeness? To find ripe peaches, look for a slight give when you press them. The skin should also have a rich color. Avoid peaches that feel hard or have dark spots. Ripe peaches will taste sweeter and grill better. How can I avoid sticking on the grill? Brush the cut sides of peaches with olive oil. This step helps to prevent sticking. Make sure your grill is hot before adding the peaches. Place them cut side down for grilling. This method creates a lovely char and makes them easier to flip. What are ideal pairings with the salad? This salad pairs well with grilled chicken or shrimp for added protein. A glass of chilled white wine also complements the flavors nicely. For a fresh twist, serve with a side of crusty bread. How should I plate for presentation? Arrange the mixed greens on a large plate. Place the grilled peach slices on top, followed by the burrata. Drizzle balsamic glaze over the salad. Finish with a sprinkle of walnuts and fresh basil for color and texture. How can I adjust seasoning to taste? Start with sea salt and black pepper. Taste as you go. You can always add more, but it’s hard to take away. If you like heat, consider adding a pinch of red pepper flakes. What are recommendations for balsamic alternatives? If you don’t have balsamic glaze, try using lemon juice or red wine vinegar. These options add a nice tang. Honey or maple syrup can also enhance sweetness if you prefer. {{image_4}} You can make this salad heartier by adding protein. Grilled chicken or shrimp work great. Just season and grill them alongside the peaches. Prosciutto is another tasty option. Its savory flavor complements the sweet peaches perfectly. Burrata is creamy and rich, but you can try other cheeses. Goat cheese adds a tangy touch. Feta brings a salty kick. If you're looking for vegan options, try cashew cheese or tofu. Both can mimic burrata's texture and taste well. Change up the fruits based on what's in season. Strawberries or figs can add new flavors. You can also swap mixed greens for seasonal options. Kale or arugula can add a nice twist. Adapting to what's fresh keeps the salad exciting. To store any leftover salad, place it in an airtight container. This keeps the salad fresh. If you have leftover peaches, keep them in a separate container. This prevents sogginess. You can also store burrata in its original container. Just cover it tightly. - Use a clean spoon for serving to avoid contamination. - Store the salad in the fridge for up to two days. You can prepare parts of this salad ahead of time. Slice the peaches and grill them in advance. Store them in a container with a lid. You can also wash and dry the greens. Keep them in a bag with paper towels for freshness. Assemble the salad just before serving. This keeps the greens crisp and vibrant. Add the burrata just before you eat. This way, it stays creamy and soft. If you store the salad properly, it lasts about two days. Check for signs of spoilage. If the greens look limp or brown, toss them. If the burrata smells sour or looks off, it’s best to discard it. Remember, freshness is key for the best taste. Always trust your senses when checking for spoilage. Burrata cheese is a creamy delight. It has a soft outer shell made of mozzarella. Inside, it holds a rich, creamy filling. This unique texture makes it a favorite in many dishes. Compared to mozzarella, burrata is creamier and richer. Mozzarella is firmer and less creamy. You can enjoy burrata fresh on salads or with bread. Its mild flavor pairs well with many ingredients. You can use canned peaches, but fresh is best. Canned peaches change the texture. They can be mushy and less sweet. If you use canned ones, choose peaches in juice, not syrup. Drain them well before grilling. This helps avoid excess liquid in your salad. To make a vegan version, swap burrata for vegan cheese. Nut-based cheeses work well. For dressing, use a mix of olive oil and lemon juice. You can add maple syrup for sweetness. Consider adding extra veggies like avocado or chickpeas. This keeps the salad hearty and tasty. Balsamic glaze is great, but other dressings work too. Try a lemon vinaigrette or honey mustard. You can make a simple dressing with olive oil, lemon juice, salt, and pepper. Mix them in a jar and shake before drizzling. This adds a fresh flavor to your salad. You can prep parts of the salad ahead of time. Grill the peaches and store them in the fridge. Keep the greens separate until you serve. This keeps them fresh and crisp. Assemble the salad just before serving to enjoy the best taste. This blog covered a refreshing grilled peach salad with burrata cheese, mixed greens, and walnuts. You learned how to grill peaches perfectly and assemble a delicious dish. I shared tips for flavor enhancement, storage, and meal prep. Consider personal touches with proteins or different cheeses. This dish is versatile and easy, perfect for any meal. Enjoy trying new variations and make it your own. Your taste buds will thank you for this delicious creation!

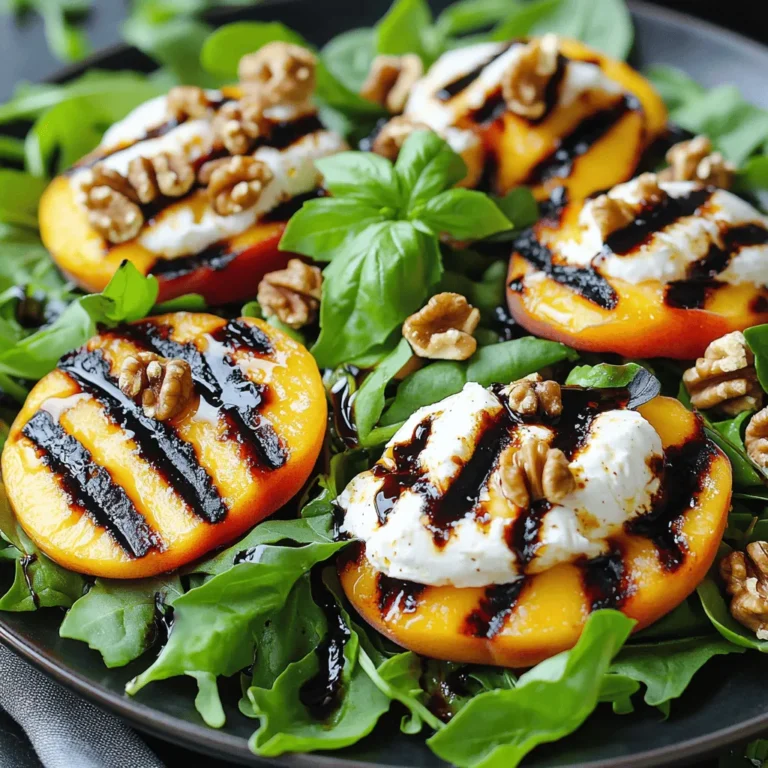
Grilled Peach Burrata Salad Fresh and Flavorful Treat

- 6 large eggs - 3 tablespoons mayonnaise - 1 tablespoon Dijon mustard - 1 teaspoon apple cider vinegar - 1 tablespoon sriracha sauce - Salt and freshly ground black pepper - 1 tablespoon fresh chives, finely minced - 1 tablespoon pickled jalapeños, finely diced - Paprika for garnish - Microgreens or edible flowers (optional) These ingredients create a creamy and spicy filling. You can adjust the sriracha sauce to suit your spice level. The chives add a fresh taste. Pickled jalapeños give a nice kick. The paprika adds color and flavor. If you want to impress, use microgreens or edible flowers as a garnish. They make the dish look beautiful and fun! 1. Place 6 large eggs gently in a medium pot. 2. Cover the eggs with cold water, ensuring there is at least an inch of water over them. 3. Heat the pot over medium-high heat until the water reaches a rolling boil. 4. Once boiling, cover the pot and remove it from the heat. 5. Let the eggs sit in the covered pot for 12 to 14 minutes. 6. To cool the eggs quickly, prepare an ice bath with a bowl of cold water and ice. 7. After the time is up, transfer the eggs to the ice bath for 5 to 10 minutes. 1. Once the eggs cool, peel them under running water. This helps remove the shells easily. 2. Slice each egg in half lengthwise and place the yolks in a mixing bowl. 3. Add 3 tablespoons of mayonnaise, 1 tablespoon of Dijon mustard, and 1 teaspoon of apple cider vinegar to the yolks. 4. Mix in 1 tablespoon of sriracha sauce, plus salt and pepper to taste. 5. Blend until smooth and creamy with no lumps. 6. Fold in 1 tablespoon of finely minced chives and 1 tablespoon of diced pickled jalapeños. 7. Taste the mixture and adjust seasoning as needed. 1. Use a spoon or piping bag to fill each egg white half with the yolk mixture. 2. Mound the filling slightly for a nice look. 3. Sprinkle paprika on top for color. 4. For a final touch, add microgreens or edible flowers for a fancy presentation. To make great hard-boiled eggs, I have learned a few tricks. First, always place the eggs in a pot and cover them with cold water. This helps prevent cracking. You want at least an inch of water over the eggs. Next, heat the pot on medium-high until the water boils. Once it boils, cover the pot and remove it from the heat. Let the eggs sit for 12 to 14 minutes. This timing gives you the best texture. After that, an ice bath is key! Quickly move the eggs to a bowl filled with ice water. This cools the eggs fast and makes peeling easier. When peeling, do it under running water. The water helps loosen the shell. Tap the eggs gently to crack them. Want to jazz up your deviled eggs? Try adding unique ingredients. Besides sriracha, you can use chipotle for a smoky kick. You could also add avocado for creaminess or bacon bits for crunch. Consider pairing your deviled eggs with fresh veggies or crackers for a fun platter. They work great for brunch, picnics, or parties. For a fancy touch, serve them with a side of pickled veggies. They add color and zing to the dish. Enjoy exploring different flavors and toppings! {{image_4}} You can spice up deviled eggs easily. Try using different sauces like hot sauce or chipotle mayo. Each sauce adds a unique kick. If you want a milder taste, use a sweet chili sauce. You can also make vegetarian-friendly versions. Replace sriracha with avocado for creaminess. Add a pinch of cumin for warmth. These options keep the dish fresh and exciting. How you present deviled eggs can make them pop. Use a nice platter or egg tray for serving. For a fun twist, serve them in avocado halves. This adds color and flavor. You can also get creative with garnishes. Use fresh herbs like dill or parsley for a bright touch. Edible flowers add elegance and charm. These small changes make your deviled eggs stand out at any gathering. To keep your deviled eggs fresh, store them in an airtight container. This helps to keep them from drying out. You can place a damp paper towel in the container to add moisture. Deviled eggs last about 3 to 4 days in the fridge. After that, they may lose flavor and texture. Reheating deviled eggs is not common. They taste best cold. If you must reheat them, do so gently in the microwave. Use low power for just a few seconds. This helps to avoid overcooking the eggs. When serving leftovers, ensure they are cold and fresh. Garnish with new chives or paprika for a nice look. Enjoy them within a few days for the best taste! The best eggs for deviled eggs are large, fresh eggs. Fresh eggs cook better and taste great. Look for eggs with no cracks. Organic or pasture-raised eggs can add flavor. They also help you make a healthier dish. Yes, you can make deviled eggs a day ahead. Prepare the filling and store it in the fridge. Keep the egg whites separate until you serve. This way, they stay fresh and tasty. Just fill the whites before serving for the best taste. To make deviled eggs less spicy, use less sriracha sauce. You can also skip the pickled jalapeños. Try adding more mayonnaise to tone down the heat. A little honey can also balance the spice. Taste as you go to get it just right. If you want a substitute for mayonnaise, try Greek yogurt. It adds creaminess and a tangy flavor. Hummus is another great option for a unique twist. You can also use avocado for a rich, healthy choice. Each option changes the taste a bit, so have fun with it! Freezing deviled eggs is not a good idea. The texture changes when thawed. The egg whites become rubbery, and the filling may separate. It is best to enjoy deviled eggs fresh. If you have leftovers, store them in the fridge for a few days. We covered how to make delicious deviled eggs step by step. You learned the best ingredients and ways to cook and store them. Don't forget to try unique twists to impress your guests. Experiment with garnishes and flavors to make each batch special. With the tips provided, you can create perfect deviled eggs every time. Enjoy cooking and sharing your tasty creations!

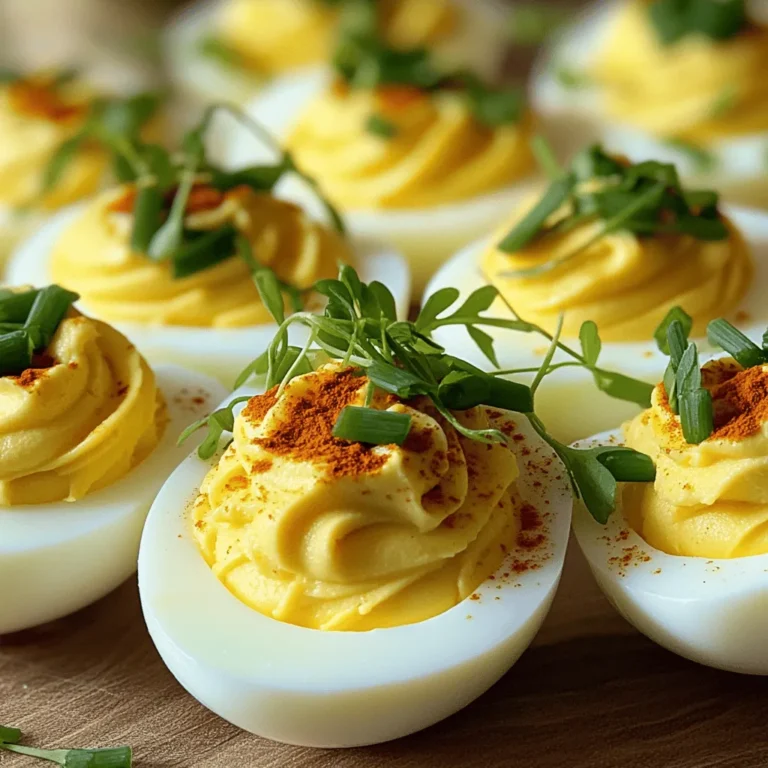
Classic Deviled Eggs with a Twist Delightful Recipe

- 4 large portobello mushrooms, stems removed - 1 cup cherry tomatoes, halved - 1 cup fresh mozzarella balls, halved - 1/4 cup fresh basil leaves, finely chopped - 2 tablespoons balsamic glaze - 2 tablespoons extra virgin olive oil - 1 teaspoon garlic powder - Salt and black pepper, to taste - Optional: Extra fresh basil leaves for garnish The star of this dish is the portobello mushrooms. Their large size makes a perfect base for stuffing. I love their meaty texture and rich flavor. Next, we have cherry tomatoes, which add a burst of sweetness. Fresh mozzarella balls bring creaminess, while basil adds a fresh kick. Balsamic glaze ties it all together with a sweet and tangy touch. Extra virgin olive oil helps with cooking and adds flavor. Garlic powder gives it a nice depth. Don’t forget salt and black pepper to enhance every bite. You can also add extra basil leaves to make it look pretty. Gather these ingredients to create a dish that’s full of flavor and fun to make! {{ingredient_image_2}} - Preheat the oven to 400°F (200°C). - Prepare your baking sheet with parchment paper. This helps keep things clean. - Brush the portobello mushrooms with olive oil. This adds flavor and helps them cook. - Sprinkle garlic powder, salt, and pepper on each mushroom. Even seasoning is key for great taste. - In a bowl, mix halved cherry tomatoes, mozzarella balls, and chopped basil. Toss gently to blend the flavors. - Fill each portobello cap with the tomato and mozzarella mix. Pack it in well for a tasty bite. - Drizzle balsamic glaze over the stuffed mushrooms. This adds a sweet and tangy flavor. - Place the baking sheet in the oven. Bake for 15-20 minutes. Watch for tender mushrooms and melted cheese. - Present the Caprese stuffed portobellos on a bright serving platter. - Drizzle extra balsamic glaze around the plate for a nice touch. - Add fresh basil leaves for color and flair. - Pair with a crisp green salad or garlic bread for a full meal. - Use goat cheese or feta instead of mozzarella for a different flavor. - Swap cherry tomatoes for sun-dried tomatoes for a richer taste. - Fresh spinach can replace basil for a new twist. - Try using arugula for a peppery kick in the filling. - Brush mushrooms evenly with olive oil to ensure even cooking. - Bake until mushrooms are tender and cheese is melted. - Keep an eye on the cheese; it should bubble and turn golden. - Let mushrooms cool a few minutes before serving to avoid burns. Pro Tips Choose Fresh Ingredients: Opt for ripe cherry tomatoes and high-quality fresh mozzarella for the best flavor. Fresh ingredients enhance the overall taste of the dish. Experiment with Cheese: If you want to switch things up, try using burrata cheese instead of mozzarella for a creamier texture that complements the other ingredients beautifully. Make it Vegan: Substitute the mozzarella with a dairy-free cheese option or use marinated tofu for a delicious vegan-friendly version of this recipe. Perfect Balsamic Glaze: If making homemade balsamic glaze, reduce balsamic vinegar over low heat until it thickens. This concentrated flavor adds a gourmet touch to your stuffed mushrooms. {{image_4}} You can change up the flavors in Caprese stuffed portobellos. Start by adding other veggies. Try bell peppers, zucchini, or spinach for extra crunch and taste. You can also mix in olives or artichokes for a Mediterranean twist. Adding meats can create a heartier dish. Prosciutto adds a salty kick. Cooked chicken or turkey can also work well. Just chop them small and mix them into your filling. If you want a vegan option, swap the mozzarella with a plant-based cheese. You can also use cashew cream for a creamy texture. For a dairy-free dish, check the labels on your cheese. Many brands offer great dairy-free choices. Gluten-free? Use gluten-free bread crumbs in your filling or skip the breadcrumbs altogether. The portobello mushrooms will still be tasty and filling. Use seasonal produce to enhance your dish. In summer, ripe tomatoes burst with flavor. In fall, try adding roasted butternut squash for a sweet touch. Adjust your recipe with seasonal herbs too. Fresh thyme or oregano can bring a new flavor dimension. These changes keep your Caprese stuffed portobellos fresh and exciting all year round. To keep your Caprese stuffed portobellos fresh, store them in the fridge. Place the leftovers in an airtight container. They will last for about 3 days. Make sure to let them cool down before sealing. If you want to save them longer, you can freeze them. Wrap each mushroom well in plastic wrap and then place them in a freezer-safe bag. They can stay fresh for up to 2 months. When you're ready to enjoy your leftovers, reheating is key. The best way to do this is in the oven. Preheat your oven to 350°F (175°C). Place the stuffed mushrooms on a baking sheet. Heat them for about 10-15 minutes. This way, they stay moist and tasty. If you prefer a quicker method, you can use the microwave. Just heat them for 1-2 minutes, but be careful. This method can dry them out. To freshen up leftovers, you can drizzle a little extra balsamic glaze on top. Adding a few fresh basil leaves can also brighten the flavors. Enjoy your delicious meal again! Yes, you can prepare these stuffed mushrooms ahead of time. To do this, follow these steps: - Prepare the mushrooms: Brush them with olive oil and season as directed. - Mix the filling: Combine the tomatoes, mozzarella, and basil. - Assemble but don’t bake: Fill the mushrooms with the mixture but skip baking for now. Store the stuffed mushrooms in the fridge. When ready to bake, just add the balsamic glaze and pop them in the oven. They will taste fresh and delicious! Look for these signs to check if your mushrooms are ready: - Tenderness: The mushrooms should feel soft to the touch. - Cheese bubbling: The mozzarella should be melted and slightly bubbly. - Color change: The edges of the mushrooms may turn golden brown. If you see these signs, your Caprese Stuffed Portobellos are done and ready to enjoy! You have many great options for sides and drinks. Here are some ideas: - Salads: A light green salad with lemon dressing works well. - Bread: Serve with crusty bread or garlic bread for dipping. - Wine: Pair with a crisp white wine, like Sauvignon Blanc or Pinot Grigio. - Vegetables: Grilled or roasted vegetables add extra flavor. These pairings will enhance your meal and make it even more enjoyable! This blog post covered how to make delicious Caprese Stuffed Portobellos. We explored the right ingredients and preparation steps. You learned how to bake and serve this tasty dish perfectly. In conclusion, by using fresh ingredients and easy methods, you can impress anyone. Enjoy creating your own twist on this recipe, and share it with friends. Happy cooking!

Caprese Stuffed Portobellos Irresistible Flavor Boost

To make this tasty casserole, gather these main ingredients: - 1 large head of cauliflower, cut into florets - 1 tablespoon olive oil - 1 teaspoon garlic powder - 1 teaspoon onion powder - 1 teaspoon smoked paprika - Salt and pepper to taste - 1 cup shredded sharp cheddar cheese - 1 cup cream cheese, softened - 1 cup unsweetened almond milk (or your favorite milk) - ½ cup grated Parmesan cheese - ¼ cup chopped fresh chives (for garnish) These ingredients blend together to create a creamy and cheesy dish that warms the heart. You will need some essential cooking supplies to make this casserole: - A large pot for boiling - A mixing bowl for the cheese mixture - A whisk for blending - A 9x13 inch casserole dish - A spatula for folding ingredients Having these tools ready will make your cooking experience smooth and fun. Feel free to get creative! You can enhance the flavor with these optional seasonings: - ½ teaspoon cayenne pepper for heat - 1 tablespoon fresh herbs like thyme or rosemary - A splash of lemon juice for brightness These additions can elevate your casserole and make it even more special. Start by preheating your oven to 375°F (190°C). This helps the casserole bake evenly. Next, bring a large pot of salted water to a rolling boil. Once boiling, carefully add the cauliflower florets. Cook them for about 5 minutes. You want them tender but still a bit crisp. After cooking, drain the florets well and set them aside to cool. In a large mixing bowl, combine the softened cream cheese and almond milk. Use a whisk to mix until it is smooth. This step is key for a creamy texture. Then, add the shredded cheddar cheese, garlic powder, onion powder, smoked paprika, salt, and pepper. Stir well to make sure all the flavors blend together. Gently fold the cooked cauliflower into the cheese mixture. Make sure each floret gets coated well. This is where the magic happens! Next, transfer the mixture into a greased 9x13 inch casserole dish. Spread it out evenly so it cooks nicely. To finish, sprinkle the grated Parmesan cheese on top. Place the casserole in the oven and bake for 25-30 minutes. Look for a golden and bubbly top. Once done, let it sit for a few minutes. Garnish with fresh chives before serving. Enjoy your cheesy delight! To get the best texture in your cheesy cauliflower casserole, cook the cauliflower just right. Boil it for only 5 minutes. It should be tender but still firm. Overcooking will lead to mushy cauliflower. After boiling, drain it well to remove excess water. This keeps the dish from being watery. One common mistake is not draining the cauliflower well. If you skip this step, the casserole can turn out too wet. Another mistake is not mixing the cheese sauce thoroughly. Make sure the cream cheese and almond milk are smooth before adding the other ingredients. Also, don't forget to coat each floret in the cheese mixture for even flavor. To amp up the flavor, consider adding fresh herbs. Thyme or rosemary can bring a nice twist. You can also try different cheeses. A bit of mozzarella or Gruyère can add depth. For heat, a pinch of cayenne pepper or red pepper flakes can spice things up. Lastly, a drizzle of olive oil before serving adds richness and flair. {{image_4}} You can easily add protein to this dish. Try diced chicken or cooked ground beef. Both add flavor and make the casserole heartier. If you want something lighter, use turkey or tofu. Simply mix the protein with the cheese before folding in the cauliflower. This change makes it a full meal. To make a vegan version, swap out the cream cheese and milk. Use cashew cream or coconut yogurt instead. Nutritional yeast gives a cheesy flavor without dairy. You can also use vegan cheese or any plant-based milk. Just ensure it's unsweetened to keep the taste balanced. This way, everyone can enjoy the dish! Cheese can change the flavor profile of this casserole. Instead of sharp cheddar, try gouda or pepper jack for a spicy kick. For a milder taste, use mozzarella or Monterey Jack. Mixing different cheeses creates a rich and creamy texture. Experiment with your favorites to find the perfect blend. Once your cheesy cauliflower casserole cools, you should store it properly. Place leftovers in an airtight container. Make sure to keep it in the fridge. It stays fresh for about three to five days. If you want to keep it longer, consider freezing it. To reheat, preheat your oven to 350°F (175°C). Place the casserole in an oven-safe dish. Cover it with foil to keep it moist. Heat it for 20 to 25 minutes until it’s warm all the way through. You can also microwave individual portions. Just heat for one to two minutes, stirring halfway. If you freeze the casserole, it’s best to do so before baking. Wrap it tightly in plastic wrap, then in foil. This keeps it fresh for up to three months. When ready to use, thaw it overnight in the fridge. Bake it as instructed in the recipe. If you freeze it after baking, it may lose some texture, but it still tastes great! Yes, you can use frozen cauliflower. It saves time and is easy to find. Just remember to thaw it first and drain any excess water. This helps keep your casserole from being too watery. Using frozen cauliflower can still give you a tasty dish. To make it a complete meal, add protein. You can mix in cooked chicken, turkey, or sausage. For a vegetarian option, try adding beans or lentils. Serve the casserole with a side salad for extra veggies. This will balance flavors and nutrients. Serve the casserole warm. Garnish with fresh chives for a pop of color. You can drizzle a bit of olive oil on top for extra flavor. Pair it with crusty bread or a light soup. This makes for a cozy, filling meal. Cheesy cauliflower casserole is tasty and easy to make. We covered main ingredients, cooking tools, and seasoning options. You learned step-by-step how to prep the cauliflower, mix the cheese, and assemble the dish. To ensure the best texture, we shared tips and common mistakes to avoid. You can even add protein or try vegan options. Finally, we discussed how to store and reheat your casserole. Keep these tips in mind to create a delicious meal that everyone will enjoy. Now, it’s time to cook!

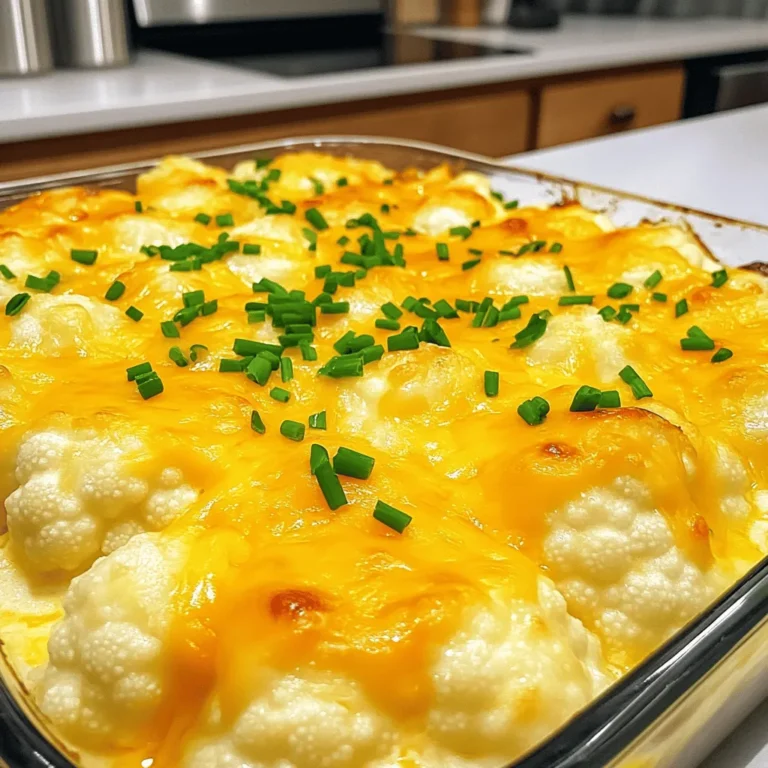
Cheesy Cauliflower Casserole Simple and Comforting Dish

- 4 cups fresh peaches, sliced (or 2 cans of peaches, drained and rinsed) - 1 cup granulated sugar - 1 teaspoon ground cinnamon - 1 box yellow cake mix (approximately 15.25 oz) - 1 cup unsalted butter, melted To start, fresh peaches give the best flavor. If you choose canned, make sure to rinse them well. Sugar and cinnamon add sweetness and warmth. The yellow cake mix makes this dessert easy and quick. Lastly, melted butter helps create a crispy top. - 1 cup pecans, chopped (optional for added texture) - Vanilla ice cream, for serving Pecans add a nice crunch to the dish. They are not necessary but do enhance the texture. A scoop of vanilla ice cream on top makes the dessert even better. The cold ice cream pairs well with the warm cake. - 9x13-inch baking dish - Mixing bowl and measuring tools You will need a 9x13-inch baking dish to hold all the yummy layers. A mixing bowl is essential for combining the peach filling. Measuring tools ensure you get the right amounts for each ingredient. These tools make your baking process smooth and fun! - Preheat your oven to 350°F (175°C). - In a large bowl, combine 4 cups of sliced peaches, 1 cup of granulated sugar, and 1 teaspoon of ground cinnamon. If you use fresh peaches, let this sit for 10 minutes. This helps the peaches release their juices. - Lightly grease a 9x13-inch baking dish. Pour the peach mixture evenly in the dish. - Next, take 1 box of yellow cake mix and sprinkle it evenly over the peaches. Make sure to cover all the peaches. - Drizzle 1 cup of melted unsalted butter over the cake mix. If you want some crunch, add 1 cup of chopped pecans on top. - Place the baking dish in the oven. Bake for 35-40 minutes. Watch for a golden brown top and bubbling edges. - When done, take it out and let it cool for about 10 minutes. This helps the cake to set. - Serve warm and add a scoop of vanilla ice cream on top. The warm cake with cold ice cream is a treat! How to choose ripe peaches To pick ripe peaches, look for a yellow or golden color. They should feel slightly soft when you press them. The best peaches smell sweet and fragrant. If you find hard peaches, let them ripen at room temperature for a few days. Best practices for layering ingredients Start by spreading the peach mixture evenly in the greased dish. This helps the peaches cook well. Next, sprinkle the dry cake mix evenly over the peaches. Make sure no spots are left bare. This helps the cake bake evenly and rise nicely. Avoiding sogginess in the cake Soggy cake can happen if you use too many juicy peaches. If using fresh peaches, let the mixture sit for just 10 minutes. This helps the juices mix well. If you use canned peaches, drain them well to remove extra liquid. Ensuring even baking To bake evenly, place your dish in the center of the oven. This provides the best heat distribution. Watch for a golden top and bubbling edges. This shows your cake is baking well. Pairing with toppings and sides For a delightful touch, serve your dump cake with vanilla ice cream. The cold ice cream contrasts well with the warm cake. You can also add whipped cream or fresh mint for extra flair. Recommended serving temperatures Peach Cobbler Dump Cake tastes best warm. Let it cool for about 10 minutes after baking. This helps it set up nicely for serving. Enjoy it warm for the best flavor and texture. {{image_4}} You can change up the fruit in this dump cake. Try using cherries, blueberries, or even mixed berries. Each fruit brings a new flavor. You can also mix different fruits together. For example, peaches and blueberries create a nice blend of sweet and tart. The key is to ensure you have about 4 cups of fruit. This keeps the cake moist and full of flavor. If you're looking for a gluten-free version, there are great options. Many brands sell gluten-free cake mixes that work well. You can also reduce sugar in the recipe. Try cutting it down to half a cup. This makes the dish healthier without losing its taste. You can even use natural sweeteners like honey or maple syrup. To make your dump cake more exciting, add spices or extracts. A dash of nutmeg or a splash of vanilla can boost the flavor. You could also mix in caramel or chocolate sauce for a rich twist. Drizzling these sauces on top before serving makes it extra special. These enhancements can take your peach cobbler dump cake to a whole new level. To keep your Peach Cobbler Dump Cake fresh, let it cool first. Cover the dish with plastic wrap or foil. You can also use an airtight container. This keeps the cake moist and tasty. Store it in the fridge for up to five days. For the best taste, reheat the dump cake in the oven. Preheat the oven to 350°F (175°C). Place slices on a baking sheet and warm for about 10-15 minutes. This method helps keep the texture nice. You can also microwave individual pieces for about 30 seconds. Warm cake tastes great, but cold cake works, too. If you have extra cake, you can freeze it. Use a freezer-safe container or wrap slices tightly in plastic wrap. Label the container with the date. The cake can stay frozen for up to three months. When ready to eat, thaw it in the fridge overnight. To serve, reheat it for a warm treat. A dump cake is a simple dessert. You mix fruit and cake mix in a pan. No need to blend or whip anything. Just dump the ingredients in layers. It cooks into a sweet, crumbly cake. This method makes it easy and quick to prepare. Yes, you can prepare this recipe ahead of time. Mix the peaches, sugar, and cinnamon first. Place the mixture in the baking dish. Cover it with plastic wrap and store it in the fridge. You can add the cake mix and butter just before baking. This keeps everything fresh. I love serving this dump cake warm. A scoop of vanilla ice cream on top is perfect. You can also add whipped cream for extra sweetness. Some people like to sprinkle nuts on top for crunch. Fresh mint leaves make a nice garnish too. The dump cake is done when the top is golden brown. You will see the peach filling bubbling at the edges. You can also poke the cake with a fork. If it comes out clean, it’s ready to eat. Yes, you can make this dump cake in a slow cooker. Prepare the peach mixture as usual. Layer the cake mix on top in the slow cooker. Drizzle melted butter over the mix. Cook on low for 2 to 3 hours or until bubbly. You can make a vegan version easily. Use a vegan cake mix instead of regular cake mix. Replace the butter with coconut oil or vegan butter. You can also use maple syrup instead of sugar for a healthier twist. This blog post covers how to make a delicious Peach Cobbler Dump Cake. You learned about the main and optional ingredients, the equipment you need, and the step-by-step baking process. I shared tips to help you avoid common mistakes and provided ideas for storing leftovers. Remember, you can make this dessert your own by using different fruits and adjusting flavors. Enjoy making this simple and tasty treat. It’s perfect for any gathering or just a cozy night in. Happy baking!

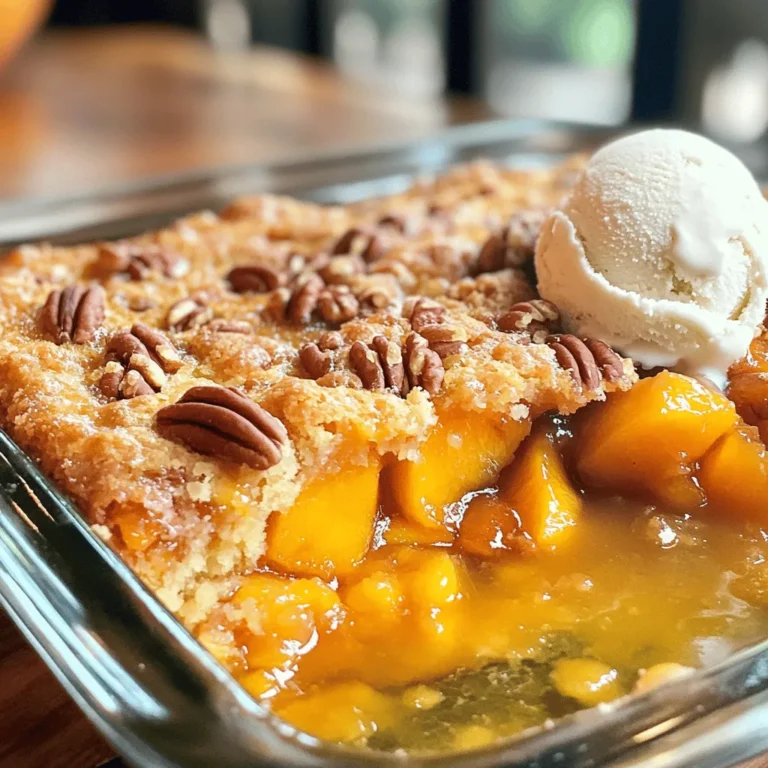
Peach Cobbler Dump Cake Easy and Tasty Dessert Recipe

1. Preheat your oven to 350°F (175°C). This is key for even baking. 2. Line a standard cupcake pan with paper liners. This helps prevent the cupcakes from sticking. 3. Gather your tools: a mixing bowl, electric mixer, whisk, and a scoop for batter. 1. In a large mixing bowl, cream together the softened butter and sugar. Use an electric mixer for about 3-4 minutes until fluffy. 2. Add the eggs, one at a time. Mix well after each egg. Then add vanilla extract and lemon zest. Mix until all is combined. 3. In another bowl, whisk together the flour, baking powder, baking soda, and salt. This ensures even distribution of the dry ingredients. 4. Gradually add the dry mix to the butter mixture. Alternate with sour cream and lemonade. Start and end with the flour mix. Mix just until combined. Overmixing can make the cupcakes tough. 5. Gently fold in the raspberries. Take your time to keep them whole. This adds great texture and flavor. 1. Use a scoop or spoon to fill each cupcake liner about two-thirds full. This allows room for rising. 2. Bake in the preheated oven for 18-20 minutes. Check doneness by inserting a toothpick. It should come out clean. 3. Let the cupcakes cool in the pan for 5 minutes. Then transfer them to a wire rack. Cooling completely before decorating helps keep them moist. To make the best Raspberry Lemonade Cupcakes, avoid key baking mistakes: - Overmixing the batter can make your cupcakes tough. Mix just until combined. - Measuring flour incorrectly can lead to dry cupcakes. Spoon flour into the cup and level it off. - Not preheating the oven means your cupcakes won’t rise properly. Always check your oven temp. To check if your cupcakes are done, use a toothpick. Insert it into the center of a cupcake. If it comes out clean, they are ready. If it has batter on it, bake for a few more minutes. When frosting your cupcakes, here are some best practices: - Use a piping bag for a neat look. It helps control the amount of frosting. - Start with a thin layer of frosting, then add more if needed. This technique prevents crumbs from mixing in. - Consider chilling your cupcakes for a short time before frosting. This helps the frosting set better. For unique topping combinations, try these ideas: - Top with fresh raspberries and a sprinkle of lemon zest for a bright look. - Use lemon curd as a filling before frosting for extra flavor. - Drizzle some raspberry sauce on top for a sweet touch. These tips will help you create cupcakes that are not only delicious but also visually appealing! {{image_4}} You can swap fruits to change the flavor. Try strawberries, blueberries, or peaches. Each fruit adds its own unique taste. You can also mix different fruits for a fun twist. For added zest, use lime or orange zest instead of lemon. This gives your cupcakes a new and exciting flavor. Extracts can also boost the taste. Use almond or coconut extract for a fun surprise. These small changes will keep your cupcakes fresh and interesting. How you serve these cupcakes can make a big impact. Use colorful cupcake liners to match your theme. Consider a pastel-colored platter for a springtime feel. You can also add fun decorations. Edible flowers or candy can make them pop. For a special event, try themed decorations. Use mini flags or personalized toppers that fit your party. Simple touches can make your cupcakes stand out. Don’t forget to garnish with fresh raspberries or a sprinkle of lemon zest. These small details will impress your guests and make your treats shine. To keep your Raspberry Lemonade Cupcakes fresh, store them in an airtight container. This keeps moisture in and prevents them from drying out. Make sure to let the cupcakes cool completely before placing them in the container. If you have frosted them, wait until the icing has set. The ideal storage temperature is room temperature for up to three days. If you need to store them longer, consider refrigeration, but be aware that this can change their texture. If you want to save some cupcakes for later, freezing is a great option. First, ensure the cupcakes are fully cooled. Wrap each cupcake tightly in plastic wrap. Then, place them in a freezer-safe bag or container. This will help keep them fresh for about three months. When you're ready to enjoy them, take the cupcakes out and let them thaw in the fridge overnight. For a quick thaw, leave them on the counter for about an hour. Enjoy your treats at their best! To keep your cupcakes moist, use sour cream in the batter. It adds richness and moisture. Make sure not to overmix the batter, as this can lead to dry cupcakes. Also, avoid baking for too long. Check them with a toothpick to find the right time. I suggest letting them cool properly before frosting. This helps to lock in the moisture. Yes, you can use frozen raspberries. They work well in cupcakes. However, they may make the batter a bit wetter. This can change the texture slightly but still tastes great. If you choose frozen berries, do not thaw them before adding. This helps keep their shape and flavor. These cupcakes pair well with a refreshing glass of iced tea or lemonade. A light fruit salad also complements their flavor nicely. For dessert pairings, consider a scoop of lemon sorbet. It matches the tangy notes of the cupcakes and adds a cool touch. In this blog post, we covered how to make Raspberry Lemonade Cupcakes. We explored key ingredients, customizations, and step-by-step instructions. I shared tips to perfect your cupcakes and offered variations for flavor and presentation. Remember, baking is all about having fun. Don’t be afraid to try new ideas. With practice, you’ll impress everyone with your delicious treats. Enjoy your baking journey and share your creations!

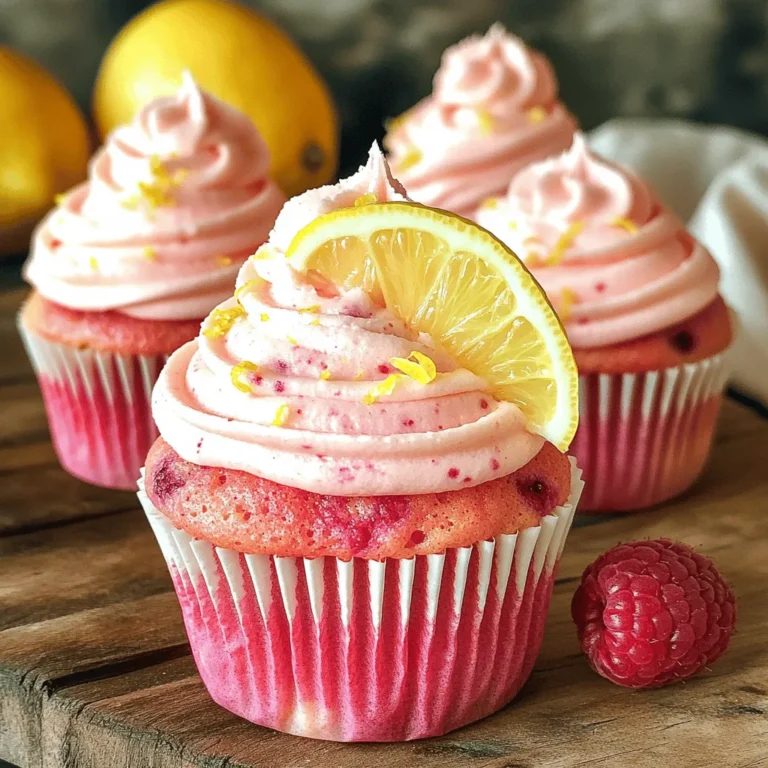
Raspberry Lemonade Cupcakes Fresh and Flavorful Treat

- 1 lb (450g) chicken breast, thinly sliced - 2 tablespoons soy sauce - 2 tablespoons cornstarch - 1 tablespoon olive oil - Juice and zest of 1 large orange - 1 tablespoon honey - 1 teaspoon fresh ginger, finely grated - 3 cloves garlic, minced - 1 red bell pepper, thinly sliced - 1 cup broccoli florets - 1 cup snap peas - Salt and freshly ground pepper to taste - Green onions, thinly sliced - Toasted sesame seeds - Skillet or wok - Mixing bowls - Measuring cups and spoons Gather these items before you start cooking. The chicken breast gives a nice base, while the fresh veggies add color and crunch. Orange juice and zest brighten the dish, and soy sauce with honey brings the sweet and salty balance. Don’t skip the garnishes. Green onions and sesame seeds add a pop of flavor and texture. 1. Marinate the chicken with soy sauce and cornstarch: Start by slicing 1 pound of chicken breast into thin strips. In a mixing bowl, combine the chicken with 2 tablespoons of soy sauce, 2 tablespoons of cornstarch, and a pinch of salt and pepper. Mix it well until all pieces are coated. Cover the bowl and let it sit for at least 15 minutes. This step makes the chicken tender and flavorful. 2. Prepare the orange sauce mixture: Take a separate bowl and whisk together the juice and zest from 1 large orange, 1 tablespoon of honey, 1 teaspoon of grated ginger, and 3 minced garlic cloves. This sauce will give your stir fry a bright, sweet flavor. 3. Sauté the marinated chicken: Heat 1 tablespoon of olive oil in a large skillet over medium-high heat. Once the oil is hot, add the marinated chicken in a single layer. Cook for about 4-5 minutes until the chicken is golden brown. Make sure to stir it occasionally. When done, take the chicken out and set it aside on a plate. 4. Stir-fry the vegetables: In the same skillet, add sliced red bell pepper, 1 cup of broccoli florets, and 1 cup of snap peas. Stir-fry these vegetables for about 3-4 minutes. You want them bright and slightly tender but still crisp. 5. Return the chicken to the skillet: After the vegetables are ready, add the cooked chicken back into the skillet with the veggies. 6. Pour and toss with the orange sauce: Now, pour the orange sauce over the chicken and veggies. Toss everything gently to combine. Let it cook for an extra 2-3 minutes. This allows the sauce to coat the chicken and vegetables nicely. Adjust seasoning with salt or pepper if needed. Enjoy the vibrant flavors and colors of your orange glazed chicken stir fry! - Marination time is key. Letting the chicken sit for at least 15 minutes helps it soak up flavor. This step also makes the chicken more tender. - Cook at the right temperature. Use medium-high heat to get a nice sear on the chicken. This helps lock in juices and adds a great taste. - Adjust seasoning to your taste. After cooking, taste the stir fry and add more salt or pepper if needed. - Use fresh ingredients. Fresh veggies and a ripe orange make a big difference in flavor. They add brightness and crunch to your dish. - Pair this stir fry with rice or quinoa. Both options soak up the sauce well and make your meal filling. - This dish is perfect for meal prep. You can make a big batch and enjoy it throughout the week. Just store in the fridge. {{image_4}} You can switch the chicken for shrimp or tofu. Shrimp cooks fast and adds a nice flavor. Tofu is a great choice for a plant-based meal. You can marinate the tofu just like chicken for extra taste. If you prefer beef, use thin slices of flank steak. For pork, try tenderloin or pork chops. Feel free to use any seasonal produce you like. Zucchini, bell peppers, or asparagus can work well. Adding mushrooms gives a nice, earthy taste. Carrots add a sweet crunch and color to the dish. You can mix your favorite veggies for a colorful stir fry. This dish is flexible, so use what you have on hand. Change up the sweetener in your sauce for fun. You can use maple syrup or agave for a twist. If you like heat, add some chili flakes or fresh chili. Garlic can boost the flavor even more. Try adding a splash of rice vinegar for tang. These changes can make the dish feel new and exciting. - Refrigerating leftovers: Store any leftover orange glazed chicken stir fry in an airtight container. It keeps well in the fridge for up to four days. Make sure it has cooled to room temperature before sealing. This helps avoid condensation, which can make the food soggy. - Freezing stir fry: If you want to save it for later, freeze the stir fry in a freezer-safe bag or container. It can last for up to three months. Try to remove as much air as possible before sealing. This prevents freezer burn and keeps the flavors intact. - Best practices for reheating in the skillet: To reheat, place the stir fry in a skillet over medium heat. Add a splash of water or broth to help steam and rehydrate the dish. Stir it occasionally until it’s hot throughout. This method keeps the veggies crisp and tasty. - Microwave options: If you're in a hurry, use the microwave. Place the stir fry in a microwave-safe dish. Cover it with a microwave-safe lid or wrap, leaving a small vent. Heat in short bursts, stirring in between until it’s warm. This keeps the chicken from drying out. - How long it lasts in the fridge: The orange glazed chicken stir fry stays safe to eat for about four days in the fridge. Always check for any signs of spoilage before consuming. - Signs of spoilage: Look for changes in color, texture, or smell. If the chicken smells sour or the veggies look wilted, it’s best to throw it away. Trust your senses; they help keep you safe! You can pair this dish with several sides. Here are some great options: - Steamed white rice - Brown rice or quinoa - Noodles, like chow mein or rice noodles - A crisp green salad - Roasted vegetables These sides will complement the sweet and tangy flavors of your stir fry. Yes, you can make this stir fry in advance! Here are some tips: - Cook the chicken and vegetables, then store them in the fridge. - Prepare the orange sauce and keep it separate. - When ready to eat, reheat the stir fry and add the sauce. This way, you can enjoy a quick, delicious meal later. You can easily modify this recipe for dietary needs: - For gluten-free, use tamari instead of soy sauce. - If you're vegetarian, try tofu or tempeh instead of chicken. - For low-sugar diets, use a sugar substitute in the sauce. These adjustments let everyone enjoy the tasty orange glazed chicken stir fry! This guide showed how to make delicious Orange Glazed Chicken Stir Fry. I covered key ingredients and equipment, plus step-by-step cooking instructions. Remember, marinating your chicken and using fresh veggies makes all the difference. You can vary this dish with different proteins and seasonings for new flavors. Proper storage ensures your leftovers stay tasty. Enjoy your tasty stir fry and feel free to experiment with it!

Flavorful Orange Glazed Chicken Stir Fry Delight

PREV 1 … 22 23 24 … 48 NEXT
meal plan mapper

explore

DessertsDinnerAppetizersDrinks

Our Policies

  • Cookie Policy
  • Copyright Policy
  • Disclaimer
  • GDPR Policy
  • Terms Of Use
Back to Top
  • About
  • Contact Us
  • Privacy Policy
© 2025 meal plan mapper