FREE DINNER EBOOK! Get your copy!
  • Cookie Policy
  • GDPR Policy
  • Disclaimer
  • Terms Of Use
  • Visit my other site: Fun Cookie Recipes
meal plan mapper
  • Home
  • Dinner
  • Desserts
  • Drinks
  • Appetizers
  • Contact
  • About
  • Privacy Policy
  • Home
  • Dinner
  • Desserts
  • Drinks
  • Appetizers
  • Contact
  • About
  • Privacy Policy
  • Cookie Policy
  • GDPR Policy
  • Disclaimer
  • Terms Of Use
Visit my other site: Fun Cookie Recipes

HOME / CATEGORIES /

Latest

- 1 cup all-purpose flour - 2 tablespoons granulated sugar - 1 tablespoon baking powder - 1/2 teaspoon salt - 1 cup milk - 1 large egg - 2 tablespoons unsalted butter, melted - 1 teaspoon pure vanilla extract - 1/4 cup packed brown sugar - 1 tablespoon ground cinnamon - 1/4 cup unsalted butter, softened - 1/2 cup cream cheese, softened - 1 cup powdered sugar - 2 tablespoons milk When I make cinnamon roll pancakes, I enjoy using simple, fresh ingredients. Each one plays a key role in creating that soft, flavorful delight. First, the main ingredients come together to form a fluffy pancake batter. The flour, sugar, baking powder, and salt mix well for the base. Then, I add milk, a large egg, melted butter, and vanilla. Each helps create the perfect texture. Next, I focus on the cinnamon filling. The brown sugar and cinnamon create that classic cinnamon roll taste. Softened butter helps it stick together so I can swirl it into the pancakes later. Finally, I prepare the cream cheese frosting. Using softened cream cheese, powdered sugar, and a bit of milk, this frosting adds a rich touch. It brings the whole dish together and makes it feel special. With these ingredients, you can create wonderful cinnamon roll pancakes that impress everyone at the breakfast table! {{ingredient_image_2}} - Step 1: Prepare the Dry Ingredients In a large bowl, mix 1 cup of all-purpose flour, 2 tablespoons of granulated sugar, 1 tablespoon of baking powder, and 1/2 teaspoon of salt. Make sure they blend well. Set this bowl aside for later. - Step 2: Mix the Wet Ingredients In another bowl, combine 1 cup of milk, 1 large egg, 2 tablespoons of melted unsalted butter, and 1 teaspoon of pure vanilla extract. Whisk these ingredients together until the mixture is smooth. - Step 3: Combine Wet and Dry Ingredients Slowly pour the wet mixture into the dry ingredients. Use a spatula to stir gently. Mix until just combined. It’s okay if there are a few lumps; overmixing can make the pancakes tough. - Step 4: Make the Cinnamon Swirl Mixture In a small bowl, mix 1/4 cup of packed brown sugar and 1 tablespoon of ground cinnamon. This mixture will create the sweet swirl in your pancakes. - Step 5: Heat the Cooking Surface Preheat a non-stick skillet or griddle over medium heat. Lightly grease it with cooking spray or a small amount of butter. This helps prevent sticking. - Step 6: Cook the Pancakes Pour about 1/4 cup of batter onto the skillet. Then, drizzle some cinnamon swirl mixture in a spiral over the batter. Use a toothpick to swirl it gently into the pancake. - Step 7: Flip and Finish Cooking Cook for about 3-4 minutes. Watch for bubbles forming on the surface. Carefully flip the pancake and cook for another 2-3 minutes until it turns golden brown. - Step 8: Repeat the Process Keep going with the remaining batter and cinnamon mixture. Adjust the heat if the pancakes start to brown too quickly. - Step 9: Prepare the Cream Cheese Frosting In a medium bowl, beat together 1/2 cup of softened cream cheese, 1 cup of powdered sugar, and 2 tablespoons of milk. Mix until smooth and creamy. - Step 10: Serve and Present Stack the warm pancakes on plates. Drizzle or dollop the cream cheese frosting on top. For a fun twist, add a sprinkle of cinnamon or chopped nuts for added flavor and texture. - Avoid Overmixing: Mix the wet and dry ingredients gently. You want a few lumps to keep them light. If you mix too much, your pancakes can get tough. - Adjust Cooking Temperature as Needed: Cook on medium heat. If your pancakes brown too fast, lower the heat. You want them golden, not burned. - Add Fresh Fruits or Nuts: Top your pancakes with berries or sliced bananas. Nuts like pecans or walnuts add crunch and flavor. - Drizzling Extra Cinnamon or Maple Syrup: A swirl of cinnamon or a drizzle of syrup boosts sweetness. It makes the pancakes even more delicious. - Not Preheating the Skillet: Always preheat your skillet. This ensures even cooking and helps your pancakes rise well. - Using Cold Ingredients: Let your milk and eggs come to room temperature. Cold ingredients can make your batter dense and flat. Pro Tips Use Room Temperature Ingredients: Allow the milk, egg, and butter to reach room temperature before mixing. This helps create a smoother batter and fluffier pancakes. Don’t Overmix the Batter: Mix until just combined. Overmixing can lead to tough pancakes. A few lumps are perfectly fine! Adjust the Heat: If pancakes are browning too quickly, reduce the heat. Cooking at the right temperature ensures they cook evenly without burning. Experiment with Toppings: Besides cream cheese frosting, try adding fruits like bananas or berries, or even a drizzle of maple syrup for extra flavor! {{image_4}} You can make your cinnamon roll pancakes even more fun. Here are two tasty ideas: - Vanilla Bean Cinnamon Roll Pancakes: Add one tablespoon of vanilla bean paste to the batter. This will give your pancakes a rich vanilla flavor. It pairs well with the cinnamon filling. You’ll love how the vanilla shines through! - Pumpkin Spice Cinnamon Roll Pancakes: For a fall twist, mix in one cup of pumpkin puree and one teaspoon of pumpkin spice. This makes the pancakes taste warm and cozy. They are perfect for chilly mornings. Want to enjoy these pancakes while sticking to your diet? Here are some options: - Gluten-Free Options: Use gluten-free all-purpose flour instead of regular flour. Make sure the baking powder is also gluten-free. This keeps the pancakes soft and tasty. - Vegan Adaptations: To make these pancakes vegan, swap the egg for a flax egg. Mix one tablespoon of flaxseed meal with three tablespoons of water. Let it sit for a few minutes until it thickens. Use almond milk instead of regular milk, and replace the butter with coconut oil. If you want to serve your pancakes in new ways, try these ideas: - Cinnamon Roll Pancake Bake: Layer your pancakes in a baking dish. Drizzle with cream cheese frosting and bake at 350°F for about 15 minutes. This creates a warm, gooey breakfast that everyone will love. - Cinnamon Roll Pancake Stacks: Stack your pancakes high and drizzle frosting on each layer. Add a sprinkle of cinnamon or some chopped nuts on top for a beautiful finish. This makes a stunning presentation at brunch! To keep your cinnamon roll pancakes fresh, store them in the fridge. Place the pancakes in an airtight container. This helps to keep them from drying out. If you don’t have a container, you can wrap them tightly in plastic wrap. Make sure to cool them to room temperature before you store them. This prevents moisture buildup. When you want to enjoy the leftovers, you can reheat them easily. You have two main options: stovetop or microwave. - Stovetop: Heat a non-stick skillet over low heat. Add a tiny bit of butter for flavor. Place the pancakes in the skillet. Heat for about 2-3 minutes on each side. This keeps them soft and tasty. - Microwave: If you’re in a hurry, you can use the microwave. Place one pancake on a microwave-safe plate. Cover it with a damp paper towel. Heat for about 20-30 seconds. Check to make sure it is warm throughout. For the oven, preheat it to 350°F (175°C). Place the pancakes on a baking sheet. Cover them with foil to keep moisture in. Heat for about 10-15 minutes. Freezing your pancakes is a great way to save them for later. - Freezing Individual Pancakes: Let the pancakes cool completely. Stack them with parchment paper between each one. Place the stack in a freezer bag and squeeze out any air. This helps prevent freezer burn. - Best Practices for Freezing Frosting: For the cream cheese frosting, place it in a small airtight container. You can also use freezer bags. Make sure to label them with the date. When you’re ready to use it, thaw it in the fridge overnight. To make your pancakes fluffy, use fresh baking powder. This ingredient helps them rise. Mix the wet and dry ingredients gently. Overmixing can make them dense. A few lumps in the batter are just fine. Also, let the batter rest for a few minutes. This helps it become airier. Yes, you can make the batter ahead of time. Store it in the fridge for up to 24 hours. When you’re ready to cook, stir it gently. If it thickens, add a splash of milk. This helps it return to a good consistency. Just remember, fresh pancakes taste best! For toppings, try cream cheese frosting. It adds a sweet, tangy flavor. You can also drizzle maple syrup for extra sweetness. Fresh fruits like berries or sliced bananas work well too. Nuts like pecans or walnuts add a nice crunch. A sprinkle of cinnamon can make the stack even better! Cinnamon Roll Pancakes blend classic flavors in a fun way. We explored key ingredients, step-by-step cooking, and unique serving ideas. Use tips to avoid common mistakes and enjoy delicious results. Whether you stick with the classic or try a variation, these pancakes are a treat. Store and reheat leftovers easily for more enjoyment. Get creative with toppings, and make every bite special. Enjoy your pancake adventure!

Cinnamon Roll Pancakes Soft and Flavorful Delight

To make Jalapeño Cheddar Cornbread, you will need a few simple ingredients. Each one plays an important role in bringing great flavor and texture to your dish. Here is what you'll need: - 1 cup cornmeal - 1 cup all-purpose flour - 1 tablespoon baking powder - 1/2 teaspoon salt - 1/4 teaspoon ground black pepper - 1 cup buttermilk (can substitute with plant-based milk) - 1/3 cup vegetable oil - 2 large eggs - 1 cup sharp cheddar cheese, shredded - 1-2 fresh jalapeños, finely chopped (remove seeds for milder flavor, if desired) - 1/4 cup honey (optional, for a hint of sweetness) Each ingredient adds unique flavors. The cornmeal gives a sweet, nutty taste. The flour helps with texture. Baking powder makes the cornbread rise. Salt and pepper add depth. Buttermilk keeps it moist and tender. Vegetable oil adds a rich flavor. Eggs bind it all together. Cheddar cheese brings creaminess and sharpness. Jalapeños add heat and zest. Honey, if you choose, adds sweetness. Gather these ingredients before you start cooking. It makes the process smooth and fun. {{ingredient_image_2}} - Set oven temperature to 400°F (200°C). - Grease the baking pan or skillet well. - Combine cornmeal, flour, baking powder, salt, and black pepper in a bowl. - Whisk together buttermilk, vegetable oil, and eggs until smooth. - Incorporate honey if you want a touch of sweetness. - Pour the wet mixture into the dry ingredients. Mix gently with a spatula. - Fold in shredded cheddar cheese and chopped jalapeños until evenly mixed. - Transfer the batter to the prepared pan or skillet. - Bake for 20-25 minutes until the top is golden brown. - Cool the cornbread for 10 minutes before slicing. - For a great presentation, serve with butter on top and a garnish of jalapeño slices or cilantro. To get the best texture in your cornbread, avoid overmixing. When you combine the wet and dry ingredients, mix gently. You want a few lumps; they are okay. Overmixing can make your cornbread dense and tough. Make sure to evenly distribute your ingredients. When adding the jalapeños and cheese, fold them in carefully. This way, you get a burst of flavor in every bite. You can adjust the spice level by using jalapeños. If you want less heat, remove the seeds and membranes. This will give your bread a milder taste. For more heat, leave them in or add more jalapeños. Try different types of cheese too. Pepper jack adds a nice kick. A mild cheese like Monterey Jack gives a creamy texture without too much spice. This cornbread pairs well with chili, soups, or grilled meats. You can serve it alongside a fresh salad for a balanced meal. For condiments, butter is a classic choice. A drizzle of honey enhances the sweetness, which contrasts nicely with the spice. Consider trying a dollop of sour cream or a spicy aioli for a unique twist. Pro Tips Cheese Selection: Opt for a sharp cheddar cheese to enhance the flavor profile of your cornbread. Aged cheeses will give a more robust taste. Jalapeño Heat Control: If you prefer a milder cornbread, be sure to remove the seeds and membranes from the jalapeños before chopping them. Storage Tips: Store any leftover cornbread in an airtight container at room temperature for up to 2 days. For longer storage, freeze slices wrapped in plastic wrap. Serving Suggestions: Pair your cornbread with chili or soups for a delightful meal. It also makes a great base for savory breakfast dishes topped with eggs. {{image_4}} You can easily adjust this recipe for special diets. If you want a dairy-free option, use plant-based milk instead of buttermilk. Almond or oat milk works well. For gluten-free cornbread, replace the all-purpose flour with a gluten-free blend. Many brands offer great options that taste delicious. Cheese is another area to switch things up. While sharp cheddar gives a nice kick, you can try pepper jack for extra heat. Monterey Jack adds a creamy texture, which is also tasty. Want to jazz up your cornbread? You can add more spices or herbs. A pinch of cumin or smoked paprika can enhance the flavor. Fresh herbs like cilantro or chives also add a fresh taste. You can add vegetables for extra flavor. Corn kernels bring sweetness, while diced bell peppers add crunch. Even spinach can work for a healthy twist. Adjust the honey level based on your taste. If you like it sweeter, add more honey. Just remember to balance it with the heat from the jalapeños. To create a sweeter cornbread version, use a bit more honey and reduce the salt slightly. This gives a nice contrast to the spicy peppers. It’s a fun way to mix flavors! To store leftovers, let the cornbread cool completely. Wrap it tightly in plastic wrap or place it in an airtight container. This helps keep it fresh. You can store it in the fridge for up to four days. If you notice any signs of mold or an off smell, it’s best to toss it. If you want to keep cornbread longer, freezing is a great option. Cut the cornbread into squares before freezing. Wrap each piece in plastic wrap, then place them in a freezer bag. This helps save space and prevents freezer burn. Cornbread can stay fresh in the freezer for up to three months. To thaw, simply take out a piece and let it sit at room temperature for an hour. For a quick option, you can microwave it for 15-20 seconds. Reheat in the oven at 350°F (175°C) for about 10 minutes for a crispy texture. Enjoy your cornbread warm! To make your cornbread spicier, use more jalapeños. You can add one more pepper. Keep the seeds in for extra heat. You can also try adding cayenne pepper or hot sauce to the batter. Start with a small amount and taste as you go. This way, you can control the spice level. Yes, you can use different flours! Cornmeal is key for texture, but you can mix in whole wheat flour. This will add a nutty flavor and more fiber. If you use gluten-free flour, check the package for the right amount. It may change the texture, making it a bit denser. This cornbread pairs well with many dishes. Try serving it with chili or soup for a warm meal. It also tastes great with BBQ meats. You can add a side of roasted vegetables or a fresh salad for balance. A dollop of sour cream can add a nice creamy touch too. To check if your cornbread is done, look for a golden-brown top. Insert a toothpick in the center. If it comes out clean, your cornbread is ready. If it has wet batter on it, bake for a few more minutes. Let it cool before slicing for the best texture. In summary, this blog shared a simple recipe for Jalapeño Cheddar Cornbread. You learned about essential ingredients, preparation steps, and baking tips. Experimenting with flavors and textures can enhance your dish. Remember to store any leftovers properly to keep them fresh. Feel free to adjust spice levels or try new ingredients. Enjoy your tasty cornbread, and let it be a crowd favorite at your next meal!

Jalapeño Cheddar Cornbread Flavorful and Simple Recipe

To make a tasty Blackberry Sage Lemonade, gather these fresh and simple ingredients: - 1 cup fresh blackberries, rinsed - 1/4 cup fresh sage leaves, finely chopped - 1 cup granulated sugar - 1 cup freshly squeezed lemon juice (about 5-6 medium lemons) - 4 cups cold water - Ice cubes for serving - Optional garnishes like lemon slices and extra sage sprigs These ingredients are easy to find. Fresh blackberries give a sweet and tart flavor. Sage adds a nice herbal note that makes this drink unique. The sugar balances the tartness of the lemons. Fresh lemon juice is key for that classic lemonade taste. Cold water helps to make it refreshing. You can add ice cubes to keep your drink cool. The garnishes are fun and make your drink look pretty. {{ingredient_image_2}} First, grab a medium saucepan. In it, combine 1 cup of fresh blackberries, 1/4 cup of finely chopped sage leaves, and 1 cup of granulated sugar. Pour in 1 cup of water. Place the saucepan on medium heat. Stir as it heats up. The sugar will dissolve in about 5 to 7 minutes. You will see the blackberries soften and release their juices. Once it simmers, take it off the heat. Let it steep for 10 minutes. This lets the sage add its rich flavor to the syrup. Now, take a fine mesh sieve. Place it over a pitcher. Pour the blackberry-sage mixture into the sieve. Use the back of a spoon to press down on the solids. This step helps to extract as much liquid as possible. Discard the leftover solids. You will have a vibrant liquid that smells amazing. To the pitcher, add 1 cup of freshly squeezed lemon juice. This is about 5 to 6 medium lemons. Next, add 3 cups of cold water to the mix. Stir well to combine everything. Now, take a taste. If it needs more sweetness, add sugar slowly. If it’s too sweet, dilute it with more water until it’s just right. Refrigerate the lemonade for at least 1 hour. This chilling time lets the flavors meld together. When ready to serve, fill glasses with ice cubes. Pour the chilled blackberry sage lemonade over the ice. For a lovely touch, garnish each glass with a lemon slice and a sprig of fresh sage. This makes for a bright and refreshing drink! To make your blackberry sage lemonade just right, focus on sweetness. You can adjust the sugar to fit your taste. If you want it sweeter, add more sugar slowly. If it’s too sweet, just mix in more cold water until it tastes great. Adding lemon zest will bring out fresh flavors. Use a grater to get the yellow part of the lemon peel. Mix this zest into your lemonade after adding the lemon juice. This step brightens the drink and adds a zesty touch. Serving your lemonade in clear glassware makes it pop. The deep purple color looks stunning against the glass. You can also use colorful straws to add a fun vibe. For garnishing, add a lemon slice on the rim of each glass. It looks pretty and gives a hint of flavor. A sprig of fresh sage can sit next to the lemon for a lovely touch. Enjoy the refreshing look of your lemonade before you sip! Pro Tips Use Fresh Ingredients: For the best flavor, ensure that your blackberries and sage are fresh. This will enhance the taste of your lemonade significantly. Adjust to Your Taste: Don’t hesitate to tweak the sweetness or tartness of your lemonade. Start with less sugar and add more to suit your personal preference. Chill Before Serving: Allow the lemonade to chill in the refrigerator for at least an hour. This helps the flavors to meld and results in a more refreshing drink. Garnish Creatively: Use vibrant garnishes like lemon slices and sage sprigs for a beautiful presentation. It makes the drink more appealing and enhances the overall experience. {{image_4}} You can change the berries in this drink. Try using raspberries or blueberries instead of blackberries. Each berry brings a unique flavor to the lemonade. Raspberries add a tart note, while blueberries offer a sweeter touch. Both options are just as refreshing. You can swap out the sage for other herbs too. Mint adds a cool and fresh flavor. Basil gives a slightly sweet and peppery twist. Both herbs work well with lemon, making your drink even more exciting. If you want a different sweetener, honey or agave syrup works great. Honey adds a floral note, while agave is smooth and mild. Both blend well into the lemonade, making it sweet but not overpowering. For those who watch their sugar, low-sugar options exist. You can use sugar substitutes or natural sweeteners. These alternatives keep the drink tasty without too many calories. Adjust to your taste to find the perfect balance. Blackberry Sage Lemonade can last about 5-7 days in the fridge. To keep it fresh, store it in an airtight container. This helps to prevent any odors from mixing in. Always give it a quick stir before serving, as ingredients may settle. If you notice any separation, just mix it up again. You can make ice cubes with the lemonade to keep drinks cold without watering them down. Just pour the lemonade into an ice cube tray and freeze. Once frozen, store the cubes in a bag. Another fun option is to pour the lemonade into popsicle molds. This gives you a refreshing treat on hot days. You can blend in some whole blackberries for a fun twist. Enjoy your Blackberry Sage Lemonade in various forms! To make your Blackberry Sage Lemonade sweeter, start by tasting it after mixing. If it needs more sweetness, add sugar gradually. You can also try honey or agave syrup for a different flavor. Mix well after each addition to see how it changes. Always taste before adding more. This way, you find the right balance for your palate. You can use dried sage, but the flavor will change. Dried sage is stronger than fresh, so use less. Start with a teaspoon and adjust to taste. Fresh sage gives a bright, herbal note that dried sage cannot match. If you want that rich flavor, fresh is best. You can find ready-made Blackberry Sage Lemonade at local grocery stores or health food shops. Look for brands like Simply Lemonade or Whole Foods’ 365 brand. Some farmers' markets may also sell homemade versions. Always check the ingredients for the best flavor and quality. You now have a clear guide to making Blackberry Sage Lemonade. This drink blends fresh blackberries and sage for a unique flavor. Follow the steps for the syrup and garnishes to impress your guests. Remember to taste and adjust sweetness to your liking. Don't hesitate to explore variations with other berries or herbs. Enjoy your refreshing drink, knowing you made it from scratch!

Blackberry Sage Lemonade Refreshing Summer Drink

To make a tasty BBQ Ranch Chicken Salad, you will need: - 2 cups cooked chicken, shredded or diced - 4 cups mixed salad greens (spinach, romaine, and arugula) - 1 cup cherry tomatoes, halved - 1 cup corn (fresh, canned, or grilled) - 1 cup black beans, rinsed and drained - 1 cup shredded cheddar cheese - 1/2 red onion, thinly sliced - 1/2 cup ranch dressing - 1/2 cup barbecue sauce - 1 avocado, diced - Salt and pepper, to taste - Optional: Crunchy tortilla chips These ingredients make a colorful and satisfying salad. You can add a few extras to boost flavor: - Fresh herbs like cilantro or parsley - Sliced jalapeños for heat - Grilled chicken for added smoky taste - Lime juice to brighten the flavors These additions can enhance the salad and make it even more enjoyable. Here's a quick look at the nutrition in this salad: - Protein from chicken and black beans helps with muscle repair. - Fiber from beans and greens aids digestion. - Healthy fats from avocado support heart health. - Vitamins from mixed greens and tomatoes boost your immune system. This salad is not only delicious but also packs a nutritious punch. Enjoy it as a main dish or a side! {{ingredient_image_2}} First, take 2 cups of cooked chicken. You can use shredded or diced chicken. Place it in a large mixing bowl. Pour 1/2 cup of barbecue sauce over the chicken. Toss the chicken well so all pieces are coated. Let it sit for a few minutes to soak in the flavor. This step adds a smoky kick that makes the salad pop. In another large bowl, add 4 cups of mixed salad greens. I love using spinach, romaine, and arugula together. Next, toss in 1 cup of halved cherry tomatoes. They add a sweet touch to the mix. Now, add 1 cup of corn. You can choose fresh, canned, or grilled corn for extra flavor. Then, include 1 cup of rinsed black beans and 1 cup of shredded cheddar cheese. The cheese gives a creamy feel to the salad. Finally, add 1/2 of a thinly sliced red onion for a bit of sharpness. Gently toss these ingredients to mix them well. Take a small bowl and add 1/2 cup of ranch dressing. Whisk in a splash of the barbecue sauce. This mix boosts the ranch flavor. Taste it and adjust if needed. Now, add the seasoned chicken to the salad bowl. Drizzle the ranch dressing mixture on top. Using tongs, gently toss everything together. Be careful not to mash the avocado. When you are ready to serve, season the salad with salt and pepper. Finally, fold in 1 diced avocado carefully. This step adds creaminess and freshness. Enjoy your colorful and tasty BBQ Ranch Chicken Salad! To make the chicken shine, use cooked chicken that is juicy. You can grill or roast it for extra flavor. Toss the chicken in barbecue sauce well. This adds a nice smoky taste. Let it sit for a few minutes. This helps the flavors mix and makes the chicken even better. To keep your greens fresh, wash and dry them well. Use a salad spinner or a clean towel. Add the dressing just before serving. This keeps the greens crisp and not soggy. If you have leftovers, store the dressing on the side. This way, the greens stay fresh for later. When dicing avocado, start with a ripe one. Cut it in half and twist to separate. Remove the pit carefully with a knife. Use a spoon to scoop out the flesh. Make cuts in the flesh while it is still in the skin. Then, scoop out the diced pieces gently. This keeps the avocado from getting mushy in your salad. Pro Tips Keep It Fresh: Use freshly cooked chicken for the best flavor and texture. If you have leftovers, ensure they are stored properly to maintain freshness. Customize Your Greens: Feel free to mix up the salad greens based on your preference. Kale, mixed baby greens, or even cabbage can add different textures and flavors. Make It Your Own: Add other toppings like sliced jalapeños, cilantro, or diced bell peppers for extra flavor and nutrition. Serving Suggestions: Serve the salad with grilled corn on the cob or a side of garlic bread for a more filling meal. {{image_4}} You can easily make this salad low-carb and gluten-free. For a low-carb option, skip the corn and black beans. Instead, add extra veggies like bell peppers or cucumbers. Use grilled chicken for added flavor. Ensure your barbecue sauce and ranch are gluten-free. Some brands offer great options that fit this need. While ranch and barbecue sauce taste great together, you can try different dressings. A honey mustard dressing adds a sweet twist. For a spicy kick, use chipotle ranch. If you prefer something lighter, a lemon vinaigrette works well. Each dressing brings a unique flavor to the salad, making it fun to experiment. You can swap ingredients to fit your taste. Try using turkey or tofu instead of chicken for a new flavor. Replace cheddar cheese with feta or goat cheese for a tangy note. Swap cherry tomatoes for diced bell peppers for a crunchy bite. Each choice lets you tailor the salad to what you love. To keep your BBQ Ranch Chicken Salad fresh, place it in an airtight container. Make sure to separate any crunchy items, like tortilla chips, so they stay crispy. Avoid adding the avocado until you are ready to eat. This helps keep it from browning and losing its texture. When stored properly, your salad can last up to three days in the fridge. However, the taste and texture may change after the first day. For the best experience, eat it within one or two days. You can enjoy the chicken warm or cold. If you want to reheat the chicken, do it gently on the stove. Keep it on low heat to avoid drying it out. Once heated, mix it back into the salad. If you prefer it cold, just add the chicken directly from the fridge. Always add fresh avocado just before serving for the best taste and texture. Yes, you can make BBQ Ranch Chicken Salad in advance. I recommend prepping the salad without the dressing first. Keep the chicken, veggies, and toppings together in a bowl. Store the salad in the fridge for up to two days. When you are ready to eat, mix in the ranch dressing and barbecue sauce. This keeps the greens fresh and crunchy. If you want a different flavor, you can use Greek yogurt or sour cream. Both add a creamy texture. You may also try blue cheese dressing for a tangy kick. For a lighter option, use a vinaigrette made with olive oil and vinegar. Each choice adds its own taste, so have fun experimenting! To spice up your BBQ Ranch Chicken Salad, add chopped jalapeños or a dash of hot sauce. You can also mix in cayenne pepper or chili powder with the dressing. For an extra kick, try spicy barbecue sauce. Adjust the heat to your liking. Enjoy the bold flavors! BBQ Ranch Chicken Salad combines tasty ingredients and simple steps for a great dish. You learned about key ingredients, preparation, and how to enhance flavor. Remember to keep greens crisp and try new dressings. You can customize this salad to fit your diet or taste. With proper storage, leftovers stay fresh. Enjoy making this salad your own and impress others with your skills. Happy cooking!

Savory BBQ Ranch Chicken Salad Quick and Easy Recipe

To make Garlic Parmesan Roasted Potatoes, you will need: - 1.5 pounds baby potatoes, halved - 4 cloves of garlic, finely minced - 1/2 cup freshly grated Parmesan cheese - 3 tablespoons extra-virgin olive oil - 1 teaspoon dried oregano - 1 teaspoon smoked paprika - Salt and freshly ground black pepper to taste - Fresh parsley, finely chopped, for garnish You can swap baby potatoes with regular potatoes if needed. Just cut them into smaller pieces. Instead of Parmesan cheese, use Pecorino Romano for a stronger flavor. If you want a vegan option, use nutritional yeast instead of cheese. For garlic lovers, try roasted garlic for a sweet touch. Use fresh herbs if you have them; they add great flavor. When selecting baby potatoes, pick small, firm ones with smooth skin. Avoid any that have blemishes or sprouts. Different types of potatoes can affect the dish. Waxy potatoes, like red or new potatoes, hold their shape well. If you want a fluffier interior, use starchy potatoes like Russets. Always wash potatoes well to remove dirt before cooking. {{ingredient_image_2}} Start by preheating your oven to 425°F (220°C). This step makes sure the oven is hot enough for roasting. A hot oven helps the potatoes turn crispy and golden. Grab a large mixing bowl. Add 1.5 pounds of halved baby potatoes. Then, finely mince 4 cloves of garlic and add that too. Pour in 3 tablespoons of extra-virgin olive oil. Next, add 1 teaspoon of dried oregano and 1 teaspoon of smoked paprika. Don’t forget to season with salt and black pepper. Grab your hands or a spatula. Mix everything well until the potatoes are coated in oil and spices. This ensures every bite is packed with flavor. Line a baking sheet with parchment paper for easy cleanup. Spread the seasoned potatoes in a single layer. Make sure they aren’t crowded; this helps them get crispy. Place the baking sheet in the oven. Roast for about 25 minutes, flipping them halfway through. After 25 minutes, take out the baking sheet. Sprinkle 1/2 cup of freshly grated Parmesan cheese over the potatoes. Then, return the baking sheet to the oven. Roast for another 10-15 minutes until they are golden brown and crispy. Finally, take them out and garnish with fresh parsley. Enjoy your tasty Garlic Parmesan Roasted Potatoes! To make your Garlic Parmesan Roasted Potatoes crispy, start with baby potatoes. Their small size cooks quickly and gives a nice crunch. Halve them to increase the surface area. This helps them get crispy all over. Toss them well with olive oil and spices. Make sure every piece is coated. Use a large baking sheet. This gives them space to roast evenly. Avoid overcrowding the pan. This step is key to getting that golden brown color. Turn the potatoes halfway through roasting. This ensures all sides crisp up nicely. Garlic Parmesan Roasted Potatoes taste great, but you can boost their flavor. Add fresh herbs like rosemary or thyme for a fragrant touch. You can mix in a squeeze of lemon for brightness. For a spicy kick, sprinkle some red pepper flakes. This will give your dish a warm heat. Try using different cheeses too, like Pecorino Romano, for a unique twist. You can also add a dash of balsamic vinegar before serving for depth. Serve your Garlic Parmesan Roasted Potatoes on a large platter. A rustic wooden board or colorful dish works well. Garnish with fresh parsley for a pop of color. You can sprinkle extra Parmesan on top for a cheesy finish. These potatoes pair well with grilled meats or roasted veggies. They also make a great side for a fresh salad. Enjoy them hot for the best texture and flavor! Pro Tips Use Even Sizes: Ensure all potato halves are of similar size to guarantee even cooking and browning. Garlic Infusion: For a deeper garlic flavor, consider roasting the minced garlic with the potatoes for the first 25 minutes. Cheese Variation: Experiment with different cheeses such as Asiago or Pecorino for a unique flavor twist. Storage Tips: Store any leftovers in an airtight container in the fridge for up to 3 days, and reheat in the oven for best results. {{image_4}} You can mix up the herbs to change the flavor. Try using fresh rosemary or thyme for a bright taste. If you want a kick, add some chopped fresh basil. You can also use Italian seasoning for a blend of flavors. Each herb adds its own twist, so feel free to experiment. While Parmesan is tasty, you can swap it out for other cheeses. Grated Pecorino Romano gives a sharper flavor. For a milder touch, use mozzarella or cheddar. Vegan cheese works well too, if you want a dairy-free option. Just remember to adjust the amount based on the cheese's strength. Want to add more veggies? Toss in carrots, bell peppers, or Brussels sprouts with your potatoes. Cut them to similar sizes for even cooking. Mix and match your favorites for a colorful dish. You can even add some onions for extra sweetness. These combinations make your meal more vibrant and healthy. To store leftover garlic Parmesan roasted potatoes, let them cool first. Place them in an airtight container. They will stay fresh for about three days in the fridge. If you want to keep them longer, freezing is a good option. When you’re ready to eat the leftovers, preheat the oven to 350°F (175°C). Spread the potatoes on a baking sheet in a single layer. Heat them for about 10-15 minutes. This will help them regain their crispiness. You can also use a microwave, but they may not be as crunchy. If you freeze the potatoes, make sure they are completely cool. Place them in a freezer-safe bag. They can last up to three months in the freezer. To reheat, follow the same oven method. Just add a few extra minutes to the time, as they will be frozen. Yes, you can use regular potatoes. Just cut them into smaller pieces. Aim for even sizes for even cooking. Larger pieces may need more time to roast. Adjust cooking time as needed. This way, you still get that crispy texture and rich flavor. This recipe is naturally gluten-free. Just use gluten-free ingredients. Check the Parmesan cheese label to ensure it’s gluten-free. You do not need to change any other ingredients. Feel free to enjoy this dish without worry. These potatoes pair well with many dishes. They complement grilled meats like chicken or steak. You can also serve them with roasted vegetables for a nice mix. A fresh salad adds a great crunch. These potatoes fit well in almost any meal! This post covers how to make Garlic Parmesan Roasted Potatoes. We discussed key ingredients, substitutes, and tips for choosing the best potatoes. I shared step-by-step instructions and ways to create a crispy texture. You learned about flavor boosts, serving ideas, and tasty variations. Finally, I provided storage tips to keep leftovers fresh. Enjoy making these potatoes and don’t hesitate to experiment with different flavors! Your kitchen will shine with great meals.

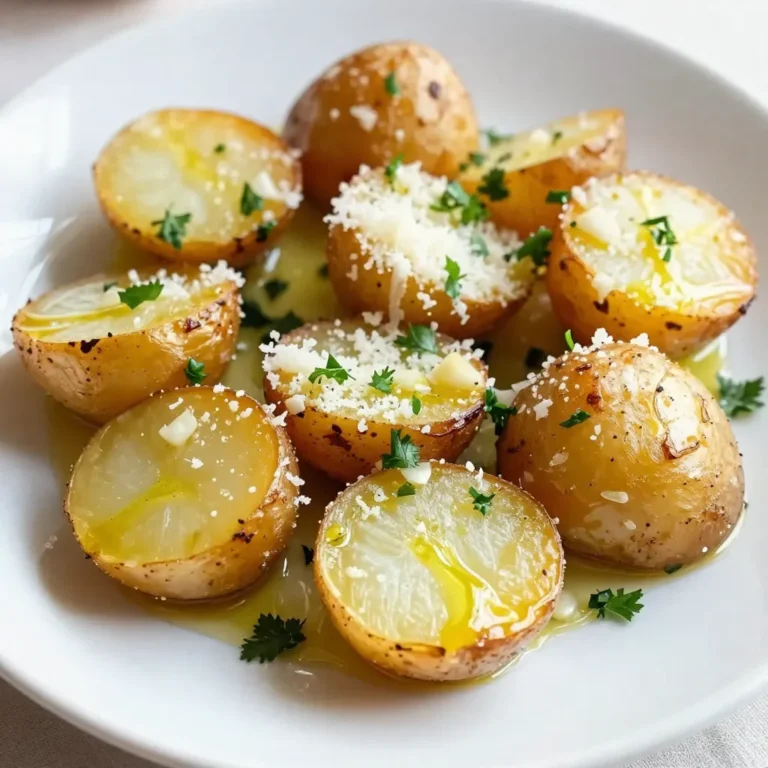
Garlic Parmesan Roasted Potatoes Simple and Tasty

For these delightful White Chocolate Raspberry Cheesecake Bites, you need: - 1 cup graham cracker crumbs - 1/4 cup unsalted butter, melted - 1/4 cup granulated sugar - 8 oz cream cheese, softened - 1/2 cup white chocolate chips, melted - 1/2 cup sour cream - 1/2 cup fresh raspberries - 1 teaspoon vanilla extract - 1 tablespoon fresh lemon juice - A pinch of salt Each ingredient plays a key role. The graham cracker crumbs form a crunchy base. The melted butter helps bind the crumbs, while sugar adds sweetness. Cream cheese gives the bites their rich and creamy texture. Melted white chocolate adds a lovely sweetness and flavor. Sour cream gives a slight tang, balancing the sweetness. Fresh raspberries not only add flavor but also a beautiful color. Vanilla extract enhances the overall taste, and lemon juice adds brightness. A pinch of salt rounds it all out. Gather these ingredients to create a treat that is both easy and fancy. You’ll impress your friends and family with these bites! {{ingredient_image_2}} 1. In a medium bowl, combine graham cracker crumbs, melted butter, and sugar. 2. Mix until the crumbs look like wet sand. 3. Press the crumb mixture firmly into a mini muffin tin. 4. Use the back of a spoon to compact it tightly. 5. Place the tin in the fridge for 15 minutes to chill and set. 1. In a large bowl, beat the softened cream cheese until smooth. 2. Add the melted white chocolate, sour cream, vanilla, lemon juice, and a pinch of salt. 3. Mix on medium speed until everything is fully combined and creamy. 1. Gently fold in the fresh raspberries with a spatula. 2. Be careful not to crush the raspberries. You want nice pops of fruit. 3. Spoon the cheesecake filling into the chilled crusts in the muffin tin. 4. Fill each cup to the brim for generous portions. 5. Chill in the fridge for at least 2 hours until set. 6. When ready, run a knife around the edges to loosen them. 7. Carefully lift each bite out with your fingers or a spoon. 8. Garnish each bite with an extra raspberry for a fresh touch. To get the best texture, start with the cream cheese. Make sure it is soft. This helps it blend well without lumps. I recommend leaving it out of the fridge for a bit. It should be at room temperature before you mix it. When you beat the cream cheese, do it slowly at first. Gradually increase the speed. This prevents air bubbles from forming. If you mix too fast, the filling can become too light and airy. You want it smooth and creamy. Presentation matters! To make your cheesecake bites shine, consider adding fresh raspberries on top. They add color and taste. You can also drizzle some white chocolate over them for a fancy touch. Try pairing these bites with a raspberry sauce. It enhances the flavor and looks great on the plate. A sprinkle of lemon zest can also add a nice touch. One common mistake is overmixing the filling. This can make your bites too fluffy. Mix just until combined. Another issue is the crust. If the crust is not pressed firmly enough, it can crumble. Make sure to pack it down tightly in the muffin tin. A solid crust supports the filling and gives a great bite. Pro Tips Use Room Temperature Ingredients: Ensure your cream cheese and sour cream are at room temperature for a smoother filling. This helps to avoid lumps and ensures even mixing. Chill for Perfect Texture: Allow the cheesecake bites to chill for at least 2 hours. This helps them set properly, resulting in a firmer and more enjoyable texture. Gently Fold in Raspberries: When adding raspberries, fold them in carefully to maintain their shape. This not only looks beautiful but also provides bursts of flavor in every bite. Experiment with Flavors: Feel free to substitute the raspberries with other fruits like strawberries or blueberries for a different twist, or add a splash of almond extract for added depth. {{image_4}} You can change the flavors of these bites. Swap white chocolate for dark chocolate. Dark chocolate adds a rich taste. It pairs well with raspberries. You can also try different fruits. Instead of raspberries, use strawberries or blueberries. Each fruit gives a new twist to the bites. Just remember, the fruit should be fresh. This keeps the flavor bright. If you need a gluten-free option, you have choices. Use gluten-free graham crackers for the crust. They work the same way. For those who want a vegan treat, replace the cream cheese. Use a plant-based cream cheese instead. You can also swap out the sour cream for coconut cream. This makes the bites vegan and tasty. Make your cheesecake bites even more fun to eat. Drizzle them with chocolate sauce or caramel. This adds sweetness and makes them look fancy. For a party, serve them on a colorful platter. You can also add sprigs of mint for a fresh touch. These ideas make your bites stand out. They will impress your friends and family! To keep your White Chocolate Raspberry Cheesecake Bites fresh, store them in the refrigerator. Place them in an airtight container. This helps to lock in their creamy texture and sweet taste. If you have leftovers, they will stay tasty for a few days. If you want to store them for longer, freezing is a great option. Wrap each cheesecake bite in plastic wrap. Then, place them in a freezer-safe bag. This keeps them safe from freezer burn. You can enjoy them later, even after a month in the freezer. In the fridge, these cheesecake bites last up to five days. Always check for signs of spoilage. If you see any mold or if they smell off, it's best to toss them. When frozen, they remain good for about one month. After that, they may lose flavor or texture. Always label your bags with the date to keep track. To enjoy any leftovers, simply thaw them in the fridge overnight. This keeps their texture nice and smooth. If you want to eat them right away, let them sit at room temperature for a bit. If you freeze them, avoid reheating in the microwave. This can make them too soft or runny. Enjoy them cold for the best taste! These cheesecake bites can last up to five days in the fridge when stored properly. Keep them in an airtight container to maintain their freshness. If you want to enjoy them longer, you can freeze them. Just make sure to wrap each bite tightly in plastic wrap before placing them in a freezer bag. They will stay good for about three months in the freezer. Yes, you can use frozen raspberries. They work well in this recipe. However, be sure to thaw them first. Drain any excess juice to avoid sogginess in your bites. Gently fold the thawed raspberries into the cheesecake mixture to keep them whole. This way, you still get those lovely bursts of fruit without losing texture. Absolutely! You can make these bites a day or two in advance. Just prepare the bites and chill them in the fridge. This will save you time on the day you plan to serve them. Just remember to garnish them with fresh raspberries right before serving for a nice look. Yes, you can use Greek yogurt as a cream cheese substitute. This option is great for a lighter version. For a dairy-free option, use a vegan cream cheese or cashew cream. Both will give you a creamy texture while keeping the flavor delicious. You’ve learned how to make tasty White Chocolate Raspberry Cheesecake Bites. We covered the key ingredients, step-by-step instructions, and helpful tips to avoid mistakes. You also discovered fun flavor variations and storage tips. These bites are easy to prepare and perfect for any event. I hope you feel inspired to try making these treats! Enjoy the creamy texture and fresh fruit flavor. Happy baking!

White Chocolate Raspberry Cheesecake Bites Delight

- 12 frozen potstickers (chicken, pork, or vegetable) - 4 cups chicken or vegetable broth - 1 cup water - 1 cup bok choy, roughly chopped - 1 cup fresh mushrooms, sliced (shiitake or button) - 2 green onions, finely chopped - 1 garlic clove, minced - 1 teaspoon fresh ginger, finely grated - 2 tablespoons soy sauce - 1 teaspoon sesame oil - Salt and pepper, to taste - Fresh cilantro, chopped (for garnish) You can switch out any ingredient for a different one. If you don’t have bok choy, use spinach or kale. For mushrooms, try any fresh type you like. If you prefer a different flavor, use beef or shrimp potstickers. You can also make a vegan version by using vegetable broth and tofu potstickers. Using frozen potstickers makes this soup quick and easy. They are also convenient and come in many flavors. If you want to make your own potstickers, you can. Fresh ones will need to be cooked longer. You may need to adjust the cook time to ensure they are hot and cooked through. However, frozen potstickers save time and still taste great in this soup. {{ingredient_image_2}} Start by taking a large pot. Pour in 4 cups of chicken or vegetable broth. Add 1 cup of water. Place the pot on the stove over medium-high heat. Bring this mix to a rolling boil. This broth makes the soup tasty and warm. Once the broth boils, carefully add 12 frozen potstickers. You can choose chicken, pork, or vegetable. Cook these for about 5 minutes. Stir gently to stop them from sticking. They should be hot and soft when done. After cooking the potstickers, fold in 1 cup of chopped bok choy and 1 cup of sliced mushrooms. I like to use shiitake or button mushrooms for more flavor. Add 1 minced garlic clove and 1 teaspoon of finely grated ginger. This gives the soup a nice kick. Lower the heat to medium-low and cover the pot. Let it simmer for 5-7 minutes. The bok choy will become tender, and the mushrooms will cook through. Then, stir in 2 tablespoons of soy sauce and 1 teaspoon of sesame oil. Taste your soup and add salt and pepper as needed. Let it simmer for another 2 minutes. This helps the flavors blend well. When ready, serve the soup in bowls. Top with chopped green onions and fresh cilantro for a vibrant look. Enjoy every spoonful! To get the best potstickers, follow these simple steps: - Use frozen potstickers: They save time and still taste great. - Don’t overcook: Cook them for about 5 minutes in boiling broth. This keeps them tender. - Stir gently: Stir them while cooking to stop sticking. Be careful not to break them. Cooking potstickers this way gives you a nice texture. You want them soft but not mushy. For a richer taste, try these ideas: - Add aromatics: Include extra garlic or ginger for more depth. - Use fresh herbs: Cilantro or green onions brighten the dish. - Experiment with sauces: Try different soy sauces or add chili oil for heat. Each of these tips boosts the flavor of your soup. They make each bowl more exciting. Make your soup look as good as it tastes with these tips: - Use rustic bowls: They add charm and warmth to your meal. - Garnish wisely: Top with fresh cilantro and green onions for color. - Serve with lime: A wedge on the side adds brightness and an extra zing. A well-presented dish makes the meal feel special. These small touches can impress your family and friends. Pro Tips Choosing Potstickers: Opt for high-quality frozen potstickers from a trusted brand to enhance the flavor of your soup. Vegetable Variations: Feel free to add other vegetables like carrots or snap peas for extra nutrition and color. Homemade Broth: For a richer taste, consider using homemade chicken or vegetable broth instead of store-bought. Extra Flavor Boost: A splash of rice vinegar or a few drops of chili oil can add an exciting twist to the soup. {{image_4}} You can easily make a vegetarian or vegan version of this soup. Use frozen vegetable potstickers. Swap chicken broth for vegetable broth. This keeps the flavor rich while making it plant-based. Add tofu for protein. Tofu absorbs flavors well and adds a nice texture. You could also try adding edamame or chickpeas for more protein. Broth can really change the taste of your soup. If you want a lighter taste, use vegetable broth. For a rich flavor, try using miso broth. This adds depth and pairs well with the potstickers. You can also experiment with homemade broth. It gives you full control over the flavors. Feel free to boost the nutrition by adding more ingredients. You can add cooked chicken, pork, or shrimp for extra protein. Just toss them in with the potstickers. If you like more veggies, add carrots, bell peppers, or spinach. These add color and crunch. Make the soup your own based on what you have at home! You can store leftover potsticker soup in the fridge. Use an airtight container to keep it fresh. It will last for up to three days. Make sure to let it cool down before sealing it up. This helps to avoid condensation and soggy soup. Reheat your soup on the stove for the best flavor. Pour the soup into a pot and warm it over medium heat. Stir it gently, so it heats evenly. This should take about 5-10 minutes. You can also use a microwave if you are in a hurry. Just place the soup in a microwave-safe bowl and heat it for 1-2 minutes. Stir and check if it is hot enough. If you want to save the soup for later, freezing is a great option. Let the soup cool completely. Then, transfer it to a freezer-safe container. Leave some space at the top for expansion. It can last in the freezer for up to three months. When you are ready to eat it, thaw it overnight in the fridge. Then, reheat it on the stove as mentioned above. Yes, you can use homemade potstickers for this soup. They add a personal touch. Make sure they are cooked before adding them to your soup. This way, they will warm up nicely as the soup simmers. You can also customize the filling to suit your taste. Potsticker soup lasts about 3 to 4 days in the fridge. Store it in an airtight container to keep it fresh. The flavors will blend more as it sits, enhancing the taste. Just remember, the potstickers may get softer over time. You can serve potsticker soup with a side of steamed rice or a fresh salad. A crunchy cucumber salad pairs well too. For a little kick, try adding chili oil or hot sauce. These sides will enhance your meal and add variety. To sum up, this blog post covered all you need for potsticker soup. We discussed the key ingredients, gave options for substitutions, and compared fresh and frozen potstickers. You learned step-by-step how to prepare the broth, cook the potstickers, and add fresh veggies. I shared tips for the best cooking practices and flavor enhancement. Lastly, we explored variations and how to store leftovers. Enjoy making this dish; it’s easy and fun!

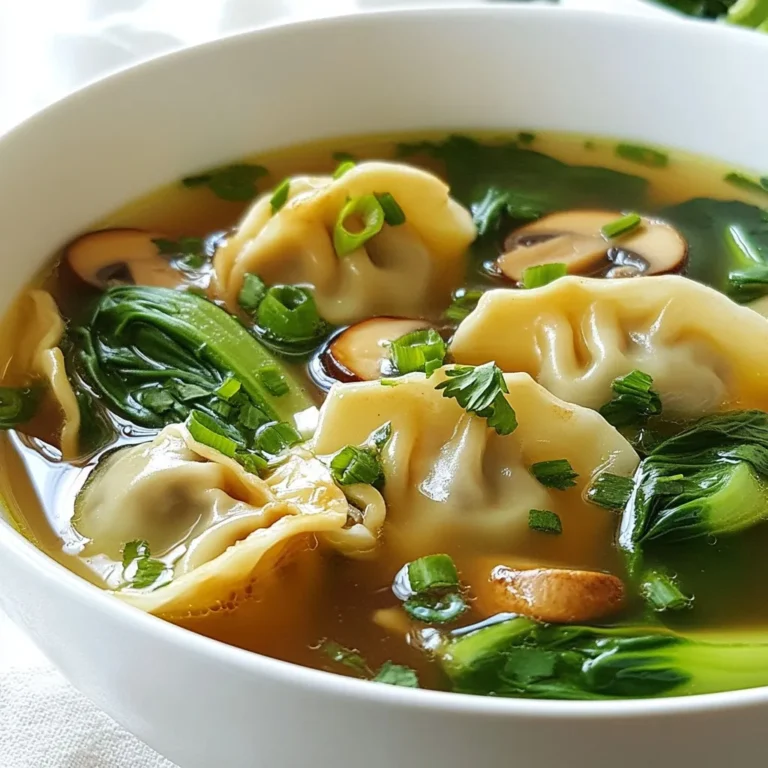
Quick Potsticker Soup Simple and Hearty Recipe

- 1 cup cottage cheese - 1/2 cup cornstarch - 1/4 teaspoon garlic powder - 1/4 teaspoon onion powder - 1/2 teaspoon paprika - Salt and freshly ground pepper to taste - 1 tablespoon olive oil - Fresh herbs (e.g., chives or parsley), finely chopped, for garnish To make crispy cottage cheese chips, gather these simple ingredients. Cottage cheese is the star here. It gives the chips a great texture and flavor. Cornstarch helps to make the chips crispy. It absorbs moisture and creates that crunch you want. The garlic powder and onion powder add savory depth. Paprika brings a mild sweetness and color to the chips. Don't forget to season with salt and pepper. These basics enhance all the flavors. Olive oil is key for that golden crust. Lastly, fresh herbs make a wonderful garnish. They add color and freshness to your chips. Having these ingredients ready makes the cooking process smooth. Prepare to enjoy a tasty snack that’s easy to make! {{ingredient_image_2}} 1. Preheat your oven to 400°F (200°C). This step is crucial for crispy chips. 2. In a medium bowl, combine 1 cup of cottage cheese with 1/2 cup of cornstarch. 3. Add 1/4 teaspoon of garlic powder, 1/4 teaspoon of onion powder, and 1/2 teaspoon of paprika. 4. Season with salt and freshly ground pepper to taste. 5. Stir the mixture until it becomes thick and batter-like. This blending is key to great texture. 1. Use a tablespoon to scoop out small amounts of the mixture. 2. Gently flatten each scoop into small circles. 3. Place the chips on a lined baking sheet, leaving space between each one. This allows for even cooking and crisping. 1. Drizzle a little olive oil over the tops of the chips. This helps them become extra crispy. 2. Bake the chips for 15-20 minutes. Halfway through baking, flip each chip gently. This ensures they cook evenly. 3. Once the edges turn golden, take them out of the oven. Let them cool for a few minutes on the baking sheet. This helps them firm up. 4. Transfer the chips to a serving platter. They are ready to enjoy! 5. For added flair, sprinkle some finely chopped fresh herbs on top. This enhances both flavor and presentation. To make sure your chips turn out crispy, preheat your oven to 400°F (200°C). A hot oven helps the chips cook evenly and become golden brown. This step is key for that crunchy texture we all love. Next, spacing is important. Place the chips on the baking sheet with enough room between them. This allows air to flow, making each chip crispy. If they crowd each other, they will steam instead of crisp. Now, let's talk about flavor. You can have fun with different spices. Try adding cayenne pepper for some heat or even a bit of dried rosemary for a fresh taste. Don't be afraid to mix and match to find what you love! Using fresh herbs can also boost flavor. Chives and parsley add a nice touch. Sprinkle them on top after baking for a pop of color and taste. Fresh herbs give your chips a gourmet feel. Avoid common mistakes to ensure success. One mistake is overcrowding the baking sheet. This can lead to soggy chips. Always give each chip its own space to breathe. Another mistake is not flipping the chips during baking. Flipping them halfway through ensures they cook evenly. This step helps achieve that perfect golden color on both sides. Remember, a little care goes a long way! Pro Tips Monitor Baking Time: Keep an eye on the chips during baking to prevent overcooking. Every oven varies, so adjust the time as needed for perfectly crispy chips. Flavor Variations: Experiment with different spices such as cumin or chili powder for a unique twist on the flavor. This allows you to customize the chips to your taste preferences. Storage Tips: Store leftover chips in an airtight container at room temperature. To revive their crispiness, reheat them in the oven for a few minutes before serving. Garnish with Style: Use a variety of fresh herbs like dill or basil for garnishing. This not only adds flavor but also enhances the visual appeal of your dish. {{image_4}} You can easily change the taste of your cottage cheese chips. For a spicy kick, add cayenne pepper. Just a pinch gives it heat without overpowering. If you love cheese, try using grated Parmesan or cheddar. These will make your chips even more savory and rich. If you want to save time, consider air frying. Air fryers give a nice crunch with less oil. Just cook them at 375°F (190°C) for about 10-15 minutes. If you’re in a hurry, you can use the microwave. Spread the mixture on a microwave-safe plate. Cook for 2-3 minutes, checking every 30 seconds. The texture won’t be the same, but it’s quick! These chips taste amazing with dips. Try serving them with sour cream, guacamole, or salsa. They also pair well with fresh veggies or cheese slices for a fun snack spread. Mix and match to find your favorite combos! Once your crispy cottage cheese chips cool down, you need to store them right. First, let them cool on the baking sheet. This step keeps them from becoming soggy. After a few minutes, transfer the chips to an airtight container. This helps keep them fresh and crunchy. Make sure to layer the chips with parchment paper if you stack them. This avoids crushing. If your chips lose their crispiness, don’t worry. You can bring them back. The best way to reheat them is in the oven. Preheat the oven to 350°F (175°C). Place the chips on a baking sheet for about 5-10 minutes. This method helps them regain their crunch. For storage duration, keep the chips in an airtight container. They will stay fresh for up to a week. However, for the best taste, enjoy them within the first few days. To make crispy cottage cheese chips, start by preheating your oven to 400°F (200°C). Line a baking sheet with parchment paper. In a bowl, mix 1 cup of cottage cheese, 1/2 cup of cornstarch, 1/4 teaspoon of garlic powder, 1/4 teaspoon of onion powder, 1/2 teaspoon of paprika, and salt and pepper. Stir until smooth. Use a tablespoon to scoop small amounts of the mix. Flatten them into circles on the baking sheet, leaving space between each. Drizzle olive oil over the chips. Bake for 15-20 minutes, flipping halfway. Let them cool before serving. Yes, you can use low-fat cottage cheese. It will still work well. The texture may be slightly different, but the chips will remain crispy and tasty. Low-fat options can be a great choice if you want to cut calories. You can find ready-made crispy cottage cheese chips in many grocery stores. Check the snack aisle or health food section. Some online shops also offer these snacks. They may come in various flavors for a fun twist. Cottage cheese is high in protein and low in fat. It contains calcium, which is good for bones. This dairy product also has vitamins B12 and riboflavin. These nutrients help with energy and overall health. Some people may be lactose intolerant and should avoid cottage cheese. Others may need to watch their sodium intake, as some brands can be high in salt. Always check the label for information on ingredients and nutrition. You learned how to make crispy cottage cheese chips in this post. We covered ingredients, step-by-step instructions, and tips for perfecting your chips. You now know about flavor variations and storage tips too. These chips are fun, tasty, and easy to make. Experiment with spices to make them your own. Enjoy those crunchy bites with your favorite dips. Happy cooking!

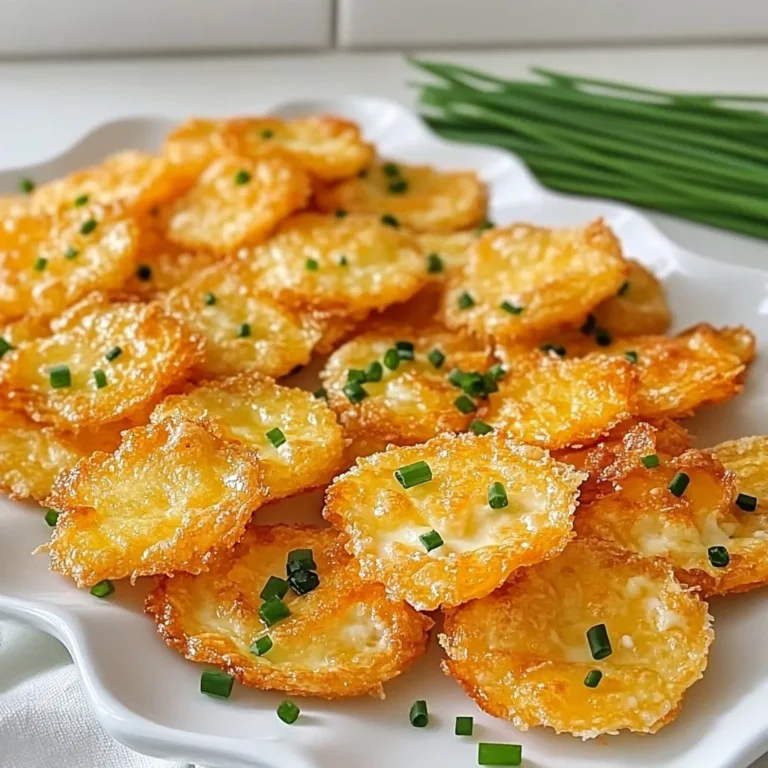
Crispy Cottage Cheese Chips Simple Snack Recipe

- 1 lb boneless, skinless chicken breasts - 2 tablespoons olive oil - 2 cups cooked quinoa - 1 cup cherry tomatoes, halved - 1 cucumber, diced - 1 red bell pepper, diced - 1 cup Kalamata olives, pitted and halved - 1 cup feta cheese, crumbled Each of these items brings unique flavors. The chicken provides the protein, while quinoa adds a tasty, nutty base. Fresh veggies like cherry tomatoes and cucumbers brighten the dish. Kalamata olives and feta cheese give it that true Greek twist. - 2 teaspoons dried oregano - 1 teaspoon garlic powder - Salt and black pepper to taste The seasoning is simple but powerful. Dried oregano adds a fragrant touch. Garlic powder gives depth, while salt and pepper enhance every flavor. These spices tie the dish together beautifully. - Fresh parsley, chopped - Juice of 1 lemon Garnishes elevate the meal. Fresh parsley adds color and freshness. A squeeze of lemon juice brightens all the flavors, making every bite delightful. {{ingredient_image_2}} To start, preheat your oven to 400°F (200°C). In a medium bowl, mix 2 tablespoons of olive oil, 2 teaspoons of dried oregano, 1 teaspoon of garlic powder, salt, and black pepper. This blend will give the chicken great flavor. Coat each chicken breast with this mix, covering all sides well. Place the chicken on a baking tray lined with parchment paper. This makes clean-up easy. Bake the chicken for 20-25 minutes. Use a meat thermometer to check that it reaches 165°F (75°C). After baking, let the chicken rest for 5 minutes. This step keeps the juices inside, making the chicken moist. While the chicken bakes, rinse 1 cup of quinoa under cold water using a fine-mesh sieve. This helps remove any bitterness. In a medium saucepan, bring 2 cups of water to a boil. Add the rinsed quinoa to the boiling water. Lower the heat, cover the pan, and let it simmer for about 15 minutes. Once the water is gone, fluff the quinoa gently with a fork. Set it aside for later. While the quinoa cooks, it's time to chop the veggies. Dice the cucumber into small cubes. Cut the cherry tomatoes in half. Dice the red bell pepper into bite-sized pieces. For Kalamata olives, slice them in half. This adds flavor and texture to your bowls. Now comes the fun part—assembling your bowls! In meal prep containers, start with a base of quinoa. Spread it out evenly. Next, layer the sliced chicken on top. Add the cherry tomatoes, diced cucumber, red bell pepper, and halved Kalamata olives. Finally, sprinkle crumbled feta cheese over everything. To finish, squeeze fresh lemon juice on top for a zesty kick. This brightens all the flavors. Optionally, garnish with chopped fresh parsley for a pop of color. Your Greek Chicken Meal Prep Bowls are ready to enjoy! To make meal prep easy, start with a clean workspace. Gather all your ingredients first. This saves time and keeps you organized. Use sharp knives for quick chopping. Prep your vegetables while the chicken and quinoa cook. Store extra veggies in airtight containers. This keeps them fresh longer. For a twist, try different dressings. A tahini sauce adds creaminess. A spicy yogurt sauce can boost flavor. You can also swap spices. Try cumin or smoked paprika for extra depth. Mix and match ingredients to change things up. Add roasted red peppers or artichokes for variety. Oven times can vary. If your chicken is thicker, it may need more time. Always check the internal temperature. It should reach 165°F (75°C) for safe eating. If using a slow cooker, cook on low for 4-6 hours. Adjust cooking times based on your appliances to ensure perfect results. Pro Tips Marinate for Extra Flavor: Allow the chicken to marinate in the olive oil and spices for at least 30 minutes before baking. This will enhance the flavor and tenderness of the meat. Perfectly Fluffy Quinoa: To ensure your quinoa is perfectly fluffy, let it sit covered for 5 minutes after cooking before fluffing it with a fork. Veggie Variations: Feel free to swap in seasonal vegetables or your favorites, such as bell peppers or zucchini, to customize the bowl to your taste. Meal Prep Made Easy: This bowl is great for meal prepping. Prepare the ingredients in advance and assemble them in containers for quick grab-and-go lunches throughout the week. {{image_4}} For gluten-free or low-carb diets, you can easily adapt this recipe. Use cauliflower rice instead of quinoa. It offers a similar texture and is very low in carbs. If you need a gluten-free option, ensure all your ingredients, like olives and feta, are certified gluten-free. You can also swap regular olive oil for avocado oil for a different flavor. If you want to change the protein, several great options exist. Tofu works well for a plant-based choice. Marinate tofu in the same olive oil mixture to add flavor. Shrimp is another tasty option. Cook it quickly in a pan for just a few minutes. For a heartier meal, chickpeas can replace the chicken, providing protein and fiber. Feel free to add more vegetables or legumes for extra nutrition. Spinach or kale adds a nice pop of green and boosts vitamins. Roasted red peppers can give a sweet flavor. You might also try adding black beans or lentils for a protein kick. Nuts like walnuts or almonds can add crunch and healthy fats, enhancing the meal's texture. To keep your Greek chicken meal prep bowls fresh, use airtight containers. Glass containers work well as they do not stain or retain odors. Make sure to divide the quinoa and toppings to prevent sogginess. Each bowl should have a good seal to keep out air. These bowls can stay fresh in the fridge for up to 4 days. When it comes time to eat, there are a few ways to reheat your meal prep bowls. The microwave is quick and easy; just heat in short bursts. Stir the bowl to ensure even heating. You can also use the oven for a crispier finish. Preheat it to 350°F (175°C) and heat for about 10-15 minutes. To avoid sogginess, do not cover the bowl tightly when reheating. Leave a small gap or use a microwave-safe lid. This allows steam to escape and keeps your meal enjoyable. To keep your chicken juicy, use the right cooking techniques. First, coat the chicken in olive oil, oregano, garlic powder, salt, and pepper. This mix locks in moisture. Bake the chicken at 400°F for 20-25 minutes. Use a meat thermometer to check for 165°F inside. Let the chicken rest for about 5 minutes after baking. This helps the juices redistribute, making each bite tender and juicy. Yes, you can freeze Greek Chicken Meal Prep Bowls. Assemble the bowls as normal but leave off the fresh garnishes. Use airtight containers to store them. They keep well in the freezer for up to three months. When ready to eat, thaw in the fridge overnight. Reheat in the microwave until hot. Add fresh garnishes like parsley and lemon juice before serving for the best flavor. If you want to substitute quinoa, there are several options. Brown rice is a popular choice. It cooks similarly and has a nice texture. Couscous is another great option, as it cooks quickly. For a low-carb choice, try cauliflower rice. It absorbs flavors well and is light. Each option brings a unique taste to your meal prep bowls. Choose based on your dietary needs and preferences. This article covers how to make Greek Chicken Meal Prep Bowls with fresh, healthy ingredients. You learned about the key components, like chicken, quinoa, and fresh vegetables. I provided steps for cooking, tips for meal prep, and variations for different diets. Remember, these bowls are versatile and easy to customize. You can store them well and reheat them without losing flavor. Enjoy creating colorful, delicious meals that keep you energized!

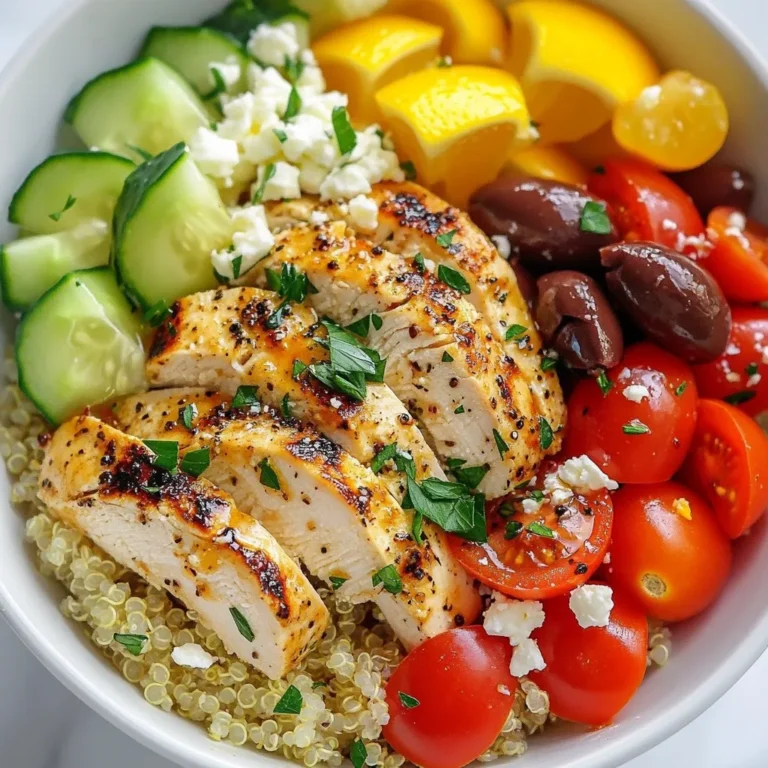
Greek Chicken Meal Prep Bowls Flavorful and Easy Recipe

To make Banana Cream Pie Cupcakes, you need a few simple ingredients. Here’s the list: - 1 1/2 cups all-purpose flour - 1 teaspoon baking powder - 1/2 teaspoon baking soda - 1/4 teaspoon salt - 1/2 cup unsalted butter, softened to room temperature - 1 cup granulated sugar - 2 large eggs, at room temperature - 1 teaspoon pure vanilla extract - 1/2 cup buttermilk, at room temperature - 1 large ripe banana, thoroughly mashed - 1/2 cup instant vanilla pudding mix - 1 cup heavy cream, chilled - 2 tablespoons powdered sugar - Fresh banana slices and additional whipped cream for topping Each ingredient plays a key part in making these cupcakes delicious. The all-purpose flour gives the cupcakes structure. The baking powder and baking soda help them rise nicely. The ripe banana adds flavor and moisture. The instant vanilla pudding mix makes the cupcakes extra creamy and tasty. Make sure your butter and eggs are at room temperature. This helps them mix well. The heavy cream is for a fluffy topping that completes the cupcake. Don't forget the fresh banana slices on top for that classic pie look! {{ingredient_image_2}} First, preheat your oven to 350°F (175°C). This step is key for even baking. Next, line a cupcake pan with 12 paper liners. This helps with easy removal later. Now, let’s mix our dry ingredients. In a medium bowl, whisk together 1 1/2 cups all-purpose flour, 1 teaspoon baking powder, 1/2 teaspoon baking soda, and 1/4 teaspoon salt. Set this aside for later. Next, in a large bowl, cream together 1/2 cup unsalted butter and 1 cup granulated sugar. Use an electric mixer to do this for about 3-4 minutes. You want it to be light and fluffy. Add in 2 large eggs, one at a time. Be sure to blend well after each addition. Then, stir in 1 teaspoon pure vanilla extract until it is fully mixed in. Now, it’s time to combine our ingredients. Gradually add the dry mix to the wet mix. Alternate this with 1/2 cup buttermilk. Start and end with the flour mixture. Mix until just combined. This helps to avoid overmixing. Next, fold in 1 large ripe banana, which should be thoroughly mashed, along with 1/2 cup instant vanilla pudding mix. This adds that tasty banana cream pie flavor! Using a spoon or ice cream scoop, fill each cupcake liner about 2/3 full with batter. This gives them room to rise. Now, bake the filled pan in your preheated oven for 18-20 minutes. Check if a toothpick inserted into the center comes out clean. Once baked, let the cupcakes cool in the pan for about 5 minutes. Carefully transfer them to a wire rack to cool completely. - Avoid overmixing: Mix the batter just enough. Overmixing makes the cupcakes dense. - Proper cooling techniques: After baking, cool the cupcakes in the pan for 5 minutes. Then, move them to a wire rack. This keeps them from getting soggy. - Achieving stiff peaks: Whip the heavy cream until it forms stiff peaks. This means it holds its shape when you lift the whisk. - Suggested flavors or add-ins: Try adding a splash of vanilla extract or a hint of almond for extra flavor. - Decorative serving ideas: Arrange your cupcakes on a pretty platter. You can add whole bananas around them for flair. - Garnishing techniques: Top each cupcake with fresh banana slices. Add more whipped cream on top for that classic look. Consider a sprinkle of crushed graham crackers for a pie-like touch. Pro Tips Use Ripe Bananas: The riper the bananas, the sweeter and more flavorful your cupcakes will be. Look for bananas with brown spots for the best taste. Room Temperature Ingredients: Ensure that your eggs, buttermilk, and butter are at room temperature. This helps create a smoother batter and results in fluffier cupcakes. Don’t Overmix the Batter: Mix the batter until just combined to avoid dense cupcakes. Overmixing can lead to a tough texture. Chill Your Whipped Cream: Make sure your heavy cream is very cold before whipping. This helps achieve fluffy, stable whipped cream that holds its shape well. {{image_4}} You can easily change the flavor of your banana cream pie cupcakes. Adding chocolate chips gives a rich taste. You might also try mixing in nuts for a crunchy bite. If you want a lighter texture, swap the butter for vegetable oil. This change keeps the cupcakes moist and fluffy. For those with dietary needs, you can use gluten-free flour. This option makes the recipe suitable for gluten-sensitive people. To make it dairy-free, replace buttermilk with almond or coconut milk. You can also use coconut cream instead of heavy cream for the topping. Seasons can inspire fun twists. Try adding a sprinkle of cinnamon for warmth in fall. You can also experiment with other fruits like strawberries or blueberries. These toppings add color and fresh flavors to the cupcakes. You can store your Banana Cream Pie Cupcakes easily. If you plan to eat them soon, keep them at room temperature. Place them in an airtight container. They stay fresh for about two days. If you want to keep them longer, put them in the fridge. This helps them last up to a week. Just remember, the fridge can dry them out a bit. Freezing these cupcakes is simple. First, let them cool completely. Then, wrap each cupcake tightly in plastic wrap. Place them in a freezer-safe bag or container. They can stay frozen for up to three months. When you’re ready to eat them, take out how many you need. Let them thaw in the fridge overnight. If you want them faster, leave them at room temperature for a couple of hours. To keep your cupcakes fresh, avoid adding the toppings too soon. Wait until you’re ready to serve. This keeps the whipped cream fluffy and the bananas fresh. If you have leftover whipped cream, store it in a separate container in the fridge. Use it within a few days for the best taste. Enjoy your delicious cupcakes! To make your cupcakes moist, use room temperature ingredients. This includes butter, eggs, and buttermilk. Mix the batter gently. Overmixing can lead to dryness. Adding a little extra mashed banana also helps keep them moist. Yes, ripe bananas work best for this recipe. Their natural sweetness and flavor enhance the cupcakes. Make sure to mash them well, so they blend smoothly into the batter. Banana cream pie cupcakes stay fresh for about 2-3 days at room temperature. If you want them to last longer, store them in the fridge for up to a week. Just remember, they taste best fresh! To soften butter quickly, cut it into small cubes. Place it in a warm spot in your kitchen for about 10-15 minutes. You can also microwave it for about 5-10 seconds. Just watch it closely to avoid melting. Yes, you can substitute instant pudding mix with a homemade version. Use cornstarch, sugar, and a little vanilla extract. However, the instant pudding gives extra creaminess and flavor, so keep that in mind! This blog post covered the key steps to make delicious banana cupcakes. We looked at the ingredients needed, from flour and butter to ripe bananas. You now know how to mix, bake, and cool your cupcakes perfectly. We also shared tips for whipping cream and ideas for variations. Remember, baking is fun. Feel free to experiment and make this recipe your own. Enjoy your tasty creation with family and friends!

Banana Cream Pie Cupcakes Delicious and Easy Recipe

PREV 1 … 25 26 27 … 48 NEXT
meal plan mapper

explore

DessertsDinnerAppetizersDrinks

Our Policies

  • Cookie Policy
  • Copyright Policy
  • Disclaimer
  • GDPR Policy
  • Terms Of Use
Back to Top
  • About
  • Contact Us
  • Privacy Policy
© 2025 meal plan mapper