FREE DINNER EBOOK! Get your copy!
  • Cookie Policy
  • GDPR Policy
  • Disclaimer
  • Terms Of Use
  • Visit my other site: Fun Cookie Recipes
meal plan mapper
  • Home
  • Dinner
  • Desserts
  • Drinks
  • Appetizers
  • Contact
  • About
  • Privacy Policy
  • Home
  • Dinner
  • Desserts
  • Drinks
  • Appetizers
  • Contact
  • About
  • Privacy Policy
  • Cookie Policy
  • GDPR Policy
  • Disclaimer
  • Terms Of Use
Visit my other site: Fun Cookie Recipes

HOME / CATEGORIES /

Latest

- 2 large apples (Honeycrisp or Fuji) - 1/2 cup granulated sugar - 1 tablespoon ground cinnamon - 2 tablespoons unsalted butter, melted - A pinch of sea salt You want to choose the right apple for your chips. Honeycrisp and Fuji apples are the best options. They have a sweet and juicy flavor that works well. Honeycrisp apples are crisp and slightly tart. Fuji apples are sweeter and very crunchy. Other good options include Gala and Braeburn, which also provide great taste and texture. You can adjust the sweetness to your liking. Try using honey or maple syrup instead of granulated sugar. This adds a unique flavor. If you want dairy-free options, replace the unsalted butter with coconut oil or a dairy-free butter. These swaps still give you tasty chips while accommodating different diets. {{ingredient_image_2}} First, preheat your oven to 200°F (95°C). This low heat is key for crisping the apple chips without burning them. While the oven warms up, grab a baking sheet and line it with parchment paper. This step helps prevent sticking and makes cleanup a breeze. Next, wash your apples thoroughly. This removes any wax or dirt. I recommend using Honeycrisp or Fuji apples for the best flavor. After washing, slice each apple into thin rounds, about 1/8 inch thick. A mandoline slicer works great for this, but a sharp knife will do. Keeping the slices even helps them bake uniformly and ensures they become crispy. In a small bowl, mix together the granulated sugar, ground cinnamon, and a pinch of sea salt. Stir well to combine. In another bowl, pour your melted unsalted butter over the apple slices. Toss the slices gently to coat them evenly. This butter adds flavor and helps the sugar mix stick. Now, lay the apple slices in a single layer on your prepared baking sheet. Make sure they don’t overlap; this is crucial for even baking. Once arranged, place the baking sheet in your preheated oven. Bake for about 2 to 3 hours. Check the chips after the first hour. They should turn a lovely caramel color and feel crisp when they are done. After baking, take the chips out of the oven and let them cool completely on the baking sheet. This cooling step is important. It helps the chips become even crispier. Once cooled, store them in an airtight container at room temperature. They will stay fresh for about a week. Enjoy your sweet and crunchy caramel cinnamon apple chips! To get that crunch, bake your apple chips just right. Start by adjusting the baking time. I suggest checking them after the first hour. Every oven is a bit different. If they are still soft, give them more time. Aim for about 2 to 3 hours total. You want them golden brown and crisp. Checking for doneness is key. Use your eyes and fingers. Gently touch a slice; it should feel hard and dry. If you see any moisture, keep baking. The goal is a perfect texture that stays crunchy even after cooling. Want to spice things up? You can add nuts or other spices to the apple chips. Try walnuts or pecans for a nice crunch. A sprinkle of nutmeg or ginger can bring warmth, too. Get creative with flavors that excite your taste buds. Drizzling with caramel sauce adds a sweet touch. After baking, let the chips cool. Then, pour warm caramel over them. This extra layer makes your apple chips extra special. When serving your apple chips, think about presentation. Use a chic bowl or a rustic wooden board. This makes the dish look inviting. A sprinkle of cinnamon on top adds flair. Pair your chips with dips for fun. Creamy yogurt or a light caramel dip works great. You can also serve them with a cheese platter. This mix of flavors makes for a tasty snack. Pro Tips Choose the Right Apples: Honeycrisp or Fuji apples are ideal for this recipe due to their crisp texture and sweetness, which enhances the flavor of the chips. Use a Mandoline: For even, thin slices, use a mandoline slicer. This ensures that all apple slices cook evenly and achieve that perfect crispiness. Monitor Baking Time: Baking times can vary based on your oven and the thickness of your slices. Check the chips after the first hour to prevent overbaking. Cool for Extra Crispiness: Allow the chips to cool completely on the baking sheet to ensure they become extra crispy before storing them. {{image_4}} You can add different flavors to your apple chips. Try mixing in cocoa powder for a rich taste. You can also add a splash of vanilla extract for a sweet hint. Experiment with spice blends like nutmeg or ginger for new twists. Apple chips are great as a snack. You can eat them on their own or use them in recipes. They make a crunchy topping for desserts like ice cream or yogurt. You can also sprinkle them over oatmeal for a sweet crunch. If you want to try other cooking methods, the air fryer works well. Set your air fryer to 300°F. Cook the apple slices for about 15-20 minutes, shaking the basket halfway through. For a quick treat, use the microwave. Place apple slices on a plate and cook for 5 minutes, checking every minute until crispy. To keep your caramel cinnamon apple chips fresh, use airtight containers. This helps keep moisture out. Store them at room temperature. Avoid refrigeration, as it can make them soggy. Homemade apple chips can last about one week. Look for signs of spoilage, like soft spots or a loss of crispness. If they feel chewy or look dull, it’s time to toss them. If your chips go stale, don’t worry! You can revive them. Place them on a baking sheet and bake at 200°F (95°C) for 10-15 minutes. This will help them regain their crunch. Enjoy your tasty snack! To make your apple chips sweeter, you can adjust the sugar content. Try increasing the sugar to 3/4 cup instead of 1/2 cup. You can also use brown sugar for a richer flavor. Mixing in a little honey or maple syrup works too. These options add sweetness and depth to your chips. Yes, you can use other fruits for chips! Some great choices are pears, bananas, and even sweet potatoes. Slice them thin, just like apples. Each fruit gives a unique flavor and texture. Experiment with your favorites to find new snacks you love. Each serving of caramel cinnamon apple chips has about 150 calories. They contain around 30 grams of carbs, 0 grams of protein, and 3 grams of fat. The sugar content is roughly 14 grams. These chips are a tasty treat but enjoy them in moderation. To make apple chips without added sugar, you can skip the sugar entirely. Focus on the natural sweetness of the apples. Sprinkle on cinnamon for flavor. You could also use a little lemon juice to enhance taste without sugar. Yes, these chips are great for kids! They are a healthy snack alternative to chips or candy. Apples offer fiber and vitamins. You can serve them as a fun snack or dessert. Pair them with yogurt for a tasty treat. In this blog post, we explored how to make delicious, crunchy apple chips. I shared the essential ingredients, like apples and cinnamon, and discussed how to get the best flavors. You learned step-by-step instructions on preparing, baking, and cooling your chips. We covered tips for achieving perfect crispiness and even offered serving ideas. Making apple chips is easy and fun. With these methods, you can create a tasty snack at home. Enjoy trying different flavors and variations!

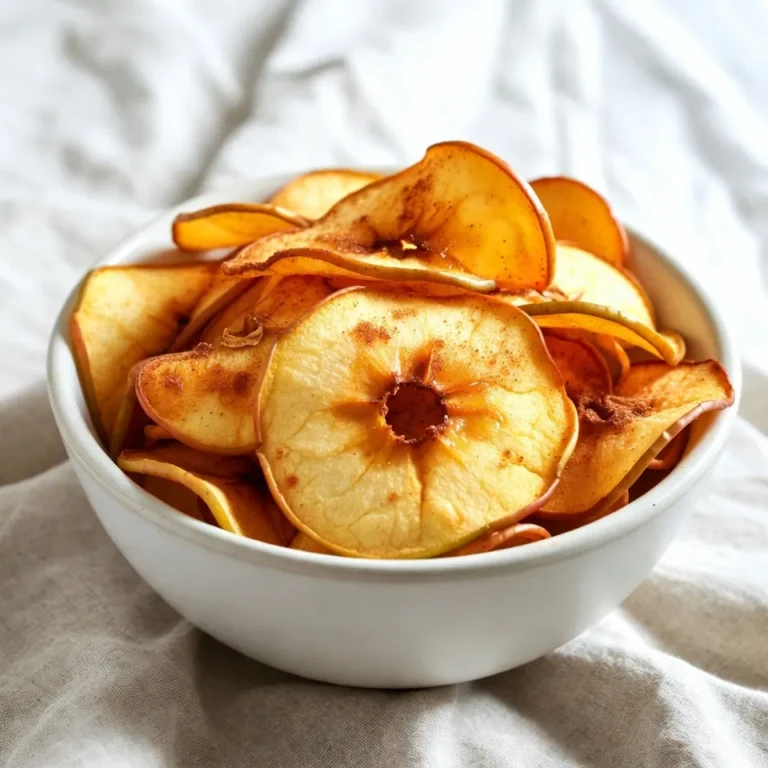
Caramel Cinnamon Apple Chips Sweet and Crunchy Treat

To make the best ingredient crack dip, you need: - 1 cup cream cheese, softened - 1 cup sour cream - 1 cup shredded sharp cheddar cheese - 1/2 cup diced tomatoes, drained - 1/2 cup green onions, chopped - 1/2 teaspoon garlic powder - 1/2 teaspoon onion powder - 1/4 teaspoon cayenne pepper (optional) - Salt and black pepper, to taste - 1/2 cup cooked sausage (optional) - Tortilla chips or veggie sticks for serving These ingredients create a rich and creamy dip. The cream cheese and sour cream give it a smooth texture. The cheddar cheese adds sharp flavor, while tomatoes and green onions provide freshness. You can change this dip to fit your taste. Here are some options: - Use different types of cheese, like pepper jack or mozzarella. - Add fresh herbs, such as cilantro or parsley, for added flavor. - Mix in some diced jalapeños for a spicy kick. - Swap in Greek yogurt instead of sour cream for a tangy twist. - Use turkey sausage instead of pork for a lighter option. These choices let you personalize your dip. Feel free to mix and match based on what you like. If you don't have some ingredients, don't worry! Here are easy swaps: - Cream cheese can be replaced with Neufchâtel cheese for lower fat. - Sour cream can be swapped with plain yogurt for a tangy taste. - If you lack cheddar cheese, try gouda or Swiss cheese instead. - For a vegetarian option, leave out the sausage or use plant-based sausage. These substitutes keep the dip tasty and fun. You can easily adapt it based on what you have on hand. {{ingredient_image_2}} Start by gathering your cream cheese and sour cream. Make sure the cream cheese is soft. This makes mixing much easier. In a medium bowl, combine the cream cheese and sour cream. Use a hand mixer or spatula to blend them together. Mix until the mixture is smooth and creamy. You want to avoid any lumps. This creamy base is the heart of your dip. Next, it’s time for the fun part! Gradually add the shredded cheddar cheese to your creamy base. Then, fold in the diced tomatoes and chopped green onions. Mix gently to keep the dip light and fluffy. Now, season your dip by adding garlic powder, onion powder, and cayenne pepper if you like a bit of heat. Don’t forget to add salt and freshly cracked black pepper to taste. If you want to add more flavor, mix in crumbled sausage. This makes the dip even more savory! Once everything is mixed well, spoon the dip into a nice serving dish. Spread it out evenly using the back of a spoon. This gives it a pretty look. Cover the dish tightly with plastic wrap. Place it in the fridge for at least 30 minutes. This chilling time helps the flavors blend. When you’re ready to serve, enjoy it chilled or at room temperature. Pair your dip with tortilla chips or crunchy veggie sticks. Get ready to dive into this creamy and savory delight! To get that smooth and creamy dip, start with room temperature cream cheese. This helps it mix well with sour cream. Use a hand mixer or a sturdy spatula. Blend until you see no lumps. If your dip feels too thick, add a tiny bit of milk. This will help it stay creamy and easy to scoop. To boost flavor, consider adding some fresh herbs. Chopped cilantro or parsley can add a bright touch. You can also add more spices like smoked paprika or chili powder. If you want more heat, try adding jalapeños. For a savory kick, mix in some crumbled bacon. Each addition brings a new twist to your dip. Make your dip look appealing by using a nice serving dish. Spread it evenly with the back of a spoon. You can top it with extra diced tomatoes or green onions for color. Serve it with bright tortilla chips or crunchy veggie sticks. This adds a fun touch and makes it more inviting. Pro Tips Use Room Temperature Ingredients: Allow your cream cheese and sour cream to come to room temperature before mixing. This helps create a smoother and creamier dip without lumps. Customize Your Heat Level: Adjust the cayenne pepper to your taste. You can also add jalapeños or hot sauce for an extra kick, depending on your preference for spice. Make Ahead for Enhanced Flavor: Prepare the dip a few hours ahead or the night before to let the flavors meld together, making it even more delicious when served. Explore Serving Options: While tortilla chips are classic, consider serving the dip with crunchy veggie sticks like carrots, cucumbers, or bell peppers for a healthier option. {{image_4}} You can easily make a vegetarian version of Ingredient Crack Dip. Just skip the sausage. Add some extra veggies instead. Try using diced bell peppers or chopped spinach. They add color and flavor. You can also mix in some black olives for a fun twist. This keeps the dip rich and creamy while being meat-free. If you love a bit of heat, cayenne pepper is your friend. You can also add chopped jalapeños for a fresh kick. For a smoky taste, use smoked paprika instead of regular paprika. It gives the dip a lovely depth. You can even add a splash of hot sauce if you want more spice. Adjust the flavors to suit your taste buds. Looking for a lighter dip? Use low-fat cream cheese and sour cream. You can also swap in Greek yogurt for a tangy flavor. For a dairy-free option, try using cashew cream or a dairy-free sour cream. Blend soaked cashews with a bit of lemon juice. This keeps the creaminess while being healthier. Enjoy your dip without the guilt! To store leftover crack dip, place it in an airtight container. This keeps it fresh and tasty. Make sure to seal the lid tightly. Store it in the fridge for up to three days. If you want to enjoy the dip later, you can keep it longer. Just follow the freezing guidelines below. You can freeze crack dip for later. Use a freezer-safe container for best results. Make sure to leave some space at the top. The dip may expand when frozen. It stays good for up to three months. When you're ready to eat it, move it to the fridge overnight to thaw. This keeps the dip nice and creamy. To reheat the dip, place it in a bowl. You can use a microwave or an oven. If using a microwave, heat it in short bursts. Stir it every 30 seconds to keep it even. If using an oven, set it to 350°F (175°C). Heat for about 15 minutes or until warm. Stir before serving to mix the flavors back together. Enjoy your creamy and savory delight! You can serve Ingredient Crack Dip with many tasty options. I love using tortilla chips. They add great crunch. Crunchy veggie sticks work well too. Try carrots, celery, and bell peppers for a fresh bite. You can also pair it with crackers for variety. Each option adds a fun twist to the dip. Crack Dip lasts about 3 to 5 days in the fridge. Make sure to keep it in a tight container. This helps keep it fresh and tasty. Before serving, always check for any off smells or changes in texture. If it seems fine, enjoy it again! Yes, you can make this dip ahead of time! In fact, I recommend it. Making it the night before lets the flavors blend well. Just store it in the fridge. Cover it tightly to keep it fresh. When ready to serve, take it out and enjoy! To change the spice level, you have a few options. If you want it milder, skip the cayenne pepper. For more heat, add more cayenne or even some hot sauce. You can also mix in diced jalapeños for a spicy kick. Adjust it to match your taste for a perfect dip! This blog post covers everything you need for the perfect dip. We discussed key ingredients, customization options, and substitutions to fit your taste. You learned step-by-step instructions for making a creamy base and serving with flair. Tips for creamy consistency and flavor enhancement will elevate your dish. We also explored tasty variations and essential storage tips to keep your dip fresh. Whether hosting a party or a quiet night in, you can make a dip everyone will love. Now, it’s time to gather your ingredients and get started!

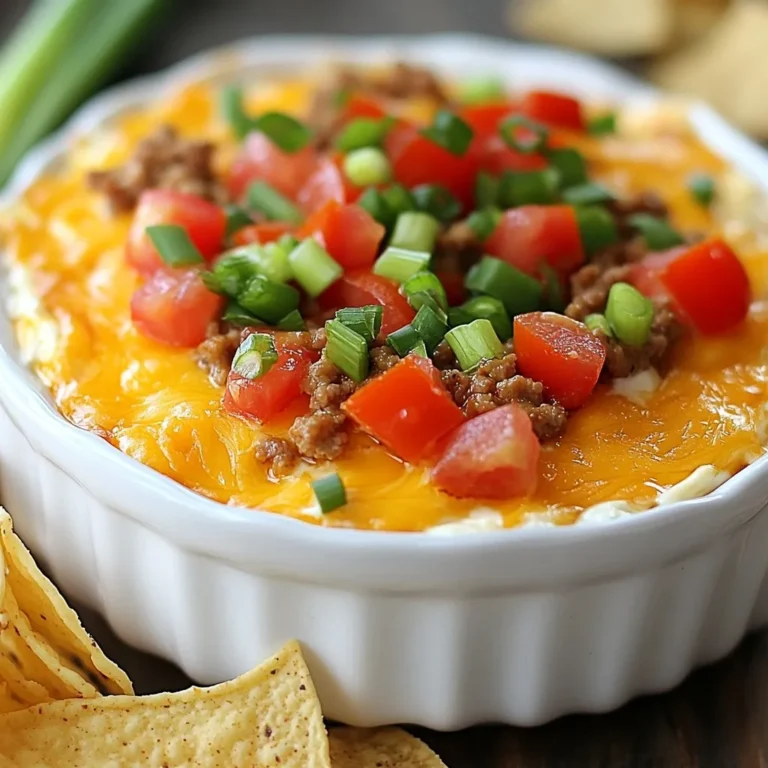
Ingredient Crack Dip Creamy and Savory Delight

To make a great Mediterranean steak bowl, you need: - 1 lb flank steak - 1 cup cooked quinoa - 1 cup cherry tomatoes, halved - 1 cucumber, diced - 1/2 red onion, thinly sliced - 1/2 cup kalamata olives, pitted and halved - 1/2 cup feta cheese, crumbled These ingredients come together to create a colorful and tasty dish. The right seasonings make all the difference. For this recipe, you will use: - 2 tablespoons extra virgin olive oil - 1 teaspoon ground cumin - 1 teaspoon smoked paprika - Salt and freshly ground black pepper to taste - 1/4 teaspoon garlic powder These spices give your steak a rich flavor. The olive oil helps the spices stick and adds a nice finish. To add freshness and crunch, consider these toppings: - Fresh parsley, finely chopped for garnish - 2 tablespoons fresh lemon juice The parsley adds a pop of green. Lemon juice brightens the whole dish. You can also sprinkle some extra feta on top for good measure. Each ingredient plays a role in making your Mediterranean steak bowls both easy and flavorful. {{ingredient_image_2}} Start by making a marinade. In a bowl, mix 2 tablespoons of olive oil, 1 teaspoon of ground cumin, 1 teaspoon of smoked paprika, 1/4 teaspoon of garlic powder, salt, and black pepper. Whisk it all together until smooth. Now, take 1 pound of flank steak. Rub the marinade all over the steak. Make sure it’s well coated. Cover the steak and let it marinate for at least 30 minutes. For more flavor, let it sit in the fridge for up to 2 hours. When your steak is ready, heat your grill to medium-high. Remove the steak from the marinade, shaking off the extra. Grill the steak for about 4-5 minutes on each side. Adjust the time if you want it more or less cooked. Once it’s done, move the steak to a cutting board. Let it rest for at least 5 minutes. This makes it juicy. After resting, slice the steak against the grain into thin strips. While the steak rests, it’s time for the quinoa salad. In a big bowl, combine 1 cup of cooked quinoa with 1 cup of halved cherry tomatoes, 1 diced cucumber, and 1/2 thinly sliced red onion. Add 1/2 cup of halved kalamata olives too. Drizzle the salad mix with 2 tablespoons of fresh lemon juice. Toss it gently to mix everything well. This salad adds a fresh touch to your bowls. When choosing steak, I love using flank steak. It has a nice flavor and cooks well. Look for a cut with good marbling. This means it has fat running through it, which adds juiciness. If you can't find flank steak, try skirt steak or sirloin. Both will work nicely in this dish. Marinating is key for great taste. I recommend at least 30 minutes of marination. If you have time, let it marinate for up to two hours. This helps the spices soak in and makes each bite more flavorful. Remember, the longer you marinate, the deeper the flavor. Just don’t go over two hours, as the meat can become too soft. Cooking quinoa is simple, but you need to rinse it first. This removes the bitter coating called saponin. Use a ratio of 1 part quinoa to 2 parts water. Bring it to a boil, then reduce to a simmer. Cover and cook for about 15 minutes. When it's done, fluff it with a fork. This makes it light and airy, perfect for your steak bowl. Pro Tips Marination Time: For the best flavor, allow the steak to marinate for at least 2 hours. If time permits, marinate overnight for a deeper taste. Resting the Steak: Always let the steak rest after grilling. This helps the juices redistribute, ensuring every bite is juicy and tender. Quinoa Cooking: For extra flavor, cook quinoa in vegetable or chicken broth instead of water. This enhances the overall taste of the dish. Serving Temperature: Serve the steak warm over the quinoa salad to create a delightful contrast with the cool vegetables and feta. {{image_4}} You can make a tasty vegetarian version of the Mediterranean steak bowls. Instead of flank steak, use grilled portobello mushrooms. They have a meaty texture and absorb flavors well. Marinate the mushrooms with olive oil, garlic powder, cumin, and smoked paprika. Grill them until tender, about 5-7 minutes. This swap keeps the dish hearty and satisfying. If you want to change the grain in your bowls, consider using farro or couscous. Both grains offer unique textures and flavors. Farro has a nutty taste and chewy bite, while couscous cooks quickly and is light. You can even use brown rice for a gluten-free option. Just cook the grain according to the package instructions. To boost the flavor in your Mediterranean steak bowls, add more herbs and spices. Fresh herbs like dill or mint can brighten the dish. Add a sprinkle of za'atar spice mix for a Middle Eastern twist. You can also mix in roasted red peppers or artichoke hearts for extra depth. A drizzle of tahini sauce or tzatziki can elevate the flavors even more. To keep your Mediterranean steak bowls fresh, store leftovers in airtight containers. Place the steak, quinoa salad, and toppings in separate containers. This way, they stay fresh and tasty. You can keep them in the fridge for up to three days. For best results, eat them within this time frame. When ready to enjoy your leftovers, reheat the steak and quinoa salad separately. Use a microwave for quick reheating. Heat the steak for about 30 seconds to 1 minute, checking for warmth. For quinoa, heat for about 1 minute, stirring halfway. Avoid overheating, as it can make the steak tough. You can freeze the steak bowls if you want to save them for later. Wrap the cooked steak tightly in plastic wrap and then in foil. Place the quinoa salad in a freezer-safe container. You can freeze these for up to three months. When ready to eat, thaw them in the fridge overnight before reheating. If you cannot find flank steak, you can use skirt steak or sirloin. Both cuts have great flavor and grill well. You can also try chicken breast or tofu for a lighter option. Just ensure the protein you choose cooks evenly for the best taste. To make your Mediterranean steak bowls more filling, add more grains. Quinoa is a great choice, but you can also use brown rice or farro. You can add beans like chickpeas or black beans for extra protein and fiber. Mixing in more veggies like roasted bell peppers or spinach can also boost nutrition and volume. Yes, you can prepare most parts of the dish in advance. Marinate the steak a few hours or even the night before. Cook the quinoa ahead of time and store it in the fridge. You can also chop the veggies and mix them with lemon juice to keep them fresh. Just grill the steak right before serving for the best flavor. In this post, I shared how to create tasty Mediterranean steak bowls. You learned about key ingredients, from the steak to the perfect toppings. I provided simple steps for marinating, grilling, and making quinoa salad. I also shared tips on selecting steak and cooking quinoa. You saw variations for different diets and smart storage ideas. These bowls are easy to customize, making them fun to prepare. Enjoy making them your own!

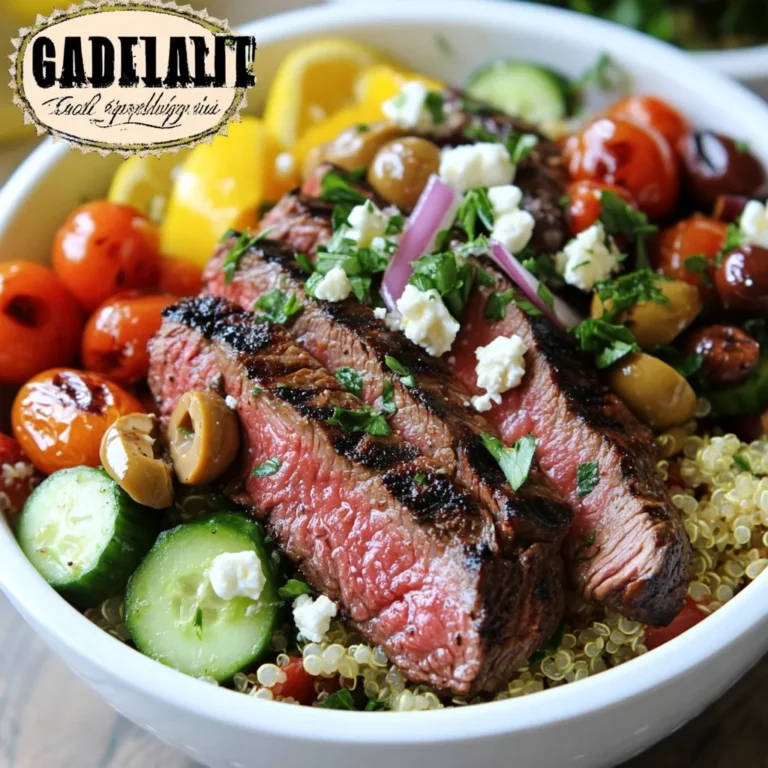
Savory Mediterranean Steak Bowls Easy and Flavorful

- 1 pre-made 9-inch pie crust - 4 large eggs - 1 cup heavy cream - 1 cup shredded cheddar cheese - 1 cup chopped mixed vegetables (e.g., fresh spinach, diced bell peppers, and sliced mushrooms) - 1/2 cup whole milk - 1 teaspoon dried thyme - Salt and pepper, to taste - Fresh parsley, chopped (for garnish) The key to a great quiche is quality ingredients. A pre-made pie crust saves time and offers a nice base. Fresh eggs give the quiche a rich texture. Heavy cream and whole milk create a creamy filling that tastes amazing. I love mixing in vibrant vegetables for color and flavor. Spinach, bell peppers, and mushrooms work great. Don't forget to season with thyme, salt, and pepper for depth. Finally, fresh parsley adds a lovely touch when you serve it. - Alternatives for heavy cream: You can use half-and-half or whole milk for a lighter option. - Vegetable options and variations: Try broccoli, zucchini, or even sun-dried tomatoes for different flavors. - Dairy-free alternatives: Use coconut milk or almond milk instead of dairy. Nutritional yeast can add a cheesy flavor. These substitutions keep your quiche flexible. You can adjust it based on what you have at home. This way, you'll always have a tasty quiche to enjoy! {{ingredient_image_2}} Preheating the oven First, you need to preheat your oven to 375°F (190°C). This temperature helps bake the quiche evenly. Preparing the pie crust Next, take your pre-made pie crust. Carefully place it into a 9-inch pie dish. Use a fork to prick the bottom of the crust. This step stops bubbles from forming while it bakes. Whisking the egg mixture In a large bowl, whisk together four large eggs, one cup of heavy cream, and half a cup of whole milk. Mix until it's smooth and well combined. Folding in cheese and vegetables Now, fold in one cup of shredded cheddar cheese and one cup of chopped mixed vegetables. You can use fresh spinach, diced bell peppers, and sliced mushrooms. Add one teaspoon of dried thyme and season with salt and pepper. Use a spatula to mix everything evenly. Pouring the mixture into the crust Pour the creamy egg and vegetable mix into the prepared pie crust. Fill it just below the edge to allow it to rise. Baking time and checking doneness Place the quiche in the hot oven. Bake it for 35 to 40 minutes. The top should turn golden brown. To check if it’s done, insert a knife into the center. If it comes out clean, your quiche is ready. Remove it from the oven and let it cool for about 10 minutes. This cooling time helps the filling set, making neat slices easier. To avoid a soggy bottom, use a few simple tricks. Pricking the crust with a fork helps release steam. This keeps the bottom crisp. You can also blind bake the crust. To do this, line the crust with parchment paper and fill it with pie weights or dried beans. Bake it for about 10-15 minutes before adding the filling. This will give you a sturdy base. For a light texture, whisk the eggs well. Use a large bowl and mix until the eggs are fully blended. This adds air, which makes the filling fluffy. When adding seasonings, taste as you go. A good mix of salt, pepper, and thyme brings out the best flavor. Don’t skip this step. It makes a big difference. Quiche pairs well with fresh salads or light soups. Try a simple green salad with a vinaigrette. This adds a nice contrast to the creamy quiche. For presentation, slice the quiche into wedges. Place them on a colorful plate. A sprinkle of fresh parsley on top adds a pop of color. This makes your dish more inviting. Pro Tips Blind Bake the Crust: For an extra crispy crust, consider blind baking it for 10-15 minutes before adding the filling. This helps prevent a soggy bottom. Customize Your Veggies: Feel free to use any vegetables you have on hand, such as zucchini, asparagus, or broccoli. Just make sure they are chopped small for even cooking. Add Extra Flavor: Enhance the flavor by adding herbs like basil or oregano, or a sprinkle of red pepper flakes for some heat. Storage Tips: Store leftover quiche in an airtight container in the refrigerator for up to 3 days. Reheat in the oven for best results. {{image_4}} You can change up your quiche to fit your taste. For meat lovers, try adding ham or bacon. These meats add a savory kick. Just chop them into small pieces and mix them into the egg filling. For a vegetarian twist, add more veggies. You can use broccoli, zucchini, or even sun-dried tomatoes. Mix them with eggs and cheese for a colorful dish. Each veggie brings its own flavor. This way, you can create a new quiche every time! If you need a gluten-free option, use a gluten-free pie crust. Many stores sell these, or you can make your own. They taste great and hold the filling well. For those who follow a vegan diet, you can make a delicious quiche too. Swap the eggs for a mix of silken tofu and chickpea flour. Add your favorite plant-based milk and spices to get the right texture. You can still enjoy the creamy filling without dairy! These variations let you explore different tastes and diets. Get creative in your kitchen! To keep your quiche fresh, you should refrigerate it right away. Place it in an airtight container. This helps prevent drying out or picking up other smells. Quiche can last in the fridge for about 3 to 4 days. If you want to store quiche for a longer time, freezing is a great option. Wrap the quiche tightly in plastic wrap and then in aluminum foil. This keeps it safe from freezer burn. You can freeze it for up to 2 months. When ready to eat, thaw it in the fridge overnight. Reheating can be tricky. You want to keep the quiche fluffy and moist. The best way is to use the oven. Preheat your oven to 350°F (175°C). Place the quiche on a baking sheet and cover it with foil. Heat for about 15 to 20 minutes. This keeps the crust crisp and the filling warm. You can also use the microwave for quick reheating. But be careful; it can make the crust soggy. Heat in short bursts of 30 seconds. Check often to avoid overheating. After reheating, serve the quiche with a side salad or fresh fruit. A sprinkle of herbs on top makes it look nice and adds flavor. Enjoy your delicious meal! You can tell your quiche is done when the top is golden brown. A knife inserted in the center should come out clean. The filling should also be set, not jiggly. If it wobbles too much, give it a few more minutes in the oven. Yes, you can make a crustless quiche! Just skip the pie crust and pour the filling directly into a greased pie dish. This method is lower in carbs and just as tasty. You can add more veggies or cheese for extra flavor. Crustless quiches are simple and often quicker to prepare. You can keep quiche in the fridge for about three to four days. Make sure to cover it tightly with plastic wrap or foil. If you want to store it longer, consider freezing it. Just wrap it well and it can last up to three months in the freezer. This blog post covered how to make a delicious quiche from scratch. You learned about essential ingredients, including pie crust, eggs, and vegetables. I shared tips for substitutions and how to prep your crust and filling. You now know the best techniques to bake it perfectly. Remember, the right seasonings can make a big difference. Quiche is versatile and can fit many diets. Whether you try it savory or sweet, enjoy experimenting. With these tips, you're ready to create your own tasty quiche at home!

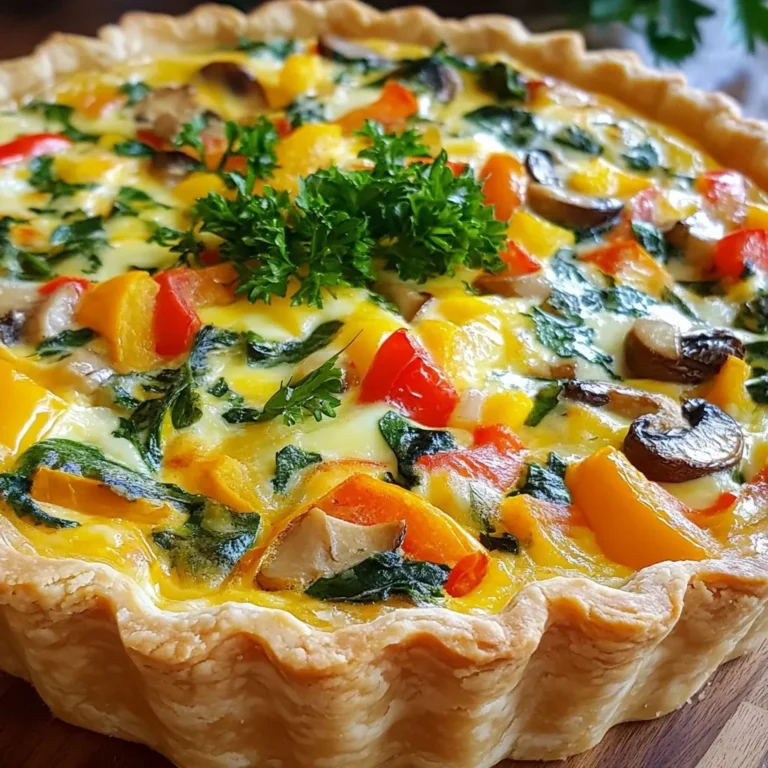
Basic Quiche Simple and Tasty Family Meal

To make Ricotta Zucchini Lasagna Roll-Ups, you need fresh and tasty ingredients. Here’s what you will need: - 3 medium zucchinis, sliced thinly lengthwise - 2 cups ricotta cheese - 1 cup grated mozzarella cheese - 1 cup grated Parmesan cheese - 1 large egg - 2 cups marinara sauce (homemade or store-bought) - 2 cloves garlic, minced - 1 teaspoon dried Italian herbs (a blend of oregano, basil, and thyme) - Salt and pepper to taste - Fresh basil leaves for garnish Each ingredient plays a key role in the dish. Zucchini serves as the base, while ricotta adds creaminess. Mozzarella and Parmesan bring that cheesy goodness. The egg helps bind everything together. Marinara sauce adds rich flavor, and garlic gives it a nice kick. Dried Italian herbs and seasonings round out the taste. Fresh basil adds a bright touch when serving. You can easily find these ingredients at your local store. Choose the freshest zucchini for the best flavor. Quality cheeses make a big difference too. When you gather these items, you set the stage for a delightful meal! {{ingredient_image_2}} 1. Preheat the oven to 375°F (190°C). This helps cook the roll-ups evenly. 2. Slice three medium zucchinis thinly lengthwise. Aim for about 1/8 inch thick. A mandoline slicer works great here. 3. Lightly sprinkle salt on the zucchini slices and let them rest for 10-15 minutes. This draws out moisture. After that, pat them dry with a paper towel. 4. In a medium bowl, mix 2 cups of ricotta cheese, half of the grated mozzarella, half of the grated Parmesan, one large egg, minced garlic, and dried Italian herbs. Add salt and pepper to taste. Blend until smooth. 1. Spread a thin layer of marinara sauce across the bottom of a 9x13 inch baking dish. 2. Take a zucchini slice and place a generous tablespoon of the ricotta mixture at one end. Roll it tightly, tucking in the filling. Place the roll seam-side down in the baking dish. Repeat this until you use all the zucchini and filling. 3. Pour the remaining marinara sauce evenly over the roll-ups. Top with the rest of the mozzarella and Parmesan cheese. 1. Cover the baking dish with aluminum foil to keep the cheese from burning. 2. Bake in the preheated oven for 25 minutes. Then, remove the foil and bake for 15 more minutes. Look for melted, bubbly cheese that is lightly golden. 3. After baking, let the roll-ups rest for 5 minutes. This helps them set. Garnish with fresh basil leaves before serving for added flavor and color. - Salting zucchini for moisture control: Start by slicing the zucchini thin. Use a sharp knife or a mandoline for even cuts. Once sliced, sprinkle salt on the zucchini. Let it sit for 10-15 minutes. This step draws out extra moisture. Afterward, pat the slices dry with a paper towel. This helps keep your roll-ups from getting soggy. - Achieving a smooth ricotta mixture: In a bowl, mix the ricotta cheese, half of the mozzarella, half of the Parmesan, and the egg. Add minced garlic and dried herbs. Use a fork or spatula to blend well. Make sure there are no lumps. A smooth mixture ensures even flavor in every bite. - Pairing with salads or bread: These roll-ups are great with a fresh salad. A simple green salad adds a nice crunch. You can also serve them with garlic bread. The warm, crispy bread complements the cheesy roll-ups perfectly. - Presentation ideas for serving: For a lovely display, use a rustic platter. Arrange the roll-ups neatly and drizzle with extra marinara sauce. Sprinkle fresh herbs on top for a pop of color. This makes the dish even more inviting. - Best tools for slicing: A mandoline slicer is ideal for cutting zucchini. It gives you even, thin slices quickly. If you don’t have one, a sharp chef's knife works well too. - Essential baking dishes: Use a 9x13 inch baking dish for this recipe. It’s the perfect size for all your roll-ups. Make sure it’s deep enough to hold the sauce without spilling. A glass or ceramic dish works best for even cooking. Pro Tips Use a Mandoline Slicer: For perfectly even zucchini slices, a mandoline slicer is your best friend. This ensures consistent thickness, allowing for even cooking and a better presentation. Extract Excess Moisture: Salting the zucchini slices and letting them rest helps draw out excess moisture. This prevents your dish from becoming watery and keeps the flavors concentrated. Customize the Filling: Feel free to add additional ingredients to your ricotta mixture, such as spinach, roasted red peppers, or even a hint of nutmeg for a unique twist on flavor. Rest Before Serving: Allowing the roll-ups to rest for a few minutes after baking helps them set and makes for cleaner slices when serving. This also enhances the flavors as they meld together. {{image_4}} You can swap cheeses for a twist. Vegan cheese works well in this recipe. It melts nicely and adds creaminess. You can also try cottage cheese for a lighter option. If you want more protein, add cooked ground turkey or chicken. You can mix in finely chopped spinach or bell peppers for extra veggies. Spices can elevate your roll-ups. Try adding red pepper flakes for heat. A pinch of smoked paprika adds a nice depth. You can also mix in fresh herbs like parsley or thyme for brightness. For sauces, use pesto instead of marinara for a fresh flavor. You can also drizzle balsamic glaze before serving for a sweet touch. Cold roll-ups make a great salad option. Just chill the filled roll-ups and serve with a light dressing. Baked versions can vary, too. Serve with alfredo sauce for a creamy change. You can even layer the roll-ups with marinara and cheese for a decadent bake. Each style offers a unique taste experience. Keep your ricotta zucchini lasagna roll-ups in the fridge. Place them in an airtight container. They stay fresh for about 3 to 4 days. If you want to keep them longer, freezing is a great option. To reheat, use the oven for the best taste. Preheat it to 350°F (175°C). Cover the roll-ups with foil to keep them moist. Bake for about 15 to 20 minutes. This method avoids sogginess and keeps the cheese melty. You can freeze the roll-ups before or after baking. If freezing before, assemble them and wrap tightly. If baked, let them cool first. Store in a freezer-safe container. When ready to eat, thaw overnight in the fridge for best results. To stop zucchini from being watery, you must extract moisture. Here are my tips: - Slice zucchini thinly. Use a mandoline for best results. - Sprinkle salt on the slices and let them rest for 10-15 minutes. - After resting, pat the slices dry with a paper towel. This method helps keep your roll-ups firm and tasty. Yes, you can prepare these roll-ups in advance. Here’s how: - Make the ricotta filling and roll up the zucchini slices. - Place the roll-ups in a baking dish and cover with foil. - Store in the fridge for up to 24 hours before baking. When you're ready, just pop them in the oven. I love serving these roll-ups with a few sides: - A fresh mixed greens salad adds crunch and color. - Garlic bread pairs well for a comforting meal. - Drizzle extra marinara sauce on top for added flavor. - Garnish with fresh basil for a pop of green. These touches make for a delicious presentation! This post covered everything you need for Ricotta Zucchini Lasagna Roll-Ups. We explored the ingredients, step-by-step preparation, and tips for perfecting your dish. Don’t forget variations and storage options to keep your meal fresh. Enjoy experimenting with flavors and serving styles. With practice, you’ll impress family and friends. Embrace your kitchen adventures with these tasty roll-ups!

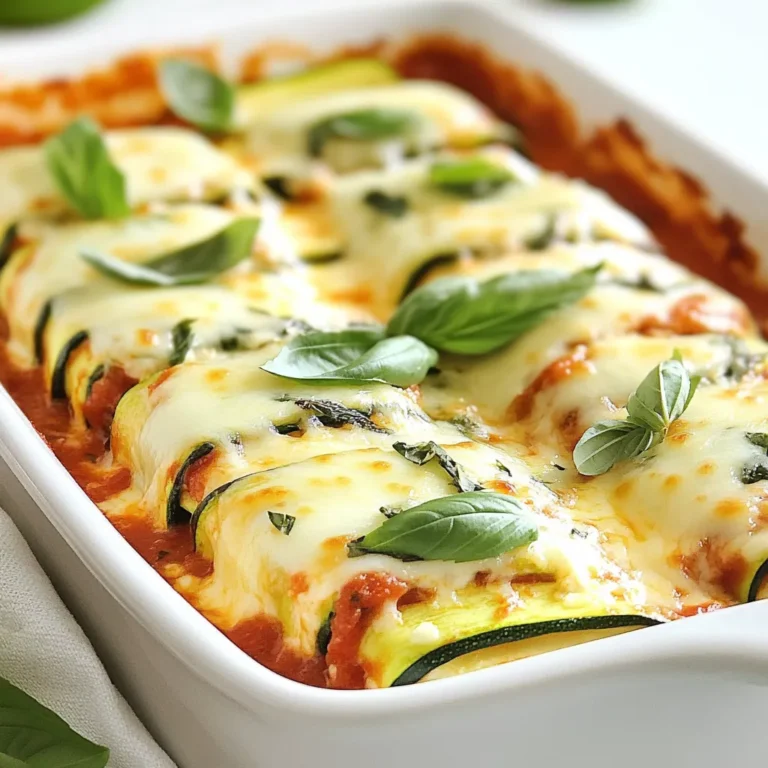
Ricotta Zucchini Lasagna Roll-Ups Simple and Tasty

- 4 cups fresh baby spinach, thoroughly washed and carefully dried - 2 cups ripe strawberries, hulled and elegantly sliced - 1/2 cup red onion, ultra-thinly sliced for a mild flavor - 1/4 cup creamy feta cheese, crumbled - 1/4 cup walnuts, coarsely chopped for a crunchy texture - 1/4 cup high-quality extra virgin olive oil - 2 tablespoons tangy apple cider vinegar - 1 tablespoon sweet honey - 1 tablespoon poppy seeds for added interest - Salt and freshly cracked pepper, to taste - Each serving has about 200 calories. - You get around 15g of fat, 10g of carbs, and 5g of protein. - Baby spinach is rich in vitamins A and K. Strawberries add fiber and antioxidants. Feta cheese gives calcium, while walnuts offer healthy fats and protein. This salad not only tastes great but also brings a lot of health benefits to the table. Enjoy! {{ingredient_image_2}} 1. Start with 4 cups of fresh baby spinach. 2. Rinse the spinach under cool water. 3. Use a salad spinner or a clean towel to dry the spinach. 4. Next, take 2 cups of ripe strawberries. 5. Hull and slice the strawberries. Aim for even slices. 6. Then, grab 1/2 cup of red onion. 7. Slice the red onion ultra-thin for a mild flavor. 1. Place the washed spinach in a large bowl. 2. Layer the sliced strawberries over the spinach. 3. Add the thinly sliced red onion next. 4. Sprinkle 1/4 cup of crumbled feta cheese on top. 5. Lastly, add 1/4 cup of coarsely chopped walnuts for crunch. 1. In a small bowl, mix together the dressing ingredients. 2. Combine 1/4 cup of extra virgin olive oil, 2 tablespoons of apple cider vinegar, and 1 tablespoon of honey. 3. Add 1 tablespoon of poppy seeds to the mixture. 4. Whisk the ingredients well until they blend into a smooth dressing. 1. Drizzle the poppy seed dressing over the salad. 2. Toss the salad gently to coat every leaf and topping. 3. Taste the salad and add salt and pepper as needed. 4. Serve the salad in large bowls for a beautiful presentation. 5. For extra flair, garnish with more sliced strawberries and a sprig of mint. To make your salad look fancy, use large, clear bowls. The colors of the greens and strawberries pop beautifully. You can enhance the look by adding extra sliced strawberries on top. A sprig of fresh mint also adds a nice touch. Mint gives a fresh scent and bright color. If you want a different taste, try goat cheese instead of feta cheese. It has a creamy texture and tangy flavor. For a nut-free version, replace walnuts with sunflower seeds. They add a nice crunch without nuts. To add more crunch, consider adding crispy bacon bits or crunchy chickpeas. They add flavor and texture to the salad. Balance the dressing's flavors by tasting it before serving. If it’s too sweet, add a tiny bit more vinegar. If it’s too tangy, a little honey can help. Pro Tips Choose Fresh Ingredients: Select vibrant, fresh strawberries and crisp spinach to enhance the overall flavor and appearance of your salad. Customize Your Nuts: Feel free to substitute walnuts with pecans or almonds for a different texture and taste that complements the salad beautifully. Make Ahead Dressing: Prepare the poppy seed dressing in advance and store it in the refrigerator for up to a week, allowing the flavors to meld together. Add Protein: Consider adding grilled chicken or chickpeas to make this salad a heartier meal, perfect for lunch or dinner. {{image_4}} You can make this salad special by using seasonal berries. Fresh blueberries or blackberries add unique flavors. During fall, try adding sliced apples or pears for a crisp touch. You can also add other greens like arugula or kale. This mix gives your salad extra color and flavor. Adding protein makes this salad more filling. Grilled chicken or shrimp are great options. They add a nice smoky taste and pair well with the sweet strawberries. If you prefer vegetarian options, try chickpeas or quinoa. These options add good texture and protein to your meal. While poppy seed dressing is tasty, you can experiment with different dressings. Citrus dressings made with orange or lemon juice can brighten the salad. Adding fresh herbs like basil or mint gives it a fresh twist. These small changes can make your salad feel new each time you make it. To store leftover salad, use an airtight container. This keeps the salad fresh. Layer paper towels between the layers of salad. This absorbs extra moisture. Store it in the fridge for up to two days. Use fresh ingredients for the best taste. The poppy seed dressing lasts about a week in the fridge. Keep it in a sealed jar or container. This prevents spills and keeps the dressing fresh. You can make the dressing ahead of time. Just shake it well before using. I do not recommend freezing the salad. The spinach and strawberries become mushy when thawed. You can, however, freeze the dressing. It will keep well for up to three months. Thaw it in the fridge before using. You can keep the salad in the fridge for about 3 days. Store it in an airtight container to keep it fresh. Make sure to add the dressing just before serving. This way, the spinach stays crisp and bright. Yes, you can make the Poppy Seed Dressing a few days in advance. Store it in a sealed jar in the fridge. Give it a good shake before using. The flavors will meld nicely, making it even tastier. Absolutely! This salad is great for meal prep. You can wash and chop the spinach and strawberries ahead of time. Keep the dressing in a separate container. Combine everything when you're ready to eat for a fresh flavor. This salad pairs well with many dishes. Try serving it with grilled chicken or fish for protein. It also goes great with sandwiches or wraps for lunch. The sweet and savory flavor makes it a perfect side. This blog post covered how to make a tasty Strawberry Spinach Salad. We discussed fresh ingredients, like baby spinach and ripe strawberries, along with a simple poppy seed dressing. You learned step-by-step instructions to prepare, assemble, and serve the salad. I shared tips for presentation, ingredient substitutes, and variations to enhance flavor. Remember, this salad is not just healthy; it's also fun to make. Enjoy experimenting and tailoring the recipe to your tastes. Your healthy plate awaits!

Strawberry Spinach Salad with Poppy Seed Dressing Recipe

To make delicious Chocolate Peanut Butter Overnight Oats, you need these simple ingredients: - 1 cup rolled oats - 2 cups almond milk (or any milk of choice) - 2 tablespoons unsweetened cocoa powder - 2 tablespoons peanut butter (either creamy or crunchy based on preference) - 2 tablespoons pure maple syrup (adjust quantity according to sweetness preference) - 1 teaspoon pure vanilla extract - A pinch of sea salt - 1 ripe banana, sliced (for topping) - Chopped nuts or granola (for garnish and added texture) These ingredients come together to create a tasty and satisfying breakfast. Each one plays a role in the final dish. The oats provide a hearty base, while the cocoa powder brings rich chocolate flavor. Peanut butter adds creaminess and protein. Maple syrup gives sweetness without being overpowering. The banana and nuts add freshness and crunch. You can mix and match these ingredients to fit your taste. For example, if you like it sweeter, add more maple syrup. If you prefer a nutty flavor, switch to almond butter. The possibilities are endless, and that’s what makes this recipe so fun to explore! {{ingredient_image_2}} - Step 1: Combine dry ingredients In a medium mixing bowl, add 1 cup of rolled oats, 2 tablespoons of cocoa powder, and a pinch of sea salt. Stir until the dry ingredients mix well. - Step 2: Whisk together wet ingredients In a separate bowl, pour in 2 cups of almond milk, then add 2 tablespoons of peanut butter, 2 tablespoons of maple syrup, and 1 teaspoon of vanilla extract. Whisk until smooth. If your peanut butter is thick, warm it in the microwave for 10-15 seconds. - Step 3: Mix wet and dry ingredients Pour the wet mixture over the dry oats. Stir until all oats are covered. Make sure there are no dry bits left. - Step 4: Divide into jars Spoon the oat mixture into two jars or airtight containers. Make sure to divide it evenly. - Step 5: Refrigerate overnight Seal the jars with their lids. Place them in the fridge overnight or for at least 4 hours. This helps the oats soak up the liquid. - Step 6: Serve and enjoy When ready to eat, take the jars from the fridge. Stir the oats well. Top with sliced banana and sprinkle some chopped nuts or granola for crunch. - Adjusting sweetness: You can change the sweetness by adding more or less maple syrup. Start with two tablespoons and taste it. If you want it sweeter, add more syrup. - Softening peanut butter: If your peanut butter is thick, it can be hard to mix. To make it easier, microwave it for about 10-15 seconds. This will help it blend smoothly with the other wet ingredients. - Achieving a creamy consistency: For creamy oats, mix the wet and dry ingredients well. Ensure there are no dry bits left. The oats should soak up the liquid overnight, becoming thick and creamy. - Serving in clear glass jars: Use clear jars to show off the layers. It makes your oats look more appealing and fun to eat. You can see the chocolate and toppings! - Drizzling peanut butter: After you spoon the oats into jars, drizzle some peanut butter on top. It adds more flavor and looks great too. - Adding cacao nibs for garnish: Finish off your oats with a sprinkle of cacao nibs. They give a nice crunch and extra chocolate taste. Plus, they look fancy! Pro Tips Peanut Butter Preference: Choose creamy peanut butter for a smooth texture or crunchy for an added bite. Adjust according to your taste! Sweetness Level: Feel free to modify the amount of maple syrup based on your sweetness preference. Taste the mixture before adding the oats! Make Ahead: These overnight oats can be made in batches. Store them in the fridge for up to 5 days for a quick breakfast option! Layering for Visual Appeal: When serving, layer the oats with banana slices and nuts in the jar for a beautiful presentation that enhances the eating experience! {{image_4}} You can easily change the flavors in your overnight oats. Adding fresh fruit is a fun twist. Berries like strawberries or blueberries work great. Apples also add a nice crunch. Simply chop them up and stir them in before you chill the oats. If you want a change from peanut butter, try almond or cashew butter. These nut butters give a different taste while still being creamy. Just swap them with the peanut butter in the recipe. You can mix and match until you find your favorite combo. Toppings can make your oats even more exciting. Seeds like chia or sunflower seeds add texture and crunch. Sprinkle them on top just before you eat. You can also try different nuts or granola. Chopped walnuts or pecans add a nice flavor. Granola gives a sweet touch and extra crunch. Mix and match your toppings for a new taste each time. How long will they last in the fridge? Chocolate peanut butter overnight oats will stay fresh in the fridge for up to five days. This makes them great for meal prep. You can make a batch at the start of the week and enjoy them each morning. Storing in airtight containers Always store your oats in airtight containers. This keeps them fresh longer and prevents any unwanted smells from the fridge. Jars work well, but any container with a tight lid is fine. Should you heat overnight oats? You can heat overnight oats, but it's not necessary. Many enjoy them cold, right from the fridge. If you prefer warm oats, simply pop them in the microwave for about 30 seconds. Enjoying cold versus warm preparation Cold oats are creamy and refreshing, especially in hot weather. Warm oats can feel comforting and cozy. Choose whichever you like best! Yes, you can use quick oats. They will soak up liquid faster. This may change the texture. Rolled oats give a chewier bite. If you prefer a creamier texture, quick oats work well. This recipe is gluten-free. Just make sure to choose certified gluten-free oats. Most oats are safe, but cross-contamination can happen. Always check the label if gluten is a concern. To make this recipe vegan, use plant-based milk. Almond milk works great. Also, ensure your peanut butter and maple syrup are vegan-friendly. This recipe is already dairy-free. Absolutely! These oats are perfect for meal prep. You can make them up to five days in advance. Just store them in airtight containers. They stay fresh and tasty in the fridge. This recipe for overnight oats is easy and tasty. You learned the simple steps to mix oats, milk, and cocoa. Remember to adjust sweetness and try different toppings. Store your oats in airtight containers for the best flavor and freshness. You can make this recipe your own with fun twists. Enjoy the process and have fun experimenting with flavors. Overnight oats are a great way to start your day right!

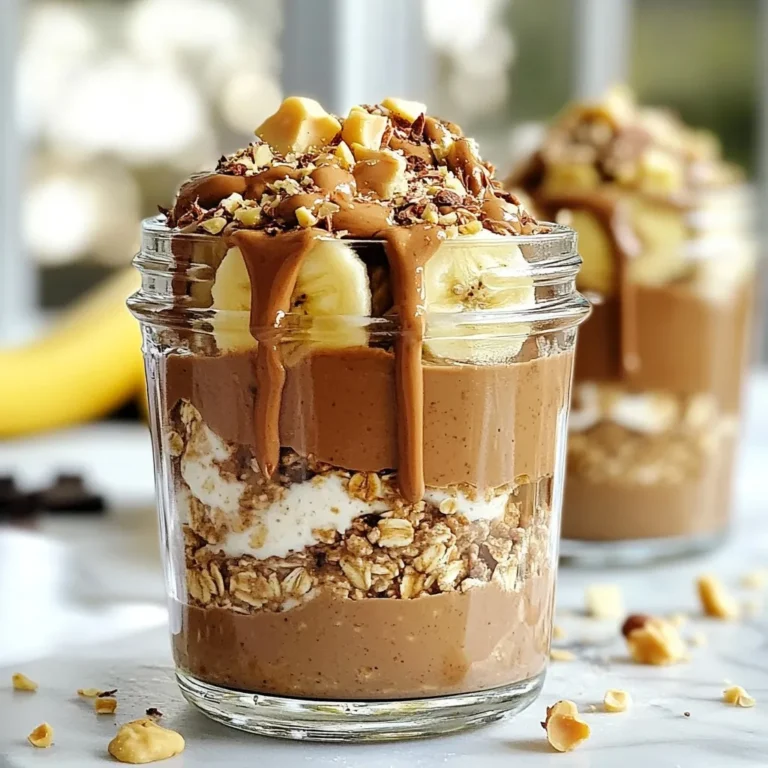
Chocolate Peanut Butter Overnight Oats Tasty and Easy

You need 2 cups of fresh strawberries. Make sure they are ripe and sweet. Hull them and slice them for the best flavor. Fresh strawberries give a nice color and taste to the popsicles. Use 1 cup of freshly squeezed lemon juice. This usually comes from about 4 to 6 lemons. The juice adds a bright, tangy flavor. Don’t forget the zest of 1 lemon. It brings a nice extra punch to the mix. For sweetness, add 1/2 cup of honey or agave syrup. You can adjust this amount based on how sweet you like your popsicles. Honey brings a rich flavor, while agave syrup is lighter. Add 1 cup of water to help blend the flavors. A pinch of salt is also important. It enhances the taste and balances the sweetness. For a fun touch, you can add fresh mint leaves as a garnish. They add a pop of color and a refreshing taste. You don’t have to use them, but they make your popsicles look fancy! {{ingredient_image_2}} Start by washing 2 cups of fresh strawberries. Remove the green tops and slice them into smaller pieces. Next, grab 4 to 6 lemons, depending on their size. Squeeze them to get 1 cup of fresh lemon juice. This juice gives your popsicles a bright, zesty flavor. Now, take your sliced strawberries and lemon juice. In a blender, add the strawberries, lemon juice, 1/2 cup of honey or agave syrup, and 1 cup of water. Also, add the zest of 1 lemon and a pinch of salt. Blend on high speed until it is smooth. Taste your mix. If it needs more sweetness, add a bit more honey or agave. Carefully pour your strawberry lemonade mix into popsicle molds. Fill each mold about three-quarters full. This allows space for the popsicles to expand when they freeze. Insert the popsicle sticks into the molds, making sure they are straight. Place the molds in the freezer. Let them freeze for at least 6 hours or until they are completely solid. To enjoy your popsicles, run warm water over the outside of the molds for a few seconds. This helps the popsicles come out easily. Gently pull them out with a light tug. For a fun touch, garnish with fresh mint leaves before serving. When you blend, start with the softer fruits first. This helps the blades work better. Add strawberries and lemon juice first. Then, pour in the water and sweetener. Blend until smooth. If it’s too thick, add more water. This makes a creamier popsicle. Taste your mixture before freezing. If it’s too tart, add more honey or agave syrup. Start with a little, then blend again. Remember, once frozen, popsicles taste less sweet. Adjust sweetness to your liking before you pour the mixture into molds. To get even popsicles, pour the mixture slowly. Fill each mold about three-quarters full. This allows room for the mixture to expand. If you fill them too much, they may spill over. For best results, ensure all molds are filled to the same level. To release popsicles easily, use warm water. Run it over the outside of the molds for a few seconds. This helps warm the edges. If the popsicles still stick, twist gently while pulling. A slow pull can help avoid breaks. Pro Tips Choose Ripe Strawberries: Ensure your strawberries are ripe for the best flavor. They should be bright red and fragrant to provide the sweetest popsicles possible. Adjust Sweetness to Taste: Before pouring into molds, taste the mixture and adjust the sweetness with more honey or agave syrup according to your preference. Experiment with Flavors: Feel free to add other fruits, like blueberries or raspberries, to create a mixed berry popsicle or even a splash of coconut water for a tropical twist. Storage Tips: Store leftover popsicles in a freezer-safe bag or container to prevent freezer burn and maintain their flavor for longer. {{image_4}} You can easily mix in other fruits for fun flavors. Try adding ripe peaches, blueberries, or raspberries. Simply chop them up and blend them in. Each fruit brings its own taste and color. Your popsicles will look and taste great! If you want a different sweetness, use maple syrup or coconut sugar. These options give a unique flavor. Adjust the amount based on your taste. Always taste the mixture before pouring it into molds. Herbs can add a fresh twist to your popsicles. Consider adding fresh basil or rosemary for a unique taste. Blend the herbs with your fruit mixture. For a spicy kick, add a dash of cayenne pepper. This can surprise your taste buds! You can swap out lemon juice for other citrus juices. Try lime or orange juice for a new flavor. Mixing juices can create a fruity burst. Experiment with combinations until you find your favorite mix. This keeps your popsicles exciting and fresh! Store your strawberry lemonade popsicles in an airtight container. If you use molds, remove the popsicles first. Wrap each popsicle in plastic wrap to keep them fresh. This helps prevent ice crystals from forming. These popsicles stay tasty in the freezer for about two months. After that, they may lose flavor or texture. Use a marker to write the date on the container. This way, you will know how long they have been stored. To enjoy your popsicles, you can thaw them in a few ways. The quickest method is to run warm water over the outside of the molds. This melts the ice slightly and helps release the popsicles. If you have time, let them sit at room temperature for a few minutes. This will also help them soften a bit before you eat them. Yes, you can use frozen strawberries. They will blend well and create a nice texture. Just let them thaw slightly before blending. This helps them mix better with the other ingredients. The flavor may be a bit different, but they will still taste great. The popsicles take at least 6 hours to freeze. If you want them extra firm, leave them overnight. Make sure they are solid before trying to remove them from the molds. Patience is key for the best popsicle experience! You can use maple syrup or a sugar substitute like stevia. Adjust the amount based on your taste. If you prefer a less sweet option, reduce the amount you add. Just remember, sweetness is personal! Yes, these popsicles are vegan if you use agave syrup. Honey is the only ingredient that is not vegan. Simply swap honey for agave or maple syrup for a vegan-friendly treat. Enjoy without guilt! Yes, you can add alcohol. A splash of vodka or rum can make these popsicles a fun adult treat. Just remember to keep the total liquid amount the same. This keeps the texture smooth and the popsicles firm. Enjoy responsibly! Making Strawberry Lemonade Popsicles is fun and simple. We covered fresh ingredients like strawberries and lemon juice. I shared step-by-step instructions for preparation and freezing. You learned tips to adjust sweetness and prevent sticking. I also offered variations for added flavor and storage info to keep them fresh. These easy popsicles are great for hot days. Try different fruits or sweeteners to make them your own. Enjoy these tasty treats while staying cool!

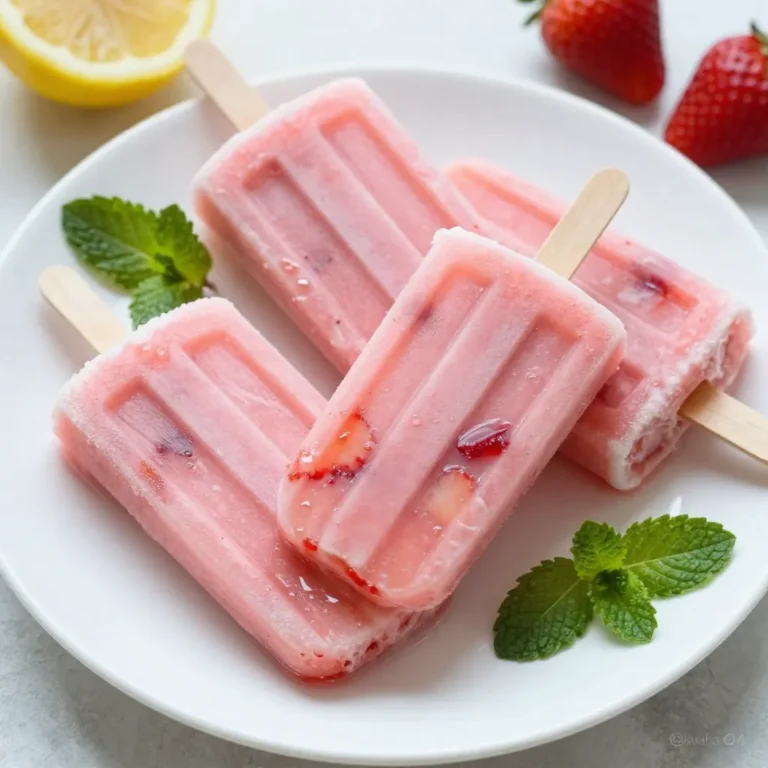
Strawberry Lemonade Popsicles Fresh and Easy Treat

- 1 cup unsalted butter, melted - 2 cups granulated sugar - 4 large eggs - 1 teaspoon vanilla extract - 1 cup all-purpose flour - 1 cup unsweetened cocoa powder - 1 teaspoon baking powder - 1/2 teaspoon salt - 1 cup semi-sweet chocolate chips - 12 Oreo cookies To make Oreo stuffed brownies, you need simple and tasty ingredients. The melted butter gives the brownies a rich base. Granulated sugar adds sweetness and helps create a nice crust. You’ll use four large eggs for moisture and structure. Vanilla extract brings a lovely flavor. All-purpose flour and cocoa powder create the brownie body. Baking powder helps the brownies rise, while a pinch of salt balances the sweetness. Finally, semi-sweet chocolate chips add extra chocolate goodness. And of course, Oreos are the star of the show, adding crunch and creaminess. - 9x13 inch baking pan - Mixing bowls - Whisk and spatula - Toothpick for testing doneness You’ll need a few basic kitchen tools. A 9x13 inch baking pan works perfectly for brownies. Mixing bowls help keep your workspace organized. A whisk mixes the wet ingredients well, while a spatula helps spread the batter smoothly. A toothpick is essential for testing if your brownies are done. With these items, you’re ready to create a delicious dessert! {{ingredient_image_2}} - Preheat oven to 350°F (175°C). - Grease baking pan or line with parchment paper. First, I heat the oven. This step helps the brownies bake evenly. I also prepare a 9x13 inch baking pan. Greasing the pan or using parchment paper makes for easy removal. This way, my brownies won’t stick. - Combine melted butter and sugar. - Add eggs one at a time and vanilla extract. Next, I mix the melted butter and sugar in a large bowl. I whisk until it is smooth. Then, I add the eggs one at a time. Mixing well after each egg is key. Finally, I pour in the vanilla extract. This adds great flavor to my batter. - Mix flour, cocoa powder, baking powder, and salt. - Gradually add to wet mixture. In a separate bowl, I combine the flour, cocoa powder, baking powder, and salt. I mix these dry ingredients well. Then, I slowly add them to the wet mixture. I stir gently to combine everything. It’s important not to overmix; I want my brownies to be soft. - Fold in chocolate chips. - Layer brownie batter and Oreo cookies. - Bake and check for doneness. Now, I fold in the chocolate chips. They add a rich touch to the batter. I pour about two-thirds of the brownie batter into the prepared pan. Then, I place Oreo cookies on top in a single layer. After that, I dollop the rest of the brownie batter over the Oreos. I want to cover them completely. Finally, I pop the pan into the oven and bake for 30-35 minutes. To check if they’re done, I use a toothpick. It should come out with a few moist crumbs, but no wet batter. Once baked, I let them cool for 20 minutes before slicing. This makes cutting easier and keeps them from crumbling. To make your brownies just right, avoid overmixing the batter. When you stir, do it gently until the dry and wet ingredients just come together. This keeps your brownies soft and fudgy. Every oven is different, so check your brownies at 30 minutes. If a toothpick comes out with some moist crumbs, they are done. If it has wet batter, bake for a few more minutes. For a special treat, serve warm brownies with a scoop of ice cream. Vanilla is a great choice, but chocolate sauce also works well. To make it even better, sprinkle crushed Oreos on top. This adds a nice crunch and makes the dessert look stunning. Measure your ingredients accurately. Too much flour can make your brownies dry. If your brownies turn out too dry, try adding a little melted butter on top. If they are too gooey, bake them a bit longer. Just watch them closely, so they don’t burn. Pro Tips Use Room Temperature Ingredients: Allow your eggs and butter to sit at room temperature before mixing. This helps create a smoother batter, leading to fudgier brownies. Don’t Overmix the Batter: When combining the dry and wet ingredients, mix just until incorporated. Overmixing can result in tough brownies. Check for Doneness Carefully: Insert a toothpick in the center; it should come out with a few moist crumbs. If it’s clean, the brownies may be overcooked. Let Them Cool: Allow the brownies to cool in the pan for at least 20 minutes before cutting. This helps them set and makes for cleaner slices. {{image_4}} You can make Oreo stuffed brownies even more exciting. Try adding different types of cookies. Chocolate chip cookies or peanut butter cookies can bring new flavors. You can also mix in nuts like walnuts or pecans for a crunchy bite. If you love chocolate, consider adding white chocolate chips or chunks. These small tweaks can change the whole taste. If you need a gluten-free recipe, it’s easy to adapt. Use a gluten-free flour blend instead of all-purpose flour. This will keep the texture nice and soft. You might need to adjust the baking time, as gluten-free flours can cook faster. Always check your brownies a bit earlier to avoid overbaking. You can also make these brownies vegan. For eggs, try using flaxseed meal or applesauce as a replacement. Mix one tablespoon of flaxseed meal with three tablespoons of water for each egg. This will help bind the brownies. For butter, use dairy-free options like coconut oil or vegan butter. You can find dairy-free chocolate chips too, which work perfectly in this recipe. To keep your Oreo stuffed brownies fresh, refrigerate them. First, let them cool completely. Then, slice your brownies into squares. Place them in an airtight container. This will help keep them moist and tasty. You can store them in the fridge for up to five days. If you want to save some for later, freezing is a great option. First, make sure your brownies are completely cool. Wrap each brownie tightly in plastic wrap. Then, place them in a freezer-safe bag or container. They will stay fresh for up to three months. When you’re ready to enjoy them, take the brownies out of the freezer. Let them thaw in the fridge overnight. If you're in a hurry, you can thaw them at room temperature for about an hour. To reheat, warm them in the microwave for about 10-15 seconds. This will make them soft and gooey again. Enjoy your delicious Oreo stuffed brownies! Oreo stuffed brownies last about 3 to 5 days when stored properly. To keep them fresh, place the brownies in an airtight container. You can also add a slice of bread to keep them moist. This method helps prevent the brownies from drying out too quickly. Yes, you can use other types of cookies! Here are some fun options: - Peanut butter cookies for a nutty flavor. - Chocolate chip cookies for extra chocolate goodness. - Mint chocolate cookies for a refreshing twist. Feel free to mix and match based on your taste! To check if your brownies are done, insert a toothpick into the center. If it comes out with a few moist crumbs, they are ready. If the toothpick has wet batter, they need more time. Remember, it’s better to underbake slightly for a fudgy texture! You now have a simple guide to making Oreo-stuffed brownies. We covered all the ingredients and tools you need. I shared easy steps to mix and bake delicious brownies. Remember, avoiding overmixing is key for the perfect texture. Feel free to try different cookie flavors or make them gluten-free or vegan. Enjoy your brownies fresh or stored properly. With these tips, you can bake with confidence and impress your friends and family. Happy baking!

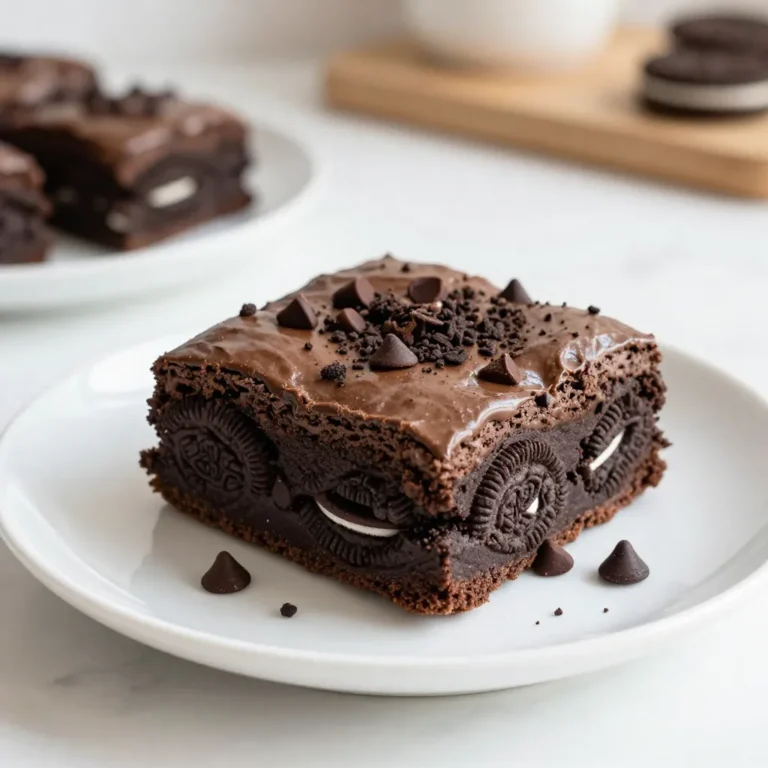
Oreo Stuffed Brownies Rich and Decadent Delight

PREV 1 … 26 27 28 … 48 NEXT
meal plan mapper

explore

DessertsDinnerAppetizersDrinks

Our Policies

  • Cookie Policy
  • Copyright Policy
  • Disclaimer
  • GDPR Policy
  • Terms Of Use
Back to Top
  • About
  • Contact Us
  • Privacy Policy
© 2025 meal plan mapper