FREE DINNER EBOOK! Get your copy!
  • Cookie Policy
  • GDPR Policy
  • Disclaimer
  • Terms Of Use
  • Visit my other site: Fun Cookie Recipes
meal plan mapper
  • Home
  • Dinner
  • Desserts
  • Drinks
  • Appetizers
  • Contact
  • About
  • Privacy Policy
  • Home
  • Dinner
  • Desserts
  • Drinks
  • Appetizers
  • Contact
  • About
  • Privacy Policy
  • Cookie Policy
  • GDPR Policy
  • Disclaimer
  • Terms Of Use
Visit my other site: Fun Cookie Recipes

HOME / CATEGORIES /

Latest

- 2 cups milk (choose dairy or your favorite plant-based alternative) - 1 cup water - 2 tablespoons black tea leaves or 2 black tea bags - 1/4 cup fresh peppermint leaves (or 1 tablespoon dried peppermint) - 2 tablespoons honey or sugar (adjust for sweetness) - 1/2 teaspoon vanilla extract (optional) - Whipped cream (optional, for topping) - Crushed peppermint candies (for garnish) To make peppermint milk tea, gather these simple ingredients first. You can use any milk you like. Dairy milk gives a rich taste, while plant-based options offer a lighter feel. I often use almond or oat milk for their unique flavors. Next, choose your tea. Black tea gives a strong base. Use either loose leaves or bags. If you love peppermint, fresh leaves work best. Dried peppermint can also be used if fresh isn't available. When it comes to sweeteners, honey adds a lovely floral note. Sugar is a classic choice, and you can adjust the amount to match your taste. The optional vanilla extract adds warmth and depth, making your drink extra special. Finally, for toppings, whipped cream creates a creamy layer on top. Crushed peppermint candies are perfect for a festive touch and add a sweet crunch. Enjoy these ingredients as you prepare a delightful cup of peppermint milk tea! {{ingredient_image_2}} Boiling water is key for great flavor. It helps release the tea's and peppermint's full taste. Use medium heat to get the water rolling. A good boil makes a stronger base for your tea. Timing is important when steeping tea. For black tea, steep for about 5 minutes. If you use tea bags, the time is the same. Tea leaves and bags both work well, but loose leaves give a richer taste. You can use fresh or dried peppermint. If using fresh leaves, steep them with the tea for 3 minutes. For dried peppermint, add it to the tea and steep for 5 minutes. This helps bring out the minty flavor. Strain the tea mixture into a clean pot. This removes the leaves and peppermint. Next, gently heat 2 cups of milk in a separate pan. Keep the heat low to avoid boiling. If you want, add vanilla extract for extra flavor. Pour the peppermint milk tea into cups with care. To make it special, top with whipped cream. For a fun twist, sprinkle crushed peppermint candies on top. This adds color and crunch to your drink. You can easily change the sweetness of your peppermint milk tea. Start with two tablespoons of honey or sugar. If you want it sweeter, add more, a little at a time. For a healthy twist, try maple syrup or agave nectar. You can also use stevia or monk fruit for a low-calorie option. Adjust based on your taste and dietary needs. Want to spice things up? Try adding chocolate or cinnamon. A little cocoa powder goes a long way for a chocolatey treat. If you love spices, a pinch of nutmeg or ginger can bring warmth. Just be careful not to overpower the peppermint. Balance is key here. You want the peppermint to shine through. The creaminess of your milk tea matters. For a rich feel, choose whole milk or a creamy plant-based milk like oat or coconut. Heat your milk gently to avoid boiling, which can change the texture. If you want a frothy finish, use a milk frother or shake the milk in a jar before adding it. This will give you that café-style foam. Pro Tips Fresh is Best: Using fresh peppermint leaves will enhance the flavor significantly compared to dried. Look for vibrant, green leaves for the best taste. Temperature Matters: Ensure the milk is warmed gently, as heating it too quickly can cause it to scorch and alter the flavor. Use low to medium heat for best results. Sweetness Adjustment: Start with less sweetener and adjust to taste. This allows you to control the sweetness and enjoy the tea's natural flavors. Garnish with Flair: Crushed peppermint candies not only add a festive touch but also provide a delightful crunch that complements the creamy texture of the milk tea. {{image_4}} To make iced peppermint milk tea, start by brewing your tea as normal. After straining the tea, let it cool at room temperature. Once cooled, pour the tea over a glass filled with ice. This adds a refreshing chill. - Ice and Presentation Tips: Use clear glasses to see the pretty layers. You can add a sprig of fresh peppermint for a pop of color. If you want, drizzle some chocolate syrup for extra flair. For a fancier version, turn your peppermint milk tea into a latte. After brewing and straining your tea, foam some warm milk. You can use a frother or whisk to create foam. - Coffee or Espresso Additions: Pour the brewed tea into a cup and add the foamed milk on top. If you like coffee, add a shot of espresso for a rich twist. Sweeten to taste. You can easily make this tea fit your diet. For dairy-free options, use almond, oat, or soy milk. These alternatives still taste great with peppermint. - Recommended Substitutions: If you want to avoid sugar, try using stevia or monk fruit sweetener. These will keep the tea sweet without added calories. Adjusting these ingredients can change the flavor. Dairy-free milk may taste nuttier, while sugar substitutes can alter the sweetness. Experiment to find your perfect blend! After making peppermint milk tea, let it cool to room temperature. Pour any leftovers into a clean, airtight container. Store it in the fridge. It will stay fresh for about 2 to 3 days. Remember to check for any off smells before drinking. To reheat your tea, pour it into a saucepan. Warm it over low heat. Stir gently to avoid burning. You want to bring it back to a nice warm temperature without losing any flavor. Avoid boiling, as this can change the taste and texture. You can freeze peppermint milk tea, but it’s best to separate the milk and tea first. Pour the tea into ice cube trays for freezing. This way, you can use the cubes later for smoothies or other drinks. To make peppermint tea concentrate, brew a stronger batch. Store it in a jar in the fridge for up to a week. Use it to make quick cups of tea whenever you want. Peppermint tea has many health benefits. It helps with digestion and can ease stomach pain. The tea also has soothing properties. It can calm headaches and reduce stress. Some people drink it to help with bad breath and sinus issues. Peppermint tea is caffeine-free, making it a great choice for any time of day. Yes, you can use other herbs. For a different taste, try spearmint, lemon balm, or even chamomile. Each herb has a unique flavor. Spearmint will taste sweeter, while chamomile will add a floral note. Keep in mind that the tea's taste will change based on the herb you choose. You can find pre-made peppermint milk tea in many stores. Brands like Tazo and Stash offer great options. Look for them in the tea aisle. You can also check online retailers like Amazon or specialty tea shops. They often have ready-to-drink bottles or tea bags for easy brewing. Peppermint milk tea can be caffeine-free. If you use black tea, it will have some caffeine. If you want a caffeine-free option, use herbal tea or skip the tea altogether. This way, you enjoy the minty flavor without any caffeine jitters. This blog post covered all you need to make delicious peppermint milk tea. You learned about the key ingredients, step-by-step instructions, and helpful tips to enhance your drink. Whether you prefer it hot or cold, you can customize sweetness and flavor to fit your taste. Remember, proper storage keeps your tea fresh longer. Explore the variations and enjoy the many benefits of peppermint tea. Now, it’s your turn to create a delightful cup at home!

Peppermint Milk Tea Refreshing and Easy Recipe

To make Sticky Garlic Chicken Noodles, you'll need: - 300g egg noodles - 2 tablespoons vegetable oil - 2 chicken breasts, thinly sliced - 4 garlic cloves, minced - 1 tablespoon fresh ginger, grated - 1/4 cup soy sauce - 2 tablespoons honey - 1 tablespoon rice vinegar - 1 tablespoon oyster sauce - 1/2 teaspoon red pepper flakes (optional) - 1 green onion, finely chopped for garnish - Sesame seeds for garnish This recipe serves four people. Each person gets a hearty bowl of sticky noodles with tasty chicken. You can easily adjust the amounts if you need to feed more or fewer people. Just keep the same ratios for the sauce and noodles. You can swap ingredients if you have dietary needs: - Use rice noodles instead of egg noodles for a gluten-free option. - Try tofu or shrimp instead of chicken for a different protein. - Maple syrup can replace honey for a vegan choice. - If you don’t have oyster sauce, a mix of soy sauce and a dash of vinegar can work as a substitute. - You can skip red pepper flakes if you prefer no heat. These substitutions make the dish flexible and fun to adjust to your taste! {{ingredient_image_2}} To cook the noodles, fill a large pot with salted water. Bring it to a rolling boil. Add 300g of egg noodles to the pot. Cook them for about 4 to 6 minutes. The noodles should be al dente. After cooking, drain them in a colander. Rinse them under cold water to stop cooking. Set the noodles aside for later. Grab a small mixing bowl. Combine 1/4 cup soy sauce, 2 tablespoons honey, 1 tablespoon rice vinegar, and 1 tablespoon oyster sauce. If you like heat, add 1/2 teaspoon red pepper flakes. Whisk everything together well. This sauce will coat the chicken and noodles nicely. Set the sauce aside for later use. Take a large skillet or wok and heat 2 tablespoons of vegetable oil over medium-high heat. Once the oil is hot, add 2 thinly sliced chicken breasts. Cook the chicken for about 5 to 7 minutes. Stir it occasionally until it turns golden brown. Ensure the chicken is cooked through. When done, transfer the chicken to a plate and set it aside. In the same skillet, add 4 minced garlic cloves and 1 tablespoon of grated fresh ginger. Sauté these for about 1 minute. Cook until they become fragrant. Be careful not to burn the garlic, as it can taste bitter. Put the cooked chicken back into the skillet. Pour the prepared sauce over the chicken. Stir everything together well. Let it simmer for 2 to 3 minutes. This helps the sauce thicken and cling to the chicken. Carefully add the cooked egg noodles to the skillet. Toss everything gently to coat the noodles in the sticky garlic sauce. Once everything is mixed, remove the skillet from the heat. Serve the sticky garlic chicken noodles in bowls. Garnish with finely chopped green onions and a sprinkle of sesame seeds for a nice touch. Enjoy your meal! To cook the best noodles, follow these simple steps: - Use plenty of water. This helps the noodles cook evenly. - Add salt to the boiling water. It adds flavor to the noodles. - Cook until al dente, usually 4-6 minutes. They should be firm yet tender. - Rinse the noodles in cold water. This stops cooking and keeps them from sticking. Cooking chicken well is key to a great dish. Here are some tips: - Slice the chicken thinly. This helps it cook evenly and quickly. - Use a hot skillet for sautéing. This gives the chicken a nice sear. - Avoid crowding the pan. Cook in batches if needed to ensure browning. - Always check doneness. Chicken should reach an internal temperature of 165°F. A good sauce can elevate your meal. Here’s how to boost the flavor: - Use fresh garlic and ginger. Fresh ingredients add a punch of taste. - Adjust the honey. If you like it sweet, add a bit more. - Add a splash of lime juice for brightness. This can balance the sweetness. - Experiment with spices. Try adding a pinch of five-spice powder or sesame oil for depth. Pro Tips Marinate for More Flavor: If you have time, marinate the chicken in the sauce for 30 minutes before cooking. This allows the flavors to penetrate the meat, making it even more delicious. Use Fresh Ingredients: Fresh garlic and ginger elevate the dish's flavor significantly compared to dried alternatives. Always opt for fresh when possible. Adjust Spice Level: Feel free to adjust the amount of red pepper flakes or add fresh chili for a spicier kick. Customize the heat to your taste! Perfect Noodle Texture: Rinsing the noodles under cold water after cooking stops the cooking process and helps maintain their texture, ensuring they don’t become mushy. {{image_4}} You can switch out chicken for other proteins. Shrimp, beef, or tofu work great. For shrimp, cook it until pink and tender. For beef, slice it thin and sauté until just brown. Tofu should be firm and pan-fried until crispy. Each protein gives a different taste and texture. If you want a vegetarian dish, replace chicken with veggies. Use bell peppers, carrots, or broccoli. You can also add mushrooms for a meaty bite. Just sauté the veggies until tender. The sauce still adds that sticky goodness you love. Feel free to mix up the flavors. Add lime juice for a zesty kick. Swap soy sauce for tamari to go gluten-free. If you love heat, toss in more red pepper flakes. You can also try adding hoisin sauce for a sweet twist. These changes keep the dish fresh and exciting. To store your leftover sticky garlic chicken noodles, let them cool first. Place them in an airtight container. You can keep them in the fridge for up to three days. This allows the flavors to meld, making them even tastier when you reheat them. When it’s time to enjoy your leftovers, reheat them on the stove for best results. Add a splash of water or soy sauce to prevent sticking. Heat over medium until hot. You can also use the microwave. Just place them in a bowl, cover with a damp paper towel, and heat for one to two minutes. Stir halfway for even heating. If you want to freeze the sticky garlic chicken noodles, use a freezer-safe container. You can freeze them for up to three months. When you’re ready to eat, let them thaw in the fridge overnight. Reheat as mentioned above once they are thawed. This way, you can enjoy a quick meal even on busy days. You can use tamari as a soy sauce substitute. Tamari is gluten-free and has a similar taste. Coconut aminos is another great option. It is lighter and sweeter than soy sauce. Both will add flavor to your dish without changing it too much. To make Sticky Garlic Chicken Noodles gluten-free, swap out regular soy sauce for tamari or coconut aminos. You should also use gluten-free noodles. Rice noodles work well and are easy to find. This way, you can enjoy the dish without worry. Yes, you can make this dish ahead of time. Cook the chicken and sauce, then store them in the fridge. When ready to eat, reheat the chicken and mix in the cooked noodles. This saves time and keeps the flavors fresh. Sticky Garlic Chicken Noodles pair well with a fresh salad or steamed veggies. You can also serve them with spring rolls or dumplings for a full meal. Add some pickled vegetables for extra crunch and flavor. This makes your meal more exciting and delicious. This post detailed the key elements for making Sticky Garlic Chicken Noodles. We explored the ingredients and their portions. I shared tips for perfect noodles and chicken. We also discussed variations to suit different tastes. Finally, I explained how to store and reheat leftovers effectively. Remember, cooking is fun! Use this guide to create your own dish. Enjoy your meal and share with friends!

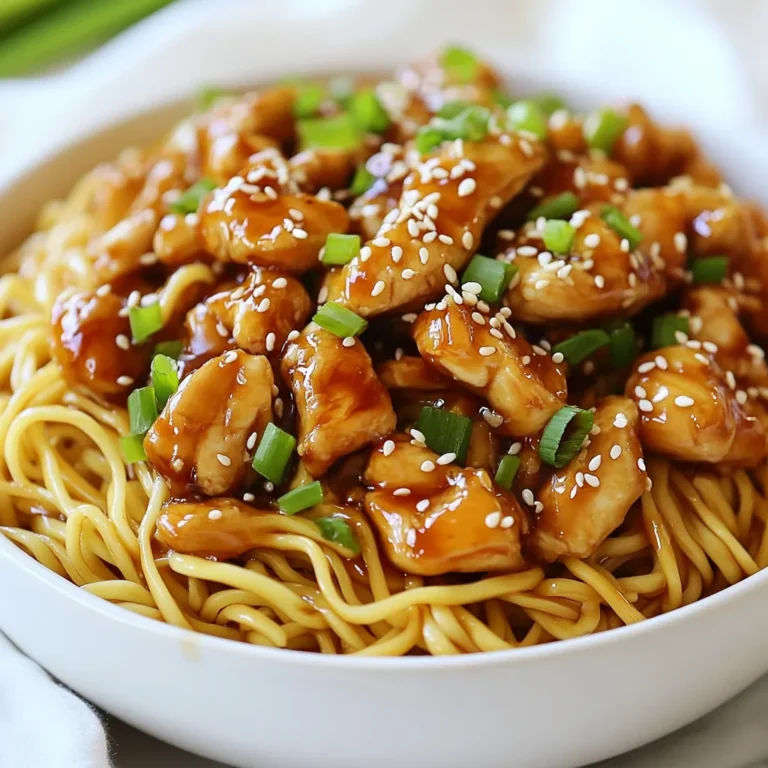
Sticky Garlic Chicken Noodles Quick and Simple Meal

To make a delicious Crack Chicken Penne Bake, you need the following ingredients: - 12 oz penne pasta - 2 cups cooked chicken, shredded - 1 cup cream cheese, softened - 1 cup shredded cheddar cheese - ½ cup ranch dressing - 1 cup chicken broth (low sodium preferred) - 1 cup frozen broccoli florets, thawed and chopped - 1 teaspoon garlic powder - 1 teaspoon onion powder - Salt and black pepper to taste - ½ cup crispy fried onions - Fresh parsley, finely chopped Each ingredient plays a key role in creating this rich dish. The penne pasta serves as the heart of the bake, giving it structure. I love using shredded rotisserie chicken for a quick option. Cream cheese adds creaminess, while ranch dressing brings a tangy kick. The chicken broth keeps the dish moist. Broccoli adds a nice texture and color. Garlic and onion powders enhance the flavor without overpowering it. Finally, crispy fried onions add crunch and visual appeal, while parsley brightens everything up. Gather everything before you start cooking. Trust me, this will make your cooking experience smooth and fun! {{ingredient_image_2}} - Preheat oven to 350°F (175°C). - Prepare baking dish with cooking spray or oil. - Boil salted water and cook penne as per package instructions. - Drain and set pasta aside. - Combine chicken, cream cheese, ranch dressing, broth, garlic and onion powders, salt, and pepper. - Blend until smooth and creamy. - Fold in cooked penne and broccoli. - Spread mixture into the baking dish. - Add cheddar cheese and crispy fried onions on top. - Bake for 25-30 minutes until cheese is melted and bubbly. - Rest for 5-10 minutes before slicing. - Garnish with fresh parsley. Each step builds flavor and texture. The creamy mix combined with the penne creates a rich dish. Baking it allows the cheese to melt and become golden. The crispy onions add a lovely crunch. Enjoy this warm meal fresh from the oven! To cook penne pasta al dente, start with salted water. The salt adds flavor. Boil the water before adding the pasta. Cook the penne for about 10-12 minutes. Check the package for specific times. Taste a piece to see if it's firm but not hard. Drain the pasta in a colander and do not rinse it. Rinsing will wash away the starch that helps the sauce stick. For this recipe, you can use rotisserie chicken or cooked chicken breasts. Rotisserie chicken is easy and packed with flavor. If you use cooked chicken breasts, season them well before cooking. To shred the chicken, use two forks. Gently pull the meat apart until it is in small pieces. This helps it mix well with the sauce. To boost flavor, think about adding spices and herbs. Garlic powder and onion powder are great choices. You can also add dried basil or parsley for more taste. If you want cream cheese to be extra smooth, let it sit at room temperature before mixing. This helps it blend into the sauce more easily. Pro Tips Use Rotisserie Chicken: For a quick and convenient option, use store-bought rotisserie chicken. It adds flavor and saves time on cooking. Customize Your Cheese: Feel free to mix different types of cheese such as mozzarella or pepper jack for a unique flavor profile. Make it Ahead: This dish can be assembled in advance and stored in the refrigerator. Just bake it when you're ready to serve! Add Extra Veggies: Incorporate other vegetables like bell peppers or spinach for added nutrition and color. {{image_4}} You can add more veggies to your Crack Chicken Penne Bake. Spinach is a great choice. It wilts down nicely and adds color. Bell peppers also work well. They bring sweetness and crunch. You can even try zucchini or cherry tomatoes. Just chop them up and mix them in. More veggies make it healthier and tastier. If you want to switch up the protein, consider using turkey. Ground turkey or shredded turkey both fit nicely. For a plant-based option, tofu is great too. Just press it to remove extra water before cooking. You can also use chickpeas for a hearty twist. Each protein brings a unique flavor to the dish. Cheese can change the whole taste of the bake. Instead of cheddar, try mozzarella for a milder flavor. Gouda adds a nice smoky taste. You might also like pepper jack for a spicy kick. Feta cheese gives a tangy twist. Mixing cheeses can create a fun, new flavor profile. Experiment and find what you love best! To store leftover Crack Chicken Penne Bake, let it cool first. Then, place it in an airtight container. Ensure you cover it well to keep it fresh. You can keep it in the fridge for up to 3 days. When you’re ready to eat, just reheat it in the oven or microwave. If you want to freeze the bake, use a freezer-safe container. Make sure it’s tightly sealed to prevent freezer burn. You can freeze it for about 2 to 3 months. To reheat, allow it to thaw overnight in the fridge. Then, bake it at 350°F (175°C) until hot and bubbly. In the fridge, your Crack Chicken Penne Bake lasts for about 3 days. If frozen, it can last for 2 to 3 months. Always check for any signs of spoilage before eating. Proper storage helps keep your meal tasty and safe. Yes, you can prep this dish in advance. You can cook the pasta and mix the creamy chicken base. Store them separately in the fridge for up to two days. When ready, combine them and bake as directed. This saves time during busy days. I love serving this meal with a light green salad. It adds a fresh crunch. Garlic bread also pairs well, adding warmth and flavor. Another option is steamed veggies, which brighten the plate and boost nutrition. To lighten this dish, use low-fat cream cheese. Swap regular ranch dressing for a lower-calorie version. You could add more veggies, like spinach or bell peppers, to boost nutrients. Using less cheese or a blend of cheeses can also help cut calories. Yes, whole grain penne is a great choice! It adds fiber and nutrients. The taste is slightly nuttier but blends well with the creamy sauce. This option makes the dish a bit healthier without losing flavor. This recipe for Crack Chicken Penne Bake blends creamy flavors with tender chicken and pasta. You learned how to prepare the dish step-by-step, from cooking the penne to baking it perfectly. Remember, you can customize it with different veggies or proteins. Lastly, store leftovers properly for future meals. Enjoy making this dish for your friends and family!

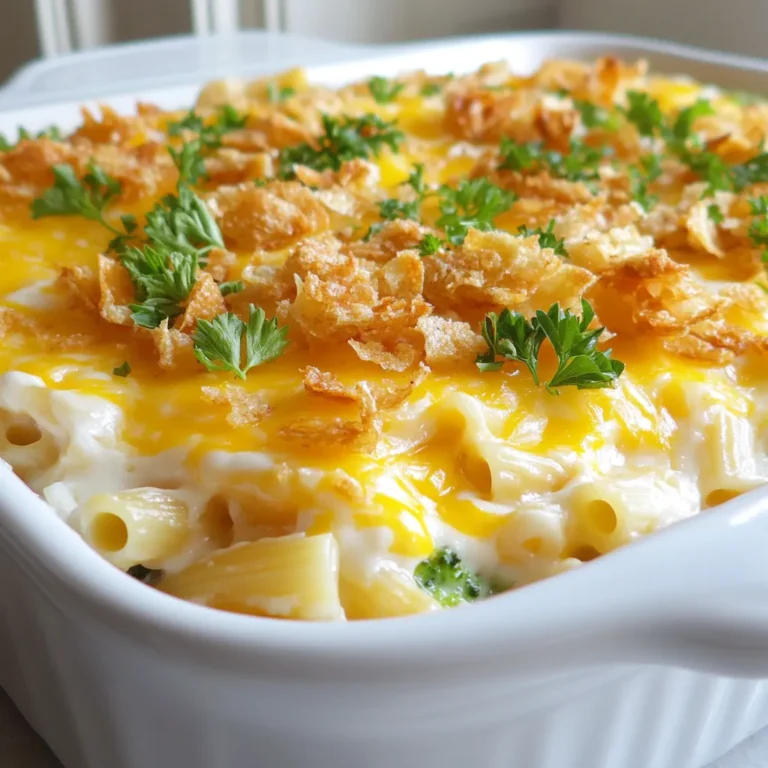
Crack Chicken Penne Bake Flavorful and Comforting Meal

- 1 pound ground beef - 1 large onion, finely chopped - 1 green bell pepper, finely chopped - 2 cloves garlic, minced - 1 can (14 ounces) diced tomatoes, with juices - 2 tablespoons tomato paste - 1 tablespoon olive oil - 1 tablespoon apple cider vinegar - 1 cup pimento-stuffed green olives, sliced - 1/4 cup raisins - 1 teaspoon ground cumin - 1 teaspoon dried oregano - Salt and freshly ground black pepper, to taste - Fresh cilantro leaves for garnish (optional) When making Cuban Beef Picadillo, the right ingredients matter. Ground beef serves as the main protein. It gives the dish a hearty base. Fresh vegetables add flavor and texture. I use onion, green bell pepper, and garlic. These veggies create a savory aroma. Diced tomatoes and tomato paste bring richness. They add both moisture and flavor to the dish. Olive oil is essential for cooking. It helps sauté the vegetables and adds a nice taste. Apple cider vinegar provides a tangy kick and balances the dish's sweetness. Herbs and spices are vital. Ground cumin and dried oregano bring warmth and depth. For a unique twist, I add pimento-stuffed green olives. They give a salty bite. Raisins balance this with a touch of sweetness. This combo creates a dish full of flavor. Each ingredient plays a role in making Cuban Beef Picadillo special. Choose fresh and high-quality items for the best result. {{ingredient_image_2}} - Heat 1 tablespoon of olive oil in a large skillet over medium heat. - Add 1 large onion and 1 green bell pepper, both finely chopped. - Sauté for about 5 minutes until the onion is soft and clear. - Then, add 2 cloves of minced garlic and stir for 1 minute. The garlic should smell great. - Raise the heat to medium-high and add 1 pound of ground beef. - Use a spatula to break the meat into small pieces. - Brown the beef for 6 to 8 minutes, stirring often. - If there’s too much fat, drain it out carefully. - Next, stir in 1 can of diced tomatoes, 2 tablespoons of tomato paste, and 1 tablespoon of apple cider vinegar. - Add 1 teaspoon of ground cumin and 1 teaspoon of dried oregano. Mix well. - Now, add 1 cup of sliced pimento-stuffed green olives and 1/4 cup of raisins. - Stir until everything is evenly mixed. - Season with salt and freshly ground black pepper to taste. - Reduce the heat and let it simmer for 15 to 20 minutes. - Stir occasionally to keep it from sticking. - When finished, taste and adjust the seasoning as needed. To get that true Cuban taste, start with quality beef. Use fresh ground beef for the best flavor. Fresh ingredients make a big difference too. Choose ripe tomatoes and bright bell peppers. The right balance of sweetness and acidity is key. The raisins add sweetness, while the vinegar brings a tang that brightens the dish. Simmering is crucial for depth of flavor. Let the picadillo cook slowly. This helps the flavors mix well. A good simmer takes about 15 to 20 minutes. Stirring is also important. It helps cook the beef evenly and prevents sticking. When serving Cuban Beef Picadillo, pair it with fluffy white rice. Black beans are a classic side that complements the dish. You can also serve it with crispy fried plantains. For a pop of color, garnish with fresh cilantro leaves. A lime wedge on the side adds a zesty touch. Pro Tips Use Lean Ground Beef: Opt for 80/20 or leaner ground beef to reduce excess fat while still enjoying flavorful meat. Enhance with Spices: Feel free to add a pinch of cayenne pepper or smoked paprika for an extra layer of flavor and a hint of spice. Let it Rest: Allow the picadillo to rest for a few minutes after cooking; this helps the flavors meld together for a more delicious dish. Pair with Fresh Sides: Complement the picadillo with fresh avocado slices or a simple green salad to balance the richness of the dish. {{image_4}} You can swap ground beef for other meats. Ground turkey or chicken works well. They will keep the dish light but still tasty. If you want a vegetarian option, try lentils or mushrooms. They both add a nice texture and flavor. To add depth, consider using spices. Bay leaves and paprika are great choices. They will boost the aroma and taste. You can also add more vegetables. Chopped carrots blend well and add sweetness. There are fun ways to serve picadillo. You can fill tacos with it for a hand-held meal. Another option is to serve it over polenta for a hearty dish. You could also create a Cuban-style bowl. Just add rice and beans for a complete meal. To keep your Cuban Beef Picadillo fresh, use airtight containers. Glass or plastic containers work well. Store it in the fridge for up to four days. Make sure it cools down before sealing. This helps keep the flavors strong and safe to eat. You can freeze Cuban Beef Picadillo for later use. Let it cool completely first. Then, place it in a freezer-safe container or bag. Make sure to push out any air to avoid freezer burn. It can last for up to three months in the freezer. When ready to enjoy, thaw it overnight in the fridge for best flavor. To reheat, use the stove or microwave. If using the stove, heat it in a skillet over low heat. Stir often to keep it from sticking. If you prefer the microwave, place it in a bowl and cover. Heat it in 30-second intervals, stirring in between. The ideal serving temperature is around 165°F. This ensures it's hot and tasty. Cuban Beef Picadillo is a savory dish made with ground beef. It has roots in Cuba and blends Spanish, African, and Caribbean flavors. This dish is comforting and packed with spices. It often includes olives and raisins, giving it a unique taste. Cuban families enjoy picadillo for special occasions and everyday meals. Each bite tells a story of rich culture and tradition. Yes, you can make Cuban Beef Picadillo ahead of time! It stores well in the fridge for up to three days. To do this, let the dish cool, then place it in an airtight container. For longer storage, you can freeze it. Just make sure to use a freezer-safe container. When ready to eat, thaw it overnight in the fridge. Reheat gently on the stove to keep the flavors fresh. Cuban Beef Picadillo pairs well with many sides. Here are some popular options: - Fluffy white rice - Black beans - Crispy fried plantains - A simple green salad - Avocado slices You can also serve it with lime wedges for a zesty twist. Each side enhances the dish’s flavor and makes your meal even more delightful. Enjoy your Cuban feast! Cuban Beef Picadillo offers a tasty mix of ground beef, veggies, and spices. You learned about essential ingredients, step-by-step cooking, and tips for the best flavor. Remember to adjust flavors for your taste and try different proteins if needed. Storing properly keeps leftovers fresh. Exploring this dish pays off with rich meals or simple snacks. Enjoy bringing this Cuban classic to your kitchen and sharing it with loved ones.

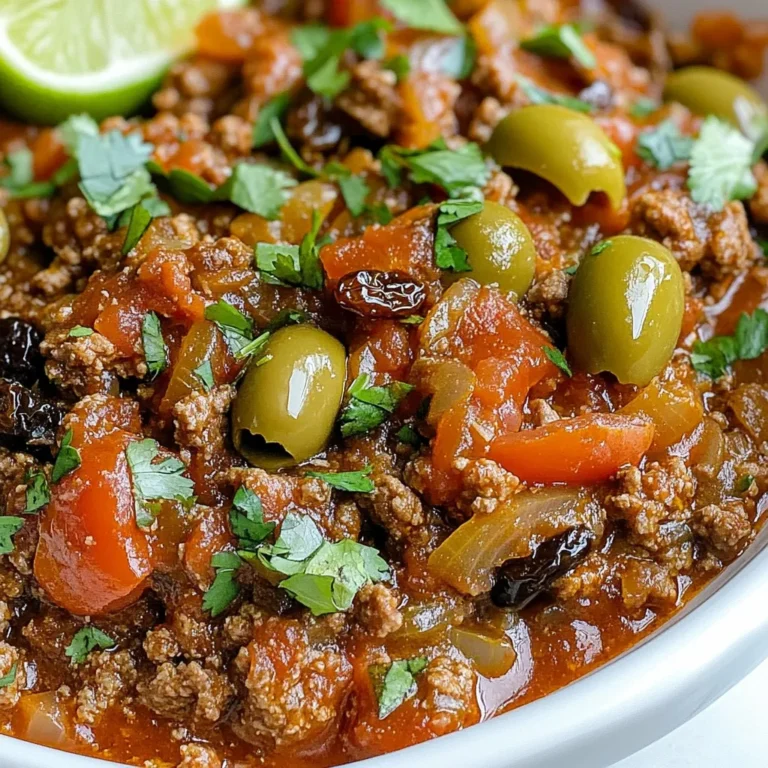
Cuban Beef Picadillo Flavorful and Easy Recipe

- 1 lb turkey breast, thinly sliced into strips - 1 cup mushrooms, sliced (cremini or button) - 1 medium onion, finely chopped - 2 cloves garlic, minced - 1 cup low-sodium chicken broth - 1 cup sour cream - 1 teaspoon smoked paprika - 1 teaspoon dried thyme - Fresh parsley, chopped - 8 oz egg noodles or your choice of pasta The main ingredients of this creamy turkey stroganoff make it rich and tasty. Turkey breast is lean, so it cooks quickly and stays juicy. The mushrooms add a nice earthiness. Onions and garlic give a sweet, savory base to the dish. Next, we have the broth and sour cream. Using low-sodium chicken broth keeps the salt level in check. Sour cream creates that creamy texture we love. For seasoning, smoked paprika adds depth. Dried thyme brings a warm herbal note. Fresh parsley not only adds color but also a refreshing taste as a garnish. Lastly, you need pasta. Egg noodles are perfect for this dish. They soak up the sauce well. If you prefer, you can use other pasta types too. Just make sure to cook them al dente for the best texture. These simple ingredients come together to create a delicious meal that anyone can make. {{ingredient_image_2}} To cook the egg noodles, fill a large pot with water. Add a good amount of salt to the water. Bring it to a rolling boil. Once boiling, add the noodles. Cook them according to the package instructions. This usually takes about 7-9 minutes for al dente. Al dente means the pasta is firm but not hard. Drain the noodles and set them aside. Save a little pasta water in case you want to adjust the sauce later. In a large skillet, heat 2 tablespoons of olive oil over medium-high heat. Add the thinly sliced turkey breast. Season with salt and black pepper. Sauté for about 5-7 minutes. Stir occasionally until the turkey is golden brown and cooked through. This helps avoid dryness in the turkey. Once done, remove the turkey from the skillet and place it on a plate to keep it warm. In the same skillet, add the finely chopped onion. Sauté for about 3-4 minutes until it softens. Next, add the minced garlic and sliced mushrooms. Cook these for about 5 minutes. Stir often until the mushrooms turn golden brown. This step is key as it helps release their moisture, adding flavor to the dish. Now, sprinkle 2 tablespoons of all-purpose flour over the mushroom mixture. Stir it in well to coat the vegetables. Cook for about 1 minute to remove the raw flour taste. Gradually whisk in 1 cup of low-sodium chicken broth. Keep stirring to prevent lumps. This will create a nice base for your sauce. Next, stir in 1 teaspoon of smoked paprika and 1 teaspoon of dried thyme. Bring this mixture to a gentle simmer. Let it cook for about 5 minutes. This allows the sauce to thicken slightly and the flavors to meld together. Stir occasionally to avoid sticking to the pan. Now, lower the heat to a gentle simmer. Stir in 1 cup of sour cream. Mix it until the sauce looks creamy and well blended. Add the cooked turkey back into the skillet. Mix everything together thoroughly. Let it simmer for an additional 2-3 minutes to heat through. If the sauce is too thick, add a bit of the reserved pasta water to reach your desired consistency. To avoid common mistakes, aim for tender turkey. Overcooking makes it dry. Cook just until golden brown. For a creamy sauce, use sour cream at the end. Stir it in slowly. For texture, sprinkle flour over the mushrooms. This helps thicken the sauce. Whisk in the broth slowly to avoid lumps. Let it simmer gently. This builds a nice, thick sauce. For a flavor boost, add garlic powder or extra spices. Smoked paprika adds depth. You can also try a pinch of cayenne for heat. Fresh herbs like parsley or thyme brighten the dish. Add them at the end for a fresh taste. Pair this stroganoff with egg noodles or a side of steamed veggies. Broccoli or green beans work well. For presentation, serve in deep bowls. Top with chopped parsley for color. A sprinkle of black pepper adds a nice touch too. Pro Tips Use Fresh Herbs: Fresh parsley or thyme can elevate the dish with a burst of flavor. Add them at the end for the best taste. Cook Noodles Al Dente: Ensure your noodles are cooked al dente for the best texture; they will continue to absorb sauce as they sit. Adjust Thickness: If your sauce is too thick, gradually add reserved pasta water until you reach your desired consistency. Leftover Turkey Hack: This recipe is perfect for using up leftover turkey after holidays. Just skip the sautéing step for a quicker meal! {{image_4}} You can switch the turkey for chicken or beef. Both meats work well in stroganoff. If you prefer a vegan dish, try using plant-based crème. This gives you the creamy texture without dairy. While egg noodles are classic, you can use gluten-free pasta. Rice noodles or quinoa pasta also taste great. These options make it easy for those with dietary needs. Try different shapes like fusilli or penne for fun. To add more nutrition, include veggies like spinach or bell peppers. These not only boost flavor but also add color. You can also play with spices. Try a pinch of chili powder or some Italian herbs for a new twist. To keep your creamy turkey stroganoff fresh, store it in the fridge. Let it cool to room temperature before placing it in an airtight container. This helps to keep the flavors intact and avoids moisture loss. I recommend using glass or BPA-free plastic containers. They seal well and help prevent spills. If you want to save some stroganoff for later, freezing is a great option. First, let the dish cool completely. Then, portion it into freezer-safe bags or containers. Make sure to remove as much air as possible to prevent freezer burn. To reheat, thaw it in the fridge overnight. Heat it in a pan over medium-low heat. Add a splash of chicken broth or water to help restore creaminess. In the fridge, creamy turkey stroganoff lasts about 3 to 4 days. Keep an eye out for signs of spoilage. If it smells off or looks discolored, it's best to toss it. Always trust your senses. Fresh food is key to great taste! Turkey stroganoff is a creamy dish made with turkey, mushrooms, and onions. It has a rich sauce that is often served over egg noodles or pasta. The dish is inspired by the classic beef stroganoff but uses turkey for a lighter option. It’s comforting, filling, and perfect for a quick weeknight dinner. Yes! You can easily make turkey stroganoff gluten-free. Use gluten-free pasta instead of egg noodles. For the sauce, replace all-purpose flour with cornstarch or a gluten-free flour blend. Just mix the cornstarch with a little cold water before adding it to the sauce to avoid lumps. Check your chicken broth to ensure it’s gluten-free as well. To thicken the sauce, you can use a few methods. Add a little more flour or cornstarch mixed with water to the sauce. Another option is to let the sauce simmer longer, which helps it reduce and thicken. If you prefer a creamier texture, you can also stir in some cream cheese. Absolutely! You can prepare turkey stroganoff ahead of time. Cook the turkey and sauce, then store them in the fridge. When you’re ready to eat, simply reheat it on the stove. Cook the pasta fresh when serving to keep it from getting soggy. If you don’t have sour cream, there are good substitutes. Plain yogurt works well and gives a similar tang. You can also use cream cheese, thinned with a little milk. Another option is to mix buttermilk with some heavy cream for a creamy texture. You learned how to make a tasty Turkey Stroganoff with simple steps. We covered key ingredients like turkey, mushrooms, and seasonings for flavor. I shared tips for cooking noodles and sautéing turkey and veggies just right. You can even customize the dish with different proteins and pasta types. Don’t forget storage tips to keep your meal fresh. Now, you’re ready to create a comforting dish that friends and family will love. Enjoy experimenting and make it your own!

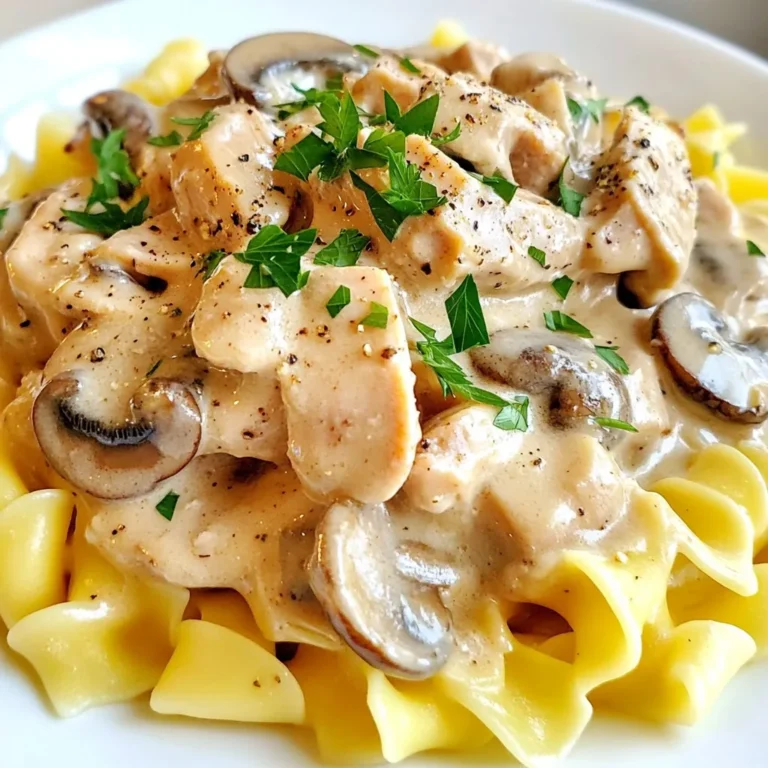
Creamy Turkey Stroganoff Easy Weeknight Dinner Recipe

- 2 pounds of chicken wings - 4 tablespoons of extra virgin olive oil - 5 cloves of garlic, finely minced - 1/2 cup of freshly grated Parmesan cheese - 1 teaspoon of smoked paprika - 1 teaspoon of dried oregano - 1 teaspoon of sea salt - 1/2 teaspoon of freshly ground black pepper - Fresh parsley, finely chopped (for garnish) When cooking, exact measurements matter. Use a kitchen scale for the chicken wings. A scale gives you precise weight. For liquids, use measuring cups or spoons. This ensures each bite tastes great. Fresh garlic should be minced finely. This helps release its strong flavor. Grate your Parmesan just before use. Fresh cheese melts better and tastes richer. Fresh ingredients make all the difference. They enhance flavor and texture. Fresh wings have better taste and hold moisture well. Fresh garlic packs more punch, while aged garlic loses its zest. The same goes for Parmesan cheese. Freshly grated cheese melts and sticks better. Using fresh herbs, like parsley, adds bright flavor. Always choose fresh over stale for the best dish. {{ingredient_image_2}} To start, you need to make a tasty marinade. Grab a large bowl and add 4 tablespoons of extra virgin olive oil. This oil helps the flavors stick to the wings. Next, finely mince 5 cloves of garlic and toss them into the bowl. Garlic gives a strong and savory taste. Then, add 1 teaspoon of smoked paprika for some warmth. Sprinkle in 1 teaspoon of dried oregano for an earthy note. Finally, add 1 teaspoon of sea salt and 1/2 teaspoon of freshly ground black pepper. Stir everything well to mix the flavors. Now it’s time to add the chicken wings. Place 2 pounds of chicken wings in the bowl with the marinade. Toss the wings around until they are fully coated. Make sure each wing gets a good amount of that yummy mix. For the best flavor, let them marinate for at least 30 minutes. If you have more time, placing them in the fridge for a few hours makes them even better. While the wings are marinating, preheat your air fryer to 400°F (200°C). Let it heat up for about 5 minutes. This step is important for crispiness. Once hot, arrange the marinated wings in the air fryer basket in a single layer. Avoid overcrowding, as this can make them less crispy. Depending on your air fryer size, you might need to cook them in batches. Cook the wings for 25-30 minutes. Remember to shake the basket halfway through to ensure they cook evenly. When done, the wings should look golden brown and crispy. Carefully take the wings out of the air fryer and place them in a serving bowl. While they are still warm, sprinkle 1/2 cup of freshly grated Parmesan cheese over them. Toss the wings gently so the cheese melts and sticks nicely to each piece. For a final touch, chop some fresh parsley and sprinkle it on top. This adds a nice pop of color and fresh flavor. Serve the wings on a platter lined with parchment paper and add lemon wedges for extra zest. Enjoy your delicious Garlic Parmesan Air Fryer Wings! To get crispy wings, start with dry chicken. Pat them with paper towels. The less moisture, the better. Use a good amount of olive oil in your marinade. This helps the skin crisp up nicely. Cook the wings in a single layer. Overcrowding leads to steaming, not crisping. Shake the basket halfway through cooking. This ensures even cooking and browning. Marinating is key for flavor. I recommend marinating for at least 30 minutes. If you can, let them sit in the fridge for a few hours. This lets the garlic and spices soak in. Use a large bowl so the wings get coated well. Make sure each wing is covered in the marinade. For extra flavor, try adding a splash of lemon juice. Want to boost flavor? Consider adding crushed red pepper flakes for heat. A touch of honey adds sweetness and balances the garlic. You can also mix in some lemon zest for brightness. If you love herbs, try adding thyme or rosemary. These simple tweaks bring your wings to another level. Enjoy experimenting with flavors! Pro Tips Marinate for Maximum Flavor: Let the wings marinate for at least 30 minutes, or up to a few hours for deeper flavor penetration. Don’t Overcrowd the Basket: Arrange the wings in a single layer in the air fryer to ensure they cook evenly and get crispy all around. Check for Doneness: Use a meat thermometer to ensure the wings reach an internal temperature of 165°F (74°C) for safe consumption. Customize Your Seasoning: Feel free to experiment with additional spices or herbs to customize the flavor profile to your liking. {{image_4}} You can change up the flavors of your wings. Try adding cayenne pepper for heat. If you like a smoky taste, use chipotle powder. You can also mix in some Italian seasoning for a herb-rich flavor. Another option is to use lemon pepper. It adds a bright, zesty kick. Experiment with flavors to find your favorite. While Parmesan is delicious, other cheeses work too. Grated Pecorino Romano gives a sharper taste. If you want a creamy twist, try using crumbled feta. You could even use a blend of cheeses for depth. Just remember, the cheese should melt well to coat the wings nicely. If chicken wings are not your thing, try other proteins. Chicken thighs are juicy and flavorful. You can also use turkey wings for a leaner option. For a vegetarian twist, try cauliflower wings. The same marinade works great on these. Just adjust the cooking time as needed. Each option brings its own unique taste and texture. To keep your leftover wings fresh, place them in an airtight container. Make sure they cool to room temperature first. Seal the container tightly. Store it in the fridge. The wings will stay good for up to three days. If you want to keep them longer, freezing is a great option. When it's time to enjoy your wings again, reheating is key. The best way to reheat them is in the air fryer. Set the air fryer to 350°F (175°C). Heat the wings for about 5 to 10 minutes. This method keeps them crispy. You can also use an oven, but it may take longer. Just avoid the microwave, as it can make them soggy. If you have extra wings, freezing them is simple. Place them in a freezer-safe bag. Remove as much air as possible before sealing. Write the date on the bag. Frozen wings can last up to three months. When you're ready to eat them, thaw in the fridge overnight before reheating. This method keeps their flavor and texture. To make your wings crispier, try these tips: - Pat dry: Before marinating, dry the wings with paper towels. - Use baking powder: Mix a teaspoon of baking powder into your dry seasonings. - Air fryer spacing: Arrange wings in a single layer, with space between each one. - Cook longer: Increase cooking time by a few minutes for extra crunch. These steps help create that perfect crispy texture you crave. Yes, you can use frozen wings! However, follow these steps: - Thaw first: Defrost the wings in the fridge overnight or use the microwave. - Adjust cooking time: Increase the cooking time by about 5-10 minutes. - Check for doneness: Use a meat thermometer to ensure they reach 165°F (75°C). Using frozen wings is convenient, just remember to thaw them first for best results. Here are some tasty dipping sauces to enjoy with your wings: - Ranch dressing: Creamy and cool, it complements the garlic flavor. - Blue cheese dressing: A classic choice for a bold flavor contrast. - Buffalo sauce: For a spicy kick, drizzle this tangy sauce on your wings. - Honey mustard: The sweetness balances the savory garlic and cheese. These sauces will elevate your Garlic Parmesan Wings to a whole new level! In this post, I shared how to make crispy air fryer wings. We covered the best ingredients and how to measure them. Fresh ingredients matter for the best taste. I provided easy steps for marinating and cooking your wings. Plus, I included tips for crunch and flavor. You can explore variations and storage methods for your leftovers. Lastly, I answered common questions to help you succeed. Enjoy your cooking journey and serve up delicious wings!

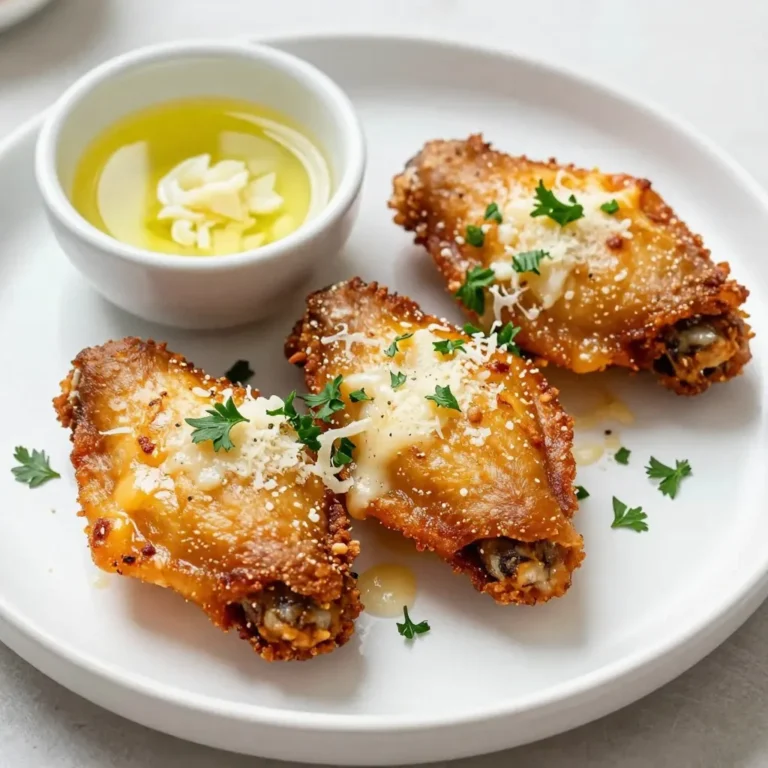
Garlic Parmesan Air Fryer Wings Crispy and Flavorful

- 1 ½ cups graham cracker crumbs - ½ cup unsalted butter, melted - 2 cups cream cheese, softened - 1 cup powdered sugar - 1 teaspoon pure vanilla extract - Zest of 2 ripe lemons - ½ cup fresh lemon juice (about 2-3 lemons) - 1 tablespoon gelatin powder (optional for improved setting) - ⅔ cup heavy whipping cream These ingredients create the base of your no-bake lemon cheesecake. The graham cracker crumbs add a nice crunch, while the cream cheese gives it that smooth texture. The lemon zest and juice bring brightness and flavor. If you want a firmer texture, consider adding gelatin. The heavy cream makes the filling light and fluffy if you choose to use it. {{ingredient_image_2}} Start by mixing 1 ½ cups of graham cracker crumbs with ½ cup of melted unsalted butter. Stir until you get a mixture that looks like wet sand. This is the base of your pie. Next, take a 9-inch springform pan. Firmly press the crumb mixture into the bottom. Make sure it is even and compact. Place the crust in the refrigerator while you prepare the cheese filling. In a large bowl, beat 2 cups of softened cream cheese. Use an electric mixer and mix on medium speed for about 2-3 minutes until creamy. Gradually add in 1 cup of powdered sugar and mix until smooth. This step is key for a velvety texture. Then, fold in 1 teaspoon of pure vanilla extract, the zest of 2 ripe lemons, and ½ cup of fresh lemon juice. If you choose to use gelatin, dissolve 1 tablespoon in 2 tablespoons of warm water, then mix it in. In a separate bowl, whip ⅔ cup of heavy whipping cream until stiff peaks form. This will make your cheesecake light and fluffy. Carefully fold the whipped cream into the cheese mixture. Be gentle here; you want to keep that airy texture. Now, take the chilled crust out of the fridge. Pour the lemon filling over the crust. Use a spatula to smooth the top. Make sure it’s even for a beautiful finish. Cover the cheesecake with plastic wrap or a lid. Chill in the refrigerator for at least 4 hours. If you can wait, overnight is even better for a perfect set. To make the best crust, use finely crushed graham crackers. Aim for a texture like wet sand. Mix the crumbs with melted butter. Press it firmly into your springform pan. The crust needs to hold together well. If you don’t have graham crackers, you can use vanilla wafers or crushed cookies. Both will give a tasty twist. To boost flavor, consider adding a hint of lime or orange zest. You can also mix in some fresh herbs like mint for a fun touch. When choosing lemons, look for ones that feel heavy and firm. Bright yellow skin shows ripeness and flavor. Always use fresh juice for the best taste. Chilling is key to a firm cheesecake. I recommend at least four hours in the fridge. For the best results, let it chill overnight. This allows the flavors to meld and the texture to set. If you use gelatin, it helps the cheesecake hold its shape better. Just be sure to dissolve it fully before adding it to the mix. Pro Tips Use Fresh Lemons: For the best flavor, always use fresh lemons for both zest and juice. The vibrant taste will elevate your cheesecake significantly. Chill the Mixing Bowl: Before whipping the cream, chill your mixing bowl and beaters in the freezer for 10 minutes. This helps the cream whip faster and achieve better peaks. Gelatin for Stability: If you want a firmer texture, consider adding gelatin. Dissolve it in warm water as instructed and incorporate it into the cheese mixture for a cheesecake that holds its shape better. Overnight Chill: For optimal results, let the cheesecake chill overnight. This allows the flavors to meld and the texture to become perfectly creamy. {{image_4}} You can make this cheesecake even more fun by changing the flavors. Try adding other citrus fruits like lime or orange. These fruits will give a fresh twist to the lemon taste. You can also mix in chocolate or berry swirls. Just melt some chocolate or mash fresh berries, then gently swirl them into the cheese mixture. This adds a pop of color and flavor that everyone will love. If you need a gluten-free option, use gluten-free graham cracker crumbs for the crust. Many brands offer these, so look for one you like. For those following a vegan diet, swap out the cream cheese for vegan cream cheese. You can also use coconut cream as a tasty alternative. These changes keep the cheesecake creamy while meeting dietary needs. Serving this cheesecake can be a creative moment. Fresh fruit toppings like strawberries, blueberries, or raspberries pair well. You can also drizzle your favorite fruit sauce on top. For special occasions, add festive garnishes. A sprinkle of lemon zest or some mint leaves can make the cheesecake look even more appealing. These little touches will impress your guests and add to the fun! To keep your no-bake lemon cheesecake fresh, store it in the fridge. Use an airtight container or cover it tightly with plastic wrap. It will stay fresh for up to five days. After that, the texture may change, and the flavors may fade. You can freeze any leftover cheesecake. First, let it chill in the fridge. Once set, wrap it in plastic wrap, then in aluminum foil. This extra layer helps prevent freezer burn. The cheesecake will last up to three months in the freezer. When you're ready to enjoy it again, take it out and place it in the fridge overnight to thaw. Serve it cold for the best taste. You can garnish it with fresh lemon zest or berries for a fun twist! A no-bake cheesecake needs at least 4 hours to set. For best results, chill it overnight. This time allows the filling to firm up. You want it to hold its shape when sliced. The longer it chills, the better it tastes. Yes, you can use whipped topping. It offers convenience and saves time. However, whipped topping may lack the rich flavor of heavy cream. It also can make the cheesecake lighter. If you want a denser feel, stick with heavy cream. You can use Greek yogurt or mascarpone cheese. Both give a creamy texture. They add a different taste but work well in desserts. Silken tofu is also a good choice for a vegan option. Just blend it until smooth for best results. No, gelatin is not a must. It helps the cheesecake set firmer. If you want a softer texture, leave it out. The cheesecake will still taste great without it. Just remember, it may be a bit less stable. This recipe highlighted key steps to make a delicious no-bake cheesecake. We covered the main ingredients like graham cracker crumbs and cream cheese. I shared tips on perfecting the crust and enhancing flavor. You also learned how to customize your cheesecake with different fruits and dietary options. In conclusion, making a no-bake cheesecake is simple and fun. You'll impress your friends and family with your skills. Enjoy creating dessert that everyone will love!

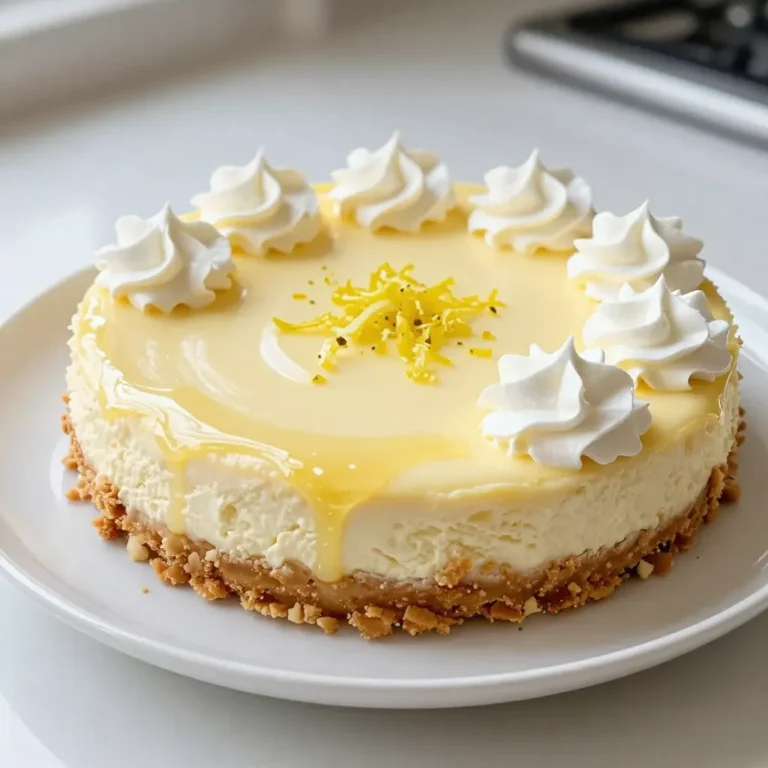
No-Bake Lemon Cheesecake Simple and Refreshing Recipe

- 4 boneless, skinless chicken thighs - 1 red bell pepper, thinly sliced - 1 yellow bell pepper, thinly sliced - 1 medium zucchini, sliced into half-moons - 1 red onion, cut into wedges - 2 tablespoons olive oil (divided) - 1 teaspoon garlic powder - 1 teaspoon smoked paprika - 1 teaspoon dried oregano - Salt and freshly ground pepper, to taste - Fresh parsley, finely chopped for garnish This dish starts with simple, fresh ingredients. The chicken thighs are juicy and tender. The veggies add color and crunch. Each one brings its own flavor to the plate. For seasoning, olive oil adds richness. Garlic powder gives a nice kick. Smoked paprika adds depth. Dried oregano gives an herb touch. Use salt and pepper to balance everything. When ready to serve, sprinkle fresh parsley on top. It brightens the dish and adds freshness. This mix of ingredients makes a meal that is both tasty and healthy. Feel free to explore other veggies, too. You can add broccoli or asparagus. They cook well in the air fryer, too! {{ingredient_image_2}} Start by marinating the chicken thighs. In a large bowl, mix the thighs with 1 tablespoon of olive oil, garlic powder, smoked paprika, dried oregano, and a good pinch of salt and pepper. Make sure each piece gets coated well. Let the chicken marinate for at least 15 minutes. This step is key for great flavor. Next, prepare the vegetables. Slice the red and yellow bell peppers, the zucchini, and the red onion. Take another bowl and toss these veggies with the remaining 1 tablespoon of olive oil. Add salt and freshly ground pepper to taste. Mix everything until the veggies are well coated. This helps them cook evenly and adds flavor. Now, it's time to preheat the air fryer. Set it to 400°F (200°C) and let it warm up for about 5 minutes. This step ensures even cooking for both the chicken and the vegetables. Once preheated, arrange the marinated chicken in a single layer in the air fryer basket. Cook the chicken for 10 minutes. This helps develop a nice brown color. After 10 minutes, carefully open the air fryer and add the prepared vegetables around the chicken. Cook everything together for an additional 10 to 12 minutes. Be sure to shake the basket halfway through to promote even crisping. To check if the chicken is done, use a meat thermometer. It should read 165°F (75°C). Once fully cooked, carefully remove the air fryer basket. Let the chicken and veggies rest for one minute. This helps the juices settle. Just before serving, garnish with freshly chopped parsley. This adds a nice pop of color and freshness to your dish. - Use a large bowl to mix the chicken. - Add 1 tablespoon of olive oil, garlic powder, smoked paprika, and oregano. - Season with salt and pepper to taste. - Mix well to coat each thigh evenly. - Let the chicken marinate for at least 15 minutes for the best flavor. - Preheat your air fryer to 400°F (200°C) for even cooking. - Arrange the chicken thighs in a single layer. - Cook for 10 minutes to get a nice brown color. - Add the veggies after 10 minutes and cook for another 10-12 minutes. - Shake the basket halfway through to ensure even crispiness. - Use a meat thermometer to check for 165°F (75°C) internal temperature. - Plate the chicken and veggies on a large platter. - Drizzle with extra virgin olive oil for shine. - Sprinkle fresh parsley on top for color and flavor. - This makes your dish look vibrant and inviting. Pro Tips Marinate for Flavor: Allow the chicken to marinate for at least 15 minutes, or even longer if time permits, to enhance the flavor and tenderness of the meat. Even Cooking: Make sure to arrange the chicken thighs in a single layer in the air fryer to ensure even cooking and browning on all sides. Shake it Up: Remember to shake the basket halfway through the cooking time to achieve an evenly crisped texture on both the chicken and vegetables. Check Temperature: Use a meat thermometer to check that your chicken has reached 165°F (75°C) for safe consumption and optimal juiciness. {{image_4}} You can easily change the chicken in this dish. Use chicken breasts or drumsticks if you prefer. Both work great in the air fryer. For veggies, feel free to get creative. You can add broccoli or asparagus for a fun twist. They cook well and add different flavors. Spice it up! Try using different spices or marinades to change the taste. You might want to add some chili powder for heat or lemon juice for zest. Another fun idea is to add cheese. Sprinkle shredded cheese on the veggies in the last few minutes of cooking. This adds a creamy twist that many love. If you want a low-carb or gluten-free meal, just skip the starchy veggies. Instead, use leafy greens or cauliflower. For a vegetarian option, swap chicken for tofu or chickpeas. Both options soak up flavors well and offer protein. Just make sure to adjust cooking times for these swaps. To store leftovers in the fridge, let the chicken and veggies cool down first. Place them in an airtight container. You can keep them fresh for up to three days. I recommend using glass containers. They help keep food fresh and are easy to clean. For freezing cooked chicken and veggies, ensure they cool completely first. Place them in freezer-safe bags, removing as much air as possible. This helps avoid freezer burn. You can freeze them for up to three months. When ready to eat, thaw in the fridge overnight or use the microwave for quick thawing. This keeps the flavor intact. When you reheat, the air fryer works great for chicken and veggies. Set it to 350°F (175°C) and heat for about 5-7 minutes. This helps maintain crispness. If using a microwave, place them in a safe dish and cover. Heat in short intervals to avoid overcooking. Always check that the chicken is heated through. It should reach 165°F (75°C) inside. This ensures your meal is safe and tasty. It takes about 20 minutes to cook chicken thighs in an air fryer. First, cook the marinated chicken for 10 minutes at 400°F (200°C). Then, add the veggies and cook for another 10-12 minutes. This method gives the chicken a nice brown color and keeps it juicy. Yes, you can cook frozen chicken in the air fryer. However, it will take longer than fresh chicken. Increase the cooking time by about 5-10 minutes. Always check the chicken’s internal temperature to ensure it reaches 165°F (75°C). The best vegetables for the air fryer include: - Bell peppers (red and yellow) - Zucchini - Red onions - Broccoli - Asparagus Most of these veggies take about 10-12 minutes to cook. Cut them into even pieces for uniform cooking. To check if chicken is fully cooked, use a meat thermometer. The internal temperature should reach 165°F (75°C). Also, the juices should run clear, not pink. The chicken should feel firm to the touch when done. In this post, we explored a tasty air fryer recipe that uses chicken thighs and fresh vegetables. You learned how to marinate, cook, and present this meal. We also shared tips for customizing and storing your dish. By following these steps, you can enjoy a simple and delicious meal. The air fryer not only saves time but also keeps the food healthy. I hope you feel excited to try this recipe and make it your own! Keep experimenting in the kitchen for great results.

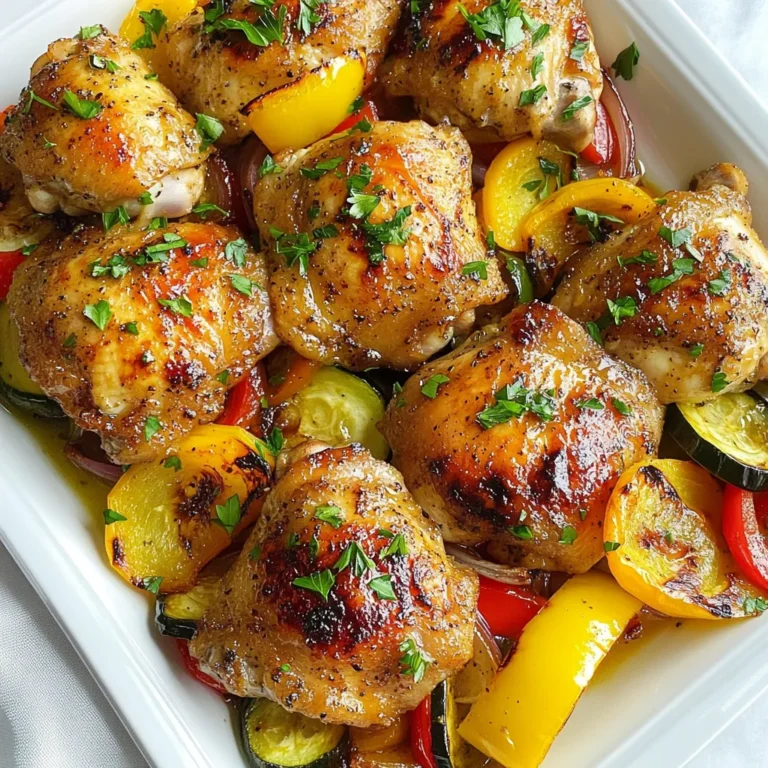
Air Fryer Chicken and Veggies Perfectly Cooked Dish

To make delicious Greek yogurt parfait jars, gather these simple ingredients: - 2 cups Greek yogurt (plain or flavored) - 1 cup granola (a nutty blend is great) - 1 cup mixed berries (strawberries, blueberries, raspberries) - 2 tablespoons honey or maple syrup (for sweetening) - 1 teaspoon vanilla extract (optional, for flavor) - A pinch of ground cinnamon (optional, for warmth) - Fresh mint leaves (for garnish) You can swap ingredients based on what you have or prefer. - Use non-dairy yogurt for a vegan option. - Choose any granola you love; look for nut-free blends if needed. - Try agave syrup or coconut sugar instead of honey. - Substitute fresh berries with dried fruits or applesauce for sweetness. - Omit vanilla and cinnamon if you prefer a lighter flavor. Fresh berries taste great and add color. They are juicy and sweet. Frozen berries work well too. They are convenient and easy to use. Just thaw them before adding. Both types will give your parfaits a fruity kick. Choose what you enjoy most! {{ingredient_image_2}} Start by rinsing the mixed berries gently under cool water. Pat them dry with a paper towel to avoid excess water. If you use strawberries, slice them into halves or quarters. This helps with even layering and makes the parfait look pretty. In a mixing bowl, add the Greek yogurt. You can use plain yogurt or a flavored one, depending on what you like. Mix in the honey or maple syrup for sweetness. If you want to boost the taste, add the vanilla extract. Stir until everything is smooth. If you like, sprinkle a pinch of ground cinnamon to add warmth and depth to the flavor. Take clean glass jars or cups, each about eight ounces in size. Start by spooning in about 1/4 cup of the creamy yogurt into the bottom as your first layer. - Tips for Even Layers For a great texture, sprinkle about 2 tablespoons of nutty granola on top of the yogurt. This adds a nice crunch. Next, layer in about 1/3 cup of mixed berries over the granola. Use a mix of strawberries, blueberries, and raspberries for a colorful look. Repeat these layers until you fill the jar. Aim for two to three layers. The top layer should be yogurt, topped with a few berries for a beautiful finish. For extra sweetness, drizzle more honey or maple syrup on top. Finally, add fresh mint leaves for color and a refreshing scent. Chill the parfaits for about 30 minutes in the fridge if you prefer a cool treat. Enjoy your delicious Greek yogurt parfaits! To make your Greek yogurt parfait jars shine, serve them on a nice platter. A wooden or marble board adds a warm touch. You can also set out extra berries and nuts on the side. This way, guests can add more if they want. Use small spoons for easy digging into the jars. It makes eating fun and neat! The type of jar you use can change how your parfait looks. Clear glass jars show off the colorful layers. Mason jars are a popular choice and they hold a good amount. Small cups work well too for a more casual vibe. You can even use dessert bowls if you want something different. Just remember, the key is to show off those lovely layers! Garnishing adds flair to your parfaits. A drizzle of honey or maple syrup on top is always a hit. Fresh mint leaves give a nice pop of green and a fresh smell. You can also sprinkle a pinch of cinnamon for extra warmth. For a fun twist, add chocolate shavings or a few nuts on top. These little touches make your parfaits look even more inviting. Pro Tips Choose the Right Yogurt: Opt for a full-fat Greek yogurt for a creamier texture and richer flavor, or use a low-fat version if you're looking for a lighter option. Layer Strategically: For the best visual appeal, alternate colors and textures when layering the yogurt, granola, and berries. This not only looks good but enhances the eating experience. Mix and Match Flavors: Don’t be afraid to experiment with different flavored yogurts or sweeteners like agave syrup. Each variation can give your parfait a unique twist. Make Ahead: Prepare your parfaits in advance and store them in the fridge. This allows the flavors to meld together and makes for a quick grab-and-go breakfast or snack. {{image_4}} You can change the taste of your parfaits in fun ways. Try adding cocoa powder for a chocolate twist. Mix in peanut butter for a nutty kick. You can also use flavored Greek yogurt for added sweetness. Vanilla, coconut, or lemon flavors work great. These changes make your parfaits unique and tasty. If you're short on berries, use apples or bananas instead. Both fruits add natural sweetness and fiber. For a crunchier texture, try seeds like pumpkin or sunflower seeds. Nuts like walnuts or almonds also add a nice crunch. If you're avoiding dairy, use coconut yogurt as a substitute. Using seasonal fruits can make your parfaits even better. In spring, try fresh strawberries and cherries. Summer is perfect for blueberries and peaches. In fall, add sliced apples and pears. Winter is great for citrus fruits like oranges and grapefruits. These fruits not only taste great but also make your parfaits colorful and fresh. To keep your Greek yogurt parfait jars fresh, store them in glass containers. Glass helps prevent odors and keeps flavors pure. Seal the jars tightly to avoid any spills. Always place them in the fridge, not on the counter. This keeps the yogurt cold and safe to eat. Greek yogurt parfaits stay fresh in the fridge for about 2 to 3 days. After that, the berries might lose their crunch. The yogurt can still be safe to eat, but the taste may change. Always check for any off smells or changes in texture before enjoying. You can freeze your Greek yogurt parfaits, but it’s best to do so without the granola. Granola can get soggy when thawed. To freeze, layer yogurt and berries in a freezer-safe jar. Leave some space at the top, as the yogurt will expand. When ready to eat, thaw overnight in the fridge. Add fresh granola just before serving for the best crunch! Yes, you can make Greek yogurt parfaits ahead of time. I suggest preparing them the night before. This way, they can chill in the fridge overnight. This allows the flavors to mix well. Just keep the granola separate until you are ready to eat. This keeps it crunchy. If you want to skip honey or maple syrup, try using agave syrup. You can also use stevia or coconut sugar. These options add sweetness without changing taste much. You can even use mashed bananas for a natural sweetness. Adjust the amount based on your taste. Absolutely! You can make these parfaits gluten-free by choosing gluten-free granola. For a vegan option, use plant-based yogurt. Almond, coconut, or soy yogurt works well. You can also swap honey with agave syrup. This keeps your parfait tasty and suitable for your diet. In this article, we explored making delicious Greek yogurt parfaits. We discussed ingredients, substitutions, and the choice between fresh and frozen berries. Step-by-step, I guided you through preparation, mixing, and layering. We also covered tips for presentation and unique variations to try. Finally, I shared best practices for storage and answered common questions. Enjoy creating your parfaits! They are healthy, fun, and customizable. You can impress friends and family with your tasty creations. Dive in and enjoy every layer!

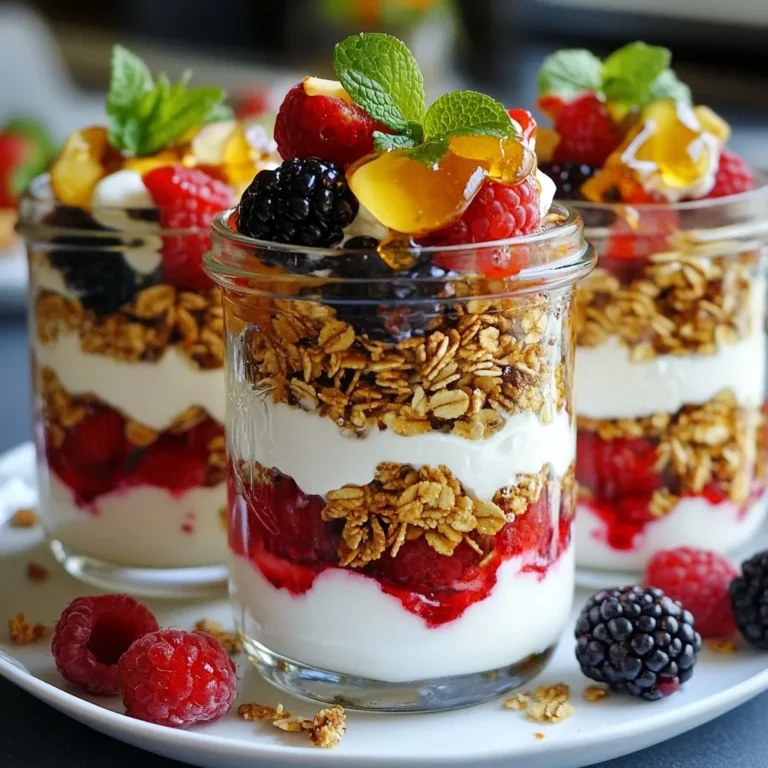
Greek Yogurt Parfait Jars Delicious and Nutritious Treat

- 1 cup all-purpose flour - 1/2 cup granulated sugar - 1 teaspoon baking powder - 1/2 teaspoon baking soda - 1/4 teaspoon salt - 1/2 teaspoon ground cinnamon - 1/2 cup Greek yogurt (plain) - 1/4 cup milk - 1/4 cup unsalted butter, melted and slightly cooled - 1 large egg - Zest of 1 lemon (about 1 teaspoon) - 1 tablespoon fresh lemon juice - 1 cup fresh blueberries (washed and drained) - Optional: powdered sugar for dusting - If you lack Greek yogurt, try sour cream for a similar texture. - You can swap milk for almond milk or oat milk for a dairy-free option. - Instead of unsalted butter, use coconut oil for a lighter taste. - For gluten-free donuts, use a gluten-free flour blend. Fresh blueberries make a big difference in flavor. Choose firm, plump berries. Use fresh lemons for zest and juice. Bottled juice lacks the bright taste. Check your baking powder and baking soda for freshness. Old leavening agents may not rise well. When using dairy, choose high-quality products for the best flavor and texture. {{ingredient_image_2}} Start by turning your oven to 350°F (175°C). This temperature helps the donuts bake evenly. Next, take your donut pan and lightly grease it. You can use cooking spray or a little melted butter. This step ensures your donuts come out easily after baking. In a large bowl, add the dry ingredients. Combine 1 cup of all-purpose flour, 1/2 cup of granulated sugar, 1 teaspoon of baking powder, 1/2 teaspoon of baking soda, 1/4 teaspoon of salt, and 1/2 teaspoon of ground cinnamon. Use a whisk to mix them well. Mixing well helps the donuts rise and taste great. In another bowl, mix the wet ingredients. Combine 1/2 cup of plain Greek yogurt, 1/4 cup of milk, and 1/4 cup of melted butter. Add 1 large egg, the zest of 1 lemon, and 1 tablespoon of fresh lemon juice. Stir until smooth. This mixture gives the donuts moisture and flavor. Now, gently fold the wet mixture into the dry mixture. Use a rubber spatula and be careful not to overmix. The batter should be a bit lumpy. Next, fold in 1 cup of fresh blueberries gently. Avoid breaking them, so your donuts have nice bursts of blueberry flavor. Using a piping bag or a spoon, fill each donut cavity about three-quarters full. This allows the donuts to rise nicely. Place the pan in the oven and bake for 12 to 15 minutes. The edges should be light golden brown, and a toothpick should come out clean when inserted. Once baked, take the donut pan out of the oven. Let the donuts cool in the pan for about 5 minutes. Then, transfer them to a wire rack to cool completely. If you want, you can dust the tops with powdered sugar for extra sweetness and flair. Enjoy these delightful treats with your family and friends! Mixing the batter correctly is key to great donuts. Start by whisking the dry ingredients in one bowl. Make sure they blend well. In another bowl, mix your wet ingredients until smooth. This can help your donuts rise better. When you combine both mixtures, use a rubber spatula. Gently fold them together. Avoid overmixing. A few lumps in the batter are okay. Many people overmix the batter. This can make the donuts tough. You want them light and fluffy. Another mistake is not measuring ingredients correctly. Use measuring cups and spoons for accuracy. Be sure to also avoid adding too many blueberries. Too many can weigh down the batter. Stick to the one cup for the best results. The texture of your donuts is very important. To get it just right, use Greek yogurt. It keeps the donuts moist and adds flavor. Mixing in the lemon zest gives a nice zing. Also, ensure the batter is slightly lumpy. This helps maintain a light texture. Bake them until they are golden brown. This will give you a perfect crunch on the outside and softness inside. Pro Tips Use Fresh Blueberries: Fresh blueberries provide the best flavor and texture. If using frozen, ensure they are thawed and drained to prevent excess moisture in the batter. Don’t Overmix: To achieve light and fluffy donuts, mix the batter just until combined. A few lumps are okay; overmixing can lead to dense donuts. Check Doneness Early: Ovens can vary, so start checking for doneness at 12 minutes. Remove the donuts when a toothpick comes out clean to avoid overbaking. Customize with Glaze: For an extra touch, drizzle a simple lemon glaze over the cooled donuts. Mix powdered sugar with lemon juice for a sweet and tangy finish. {{image_4}} You can easily change up the flavor of your donuts. Try using different types of yogurt, like vanilla or honey. This will add a nice twist. You can also swap out regular milk for almond or oat milk for a dairy-free option. If you love nuts, consider adding chopped walnuts or pecans for crunch. For a spiced kick, try adding a dash of nutmeg or ginger. These small changes can make your donuts unique and fun. A glaze can take your donuts to the next level. Mix powdered sugar with lemon juice for a zesty glaze. This adds sweetness and brightness. You can also make a simple vanilla glaze by mixing powdered sugar with milk and vanilla extract. For a chocolate twist, melt dark chocolate and drizzle it over the cooled donuts. Each glaze gives a different taste, so feel free to experiment! Seasonal fruits can change the whole vibe of your donuts. In spring and summer, use fresh strawberries or raspberries instead of blueberries. These fruits pair well with lemon. In the fall, add chopped apples or pears for a cozy flavor. Winter can bring in cranberries for a tart taste. Each fruit brings its own charm, making your baked lemon blueberry donuts even more delightful! Baked lemon blueberry donuts taste best fresh, but you can store them. Let the donuts cool completely before wrapping them. Use plastic wrap or a sealed container. This keeps them moist and tasty. Store at room temperature for up to two days. If you want to keep them longer, consider freezing. Freezing is an easy way to save your donuts. Place cooled donuts in a single layer on a baking sheet. Freeze them for about an hour. After that, wrap each donut in plastic wrap. You can also place them in a freezer bag. They will stay fresh for up to three months. Just remember to label the bag with the date. When you're ready to enjoy your frozen donuts, take them out. Allow them to thaw at room temperature. This usually takes about 30 minutes. For a warm treat, preheat your oven to 350°F (175°C). Place the donuts on a baking sheet and heat for about 5-7 minutes. This brings back their soft texture and flavor. You can dust them with powdered sugar again for extra sweetness! Yes, you can use frozen blueberries. However, they may release more juice. This can make the batter a bit wetter. To avoid this, lightly coat the frozen blueberries in flour before adding them to the batter. This helps keep the color bright and the texture nice. To make these donuts gluten-free, swap all-purpose flour for a gluten-free blend. Many blends work well in recipes. Ensure that the blend you choose has a good texture. You might also need to add a bit of xanthan gum if your blend does not contain it. Many flavors pair nicely with lemon and blueberry. Try adding lavender for a floral note. Almond extract can add a rich taste. You could also mix in some fresh mint for a refreshing twist. Check the donuts around 12 minutes. Insert a toothpick into the center of a donut. If it comes out clean, the donuts are done. They should also have a light golden color. If they need more time, check every minute until done. Yes, you can make mini baked donuts! Just use a mini donut pan instead of a regular one. Fill each cavity about halfway. Bake for about 8 to 10 minutes. Keep an eye on them since mini donuts bake faster. Enjoy your adorable mini treats! We covered the key ingredients and their quality for baked donuts. I shared step-by-step instructions to guide your baking. You read tips to mix batter and avoid mistakes. I also offered variations for flavors and storage info to keep your donuts fresh. Now, you can create tasty, homemade treats with ease. Embrace your baking adventure and enjoy every bite!

Baked Lemon Blueberry Donuts Delightful Treats to Enjoy

PREV 1 … 27 28 29 … 48 NEXT
meal plan mapper

explore

DessertsDinnerAppetizersDrinks

Our Policies

  • Cookie Policy
  • Copyright Policy
  • Disclaimer
  • GDPR Policy
  • Terms Of Use
Back to Top
  • About
  • Contact Us
  • Privacy Policy
© 2025 meal plan mapper