FREE DINNER EBOOK! Get your copy!
  • Cookie Policy
  • GDPR Policy
  • Disclaimer
  • Terms Of Use
  • Visit my other site: Fun Cookie Recipes
meal plan mapper
  • Home
  • Dinner
  • Desserts
  • Drinks
  • Appetizers
  • Contact
  • About
  • Privacy Policy
  • Home
  • Dinner
  • Desserts
  • Drinks
  • Appetizers
  • Contact
  • About
  • Privacy Policy
  • Cookie Policy
  • GDPR Policy
  • Disclaimer
  • Terms Of Use
Visit my other site: Fun Cookie Recipes

HOME / CATEGORIES /

Latest

- 1 lb ground beef or ground turkey - 1 cup breadcrumbs (preferably Italian seasoned for extra flavor) - 1/2 cup grated Parmesan cheese - 1 large onion, finely chopped - 2 cloves garlic, minced - 1 large egg - 1/4 cup milk (whole or low-fat) - 1 tablespoon Worcestershire sauce - 1 cup diced bell peppers (mix of red and green) - 1 teaspoon dried oregano - Salt and pepper to taste When you choose the ground meat, pick what you love best. Ground beef gives a rich flavor. Ground turkey is lighter but just as tasty. Adding breadcrumbs makes the meatloaf soft and juicy. Don’t skip the Parmesan cheese; it adds a nice salty kick. The onion and garlic bring great flavor. Bell peppers add color and sweetness. Use fresh ingredients for the best taste. - 1/3 cup ketchup - 2 tablespoons brown sugar - 1 tablespoon Dijon mustard - 1 teaspoon apple cider vinegar - Seasonings and spices: Worcestershire sauce, dried oregano, salt, and pepper The glaze is what makes the meatloaf shine. Ketchup is the star, giving that sweet and tangy taste. Brown sugar adds depth and a touch of sweetness. Dijon mustard gives a bit of spice. A splash of apple cider vinegar brightens it all up. This blend creates a sticky top that you will love. Don't forget to season well; it makes a big difference. {{ingredient_image_2}} - Preheat your oven to 350°F (175°C). This step is key for even cooking. - In a large bowl, mix together the ground meat, breadcrumbs, and cheese. - Add the chopped onion, minced garlic, egg, milk, Worcestershire sauce, and diced peppers. - Sprinkle in the oregano, salt, and pepper. - Use your hands or a spoon to combine everything well. - Shape the meat mixture into a loaf about 2 inches thick. - Place it in a lined or greased baking dish for easy cleanup. - In a separate bowl, whisk together the ketchup, brown sugar, Dijon mustard, and vinegar. - Spread half of this glaze over the meatloaf. Make sure to cover the top and sides. - Place the meatloaf in your preheated oven. - Bake for about 50-60 minutes. - Use a meat thermometer to check the internal temperature. It should reach 160°F (70°C). - About 10 minutes before it's done, brush the remaining glaze on top for a sticky finish. - Once cooked, let the meatloaf rest for 10 minutes before slicing. This helps keep it juicy. Mixing the ingredients well is key. When you combine the meat and veggies, do it thoroughly. This helps all the flavors blend together. I like to use my hands for mixing. It gives me better control and ensures an even mix. Using seasoned breadcrumbs is another great tip. They add extra flavor to the meatloaf. I prefer Italian seasoned breadcrumbs, but any seasoned type works well. You can also make your own by adding dried herbs to plain breadcrumbs. Applying the glaze correctly makes the meatloaf shine. Start by spreading half of the glaze before baking. Use a spatula for an even coat all around. This helps build a sweet crust. Timing is crucial for the second glaze. About ten minutes before it finishes baking, brush on the rest of the glaze. This creates a sticky finish that makes the meatloaf look delicious and inviting. Pro Tips Use Lean Meat: Opt for lean ground beef or turkey to create a healthier meatloaf without sacrificing flavor. Mix Ingredients Well: Ensure all ingredients are thoroughly combined for a uniform texture and even cooking. Temperature Check: Always use a meat thermometer to ensure your meatloaf reaches an internal temperature of 160°F (70°C) for safe consumption. Rest Before Slicing: Allow the meatloaf to rest for about 10 minutes after baking to help retain its juices and enhance flavor. {{image_4}} You can easily switch up the meat in this recipe. Ground turkey or chicken works well. These options are leaner but keep the meatloaf moist. Use the same amount as you would for beef. If you're looking for a vegetarian choice, try lentils or black beans. Cook them until soft, then mash them lightly. This gives a great texture. Add the same other ingredients as in the meatloaf. Adding spices or herbs can change the flavor of your meatloaf. Try a teaspoon of smoked paprika for a smoky taste. Fresh herbs like thyme or basil can also add a nice touch. Cheese is another fun twist. You can mix in shredded cheddar or mozzarella. For a gourmet feel, try crumbled feta or blue cheese. They add a rich flavor that makes your meatloaf special. Feel free to experiment! Each change can give you a new meal to enjoy. After your meal, store leftover meatloaf properly. For short-term storage, place it in the fridge. Wrap it tightly in plastic wrap or put it in an airtight container. This keeps it fresh for up to four days. If you want to keep it longer, freezing is best. Cut the meatloaf into slices. Wrap each slice in plastic wrap, then place them in a freezer bag. This way, you can enjoy it for up to three months. When you’re ready to eat it, reheat the meatloaf. For the best results, use the oven. Preheat your oven to 350°F (175°C). Place the meatloaf slices in a baking dish. Add a little broth or water to keep it moist. Cover the dish with foil and bake for about 20-25 minutes. Leftover meatloaf can be fun too! Try making meatloaf sandwiches. Just slice the meatloaf and put it between two pieces of bread. Add your favorite toppings like lettuce, tomatoes, or even some ketchup. You can also use leftover meatloaf in pasta dishes. Chop it up and mix it with your favorite pasta and sauce. It adds flavor and protein to your meal. For side dishes, mashed potatoes are a classic choice. You can also serve it with green beans or a fresh salad. These sides balance the rich taste of the meatloaf and make a complete meal. For a standard oven, cook your glazed meatloaf for about 50 to 60 minutes. Use a meat thermometer to check for a safe internal temperature of 160°F (70°C). If you use a convection oven, it may take about 5 to 10 minutes less. Always rely on the thermometer for the best results. Yes, you can prepare meatloaf ahead of time. Mix and shape it, then wrap it tightly in plastic wrap. You can freeze it for up to three months. When ready to cook, thaw it overnight in the fridge. This way, you can enjoy a hot meal without much fuss. Pair your glazed meatloaf with delicious sides. Here are some great options: - Creamy mashed potatoes - Steamed broccoli or green beans - Roasted carrots for sweetness - A fresh garden salad These sides balance the savory flavor of the meatloaf and add color to your plate. You can create a tasty glazed meatloaf with simple ingredients and steps. Start with ground meat, breadcrumbs, and veggies. Mix in spices and prepare a sweet glaze to top it off. Remember to bake it until done and check with a meat thermometer. In the end, feel free to change up flavors or use different meats. Plus, I shared helpful tips for storing and enjoying leftovers. You can turn this dish into more fun meals too! Enjoy your meatloaf adventure!

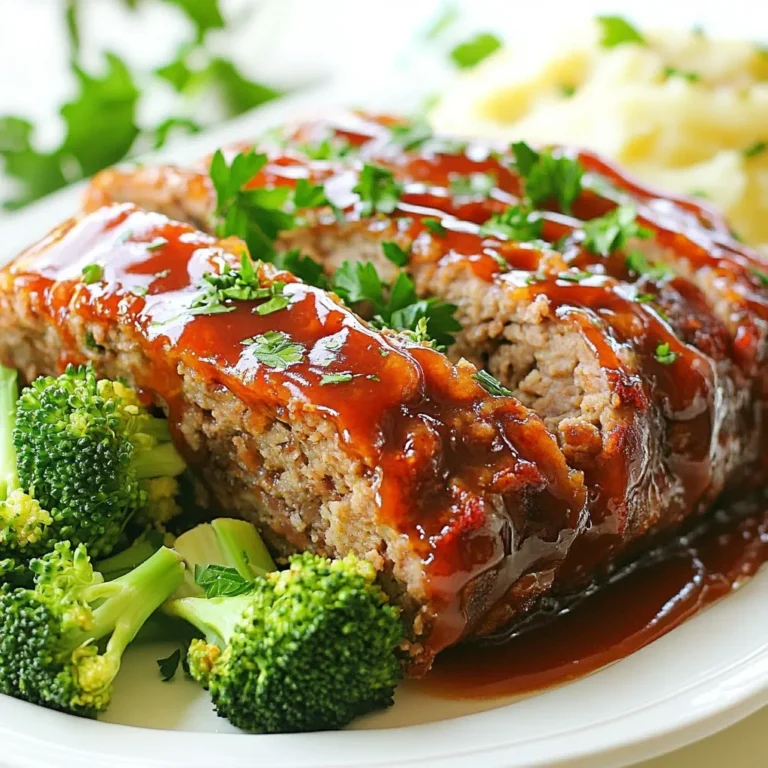
Glazed Meatloaf Dinner Savory and Simple Meal

- 1 whole chicken (4-5 lbs) - 1/2 cup unsalted butter, softened - 8 cloves garlic, finely minced - 2 tablespoons fresh rosemary, finely chopped - 2 tablespoons fresh thyme, finely chopped - 1 tablespoon fresh parsley, finely chopped - Zest of 1 lemon - Juice of 1 lemon - Salt and black pepper, to taste - 1 medium onion, cut into quarters - 1 lemon, cut into wedges - 4 cups assorted root vegetables (carrots, potatoes, parsnips), chopped When measuring butter, make sure it’s soft. This helps it mix well with herbs. Use a measuring cup for liquids like lemon juice. For zest, use a fine grater. Chop herbs finely for the best flavor. Use a kitchen scale for the chicken to ensure it’s the right size. Fresh ingredients make a big difference. Fresh herbs add bright flavors that dried herbs can't match. Fresh garlic has a stronger taste than pre-minced. A good chicken is key to this dish. It cooks evenly and stays juicy. Using fresh vegetables gives you better texture and taste. Always look for quality ingredients to make your meal shine. {{ingredient_image_2}} Start by preheating your oven to 425°F (220°C). This heat is key for a crispy skin. Next, grab your whole chicken and pat it dry using paper towels. Dry skin helps the chicken roast better. Carefully lift the skin over the chicken breast and thighs. Make small pockets under the skin. This lets the herb butter seep into the meat for great flavor. In a medium bowl, mix the softened butter with 8 minced garlic cloves, 2 tablespoons of finely chopped rosemary, 2 tablespoons of thyme, and 1 tablespoon of parsley. Add the zest and juice of one lemon. Stir until it is smooth and well-blended. This herb butter is what makes your chicken really tasty. Rub half of the herb butter under the skin of the chicken. Then, spread the rest all over the outside. Season the chicken with salt and freshly ground black pepper. Next, stuff the cavity with the quartered onion and lemon wedges. This adds moisture and flavor as it cooks. In a large roasting pan, add 4 cups of chopped root vegetables, such as carrots and potatoes. Drizzle with olive oil and season with salt and pepper. Toss them gently to coat. Lay the chicken on top, breast side up. Roast for about 1 hour and 15 minutes. Use a meat thermometer to check that it reaches 165°F (75°C). Baste the chicken with pan juices halfway through for extra moisture. After roasting, let the chicken rest for 10-15 minutes before carving. This helps keep it juicy and tender. To roast chicken well, start with a hot oven. Preheat to 425°F (220°C). This will help the skin crisp up nicely. Always dry the chicken with paper towels before seasoning. Moisture can prevent crisp skin. Season well with salt and pepper, as this enhances the flavor. Placing the chicken on root vegetables allows them to soak up juices. Basting keeps the chicken moist and adds flavor. Halfway through roasting, use a spoon to collect pan juices. Gently pour the juices over the chicken. This step helps the skin to become golden and flavorful. Repeat basting every 20 minutes for best results. Just be careful when opening the oven! For crispy skin, rub herb butter all over the chicken. The butter helps create a golden crust as it roasts. Be sure to spread some butter under the skin, too. This step adds flavor directly to the meat. Letting the chicken rest after cooking helps the skin stay crispy. If you skip this, the skin may get soggy. Enjoy that perfect crunch on every bite! Pro Tips Resting is Key: Allow the chicken to rest after roasting. This helps the juices redistribute, ensuring each slice is juicy and tender. Use a Meat Thermometer: Invest in a reliable meat thermometer to check the chicken's internal temperature. It should read 165°F (75°C) for safe consumption. Flavor Boost: For added flavor, marinate the chicken in the herb butter mixture for a few hours or overnight before roasting. Vegetable Variety: Feel free to mix and match your root vegetables based on seasonal availability or personal preference for a colorful and nutritious side dish. {{image_4}} You can change the flavor of your chicken by adding citrus or spices. Try using orange or lime zest alongside lemon. This brings a sweet and bright taste. For spices, add paprika or cayenne pepper for a kick. These simple changes can make your dish feel new and exciting. Just mix them into the herb butter before spreading it on the chicken. If you want to try cooking your chicken differently, use a grill or a slow cooker. Grilling gives the chicken a nice char and smoky flavor. Set the grill to medium heat. Cook the chicken for about 1 hour, turning often for even cooking. A slow cooker is great for busy days. Just place the chicken in, add the vegetables, and let it cook on low for 6-8 hours. Both methods yield tender, juicy chicken with great taste. You can mix up the vegetables you use with your chicken. While root vegetables like carrots and potatoes are great, don't stop there! Consider adding bell peppers, zucchini, or Brussels sprouts for added color and flavor. Just chop them into similar sizes for even cooking. This not only makes your meal more vibrant but also adds various nutrients and tastes. Feel free to get creative and use what you have on hand! After you enjoy your Garlic Herb Butter Roast Chicken, store leftovers safely. Allow the chicken to cool to room temperature. Place the chicken in an airtight container. You can also wrap it tightly in plastic wrap. This will keep the chicken fresh for up to three days in the fridge. For the best flavor, try to eat the leftovers within two days. Reheating your roast chicken is easy. Preheat your oven to 350°F (175°C). Place the chicken in a baking dish. Cover it with aluminum foil to prevent it from drying out. Heat for about 20-25 minutes or until the chicken is warm throughout. If you like crispy skin, remove the foil for the last five minutes of reheating. You can also reheat in the microwave, but this may make the skin less crispy. If you have more leftovers, freezing is a great option. Cut the chicken into portions for easier thawing later. Wrap each piece tightly in plastic wrap, then place in a freezer bag. Make sure to squeeze out as much air as you can. Label the bag with the date. Frozen chicken can last up to three months. When you’re ready to eat, thaw it overnight in the fridge before reheating. You should roast a whole chicken for about 1 hour and 15 minutes. This time works well for a chicken weighing 4-5 lbs. Make sure to check the chicken's internal temperature. It should reach 165°F (75°C) for safe eating. If the chicken is larger, you may need to add more time. Using frozen chicken is not the best choice for this dish. It’s better to thaw the chicken first. Thawing ensures even cooking and helps the herb butter soak into the meat. You can thaw it overnight in the fridge or in cold water. This will help keep your chicken juicy and tasty. I love serving Garlic Herb Butter Roast Chicken with a mix of roasted root vegetables. Carrots, potatoes, and parsnips make great choices. You can also add a fresh salad or some garlic bread. These sides balance the rich flavors of the chicken. For a fun twist, a lemony quinoa or couscous works well too! This blog post offers a full guide to roasting a chicken. We covered key ingredients, their importance, and tips for perfect cooking. I shared step-by-step instructions and helpful tricks to get crispy skin. You can also explore fun flavor ideas and cooking methods. Finally, I provided easy ways to store leftovers. Roasting a chicken doesn't have to be hard. Use fresh items for great taste and enjoy your dinners!

Garlic Herb Butter Roast Chicken Flavorful Dinner Delight

To make Buffalo Chicken Tacos, gather these ingredients: - 1 lb chicken breast, thoroughly cooked and shredded - 1/2 cup spicy buffalo sauce - 8 small corn tortillas - 1 cup finely shredded lettuce - 1/2 cup crumbled creamy blue cheese - 1/2 cup fresh diced tomatoes - 1/4 cup green onions, finely chopped - 1 ripe avocado, sliced into wedges - 1 tablespoon extra virgin olive oil - Salt and freshly cracked black pepper to taste - 1/4 cup ranch dressing (optional for drizzling) For the best flavor, I suggest using Frank's RedHot sauce for the buffalo sauce. It's spicy and perfect for tacos. For the cheese, look for Maytag blue cheese. It has a rich and creamy taste that pairs well with the spice. You can switch chicken with shredded rotisserie chicken for a quicker meal. If you want a vegetarian option, use crispy cauliflower or mushrooms instead of chicken. For a milder flavor, use a mild buffalo sauce or mix it with some ranch dressing. {{ingredient_image_2}} Start by cooking the chicken breast. You can boil, bake, or grill it. Once it’s fully cooked, shred the chicken into small pieces. Place the shredded chicken in a medium-sized mixing bowl. Pour in the spicy buffalo sauce. Toss the chicken well. Make sure every piece gets coated. This step is key for flavor. Next, heat one tablespoon of extra virgin olive oil in a skillet over medium heat. When the oil is hot, add the buffalo chicken mixture to the skillet. Sauté the chicken for about 3 to 5 minutes. You want it heated through and fragrant. Taste the mixture and add salt and freshly cracked black pepper to your liking. While the chicken cooks, warm the small corn tortillas. You can do this in a separate skillet or in the microwave for about 30 seconds. Once warm, place a generous scoop of buffalo chicken in the center of each tortilla. Pile it high for maximum flavor! Now, add the toppings. Start with shredded lettuce, then crumbled blue cheese, diced tomatoes, chopped green onions, and avocado slices. Each layer adds color and taste. If you want, drizzle some ranch dressing for a creamy touch. Finally, fold each tortilla over, encasing all that deliciousness. Enjoy your tasty buffalo chicken tacos! To coat the chicken well, use a large bowl. Add the shredded chicken first. Pour in the buffalo sauce next. Mix it gently but thoroughly. You want each piece to soak up that spicy flavor. If you like it hot, add more buffalo sauce. For a milder taste, use less. Always taste before you serve. Adjust the salt and pepper to your liking. This step is key for tasty tacos. Warm tortillas make for better tacos. You can use a skillet or microwave. In a skillet, set the heat to low. Place tortillas one by one, warming each for about 30 seconds. They should be soft and easy to fold. In the microwave, stack them and cover with a damp paper towel. Heat for about 30 seconds. Either way works well. Warm tortillas keep the fillings from falling out. When serving, presentation matters. Use a big platter for your tacos. Arrange toppings in small bowls. This lets everyone customize their tacos. Add fresh lime wedges for a zesty touch. They bring a bright flavor that pairs well with buffalo sauce. You can also drizzle ranch dressing on top for creaminess. Fresh ingredients like diced tomatoes and chopped green onions add color and crunch. These small touches make a big difference in taste and look. Pro Tips Use Homemade Buffalo Sauce: For an extra layer of flavor, consider making your own buffalo sauce using hot sauce, butter, and a splash of vinegar. This allows you to customize the heat level to your liking. Rest the Chicken: After cooking and shredding the chicken, let it rest for a few minutes before mixing it with the buffalo sauce. This helps the chicken retain moisture and enhances the overall texture. Warm Tortillas Properly: To avoid tearing, warm your corn tortillas in a dry skillet rather than a microwave. This helps maintain their structure and adds a slight toasty flavor. Garnish Creatively: Elevate your tacos by adding unique garnishes such as pickled red onions or jalapeños for an extra kick. These add both flavor and visual appeal to your dish! {{image_4}} You can choose between spicy and mild buffalo sauce for your tacos. If you love heat, go for a hot sauce. It adds a fiery kick. For those who prefer less spice, opt for a mild buffalo sauce. This way, you still enjoy the flavors without overwhelming heat. You can also mix both sauces for a balanced taste. This creates a unique flavor that pleases everyone. You don’t need chicken to enjoy buffalo tacos. Try using cauliflower or mushrooms instead. Cauliflower gives you a great texture when roasted. Simply toss the florets in buffalo sauce, then roast until crispy. Mushrooms can absorb flavors well, making them perfect for a savory taco. Just sauté them with buffalo sauce for a quick option. Both choices are tasty and filling. Toppings can elevate your buffalo chicken tacos. Consider adding jalapeños for an extra spice boost. Fresh cilantro adds a nice herbal note to the dish. You can also add sour cream for creaminess. Feel free to explore your favorite toppings, like diced red onions or shredded cheese. Each addition adds new flavors and textures to your meal. Experiment to find your perfect combination! To keep leftover buffalo chicken tasty, place it in an airtight container. Make sure it cools down first. Store it in the fridge for up to three days. Use it for tacos, salads, or sandwiches. If you notice any off smell, it’s best to toss it. You can freeze cooked tacos for future meals. Wrap each taco tightly in plastic wrap. Then, place them in a freezer-safe bag. They can last for about three months in the freezer. When you are ready to eat, let them thaw overnight in the fridge. For the best flavor when reheating, avoid the microwave if possible. Instead, use a skillet over medium heat. Heat the tacos for about 5-7 minutes until warm. This keeps the tortillas crispy. If you must use a microwave, heat them in 30-second bursts to prevent sogginess. Yes, you can prepare buffalo chicken tacos in advance. Cook the chicken and mix it with the buffalo sauce. Place the chicken in the fridge for up to two days. When ready to serve, warm the chicken in a skillet. Heat your tortillas, and assemble the tacos right before eating. This way, you keep the flavors fresh and vibrant. Buffalo chicken tacos go great with many side dishes. Here are some tasty options: - Corn on the cob: Sweet and crunchy, it balances the flavors. - Mexican rice: Fluffy and flavorful, it complements the spices. - Black bean salad: A fresh, protein-rich option that adds color. - Chips and salsa: A fun, crunchy side that everyone loves. - Guacamole: Creamy, smooth, and adds a rich taste. You can easily change the spice level in buffalo chicken tacos. To make them milder, use a less spicy buffalo sauce or mix in some ranch dressing. If you prefer more heat, add fresh jalapeños or a hotter sauce. Taste the chicken after cooking, and adjust as needed. This way, everyone can enjoy their tacos just the way they like! Buffalo chicken tacos are fun and tasty. We explored key ingredients, easy steps, and great tips. You can use different sauces, try veggie options, and even store leftovers with care. Remember, making food is all about joy and creativity. Don’t be afraid to mix flavors and find what you love. Dive in and savor every bite!

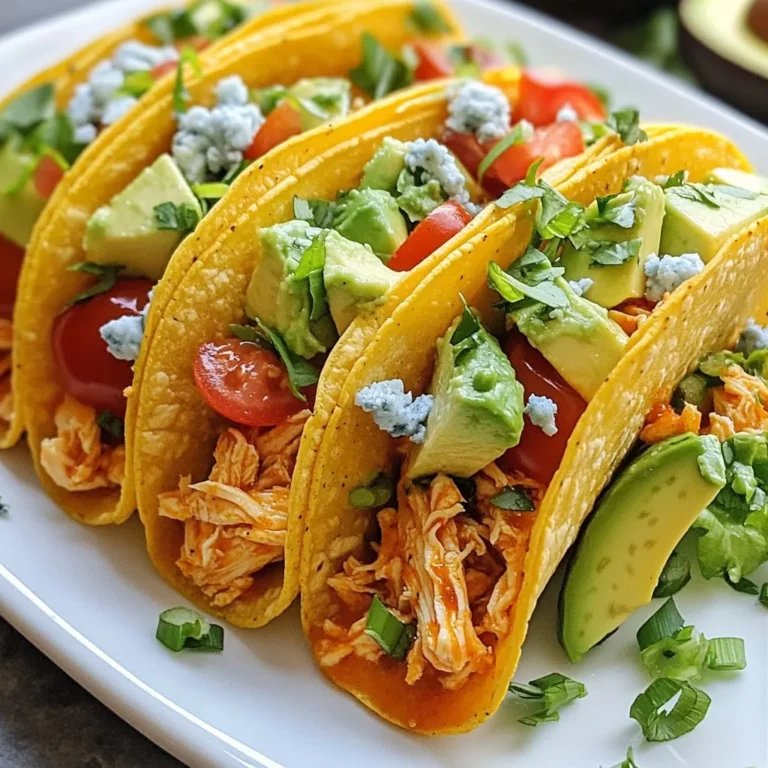
Buffalo Chicken Tacos Flavorful and Easy Recipe

- 2 cups fresh spinach - 1 cup feta cheese - 1 cup mozzarella cheese - 1 small onion - 2 cloves garlic - 4 large flour tortillas - 2 tablespoons olive oil - Salt and pepper to taste - Red pepper flakes (optional) - Large skillet - Mixing bowl - Knife and cutting board - Serving plate For my spinach and feta quesadillas, I use fresh ingredients to get the best flavor. The two cups of fresh spinach bring a bright green color and a light taste. Feta cheese adds a salty bite, while mozzarella gives that melty goodness we all love. I finely chop the onion and mince the garlic to ensure they mix well. The onion lays the base flavor, while garlic adds a subtle kick. When I cook them, I want to soften them first, so the quesadillas are creamy and tasty. Next, I grab four large flour tortillas. They hold all the goodness and are easy to fold. I also have olive oil on hand; it helps with cooking and gives a nice crisp to the outside. Lastly, I like to sprinkle salt, pepper, and optional red pepper flakes for a hint of heat. Having the right tools is key. A large skillet cooks the quesadillas evenly. I use a mixing bowl to combine the filling, and a knife and cutting board make preparation easy. A serving plate is essential for that final touch. With all these ingredients and tools ready, you are set to make a simple yet tasty meal! {{ingredient_image_2}} To start, I heat a large skillet over medium heat. I add one tablespoon of olive oil. Once it gets warm, I toss in the finely diced onion. I sauté it for about 3-4 minutes until it becomes soft and clear. This step adds flavor to our filling. Next, I add two cloves of minced garlic. I let it cook for a minute until it smells great. I make sure not to let it burn. Now, I add the two cups of chopped spinach to the skillet. I stir it often until it wilts down. This takes about 2-3 minutes. I then sprinkle in some salt and black pepper. If I want a kick, I also add a dash of red pepper flakes. Once everything is cooked, I take the skillet off the heat. In a mixing bowl, I combine the spinach mix with one cup of crumbled feta cheese and one cup of shredded mozzarella cheese. Mixing well ensures that every bite is cheesy and tasty. Next, I prepare my tortilla. I heat a clean skillet over medium heat. I brush one side of a tortilla with olive oil. Then, I place it in the skillet, oiled side down. On one half of the tortilla, I generously spread a portion of the spinach and cheese filling. I cover it well to ensure a good taste in every bite. After that, I carefully fold the tortilla over to make a half-moon shape. I press down lightly to seal the edges. I cook the quesadilla for about 2-3 minutes on one side. I want it golden brown and the cheese to start melting. Then, I gently flip it over and cook for another 2-3 minutes on the other side. I look for the same golden brown color. Once cooked, I take the quesadilla out of the skillet and place it on a plate. I repeat this process with the remaining tortillas and filling. After they cool for a minute, I slice each quesadilla into wedges for easier serving. To get the best quesadillas, melt the cheese evenly. I recommend using both feta and mozzarella. Feta adds a tangy flavor, while mozzarella gives that gooey texture. Mix them well in the filling. This helps them melt together nicely. Adjusting the seasoning is also key. Taste your filling before cooking. You may want more salt or pepper. If you like heat, add red pepper flakes. Just a little can make a big difference. I love serving my quesadillas with tangy yogurt or tzatziki. These dips cool down the heat and add flavor. You can also add a side of salsa for a fresh kick. Garnishing is important too. Fresh herbs like parsley or cilantro add color and taste. Sprinkle them on top just before serving. It makes the dish look extra special. One common mistake is overstuffing the quesadilla. It may seem tempting, but too much filling can make it hard to cook. Stick to a moderate amount so it cooks evenly. Another mistake is not heating the skillet enough. Make sure your skillet is hot before adding the quesadilla. This helps achieve that golden brown finish on both sides. Adjust the heat as needed while cooking. Pro Tips Cheese Choice: For a creamier texture, consider adding a bit of cream cheese to the filling along with the feta and mozzarella. Cooking Temperature: Ensure your skillet is at medium heat; this helps to melt the cheese evenly without burning the tortilla. Customize Your Fillings: Feel free to add other vegetables like bell peppers or mushrooms for added flavor and nutrition. Serving Suggestions: Pair your quesadillas with a fresh salad or grilled vegetables for a complete meal. {{image_4}} You can change the flavor of your quesadillas with different cheeses. Goat cheese adds a tangy touch. It melts nicely and pairs well with spinach. Cheddar gives a sharp, bold flavor. It’s great if you love a cheesy taste. For a dairy-free option, try vegan cheese. There are many brands that melt well. This way, everyone can enjoy quesadillas. Want to spice things up? Add more fillings! Bell peppers bring a sweet crunch. Mushrooms add a savory depth. You could also mix in some spices. Cumin or paprika can give it a nice kick. Fresh herbs like basil or cilantro can brighten the flavors. Feel free to play around with what you have at home. If you need a gluten-free choice, corn tortillas work great. They are tasty, and they hold up well. You can also look for other healthy tortilla options. Almond or chickpea tortillas are popular. They add a nice twist to your quesadilla. Enjoy your meal without worry! Store any leftovers in an airtight container. This keeps them fresh and safe. They last in the fridge for about 3 days. If you want to enjoy them later, it's best to chill them quickly. You can freeze cooked quesadillas for up to 2 months. Just wrap each one in plastic wrap. Then, place them in a freezer bag. For reheating, take them out and let them thaw in the fridge overnight. To reheat quickly, use a skillet over medium heat. Cook each side for about 3-4 minutes. This helps keep the quesadilla crispy and warm. You can also use an oven at 350°F for about 10 minutes. This method maintains the great texture and flavor. To make these quesadillas lighter, try these tips: - Use whole wheat tortillas instead of regular ones. - Cut back on cheese or use low-fat options. - Olive oil can be reduced or brushed lightly on the tortillas. - Add more veggies, like bell peppers or mushrooms, for extra nutrients. These changes keep the taste great while lowering calories. Yes, frozen spinach works well! Here’s how to use it: - Thaw the spinach completely and drain excess water. - Squeeze it to remove more moisture. - Add it to the skillet with onion and garlic as you would fresh spinach. This method saves time and still gives you tasty quesadillas. Quesadillas pair well with various sides and dips: - Serve with yogurt or tzatziki sauce for a creamy touch. - Fresh salsa or guacamole adds a nice kick. - A side salad with light dressing keeps it fresh. These sides enhance the meal and make it more fun to eat. In this post, I shared a simple method for making delicious spinach and feta quesadillas. We covered the main and additional ingredients, cooking tools, and detailed steps for perfecting your dish. Tips like not overstuffing and adding optional fillings can enhance your meal. Lastly, I discussed proper storage and reheating techniques to keep leftovers tasty. Try these ideas and make your quesadilla experience much better! Enjoy your cooking adventure.

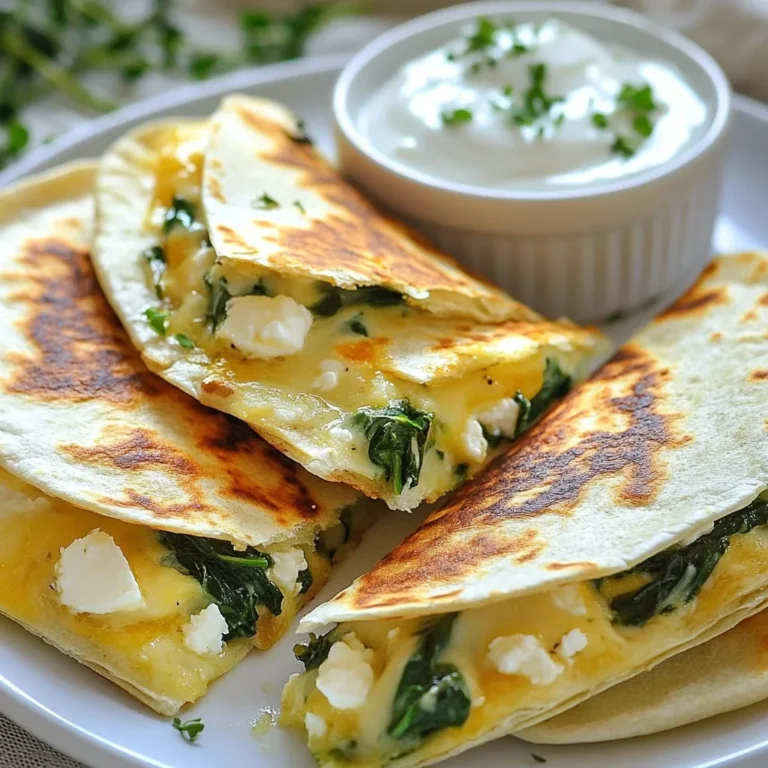
Spinach & Feta Quesadillas Simple and Tasty Meal

To make a delicious Thai fried chicken sandwich, you need: - 2 boneless, skinless chicken thighs - 1 cup buttermilk (or plant-based milk) - 1 tablespoon fish sauce - 1 tablespoon Sriracha sauce - 1 cup all-purpose flour - 1 teaspoon cornstarch - 1 teaspoon garlic powder - 1 teaspoon onion powder - 1 teaspoon salt - 1/2 teaspoon freshly ground black pepper - Oil for frying (about 2 cups) - 4 brioche or whole wheat hamburger buns - Fresh lettuce leaves - Sliced cucumbers - Fresh cilantro leaves - Spicy mayo (mix mayonnaise and Sriracha) If you want to change a few ingredients, here are some swaps: - Use almond milk or soy milk for a dairy-free option. - Replace fish sauce with soy sauce for a vegetarian version. - Use gluten-free flour for a gluten-free sandwich. - Swap Sriracha for a milder sauce if you prefer less heat. To prepare this sandwich, you will need: - A medium mixing bowl for marinating - Another bowl for the dry coating - A deep skillet or frying pan for frying - A thermometer to check oil temperature - A paper towel-lined plate for draining excess oil - A spatula for flipping the chicken These ingredients and tools set you up for a tasty meal. Enjoy every crispy bite! {{ingredient_image_2}} To start, grab a medium bowl. Whisk together 1 cup of buttermilk, 1 tablespoon of fish sauce, and 1 tablespoon of Sriracha. This mix brings flavor and moisture. Next, add the chicken thighs to the bowl. Make sure they are fully covered in the marinade. Cover the bowl with plastic wrap and place it in the fridge. I recommend marinating for at least 1 hour, but overnight works best. This waiting time allows the flavors to soak in deeply. In another bowl, mix 1 cup of all-purpose flour with 1 teaspoon of cornstarch, 1 teaspoon of garlic powder, 1 teaspoon of onion powder, 1 teaspoon of salt, and 1/2 teaspoon of black pepper. Stir it well to combine all the dry ingredients. This mixture will create a crispy crust. You want it to be even and flavorful for the chicken. Set this bowl aside while you prepare to fry. Now it's time to heat the oil. Pour about 2 cups of oil into a deep skillet. You need about 1 inch of oil for frying. Heat it over medium-high heat until it reaches 350°F (175°C). You can check the oil's heat by dropping in a pinch of the flour mix. If it sizzles, you're ready. Remove the chicken from the marinade, letting excess drip off. Dredge each thigh in the flour mix, pressing gently for a good coating. Carefully place the chicken in the hot oil. Fry for about 5 to 7 minutes per side. Look for a golden brown color and ensure the chicken reaches an internal temperature of at least 165°F (74°C). When cooked, transfer the chicken to a paper towel-lined plate to drain any extra oil. Enjoy the crunchy sound as you place it down! Marinating chicken makes it juicy and full of flavor. For this sandwich, I use buttermilk, fish sauce, and Sriracha. Mix these well in a bowl. Add your chicken thighs, making sure they are fully covered. Cover with plastic wrap and let it sit in the fridge for at least one hour. If you can, marinate overnight. This step really deepens the flavor and makes the chicken more tender. Keeping the right oil temperature is key for crispy chicken. Heat your oil to about 350°F (175°C). You can test it by dropping a pinch of the coating mix in the oil. If it sizzles and bubbles, the oil is ready. If the oil is too hot, the chicken will burn. If it's too cold, the chicken will soak up too much oil and become greasy. Use a thermometer for best results. Spicy mayo is easy to make and adds a kick. Start with mayonnaise as your base. Mix in Sriracha to your liking. For extra flavor, try adding lime juice or a touch of garlic powder. This can balance the heat and add depth. You can even mix in some fresh herbs like cilantro for a fresh taste. Adjust the spices to make it your own! Pro Tips Marination Matters: For the best flavor, marinate the chicken thighs overnight. This allows the buttermilk and spices to penetrate deeply, resulting in tender and flavorful meat. Temperature Check: Use a thermometer to check the oil temperature. Frying at the right temperature (around 350°F) ensures a crispy exterior without overcooking the chicken inside. Press for Perfection: When dredging the chicken in flour, press gently but firmly to ensure a thick and even coating. This helps achieve that perfect crispy crust. Serving Suggestion: Serve the sandwiches immediately after assembling for the best texture and flavor. If you're prepping ahead, keep components separate until ready to serve. {{image_4}} You can play with flavors in your marinade. Instead of fish sauce, use soy sauce for a vegan touch. Add lime juice or ginger for a fresh twist. Try adding different chili sauces to adjust the heat. A touch of honey or brown sugar gives a sweet kick. Experimenting with these flavors makes your chicken unique. While brioche is soft and rich, you can use whole wheat for a hearty option. Pretzel buns add a fun twist with their salty crust. For a lighter choice, consider lettuce wraps. They keep it fresh and low-carb. Each bun type changes the sandwich experience, so try different ones! If you want a meatless version, use fried tofu or tempeh. Marinate the tofu like chicken for great taste. Grilled eggplant or portobello mushrooms also work well. They add depth and flavor to the sandwich. Top with the same spicy mayo and fresh veggies for a delicious bite. To store leftover fried chicken, let it cool first. Place it in an airtight container. This keeps it fresh. You can store it in the fridge for up to three days. If you leave it out, it will spoil quickly. When you are ready to eat, reheat the chicken in the oven. Set it to 375°F (190°C). This helps keep the chicken crispy. Heat it for about 10-15 minutes. You can also use an air fryer for a quick option. It will keep the chicken crunchy. You can freeze the fried chicken for later. Wrap the pieces in plastic wrap, then place them in a freezer bag. This method stops freezer burn. You can keep it for up to three months. For buns, wrap them in foil before freezing. When you are ready, thaw them in the fridge overnight. You can serve many tasty sides with Thai fried chicken sandwiches. Here are some great options: - Crispy French fries: These add a nice crunch. - Sweet potato fries: They provide a sweet contrast. - Coleslaw: It adds a fresh, crunchy bite. - Pickles: They bring tangy flavors that pair well. - Asian-style salad: A light, refreshing side works great too. Each of these sides complements the sandwich's bold flavors. To make a gluten-free Thai fried chicken sandwich, swap regular flour for gluten-free flour. You can use: - Rice flour: This keeps it light and crispy. - Almond flour: This adds a nutty flavor. - Chickpea flour: This gives a unique taste and texture. Choose gluten-free buns to complete the sandwich. Always check labels for allergens. To ensure your chicken is fully cooked, use a meat thermometer. Insert it into the thickest part of the thigh. The chicken should reach an internal temperature of 165°F (74°C). Here are some tips: - Visual check: The chicken should be golden brown. - Juices: They should run clear, not pink. - Cut test: If unsure, cut into the thickest part. No pink means it’s done! Following these steps ensures a safe, delicious meal. You now know how to make a Thai fried chicken sandwich. We looked at important ingredients, cooking steps, and great tips for the best flavor. You can even try fun variations or store leftovers well. Remember to adjust for your tastes or dietary needs. Keep experimenting and enjoy this tasty dish! Your kitchen will smell amazing, and your meals will shine. Start cooking and share your delicious results!

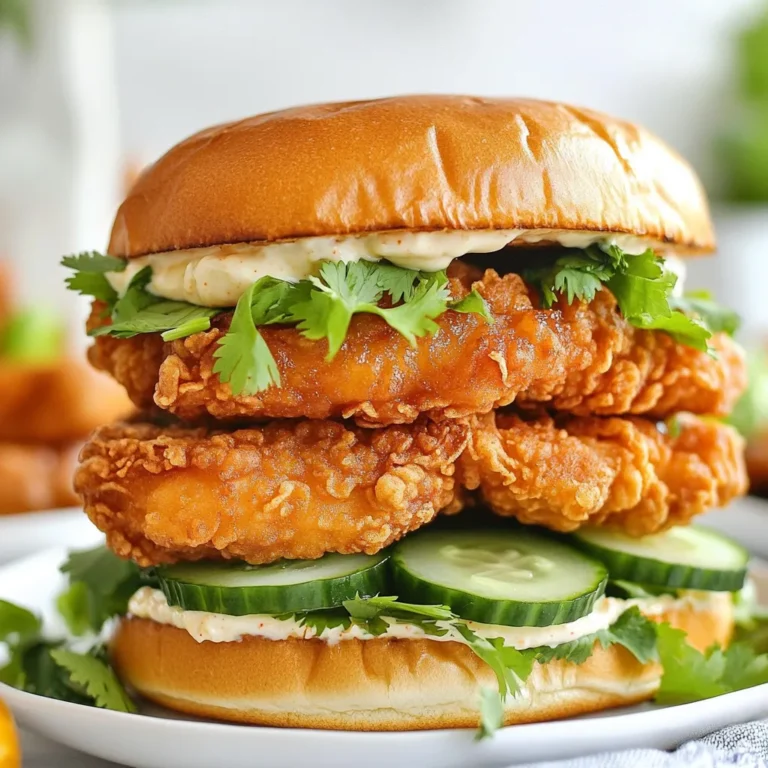
Thai Fried Chicken Sandwich Flavorful and Crispy Bite

To make Loaded Cheeseburger Soup, gather these key items: - 1 lb ground beef - 1 medium onion, diced - 2 cloves garlic, minced - 3 medium potatoes, peeled and diced - 4 cups beef broth - 1 cup milk These ingredients form the base of the soup. The ground beef gives it that rich, meaty flavor. The onion and garlic add depth and aroma, while the potatoes create a hearty texture. Beef broth brings everything together and enhances the taste. Finally, milk makes the soup creamy and smooth. Next, you’ll need these dairy items and toppings: - 1 cup shredded cheddar cheese - 1 cup sour cream - Optional: 1 cup cooked and crumbled bacon - Chopped green onions for garnish Cheddar cheese is the star here. It melts beautifully and adds a cheesy goodness. Sour cream adds a tangy note that balances the flavors. If you like, crumbled bacon gives extra crunch and richness. Chopped green onions add freshness and color to your bowl. Don’t forget these seasonings to boost the flavor: - 1 tablespoon Worcestershire sauce - 1 teaspoon onion powder - 1 teaspoon garlic powder - Salt and pepper to taste Worcestershire sauce brings a savory kick. Onion powder and garlic powder enhance the flavor without needing fresh ingredients. Salt and pepper are key to making all the flavors pop. Adjust these seasonings to your taste for the best result. {{ingredient_image_2}} - First, heat a large pot over medium heat. - Add 1 lb of ground beef to the pot. - Cook until the beef turns brown. - Use a wooden spoon to break it apart as it cooks. - Once browned, drain any extra fat. This helps keep the soup light. - Now, throw in 1 diced onion and 2 minced garlic cloves. - Sauté these for 2-3 minutes until the onion is clear. - Next, add 3 diced potatoes to the pot. - Pour in 4 cups of beef broth. - Increase heat to high and bring this to a boil. - Once boiling, lower heat and let it simmer for about 15 minutes. - Check the potatoes with a fork; they should be tender. - Slowly stir in 1 cup of milk. - Be careful not to let it boil, or the milk will curdle. - Gradually add 1 cup of shredded cheddar cheese and 1 cup of sour cream. - Keep stirring until both are mixed in well and the cheese melts. - Mix in 1 tablespoon of Worcestershire sauce, 1 teaspoon of onion powder, and 1 teaspoon of garlic powder. - Season with salt and pepper to fit your taste. - If you want, add 1 cup of crumbled bacon for extra flavor. - Serve hot, garnished with chopped green onions for a fresh touch. - Avoiding curdled milk: When adding milk, lower the heat first. Heating it too fast can cause curdling. Stir gently and let it warm up slowly. This keeps your soup creamy and smooth. - Ensuring tender potatoes: Cut potatoes into small, even pieces. This helps them cook faster and evenly. Boil them until soft, about 15 minutes. Check with a fork; they should pierce easily. - Best ways to serve: Ladle the soup into bowls while it’s hot. Top each bowl with chopped green onions for a fresh touch. You can also add crumbled bacon for extra flavor. - Pairing ideas with sides: This soup pairs well with crusty bread or a fresh salad. A side of garlic bread also works great for dipping. Enjoy a complete meal with these sides. - Overcooking ingredients: Keep an eye on the potatoes. Overcooked potatoes can turn mushy. Cook them just until tender. This keeps the texture nice in your soup. - Not seasoning properly: Taste as you cook. Add salt and pepper in small amounts. You can always add more, but you can’t take it out. Proper seasoning makes a big difference in flavor. Pro Tips Brown the Beef Well: Ensure the ground beef is browned nicely to develop a rich flavor base for your soup. Don't rush this step; it adds depth to the overall taste. Control the Heat: When adding milk, keep the heat low to prevent curdling. A gentle heat ensures a smooth and creamy soup without any lumps. Customize Your Cheeses: Feel free to mix different types of cheese for added complexity. A blend of cheddar and gouda can create a unique flavor profile. Enhance with Toppings: Consider adding extra toppings like jalapeños or crispy onions for an exciting texture contrast and flavor boost! {{image_4}} You can swap ground beef for ground turkey or chicken. These options are leaner and still tasty. If you want a non-meat choice, use lentils or mushrooms for a hearty base. For a dairy-free version, try coconut milk or almond milk instead of regular milk. To spice things up, add jalapeños or a dash of hot sauce. This adds a nice kick to the soup. Fresh herbs like parsley or thyme can brighten the flavor. You can mix these in right before serving for the best taste. Different cheeses can change your soup game. Try pepper jack for spice or gouda for a smoky flavor. Unique garnishes, like crispy fried onions or diced tomatoes, can add texture and freshness. Each topping can make your bowl special and personal. To keep your Loaded Cheeseburger Soup fresh, cool it quickly. Place it in a shallow container for faster cooling. This way, it chills evenly. Use airtight containers to avoid spills and keep out air. Glass or plastic containers work well. Label them with the date to track freshness. You can freeze Loaded Cheeseburger Soup too! First, let it cool completely. Then, pour it into freezer-safe containers. Leave some space at the top for expansion. Seal them tightly to prevent freezer burn. When ready to eat, thaw it overnight in the fridge. For reheating, warm it gently on the stove. Stir often to keep it smooth and creamy. In the fridge, Loaded Cheeseburger Soup lasts about three to four days. In the freezer, it stays good for about three months. Always check for any off smells or changes in texture before eating. Proper storage helps maintain its rich and tasty goodness. You can use ground turkey or chicken. These options are leaner. You can also try plant-based meat for a vegetarian version. Each choice offers a different taste and texture. Yes, you can! This soup tastes even better the next day. Store it in the fridge in an airtight container. Reheat it on the stove or in the microwave when ready to eat. Yes, this soup is gluten-free. The ingredients like beef broth and Worcestershire sauce are usually gluten-free. Always check labels to be sure. Add diced jalapeños or a dash of hot sauce. You can also use spicy cheese for an extra kick. Experiment with the level of heat that you enjoy! Absolutely! Brown the beef first, then add it to the slow cooker with other ingredients. Cook on low for 6-8 hours or high for 3-4 hours. Enjoy a warm, hearty meal without much fuss! In this blog post, we explored the ingredients needed for Loaded Cheeseburger Soup, like ground beef and potatoes. I shared a step-by-step guide for cooking the dish, followed by essential tips to enhance your soup experience. We also covered variations, storage tips, and frequently asked questions. You now have everything needed to create a tasty meal. Enjoy making it your own! This soup is simple, versatile, and sure to please everyone at the table.

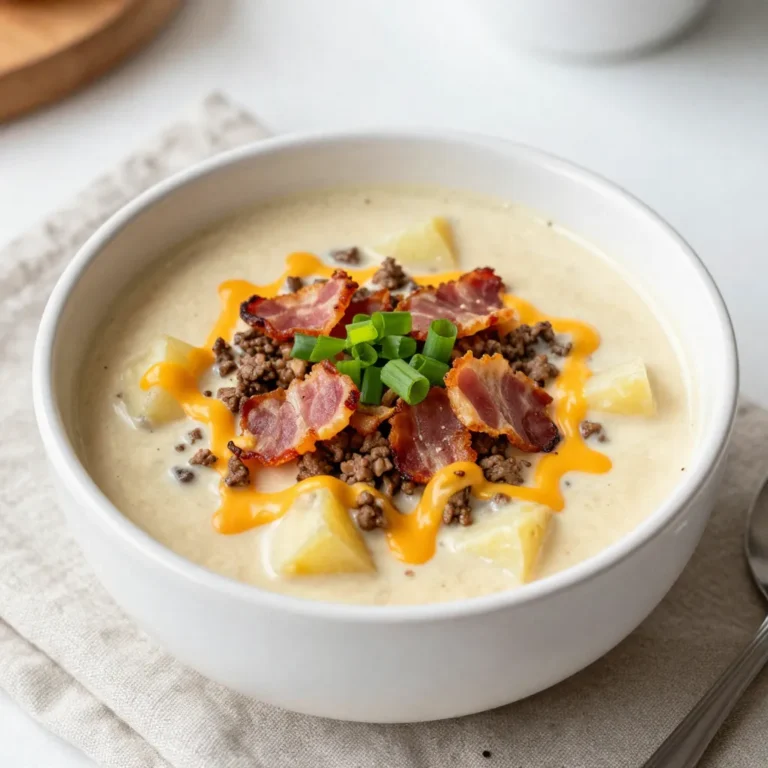
Loaded Cheeseburger Soup Rich and Flavorful Treat

- 2 cups fresh cherries, pitted and halved - 1 cup heavy cream - 1 cup whole milk - 3/4 cup granulated sugar - 1 teaspoon vanilla extract - 1/4 teaspoon almond extract - 1 cup semi-sweet chocolate chips - A pinch of salt To make Cherry Chocolate Chip Ice Cream, you need fresh cherries. Choose ripe ones for the best flavor. The cherries create a sweet and tart balance in the ice cream. Heavy cream and whole milk provide a rich base. This creaminess makes the ice cream soft and smooth. You'll also need granulated sugar. It sweetens the mix and helps with texture. The vanilla extract adds depth. Almond extract gives a nutty hint, enhancing the flavor. Semi-sweet chocolate chips add a nice crunch and chocolatey taste. A pinch of salt rounds out the sweetness, making it perfect. - Calories per serving: About 250 - Macronutrient breakdown: - Fat: 14g - Carbohydrates: 30g - Protein: 3g - Allergen information: Contains dairy and may contain nuts from almond extract. This ice cream has about 250 calories per serving. The creamy ingredients contribute to the fat content. It’s a treat, so enjoy it in moderation. Always check for allergies, especially with the almond extract. {{ingredient_image_2}} To start, grab a medium saucepan and add the pitted and halved cherries. Then, sprinkle in 1/4 cup of granulated sugar. Cook over medium heat for about 5 minutes. Stir gently as the cherries soften and release their juices. Once they are nice and juicy, take the saucepan off the heat. Set it aside and let the mixture cool completely. Next, take a large mixing bowl. In it, whisk together 1 cup of heavy cream, 1 cup of whole milk, and the remaining 1/2 cup of granulated sugar. Make sure to mix well until the sugar dissolves and the mixture is smooth. Now, add 1 teaspoon of vanilla extract, 1/4 teaspoon of almond extract, and a pinch of salt to enhance the flavor. Stir until combined. Once your cherry mixture has cooled, it's time to bring everything together. Carefully fold the cherry mixture into the cream mixture using a spatula or wooden spoon. Be gentle to keep the cherries intact. After that, stir in 1 cup of semi-sweet chocolate chips. Ensure they spread evenly throughout the mixture. Now, pour the combined mixture into your ice cream maker. Follow the manufacturer's instructions to churn the ice cream. This usually takes about 20-25 minutes. You want it to reach a soft-serve consistency. After churning, transfer the ice cream to an airtight container. Smooth out the top and seal it well. Freeze the ice cream for at least 4 hours. This will help it harden to your liking. When ready to serve, let it sit at room temperature for about 10 minutes. This makes scooping easier and more fun! Achieving the ideal texture To get the best texture, follow the steps closely. Churn the mixture until it reaches a soft-serve consistency. This usually takes about 20 to 25 minutes. If you churn too little, your ice cream may be too hard. If you churn too much, it can become grainy. Avoiding ice crystals Ice crystals can ruin your ice cream. To avoid them, freeze the mixture quickly. Use an ice cream maker, as it helps incorporate air. This process gives your ice cream a smooth feel. After churning, transfer it to an airtight container for freezing. This keeps air out and prevents ice crystals from forming. Presentation tips for serving Serving your ice cream nicely makes it more tempting. Use waffle cones or pretty bowls for a fun look. Add fresh cherry halves on top for color and taste. A sprinkle of chocolate shavings adds a nice touch too. These small details can turn your dessert into a showstopper. Pairing with toppings Toppings can enhance your ice cream experience. Try nuts, such as almonds or walnuts, for crunch. A drizzle of chocolate sauce can make it richer. You could also serve it with whipped cream for extra creaminess. Feel free to mix and match based on your taste! Pro Tips Use Fresh Cherries: Fresh cherries will give your ice cream the best flavor and texture. Look for ripe, sweet cherries for optimal results. Chill Your Mixture: For creamier ice cream, chill the cream mixture in the refrigerator for about an hour before churning. This helps to enhance the overall texture. Experiment with Extracts: Feel free to substitute or add other extracts like coconut or mint to create your own unique flavor profile. Keep It Airtight: To maintain freshness and prevent ice crystals from forming, always store your ice cream in an airtight container. {{image_4}} You can make your Cherry Chocolate Chip Ice Cream even more fun by mixing in different flavors. - Adding Different Fruits: Try adding raspberries or strawberries to the mix. These fruits pair well with cherries. You can also use blueberries for a burst of flavor. Just remember to chop them up before adding. This lets their juices mix in nicely. - Using Dark Chocolate Instead: If you want a richer taste, swap semi-sweet chocolate chips for dark chocolate. Dark chocolate adds depth and a nice contrast to the sweet cherries. You can chop a dark chocolate bar into small pieces or use chips. If you're looking for healthier options, there are many choices to make this treat fit your needs. - Dairy-Free Options: You can use coconut milk or almond milk instead of whole milk and heavy cream. This keeps the creaminess while making it dairy-free. You can also try using dairy-free chocolate chips for a complete dairy-free dessert. - Low-Sugar Substitutions: If you want to cut down on sugar, use a sugar substitute like stevia or erythritol. These options can still give you that sweet flavor without the calories. Just use them according to the package instructions, as they can vary in sweetness. To keep your Cherry Chocolate Chip Ice Cream fresh, follow these steps: - Best practices for freezing: Make sure your freezer is set to 0°F (-18°C) or lower. This keeps the ice cream firm and helps it hold its texture. - Packaging for freshness: Store the ice cream in an airtight container. A container allows no air to enter. This helps stop ice crystals from forming and keeps your ice cream smooth. How long can you keep your ice cream? - How long it lasts in the freezer: Cherry Chocolate Chip Ice Cream can last up to 2 months in the freezer. While it may stay safe to eat, the taste may fade over time. - Signs of spoilage: If you see ice crystals on the surface or the ice cream has a grainy texture, it’s best to toss it. Also, if the ice cream smells off or has a strange flavor, don’t eat it. Following these tips will keep your Cherry Chocolate Chip Ice Cream tasty and delightful! You can make this ice cream without an ice cream maker. Here’s how: - Use a mixing bowl: After mixing your ingredients, pour them into a bowl. - Freeze and stir: Place the bowl in the freezer. Every 30 minutes, stir the mixture with a fork for about 2-3 hours. This helps break up ice crystals. - Final freeze: After 3 hours, let the ice cream freeze for an additional hour without stirring. This method gives you a creamy texture, even without a machine. Yes, frozen cherries work well! Here’s how to use them: - Thaw first: Let the frozen cherries thaw before cooking. This helps them soften. - Drain excess liquid: After thawing, drain any extra juice. You want to keep the ice cream from getting too watery. - Cook as fresh cherries: Cook the thawed cherries with sugar as you would fresh ones. Using frozen cherries is a great option, especially when fresh ones are not in season. You can create many tasty treats with cherry and chocolate flavors! Here are some ideas: - Cherry Chocolate Chip Milkshake: Blend your ice cream with milk for a creamy shake. - Cherry Chocolate Sundae: Top your ice cream with hot fudge, nuts, and whipped cream. - Cherry Chocolate Chip Cookies: Fold cherry bits and chocolate chips into cookie dough for a fun twist. These ideas keep the flavors alive in different ways, perfect for any sweet tooth! You learned how to make cherry chocolate chip ice cream using simple steps. We discussed the ingredients, from fresh cherries to chocolate chips. I shared tips for perfect texture and storage methods. You can customize the recipe with different fruits or dairy-free options. Enjoy making this treat at home! It's a fun way to beat the heat and impress friends. Now, get started and create your own delicious version!

Cherry Chocolate Chip Ice Cream Delightful Treat Recipe

- 2 cans (15 oz each) sliced peaches in syrup, drained - 1 cup sugar - 1 teaspoon ground cinnamon - 1 box (15.25 oz) yellow cake mix - 1 cup unsalted butter, melted - 1/2 cup chopped pecans (for added crunch) - Vanilla ice cream (for serving) Serve the dump cake warm in bowls. Top each serving with a scoop of vanilla ice cream. You can also add a slice of fresh peach or a mint leaf for a nice touch. This makes your dessert not only tasty but also pretty. {{ingredient_image_2}} 1. Preheat your oven to 350°F (175°C). 2. Grease a 9x13 inch baking dish with non-stick spray or butter. 3. In a large bowl, mix the drained peaches, sugar, and cinnamon. 4. Gently stir until the peaches are coated with the sugar mixture. 5. Pour the peach mixture evenly into the prepared baking dish. 6. Sprinkle the dry yellow cake mix over the peaches. Do not stir it. 7. Carefully drizzle the melted butter over the cake mix, covering it all. 8. If using, sprinkle the chopped pecans on top for extra crunch. 1. Place the baking dish in the preheated oven. 2. Bake for 45-50 minutes. Look for a golden brown and bubbly top. 3. The butter will soak into the cake mix, creating a nice crust. 1. Remove the cake from the oven. Let it cool for a few minutes. 2. Serve it warm for the best taste. 3. A scoop of vanilla ice cream on top makes it even better! 4. For a fun touch, add a slice of fresh peach or a mint leaf when serving. To make the best Peach Cobbler Dump Cake, follow a few simple steps. First, use ripe peaches for a sweeter taste. If you use canned peaches, drain them well to avoid extra liquid. Mix the peaches with sugar and cinnamon for great flavor. After that, layer the dry cake mix evenly over the peaches. This helps create a nice crust when baked. Pour melted butter over the cake mix without stirring. This step keeps the topping crispy and golden. One common mistake is mixing the cake batter too much. You want to keep it dry and fluffy. Another mistake is not preheating the oven. Baking at the right temperature makes a big difference. Don't skip the cooling time after baking. Letting it sit helps the flavors blend well. Lastly, be careful not to overbake. A golden top is what you want, not a burnt one. To boost flavor, add vanilla extract to the peach mix. You can also sprinkle in some nutmeg for warmth. For a crunchier texture, toss in chopped pecans or walnuts on top. Serve with a scoop of vanilla ice cream for a creamy contrast. If you want a twist, try adding a bit of lemon juice to the peaches. This brightens the overall taste. Remember, little changes can lead to big flavor! Pro Tips Use Fresh Peaches: If you have access to fresh peaches, slice them up for an even more flavorful and juicy cake. Butter Coverage: Ensure the melted butter covers the cake mix evenly to achieve a perfectly crispy top. Serve Warm: This cake is best enjoyed warm, so consider serving it straight from the oven with a scoop of vanilla ice cream. Customize Your Nuts: Feel free to substitute pecans with walnuts or almonds for a different nutty flavor. {{image_4}} You can switch up the fruit in this dump cake. Berries, cherries, or apples work great. Just replace the peaches. For berries, use mixed berries or just blueberries. With apples, slice them thin and mix with sugar and cinnamon. This keeps the same sweet taste and warm feel. Not a fan of yellow cake mix? Try white or chocolate cake mix instead. Each flavor brings a new twist to the cake. White cake mix keeps the flavor light. Chocolate cake adds richness. Both still pair well with the fruit. Want a gluten-free version? Use a gluten-free cake mix. Many brands offer great taste without gluten. For a vegan option, swap the butter for coconut oil or vegan butter. Use a plant-based cake mix too. This way, everyone can enjoy your tasty dessert! To store your leftover Peach Cobbler Dump Cake, let it cool first. Then, place it in an airtight container. You can keep it in the fridge for about 3 to 5 days. Make sure to seal it well to keep it fresh. If you want to enjoy it later, consider freezing it. If you want to freeze your cake, slice it into portions first. Wrap each piece tightly in plastic wrap. Then, put the wrapped slices into a freezer bag or container. This way, you can grab just what you need. It will stay good in the freezer for up to 3 months. Just remember to label the bag with the date. To reheat, take a slice out of the fridge or freezer. If it’s frozen, let it thaw in the fridge overnight. For a quick reheat, use the microwave. Heat it for 20-30 seconds, checking to avoid overheating. If you prefer the oven, preheat it to 350°F (175°C) and bake for about 10-15 minutes. Serve warm, topped with a scoop of vanilla ice cream for a treat! Yes, you can use fresh peaches. Slice about 6-8 ripe peaches. Peel them if you like. They will add a fresh flavor to your dump cake. Just remember to add a bit of sugar. Fresh peaches can be less sweet, so taste as you go. You can adjust the sugar in the recipe. If you like it less sweet, reduce the sugar by half a cup. If you want more sweetness, add more sugar to taste. You can also use brown sugar for a richer flavor. I love serving this cake with vanilla ice cream. The cold ice cream melts into the warm cake. You can also add whipped cream or fresh fruit. A sprinkle of cinnamon on top adds a nice touch too. Peach Cobbler Dump Cake lasts about 3-4 days in the fridge. Make sure to store it in an airtight container. Reheat it gently before serving for the best taste. Peach cobbler dump cake is simple and fun to make. I have shared key ingredients, tips, and serving ideas that will help you create the best dessert. Remember to explore fruit options and try different cake mixes for tasty twists. Storing leftovers properly can keep your dessert fresh. I hope you enjoy making and sharing this sweet treat with family and friends. With these steps, you’ll impress everyone at your next gathering!

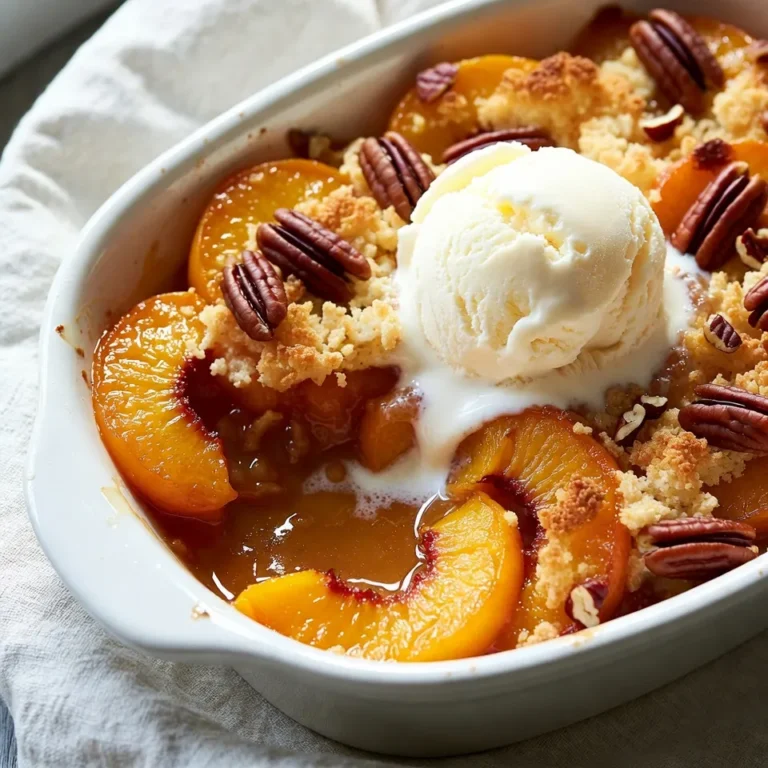
Peach Cobbler Dump Cake Simple and Sweet Recipe

- 8 oz rice noodles - 4 tablespoons sweet chili sauce - 2 tablespoons soy sauce - 2 tablespoons sesame oil - 1 cup snap peas - 1 red bell pepper - 2 green onions - 3 cloves garlic, minced - 1 teaspoon fresh ginger, grated - Sesame seeds - Lime wedges When I prepare Sweet Chili Garlic Noodles, I focus on fresh and vibrant ingredients. The rice noodles are the base of the dish. They soak up all the lovely flavors. I use 8 ounces, which is perfect for two servings. Next, the sweet chili sauce adds a nice kick. It’s sweet, spicy, and takes the noodles to another level. I use four tablespoons for a great balance. The soy sauce brings depth and umami to the dish. Two tablespoons do the trick. Sesame oil is my go-to for sautéing. It has a rich, nutty taste. I use two tablespoons to enhance the flavors of the garlic and ginger. For veggies, I love snap peas and red bell peppers. The snap peas add crunch, while the bell pepper brings sweetness. I add one cup of snap peas and one sliced red bell pepper. Green onions are a must for garnish. They add freshness and color. I chop two green onions and mix them in at the end. Aromatics are key to this recipe. I mince three cloves of garlic and grate one teaspoon of fresh ginger. They infuse the dish with amazing flavor. Finally, I sprinkle sesame seeds on top for a nice crunch. Lime wedges are perfect for squeezing over the noodles just before eating. They add a bright, zesty finish. Gather these ingredients, and you’re ready to make a quick, tasty meal! {{ingredient_image_2}} To start, you need to cook the rice noodles. Follow the package instructions for the best results. After cooking, drain the noodles well. Rinsing them under cold water stops the cooking process. This step is key to keeping the noodles from becoming mushy. Next, heat the sesame oil in a large skillet over medium heat. Once the oil is hot, add the minced garlic and grated ginger. Cook them for about 30 seconds. Stir constantly to mix. Watch closely to avoid burning, as burnt garlic and ginger can ruin the taste. Now, it’s time to add the veggies! Toss in the snap peas and sliced red bell pepper. Sauté the vegetables for about 2-3 minutes. They should be bright and slightly tender but still crisp. After that, gently fold in the cooked rice noodles. Pour in the sweet chili sauce and soy sauce. Toss everything together until the noodles are well coated and hot, which takes another 2-3 minutes. Finally, stir in the chopped green onions right before serving. - To keep noodles from sticking, rinse them in cold water after cooking. - Use sesame oil for a nutty flavor. It works great for sautéing. - Add cooked chicken, shrimp, or tofu for more protein. - Adjust sweetness by adding more or less sweet chili sauce. - Increase spice with red pepper flakes or sriracha. - Serve in bowls and sprinkle sesame seeds on top. - Pair with a fresh salad or spring rolls for a full meal. Pro Tips Perfectly Cooked Noodles: Make sure to follow the package instructions for cooking the rice noodles. Overcooking can lead to mushy noodles, while undercooking can leave them too firm. Freshness Matters: Use fresh garlic and ginger for the best flavor. They can significantly enhance the dish's overall taste and aroma. Vegetable Crunch: Avoid overcooking the vegetables. They should be vibrant and crisp to add texture and freshness to your dish. Lime Zest: Don't skip the lime wedges! A squeeze of lime right before eating brings a zesty brightness that complements the sweet and savory flavors beautifully. {{image_4}} You can swap rice noodles for other types. Try using egg noodles or whole wheat spaghetti. Both options work well and add a different taste. For a gluten-free meal, use rice or buckwheat noodles. They cook fast and soak up flavors nicely. Feel free to adjust the veggies based on your taste. Seasonal choices like zucchini or carrots can bring new flavors. You can also use broccoli or bell peppers in different colors. They add color and crunch to your dish. Mix and match to keep it fresh and exciting. You can easily adapt this recipe to fit your diet. To make it vegan, use a plant-based sweet chili sauce and soy sauce. For gluten-free needs, check labels on sauces and noodles. These changes keep the dish tasty while meeting your dietary needs. To store your Sweet Chili Garlic Noodles, let them cool first. Place the noodles in an airtight container. This helps keep the noodles fresh. They last up to three days in the fridge. Label your container with the date. This way, you won’t forget when you made them! For the best texture when reheating, use a skillet. Heat a small amount of sesame oil over medium heat. Add your noodles and a splash of water. Stir-fry them for about 3-5 minutes. This keeps them from drying out. You can also use the microwave. Cover the dish to keep moisture in. Heat for one minute, stir, then heat again until hot. Yes, you can freeze Sweet Chili Garlic Noodles! First, let them cool completely. Then, place them in a freezer-safe bag or container. Remove as much air as you can. They can stay good for about one month. When ready to eat, thaw overnight in the fridge. Reheat them using the skillet method for the best taste! Sweet chili garlic noodles are a quick dish full of flavor. They mix rice noodles with sweet chili sauce and garlic. You get a nice balance of heat and sweetness. The noodles are soft, while the veggies add crunch. Fresh ginger and garlic give a warm depth. This dish is easy to make and great for any meal! Yes, you can make this dish vegan with simple swaps. Use a plant-based sweet chili sauce. For the soy sauce, choose a vegan brand. You can also add tofu or tempeh for protein. This way, you keep all the flavor while making it vegan-friendly. Leftovers of sweet chili garlic noodles last up to three days in the fridge. Store them in an airtight container. To keep them fresh, avoid leaving them out at room temperature. When ready to eat, reheat them in a pan or microwave for the best taste. Sweet Chili Garlic Noodles are easy and fun to make. We covered the main ingredients, like rice noodles and fresh veggies, along with step-by-step instructions. I shared tips for cooking perfection and serving ideas. You can even customize the dish with different noodles or veggies. Storing and reheating leftovers keeps the meal fresh and tasty. Now, dive in and enjoy creating your own version of this delightful dish!

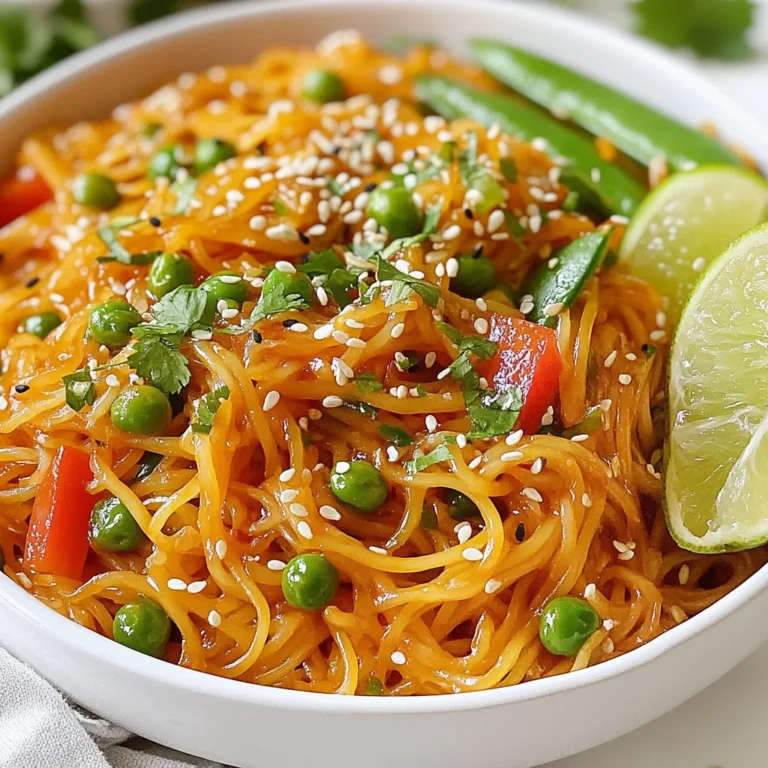
Sweet Chili Garlic Noodles Quick and Flavorful Recipe

- 12 ounces rigatoni pasta - 1 pound Italian sausage (mild or spicy) - 1 tablespoon extra virgin olive oil - 1 medium onion, finely chopped - 3 cloves garlic, minced - 1 cup heavy cream - 1 cup freshly grated Parmesan cheese - 1 cup fresh spinach, roughly chopped - 1 teaspoon dried oregano - ½ teaspoon red pepper flakes (optional) - Salt and freshly cracked black pepper to taste - Fresh basil leaves, for garnish You can swap the rigatoni for penne or fusilli. If you prefer chicken, use ground chicken instead of sausage. For a lighter option, replace heavy cream with half-and-half or a non-dairy alternative like coconut cream. If you want to skip cheese, try nutritional yeast for a cheesy flavor. To make creamy sausage rigatoni, you need: - Large pot for boiling pasta - Skillet for cooking sausage and sauce - Wooden spoon or spatula for stirring - Colander for draining pasta - Measuring cups and spoons for accuracy - Knife and cutting board for chopping This list covers everything you need to create a creamy and savory dish. Enjoy your cooking! {{ingredient_image_2}} Bring a large pot of salted water to a boil. Add 12 ounces of rigatoni pasta. Cook it according to the package's instructions until it’s al dente. This means it should be firm to the bite. Drain the pasta, but keep about ½ cup of the cooking water. This water will help adjust the sauce later. In a large skillet, pour in 1 tablespoon of extra virgin olive oil. Heat it over medium heat. Add 1 pound of Italian sausage to the skillet. Use a wooden spoon to break it apart. Cook the sausage for 5 to 7 minutes. Stir it often until it turns a nice brown color and is fully cooked. Once the sausage is ready, add a finely chopped medium onion to the skillet. Sauté it for 3 to 4 minutes, until the onion becomes soft and clear. Next, toss in 3 minced garlic cloves. Cook for another minute. The smell of garlic will fill your kitchen! Now, reduce the heat to low. Pour in 1 cup of heavy cream and stir it all together. Gradually add 1 cup of grated Parmesan cheese. Keep stirring until the cheese melts into a creamy sauce. Stir in 1 cup of roughly chopped spinach and 1 teaspoon of dried oregano. If you want some heat, add ½ teaspoon of red pepper flakes. Season with salt and black pepper to taste. If the sauce is too thick, mix in some of the reserved pasta water. Now, add the drained rigatoni to the skillet. Toss everything together until the pasta is well coated with the creamy sauce. Serve hot and enjoy your flavorful dinner! To cook perfect rigatoni, start with a big pot. Use plenty of salted water. This helps the pasta stay flavorful. Boil the water until it's rolling. Add the rigatoni and stir to prevent sticking. Cook until al dente, which means it should still have a slight bite. Remember to save some pasta water; it’s great for adjusting your sauce later. If your sauce needs to be thicker, try these tips: - Add more cheese: Parmesan melts well and adds flavor. - Use a cornstarch slurry: Mix cornstarch with water, then stir it in. - Simmer longer: Let the sauce cook down to remove excess water. - Add more cream: This makes the sauce richer and thicker. Boost the flavor of your creamy sausage rigatoni with these ideas: - Fresh herbs: Basil or parsley adds freshness. - Lemon zest: A little zest brightens up the dish. - More spices: Consider adding garlic powder or Italian seasoning for extra depth. - Red pepper flakes: If you like heat, sprinkle in some more for a spicy kick. These tips will make your creamy sausage rigatoni truly stand out! Enjoy experimenting and finding your perfect flavor balance. Pro Tips Choose Your Sausage Wisely: Opt for high-quality Italian sausage for the best flavor. If you prefer a kick, spicy sausage will elevate the dish. Perfectly Cooked Pasta: Make sure to cook the rigatoni until al dente. This ensures the pasta holds its shape and texture when mixed with the sauce. Fresh Ingredients Matter: Use fresh spinach and freshly grated Parmesan cheese to enhance the creaminess and overall flavor of the dish. Customize Your Heat Level: Adjust the amount of red pepper flakes according to your spice tolerance. You can always add more, but it's hard to take it out once added! {{image_4}} You can make a tasty vegetarian version of creamy rigatoni. Swap the sausage for plant-based sausage or mushrooms. Use the same spices and cooking steps. This way, you keep the rich flavor without meat. You can also try adding lentils for extra protein. Rigatoni is great, but other pasta shapes work well too. Penne, fusilli, or even farfalle are good choices. Each shape holds the sauce differently, adding fun to your meal. Choose whatever you have on hand or prefer. You can boost your creamy rigatoni by adding veggies. Broccoli, bell peppers, or zucchini add color and nutrients. Cook them with the sausage for a full meal. If you want more protein, try adding grilled chicken or shrimp. These options make the dish even more filling and tasty. To keep your creamy sausage rigatoni fresh, place it in an airtight container. Make sure to let the pasta cool down first. Store it in the fridge for up to three days. If you want to keep it longer, freezing is a great option. When you’re ready to enjoy your leftovers, reheat them gently. You can use a skillet over medium heat. Add a splash of water or cream to help loosen the sauce. Stir often until it’s warm. You can also use the microwave. Heat in short bursts, stirring in between, until hot. If you want to freeze your creamy sausage rigatoni, portion it into freezer-safe bags or containers. Make sure to remove as much air as possible. It can stay in the freezer for up to three months. When you’re ready to eat, thaw it in the fridge overnight before reheating. Enjoy your meal anytime! Yes, you can! Feel free to swap Italian sausage for chicken, turkey, or even plant-based sausage. Each type will give a different flavor. Chicken sausage adds a lighter taste, while spicy sausage gives a kick. The key is to find a sausage you love. This will still keep the dish rich and tasty. To make this dish dairy-free, use coconut cream or cashew cream instead of heavy cream. You can also use nutritional yeast for a cheesy taste without dairy. Choose a dairy-free cheese for the topping if you want. The dish will still be creamy and delicious! Creamy Sausage Rigatoni pairs well with a simple side salad. A fresh green salad with lemon vinaigrette adds brightness. Garlic bread is another great side. It helps to soak up the creamy sauce. You can also serve it with roasted vegetables for extra nutrition. Enjoy these sides with your meal! This blog post shared how to make a delicious creamy sausage rigatoni. We looked at essential ingredients and tools needed to start. You learned step-by-step instructions for cooking pasta and the sauce. I shared tips to enhance flavors and ensure a creamy texture. You can try different variations or save leftovers for later. Now, you’re ready to impress with this dish, whether for a weeknight meal or a special occasion. Enjoy cooking and experimenting with your own flavors!

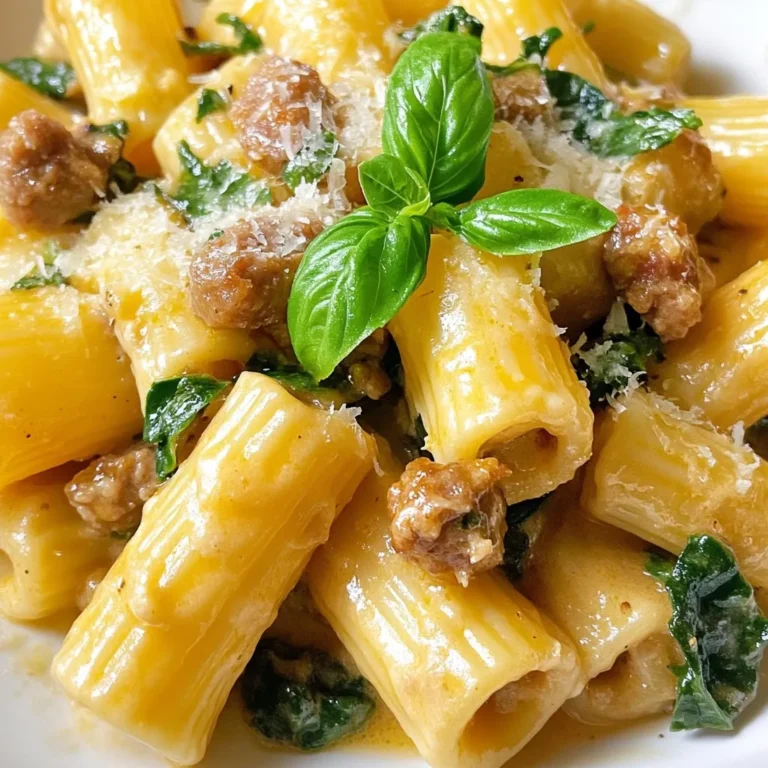
Creamy Sausage Rigatoni Flavorful Dinner Delight

PREV 1 … 28 29 30 … 48 NEXT
meal plan mapper

explore

DessertsDinnerAppetizersDrinks

Our Policies

  • Cookie Policy
  • Copyright Policy
  • Disclaimer
  • GDPR Policy
  • Terms Of Use
Back to Top
  • About
  • Contact Us
  • Privacy Policy
© 2025 meal plan mapper