FREE DINNER EBOOK! Get your copy!
  • Cookie Policy
  • GDPR Policy
  • Disclaimer
  • Terms Of Use
  • Visit my other site: Fun Cookie Recipes
meal plan mapper
  • Home
  • Dinner
  • Desserts
  • Drinks
  • Appetizers
  • Contact
  • About
  • Privacy Policy
  • Home
  • Dinner
  • Desserts
  • Drinks
  • Appetizers
  • Contact
  • About
  • Privacy Policy
  • Cookie Policy
  • GDPR Policy
  • Disclaimer
  • Terms Of Use
Visit my other site: Fun Cookie Recipes

HOME / CATEGORIES /

Latest

To make this salad fresh and tasty, gather these simple ingredients: - 5 cups fresh baby spinach, thoroughly washed - 2 cups strawberries, hulled and thinly sliced - 1 cup cucumber, peeled and sliced into thin rounds - 1/2 cup red onion, sliced thinly - 1/3 cup feta cheese, crumbled for a creamy touch - 1/4 cup walnuts or pecans, toasted for added crunch These fresh ingredients give your salad a bright look and a burst of flavor. The spinach is crisp, while the strawberries add sweetness. Cucumber adds crunch, and red onion gives a nice kick. Feta cheese adds creaminess, while toasted nuts bring a satisfying crunch. Now, let’s whip up the poppy seed dressing. You’ll need: - 1/2 cup plain yogurt, for creaminess - 2 tablespoons honey, to add sweetness - 2 tablespoons apple cider vinegar, bringing brightness - 1 tablespoon poppy seeds, for a nutty flavor - 1 tablespoon Dijon mustard, adding a savory kick - Salt and pepper to taste, to enhance flavors This dressing ties the salad together. The yogurt makes it smooth, while honey adds a touch of sweetness. Apple cider vinegar brightens the flavors, and poppy seeds add a nice crunch. Dijon mustard gives it a savory punch, while salt and pepper balance it all out. You can also try these optional add-ons for extra flavor: - Sliced avocado for creaminess - Grilled chicken for protein - Fresh herbs like mint or basil for a fragrant touch - Dried cranberries for a sweet contrast These add-ons let you customize the salad to your taste. Avocado makes it richer, while grilled chicken adds heartiness. Fresh herbs brighten the dish, and dried cranberries introduce a sweet note. Feel free to mix and match these options! {{ingredient_image_2}} To start, gather your ingredients. Use 5 cups of fresh baby spinach. Rinse it well to remove dirt. Next, slice 2 cups of strawberries into thin pieces. This brings a sweet flavor. Then, peel 1 cucumber and cut it into thin rounds. Add this to the bowl. Now, slice 1/2 cup of red onion very thin. This will add a nice bite to your salad. In a large bowl, mix all these ingredients together. Toss them gently to combine them well. In a small bowl, combine 1/2 cup of plain yogurt. This will give our dressing creaminess. Next, add 2 tablespoons of honey for sweetness. Now, pour in 2 tablespoons of apple cider vinegar. This will brighten the dressing. Then, add 1 tablespoon of poppy seeds for a nice nutty flavor. Don’t forget 1 tablespoon of Dijon mustard for a savory taste. Mix well until everything is blended. Add salt and pepper to taste. This will enhance all the flavors. Drizzle the poppy seed dressing over the salad base. Use tongs to toss the salad lightly, so it coats everything. Now, sprinkle 1/3 cup of crumbled feta cheese on top. This adds a creamy texture. Finally, add 1/4 cup of toasted walnuts or pecans for crunch. Serve the salad right away for the best taste. If you want, chill it for 30 minutes to deepen the flavors. Enjoy your Strawberry Spinach Salad with Poppy Seed Dressing! Use fresh ingredients for the best taste. Wash the spinach well to remove dirt. Cut the strawberries just before serving to keep them fresh. Slice the cucumber thinly for an even crunch. Thin slices of red onion add a nice bite. If you prefer a milder taste, soak the onions in cold water for a few minutes. The balance of soft and crunchy is key. Baby spinach provides a tender base. Add sliced strawberries for sweetness and a juicy bite. Cucumber rounds give a refreshing crunch. Crumbled feta cheese adds creaminess. Toasted walnuts or pecans bring extra crunch and flavor. Toss lightly to keep all the textures intact. For a festive look, serve in a wide, shallow bowl. Garnish with whole strawberries and edible flowers. This adds color and elegance. Chill the salad for 30 minutes to enhance the flavors. It makes a great starter or side dish for summer parties. Pair it with grilled chicken or fish for a complete meal. Pro Tips Freshness Matters: Always use fresh spinach and strawberries for the best flavor and texture in your salad. Customize Your Nuts: Feel free to substitute walnuts or pecans with your favorite nuts or seeds for a unique twist. Chill Before Serving: Letting the salad chill for 30 minutes enhances the flavors and makes it extra refreshing. Dress Just Before Serving: To keep the salad crisp, add the dressing right before serving to prevent wilting. {{image_4}} You can swap some ingredients to change the taste of your salad. Instead of spinach, try arugula for a peppery kick. If you don’t like feta, use goat cheese. It adds a tangy flavor. For a nutty twist, replace walnuts with sunflower seeds. You can also add sliced apples for extra crunch and sweetness. Use fresh, seasonal ingredients to keep your salad exciting. In summer, add ripe peaches or nectarines. In fall, try diced apples or pears. You can even throw in some roasted butternut squash during winter. These additions bring new flavors and colors to your dish. They also keep your salad fresh and fun. If you’re feeling adventurous, change up the dressing. Swap the yogurt for avocado for a creamy texture. You can use olive oil instead of yogurt for a lighter option. For a spicy kick, add some sriracha or chili flakes. Experimenting with different dressings adds new layers of flavor. This keeps your meal interesting every time you make it. To keep your strawberry spinach salad fresh, place any leftovers in an airtight container. Make sure to store it in the fridge right away. The salad is best enjoyed within two days for optimal taste and crispness. If you notice the leaves wilting, it's time to toss it. For the poppy seed dressing, you should store it in a sealed jar or container in the fridge. It will stay fresh for about a week. Before using it again, give it a good shake. This helps mix the ingredients that may have settled. - Fresh baby spinach: Use within 3 to 5 days for the best flavor. - Strawberries: Store for 3 to 7 days, depending on ripeness. - Cucumber: Keep for about a week in the fridge. - Red onion: Lasts 1 to 2 weeks if stored in a cool, dry place. - Feta cheese: Use within a week after opening. - Nuts: Toasted nuts stay good for about 2 weeks, while raw can last a few months. By following these storage tips, you can make the most of your delicious salad and dressing! Yes, you can make the salad ahead of time. Prepare the salad without the dressing. Keep it in the fridge for up to one day. Add the dressing just before serving for the best taste. You can use goat cheese or ricotta for a creamy touch. If you prefer a non-dairy option, try avocado. This adds creaminess without cheese. Yes, for a vegan version, swap plain yogurt with a plant-based yogurt. Use maple syrup instead of honey for sweetness. This keeps the flavor rich and creamy. All the salad ingredients are gluten-free. Just check the label on your Dijon mustard to ensure it is gluten-free. This way, you can enjoy the salad without worry. Yes, you can use frozen strawberries. Just thaw them first and drain excess liquid. This keeps the salad from getting soggy and still adds great flavor. This blog post shared easy steps for making a fresh salad with poppy seed dressing. We covered key ingredients and optional add-ons to boost flavor. I discussed best practices for prepping veggies and achieving the right texture. You learned about variations to try with seasonal ingredients and alternative dressings. We also explored storage tips for leftovers and common questions. In the end, making this salad can be fun and flexible, suiting your tastes and needs. Enjoy creating your perfect salad!

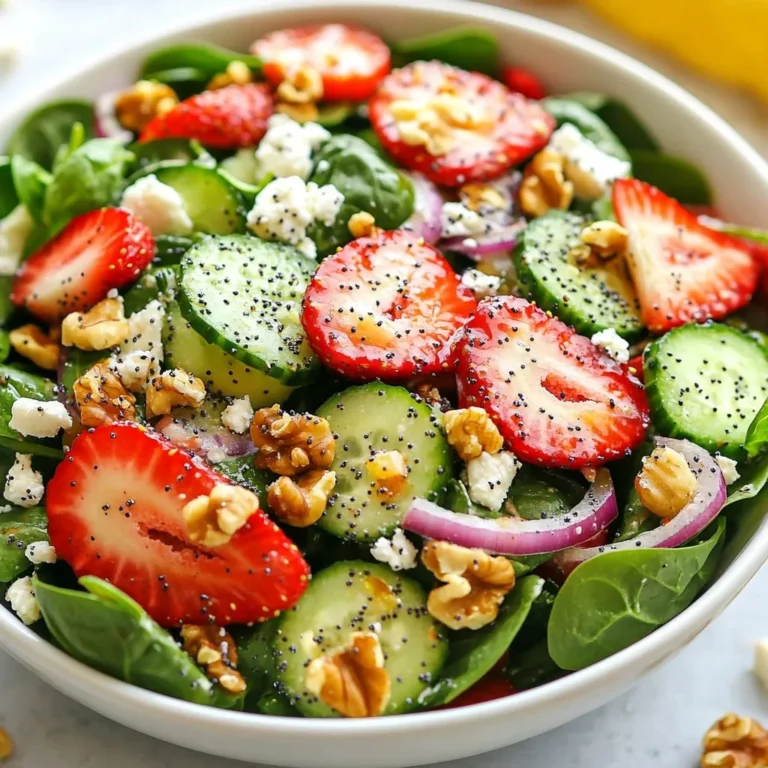
Strawberry Spinach Salad with Poppy Seed Dressing Delight

- 1 cup graham cracker crumbs - 1/2 cup unsalted butter, melted - 1 tablespoon granulated sugar - 1 (8 oz) package cream cheese, softened to room temperature - 1/2 cup powdered sugar - 1 teaspoon pure vanilla extract - 1 cup heavy whipping cream - 1 cup fresh strawberries, hulled and diced - 1/4 cup strawberry jam - Mini flour tortillas (6-inch size) These ingredients create a sweet delight. Each one plays an important role in the taste and texture. You can add a pinch of salt to the crust. It brings out the flavors. For extra fun, mix in some lemon zest in the cream cheese filling. It adds a bright note. You might also enjoy adding a sprinkle of cinnamon to the graham cracker crumbs. This gives a warm twist to each bite. These small changes can make your cheesecake tacos special. They let you play with flavors. Have fun experimenting with your favorite tastes! {{ingredient_image_2}} To start, get a medium mixing bowl. Add these items: - 1 cup graham cracker crumbs - 1/2 cup unsalted butter, melted - 1 tablespoon granulated sugar Mix until it looks like wet sand. This should take just a minute. Then, preheat your oven to 350°F (175°C). Spread the crumb mix on a baking sheet. Bake for 8-10 minutes. You want it golden brown. Once done, take it out and let it cool completely on the baking sheet. In a large bowl, add these ingredients: - 1 (8 oz) package cream cheese, softened - 1/2 cup powdered sugar - 1 teaspoon pure vanilla extract Use a hand mixer or stand mixer to beat them together. Mix until smooth and creamy. There should be no lumps left. This step is key for a velvety cheesecake filling. In a separate bowl, pour in 1 cup of heavy whipping cream. Use a hand mixer to whip it until you see stiff peaks. This takes a few minutes. Once you see those peaks, carefully fold the whipped cream into the cream cheese mix. Use a spatula and be gentle. You want to keep it light and fluffy. Take mini flour tortillas (about 6 inches each) and lay them flat. Spoon about 2 tablespoons of the cheesecake filling in the center of each tortilla. Make sure not to overfill. This will help keep the tacos neat. Next, sprinkle diced strawberries on top of the cheesecake filling. Use about 1 cup of fresh strawberries for this step. Then, drizzle 1/4 cup of strawberry jam over the strawberries. This adds a nice sweetness and bright color. Now, fold each tortilla in half like a taco. Make sure to enclose the filling well. Roll the edges in the cooled graham cracker crust for a crunchy coating. For serving, arrange the tacos on a colorful platter. You can add more strawberry jam on top and garnish with whole strawberries. This makes a beautiful display that everyone will love. To make these strawberry crunch cheesecake tacos shine, you need some key tools. Here’s what I recommend: - Mixing bowls (medium and large) - Hand mixer or stand mixer - Spatula for folding - Baking sheet for the crust - Measuring cups and spoons Using these tools will help you work efficiently. A hand mixer makes it easier to beat the cream cheese. It saves time and energy. For a beautiful presentation, arrange the tacos on a colorful platter. Here are some ideas to enhance their look: - Drizzle extra strawberry jam over the tacos. - Garnish with whole strawberries for a pop of color. - Serve with a side of whipped cream for added delight. These touches make your tacos not just tasty, but also visually appealing. You can prepare these tacos ahead of time. To store them before serving: - Assemble the tacos as instructed. - Place them in an airtight container. - Refrigerate for up to 30 minutes before serving. This way, you keep them fresh while saving time. Enjoy your delicious tacos! Pro Tips Chill Your Ingredients: For a smoother cheesecake filling, ensure your cream cheese is softened at room temperature and your heavy cream is chilled before whipping. Use Fresh Strawberries: Opt for ripe, fresh strawberries for the best flavor. You can also macerate them in a bit of sugar for extra sweetness. Experiment with Flavors: Feel free to add a splash of lemon juice or zest to your cheesecake filling for a refreshing citrus twist. Keep It Cool: If not serving immediately, refrigerate the assembled tacos for up to 30 minutes to keep them fresh and firm. {{image_4}} For a gluten-free crust, use almond flour or gluten-free graham cracker crumbs. Mix these with melted coconut oil instead of butter. This swap keeps the crunchy texture and adds a nutty flavor that pairs well with cheesecake. To make this dessert vegan, use dairy-free cream cheese and coconut whipped cream. You can find these products in most grocery stores. Replace butter with vegan margarine for the crust. These substitutes let everyone enjoy this tasty treat. While strawberries shine in this recipe, you can mix it up. Try using blueberries, raspberries, or peaches for a different twist. Each fruit brings its own sweetness and tang. This way, you can experiment and find your favorite flavor! To keep your Strawberry Crunch Cheesecake Tacos fresh, store them in the fridge. Place them in an airtight container. They stay great for up to 2 days. The longer they sit, the softer the tortillas become. For the best taste, enjoy them within this time frame. You can freeze these tacos for longer storage. Wrap each taco in plastic wrap. Then, place them in a freezer-safe bag. They last up to 2 months in the freezer. To eat, just thaw them in the fridge overnight. This keeps the filling creamy and delicious. If your tacos feel a bit soft after storage, don’t worry. You can revive them! Place them in a preheated oven at 350°F (175°C) for about 5-7 minutes. This warms them up and adds a nice crisp. For extra flavor, drizzle some fresh strawberry jam after warming. Enjoy your delicious treat! You can use crushed cookies instead of graham cracker crumbs. Try vanilla wafers or digestive biscuits. You can also use crushed pretzels for a salty twist. Just make sure to mix them with melted butter and sugar. To make these tacos ahead, prepare the crust and filling first. Store them separately in the fridge. You can fill the tortillas just before serving. This keeps everything fresh and tasty. Yes! You can use other fruits like blueberries, raspberries, or peaches. Each fruit brings a new flavor. Just be sure to adjust the jam to match the fruit you choose. Serve these tacos on a bright platter. Drizzle extra strawberry jam on top for a pop of color. Add whole strawberries for a fun touch. It makes the dish look even better! These tacos stay fresh for up to two days in the fridge. Keep them in an airtight container to avoid sogginess. For best texture, enjoy them within the first day after making. This blog post shared a fun recipe for strawberry crunch cheesecake tacos. We detailed the ingredients with measurements and optional flavors. You learned step-by-step how to create the graham cracker crust, cheesecake filling, and how to layer your tacos. We also covered tips for serving and storage, along with variations for dietary needs. Now you have the tools to impress your friends and family. Enjoy this simple and creative dessert with fresh flavors!

Strawberry Crunch Cheesecake Tacos Delightful Treat

To make Turkey Black Bean Enchiladas, you will need: - 1 lb ground turkey - 1 can (15 oz) black beans, thoroughly rinsed and drained - 1 cup corn (fresh, frozen, or canned) - 1 small onion, finely diced - 2 cloves garlic, minced - 1 teaspoon ground cumin - 1 teaspoon chili powder - 1/2 teaspoon smoked paprika - Salt and freshly cracked pepper to taste - 8 tortillas (corn or flour) - 2 cups enchilada sauce (red or green) - 1 cup shredded cheese (cheddar or Monterey Jack) - Fresh cilantro, chopped You can swap some ingredients for fun. Try using ground chicken or blackened tofu instead of turkey for a different taste. If you want more heat, add jalapeños to the filling. Use sweet potatoes or zucchini in place of corn for a veggie boost. And for the sauce, any store-bought brand works well. You can even make your own sauce for a fresh flavor. When picking tortillas, think about what you like best. Corn tortillas give a classic taste. They are firm and hold the filling well. Flour tortillas are softer and easier to roll. If you want to make it gluten-free, look for corn or gluten-free flour options. Always check the package for freshness. A good tortilla should be pliable and not break easily. {{ingredient_image_2}} To start, preheat your oven to 375°F (190°C). This ensures your enchiladas bake perfectly. In a large skillet, add 1 pound of ground turkey. Cook it over medium heat for about 5 to 7 minutes. Break the meat apart with a spoon until it turns brown and is no longer pink. Next, add 1 small finely diced onion and 2 cloves of minced garlic. Cook these for 3 to 4 minutes. Stir occasionally until the onion looks clear and smells great. Then, stir in 1 can of rinsed black beans and 1 cup of corn. Next, add 1 teaspoon of ground cumin, 1 teaspoon of chili powder, and 1/2 teaspoon of smoked paprika. Season with salt and fresh cracked pepper to taste. Cook this mixture for 2 to 3 more minutes. Make sure it’s heated evenly and all flavors mix well. Now it’s time to assemble the enchiladas. Grab a baking dish and spread a thin layer of enchilada sauce on the bottom. This prevents the tortillas from sticking. Take an 8-inch tortilla and spoon 2 to 3 tablespoons of your turkey filling into the center. Roll it up tightly and place it seam-side down in the dish. Repeat this for all the tortillas until you fill the dish. After you have all the tortillas in place, pour the rest of the enchilada sauce over them. Make sure to cover them well. Then, sprinkle 1 cup of shredded cheese evenly across the top. This will melt beautifully in the oven. Cover the dish with aluminum foil. To avoid sticking, spray the foil lightly with cooking oil. Place the dish in your preheated oven and bake for 20 minutes. After this time, remove the foil. Bake for another 10 to 15 minutes. Wait until you see the cheese bubble and turn golden. Once done, take the enchiladas out and let them sit for a few minutes. This helps them set. Before serving, sprinkle fresh chopped cilantro on top. Enjoy your tasty Turkey Black Bean Enchiladas! To cook ground turkey just right, follow these simple steps. First, heat your pan on medium. Add the turkey and break it apart with a spoon. Cook for about 5 to 7 minutes. You want it browned and no longer pink. Stir often to avoid burning. This method keeps the turkey juicy and adds flavor. Cheese plays a big role in flavor. Cheddar gives a sharp taste, while Monterey Jack adds creaminess. You can also try pepper jack for a spicy kick. For a lighter option, use queso fresco or feta. Mix and match to find your favorite cheese blend. Seasonings make all the difference. Ground cumin adds warmth, while chili powder brings heat. Smoked paprika gives depth and a hint of sweetness. Don’t forget salt and pepper to taste! Feel free to add fresh herbs like cilantro or parsley for a burst of freshness. Adjust these spices to suit your taste buds. Pro Tips Use Fresh Ingredients: Whenever possible, opt for fresh vegetables and herbs to enhance the flavor and nutrition of your enchiladas. Customize Your Fillings: Feel free to add other ingredients like bell peppers, zucchini, or cooked rice for extra texture and flavor. Make Ahead: Prepare the enchiladas in advance and store them in the refrigerator. Bake them just before serving for a quick meal. Spice It Up: Adjust the spices according to your taste. Add more chili powder or diced jalapeños for a spicier kick. {{image_4}} You can make a tasty vegetarian version of turkey black bean enchiladas. Swap out the ground turkey for a mix of sautéed vegetables. Great options are bell peppers, zucchini, and mushrooms. Keep the black beans and corn for protein and texture. Use the same spices to keep the flavor strong. You can also add some spinach for extra nutrients. This dish stays colorful and filling without the meat. If you like heat, spice up your turkey black bean enchiladas. Add diced jalapeños or serrano peppers to the turkey mix while cooking. You can also increase the chili powder to two teaspoons. For a zesty kick, drizzle some hot sauce on top before serving. Consider using pepper jack cheese instead of cheddar for extra flavor. These enchiladas will give your taste buds a fun ride! For those who need gluten-free meals, you have options. Choose gluten-free tortillas made from corn or almond flour. Check the labels to ensure they are certified gluten-free. The rest of the recipe remains the same. You can enjoy all the flavors without worrying about gluten. This way, everyone can dig into these enchiladas without a care! To keep your Turkey Black Bean Enchiladas fresh, place them in an airtight container. Make sure to cool them down to room temperature first. Store them in the fridge for up to three days. This way, you can enjoy them again without losing flavor. Reheating enchiladas is simple. Preheat your oven to 350°F (175°C). Place the enchiladas in a baking dish and cover them with foil. Bake for about 15-20 minutes until they are hot. You can also use a microwave. Just place a single serving on a plate and heat for 1-2 minutes, checking halfway through. If you want to save some for later, freezing is a great option. Wrap each enchilada in plastic wrap, then place them in a freezer bag. They will stay fresh for up to three months. When you’re ready to eat, thaw them in the fridge overnight and reheat as mentioned above. Enjoy a quick and tasty meal anytime! Yes, you can use other meats. Ground chicken or beef are great swaps. For a lighter option, try shredded chicken. If you want a twist, pulled pork works well too. Just ensure the meat is cooked fully before mixing it with the beans. Leftover enchiladas can last about three to five days in the fridge. Make sure to keep them in an airtight container. If you want to keep them longer, freezing is a good option. They can last up to three months in the freezer. There are many great sides you can serve. Consider guacamole for creaminess. Sour cream adds a nice touch too. A fresh salad with lime dressing brightens the meal. You could also serve rice or corn for extra heartiness. You’ve learned how to make delicious turkey black bean enchiladas step-by-step. We covered essential ingredients, cooking tips, and even storage methods. Each part, from filling to baking, helps you create a tasty meal. Remember, you can try different meats or make them vegetarian! Keep these tips in mind to enhance flavors and store extras for later. Enjoy your cooking journey and share these recipes with family!

Turkey Black Bean Enchiladas Flavorful Dinner Idea

- 2 cups cooked chicken, shredded - 1 cup broccoli florets - 1 cup cauliflower florets - 1 medium zucchini, diced - 1 red bell pepper, chopped - 1 cup full-fat coconut milk - 2 tablespoons extra-virgin olive oil - 2 cloves garlic, minced - Additional seasonings The main star of this dish is the chicken. I love using shredded chicken because it mixes well with veggies. Broccoli and cauliflower add crunch and color. Zucchini and bell pepper bring freshness. Coconut milk gives creaminess without dairy. Olive oil helps with flavor and cooking. Garlic is a must for taste. You can add onion powder and thyme for more depth. - Alternative vegetables: You can swap in green beans or carrots for a twist. - Coconut milk alternatives: Try almond milk or cashew cream if you want a lighter option. - Protein substitutions: Use turkey or even chickpeas for a plant-based meal. These substitutions let you customize the casserole. Experiment with what you have on hand. This is how you make it your own. - Fresh parsley - Additional herbs Garnishing adds a nice touch. Fresh parsley brightens the dish. You can also use basil or cilantro for extra flavor. These herbs make your meal look as good as it tastes. {{ingredient_image_2}} - Preheat the oven to 375°F (190°C). This makes sure it is hot enough to cook your casserole well. - In a large skillet, pour in 2 tablespoons of extra-virgin olive oil. Heat it on medium. - Add 2 cloves of minced garlic to the oil. Sauté for about 1 minute. You want the garlic to smell good and turn light gold. - Next, toss in 1 cup of broccoli florets, 1 cup of cauliflower florets, 1 medium diced zucchini, and 1 chopped red bell pepper. Stir and sauté for 5-7 minutes. Cook until the veggies are soft but still a bit crunchy. - In a large mixing bowl, put in 2 cups of shredded cooked chicken. - Add the sautéed veggies from the skillet. - Pour in 1 cup of full-fat coconut milk. This adds creaminess to the casserole. - Sprinkle in 1 teaspoon of onion powder, 1 teaspoon of dried thyme, and a generous pinch of salt and pepper. Mix everything well until it blends together. - Lightly grease a 9x13 inch casserole dish with a bit of olive oil or cooking spray. - Pour the chicken and veggie mix into the dish, spreading it evenly. This helps it bake evenly. - Place the casserole in the oven and bake for 25-30 minutes. It's done when the edges turn golden brown and it's hot throughout. - Carefully take it out of the oven and let it sit for about 5 minutes. This lets the flavors mix a bit more. - Before you serve, sprinkle fresh chopped parsley on top. This adds color and taste. Enjoy your meal! For this casserole, start by sautéing your garlic in olive oil. Use medium heat for best results. Cook it until it smells great, about one minute. Then, add your veggies. Broccoli, cauliflower, zucchini, and bell pepper work well together. Sauté them for five to seven minutes. You want them soft but still a bit crunchy. This adds great texture to the dish. Spices can make a big difference. Add onion powder and dried thyme to your mix. These will boost the flavor. If you want more creaminess, use full-fat coconut milk. It gives a rich taste and keeps the dish moist. You can adjust the amount based on your taste. Just remember, a little goes a long way. Pair your casserole with a simple side salad. Steamed greens also work great. They add freshness and balance the meal. If you plan for meal prep, divide the casserole into portions. This makes it easy to enjoy later. Just heat and serve. You can also garnish with fresh parsley for a pop of color and flavor. Pro Tips Use Leftover Chicken: This recipe is perfect for utilizing leftover rotisserie chicken or any pre-cooked chicken, saving you time in the kitchen. Add More Veggies: Feel free to include other vegetables like spinach, carrots, or mushrooms based on your preference or what you have on hand. Cheese Option: For a non-Paleo option, sprinkle some shredded cheese on top during the last 5 minutes of baking for a cheesy finish. Meal Prep Friendly: This casserole can be made ahead of time and stored in the fridge for up to 3 days or frozen for later use, making it a great meal prep option. {{image_4}} You can switch the chicken for turkey or beef. Ground turkey works well in this dish. If you want a meat-free option, try lentils or tempeh. These choices keep the meal light and tasty. You can also use shredded pork for a unique twist. Each protein adds a new flavor to your casserole. To make a vegetarian casserole, skip the chicken and add more veggies. Use mushrooms, chickpeas, or beans for protein. You can also add spinach or kale for extra nutrients. Replace coconut milk with cashew cream for creaminess. This way, you still get a rich taste while keeping it plant-based. Want to spice things up? Add chili flakes or jalapeños for heat. You can also mix in some curry powder for a warm flavor. If you prefer a comforting taste, try adding nutritional yeast for a cheesy flavor. Use dairy-free cheese to top your casserole. These simple changes can make your dish exciting and new! To store leftovers, let the casserole cool first. Then, place it in an airtight container. It can last in the fridge for up to four days. Make sure to cover it well. This keeps it fresh and prevents it from absorbing other odors. For long-term storage, you can freeze the casserole. Use a freezer-safe container or wrap it tightly in plastic wrap. It stays good in the freezer for about three months. Label the container with the date so you remember when you made it. Thaw it in the fridge overnight before reheating. To reheat, you can use the oven or microwave. If using the oven, preheat to 350°F (175°C). Place the casserole in a dish and cover it with foil. Heat for about 20-25 minutes until hot. In the microwave, use medium power. Heat in short intervals, checking often to avoid overcooking. Both methods keep the flavor and texture intact. The total time to cook this casserole is about 45 minutes. You spend around 15 minutes on prep and 25-30 minutes baking in the oven. This quick and easy dish fits nicely into a busy day. Yes, you can make this casserole ahead of time. To store it, let it cool first. Cover it tightly with plastic wrap or foil. You can keep it in the fridge for up to three days. For longer storage, freeze it for up to three months. Just make sure to thaw it overnight in the fridge before reheating. This casserole is great for meal prep! To fit it into your weekly plan, divide it into individual portions. Use airtight containers to keep it fresh. You can easily reheat it in the microwave or oven. This way, you have a tasty meal ready to go anytime! This blog post covered a tasty Paleo Chicken Veggie Casserole. We explored key ingredients, potential swaps, and garnish ideas. I shared step-by-step instructions on preparation, combining, and baking. Additionally, tips for cooking techniques and flavor enhancements were included. Remember, this dish is flexible. You can customize it to fit your taste. Enjoy experimenting with variations while keeping it simple. Happy cooking!

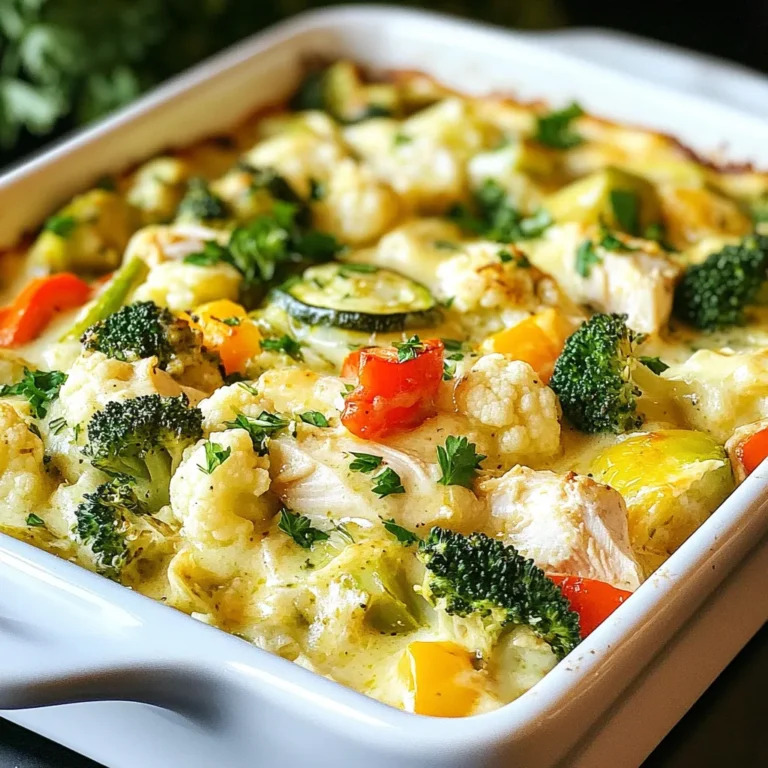
Paleo Chicken Veggie Casserole Nourishing and Easy Meal

To make Speedy Lasagna Soup, you will need these key ingredients: - 1 lb ground beef or Italian sausage - 1 medium onion, finely chopped - 2 cloves garlic, minced - 1 can (28 oz) crushed tomatoes - 4 cups chicken or vegetable broth - 2 teaspoons dried Italian seasoning - 1 teaspoon red pepper flakes (optional, for heat) - 8 lasagna noodles, broken into smaller pieces - 1 cup ricotta cheese - 1 cup shredded mozzarella cheese - ½ cup grated Parmesan cheese - Salt and freshly ground black pepper, to taste You can enhance the flavor of your soup with these optional ingredients: - Red pepper flakes for heat - Fresh herbs like thyme or parsley - Spinach for added greens - Mushrooms for an earthy taste Garnishing your soup can make it even more appealing. Here are some great options: - Fresh basil leaves - Extra mozzarella cheese on top - A drizzle of olive oil - Cracked black pepper for a bit of spice These ingredients come together to create a hearty, delicious meal that warms the soul. Use these tips to make your soup even better! {{ingredient_image_2}} First, grab a large pot and set it on medium heat. Add 1 pound of ground beef or Italian sausage. Cook it until it turns brown, which takes about 5 to 7 minutes. As it cooks, break it apart with a wooden spoon. If there is too much fat, drain it off. Next, add 1 medium onion, finely chopped. Sauté it for about 3 to 4 minutes. You want it soft and clear. Then, stir in 2 cloves of minced garlic. Cook for another minute. The garlic should smell great but not burn. Now, it’s time for the juicy part! Pour in 1 can of crushed tomatoes. Then, add 4 cups of chicken or vegetable broth. Stir in 2 teaspoons of dried Italian seasoning. If you like some heat, add 1 teaspoon of red pepper flakes. Don’t forget a generous pinch of salt and pepper! Bring this mix to a gentle simmer. Let it cook for about 5 minutes to blend the flavors. Carefully add 8 broken lasagna noodles to the pot. Cook for about 10 to 12 minutes. Stir occasionally so the noodles do not stick. You want them tender but not mushy. While the soup simmers, prepare the creamy cheese. In a bowl, mix 1 cup of ricotta cheese with a pinch of salt and pepper. Make it smooth. To serve, ladle the soup into bowls. Add a big dollop of ricotta to each bowl. Top with 1 cup of shredded mozzarella and ½ cup of grated Parmesan cheese. The heat will melt the cheese just right. Finally, add fresh basil leaves for a pop of color and taste. To boost flavor, use fresh herbs. Fresh basil adds a bright taste. You can also try adding a splash of balsamic vinegar. It gives a nice tang. If you want more heat, add extra red pepper flakes. For texture, crisp some bread on the side. It complements the soup well. Another tip is to use good-quality broth. It makes a big difference in taste. Breaking the lasagna noodles helps them cook evenly. Ensure you stir them often. This keeps them from sticking together. Cook them in the soup for 10-12 minutes. They should be tender but not mushy. If you want, you can also cook them separately. Just add them to the soup later. This keeps them firm and intact. For a beautiful presentation, use deep bowls. Ladle the soup in and top with ricotta. Then add shredded mozzarella and Parmesan. Let the cheese melt slightly for a nice look. Finish with fresh basil leaves on top. A drizzle of olive oil adds flavor and shine. You can also sprinkle cracked black pepper for a nice touch. This makes your soup not just tasty, but also pretty! Pro Tips Use Fresh Ingredients: Fresh herbs and high-quality canned tomatoes can elevate the flavors of your soup, making it taste even more delicious. Customize the Heat: Adjust the amount of red pepper flakes according to your spice preference. You can also add a dash of hot sauce for an extra kick. Make It Vegetarian: Substitute the meat with lentils or mushrooms for a hearty vegetarian version of this soup without sacrificing flavor. Store Leftovers Properly: If you have leftovers, store the soup and cheese toppings separately to prevent the noodles from becoming too soft when reheating. {{image_4}} For a vegetarian version, swap the meat for mushrooms or lentils. Use a mix of bell peppers and zucchini for added flavor. You can also add spinach for extra nutrients. Use vegetable broth instead of chicken broth. This keeps the base rich and tasty. You will still enjoy the same comforting feel of lasagna in soup form. To make this soup gluten-free, replace lasagna noodles with gluten-free pasta. Many brands offer a variety that works well in soup. Always check the package for cooking times. Feel free to use gluten-free broth to keep it safe. Your soup will still be hearty and full of flavor. If you love heat, add more red pepper flakes or diced jalapeños. You can also stir in some spicy Italian sausage instead of ground beef. For a unique twist, try adding a splash of hot sauce before serving. This will give your soup an exciting kick, perfect for those who enjoy bold flavors. To store leftover lasagna soup, let it cool first. Place it in an airtight container. This keeps the soup fresh. You can store it in the fridge for up to three days. Make sure to label the container with the date. This way, you’ll know when to eat it! If you want to save it for later, freezing works well. Pour the cooled soup into freezer-safe containers. Leave room at the top for expansion. Seal them tightly and label with the date. You can freeze it for up to three months. Just remember, it tastes best if you eat it sooner! When you’re ready to enjoy the soup again, reheating is easy. Thaw the frozen soup in the fridge overnight. If you’re in a hurry, use the microwave. Heat it in short bursts, stirring often. You can also reheat it on the stove over medium heat. Add a splash of broth if it seems too thick. This helps bring back the soup’s texture. Enjoy your tasty meal! Yes, you can make Speedy Lasagna Soup in advance. It tastes even better the next day! Just store it in the fridge. When you are ready to eat, heat it on the stove until warm. You can use ground turkey or chicken instead of ground beef or sausage. If you want a meatless option, try lentils or mushrooms. Both options add great flavor and texture. To make the soup creamier, add more ricotta cheese. Stir it in just before serving for a rich texture. You can also mix in a splash of heavy cream for extra creaminess. Ricotta cheese adds a nice touch to this soup, but it is not necessary. If you don't have ricotta, you can skip it or use cream cheese instead. Yes, increasing the serving size is easy. Just double the ingredients and use a larger pot to cook everything. This soup is great for sharing! Speedy Lasagna Soup stays fresh in the fridge for about 3 to 4 days. Make sure to store it in an airtight container for the best results. You learned how to make Speedy Lasagna Soup step by step. We explored the main ingredients, optional add-ons, and garnishes to boost flavor. I shared tips to enhance your dish and variations for different diets. You also got storage advice to keep leftovers fresh. Enjoy creating your tasty soup, and remember to experiment. Make it your own, and savor every bite!

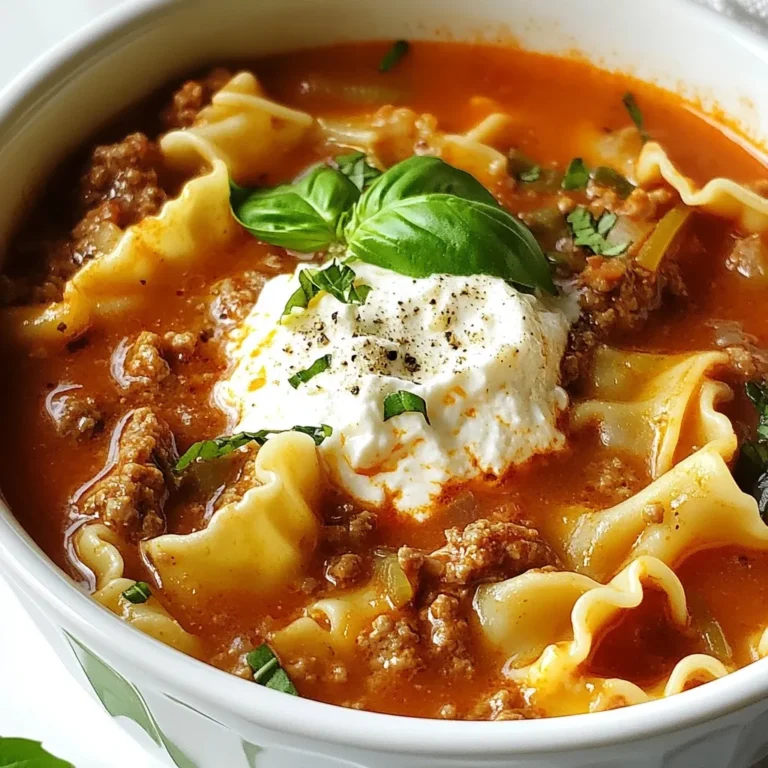
Speedy Lasagna Soup Delicious and Quick Meal Option

- Ripe avocado - Canned chickpeas - Red onion - Celery - Fresh lemon juice - Mayonnaise or Greek yogurt - Dijon mustard - Garlic powder - Salt and pepper - Whole grain bread - Leafy greens The ingredients for the avocado chickpea salad sandwich are simple yet packed with flavor. First, grab a ripe avocado. This is the star of the dish and adds creaminess. Next, you'll need one can of chickpeas. Chickpeas give protein and a nice bite. For some crunch, use red onion and celery. Their textures will balance the creamy avocado. Fresh lemon juice adds brightness and a tangy twist. You can choose between mayonnaise or Greek yogurt for added creaminess. Dijon mustard gives a hint of spice, while garlic powder adds depth. Don't forget salt and pepper to enhance all the flavors. Choose whole grain bread for a healthy base. Lastly, leafy greens like spinach or arugula will add freshness and nutrition. These ingredients come together to create a tasty and nourishing meal that you can enjoy anytime. {{ingredient_image_2}} - Prep the Base: Start by mashing the ripe avocado in a large bowl. Add the drained and rinsed chickpeas. Use a fork to mix them together. Leave some chickpeas whole for a nice texture. Aim for a creamy yet chunky mix. - Add Crunch: Next, fold in the finely chopped red onion and diced celery. This will give your salad a refreshing crunch. Mix everything evenly so each bite has a bit of crunch. - Make the Dressing: In a small bowl, whisk together the fresh lemon juice, mayonnaise or Greek yogurt, Dijon mustard, garlic powder, and salt and pepper. Keep whisking until you achieve a creamy consistency. - Combine Everything: Pour the dressing over the avocado and chickpea mix. Gently fold all the ingredients together. Ensure everything is well-coated with the dressing. Taste it and adjust the seasoning if needed. - Toast the Bread (Optional): If you like a bit of crunch, toast your whole grain bread. You can use a toaster or a skillet. Toast until it’s golden brown. - Assemble the Sandwich: Lay leafy greens on the bottom two slices of bread. Generously spoon the avocado chickpea mixture on top of the greens. This helps keep the bread from getting soggy. Place the remaining slices of bread on top to complete your sandwich. - Serve and Enjoy: Cut your sandwiches in half diagonally for a classic look. Serve them right away. These sandwiches make a great lunch or a light dinner. To create the best avocado chickpea salad sandwich, focus on texture. I like to mash the avocado and chickpeas together but leave some chickpeas whole. This gives a nice mix of creamy and chunky bites. When it comes to seasoning, always taste as you mix. If it needs more zing, add extra lemon juice or a pinch of salt. You can also customize the crunch level. If you love crunch, toss in more celery or even some chopped bell peppers. For a softer bite, reduce the onion or celery. Pair your sandwich with fresh veggies or a light salad. Colorful sliced cucumbers, carrots, or bell peppers add a bright touch. For a picnic vibe, wrap each sandwich in parchment paper. This makes it fun and easy to take on the go. You can also serve the sandwich with a side of chips or a bowl of soup for a complete meal. This mix of flavors and textures will make your lunch or dinner a hit! Pro Tips Perfectly Ripe Avocado: Ensure your avocado is perfectly ripe for the best flavor and creaminess. It should yield slightly when gently squeezed. Texture Variety: For a delicious texture, leave some chickpeas whole while mashing the rest. This adds a nice contrast to the creamy avocado. Customize Your Greens: Feel free to mix up the leafy greens! Kale, lettuce, or even fresh herbs can elevate your sandwich to a new level. Meal Prep Friendly: This avocado chickpea mixture can be prepped in advance and stored in the fridge for 1-2 days, making it a great option for quick lunches. {{image_4}} You can easily switch out some ingredients in this avocado chickpea salad sandwich for a twist. - Lighter alternatives to mayonnaise: Try Greek yogurt instead of mayonnaise. It gives a creamy taste with fewer calories. - Different types of bread: Use sourdough, pita, or gluten-free bread. Each choice brings a new flavor and texture. - Additional vegetables to include: Add diced cucumber, bell peppers, or even shredded carrots for extra crunch and nutrition. Spicing up your sandwich can make it even more delicious. - Adding spices for extra zest: A pinch of cayenne pepper or smoked paprika can add heat and depth. Experiment with cumin for a warm touch. - Incorporating herbs: Fresh herbs like cilantro or dill can brighten the flavors. Try adding chopped basil for a nice twist. To keep your avocado chickpea salad fresh, store it in an airtight container. Make sure to press out as much air as possible to prevent browning. This method will help keep the flavors intact. You can also layer plastic wrap over the salad, pressing it right against the surface. This reduces oxidation. For best results, eat the leftovers within two days. The longer it sits, the more the avocado may brown. If you want to refresh your sandwich, avoid using a microwave. Instead, try these methods: - Skillet Method: Heat a skillet over medium heat. Place the sandwich in the skillet and cover it. Cook for about 3 minutes on each side. This warms the sandwich and keeps the bread crispy. - Oven Method: Preheat your oven to 350°F (175°C). Wrap the sandwich in foil and heat for about 10 minutes. This way, the bread stays crisp and the filling warms evenly. These methods keep your sandwich tasty without making it soggy. Enjoy every bite! Can I make this recipe ahead of time? Yes, you can make this avocado chickpea salad ahead of time. Just store it in an airtight container. This makes it easy to grab for lunch or a quick snack. I recommend making it no more than a day in advance for the best taste. How long does the avocado chickpea salad last in the fridge? The salad lasts about 2 to 3 days in the fridge. However, the avocado may turn brown over time. To slow this down, add a bit of extra lemon juice. This adds flavor and keeps the salad looking fresh. What are some gluten-free bread options? You can use various gluten-free breads. Look for brands made from almond flour, rice flour, or chickpea flour. These options taste great and pair well with the salad. You can also use lettuce wraps for a low-carb option. Caloric content per serving One serving of this sandwich has about 350 calories. This can vary based on the bread and added ingredients. It's a filling meal that keeps you satisfied. Health benefits of ingredients - Avocado: Packed with healthy fats and fiber. It helps keep your heart healthy. - Chickpeas: A great source of protein and fiber. They support digestion and help keep you full. - Red onion: Contains antioxidants and may boost heart health. - Celery: Low in calories and high in water content. It's great for hydration. - Lemon juice: Rich in vitamin C and aids in digestion. - Greek yogurt: Adds protein and calcium. It can be a healthy swap for mayonnaise. Each ingredient brings its own benefits, making this sandwich a tasty and nutritious choice. This blog post guides you through making a delicious avocado chickpea sandwich. We covered the essential ingredients, step-by-step prep, and tips to make it perfect. You can customize flavors and textures to suit your taste. Don’t forget about storage tips for leftovers and answers to common questions. Enjoy this healthy meal that’s easy to prepare and satisfying. You now have all you need to whip up this tasty sandwich anytime you crave something fresh and nutritious.

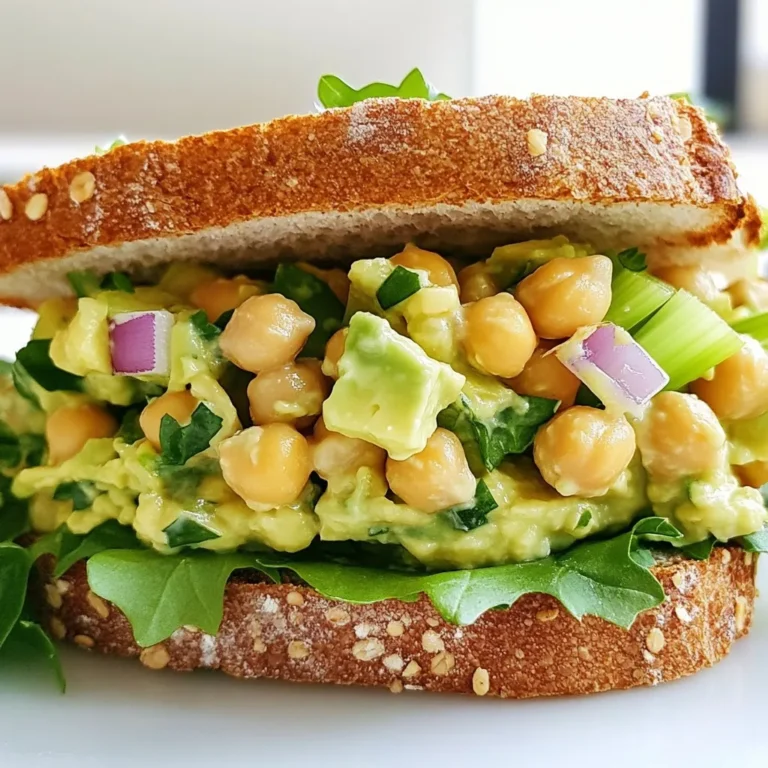
Avocado Chickpea Salad Sandwich Simple and Tasty Meal

- 1 cup unsalted butter, softened to room temperature - 1/2 cup granulated sugar - 2 cups all-purpose flour - 1/2 teaspoon fine sea salt - 1 teaspoon pure vanilla extract - Zest of 2 medium oranges (about 1 tablespoon) - 1/4 cup freshly squeezed orange juice - 1 cup dark chocolate chips (preferably 60% cocoa or higher) - 1 tablespoon coconut oil (for added sheen) - For dairy-free options, use coconut oil or vegan butter instead of unsalted butter. - If you want less sugar, consider using honey or maple syrup. Adjust the flour to balance wetness. - For gluten-free cookies, swap all-purpose flour with almond flour or a gluten-free blend. The ingredients create a lovely balance of flavors. Butter gives richness, while orange zest and juice add bright notes. Dark chocolate brings deep taste and pairs well with the cookies. Each ingredient plays an important role in making these cookies a delightful treat. {{ingredient_image_2}} First, you need to cream the butter and sugar. In a large bowl, mix the softened butter with granulated sugar. I like to use an electric mixer for this. Beat it on medium speed until it gets light and fluffy. This should take about 3 to 4 minutes. Next, add flavorings to the mixture. Stir in the pure vanilla extract and the zest of two medium oranges. This adds a fresh aroma and taste. Make sure to blend these ingredients well. Now it's time to form the dough. Gradually sift in the all-purpose flour and fine sea salt. Keep the mixer on low speed. Mix until you see a soft dough form. Finally, gently stir in 1/4 cup of fresh orange juice. The dough should feel moist and slightly sticky. After the dough is made, you need to shape and chill it. Divide the dough into two equal parts. Roll each part into a log that is about 1.5 inches in diameter. Wrap the logs tightly in parchment paper. Place them in the fridge for at least 1 hour to firm up. While the dough chills, preheat your oven to 350°F (175°C). Line a baking sheet with parchment paper. This helps with easy cookie removal later. When the dough is firm, it’s time to slice the cookies. Take the logs out of the fridge. Use a sharp knife to slice them into cookies about 1/4 inch thick. Place the cookies on the prepared baking sheet, leaving about 2 inches between them. Now, bake the cookies in the preheated oven for 12 to 15 minutes. Look for lightly golden edges. Once baked, remove them from the oven and let them cool completely on a wire rack. While the cookies are cooling, melt the chocolate. In a microwave-safe bowl, combine 1 cup of dark chocolate chips and 1 tablespoon of coconut oil. Microwave in 30-second intervals, stirring in between. Keep going until it’s smooth. Once the cookies cool, dip each cookie’s edge into the melted chocolate. Let any excess chocolate drip back into the bowl. Place the dipped cookies on a wire rack or parchment paper to set. Using room temperature ingredients is key for smooth dough. When butter is soft, it mixes well with sugar. This creates a light and fluffy base. If the butter is too hard, it won’t blend properly. To get the perfect cookie consistency, add flour slowly. Mix it in until the dough is soft and slightly sticky. It should hold its shape but not be too dry. Set your oven to 350°F (175°C) for baking. This temperature helps the cookies spread evenly. Bake them for 12-15 minutes. The edges should turn a light golden color. You can tell when cookies are done by looking at the edges. If they look firm and slightly golden, they are ready. Let them cool on a wire rack for best results. For an attractive display, arrange the cookies on a decorative platter. You can stack them or line them up neatly. This makes them look inviting and fun. Garnish your cookies with fresh orange zest. A light sprinkle adds color and a burst of aroma. You could also place slices of fresh orange around the cookies. This creates a vibrant, tasty theme. Enjoy your delightful treat! Pro Tips Use Fresh Oranges: For the best flavor, always use fresh oranges to extract the zest and juice. This enhances the overall taste of your cookies. Chill the Dough: Chilling the dough not only helps in slicing but also results in a firmer cookie that holds its shape better during baking. Quality Chocolate: Choose high-quality dark chocolate for dipping. A higher cocoa percentage provides a richer flavor that complements the orange perfectly. Decorative Touch: Add a sprinkle of sea salt on top of the chocolate-dipped edge for a delightful contrast that enhances the sweetness of the cookies. {{image_4}} You can elevate your chocolate dipped orange shortbread by adding spices. Try a hint of cinnamon or nutmeg. These spices bring warmth and depth to the cookies. Exploring different types of chocolate also adds a fun twist. Use milk chocolate for a creamier taste. Dark chocolate gives a rich and bold flavor. Both options will make your cookies delightful. For extra flair, drizzle more chocolate on top. It creates a beautiful pattern and a sweet surprise. You can also add colorful sprinkles for a festive look. Incorporating nuts or dried fruits can add texture. Chopped almonds or walnuts can give a nice crunch. Dried cranberries or apricots can add a chewy element, making each bite special. You can create themed cookies for special occasions. For a holiday touch, add peppermint extract to the dough. It gives a fresh, minty flavor that pairs well with chocolate. Seasonal adaptations can make your cookies fit any time of year. Use lemon zest in spring for a bright taste. In autumn, consider adding pumpkin spice for a cozy feel. These variations keep the recipe exciting and fresh. To keep your chocolate dipped orange shortbread fresh, store them at room temperature in an airtight container. This method works best for short-term storage. You can use a cookie jar or a sealed plastic bag. Make sure to keep them in a cool, dry place to avoid moisture. You can freeze these cookies before or after dipping in chocolate. To freeze before dipping, wrap each cookie in plastic wrap and place them in a freezer bag. For cookies already dipped in chocolate, wait for the chocolate to harden, then freeze them in a single layer. Once frozen, place them in a freezer bag. When you want to enjoy them, take the cookies out and thaw them in the fridge. This keeps the chocolate smooth and the cookie texture just right. When stored correctly, these cookies last about one week at room temperature. In the fridge, they stay fresh for up to two weeks. If you freeze them, they can last for three months. Watch for signs that the cookies are no longer good. If they smell off or have a strange texture, it’s best to toss them. Enjoy your chocolate dipped orange shortbread while they are fresh and tasty! Yes, you can use milk chocolate or white chocolate. Milk chocolate adds a creamier taste. White chocolate gives a sweet and smooth flavor. Each chocolate type changes the cookie's taste. If you use milk or white chocolate, reduce the sugar. This helps balance the sweetness. To make vegan chocolate dipped orange shortbread, swap butter for vegan butter. Use a plant-based milk like almond or soy instead of orange juice. For the chocolate, choose dairy-free chocolate chips. This keeps the cookie both tasty and vegan-friendly. These cookies pair well with coffee or tea. A cup of Earl Grey tea enhances the orange flavor. Dark chocolate pairs great with red wine, like Merlot. For dessert, serve with a scoop of vanilla ice cream. This adds a creamy touch to your treat. You have learned how to make delicious chocolate-dipped orange shortbread cookies. We covered the key ingredients, step-by-step instructions, and helpful tips for perfect cookies. You can explore variations and learn about storage options to keep cookies fresh. With these straightforward methods, you can easily impress friends and family. Enjoy your baking, and have fun experimenting with flavors!

Chocolate Dipped Orange Shortbread Delightful Treat

To make these delightful matcha white chocolate cookies, gather the following: - 1 cup all-purpose flour - 2 tablespoons matcha green tea powder - 1/2 teaspoon baking soda - 1/4 teaspoon salt - 1/2 cup unsalted butter, softened - 1/2 cup granulated sugar - 1/4 cup brown sugar, packed - 1 large egg, at room temperature - 1 teaspoon pure vanilla extract - 1 cup white chocolate chips - 1/4 cup macadamia nuts, chopped (optional) These measurements make about 12 cookies. If you want more, double the recipe. You can also adjust the matcha to taste. Add more if you love the flavor. Using less will give a milder taste. For a unique twist, add: - 1/4 cup chopped nuts (like walnuts or pecans) for extra crunch. - A pinch of cinnamon to add warmth. - Dried fruit like cranberries for a fruity burst. These options let you personalize your cookies. Each choice adds different flavors and textures. Enjoy experimenting! {{ingredient_image_2}} First, you need to preheat your oven to 350°F (175°C). This step warms the oven so your cookies bake evenly. While the oven heats, get a baking sheet. Line it with parchment paper. This paper helps prevent the cookies from sticking. Grab a medium mixing bowl. In this bowl, whisk together the all-purpose flour, matcha powder, baking soda, and salt. Mix until everything is well combined. This step makes sure the matcha is spread evenly. You want a nice color and flavor in each bite. Now, take a large mixing bowl. Add the softened butter, granulated sugar, and brown sugar. Using an electric mixer, beat this mixture on medium speed. Do this for about 2-3 minutes. The goal is to make it light and fluffy. This creates a great base for your cookies. Next, add one large egg and one teaspoon of pure vanilla extract to your butter mixture. Mix until the egg is fully blended in. The mixture should look smooth and creamy. This adds richness and flavor to your cookies. Now, it’s time to mix the dry and wet ingredients. Gradually add the dry mix to your wet mix. Use a spatula or spoon to gently fold them together. Be careful not to overmix. If you do, your cookies might become tough instead of soft. Finally, use a tablespoon or cookie scoop to drop rounded balls of dough onto your baking sheet. Make sure to leave about 2 inches between each cookie. This space allows them to spread while baking. Place the baking sheet in the oven. Bake for 10-12 minutes. Look for lightly golden edges and soft centers. Once ready, cool the cookies on the baking sheet for 5 minutes. Then, move them to a wire rack to cool completely. Enjoy your Matcha White Chocolate Cookies! To get soft and chewy cookies, use room temperature butter. This helps the butter mix well with sugars. Cream the butter and sugars until light and fluffy. This step adds air and keeps your cookies soft. Don't overmix the dough when you add the dry ingredients; just mix until you see no flour. Overmixing makes cookies tough. Finally, bake until the edges are golden, but the centers look soft. This keeps them chewy! One common mistake is not measuring ingredients correctly. Too much flour can make cookies dry. Always spoon flour into your measuring cup and level it off. Another mistake is skipping the chilling step. Chilling dough for at least 30 minutes can help the flavors develop. It also makes the dough easier to scoop. Lastly, don’t forget to space your cookies on the baking sheet. They need room to spread! For a lovely display, arrange your cookies on a nice plate. You can sprinkle a little extra matcha powder on top. This small touch adds color and makes them look fancy. Serve your cookies with a cup of tea or coffee. This pairs well with the matcha flavor. Enjoy your cookies warm for the best taste! Pro Tips Use high-quality matcha: Opt for culinary grade matcha to ensure vibrant color and rich flavor in your cookies. Chill the dough: For thicker cookies, consider chilling the dough for 30 minutes before baking to help them retain their shape. Don't overmix: Mix the dough just until combined to keep your cookies soft and chewy rather than tough. Store properly: Keep your cookies in an airtight container at room temperature to maintain freshness for several days. {{image_4}} You can change the flavor of your matcha white chocolate cookies. Try adding nuts like walnuts or pecans for a crunchy bite. You can also mix in dried fruit, such as cranberries or cherries, for a sweet twist. If you want a richer taste, swap out white chocolate for dark chocolate chips. Each add-in can create a unique cookie. Want to make your cookies gluten-free? Use almond flour or coconut flour instead of all-purpose flour. Be sure to check if your matcha is gluten-free too. For a vegan option, replace the egg with a flaxseed egg. Mix 1 tablespoon of ground flaxseed with 2.5 tablespoons of water. Let it sit for a few minutes until it thickens. Use coconut oil or vegan butter instead of regular butter for a plant-based treat. You can adapt these cookies for the seasons. In fall, add pumpkin spice or cinnamon for a cozy flavor. During the winter, try peppermint extract for a minty kick. For spring, mix in lemon zest for a fresh taste. Each season brings new ideas to make your cookies special. Enjoy experimenting! To keep your matcha white chocolate cookies fresh, store them in an airtight container. This helps keep moisture out and keeps the cookies soft. You can place a piece of bread in the container too. The bread will absorb extra air and keep your cookies fresher longer. Keep the container in a cool, dry place, away from sunlight. If you want to save some cookie dough for later, freezing is easy. First, scoop the dough into balls. Place them on a baking sheet lined with parchment paper. Freeze the balls for about one hour. Once firm, transfer them to a freezer-safe bag. Label the bag with the date and type of cookie. This way, you can enjoy fresh cookies anytime! Baked matcha white chocolate cookies can last about one week at room temperature. If you want them to last longer, store them in the fridge. In the fridge, they can stay fresh for up to two weeks. For the best taste, eat them within the first few days. If you freeze baked cookies, they can last for up to three months. Just remember to thaw them before enjoying! Matcha is a green tea powder made from finely ground tea leaves. It has a vibrant green color and a unique flavor. I love using matcha in cookies because it adds a delightful taste and a lovely color. It makes each cookie look special and fancy. Yes, you can! If you want a different flavor, try dark chocolate chips or milk chocolate chips. You can also use chopped nuts or dried fruit for a tasty twist. Just remember to pick something you enjoy. To make the cookies less sweet, you can reduce the granulated sugar or brown sugar. Start by cutting back by a tablespoon. If you prefer sweeter cookies, add a bit more sugar. Taste the dough before baking to find your perfect balance. Matcha is rich in antioxidants, which are good for your body. It can boost your energy and help you feel calm. Some studies suggest it may support weight loss and improve focus. Enjoying matcha cookies can give you a tasty treat with some health perks! Look for lightly golden edges and soft centers. The cookies should not be overly brown. They will firm up as they cool. If you gently touch the center and it springs back, they are ready. Trust your eyes and your touch for perfect cookies! This blog post covered all you need to bake tasty matcha cookies. We discussed the ingredients, precise measurements, and optional items for flavor. The step-by-step instructions guide you through mixing and baking. I shared tips for texture and serving. You can also explore variations for unique tastes. Finally, we covered how to store cookies and answered common questions. Now, get ready to impress friends and family with your newfound cookie skills!

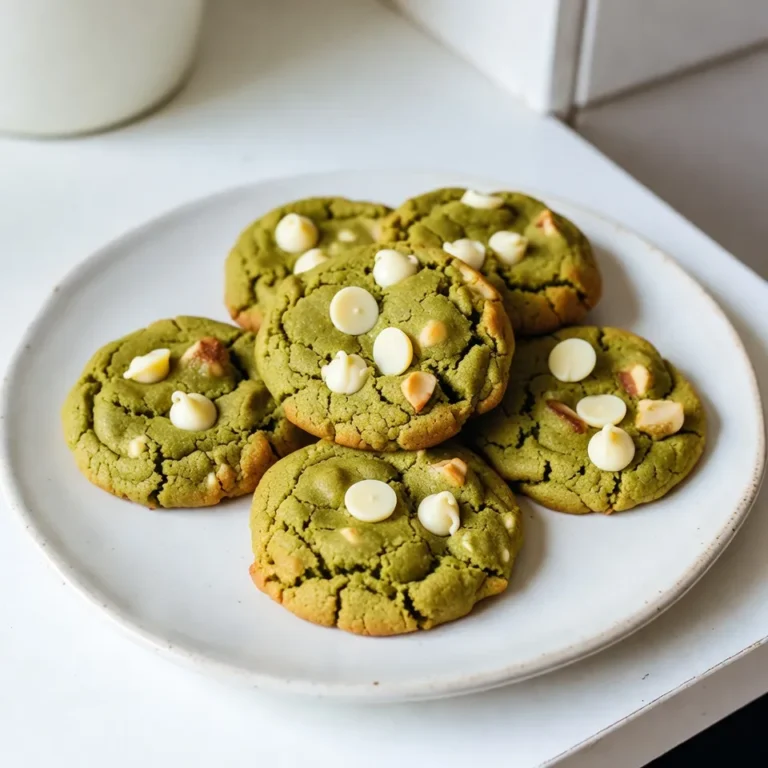
Matcha White Chocolate Cookies Delightful and Simple

You need these main ingredients to make vegan buffalo cauliflower bites: - 1 large head of cauliflower, cut into bite-sized florets - 1 cup all-purpose flour (or gluten-free flour for a GF option) - 1 cup almond milk (or any plant-based milk of your choice) - 1 teaspoon garlic powder - 1 teaspoon onion powder - 1 teaspoon smoked paprika - Salt and pepper to taste - 1 cup hot sauce (such as Frank’s RedHot or a vegan-friendly alternative) - 2 tablespoons melted coconut oil (or vegan butter for richer flavor) You can add some fun toppings or variations to your buffalo cauliflower bites: - Fresh parsley, chopped, for garnish - Vegan ranch dressing for dipping - Crunchy celery sticks to serve with If you need to make swaps, here are some easy substitutions: - Use gluten-free flour if you're avoiding gluten. - Swap almond milk for soy milk or oat milk if preferred. - You can replace coconut oil with avocado oil for a different flavor. - For a spicier kick, add cayenne pepper to the batter or sauce. These options let you customize your bites while keeping them delicious and vegan! {{ingredient_image_2}} First, set your oven to 450°F (232°C). This high heat helps make the bites crispy. Line a baking sheet with parchment paper. This step keeps your bites from sticking. In a large bowl, add 1 cup of all-purpose flour, 1 teaspoon garlic powder, 1 teaspoon onion powder, and 1 teaspoon smoked paprika. Sprinkle in some salt and pepper. Stir these dry ingredients until they blend well. Now, slowly pour in 1 cup of almond milk while whisking. Keep whisking until the mix looks smooth and lump-free. You want a batter that feels like pancake batter. If it’s too thick, add more almond milk. If it’s too thin, add a little more flour. Take your large head of cauliflower and cut it into bite-sized florets. Dip each floret into the batter, making sure it gets fully coated. Place the coated florets on the lined baking sheet. Bake them for 20-25 minutes. Be sure to flip them halfway through for even cooking. Look for a golden brown color and a crispy outside. While the cauliflower bakes, mix 1 cup of hot sauce with 2 tablespoons of melted coconut oil in a bowl. Stir until you see a smooth sauce. Once the cauliflower is baked and crispy, take it out and dip each piece into this buffalo sauce. Ensure they are well-coated. Put the coated cauliflower back on the baking sheet and return it to the oven for another 10 minutes. This final bake helps the sauce stick and boosts the flavor. After this, let them cool for about 5 minutes before serving. Enjoy your tasty vegan buffalo cauliflower bites! To get that crispy feel, use a few key steps. First, coat each cauliflower floret well in the batter. Make sure it’s thick enough to cling but not too thick. Use all-purpose flour or gluten-free flour, depending on your needs. Next, bake at a high temperature, 450°F (232°C). This high heat helps form a golden crust. Flip the florets halfway through baking for even crispiness. For extra crunch, bake them again after coating with sauce. Serve the buffalo cauliflower bites in a colorful bowl to catch the eye. Garnish with fresh parsley for a pop of color. Pair them with crunchy celery sticks for a refreshing bite. A side of vegan ranch dressing works great for dipping. You can also serve them as a snack during game day or at a party. They are perfect for gatherings and will impress all your guests. Avoid undercooking the cauliflower. If they are soft, they won't get crispy. Make sure to flip them at the right time. If you skip this step, one side may burn while the other stays soft. Also, do not rush the sauce coating. Let the bites cool slightly first. This allows the sauce to stick better and enhances the flavor. Finally, don’t forget to set your oven to the right temperature. A lower heat won’t give you that crispy finish you want. Pro Tips Choose the Right Cauliflower: Select a cauliflower head that is firm and free from blemishes for the best texture and flavor. Adjust the Spice Level: Feel free to mix in some cayenne pepper or chili powder to the batter if you prefer an extra kick! Use Parchment Paper: Lining your baking sheet with parchment paper not only prevents sticking but also makes cleanup a breeze. Experiment with Sauces: Try different sauces like teriyaki or barbecue for a unique twist on flavor, and switch up the toppings accordingly. {{image_4}} You can easily make these vegan buffalo cauliflower bites gluten-free. Simply swap the all-purpose flour with a gluten-free flour blend. Many brands offer great options, which work well for this recipe. Make sure to check that your hot sauce is also gluten-free. This way, you can enjoy crispy bites without any gluten! You can change the flavor of your cauliflower bites to fit your taste. If you love spice, add more hot sauce or a pinch of cayenne pepper to the batter. For a smoky flavor, try adding a bit more smoked paprika. You can also explore other seasonings, like chili powder or cumin, for a unique twist. While buffalo sauce is a classic choice, you can switch things up with different dips. A creamy vegan ranch or a tangy barbecue sauce pairs well with these bites. You can also try a zesty avocado dip or a sweet chili sauce for a fun change. Experiment with these sauces to find your favorite combination! To store your leftover vegan buffalo cauliflower bites, let them cool completely. Place them in an airtight container. You can keep them in the fridge for up to 3 days. Make sure to separate layers with parchment paper to prevent sticking. This helps keep them crispy for the next meal. When you want to enjoy your leftovers, preheat your oven to 375°F (190°C). Spread the cauliflower bites on a baking sheet in a single layer. Bake for about 10-15 minutes, or until they are hot and crispy again. Avoid using the microwave, as it can make them soggy. If you want to freeze these bites, it’s best to freeze them uncoated. After baking, let them cool completely. Place them in a single layer on a baking sheet and freeze for about 1-2 hours. Once frozen, transfer them to a freezer bag. They can last up to 3 months in the freezer. When you're ready to cook them, bake them straight from the freezer, adding a few extra minutes to the baking time. Yes, you can prepare the batter and florets ahead of time. Store the batter in the fridge for up to 24 hours. Keep the cauliflower florets in an airtight container. When you are ready, dip the florets in the batter, bake, and coat them in buffalo sauce. These bites are low in calories and high in flavor. A serving typically has about 150 calories, 5 grams of protein, and 7 grams of carbs. They are also packed with vitamins and fiber. For exact values, check the specific brands of ingredients you use. The heat level depends on the hot sauce you choose. Frank’s RedHot provides a medium heat, while other sauces may vary. You can adjust the spice by using less hot sauce or adding sweeteners like maple syrup to balance the heat. Absolutely! You can use broccoli, Brussels sprouts, or even zucchini. Just cut them into similar-sized pieces to ensure even cooking. Each vegetable will give a unique flavor and texture to your bites. You’ve learned all the key steps and tips to make delicious vegan buffalo cauliflower bites. From choosing the best ingredients to perfecting the baking process, this dish is both fun and easy. Remember to explore variations for different flavors and textures. Don’t forget storage tips to keep your bites fresh for later. Enjoy experimenting with new recipes and sharing them with friends. These bites are not just a treat; they're also healthy and versatile. Start your cooking adventure today!

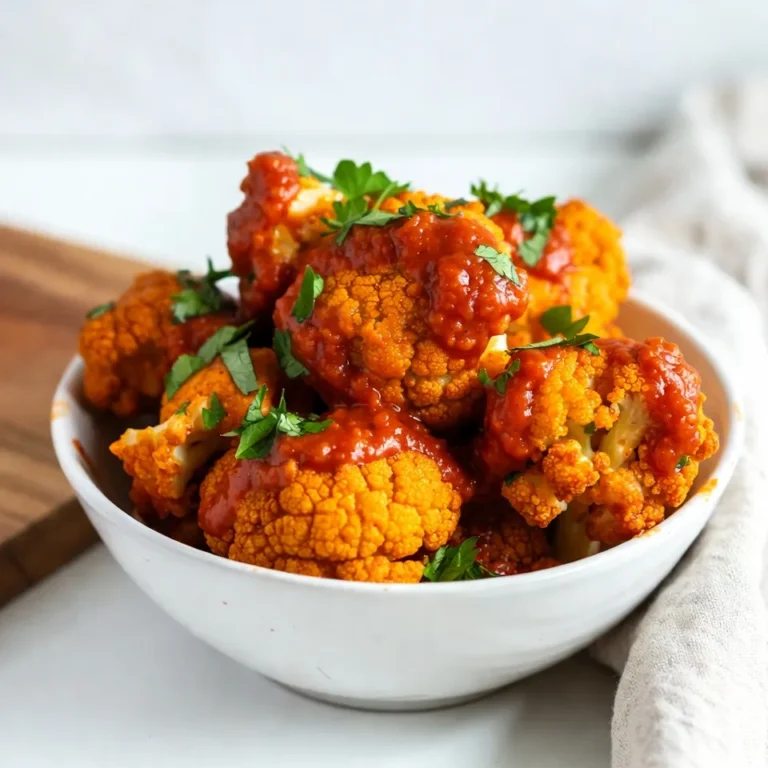
Vegan Buffalo Cauliflower Bites Crispy and Flavorful

- 2 lbs ripe tomatoes - 1 medium onion - 4 cloves garlic - 2 tablespoons extra-virgin olive oil - 1 teaspoon dried basil - 1 teaspoon dried oregano - 1 teaspoon granulated sugar - Sea salt and freshly cracked black pepper - 2 cups vegetable broth - ½ cup heavy cream (optional) - Fresh basil leaves for garnish Choosing the right ingredients is key for rich flavor. Start with fresh, ripe tomatoes. They should feel firm and smell sweet. A medium onion adds depth, while garlic gives a nice kick. Use extra-virgin olive oil for its fruity flavor. Dried basil and oregano bring an earthy taste. Granulated sugar balances the acidity of tomatoes. Always season with sea salt and black pepper for a tasty finish. For the base, vegetable broth adds warmth. If you like creamy soup, heavy cream is a great choice. Finally, fresh basil leaves make a lovely garnish. They add color and freshness. Now that you know the ingredients, you can gather everything to make this delicious soup! {{ingredient_image_2}} - Preheat oven to 400°F (200°C). - Arrange 2 lbs of halved ripe tomatoes, 1 medium quartered onion, and 4 peeled garlic cloves on a large baking sheet. - Drizzle 2 tablespoons of extra-virgin olive oil over the veggies. - Sprinkle on 1 teaspoon of dried basil, 1 teaspoon of dried oregano, 1 teaspoon of granulated sugar, sea salt, and freshly cracked black pepper. Toss to coat well. - Roast for 30 to 35 minutes until the tomatoes are soft and smell amazing. - Carefully transfer the roasted mix into a large pot. - Pour in 2 cups of vegetable broth and bring to a gentle simmer. - Use an immersion blender to puree until smooth. For a chunkier soup, blend less. - If you want it rich, add ½ cup of heavy cream. Taste and adjust seasoning with salt and pepper. - Simmer on low for 5 to 10 minutes, stirring until hot. - Serve hot, garnished with freshly torn basil leaves for a fresh touch. When making roasted tomato soup, ripe tomatoes are key. Look for tomatoes that feel heavy for their size. They should have a rich color and a slight give when you press them. If fresh tomatoes are out of season, try these options: - Canned San Marzano tomatoes - Cherry tomatoes for a sweeter taste - Grape tomatoes for a burst of flavor Seasoning makes a huge difference. Use the right ratios for salt, sugar, and herbs. A teaspoon of sugar balances the acidity of tomatoes, making the soup taste richer. Taste as you go! Adjust the salt until it tastes just right. For blending, I recommend using an immersion blender. It’s easier and less messy than a regular blender. If you want a chunkier soup, blend for a shorter time. If you prefer it smooth, blend longer until creamy. Adjust the texture to fit your taste! Pro Tips Use Fresh Tomatoes: For the best flavor, select ripe, in-season tomatoes. They should be fragrant and have a deep red color, ensuring your soup is bursting with natural sweetness. Roasting Time Matters: Keep an eye on the vegetables while roasting. If they start to char too much, they can become bitter. Aim for a nice caramelization instead, which enhances the soup's depth. Blend to Your Preference: Adjust the blending time based on your desired soup texture. For a creamier finish, blend longer; for a chunkier soup, blend less. Add a Flavor Boost: Experiment with additional herbs or spices, such as thyme or a pinch of red pepper flakes, to elevate the flavor profile of your soup. {{image_4}} To make your soup extra creamy, add heavy cream. This gives a rich taste. You can mix in half a cup of cream after blending. Stir it well to combine. This small change makes your soup feel smooth and luscious. You can also use coconut milk for a dairy-free option. This keeps the flavor while adding a twist. Cheese adds depth to your soup. Try adding grated parmesan or mozzarella. Mix in cheese after blending the soup for a creamy texture. You can also sprinkle cheese on top before serving. Broil it for a minute to melt it slightly. This creates a delightful, gooey layer that pairs well with the tomatoes. If you like heat, add some peppers. Jalapeños or red pepper flakes work great. Chop the peppers and roast them with the other veggies. You can also add a dash of cayenne for extra spice. This makes your soup exciting and full of flavor. Adjust the spice level to match your taste. After making your roasted tomato soup, let it cool down first. Store it in a clean, airtight container. This keeps the soup fresh and tasty. It will stay good in the fridge for about 3 to 5 days. Make sure to label the container with the date. This way, you can keep track of freshness. If you want to save some soup for later, freezing is a great option. Pour the cooled soup into freezer-safe bags or containers. Leave some space at the top for expansion. Seal them tightly to keep out air. You can freeze it for up to 3 months. When you're ready to eat, take it out and thaw it in the fridge overnight. To reheat, warm it gently on the stove over low heat. Stir often to keep it smooth. Roasted tomato soup pairs well with many dishes. Try it with grilled cheese sandwiches for a classic combo. You can also serve it with a fresh garden salad for a light meal. For a twist, add a dollop of pesto on top of the soup before serving. Fresh basil leaves not only taste good but also add a nice touch to the look. Enjoy your meal! Yes, you can use canned tomatoes. They save time and are easy to use. Canned tomatoes have a good flavor, but fresh ones taste bright and sweet. Fresh tomatoes let you control the taste better. For this recipe, I prefer fresh tomatoes. You can thicken your soup in several ways without cream. Here are some options: - Add more roasted vegetables. - Blend in cooked rice or pasta. - Use potato chunks for a creamy texture. - Simmer longer to reduce the liquid. Each method adds flavor and body to your soup. A few great bread options include: - Crusty sourdough for a chewy bite. - Grilled cheese sandwiches for a classic combo. - Garlic bread for added flavor. - Simple baguette slices for dipping. These breads enhance the flavors of the soup and make a hearty meal. This blog post covered how to make a delicious roasted tomato soup. You learned about key ingredients like fresh tomatoes, herbs, and vegetable broth. We explored each step, from roasting vegetables to blending them smoothly. Tips helped you choose ripe tomatoes and adjust flavors. You can also try variations like creamy soup or adding cheese. Finally, I shared storage methods for your leftovers. Enjoy this simple recipe that packs great flavor. Happy cooking!

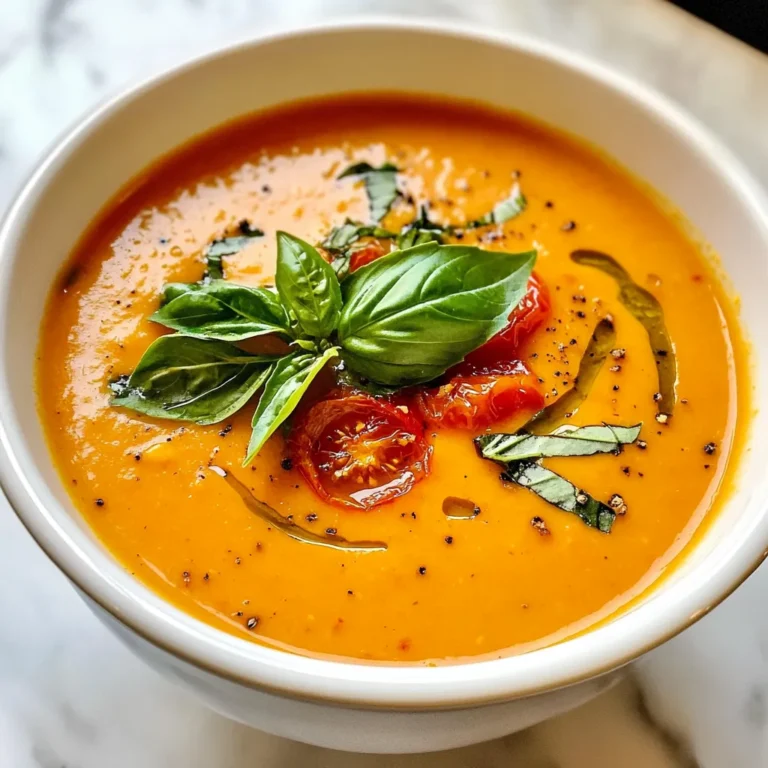
Roasted Tomato Soup ala Ramsay Rich and Flavorful Dish

PREV 1 … 29 30 31 … 48 NEXT
meal plan mapper

explore

DessertsDinnerAppetizersDrinks

Our Policies

  • Cookie Policy
  • Copyright Policy
  • Disclaimer
  • GDPR Policy
  • Terms Of Use
Back to Top
  • About
  • Contact Us
  • Privacy Policy
© 2025 meal plan mapper