FREE DINNER EBOOK! Get your copy!
  • Cookie Policy
  • GDPR Policy
  • Disclaimer
  • Terms Of Use
  • Visit my other site: Fun Cookie Recipes
meal plan mapper
  • Home
  • Dinner
  • Desserts
  • Drinks
  • Appetizers
  • Contact
  • About
  • Privacy Policy
  • Home
  • Dinner
  • Desserts
  • Drinks
  • Appetizers
  • Contact
  • About
  • Privacy Policy
  • Cookie Policy
  • GDPR Policy
  • Disclaimer
  • Terms Of Use
Visit my other site: Fun Cookie Recipes

HOME / CATEGORIES /

Latest

- 2 cups sushi rice - 2 ½ cups water - 1 lb fresh salmon, skinless and diced - 1 tablespoon rice vinegar - 1 tablespoon sugar - 1 teaspoon salt - 2 tablespoons sriracha (spiciness can be adjusted) - 2 tablespoons mayonnaise (Kewpie is preferred for creaminess) - 1 tablespoon soy sauce - 1 avocado, sliced for garnish - 1 cucumber, thinly sliced for garnish - ½ cup green onions, finely chopped - 1 tablespoon sesame seeds for topping - Nori sheets, cut into squares for serving When I make Spicy Salmon Sushi Bake, I love to use fresh ingredients. The sushi rice is the base of this dish. It gives that soft and sticky feel. Using sushi rice is key for that authentic texture. The salmon is the star here. Fresh, skinless, and diced salmon brings great flavor. I prefer to use sriracha for heat, but you can add less if you want it milder. The mayonnaise adds creaminess and binds the flavors. Kewpie mayo is a great choice for that extra rich taste. Don’t skip the garnishes! Avocado and cucumber add freshness. Green onions give a nice crunch. Finally, sesame seeds add a toasted flavor. Wrapping each bite in nori sheets makes it feel like real sushi. This dish is not just tasty; it looks great too! {{ingredient_image_2}} To start, rinse 2 cups of sushi rice under cold water. Keep rinsing until the water runs clear. This step helps remove excess starch. After rinsing, place the rice and 2 ½ cups of water in a rice cooker. Cook the rice according to the manufacturer's instructions. Once cooked, cover the rice and let it rest for 10 minutes. This resting time makes the rice fluffy. While the rice is resting, mix the seasoning. In a small bowl, combine 1 tablespoon of rice vinegar, 1 tablespoon of sugar, and 1 teaspoon of salt. Stir until the sugar and salt dissolve completely. Once the rice cools slightly, gently mix the seasoning into it. Be careful not to mash the rice grains. Set the seasoned rice aside to cool further. In a large mixing bowl, combine 1 pound of diced salmon with 2 tablespoons of sriracha, 2 tablespoons of mayonnaise, and 1 tablespoon of soy sauce. Stir well to coat every piece of salmon. This mixture adds a great spicy flavor to the dish. Preheat your oven to 375°F (190°C). Spread the seasoned sushi rice evenly across the bottom of a baking dish. This creates a solid base for the bake. Next, evenly distribute the spicy salmon mixture over the rice. Make sure to cover the rice completely for even cooking. Place the baking dish in the preheated oven. Bake for 15-20 minutes. The dish is ready when the salmon is cooked through and the top has a light golden color. Keep an eye on it to avoid overcooking. Carefully remove the dish from the oven and let it cool slightly. Top the sushi bake with slices of avocado, thinly sliced cucumber, and chopped green onions. Finally, sprinkle 1 tablespoon of sesame seeds on top for added flavor and texture. For serving, cut the sushi bake into squares. You can wrap each piece in nori sheets. This adds an authentic sushi experience. Enjoy warm, and let each bite burst with flavor! To make great sushi rice, start by rinsing it well. Rinse it under cold water until the water is clear. This removes extra starch. After that, cook it in a rice cooker. Use 2 cups of rice and 2 ½ cups of water. Let it rest for 10 minutes after cooking. This helps the rice get fluffy and soft. You can change the spiciness of the dish easily. If you want less heat, use less sriracha. Start with 1 tablespoon and taste the mixture. You can add more if you prefer a spicy kick. Mixing sriracha with mayonnaise also helps balance the heat. You can swap some ingredients if needed. If you don’t have fresh salmon, try canned salmon. Kewpie mayonnaise adds creaminess, but regular mayo works too. For a lighter flavor, use plain yogurt. You can also switch avocado with mango for a fruity twist. This sushi bake is great for many events. Serve it warm for a cozy family dinner. For parties, cut it into small squares. Let guests wrap each piece in nori sheets. It’s fun and interactive! Pair it with a fresh salad or miso soup for a full meal. Pro Tips Soak the Rice: For an even fluffier texture, soak the sushi rice in water for about 30 minutes before cooking. This helps the grains absorb water better and cook more evenly. Adjust the Spice: If you prefer a milder flavor, start with 1 tablespoon of sriracha and gradually increase to your desired spice level. You can also add a touch of honey for a sweet-spicy balance. Use Fresh Ingredients: For the best flavor, always opt for the freshest salmon available. If possible, purchase sushi-grade salmon for a safer and tastier result. Perfect Baking: Keep an eye on your sushi bake towards the end of the cooking time. If you're aiming for a crispy top, you can broil it for the last 2-3 minutes, watching closely to prevent burning. {{image_4}} You can switch out salmon for other proteins. Shrimp or crab work great here. Both bring a fun twist and pair well with the spicy sauce. You might also try tuna for a classic flavor. Just remember to adjust the cooking time. Cook time will vary based on the protein you choose. For a vegan or vegetarian option, use tofu or tempeh. Marinate them in the same sriracha and soy sauce mix. This adds flavor and keeps the dish exciting. You can also use mushrooms for a meaty texture. Just make sure to cook them until tender. You can add more flavor by mixing in herbs or spices. Try adding cilantro or basil for freshness. You could also toss in some diced jalapeños for extra heat. If you like crunch, add chopped nuts or seeds. These small changes can really elevate your sushi bake. After enjoying your spicy salmon sushi bake, store any leftovers in an airtight container. Let it cool to room temperature first. This way, the flavors stay fresh. Keep the container in the fridge for up to three days. Make sure to cover individual servings with plastic wrap if you want to save space. Reheating is easy! You can use the oven or microwave. For the oven, preheat it to 350°F (175°C). Place your sushi bake in a baking dish and cover it with foil. Heat for about 10-15 minutes until warm. If using a microwave, put a piece on a microwave-safe plate and heat for 1-2 minutes. Check to avoid overcooking. Want to save some for later? You can freeze the sushi bake! Cut it into squares and wrap each piece in plastic wrap. Place the wrapped pieces into a freezer bag. Squeeze out the air before sealing. This way, it can last for up to three months in the freezer. When ready to eat, thaw it in the fridge overnight before reheating. You can prepare the sushi bake in advance. Cook the sushi rice and make the spicy salmon mix. Layer the rice and salmon in a baking dish. Cover it tightly with plastic wrap. Store it in the fridge for up to a day. When ready to eat, simply bake it as directed. Yes, you can use cooked salmon. Just make sure it is flaked into small pieces. Mix it with sriracha, mayonnaise, and soy sauce. This will give it a nice flavor. The bake will still be delicious. Pair this sushi bake with fresh salads. A simple cucumber salad works well. You can also serve it with miso soup for warmth. Edamame is another great option. These sides balance the rich flavor of the bake. Check the sushi bake after 15 minutes in the oven. The salmon should be opaque and flaky. The top should have a light golden color. If it looks undercooked, bake it a few more minutes. The sushi bake can be gluten-free. Use gluten-free soy sauce to keep it safe. The other ingredients, like rice and salmon, are naturally gluten-free. Always check labels to be sure. This blog post explored how to make a Spicy Salmon Sushi Bake. We looked at the key ingredients, seasoning, and garnishes. Then, I shared step-by-step instructions for preparing sushi rice, making the spicy mixture, and baking the dish. I also offered tips for perfecting the recipe and variations for dietary needs. Finally, I covered storage tips and answered your FAQs. Enjoy making this dish. It’s fun, easy, and sure to impress! Dive into this recipe today.

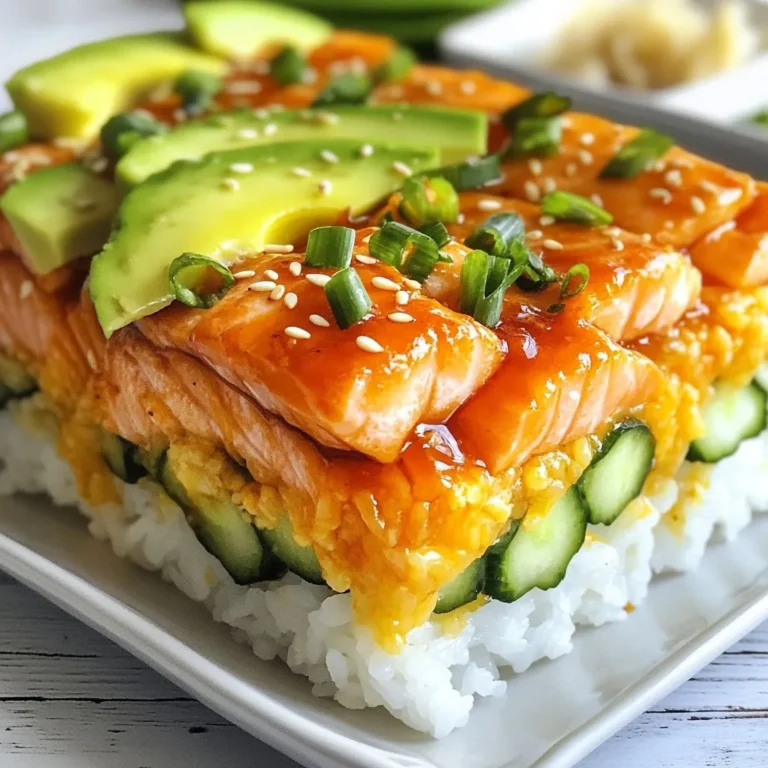
Spicy Salmon Sushi Bake Flavorful and Easy Recipe

- 4 large russet potatoes, peeled and diced into 1-inch chunks - 1 cup cooked and shredded chicken breast, preferably rotisserie - 1 cup low-fat Greek yogurt, for creaminess - 1 large onion, chopped finely - 2 cloves garlic, minced for aromatic flavor - 4 cups low-sodium chicken broth, to control salt levels - 1 cup milk (or your preferred milk alternative, such as almond or oat milk) - 1 teaspoon dried thyme, to enhance flavor - 1 teaspoon smoked paprika, for a hint of smokiness - Salt and pepper to taste - Fresh chives, chopped finely (for a vibrant garnish) This creamy potato soup packs a punch with protein. Each serving is rich in essential nutrients. The shredded chicken provides lean protein, while Greek yogurt adds creaminess and more protein. The potatoes give you carbs for energy, and the broth keeps it light. Overall, it's a balanced meal that fills you up. When selecting potatoes, look for firm and smooth ones. Avoid any that have dark spots or blemishes. For chicken, rotisserie is great, but ensure it's fresh and well-cooked. The Greek yogurt should be thick and creamy, so check the label for quality. Choose low-sodium chicken broth to control the salt. Fresh herbs like chives should look vibrant and green, which adds a nice touch to your final dish. {{ingredient_image_2}} Start by heating a drizzle of olive oil in a large pot over medium heat. Add the chopped onion and minced garlic. Sauté them until the onion is soft and clear, which takes about 3 to 4 minutes. Stir often to keep them from sticking. Next, add the diced russet potatoes into the pot. Pour in 4 cups of low-sodium chicken broth. Turn the heat up until the mix boils. Once it reaches a boil, lower the heat and let it simmer for 15 to 20 minutes. You want the potatoes to be soft enough to pierce with a fork. After cooking, it’s time to blend the soup. If you have an immersion blender, use it directly in the pot. Blend until the soup is smooth and creamy. If you only have a countertop blender, let the soup cool for a bit. Then blend it in batches. Be careful to avoid splattering. Once it’s all pureed, return the soup back to the pot if you used a countertop blender. Now, mix in 1 cup of low-fat Greek yogurt and 1 cup of milk. The yogurt adds a rich creaminess. Stir in the cooked shredded chicken, dried thyme, and smoked paprika. Season with salt and pepper to your taste. Gently heat the soup on low until it's warm. Avoid boiling it again. Taste the soup and adjust the salt or pepper if needed. If you like a thinner soup, add more broth or milk until you reach the right thickness. Finally, serve the soup in bowls and sprinkle fresh chives on top for color and flavor. Enjoy your hearty meal! To boost the protein in your creamy potato soup, add more chicken. I like using shredded rotisserie chicken for flavor and ease. You can also mix in some cooked lentils or chickpeas. These legumes pack a protein punch without changing the taste. If you're feeling fancy, try adding a scoop of protein powder into the mix. Just blend it in with the Greek yogurt for a smooth texture. Having the right tools makes cooking easier and more fun. Here are some must-haves for this recipe: - A large pot for cooking the soup. - An immersion blender for a creamy finish. - A sharp knife to chop the veggies. - A cutting board for safety. - Measuring cups to keep the portions right. - A ladle for serving the soup. These tools help you work efficiently and enjoy the cooking process. Even simple recipes can have hiccups. Here are some common mistakes to watch for: - Don’t skip the sautéing step. Cooking the onion and garlic first adds great flavor. - Avoid using too much salt early on. You can always add more later. - Don't rush the blending. Ensure the soup is cool enough if using a countertop blender. This prevents splatter. - Be careful when adding milk or yogurt. Stir it in slowly. This keeps the soup creamy and prevents curdling. Keeping these tips in mind will help you create a delicious soup that you will love. Pro Tips Use Fresh Ingredients: Opt for fresh potatoes and high-quality chicken to enhance the flavor and texture of your soup. Control the Creaminess: Adjust the amount of Greek yogurt and milk based on your desired creaminess; you can always add more for a richer soup. Flavor Variations: Experiment with different herbs and spices, such as rosemary or curry powder, to customize the flavor profile to your liking. Storage Tips: This soup can be stored in the refrigerator for up to 3 days. Reheat gently on the stove to maintain its creamy consistency. {{image_4}} You can easily make this soup vegetarian. Instead of chicken, use cooked lentils or chickpeas. These options add protein and fiber. Swap the chicken broth for vegetable broth. This keeps the soup rich and flavorful. You can also add some nutritional yeast for a cheesy flavor. To make the soup dairy-free, replace Greek yogurt with coconut yogurt. It provides creaminess without dairy. Use almond milk or oat milk instead of regular milk. This gives you a smooth texture. Check labels to make sure they are unsweetened. For more nutrition, add extra veggies. You can include carrots, celery, or spinach. Chop them small so they cook well. Add them with the potatoes for a hearty soup. You can also try kale or broccoli for a twist. These veggies add color and flavor while boosting health benefits. To store your leftover soup, let it cool first. Then, transfer it to airtight containers. This keeps it fresh and tasty. You can keep the soup in the fridge for up to three days. Be sure to label the container with the date. This way, you’ll know when to enjoy it again. You can freeze this soup for longer storage. Pour the cooled soup into freezer-safe containers. Fill them only ¾ full to allow for expansion. Seal tightly and store in the freezer for up to three months. When you're ready to eat, just pull it out and let it thaw in the fridge overnight. Reheat the soup on the stove for best flavor. Pour it into a pot over low heat. Stir often to prevent sticking. You can also use the microwave. Just place the soup in a microwave-safe bowl. Heat it in 30-second intervals, stirring in between. Always make sure it's hot all the way through before serving again. Yes, you can make this soup ahead of time. Prepare the soup, let it cool, and store it in the fridge. It will stay fresh for up to three days. When you’re ready to eat, just reheat it on the stove. This soup tastes even better after the flavors meld overnight. If you don’t have Greek yogurt, you can use regular yogurt or sour cream. Both options add creaminess. You can also try silken tofu for a dairy-free choice. Blend it smooth first to keep the soup’s texture. To adjust the spice level, start with less smoked paprika. You can add more later if needed. For a kick, sprinkle in some red pepper flakes or cayenne pepper. Always taste the soup as you go to find your perfect heat. This article covered key ingredients for soup and how to choose the best ones. I shared step-by-step instructions for preparing a creamy base and adding final touches. You learned tips to boost protein and avoid common mistakes. I also shared variations for vegetarians and those avoiding dairy. Finally, I provided tips for storage and reheating. Remember, soup is flexible and fun. Use these tips to make it your own! Enjoy your cooking and happy soup-making!

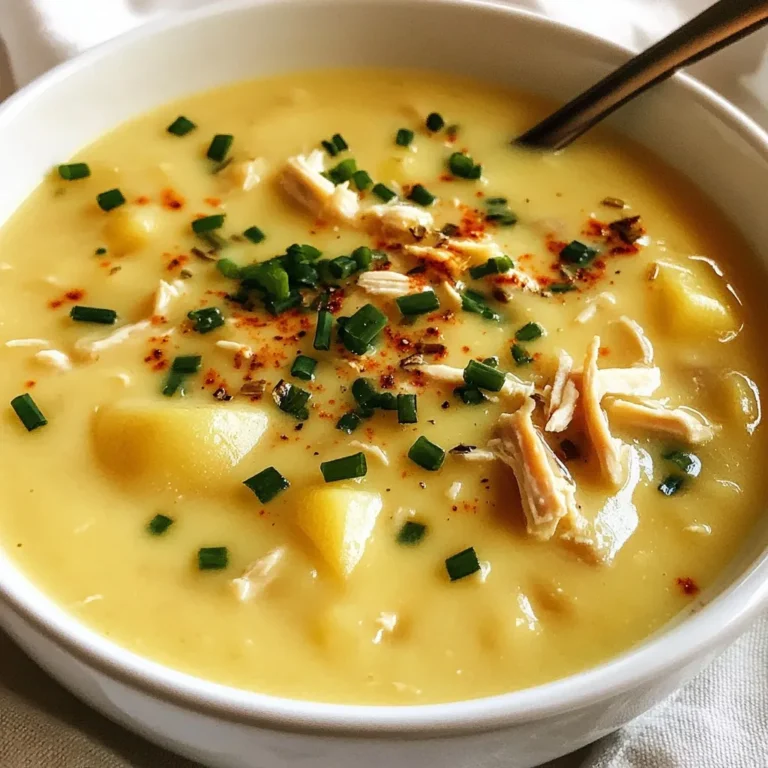
High Protein Creamy Potato Soup Simple and Tasty

- 1 lb boneless chicken breast, cut into 1-inch cubes - 1/2 cup honey - 1/4 cup Sriracha sauce - 2 tablespoons soy sauce - 2 tablespoons rice vinegar - 2 cloves garlic, minced - 1 teaspoon ginger, grated - 1 tablespoon sesame oil - Salt and pepper to taste - Fresh cilantro, chopped (for garnish) For skewers, you can use either wooden or metal. Wooden skewers are great for grilling, but you must soak them first. Soak the wooden skewers in water for at least 30 minutes. This step helps prevent them from burning on the grill. Metal skewers don't need this. They are reusable and easy to clean. Choose what works best for you! {{ingredient_image_2}} First, gather your ingredients. In a medium bowl, mix the following: - 1/2 cup honey - 1/4 cup Sriracha sauce - 2 tablespoons soy sauce - 2 tablespoons rice vinegar - 2 cloves garlic, minced - 1 teaspoon ginger, grated - 1 tablespoon sesame oil - Salt and pepper to taste Whisk these together until smooth. The mixture should be thick but pourable. If it feels too thick, add a splash of water to achieve the right consistency. Next, take your chicken breast and cut it into 1-inch cubes. Place the chicken in a large resealable bag or a shallow dish. Pour the marinade over the chicken. Seal the bag or cover the dish tightly. For best flavor, refrigerate the chicken for at least 1 hour. If you want a stronger taste, marinate it overnight. This allows the flavors to soak in deeply. Now it’s time to grill the skewers. Start by preheating your grill or grill pan to medium-high heat. This step ensures a nice sear on the chicken. Carefully thread the marinated chicken cubes onto the skewers. Make sure to leave small spaces between each piece. This helps the chicken cook evenly. Once the grill is hot, place the skewers on the grill. Cook them for about 4-5 minutes on each side. You want the chicken to be fully cooked and have beautiful grill marks. After grilling, take the skewers off the heat. Let them rest for a few minutes to keep the juices inside. For a flavor boost, drizzle any leftover marinade over the skewers. Finish by sprinkling fresh cilantro on top for a bright touch. To get those perfect grill marks, aim for a medium-high heat. This temperature helps the chicken sear nicely. Preheat your grill for about 10-15 minutes. Once hot, place the skewers down at a 45-degree angle. Grill for 4-5 minutes on each side for the best results. This timing gives you juicy chicken and nice, dark grill marks. For even more flavor, let the chicken marinate longer. I suggest at least 1 hour, but overnight works best. This extra time allows the marinade to soak in deeply. When seasoning, don’t hold back! Adjust the salt and pepper to match your taste. You can also add a pinch of cayenne for extra heat. Pair your Honey Sriracha Chicken Skewers with fresh sides. A crisp salad or grilled veggies works great. For garnish, sprinkle fresh cilantro on top. You can also serve lime wedges on the side. A squeeze of lime adds a zesty kick that brightens up the dish. Pro Tips Marinate Longer for Depth: The longer you marinate the chicken, the more flavorful it will become. Aim for at least 1 hour, but overnight is best! Adjust Spice Levels: If you prefer a milder flavor, reduce the amount of Sriracha or add more honey to balance the heat. Check Doneness: Ensure chicken is cooked through by using a meat thermometer; it should register at least 165°F (75°C) at the thickest part. Rest Before Serving: Let the skewers rest for a few minutes after grilling to allow the juices to redistribute, ensuring moist chicken when served. {{image_4}} If you want to switch up the main protein in these skewers, chicken is not your only option. You can use tofu for a plant-based meal. Tofu absorbs flavors well. Use extra-firm tofu and press it to remove excess water. Cut it into cubes and marinate it just like chicken. Shrimp is another great choice. Just be sure to peel and devein the shrimp before marinating. Cook shrimp for about 2-3 minutes on each side until they turn pink. You can easily enhance the flavor of the marinade. Add spices like smoked paprika or cayenne for extra heat. Fresh herbs, like basil or mint, can bring a fresh taste. Consider mixing in some lime juice for a zesty kick. Garlic powder or onion powder can also deepen the flavor. Just remember to balance the sweet and spicy notes. This way, you’ll get a richer taste in every bite. You don’t have to grill these skewers if you prefer other cooking methods. For baking, preheat your oven to 400°F (200°C). Place the skewers on a baking sheet lined with parchment paper. Bake for about 15-20 minutes, flipping halfway through. This method keeps the chicken juicy. If you own an air fryer, you're in luck! Preheat the air fryer to 380°F (193°C). Arrange the skewers in the basket, leaving space between them. Cook for about 10-12 minutes. Check that the chicken is fully cooked inside. Using an air fryer gives you a nice crispy texture without using much oil. You can store leftover Honey Sriracha Chicken Skewers in the fridge. They last for up to 3 days. Make sure to keep them in an airtight container. This helps keep the flavors fresh. If you want to keep skewers for longer, freezing is a good option. Wrap them tightly in plastic wrap. Then, place the wrapped skewers in a freezer bag. They can last for up to 3 months in the freezer. When ready to eat, thaw them in the fridge overnight. To reheat, you have a few options. The oven works well. Preheat it to 350°F (175°C). Place the skewers on a baking sheet. Heat for about 10-15 minutes. You can also use a microwave. Just place them on a plate and heat in 30-second bursts. Check often to avoid overcooking. Enjoy them warm to get the best taste! You should marinate the chicken for at least one hour. This time helps the chicken soak up all the flavors. For the best taste, marinate overnight. The longer it sits, the more flavorful it becomes. Yes, you can use another hot sauce if you prefer. Try a chili garlic sauce or a spicy barbecue sauce. Just keep in mind that the taste will change. Adjust the amount to match your heat preference. You can serve these skewers with many sides. Some great options are: - Steamed rice - Grilled vegetables - Fresh salad - Noodles - Dipping sauces like ranch or extra Sriracha These sides will balance the sweet and spicy flavors of the skewers. Absolutely! Honey Sriracha Chicken Skewers work well for meal prep. You can grill a batch and store them in the fridge. They last for about three to four days. This makes them great for quick lunches or dinners. Yes, you can prepare the skewers in advance. Marinate the chicken the night before. Then, thread it onto skewers when you are ready to cook. You can even grill them earlier and reheat when needed. In this blog post, we covered how to make delicious Honey Sriracha Chicken Skewers. We explored the key ingredients, like chicken breast and honey, along with flavors from garlic and ginger. You learned about marinating, grilling techniques, and tips for perfect grill marks. Try different proteins or cooking methods to keep things fresh. Whether you grill or bake, these skewers will impress everyone. Enjoy your cooking adventure and savor the taste!

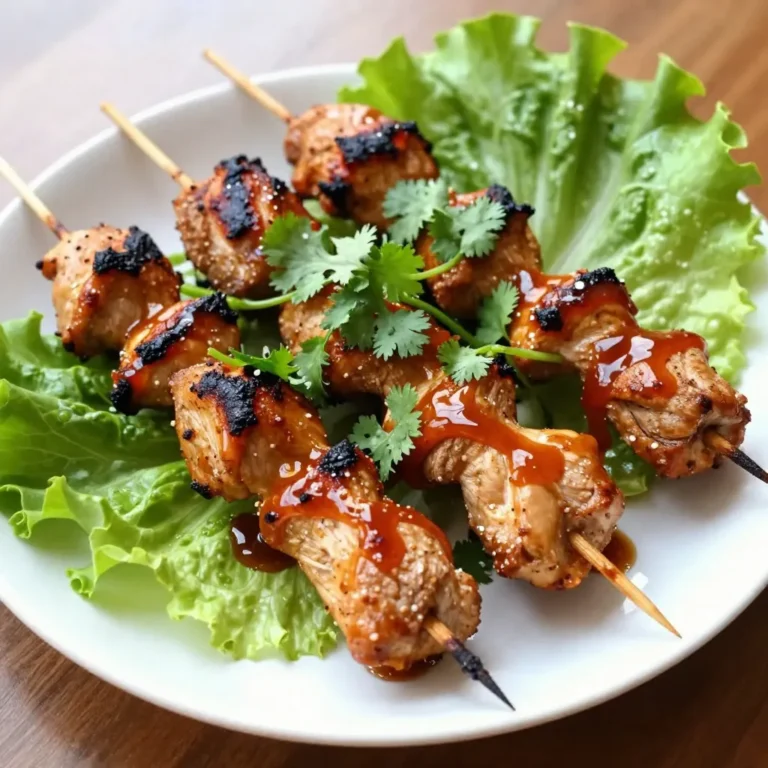
Honey Sriracha Chicken Skewers Sweet and Spicy Delight

This soup features some wonderful, healthy ingredients. Each one adds flavor and nutrition: - 1 medium-sized pumpkin, thoroughly peeled and cubed - 2 medium sweet potatoes, peeled and diced into bite-sized pieces - 1 large onion, finely chopped - 2 cloves of garlic, minced - 1 tablespoon fresh ginger, grated - 4 cups vegetable broth (preferably low-sodium) - 1 can (13.5 oz) coconut milk, full-fat for creaminess - 1 teaspoon ground turmeric, known for its anti-inflammatory properties - 1 teaspoon ground cumin for warmth - 1/2 teaspoon cayenne pepper (adjust according to your spice preference) - Salt and freshly ground black pepper to taste - 2 tablespoons olive oil for sautéing - Fresh cilantro or parsley, finely chopped, for garnish I chose these amounts to keep flavors balanced. Here's a quick guide: - Pumpkin: 1 medium-sized - Sweet potatoes: 2 medium - Onion: 1 large - Garlic: 2 cloves - Ginger: 1 tablespoon - Vegetable broth: 4 cups - Coconut milk: 1 can (13.5 oz) - Turmeric: 1 teaspoon - Cumin: 1 teaspoon - Cayenne pepper: 1/2 teaspoon - Olive oil: 2 tablespoons - Salt and black pepper: to taste - Fresh herbs: for garnish Pumpkin and sweet potatoes are packed with nutrition. They are both high in vitamins and minerals. - Pumpkin: It has vitamin A, which is great for your eyes. It's low in calories, too. - Sweet potatoes: They are rich in fiber and antioxidants. They help with digestion and give energy. - Turmeric: This spice is famous for fighting inflammation. It can help ease pain. - Coconut milk: It adds creaminess and healthy fats. It helps keep you full longer. These ingredients work together to create a tasty soup that nourishes your body. Enjoy the health benefits while savoring each bite! {{ingredient_image_2}} To start, gather all your ingredients. You need: - 1 medium-sized pumpkin, cubed - 2 medium sweet potatoes, diced - 1 large onion, chopped - 2 cloves of garlic, minced - 1 tablespoon fresh ginger, grated - 4 cups vegetable broth - 1 can coconut milk - 1 teaspoon ground turmeric - 1 teaspoon ground cumin - 1/2 teaspoon cayenne pepper - Salt and black pepper to taste - 2 tablespoons olive oil - Fresh cilantro or parsley for garnish Next, peel and cube the pumpkin. Dice the sweet potatoes into small pieces. Chop the onion finely. Mince the garlic and grate the ginger. Have everything ready to go. This makes the cooking process smooth and easy. Begin by heating the olive oil in a large pot over medium heat. Once hot, add the chopped onion. Sauté the onion for about 5 minutes until it turns translucent. Then, stir in the minced garlic and ginger. Cook for another 2 minutes until you smell the lovely aroma. Now, add the cubed pumpkin and diced sweet potatoes into the pot. Stir well to mix everything. Pour in the vegetable broth so the veggies are covered. Bring it to a boil. Lower the heat and let it simmer for 20-25 minutes. Cook until the pumpkin and sweet potatoes are soft enough to pierce with a fork. Once the veggies are cooked, it’s time to blend. Use an immersion blender to make the soup smooth. If you don’t have one, transfer the soup in batches to a regular blender. Blend until creamy and velvety. With the heat still low, stir in the coconut milk, turmeric, cumin, and cayenne pepper. Season with salt and black pepper to your taste. Heat for about 5 more minutes. This step lets the spices mix well with the soup. Taste it and adjust the seasoning if needed. Now, your delicious soup is ready to serve! To make your soup creamy, use full-fat coconut milk. This gives a rich flavor. Blend the soup well until smooth. An immersion blender works best. If you use a regular blender, blend in batches. This helps avoid spills and ensures a velvety finish. Spices can make or break your soup. Start with the suggested amounts for turmeric and cumin. If you want more warmth, add more cumin. For heat, increase cayenne pepper slowly. Taste as you go. This way, you can find the perfect spice level for your palate. Garnishing makes your soup look beautiful. A sprinkle of fresh cilantro or parsley adds color. For an elegant touch, drizzle a bit of coconut milk on top. You can also add a few roasted pumpkin seeds for crunch. Serve in deep bowls with crusty bread for a cozy meal. Pro Tips Use Fresh Ingredients: For the best flavor and health benefits, opt for fresh pumpkin and sweet potatoes rather than canned versions. Adjust the Spice Level: Feel free to modify the amount of cayenne pepper to suit your taste preferences, making it milder or spicier as desired. Blend for Creaminess: For an ultra-smooth texture, ensure to blend the soup thoroughly; using an immersion blender is perfect for this. Garnish Creatively: Experiment with different herbs such as basil or mint for garnish, adding a fresh twist to the presentation. {{image_4}} You can easily change ingredients to fit your needs. If you want a lower-carb option, swap the sweet potatoes for cauliflower. This keeps the soup creamy while lowering carbs. For a dairy-free version, use almond or oat milk instead of coconut milk. If you're allergic to nuts, avoid those options and stick with vegetable broth and water. Boost the nutrition by adding more veggies. Carrots add sweetness and color. Spinach or kale can enhance vitamins and minerals. Just chop them small and add them with the pumpkin and sweet potatoes. They will cook down and blend well into the soup. This way, you make the dish even healthier without losing flavor. Herbs and spices can take your soup to the next level. Fresh thyme or rosemary add a lovely aroma. You might also try adding a pinch of cinnamon for warmth. If you enjoy a kick, increase the cayenne pepper. Experiment with flavors based on your taste. Each herb or spice will change the soup's profile, making it unique each time you make it. To keep your soup fresh, let it cool first. Pour it into airtight containers. Make sure to fill the containers only to three-quarters full. This leaves room for expansion when you freeze it. Store the soup in the fridge if you plan to eat it within three days. For longer storage, freezing is best. When you are ready to eat your soup, reheat it gently. Pour the soup into a pot over low heat. Stir often to prevent it from sticking. If the soup seems too thick, add a bit of water or vegetable broth. Heat until it's warm, but don’t boil it, as this can change the texture. If you freeze the soup, it can last about three months. Use freezer-safe containers to avoid freezer burn. Label each container with the date. When you want to eat it, thaw it in the fridge overnight. After thawing, follow the reheating instructions for the best flavor and texture. Anti-inflammatory soups offer many health perks. They can help reduce swelling and pain. Ingredients like pumpkin and sweet potatoes are rich in antioxidants. These foods support your immune system and promote digestion. Turmeric, a key spice here, is noted for its ability to fight inflammation. Regularly eating these soups may lower the risk of chronic diseases. Enjoying a bowl can also lift your mood and soothe your soul. Yes, you can use fresh pumpkin! Fresh pumpkin brings a bright flavor and vibrant color. Just remember to peel and cube it first. If you choose fresh, you may need to cook it a bit longer. Fresh pumpkin will add more nutrients and taste to your soup. It’s a great way to use seasonal produce. To tweak the spice level, adjust the cayenne pepper. For more heat, add an extra pinch or two. You can also add chili flakes or hot sauce for a different kick. If you prefer milder soup, reduce the cayenne to a quarter teaspoon. You might also skip it entirely if you like. Taste your soup often as you cook to find your perfect balance. This blog post covered how to make a tasty soup using pumpkin and sweet potato. We explored healthy ingredients and measurements that boost flavor. You learned step-by-step instructions for preparation and cooking, plus tips for a creamy texture. I shared variations to fit dietary needs and the best ways to store leftovers. Always remember that soup can be adapted to your taste, making it fun and healthy. I hope you feel inspired to make this wholesome meal!

Pumpkin Sweet Potato Anti Inflammatory Soup Delight

For garlic herb roasted potatoes, you need: - 2 lbs baby potatoes, halved - 4 cloves garlic, finely minced - 3 tablespoons extra virgin olive oil - 1 teaspoon dried rosemary - 1 teaspoon dried thyme - 1 teaspoon smoked paprika - Salt and freshly ground black pepper, to taste - Fresh parsley, finely chopped (for garnish) These ingredients work together to make a dish that is simple yet tasty. I often prefer fresh herbs for their bright taste. Fresh rosemary and thyme add a great aroma. However, dried herbs work well too. They are easy to store and still pack flavor. Use dried herbs if fresh ones are not available. Just remember, dried herbs are stronger. You need less of them. A good rule is to use one-third the amount of dried herbs compared to fresh. Garlic herb roasted potatoes are not only delicious but also good for you. A serving of these potatoes offers: - Calories: 200 - Carbohydrates: 35g - Protein: 4g - Fat: 7g - Fiber: 4g These potatoes give you energy and nutrients. You can enjoy them as a healthy side with any meal. {{ingredient_image_2}} Start by washing your baby potatoes. This step is key! Clean them well to remove any dirt. After washing, cut each potato in half. This helps them cook evenly. Aim for similar sizes to ensure they roast perfectly. In a large bowl, add your halved baby potatoes. Next, add minced garlic and olive oil. Sprinkle in the dried rosemary, thyme, and smoked paprika. Don’t forget to add salt and black pepper to taste! Now, use your hands or a spatula to toss everything together. Make sure each potato is covered in that tasty mix. Now, it's time to roast! Preheat your oven to 400°F (200°C). Line a baking sheet with parchment paper for easy cleanup. Spread the seasoned potatoes on the sheet in a single layer. This helps them get crispy. Roast them in the oven for 30-35 minutes. Remember to stir them halfway through to get even browning. When they turn golden brown and crispy, they are done! After roasting, let them cool for a few minutes. Finally, sprinkle chopped parsley on top for a fresh look. Enjoy your garlic herb roasted potatoes! To get the best crispy potatoes, start by preheating your oven to 400°F (200°C). This hot temperature helps the potatoes brown nicely. When you coat them in oil and herbs, make sure every piece gets a good layer. Spread the potatoes out on the baking sheet. A single layer allows hot air to circulate, giving you a crisp finish. Stir them halfway through cooking to brown both sides. They should be golden and crispy outside, soft inside. Feel free to change the seasonings to fit your taste. If you love heat, add a pinch of cayenne pepper. For a fresh twist, mix in some lemon zest or juice. You can also swap the herbs. Try fresh rosemary or thyme instead of dried for a more vibrant flavor. If you want a smoky taste, add more smoked paprika. Adjust the salt and pepper based on your preference. This way, you can create a dish that feels just right for you. To make this dish smooth and easy, gather a few key tools. A large mixing bowl is essential for tossing the potatoes and seasonings. A baking sheet lined with parchment paper is great for roasting. This makes cleanup easy and helps prevent sticking. A sharp knife is important for halving the baby potatoes. Lastly, a spatula or wooden spoon works well for mixing everything together. Having the right tools makes cooking fun and efficient! Pro Tips Use Fresh Herbs: Fresh herbs can elevate the flavor of your roasted potatoes even more than dried ones. Consider using fresh rosemary or thyme if available. Try Different Potatoes: Experiment with various types of potatoes, such as Yukon Gold or red potatoes, for different textures and flavors. Pre-soak for Crispiness: Soaking the halved potatoes in cold water for 30 minutes before roasting can help achieve a crispier exterior. Don’t Crowd the Pan: Make sure the potatoes are spaced out on the baking sheet to allow for even roasting and browning, preventing steaming. {{image_4}} You can use many types of potatoes for this dish. Baby potatoes are great for their size and taste. However, you can also try Yukon gold or red potatoes. These will add a nice creaminess. If you want something more unique, try fingerling potatoes. Their shape makes them fun and interesting. If you want to change the flavors, swap out the herbs. Instead of rosemary, use oregano or basil for a fresh taste. You can also try dill for a brighter flavor. For a spicy kick, add crushed red pepper flakes. These small changes can really bring out new tastes. You can make your roasted potatoes even better by adding extras. Cheese is a fantastic option. Try grating some Parmesan or tossing in feta for a salty bite. You can also add vegetables like bell peppers or onions. Just cut them into similar sizes and roast them with the potatoes. This makes for a colorful and tasty dish. After cooking your garlic herb roasted potatoes, let them cool for a bit. Place the potatoes in an airtight container. This helps keep them fresh. Store the container in the fridge. They will stay good for up to four days. Make sure to keep the lid tight to avoid moisture. To reheat these tasty potatoes, preheat your oven to 375°F (190°C). Spread the cold potatoes on a baking sheet. Heat them for about 10-15 minutes. This will help them get crispy again. You can also use a microwave. Just warm them for 1-2 minutes. The oven method keeps the texture better. Freezing garlic herb roasted potatoes is simple. First, let them cool completely. Then, place them in a freezer-safe bag. Remove as much air as you can before sealing. They will last for about three months in the freezer. When you're ready to eat them, thaw in the fridge overnight. Reheat them in the oven to restore their crispy goodness. Garlic herb roasted potatoes last about 3 to 5 days in the fridge. Store them in an airtight container. This keeps them fresh and tasty. When you want to eat them, just reheat. Yes, you can make garlic herb roasted potatoes ahead of time. Cook them, then cool them down. After that, store them in the fridge. When you are ready to serve, just reheat them in the oven for best results. This way, you save time and enjoy a warm side dish. Garlic herb roasted potatoes pair well with many dishes. They go great with grilled chicken, steak, or fish. You can also serve them with a fresh salad or a hearty soup. These potatoes add flavor and texture to your meal. Try them with your favorite protein for a complete dish. Garlic herb roasted potatoes come together with simple ingredients and clear steps. We explored the best herbs, nutritional facts, and tips for a crispy finish. You can mix and match flavors to suit your taste. Remember to store them properly for longer freshness. These potatoes make a great side dish for many meals. I hope you enjoy making them as much as I do!

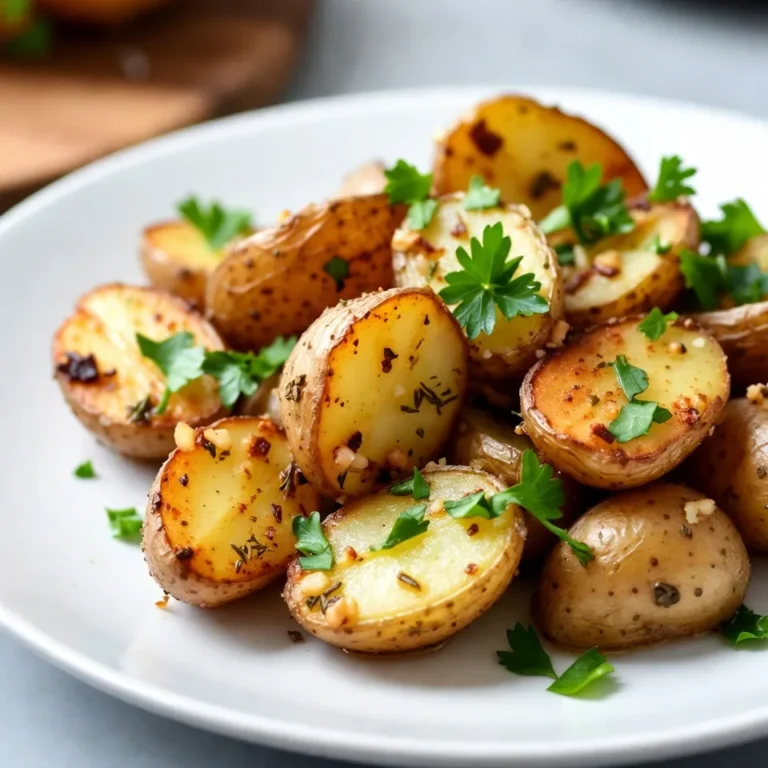
Garlic Herb Roasted Potatoes Flavorful Side Dish

- 1 ½ cups all-purpose flour - 1 cup granulated sugar - ½ cup unsweetened cocoa powder - 1 teaspoon baking powder - ½ teaspoon baking soda - ½ teaspoon salt - ½ cup unsalted butter, softened - 2 large eggs, at room temperature - 1 teaspoon pure vanilla extract - ½ cup brewed coffee, cooled - ½ cup whole milk - 1 cup caramel sauce, plus extra for drizzling - 1 cup heavy whipping cream, chilled - 2 tablespoons powdered sugar - 1 teaspoon pure vanilla extract (for whipped cream) - Optional: Chocolate shavings for garnish I love using these simple ingredients to create the perfect Caramel Macchiato Cupcakes. The dry mix forms a rich base. The cocoa powder provides depth and a hint of chocolate. The brewed coffee gives that signature macchiato taste. For the wet ingredients, I always choose room temperature eggs and milk. This helps the batter mix well and rise beautifully. Softened butter creates a fluffy texture, which is key to soft cupcakes. The toppings are where the magic happens! The caramel sauce adds sweetness and a sticky finish. I enjoy whipping the cream until it’s light and fluffy. It creates a lovely contrast with the dense cupcake. If you want to impress, sprinkle some chocolate shavings on top. This not only looks great but also adds a fun crunch. Gather all these ingredients, and you’re ready to bake a treat that everyone will adore! {{ingredient_image_2}} - Preheat oven to 350°F (175°C). - Line muffin tin with cupcake liners. Make sure they fit well. - In a large mixing bowl, combine the dry ingredients: flour, sugar, cocoa, baking powder, baking soda, and salt. Mix well until no lumps remain. - In a separate bowl, beat the softened butter until creamy. Add the eggs one by one, mixing well after each. Stir in the vanilla extract. - Slowly add the dry mix into the butter mixture. Alternate with the cooled coffee and whole milk. Mix until smooth, but don’t overdo it. - Fill each cupcake liner about two-thirds full with batter. - Bake for 18-20 minutes. Check with a toothpick. If it comes out clean, they’re done! - Let the cupcakes cool in the tin for about 5 minutes. Then, move them to a wire rack to cool completely. - Use room temperature ingredients. This helps the batter mix evenly. - Avoid overmixing the batter. Mixing too much can make cupcakes tough. - Chill your mixing bowl and beaters. Cold tools whip cream better. - Beat until stiff peaks form. This gives your whipped cream texture and height. - Drizzle caramel sauce elegantly. A light hand creates a beautiful look. - Use a piping bag for whipped cream. This helps you control the design. These tips will help you create delicious Caramel Macchiato Cupcakes that impress! Pro Tips Use Room Temperature Ingredients: Ensuring your eggs and butter are at room temperature helps them blend more easily into the batter, resulting in a smoother texture. Don’t Overmix the Batter: Mix the batter only until combined to avoid tough cupcakes. A few lumps are okay! Chill Your Whipping Cream: For best results, make sure your heavy whipping cream is well chilled before whipping. This helps achieve the perfect stiff peaks. Store Properly: Keep the cupcakes in an airtight container at room temperature for up to 2 days or in the fridge for up to a week. This keeps them fresh and moist! {{image_4}} You can make your caramel macchiato cupcakes even more special. Try adding espresso powder for a stronger coffee flavor. Just a teaspoon goes a long way in enhancing the coffee taste. You can also mix in chocolate chips into the batter. This addition gives a nice chocolatey surprise with each bite. If you need a gluten-free option, use gluten-free flour instead of all-purpose flour. This swap works well and keeps the cupcakes tasty. For a dairy-free version, choose plant-based substitutes like almond milk and coconut cream. These options ensure everyone can enjoy these delicious treats. Feeling adventurous? Swap the caramel sauce for chocolate ganache. This change offers a rich and decadent twist. You could also use flavored whipped cream, like mocha or vanilla bean, for a fun topping. Each variation adds a unique touch to your cupcakes and keeps things exciting! Store your caramel macchiato cupcakes at room temperature in an airtight container. This keeps them fresh and tasty. If you top them with whipped cream, refrigerate to keep them longer. The cold helps maintain that light, fluffy texture. You can freeze unbaked batter for later use. Just scoop it into cupcake liners and place them in a freezer-safe container. When you're ready, bake them straight from the freezer, adding a few extra minutes to the bake time. For baked cupcakes, allow them to cool completely first. Wrap each cupcake tightly in plastic wrap, then place them in a freezer-safe bag. They will stay fresh for about three months. When stored at room temperature, the cupcakes stay fresh for about three days. If you refrigerate them, they can last up to a week. Always check for any signs of spoilage before enjoying your sweet treat! To make your cupcakes fluffier, start with room temperature ingredients. Use equal parts of wet and dry ingredients. Mix until just combined. Overmixing can lead to dense cupcakes. Also, ensure you beat the butter well until creamy. This helps add air into the batter. Incorporating eggs one by one also helps with fluffiness. Lastly, gently fold in the dry ingredients to keep the air in. Yes, you can switch up the frosting. Cream cheese frosting adds a tangy twist. A mocha frosting can enhance the coffee flavor. You could also try a classic buttercream. For something lighter, use whipped cream with a hint of vanilla. Each option pairs well with the caramel flavor in the cupcakes. Feel free to get creative with your frosting choices. You can find Caramel Macchiato Cupcakes at local bakeries. Many coffee shops also offer them, especially those that sell pastries. Look for bakeries known for gourmet treats. Some grocery stores with a bakery section might carry them too. If you prefer homemade, follow this recipe for a delicious batch of your own! You’ve learned how to make delicious Caramel Macchiato Cupcakes from scratch. We covered each step, from gathering your dry and wet ingredients to baking and decorating. Remember to use room temperature ingredients for moist cupcakes and get creative with toppings. You can even try different flavors or dietary adjustments to suit your needs. Whether you bake these for a party or just for fun, they are sure to impress. Dive into this recipe and enjoy the sweet results of your hard work. Happy baking!

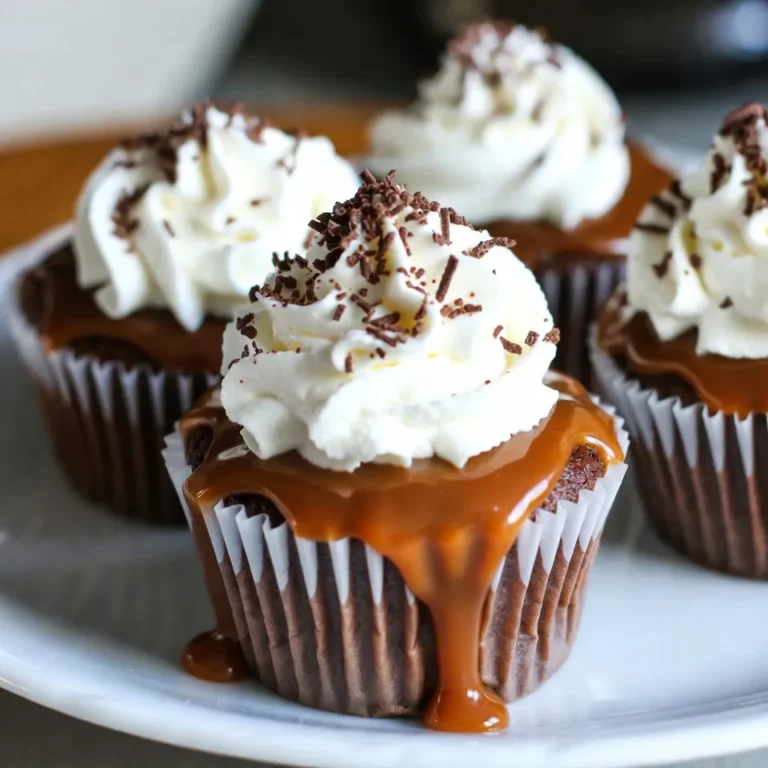
Caramel Macchiato Cupcakes Delightful Sweet Treat

- 1 cup unsalted butter, softened to room temperature - 2 cups granulated sugar - 1 cup packed brown sugar - 1 tablespoon pure vanilla extract - 1/2 teaspoon almond extract - 2 cups all-purpose flour, sifted - 1/2 teaspoon baking soda - 1/4 teaspoon fine sea salt - 1 cup sweetened condensed milk - 1 cup white chocolate chips - 1/2 cup colorful festive sprinkles When you start, use unsalted butter. It gives you control over salt. If you need to swap, use margarine, but it may change taste. For sugar, feel free to mix white and brown sugar. This mix gives a nice taste. You can also use a sugar substitute for fewer calories. Use high-quality vanilla extract. Pure vanilla makes a big difference in flavor. For the best taste, choose creamy sweetened condensed milk. Look for brands that use real milk. For the sprinkles, choose vibrant colors. They make your fudge look fun and festive. {{ingredient_image_2}} Start by taking a large mixing bowl. Add 1 cup of softened unsalted butter. Then, combine 2 cups of granulated sugar and 1 cup of packed brown sugar. Use an electric mixer at medium speed. Cream these together for about 2-3 minutes. You want it light and fluffy. Next, add 1 tablespoon of pure vanilla extract and 1/2 teaspoon of almond extract. Mix until it is smooth and fully combined. In a separate bowl, whisk together 2 cups of sifted all-purpose flour, 1/2 teaspoon of baking soda, and 1/4 teaspoon of fine sea salt. Gradually add this dry mixture to the creamed mixture. Use low speed on your mixer. Mix until just combined. Be careful not to overmix. This helps keep the fudge’s nice texture. Now, slowly pour in 1 cup of sweetened condensed milk. Keep mixing on low speed until the dough looks smooth and uniform. Next, gently fold in 1 cup of white chocolate chips. Also, add half of the colorful festive sprinkles. Make sure everything is evenly mixed into the dough. Line an 8x8-inch baking dish with parchment paper. Leave some overhang for easy removal later. Pour the fudge mixture into the dish. Spread it out evenly with a spatula. Sprinkle the rest of the festive sprinkles on top. This adds a fun, colorful touch. Place the baking dish in the refrigerator. Chill for at least 3 hours, until it feels firm. Once set, use the parchment paper to lift out the fudge. Carefully cut into squares or rectangles before serving. When making sugar cookie fudge, avoid overmixing the dough. This can make the fudge tough. Also, ensure your butter is softened, not melted. Melted butter will change the fudge's texture. Lastly, remember to chill the fudge long enough. If it's too soft, it won't hold its shape. To get a creamy and smooth fudge, mix the butter and sugars well. Cream until the mixture is light and fluffy. This adds air and helps the fudge set well. When adding dry ingredients, mix only until combined. This keeps the fudge from becoming dense. Chilling it for at least three hours helps create that perfect, firm texture. For a fun and bright display, use colorful plates or trays. Cut the fudge into neat squares for a more polished look. Placing each piece in cupcake liners adds charm. You can also sprinkle extra festive sprinkles on top right before serving. This makes each piece pop with color and joy! Pro Tips Storage: Keep your fudge in an airtight container in the refrigerator to maintain freshness for up to two weeks. Flavor Variations: Experiment with different extracts like peppermint or coconut to give your fudge a unique twist. Cutting Tips: For cleaner cuts, use a warm knife to slice through the fudge, which helps prevent it from sticking. Festive Touch: Consider adding themed sprinkles or edible glitter based on the season or occasion to enhance presentation. {{image_4}} You can change the flavor of your sugar cookie fudge easily. Try adding chocolate chips for a rich taste. You could also mix in peanut butter for a nutty twist. If you enjoy cookies and cream, crush some Oreo cookies and fold them into the fudge. Experimenting with flavors adds fun to your treats! If you need a gluten-free option, swap all-purpose flour for a gluten-free blend. Make sure the chocolate chips you choose are also gluten-free. This way, everyone can enjoy this sweet treat without worry. Always check labels for any hidden gluten. You can make this fudge fun for any holiday! Use red and green sprinkles for Christmas cheer. For Halloween, try orange and black sprinkles. Around Easter, pastel sprinkles add a festive touch. Changing the sprinkles can make this treat special for any occasion. To keep your sugar cookie fudge fresh, store it in an airtight container. This helps prevent it from absorbing moisture and odors from other foods. I recommend placing parchment paper between layers of fudge if you stack them. This keeps the pieces from sticking together. Store your fudge at room temperature for short-term use, about one week. If you want it to last longer, refrigerate it. Make sure to wrap it tightly in plastic wrap before placing it in the fridge. This keeps it safe from drying out and keeps its lovely flavor intact. You can freeze sugar cookie fudge for up to three months. First, cut the fudge into squares. Wrap each piece in plastic wrap, then place them in a freezer-safe bag. When you want to enjoy it, take out the fudge and let it thaw at room temperature. It will taste just as good! Sugar cookie fudge can last up to two weeks when stored properly. Keep it in an airtight container at room temperature. If you want it to last longer, place it in the fridge. Just remember to let it sit out for a bit before enjoying it! Yes, you can use different types of chocolate. Dark chocolate or milk chocolate can work well. Each type will give the fudge a unique flavor. If you love chocolate, mix in some chocolate chips or chunks for extra richness. If your fudge is too soft, you can try chilling it longer. Place it in the fridge for a few more hours until it firms up. If that doesn’t work, you can reheat it gently and add more flour. This will help thicken the fudge. You can make sugar cookie fudge without sweetened condensed milk. Instead, use a mixture of butter and cream. Start with 1/4 cup of butter and 1/2 cup of heavy cream. This will help keep the fudge creamy while giving it texture. In this post, we covered the key ingredients for making delicious sugar cookie fudge. We explored measurements, substitutions, and quality tips to give your fudge the best taste. Next, we walked through the step-by-step instructions, ensuring you mix and chill perfectly. I shared helpful tips to avoid common mistakes and ideas for presenting your fudge. We also looked at tasty variations, storage tips, and answered common questions. Now you’re ready to make your own fudge. Enjoy the sweet process!

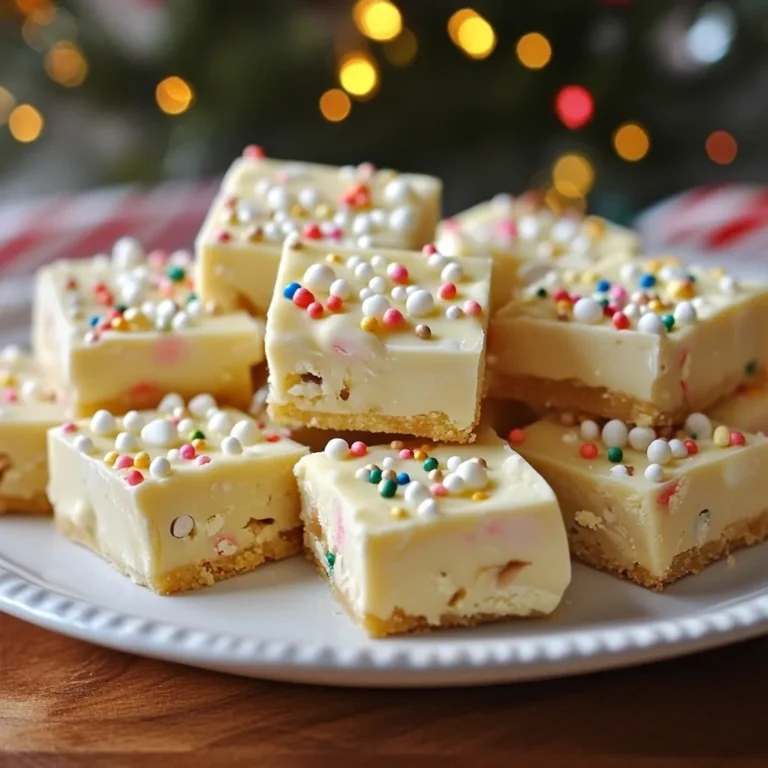
Sugar Cookie Fudge Delightful Sweet Treat Recipe

- Boneless, skinless chicken thighs: I love using chicken thighs for this dish. They stay moist and tender during cooking. You can also use chicken breasts if you prefer, but thighs give a richer flavor. - Taco seasoning options: You can use a store-bought taco seasoning packet. It saves time! If you want to make it from scratch, mix 1 tablespoon chili powder, 1 teaspoon cumin, 1 teaspoon garlic powder, and 1 teaspoon onion powder. This homemade blend adds a fresh taste. - Essential vegetables: Diced tomatoes with green chilies add a nice kick. I always use a can (15 oz) and don’t drain it to keep the sauce flavorful. Frozen corn brings sweetness and texture, while a sliced bell pepper and onion give crunch and flavor. These veggies mix well with the chicken and spices. Gather these ingredients before you start cooking. It makes the process smooth and fun! {{ingredient_image_2}} 1. Start by placing the boneless, skinless chicken thighs in the bottom of your crockpot. Spread them evenly for even cooking. 2. Next, sprinkle the taco seasoning over the chicken. Make sure each piece gets a good coat of flavor. I use a packet for ease, but you can make a homemade blend, too! 3. Pour the can of diced tomatoes over the chicken. Do not drain the juices; they add great flavor. 4. Now layer in the frozen corn. Then, add the sliced bell pepper and onion on top. Arrange them nicely for a colorful mix. 5. Carefully pour the low-sodium chicken broth over everything. This keeps the chicken moist as it cooks. 6. Finally, add salt and pepper to taste, adjusting as needed. 1. Cover your crockpot with its lid. If you set it on low, cook for 6-8 hours. For high, cook for 3-4 hours. The chicken should be very tender. 2. When the cooking time is up, shred the chicken directly in the crockpot. Use two forks to pull it apart. This makes it mix well with the sauce and veggies. 3. To serve, spoon the chicken mixture into warm corn or flour tortillas. Top each taco with fresh cilantro and your choice of extras, like diced avocado, shredded lettuce, grated cheese, or sour cream. These steps give you a simple, flavorful meal that you can enjoy any night of the week! To keep your chicken moist and full of flavor, use low-sodium broth. It helps the chicken stay juicy as it cooks. Before you add the chicken to the crockpot, sprinkle the taco seasoning evenly. This ensures that every bite is packed with taste. For time-saving shortcuts, prep your veggies the day before. Slice the bell pepper and onion, and store them in the fridge. You can even measure out the taco seasoning ahead of time. This will make cooking easier on busy days. For a fun presentation, arrange the tacos on a big platter. Place colorful toppings in small bowls nearby. This gives everyone a chance to build their perfect taco. When it comes to toppings, think fresh. Diced avocado adds creaminess, while shredded lettuce gives crunch. Grated cheese and a dollop of sour cream can round out the flavor. Don’t forget lime wedges for a zesty finish! Pro Tips Use Thighs for Moisture: Chicken thighs are more forgiving than breasts when slow-cooked, resulting in tender, juicy meat that won't dry out. Homemade Taco Seasoning: Making your own taco seasoning allows you to customize flavors and control the spice level to suit your taste. Fresh Ingredients: Opt for fresh bell peppers and onions for added crunch and flavor. Their natural sweetness complements the spices beautifully. Let it Rest: After cooking, allow the chicken to rest in the crockpot for a few minutes before shredding. This helps the flavors meld even more. {{image_4}} You can easily switch out the chicken for other proteins. Ground turkey works well and keeps it lean. You can also try ground beef for a heartier taste. Both options still cook nicely in the crockpot and absorb the flavors well. If you want a veggie-packed meal, consider using beans. Black beans or pinto beans add protein and fiber. You can also toss in more vegetables like zucchini or carrots. Just chop them small so they cook well with the chicken. Want to spice things up? Add jalapeños for a kick. You can also drizzle in some hot sauce while cooking. This gives the dish a nice heat that many enjoy. Try different seasoning blends for new tastes. Cajun seasoning adds a bold flavor, while barbecue seasoning gives a sweet and smoky twist. Mixing these blends with taco seasoning can create a unique taste that keeps everyone guessing and excited for dinner! To store leftover chicken taco mixture, place it in an airtight container. Let it cool before sealing. You can keep it in the fridge for up to three days. Cooked ingredients like chicken, corn, and veggies stay fresh for this time too. If you notice any strange smells or changes in color, toss it out. Always trust your senses for food safety. For freezing leftovers, use freezer-safe bags or containers. Remove as much air as possible before sealing. This helps prevent freezer burn and keeps the flavor intact. You can freeze the chicken taco mixture for up to three months. When you’re ready to eat, thaw it overnight in the fridge. To reheat, place the mixture in a pot over low heat. Stir often until heated through. You can also microwave it in short bursts, stirring in between. This way, you keep the juicy flavor and tender texture. Yes, you can use frozen chicken thighs. Just add an extra hour to your cooking time. This ensures the chicken cooks through and stays juicy. Always check that the chicken reaches 165°F to be safe. The best way to reheat leftover tacos is to use an oven. Preheat the oven to 350°F. Place the tacos on a baking sheet and cover with foil. Heat for about 10-15 minutes. This keeps the tortillas warm and the filling moist. You can also reheat in a microwave, but the tortillas may get soft. Yes, you can make these tacos gluten-free. Simply use corn tortillas instead of flour tortillas. Always check the taco seasoning packet for gluten-free labels if you use a store-bought option. Making your taco seasoning at home ensures it is gluten-free. This blog post covered how to create tasty chicken tacos. You learned about the best ingredients, like chicken thighs and fresh veggies. I explained easy cooking steps and tips for keeping chicken moist. You also saw ways to switch up flavors and store leftovers. In the end, you can make satisfying tacos that everyone will love. Grab your ingredients and enjoy the fun of cooking!

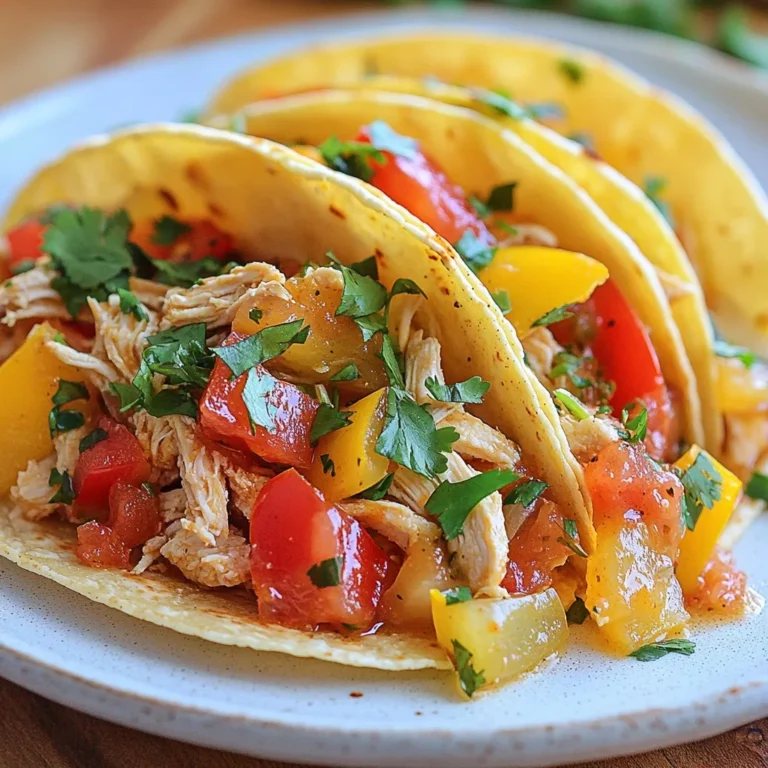
Crockpot Chicken Tacos Flavorful Easy Dinner Recipe

- 6 large eggs: Fresh eggs are best for taste and texture. - 1/4 cup mayonnaise: This gives creaminess. You can use Greek yogurt for a lighter option. - 1 teaspoon Dijon mustard: Adds a zing. Yellow mustard can be a good substitute. - 1 teaspoon apple cider vinegar: This adds a nice tang. White vinegar also works well. - 1/4 teaspoon smoked paprika, plus extra for garnish: It gives a smoky flavor. Regular paprika is a fine choice too. - Salt and freshly ground black pepper to taste: Seasoning is key. Adjust to your liking. - Chopped chives or green onions for a fresh garnish: These add a pop of color and flavor. You can skip this if you want. Store leftovers in an airtight container in the fridge. They will stay fresh for up to two days. If you see any signs of spoilage, it’s best to toss them. Also, don’t freeze deviled eggs. The texture changes and they won’t taste right after thawing. {{ingredient_image_2}} 1. Place 6 large eggs in a medium saucepan. Make sure they sit in a single layer. 2. Cover the eggs with cold water. Leave about an inch of water above the eggs. 3. Turn the heat to medium-high and bring the water to a rolling boil. 4. Once boiling, cover the pot with a lid and turn off the heat. Set a timer for 12 minutes. 5. While the eggs cook, prepare an ice bath. Fill a large bowl with ice and cold water. 6. When the timer goes off, quickly move the eggs to the ice bath. Let them cool for about 5 minutes. This stops the cooking and helps with peeling. 7. To peel, tap each egg against a hard surface to crack the shell. Roll the egg gently to loosen the shell. Peel under running water for ease. 1. Slice each peeled egg in half lengthwise. Place the yolks in a mixing bowl. 2. Mash the yolks with a fork until crumbly. 3. Add 1/4 cup mayonnaise, 1 teaspoon Dijon mustard, 1 teaspoon apple cider vinegar, and 1/4 teaspoon smoked paprika to the bowl. 4. Sprinkle in salt and black pepper to taste. Mix until creamy and smooth. 5. Adjust the flavor as needed. You can add more seasoning if you like it spicier or creamier. 1. Use a spoon or a piping bag fitted with a decorative tip to fill the egg whites with the yolk mixture. 2. Make sure to create an enticing mound on top of each egg white. 3. Lightly dust the filled eggs with extra smoked paprika for flavor and color. 4. Garnish with chopped chives or green onions for a fresh touch. This also makes them look great! To cook eggs just right, timing is key. Start by boiling water in a medium pot. Once boiling, add the eggs gently. Cover the pot and turn off the heat after 12 minutes. This method helps avoid overcooking. Common mistakes include not using fresh eggs. Fresh eggs can be hard to peel. Also, avoid boiling the eggs for too long. This can lead to a green ring around the yolk. For tasty deviled eggs, seasonings make a big difference. I love adding smoked paprika for a smoky touch. You can also try a pinch of cayenne for heat. Fresh herbs, like chives or dill, boost flavor too. Mix in these herbs for a fresh twist. They add color and taste. Experiment with different spices to find your favorite. Deviled eggs are perfect for parties and picnics. They are easy to make and fun to eat. Serve them at birthday parties, barbecues, or holiday gatherings. Pair deviled eggs with drinks like iced tea or sparkling water. They also go well with other snacks, like cheese and crackers. These combinations make a great spread for guests. Pro Tips Fresh Eggs for Easier Peeling: Using eggs that are at least a week old can make peeling them easier after boiling, as fresher eggs tend to be harder to peel. Perfectly Creamy Filling: For an ultra-smooth filling, consider using a food processor instead of a fork to blend the yolks and other ingredients. Customize Your Flavor: Experiment with different spices like cayenne pepper or garlic powder in the yolk mixture to create unique flavor profiles that suit your taste. Presentation Matters: Use a piping bag to fill the egg whites for a professional look, and don't forget to garnish with fresh herbs or a sprinkle of paprika for a pop of color. {{image_4}} You can easily change the taste of deviled eggs. Adding bacon gives a nice crunch and a salty bite. Just cook bacon until crispy, chop it, and mix it in. Avocado is another great choice. It makes the filling creamy and adds a fresh flavor. You can also try different condiments. Sriracha adds heat, while relish gives a sweet tang. Mix and match until you find your favorite! Want a healthier option? Use Greek yogurt instead of mayonnaise. This swap gives a nice tang and cuts fat. If you're vegan, you can still enjoy deviled eggs. Use mashed avocado or silken tofu for the filling. Add spices and lemon juice for flavor. Both options keep the dish tasty and fun! How you serve deviled eggs can wow your guests. Use cute egg stands or colorful platters to display them. Try arranging them in a circle or a line for a nice look. For a themed party, match the colors of the eggs to your theme. For example, use red paprika on a holiday plate for a festive touch. Make your deviled eggs a showstopper! To keep your deviled eggs fresh, store them in the fridge. Place leftover deviled eggs in an airtight container. This method helps to prevent them from drying out or absorbing other odors. If you don't have a container, cover the eggs with plastic wrap. The shelf life of prepared deviled eggs is about 3 to 4 days in the fridge. After this time, they may lose taste and texture. Always check for any off-smells or changes in appearance before eating. Can you freeze deviled eggs? No, it's not recommended to freeze deviled eggs. The texture changes when frozen. The filling can become watery and lose its creamy goodness upon thawing. If you want to prepare ahead, consider freezing just the egg whites. When ready to use, thaw them in the fridge overnight. Fill them with fresh yolk mixture. This method keeps your deviled eggs tasty and fresh. Deviled eggs can last up to 2 days in the fridge. After that, they may spoil. Signs of spoilage include a sour smell and changes in texture. If they look dry or have an off color, it's best to toss them. Yes, you can make deviled eggs a day ahead. Prepare the eggs and the filling separately. Store the egg whites in one container and the filling in another. When ready to serve, just fill the whites. This keeps them fresh and tasty. For perfect hard-boiled eggs, use this method: - Place eggs in a saucepan in a single layer. - Cover with cold water, leaving an inch above the eggs. - Bring water to a boil, then cover and turn off the heat. - Let them sit for 12 minutes. - Cool in an ice bath for easy peeling. Deviled eggs can be a fun and tasty dish. We covered the ingredients you need and how to make the filling. I shared tips on cooking and storing leftovers, too. Remember, you can change the flavor or presentation to fit your needs. Deviled eggs work for many occasions. With these tips, you can impress friends and family. Keep experimenting and enjoy your cooking journey! You'll find your own twist on this classic dish. Happy cooking!

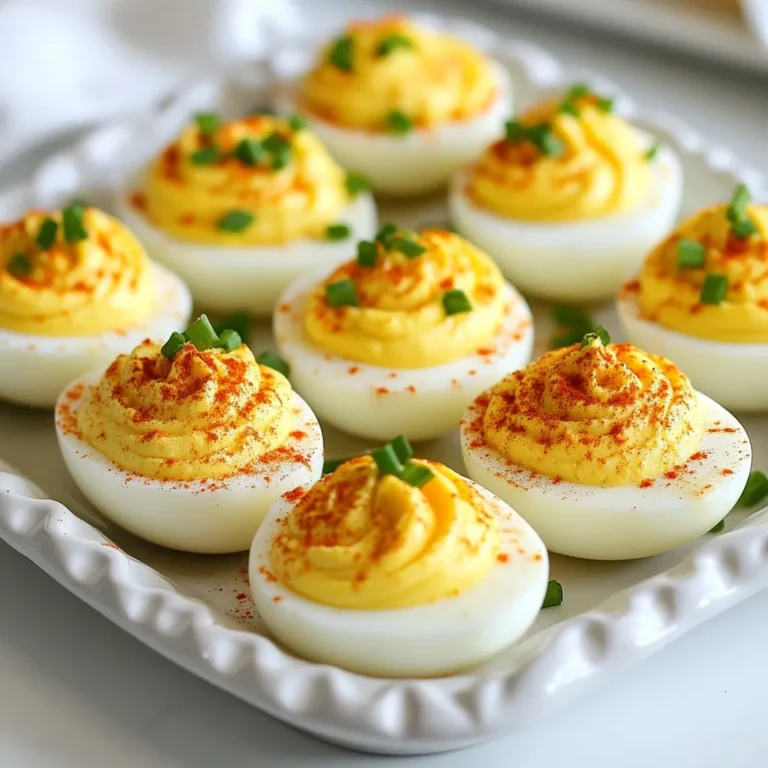
Classic Deviled Eggs Tasty and Simple Party Snack

To make Red Velvet Hot Chocolate, gather these simple ingredients: - 2 tablespoons unsweetened cocoa powder - 2 tablespoons red velvet cake mix - 2 cups milk (dairy or non-dairy) - 2 tablespoons sugar (adjust to taste) - 1/4 teaspoon vanilla extract - A pinch of salt - Whipped cream (for topping) - Red sprinkles (for decoration) - Dark chocolate shavings (optional, for an extra rich finish) These ingredients create a drink that is both cozy and decadent. The cocoa powder and red velvet cake mix give it that rich flavor and stunning color. Toppings can make your hot chocolate even better. Here are some fun options: - Mini marshmallows - Chocolate syrup drizzle - Crushed candy canes for a minty twist - A sprinkle of cocoa powder Feel free to mix and match to find your favorite combo. Not all kitchens have the same ingredients. Here are some easy swaps: - Use carob powder instead of cocoa powder for a caffeine-free option. - If you don’t have cake mix, make a simple red velvet flavor by adding food coloring to regular cocoa. - You can swap sugar for honey or maple syrup for a different sweetness. - For a vegan version, replace milk with almond or oat milk. These substitutions help you adapt the recipe to your needs while keeping it delicious! {{ingredient_image_2}} Start by gathering your ingredients. You will need cocoa powder, red velvet cake mix, and sugar. In a medium saucepan, combine the cocoa powder, red velvet cake mix, and sugar. Use a whisk to mix these dry ingredients well. Make sure there are no lumps left. This step creates a smooth base for your hot chocolate. Now, pour about 1/4 cup of milk into the dry mix. Whisk it together until you form a smooth paste. This helps eliminate clumps. Next, gradually add the rest of the milk to the saucepan. Cook this mixture over medium heat. Keep whisking to blend everything smoothly. Be careful not to let it boil. When it starts to steam, you know it's almost ready. Once your hot chocolate is well blended, stir in the vanilla extract and a pinch of salt. This adds flavor depth. Carefully remove the saucepan from the heat. Pour the hot chocolate into your favorite mugs. Top each mug with a generous dollop of whipped cream. Finish with red sprinkles and dark chocolate shavings for a special touch. Enjoy this cozy drink! To get that smooth and creamy texture, mix the dry ingredients well first. Use a whisk to blend the cocoa powder and red velvet cake mix without lumps. When you add the milk, start with just a small amount to form a paste. This step helps avoid clumps. Gradually add the rest of the milk while whisking constantly. This keeps your hot chocolate from burning on the bottom. To elevate the taste, use high-quality cocoa powder. The vanilla extract adds warmth, so don’t skip it. A pinch of salt is key too, as it balances the sweetness. If you want a richer flavor, consider adding dark chocolate shavings. They melt into the hot chocolate and give a deep, luxurious taste. For a stunning look, serve your Red Velvet Hot Chocolate in festive mugs. Top each cup with a generous swirl of whipped cream. Add red sprinkles for a pop of color. You can also sprinkle dark chocolate shavings on top for extra flair. Pair it with a heart-shaped cookie on the side for a cute touch. This makes your drink not just tasty but also beautiful! Pro Tips Use Quality Cocoa: For the best flavor, use high-quality unsweetened cocoa powder. This will enhance the richness of your hot chocolate. Adjust Sweetness: Taste the hot chocolate before serving and adjust the sugar according to your preference. Some may prefer it sweeter, while others might enjoy it less sugary. Mix Well: Ensure to whisk the cocoa powder and cake mix thoroughly to avoid any lumps, creating a smooth and creamy texture. Customize Toppings: Feel free to get creative with toppings! Besides whipped cream, consider adding marshmallows, flavored syrups, or even a drizzle of caramel for an extra indulgent treat. {{image_4}} You can easily make this drink dairy-free and vegan. Simply swap regular milk for a non-dairy milk. Almond milk, oat milk, or coconut milk works great. Each choice brings a unique flavor to your hot chocolate. Use a vegan whipped cream for a creamy topping. This way, everyone can enjoy this cozy treat! Want to spice it up? Consider adding flavors like peppermint or hazelnut. A drop of peppermint extract gives a refreshing twist. Hazelnut syrup can add a nutty depth. You might even try a dash of cinnamon for a warm aroma. Experiment and find your favorite mix! Garnishing can turn your drink into a masterpiece. Besides whipped cream, you can use mini marshmallows. They add a fun, fluffy touch. Try crushed candy canes for a festive look. You could also drizzle chocolate syrup on top. Get creative and make each mug special! To store leftover Red Velvet Hot Chocolate, let it cool first. Pour it into a clean, airtight container. Seal it tightly and place it in the fridge. It will keep fresh for up to three days. When you're ready to enjoy it again, just follow the reheating instructions below. Reheat your hot chocolate on the stove for the best results. Pour it into a saucepan. Heat it over medium-low heat, stirring often. This helps to warm it evenly without burning. You can also use the microwave. Place it in a microwave-safe mug and heat in short bursts. Stir in between to avoid hot spots. You can freeze Red Velvet Hot Chocolate if you want to save some for later. Use a freezer-safe container and leave space at the top. The hot chocolate will expand as it freezes. It can last up to a month in the freezer. To thaw, move it to the fridge overnight. Then, reheat it using the instructions above. Enjoy your cozy treat anytime! Yes, you can use any type of milk you like. Dairy milk works well, but almond, oat, or soy milk are great options too. Each milk type adds its unique flavor. For a creamier drink, try whole milk or a non-dairy cream. Adjust the milk amount for your desired richness. To make your hot chocolate less sweet, simply cut back on the sugar. Start with one tablespoon instead of two. You can also use unsweetened cocoa powder. This way, you control the sweetness while keeping the red velvet flavor. Taste as you go to find your perfect balance. Serve your hot chocolate in festive mugs to enhance the cozy vibe. Top it with whipped cream for fluffiness. Add red sprinkles for a fun touch. Dark chocolate shavings make it even richer. Pair it with a heart-shaped cookie for a delightful treat! Enjoy it warm and share with friends or family. This blog post gives you a clear guide to making Red Velvet Hot Chocolate. We explored the key ingredients and optional toppings. I shared simple steps for preparing the drink and tips for perfecting its taste and look. You can try variations like dairy-free or extra flavors, too. Finally, I covered how to store and reheat leftovers. Enjoy this warm treat with your own twist. Happy sipping!

Red Velvet Hot Chocolate Cozy and Decadent Treat

PREV 1 … 30 31 32 … 48 NEXT
meal plan mapper

explore

DessertsDinnerAppetizersDrinks

Our Policies

  • Cookie Policy
  • Copyright Policy
  • Disclaimer
  • GDPR Policy
  • Terms Of Use
Back to Top
  • About
  • Contact Us
  • Privacy Policy
© 2025 meal plan mapper