FREE DINNER EBOOK! Get your copy!
  • Cookie Policy
  • GDPR Policy
  • Disclaimer
  • Terms Of Use
  • Visit my other site: Fun Cookie Recipes
meal plan mapper
  • Home
  • Dinner
  • Desserts
  • Drinks
  • Appetizers
  • Contact
  • About
  • Privacy Policy
  • Home
  • Dinner
  • Desserts
  • Drinks
  • Appetizers
  • Contact
  • About
  • Privacy Policy
  • Cookie Policy
  • GDPR Policy
  • Disclaimer
  • Terms Of Use
Visit my other site: Fun Cookie Recipes

HOME / CATEGORIES /

Latest

- 2 tablespoons coconut oil - 1 medium onion, finely chopped - 3 cloves garlic, minced - 1-inch piece of fresh ginger, grated - 1 red bell pepper, diced - 1 teaspoon turmeric powder - 1 teaspoon ground cumin - 4 cups chicken broth (or vegetable broth for a vegetarian option) - 1 can (400ml) coconut milk - 2 chicken breasts, thinly sliced - Juice of 2 fresh limes - Zest of 1 lime - 1 cup fresh cilantro, chopped - Salt and pepper to taste The key to this soup is the balance of flavors. The coconut oil gives a rich base. Onions, garlic, and ginger add warmth and depth. The red bell pepper brings sweetness, while turmeric and cumin add a warm, earthy taste. Chicken broth and coconut milk provide a creamy, savory element. This mix creates a comforting and flavorful soup. - Sliced red chili - Lime wedges Garnishes make your dish pop. Sliced red chili adds a kick and vibrant color. Lime wedges let you adjust the soup’s brightness. These simple touches elevate your experience. They invite you to enjoy the soup in your own way. {{ingredient_image_2}} To start, heat 2 tablespoons of coconut oil in a large pot over medium heat. Once the oil melts, add 1 finely chopped onion. Sauté the onion for about 5 minutes. You want it soft and translucent. Next, add 3 minced garlic cloves, 1 grated inch of fresh ginger, and 1 diced red bell pepper. Cook this mixture for another 2 to 3 minutes. Stir often until you smell the wonderful aroma. Now it's time to bring in the spices. Sprinkle 1 teaspoon of turmeric powder and 1 teaspoon of ground cumin into the pot. Mix these spices well and let them toast for about 1 minute. This step boosts their flavors. Gradually pour in 4 cups of chicken broth while stirring. Bring this mixture to a gentle boil. Once boiling, add 2 thinly sliced chicken breasts. Cook for 5 to 7 minutes. Make sure the chicken turns white and is no longer pink in the center. Now, stir in 1 can of coconut milk. Make sure it blends well with the broth. Lower the heat and let the soup simmer for 10 minutes. This helps all the flavors come together beautifully. After simmering, add the juice of 2 fresh limes and the zest of 1 lime. Toss in 1 cup of chopped fresh cilantro. Season with salt and pepper to taste. Adjust it as you like, making it just right for you. Finally, remove the pot from the heat. Let the soup sit for about 5 minutes before serving. This little wait makes the soup even better! To make your Coconut Lime Chicken Soup truly shine, focus on the spices. Start with fresh garlic and ginger. They add a lot of flavor. When you sauté them, let them cook until they smell great. This step brings out their best taste. For spices like turmeric and cumin, toast them slightly in the oil. This helps unlock their full flavor. Just a minute is all you need. Mix them well with the other ingredients for a rich taste. When cooking chicken, slice it thin. This helps it cook faster and evenly. Use a meat thermometer if you have one. The chicken should reach 165°F to be safe to eat. Garnishing your soup makes it look fancy. Add sliced red chili for a pop of color. Fresh cilantro on top gives it a bright look and taste. Lime wedges on the side let everyone add a zing of lime juice. For side dishes, consider serving with rice. It soaks up the soup well and adds a nice touch. You can also serve it with warm bread. This makes your meal comforting and complete. Enjoy your delicious Coconut Lime Chicken Soup! Pro Tips Use Fresh Ingredients: Fresh lime juice and cilantro elevate the flavor profile of your soup, making it vibrant and refreshing. Adjust Spice Levels: If you prefer a milder soup, reduce the amount of red chili used for garnish, or omit it altogether. Make It Ahead: This soup can be made a day in advance. Allow it to cool, then refrigerate. Reheat gently before serving. Garnish Creatively: Add toasted coconut flakes or sliced avocado as a garnish to enhance texture and flavor. {{image_4}} You can easily tweak this soup to fit your needs. For a vegetarian option, replace the chicken with tofu or extra vegetables. Tofu absorbs flavors well, giving you a hearty dish. You can also use mushrooms, carrots, or zucchini for added texture. If you want a spicy kick, add sliced red chili or your favorite hot sauce. The heat from the chili pairs well with the creamy coconut milk and tangy lime. Adjust the amount based on your spice level. You can swap the broth in this recipe. If you want a lighter taste, use vegetable broth instead of chicken broth. This can enhance the soup's fresh flavors. Using different herbs can also change the taste. Try basil or mint for a unique twist. These herbs add freshness and can brighten up your soup. Don’t hesitate to experiment with what you have on hand! To store leftovers, let the soup cool. Use airtight containers to keep it fresh. Place the containers in the fridge. Your soup stays good for about three days. When reheating, heat it on the stove over low to medium heat. Stir it often to avoid sticking. You can also use the microwave. Just heat it in short bursts, stirring in between. For freezing, make sure the soup is fully cooled. Pour it into freezer-safe containers or bags. Leave some space at the top for expansion. The soup can last up to three months in the freezer. When you want to eat it, thaw it overnight in the fridge. To reheat, warm it in a pot on low heat, stirring until hot. Enjoy your delicious Coconut Lime Chicken Soup anytime! Can I make this soup in advance? Yes, you can make this soup in advance. It tastes even better the next day. To store it, let the soup cool down first. Pour it into a sealed container. Keep it in the fridge for up to three days. When you're ready to eat, heat it on the stove until warm. What can I substitute for coconut milk? If you don't have coconut milk, you can use almond milk or soy milk. These options will change the flavor slightly. You can also use regular milk, but it won’t be as creamy or rich. Caloric content and serving size This soup serves four people. Each serving has about 400 calories. The exact number may vary based on your ingredients. It's filling and packed with nutrients. Health benefits of ingredients used Coconut milk adds healthy fats for energy. Chicken provides protein for muscles. Fresh cilantro boosts your immune system. The lime juice gives you vitamin C, which is great for skin health. This soup is not just tasty; it’s good for you too! This blog post covered a simple and tasty soup recipe. We explored key ingredients like coconut oil, chicken broth, and fresh herbs. I shared step-by-step cooking instructions to help you simmer delicious flavor. Cooking tips ensured you achieve the best results. We also discussed variations for different diets and proper storage methods. In conclusion, this soup is a flexible dish that fits many tastes. Whether you want spicy or vegetarian, you can easily adapt it. Enjoy experimenting and make it your own!

Coconut Lime Chicken Soup Flavorful and Comforting Dish

For these tasty tacos, you need these main items: - 1 pound ground chicken - 1 cup shredded green cabbage - 1/2 cup grated carrots - 2 green onions, finely chopped - 2 cloves garlic, minced - 1 tablespoon fresh ginger, minced - 2 tablespoons soy sauce - 1 tablespoon sesame oil - 1 teaspoon sriracha (or to taste) - 1 package wonton wrappers - Fresh cilantro leaves for garnish - Lime wedges for serving These ingredients work together to create a delicious filling and a crisp taco shell. You can enhance your Chicken Wonton Tacos with these extras: - Chopped bell peppers for crunch - Avocado slices for creaminess - A sprinkle of sesame seeds for texture - Hot sauce for extra heat Feel free to mix and match these optional items to suit your taste. If you have dietary needs, try these swaps: - Use ground turkey instead of chicken for a leaner option. - Replace soy sauce with tamari for a gluten-free choice. - For a vegetarian option, substitute the chicken with firm tofu. - Use coconut aminos for a soy-free alternative. These substitutions let everyone enjoy the deliciousness of Chicken Wonton Tacos. {{ingredient_image_2}} Sautéing garlic and ginger Start by heating the sesame oil in a large skillet over medium heat. Once hot, add minced garlic and ginger. Cook them for about one minute. The smell will fill your kitchen with a warm aroma. Cooking the ground chicken Next, add the ground chicken to the skillet. Use a spatula to break it apart as it cooks. Cook for about 5 to 7 minutes. You want the chicken to turn brown and no longer look pink. Combining flavors with soy sauce and sriracha Stir in the soy sauce and sriracha. Let this mixture cook for another two minutes. This helps all the flavors blend together. Once done, remove the skillet from heat. Fold in shredded cabbage, grated carrots, and chopped green onions. Mix well until everything is combined. Let the filling cool a bit as you prepare the wonton wrappers. Preparing wonton wrappers Preheat your oven to 375°F (190°C). Lay out a wonton wrapper on a clean surface. Filling and shaping tacos Spoon a good amount of the chicken filling into the center of the wrapper. Carefully fold the edges upward. Shape it into a taco and press the sides tightly to seal. Baking instructions for crispy texture Repeat this process until you use all the wrappers and filling. Place the wonton tacos on a parchment-lined baking sheet, making sure they have space. Bake in your preheated oven for 10 to 12 minutes. You want the wrappers to turn golden and crispy. After baking, let them sit for a minute to keep the crunch. Plating tips for presentation For a pretty presentation, arrange the crispy wonton tacos on a large platter. Garnish with fresh cilantro leaves and lime wedges. The lime adds a zesty touch. Accompaniments and dipping sauces Try serving with sweet chili or soy sauce for dipping. These sauces will enhance the flavors and make your meal even better. Enjoy your Chicken Wonton Tacos! To keep your wonton tacos crispy, use a few easy tips. First, bake them on a parchment-lined sheet. This helps with airflow and browning. Avoid overcrowding the pan. If they touch, they won't bake evenly. You can also lightly brush the wrappers with sesame oil before baking. This adds flavor and enhances crispiness. Store your ingredients right to keep them fresh. Keep ground chicken in the fridge and use it within two days. Wrap cabbage and carrots tightly in plastic wrap. This keeps them crisp and juicy. For wonton wrappers, store them in the fridge, too. Use them within a week for the best texture. To get that perfect golden color, preheat your oven well. An oven set at 375°F (190°C) gives the best results. Rotate the baking sheet halfway through cooking. This ensures every taco gets even heat. If you notice some browning faster, you can cover them with foil to prevent burning. Pro Tips Ensure Even Cooking: Make sure to cook the ground chicken thoroughly until it's evenly browned to enhance the flavor of your filling. Don’t Overfill: Be cautious not to overfill the wonton wrappers as this can make it difficult to seal and may cause them to burst during baking. Experiment with Spices: Feel free to add other spices or herbs, such as cumin or cilantro, to the filling for an extra flavor kick. Serve Immediately: For the best texture, serve the tacos right after baking when they are still crispy. Enjoy them fresh! {{image_4}} You can easily switch to a vegetarian version. Use firm tofu instead of ground chicken. Crumble the tofu and sauté it with garlic and ginger. Add soy sauce and mix in your favorite veggies like bell peppers or mushrooms. For a vegan option, skip any egg wash when sealing the wontons. You can also use plant-based wonton wrappers to keep it fully vegan. Feel free to get creative with your fillings. Try using shrimp or ground turkey for a different taste. You can even make a spicy beef version by adding chili paste to the ground beef. For a fresh twist, use diced mango or pineapple to give a sweet and savory mix. Each alternative will help you explore new flavors. If you love heat, increase the sriracha in your filling. You can also add chopped jalapeños for extra spice. If you prefer it mild, just reduce the sriracha or leave it out entirely. To balance the heat, serve with a cooling dip like yogurt or sour cream. Adjusting spice levels can make this dish fit any palate. To keep your Chicken Wonton Tacos fresh, store them in an airtight container. Place them in the fridge if you plan to eat them within a few days. Try to separate layers with parchment paper to avoid sticking. They taste best within three days. For reheating, the oven works best. Preheat your oven to 350°F (175°C). Place the tacos on a baking sheet and heat for about 10 minutes. This keeps them crispy. If you're in a hurry, use a microwave, but expect the tacos to be softer. You can freeze these tacos for quick meals later. First, let them cool completely. Then, wrap each taco tightly in plastic wrap. Place them in a freezer bag or container. They last up to three months. To cook, bake straight from the freezer at 375°F (190°C) for about 15-20 minutes. Enjoy a tasty meal anytime! Yes, you can make Chicken Wonton Tacos ahead of time. Prepare the chicken filling and store it in the fridge. You can also shape the wonton tacos in advance. Just keep them covered to prevent drying. Bake them just before serving for the best crunch. These tacos taste great with several dipping sauces. Try sweet chili sauce for a hint of sweetness. Soy sauce adds a salty kick. You can also use spicy sriracha for an extra punch. Mix and match to find your favorite flavor combo! To keep wonton wrappers from tearing, handle them gently. Make sure your hands are dry when you touch them. If they seem dry, cover them with a damp cloth. This keeps them moist and easier to work with. Always seal the edges well to keep the filling inside. The blog post guided you through making Chicken Wonton Tacos. We covered key ingredients, cooking steps, and serving suggestions. I shared tips for crispy texture and variations for dietary needs. These tacos can be simple or filled with flavor. You can store leftovers or freeze them for later. Enjoy exploring different fills and sauces. Now, it's time to gather your ingredients and start cooking. You will love the taste and fun of these tacos!

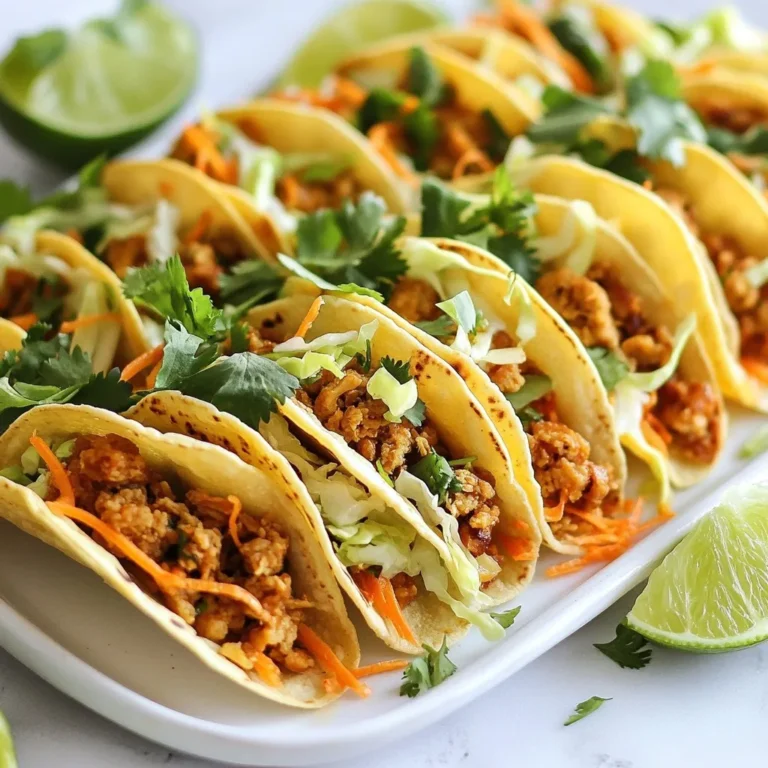
Chicken Wonton Tacos Flavorful and Easy Recipe Guide

- 8 oz cream cheese, softened to room temperature - 4 oz smoked salmon, finely chopped - 2 tablespoons fresh dill, minced - 1 tablespoon freshly squeezed lemon juice - 1 teaspoon lemon zest (from about half a lemon) - 1 clove garlic, finely minced - 1/4 teaspoon freshly cracked black pepper - 1/4 teaspoon sea salt - Fresh vegetable sticks (like carrots, cucumbers, and bell peppers) - An assortment of your favorite crackers - Optional: 1 tablespoon capers, drained and chopped for added flavor This dip brings together rich flavors in a simple way. The cream cheese serves as a rich base. It gives the dip a creamy texture that holds the other flavors well. The smoked salmon adds a savory depth. Fresh dill brightens the overall taste. Lemon juice and zest give it a zesty kick. Garlic adds a nice punch. Black pepper and sea salt balance the flavors just right. For serving, I like to pair this dip with fresh vegetable sticks. They add crunch and color to your plate. Crackers work great too, providing a nice contrast to the creaminess. If you want to level up the flavor, toss in some capers. They add a briny touch that enhances the taste. {{ingredient_image_2}} - Start by taking your cream cheese out of the fridge. Let it sit at room temperature for about 15 minutes. This helps it soften. - While that’s happening, finely chop the smoked salmon. Make sure the pieces are small for better mixing. - Next, mince one clove of garlic and fresh dill. You want the dill to be finely chopped for the best flavor. - In a medium mixing bowl, beat the softened cream cheese with an electric mixer. Mix it for 1-2 minutes until it’s smooth and creamy. - Gently fold in the chopped smoked salmon and minced garlic. Mix until they are evenly spread throughout the cream cheese. - Now, add the minced fresh dill, lemon juice, lemon zest, black pepper, and sea salt. Stir everything together until it’s all well combined. - Taste your dip. Adjust the seasoning if needed. You can add more lemon juice for a zesty kick or a pinch more salt if it needs it. - Once you’re happy with the flavor, transfer the dip to a serving bowl. Cover it with plastic wrap and refrigerate for at least 30 minutes. This helps the flavors blend. - When you’re ready to serve, take it out of the fridge. Present the dip chilled with fresh vegetable sticks or a mix of your favorite crackers for dipping. - To adjust sourness, use lemon juice. It brightens the dip. - For balance, add salt to enhance all flavors. Taste and adjust as needed. - Make sure your cream cheese is softened. This helps achieve a smooth texture. - Use folding, not mixing, for the smoked salmon. This keeps the salmon pieces intact. - Garnish with fresh dill for a pop of color. It looks great on the table. - Serve with fresh vegetable sticks or an array of crackers. Both options work well and add crunch. Pro Tips Use Room Temperature Cream Cheese: For a smooth and creamy dip, ensure your cream cheese is softened to room temperature before mixing. Fresh Ingredients Matter: Use fresh dill and freshly squeezed lemon juice for the best flavor; they elevate the dip significantly compared to dried herbs or bottled juice. Adjust to Your Taste: Don’t hesitate to taste the dip as you go! Adjust the seasoning with more lemon juice or salt to suit your palate. Chill for Maximum Flavor: Allow the dip to sit in the refrigerator for at least 30 minutes before serving; this helps the flavors meld together beautifully. {{image_4}} You can swap out ingredients based on your needs. If you want a dairy-free dip, use a dairy-free cream cheese. Brands like Kite Hill or Tofutti work well. They give a similar creamy texture without the dairy. If you're in the mood for something different, try using smoked trout instead of salmon. Trout has a mild flavor and pairs nicely with lemon and dill. This gives the dip a unique twist while staying delicious. To kick up the flavor, think about adding spices. A pinch of cayenne can add a nice kick. If you prefer a smoky flavor, sprinkle in some paprika. You can also mix in other herbs for more depth. Chives add a mild onion flavor, while parsley gives a fresh touch. Feel free to experiment with these options to find your favorite combination. For those who need gluten-free options, look for gluten-free crackers made from rice or almond flour. They pair perfectly with the dip. If you're watching carbs, serve the dip with fresh vegetable sticks. Carrots, cucumbers, and bell peppers are great choices. They add crunch without the carbs, making your dip even healthier. To store your Lemon Dill Smoked Salmon Dip, place it in an airtight container. This keeps it fresh and prevents odors from the fridge. Make sure to cover the dip tightly. This will keep it creamy and tasty. If you have leftovers, use them within three days for the best flavor. Yes, you can freeze this dip! To do it safely, pack it in a freezer-safe container. Leave some space at the top, as the dip will expand when frozen. You can freeze it for up to two months. When you are ready to eat it, move the dip to the fridge and let it thaw overnight. This helps keep the flavor intact. In the fridge, this dip lasts about three to four days. Keep an eye out for any changes. If the dip smells sour or looks off, it’s best to toss it. Always trust your senses! Freshness is key for this tasty treat. You can use several options if you need a cream cheese substitute. - Dairy-free options: Try using cashew cream or tofu blended until smooth. Both provide a rich texture. - Other creamy alternatives: Greek yogurt works well for a tangy flavor. You can also use sour cream for added creaminess. Yes, you can make this dip ahead of time! - Recommended timeframes for prepping ahead: Prepare it a day in advance for the best flavor. - Storage solutions for pre-made dip: Store it in an airtight container in the fridge. Cover it well to keep it fresh. Serving this dip is simple and fun! - Best accompaniments: Pair it with fresh vegetable sticks like carrots, cucumbers, and bell peppers. Crackers are also great for dipping. - Presentation suggestions: Use a nice bowl and garnish the dip with extra dill. Arrange the veggies and crackers around the bowl for a colorful spread. This blog post provided a thorough guide to making Lemon Dill Smoked Salmon Dip. We covered key ingredients, preparation steps, and serving ideas. You can swap ingredients, adjust flavors, and even modify for special diets. Remember, softening cream cheese and balancing flavors really enhances the dip. Store leftovers well to enjoy later. You now have the tools to create a delightful dip that impresses. Enjoy sharing this tasty treat with friends and family!

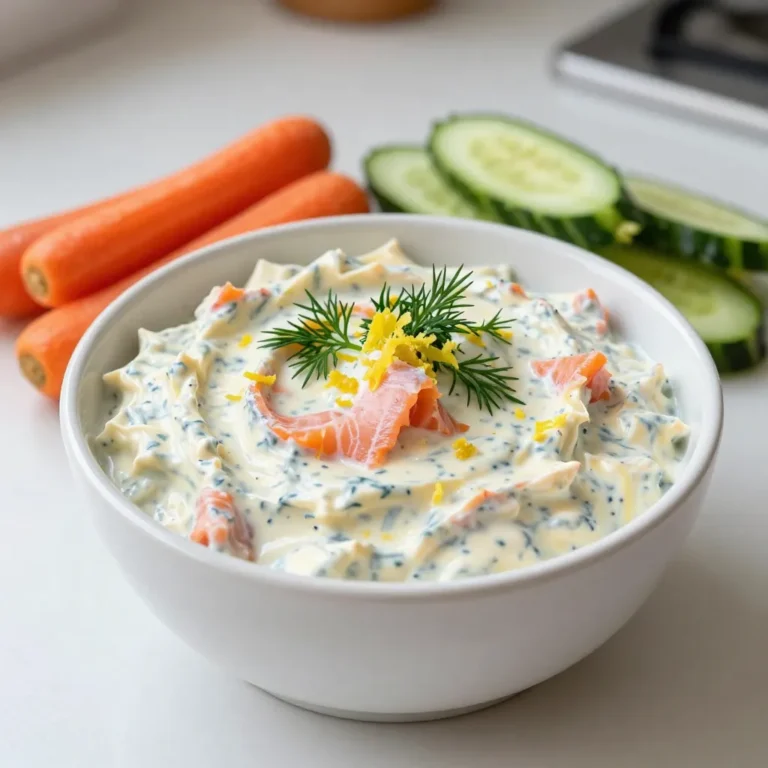
Lemon Dill Smoked Salmon Dip Tasty and Easy Recipe

To make delicious avocado egg salad lettuce wraps, you need simple and fresh ingredients. Here’s what you’ll need: - 4 hard-boiled eggs, peeled and roughly chopped - 1 ripe avocado, mashed until creamy - 2 tablespoons Greek yogurt (or mayonnaise for a richer flavor) - 1 tablespoon Dijon mustard for a tangy kick - 1 tablespoon freshly squeezed lemon juice - 2 green onions, finely chopped - 1 small celery stalk, diced very small for crunch - Salt and freshly cracked pepper to taste - 8 large lettuce leaves (preferably romaine or butter lettuce for flexibility) - Optional: Fresh herbs like dill or parsley, finely chopped, for garnish Each ingredient plays a key role. The hard-boiled eggs give protein and heartiness. The ripe avocado adds creaminess and healthy fats. Greek yogurt or mayonnaise gives the salad a nice richness. Dijon mustard and lemon juice add zing and brightness. Green onions and celery boost the freshness and crunch. Using large lettuce leaves makes these wraps easy to hold. Optional herbs add a pop of flavor and color. Choose fresh, vibrant produce for the best taste. {{ingredient_image_2}} - Chopping Hard-Boiled Eggs Start with four hard-boiled eggs. Peel them. Chop the eggs roughly with a knife. You want some chunks for texture. - Mashing the Avocado Next, grab one ripe avocado. Cut it in half. Remove the pit and scoop the flesh into a bowl. Mash it with a fork until creamy. - Dicing Celery and Green Onions Now, take one small celery stalk. Dice it very small for a nice crunch. Then, finely chop two green onions. These will add flavor and freshness. - Combining Ingredients in a Bowl In a large mixing bowl, add the chopped eggs and mashed avocado. Stir gently with a fork to mix. - Adjusting Seasonings Add two tablespoons of Greek yogurt or mayonnaise, one tablespoon of Dijon mustard, and one tablespoon of lemon juice. Mix well. Taste your salad and add salt and pepper to your liking. - Spoon Filling into Lettuce Leaves Take a large lettuce leaf, like romaine or butter lettuce. Spoon a generous amount of the avocado egg salad into the center of the leaf. - Folding Technique for Wraps Fold the sides of the lettuce leaf over the filling. Then, roll it up gently. This makes a tasty wrap that holds together well. - Achieving the Right Creaminess To get the best creaminess, mash the avocado well. It should be smooth but not completely blended. This adds body and richness to the egg salad. Mix in Greek yogurt or mayonnaise to enhance the texture. Each adds a unique flavor that makes the salad irresistible. - Balancing Flavors Balancing flavors is key. The tang from Dijon mustard and lemon juice brightens the dish. Adjust these ingredients to your taste. Add salt and freshly cracked pepper slowly. Taste as you go. This ensures your egg salad shines with every bite. - Plating and Presentation Ideas Serve these wraps on a colorful platter. Place the wraps neatly and add a bowl of leftover filling for guests. It invites everyone to dig in. Garnish with fresh herbs and halved cherry tomatoes. This makes the dish look fresh and inviting. - Pairing with Sides or Dips Pair your wraps with crunchy veggie sticks or a light dip. Hummus or tzatziki works well. These sides complement the flavors of the egg salad and add variety to your meal. - Ingredient Swaps and Additions Feel free to swap ingredients to suit your taste. If you like spice, add some chopped jalapeños. Want more crunch? Toss in diced bell peppers or pickles. These changes can make your wraps even more enjoyable. - Dietary Considerations For vegan options, replace eggs with mashed chickpeas. Use plant-based yogurt to keep it creamy. This keeps the wrap tasty and healthy for everyone. Always consider dietary needs to ensure everyone can enjoy your creation. Pro Tips Choose Ripe Avocados: Make sure your avocados are perfectly ripe for the creamiest texture. They should yield slightly to gentle pressure when squeezed. Hard-Boil Eggs Perfectly: For easy peeling, use eggs that are at least a week old. Boil them gently and then plunge them into an ice bath immediately after cooking. Customize Your Dressing: Feel free to experiment with different herbs and spices. Adding a pinch of paprika or cayenne pepper can give your salad an exciting twist! Keep It Fresh: To prevent the avocado from browning, you can add extra lemon juice to the salad mixture or cover it tightly with plastic wrap until serving. {{image_4}} For your avocado egg salad, you can choose different types of lettuce. Romaine lettuce is crisp and sturdy, making it great for wraps. It holds the filling well without tearing. Butter lettuce is softer and has a sweet taste. It adds a different texture. Both options work well, so pick what you like best. You can also use other greens. Try collard greens for a hearty alternative. They are thick and can hold the filling well. Spinach leaves are another great choice. They are tender and add a fresh flavor. Experiment with what you have on hand! You can enhance the flavor of your egg salad by adding spices or seasonings. A pinch of paprika gives a nice kick. You might also add cayenne pepper for some heat. If you like garlic, mix in a little garlic powder or fresh minced garlic. Think about mix-ins for extra flavor. Chopped pickles bring a tangy crunch. You can also add diced bell peppers or even sun-dried tomatoes. Each choice brings a new twist to your salad! If you want vegan alternatives, replace the eggs with mashed chickpeas. You can still use avocado for creaminess. Instead of Greek yogurt, try using vegan mayo. It keeps the salad smooth and tasty. For low-carb modifications, skip the yogurt and use more avocado. You can also reduce the amount of mustard. Just be mindful of the flavors as you adjust. This way, you can enjoy a healthy, delicious wrap! - Refrigeration Tips: Place your avocado egg salad in the fridge right away. This keeps it fresh. Make sure it cools down before sealing. - Best Containers for Storage: Use airtight containers to store your salad. Glass or plastic works well. These keep air out and prevent spoilage. - How Long It Lasts in the Fridge: Your egg salad lasts about 3 to 5 days if stored properly. Always check the date you made it. - Signs of Spoilage: Look for changes in color or smell. If it smells bad or the texture feels off, throw it away. - Can You Reheat Egg Salad?: It's best not to reheat egg salad. The texture and taste can change. Enjoy it cold for the best flavor. - Best Practices for Serving: Serve your salad fresh in lettuce wraps. If it has been in the fridge, give it a quick stir before serving. This helps mix the flavors again. Yes, you can prepare avocado egg salad ahead of time. To keep it fresh, store it in an airtight container. Add lemon juice to slow browning from the avocado. This dish tastes great chilled. Mix the ingredients and let them sit for a few hours. This helps flavors blend. Remember to eat it within two days for the best taste. Choose ripe avocados for this recipe. A ripe avocado feels slightly soft when you press it gently. The skin should be dark green or nearly black. Avoid avocados with large dark spots or a mushy feel. These may be overripe. The creamy texture of ripe avocados enhances the egg salad. This makes your dish smooth and flavorful. Yes, you can use regular mustard instead of Dijon. Yellow mustard adds a milder flavor. If you want a bit of heat, try spicy brown mustard. Each mustard type brings its own taste. Experiment with what you like best. The key is to find a mustard that suits your palate. Adjust the amount based on your taste preference. In this post, we explored how to make tasty avocado egg salad lettuce wraps. We covered the key ingredients, like hard-boiled eggs and ripe avocado, and detailed step-by-step instructions for preparation. I shared tips for perfecting your egg salad and variations to keep it exciting. Remember to store leftovers properly for the best taste. With these ideas, you can enjoy a healthy, tasty meal that fits your needs. Enjoy creating your own wraps!

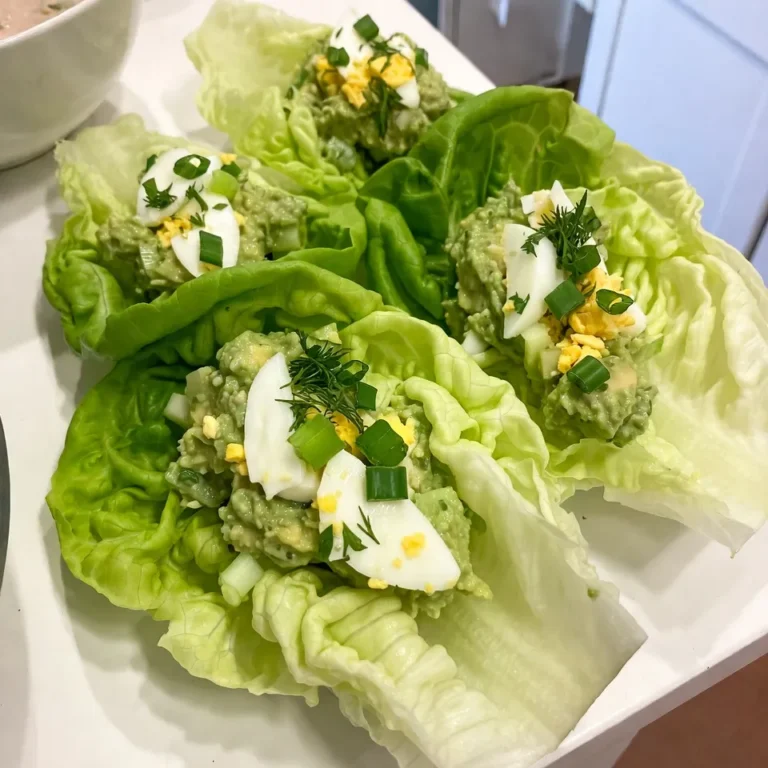
Avocado Egg Salad Lettuce Wraps Fresh and Flavorful Dish

To make mini meatloaves, you need a few key ingredients. Here’s what you will need: - 1 pound ground beef or turkey - 1 cup breadcrumbs - 1/2 cup freshly grated Parmesan cheese - 1/4 cup finely chopped onion - 1/4 cup finely chopped bell pepper - 1/4 cup milk - 1 large egg - 2 cloves garlic, minced - 1 teaspoon dried oregano - 1 teaspoon dried basil - Salt and pepper to taste These ingredients give the meatloaves their rich taste and texture. The ground meat forms the base, while the breadcrumbs and cheese add a delightful bite. Onions, bell peppers, and garlic provide great flavor. The glaze is what makes mini meatloaves extra special. It’s easy to whip up and adds a zesty kick. For the glaze, gather: - 1/4 cup ketchup - 2 tablespoons brown sugar - 1 tablespoon apple cider vinegar Mix these ingredients together for a sweet and tangy topping. This glaze not only enhances flavor but also makes the meatloaves look appealing. Seasoning is crucial for great taste. Here’s what you should use: - 1 teaspoon dried oregano - 1 teaspoon dried basil - Salt and pepper to taste These seasonings bring out the best in the meat. They create layers of flavor that make each bite enjoyable. Don’t skip the salt and pepper; they are key to making your mini meatloaves shine! {{ingredient_image_2}} Set your oven temperature to 375°F (190°C). This is the sweet spot for baking mini meatloaves. While the oven warms up, lightly grease a muffin tin or mini loaf pan. Greasing helps prevent sticking, making it easier to remove the loaves later. In a large mixing bowl, combine 1 pound of ground beef or turkey, 1 cup of breadcrumbs, and 1/2 cup of freshly grated Parmesan cheese. Add 1/4 cup of finely chopped onion and 1/4 cup of finely chopped bell pepper. These veggies add flavor and moisture. Next, pour in 1/4 cup of milk and crack 1 large egg into the bowl. Don’t forget the 2 cloves of minced garlic, 1 teaspoon of dried oregano, and 1 teaspoon of dried basil. Season generously with salt and pepper. Mix everything gently until just combined. This helps to keep the meatloaves tender and juicy. Now, divide the meat mixture into 8 equal portions. Shape each portion into a small loaf or spoon the mix into the muffin tin cavities. Press gently to fill evenly. In a small bowl, whisk together 1/4 cup of ketchup, 2 tablespoons of brown sugar, and 1 tablespoon of apple cider vinegar to create a tangy glaze. Brush this glaze generously over each mini meatloaf. If you have leftover glaze, set it aside for later. Carefully place the mini meatloaves in the oven. Bake for 25-30 minutes. You want the internal temperature to reach 160°F (70°C). This ensures they are cooked through. In the last 5 minutes of baking, apply the reserved glaze for an extra layer of flavor. Once baked, remove them from the oven and let cool for a few minutes before serving. Enjoy warm for the best taste! To keep your mini meatloaves tender, mix ingredients gently. Over-mixing can make them tough. Use your hands to combine the meat, breadcrumbs, and veggies. This helps keep the loaves light. Don’t forget to add milk and egg; they add moisture and richness. Timing is key when you glaze your meatloaves. Brush the glaze on before baking for great flavor. In the last five minutes, add more glaze for a shiny finish. This second layer intensifies the taste and gives a nice look. Mini meatloaves pair well with sides like creamy mashed potatoes or a fresh salad. The creamy potatoes balance the savory meat. A crisp salad adds a nice crunch. You can also garnish the meatloaves with parsley for color. This makes the dish pop on the plate! Pro Tips Use Lean Meat: Opt for lean ground turkey or beef to reduce fat content and make the dish healthier without sacrificing flavor. Add Vegetables: Customize your mini meatloaves by incorporating finely grated carrots or zucchini for added moisture and nutrition. Make Ahead: Prepare the meatloaves and glaze in advance, then refrigerate for up to 24 hours. Bake them fresh when you're ready to serve! Experiment with Spices: Don't hesitate to add your favorite spices or herbs to the meat mixture for a unique flavor twist, such as smoked paprika or fresh parsley. {{image_4}} You can swap ground beef for turkey. Turkey gives you a leaner meatloaf. If you need gluten-free, use gluten-free breadcrumbs. They work great and keep the taste. Want to spice things up? Add chili powder to the meat mix. It brings a nice kick. You can also toss in veggies like mushrooms or spinach. They add flavor and nutrients. While the tangy glaze is tasty, you can try other options. Barbecue sauce can give a sweet, smoky flavor. Mustard adds a nice tang. Mix and match to find your favorite. To keep your mini meatloaves fresh, store them in an airtight container. Place a piece of wax paper between layers to avoid sticking. You can also wrap each mini meatloaf in plastic wrap. This will help lock in moisture. For best taste, refrigerate them within two hours of cooking. To reheat mini meatloaves, use the oven for the best results. Preheat it to 350°F (175°C). Place the meatloaves in a baking dish. Add a splash of water or broth to keep them moist. Cover the dish with foil to prevent drying out. Heat for about 15-20 minutes, or until warm. You can also use the microwave if you're in a hurry. Place them on a microwave-safe plate and cover with a damp paper towel. Heat in short bursts of 30 seconds until hot. In the fridge, mini meatloaves last for about 3-4 days. If you freeze them, they can last up to 3 months. Make sure to label your containers with the date. This way, you can enjoy your mini meatloaves later without worry. Yes, you can make mini meatloaves ahead of time. This makes meal prep easy. I often prepare the meat mixture the night before. Simply cover it and store it in the fridge. This allows the flavors to blend well. You can also shape the meatloaves and freeze them. Just make sure to wrap them tightly. When you need them, thaw and bake them straight from the fridge or freezer. To cook mini meatloaves at 375°F, you should bake them for about 25 to 30 minutes. Always check the internal temperature. It should reach 160°F for safe eating. Each oven may vary slightly, so keep an eye on them. For the best results, use a meat thermometer. This ensures they are cooked through but still juicy. Yes, you can easily substitute meat in this recipe. Ground turkey is a great lean option. You can also try ground chicken or pork. If you prefer a vegetarian option, use lentils or black beans. Just mash them to get a good texture. You can also add chopped veggies for extra flavor. This makes mini meatloaves fun and diverse. In this blog post, we've covered everything you need to make mini meatloaves. You learned about main ingredients, tangy glaze components, and essential seasonings. I walked you through each step, from preparation to baking. We also shared tips for flavor, texture, and serving. Mini meatloaves are versatile and easy to customize. You can swap ingredients and try different glazes. Store leftovers properly to enjoy them later. With these tips, your mini meatloaves will be a hit every time. Enjoy cooking!

Mini Meatloaves Flavorful Dish for Easy Weeknight Meals

- Main Ingredients for Meat Sauce - 1 lb ground beef - 1 lb Italian sausage, casings removed - 1 onion, finely chopped - 2 cloves garlic, minced - 1 can (28 oz) crushed tomatoes - 2 cans (8 oz each) tomato sauce - Salt and pepper, to taste - Cheeses and Noodles - 12 lasagna noodles - 15 oz ricotta cheese - 3 cups shredded mozzarella cheese - 1 cup grated Parmesan cheese - 1 large egg - Herbs and Seasoning - 2 tablespoons fresh basil, chopped (or 1 tablespoon dried basil) - 1 teaspoon dried oregano - Fresh parsley, chopped, for garnish Each ingredient plays a key role. The meats add depth, while the cheeses create that gooey texture we love. Fresh herbs brighten every bite. {{ingredient_image_2}} Preheating the Oven Start by preheating your oven to 375°F (190°C). This heat sets the stage for a nice bake. Cooking the Noodles Grab a big pot and fill it with salted water. Bring it to a rolling boil. Add 12 lasagna noodles and cook them until al dente. This usually takes about 8-10 minutes. Once done, drain the noodles and lay them flat on parchment paper or a clean towel. This keeps them from sticking. Making the Meat Sauce In a large skillet, pour a splash of olive oil. Heat it over medium heat. Next, add 1 finely chopped onion and 2 minced garlic cloves. Sauté these for about 3-4 minutes, until the onion is soft. Then, add 1 pound of ground beef and 1 pound of Italian sausage. Cook this for 8-10 minutes. Break the meat into small pieces as it browns. When it’s ready, drain any extra fat from the skillet. Stir in 1 can of crushed tomatoes, 2 cans of tomato sauce, 2 tablespoons of chopped basil, and 1 teaspoon of oregano. Season with salt and pepper. Let this simmer on low heat for 15-20 minutes, stirring now and then. Assembling the Layers In a 9x13 inch baking dish, start by spreading a thin layer of meat sauce at the bottom. Place 4 noodles across this sauce. Over the noodles, spread half of the ricotta mixture, followed by one-third of the mozzarella cheese. Add more meat sauce. Repeat this process with the remaining ingredients. Finish with a final layer of noodles, topped with the last of the meat sauce, mozzarella, and Parmesan cheese. Adding the Cheese Mixture In a mixing bowl, combine 15 ounces of ricotta cheese, 1 large egg, a pinch of salt, and half of the grated Parmesan cheese. Mix everything well until it’s creamy. This cheese mixture adds a rich flavor to the lasagna. Covering and Baking Time Cover the baking dish tightly with foil. To prevent sticking, spray the foil with cooking spray or line it with parchment paper. Bake in the preheated oven for 25 minutes. After that, remove the foil and bake for another 25 minutes. Look for melted, bubbly, golden cheese! Final Steps for Serving Once baked, let the lasagna rest for about 15 minutes. This helps it stay together when you slice it. Garnish with freshly chopped parsley for a nice touch. Serve it warm and enjoy! Cooking Noodles Al Dente Cooking your lasagna noodles just right is key. You want them al dente, meaning slightly firm. This helps keep the noodles from getting mushy during baking. Follow the package instructions, but check them a minute early. Drain them and lay them flat to cool. This stops them from sticking together. Best Practices for Layering Layering is where the magic happens. Start with meat sauce on the bottom to prevent sticking. Place four noodles next. Spread half of the ricotta mixture over the noodles. Then, add one-third of the mozzarella. Repeat this process, ending with noodles and meat sauce on top. Finish with mozzarella and Parmesan cheese for a golden crust. Additional Herbs and Spices Want to amp up the taste? Add more herbs! Fresh basil and oregano boost flavor. You can also try thyme or parsley for a fresh kick. A dash of red pepper flakes adds spice if you like heat. Using Quality Ingredients Always choose fresh, quality ingredients. Great meat, cheeses, and tomatoes make a huge difference. Opt for whole-milk ricotta and fresh mozzarella. These add creaminess and flavor. Use crushed tomatoes instead of pureed for a better texture. Your lasagna will taste amazing when you start with the best! Pro Tips Cook Noodles Al Dente: Ensure your lasagna noodles are cooked al dente to avoid a mushy texture in the final dish. They will continue to soften during baking. Layering Technique: When layering, make sure to spread the ingredients evenly to allow for even cooking and flavor distribution throughout the lasagna. Rest Before Serving: Let the lasagna rest for at least 15 minutes after baking. This allows the layers to set, making it easier to slice and serve. Customize Your Cheese: Feel free to mix different types of cheese in your lasagna, such as provolone or gouda, for a unique flavor twist. {{image_4}} You can easily make a tasty vegetarian lasagna. Simply substitute the meat with vegetables. Good choices include zucchini, spinach, mushrooms, and bell peppers. Chop these veggies finely and sauté them in olive oil. This adds flavor and keeps the dish light. Layer the veggies just like you would with meat. Use the same sauces and cheeses for a rich taste. Want a gluten-free meal? Use gluten-free noodles instead of regular ones. Many brands offer great alternatives that taste just as good. Make sure to cook them according to package instructions. This ensures they hold up well in the layers. You can enjoy the same great flavors without the gluten! Cheese lovers can have fun experimenting! While mozzarella and ricotta are classic, try different cheeses. Consider using provolone, gouda, or goat cheese for a twist. Each cheese adds a unique taste and texture. Just mix and match to find your favorite blend. You can create a lasagna that is uniquely yours! To keep your lasagna fresh, refrigerate it right away. Place it in an airtight container. If you have a large portion, cover it tightly with plastic wrap or aluminum foil. This helps prevent drying out. Lasagna can last in the fridge for about three to five days. When you’re ready to enjoy it again, simply reheat the portion in the oven or microwave. Freezing lasagna is a great way to save some for later. First, let it cool completely before freezing. You can freeze the whole dish or individual portions. Wrap it tightly in plastic wrap, then cover it with aluminum foil. This protects it from freezer burn. To reheat, thaw it in the fridge overnight. Bake it at 375°F (190°C) until hot throughout. If you freeze it unbaked, bake it straight from the freezer. Just add extra time to ensure it cooks all the way. Enjoy your lasagna delights any time! How to Ensure My Lasagna Doesn’t Get Soggy? To keep your lasagna firm, I recommend using less sauce. Make sure your meat sauce simmers long enough to thicken. When cooking noodles, avoid overcooking. Al dente noodles hold their shape better. Lastly, let the lasagna rest after baking. This helps it set before slicing. Can I Prepare Lasagna in Advance? Absolutely! You can assemble the lasagna a day ahead. Just cover it tightly and keep it in the fridge. When ready to bake, preheat your oven and add an extra 10-15 minutes to the cooking time. This way, you save time and effort when it’s dinner time. What Can I Serve with Lasagna? Lasagna pairs well with many sides. I love serving it with warm garlic bread. A fresh green salad with a light vinaigrette works great too. You can also add a side of roasted vegetables for a colorful touch. These options enhance your meal and make it more enjoyable. You now know how to create the perfect lasagna. We covered essential ingredients, cooking steps, and tips for great flavor. You learned about vegetarian and gluten-free options too. Proper storage ensures your leftovers stay fresh. I hope this guide inspires you to try new recipes and enjoy making lasagna. Trust in your skills, and remember, practice makes perfect!

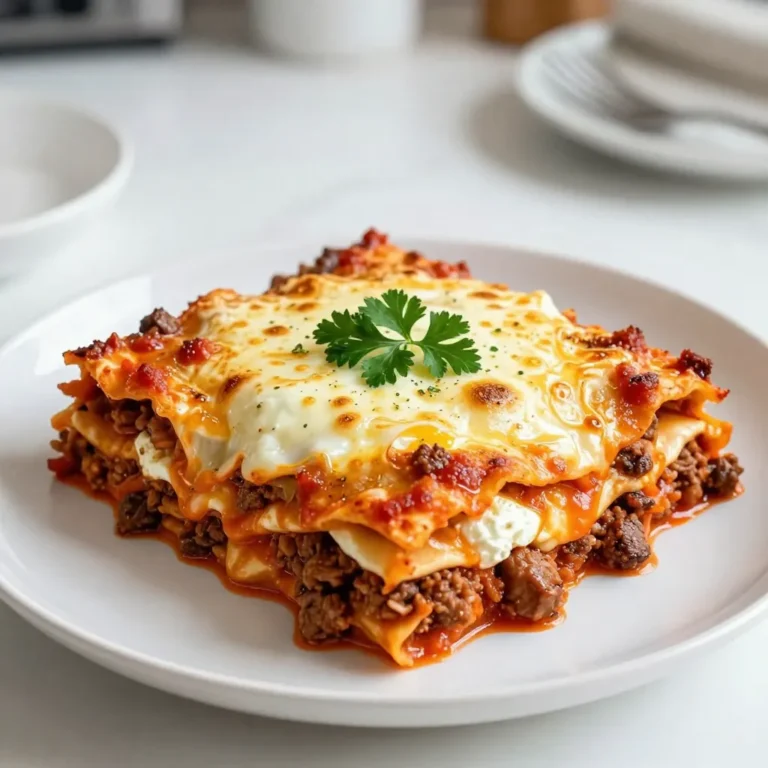
World’s Best Lasagna Delight for Cozy Dinners

- 1 cup dark chocolate chips (70% cocoa or higher) - 1/2 cup sweetened condensed milk - 1/2 cup caramel sauce (store-bought or homemade) - 1/2 teaspoon fine sea salt, plus extra for finishing - 1 teaspoon pure vanilla extract - 1 cup crushed nuts (almonds or pecans), optional - Unsweetened cocoa powder for dusting, optional You can swap dark chocolate chips for milk chocolate if you prefer a sweeter taste. Use coconut milk instead of sweetened condensed milk for a dairy-free option. If you have a nut allergy, leave out the crushed nuts or use seeds like sunflower seeds for crunch. For the caramel sauce, make a quick homemade version with sugar, butter, and cream if you want a fresh taste. Select chocolate with a cocoa content of at least 70% for a deep flavor. Look for sweetened condensed milk that is thick and creamy; this ensures a rich texture. When choosing caramel sauce, check the label for natural ingredients; this enhances the truffles' taste. For sea salt, fine grains blend better into the truffle mix. If you opt for nuts, pick fresh ones for the best crunch and flavor. {{ingredient_image_2}} Start by gathering your ingredients. You need dark chocolate chips and sweetened condensed milk. Combine them in a medium saucepan. Heat this mixture over low flame. Stir it consistently for several minutes. Wait until the chocolate fully melts. You want a silky-smooth texture. This step is key for a rich truffle. Once the chocolate melts, take the saucepan off the heat. Now, add the caramel sauce, sea salt, and vanilla extract. Gently fold these into the chocolate mix. Make sure everything blends well. This creates a deep, sweet flavor. The sea salt adds a nice balance to the sweetness. Let the mixture cool to room temperature. Then, place it in the fridge for about 30 minutes. This helps it firm up. After chilling, use a small ice cream scoop or your hands. Roll the mixture into small balls, around one inch. Next, choose your coating: crushed nuts or cocoa powder. Roll each truffle in your choice. If you like, leave some plain for a classic touch. Finally, place the truffles on a baking sheet lined with parchment paper. Sprinkle a pinch of sea salt on top. This enhances the flavor. Chill again for at least 30 minutes before serving. Enjoy your rich and decadent treats! For the best truffles, start with quality chocolate. I recommend using dark chocolate chips with at least 70% cocoa. This gives a rich flavor. Melt the chocolate slowly over low heat. Stir constantly to prevent burning. When mixed with sweetened condensed milk, the texture should be smooth and creamy. After mixing in the caramel and salt, let the mixture cool. Chilling it in the fridge helps firm up the truffles. To keep your truffles from melting, handle them gently. Warm hands can soften the chocolate. If your kitchen is hot, chill the truffles before shaping them. After rolling them into balls, place them back in the fridge. This helps them hold their shape. If you notice the truffles are too soft, return them to the fridge for a little longer. Presentation adds to the fun! Use a decorative gift box or a stylish platter. For a beautiful touch, drizzle caramel sauce over the truffles. This makes them look fancy and adds extra sweetness. You can also sprinkle a bit of sea salt on top for contrast. Arrange the truffles neatly, and they will surely impress your guests! Pro Tips Use Quality Chocolate: Opt for high-quality dark chocolate with at least 70% cocoa for a richer flavor and smoother texture. Chill for Perfect Texture: Allow the mixture to chill until it's firm enough to handle; this makes rolling the truffles easier and helps them maintain their shape. Experiment with Coatings: Try different coatings like crushed cookies or coconut flakes for a unique twist on your truffles. Store Properly: Keep the truffles in an airtight container in the refrigerator to maintain their freshness and avoid melting. {{image_4}} You can coat your salted caramel fudge truffles in many ways. Each option adds unique taste and texture. Here are some ideas: - Crushed Nuts: Almonds or pecans offer a crunchy bite. They add richness and flavor. - Cocoa Powder: Dusting with cocoa powder gives a classic look. It enhances the chocolate flavor. - Shredded Coconut: For a tropical twist, roll them in coconut. This adds sweetness and chewiness. - Chocolate Sprinkles: Use chocolate sprinkles for fun and flair. Kids love this colorful option. You can also infuse fun flavors into your truffles. This is an easy way to make them special. Here are a few suggestions: - Nuts: Fold in finely chopped nuts for crunch. Hazelnuts or walnuts work well. - Spices: Add a pinch of cinnamon or nutmeg for warmth. A dash of chili powder adds a surprising kick. - Extracts: Swap vanilla for almond or mint extract. This changes the flavor profile beautifully. The type of chocolate you use shapes the truffles' taste. Here’s how to switch it up: - Milk Chocolate: Use milk chocolate for a sweeter truffle. It creates a creamier texture. - White Chocolate: White chocolate offers a rich, sweet taste. Pair it with a hint of sea salt for balance. - Flavored Chocolate: Try chocolate with added flavors like orange or coffee. It adds depth and excitement to each bite. These variations let you tailor the truffles to your taste. Have fun experimenting! To keep your salted caramel fudge truffles fresh, store them in an airtight container. Line the container with parchment paper to prevent sticking. Place a layer of truffles in the container, then add more parchment between layers. This keeps them safe and tasty. These truffles last up to two weeks in the fridge. For longer storage, you can freeze them. First, chill the truffles until firm. Then, wrap each one in plastic wrap. Place all wrapped truffles in a freezer-safe bag. They can stay in the freezer for up to three months. To enjoy, thaw them in the fridge overnight before serving. If you plan to gift these truffles, use a sturdy box or tin. Line it with tissue paper for a nice touch. You can also add decorative elements like ribbons or stickers. Keeping the truffles cool during transport is key. If it's warm outside, use an insulated bag with ice packs. This way, your truffles arrive in perfect shape. Yes, you can make these truffles ahead of time. They keep well in the fridge. Just chill them for about 30 minutes after making. Store them in an airtight container. They can last up to a week. For longer storage, freeze them. Just let them thaw in the fridge before serving. This makes them a great treat for parties or gifts. For a dairy-free option, use coconut cream instead of sweetened condensed milk. Dark chocolate can also be dairy-free; just check the label. If you need a nut-free version, skip the crushed nuts and use cocoa powder for coating. For a vegan option, use vegan chocolate and a plant-based caramel sauce. These swaps can help you enjoy these truffles while meeting your dietary needs. If your mixture is too soft, try chilling it longer. Place it in the fridge for an additional 15-20 minutes. If it’s still soft, add a bit more melted chocolate. This will help firm it up. You can also try rolling the truffles in cocoa powder to help absorb excess moisture. Just remember, the colder the mixture, the easier it is to shape. You learned how to make delicious truffles using quality ingredients. We covered the right steps to melt chocolate, mix flavors, and shape the truffles. You also discovered tips for texture and how to avoid melting. Variations allow for creative flavor twists and coatings. Proper storage keeps your truffles fresh for longer. Remember, perfecting truffles takes practice, but it's worth the effort. Enjoy experimenting and sharing your treats with others!

Salted Caramel Fudge Truffles Rich and Decadent Treat

To create a delicious green bean casserole, gather these items: - 1 pound fresh green beans, trimmed and halved - 1 can (10.5 oz) cream of mushroom soup - 1 cup milk - 1 teaspoon soy sauce - 1 cup crispy fried onions, plus extra for garnishing - 1 cup shredded sharp cheddar cheese - 2 garlic cloves, minced - 1 small onion, finely chopped - Salt and pepper, to taste - 1 teaspoon Dijon mustard (optional for added depth of flavor) - Zest of 1 lemon (for a refreshing hint) You can swap some ingredients to suit your taste or needs: - For the cream of mushroom soup, use a homemade version or a different cream soup. - Almond milk or oat milk works well as a milk substitute. - If you don’t have soy sauce, try tamari or coconut aminos for a similar flavor. - Use any type of cheese you like, such as mozzarella or pepper jack. - For a lighter dish, replace half the green beans with cauliflower florets. Fresh ingredients make a big difference in flavor. Here are some tips: - Choose bright green beans that snap easily. Avoid beans that are wilted or brown. - When buying onions, look for firm ones with a smooth skin. - Fresh garlic should feel firm and not sprout. Avoid soft or mushy cloves. - Store fresh items in the fridge for best quality. Use them within a week for peak taste. - If using lemon zest, choose organic lemons to avoid wax or chemical residue. {{ingredient_image_2}} First, set your oven to 350°F (175°C). This step warms the oven for baking. It helps the casserole cook evenly. Next, take a large pot and fill it with salted water. Bring this water to a rolling boil. When the water is bubbling, add the fresh green beans. Blanch them for 3-4 minutes. You want them bright green and crisp. Once done, drain the beans. Rinse them under cold water to stop cooking. Set them aside for later. Now, grab a large mixing bowl. In it, combine the cream of mushroom soup, milk, soy sauce, and Dijon mustard, if you want. Whisk these ingredients until they are smooth. A well-mixed sauce is key for good flavor. Add minced garlic, chopped onion, lemon zest, and a pinch of salt and pepper to the sauce. Mix well to blend the flavors. Then, gently fold in the blanched green beans. Add half of the crispy fried onions, too. Make sure every green bean gets coated with the sauce. Lightly grease a 9x13 inch baking dish. Pour the green bean mixture into it. Spread it out so it cooks evenly. Next, sprinkle shredded cheddar cheese on top. Add the rest of the crispy fried onions for extra crunch. Place the dish in the oven. Bake for 25-30 minutes. It’s done when the casserole is bubbly and the cheese is golden brown. Remove it from the oven and let it cool for a few minutes before serving. Enjoy your tasty green bean casserole! To get the best texture, start with fresh green beans. Blanch them before mixing. This keeps them crisp and bright green. Aim for a cooking time of just 3-4 minutes. After blanching, cool them down right away with cold water. This stops the cooking. You want a nice crunch in every bite. Add-ins can make your dish even better. A teaspoon of soy sauce brings umami flavor. If you want more depth, try a teaspoon of Dijon mustard. Fresh herbs like thyme or parsley add freshness. You can also mix in some sautéed mushrooms for extra texture and taste. Feel free to play around with these ingredients. When it’s time to serve, presentation matters. You can serve it right from the baking dish. For a fancier look, scoop portions onto plates. Top with extra crispy fried onions for crunch. A sprinkle of parsley adds color and flavor. Serve with lemon wedges for a refreshing twist. This makes your dish even more delightful. Pro Tips Tip Title: Blanching Technique: Blanching the green beans not only retains their vibrant color but also ensures they maintain a crisp texture in the final casserole. Tip Title: Cheese Options: Experiment with different types of cheese, like Gruyère or Monterey Jack, for unique flavors that can elevate your casserole. Tip Title: Make Ahead: You can prepare the casserole a day in advance. Just cover it tightly with foil and refrigerate; bake it when you're ready to serve. Tip Title: Flavor Boost: Adding a splash of white wine to the sauce can enhance the overall flavor profile, adding a touch of sophistication to the dish. {{image_4}} You can make green bean casserole lighter. Swap the cream of mushroom soup for a low-fat version. Use skim milk instead of whole milk. You can also try Greek yogurt as a creamy base. This mix gives you flavor with fewer calories. To make a vegan green bean casserole, replace cream of mushroom soup with a plant-based version. Use almond or soy milk in place of dairy milk. For the cheese, try vegan cheese or skip it. Use more fried onions for crunch and flavor. Cheese can change the taste of your casserole. Instead of sharp cheddar, use mozzarella for a milder flavor. You can add Parmesan for a nutty note. For a spicy kick, try pepper jack cheese. Mix and match to find your favorite combo! To keep your green bean casserole fresh, store it in an airtight container. Place it in the fridge within two hours after cooking. The casserole will last for three to four days. Make sure the container seals well to prevent drying out. If you have extra crispy fried onions, store them separately to keep their crunch. You can freeze green bean casserole for longer storage. First, let it cool completely. Then, transfer it to a freezer-safe container. Use plastic wrap or foil to cover it well. It should stay fresh for up to three months. Remember, the texture may change after freezing, especially for the onions. When you’re ready to enjoy your casserole again, preheat your oven to 350°F (175°C). Remove the casserole from the fridge or freezer. Bake for 25 to 30 minutes if chilled, or 40 to 50 minutes if frozen. Check that it’s heated through and bubbly. For a crispy top, add more fried onions during the last few minutes of baking. Enjoy every bite! Yes, you can make green bean casserole ahead of time. Prepare the dish up to the baking step. Cover it tightly with plastic wrap or foil. Store it in the fridge for up to two days. When ready to bake, remove the cover and add extra crispy fried onions on top. Bake as directed, adding a few extra minutes if it’s cold. If you want a substitute for cream of mushroom soup, try using cream of celery soup or a homemade white sauce. You can blend sautéed mushrooms with heavy cream for a fresh taste. Another option is to mix sour cream and milk with seasonings. This keeps the creamy texture while adding unique flavors. To make green bean casserole gluten-free, use gluten-free cream of mushroom soup. You can also thicken your homemade sauce with cornstarch instead of flour. Check the label on crispy fried onions; some brands are gluten-free. This way, you can enjoy the dish without worry. This blog post covered everything you need for a great green bean casserole. We discussed the key ingredients, how to prepare and bake the dish, and tips for perfecting the texture and flavor. You learned about healthy variations and how to store leftovers properly. Remember, your choices in ingredients can make a big difference. Enjoy experimenting with flavors and textures. A delicious casserole awaits!

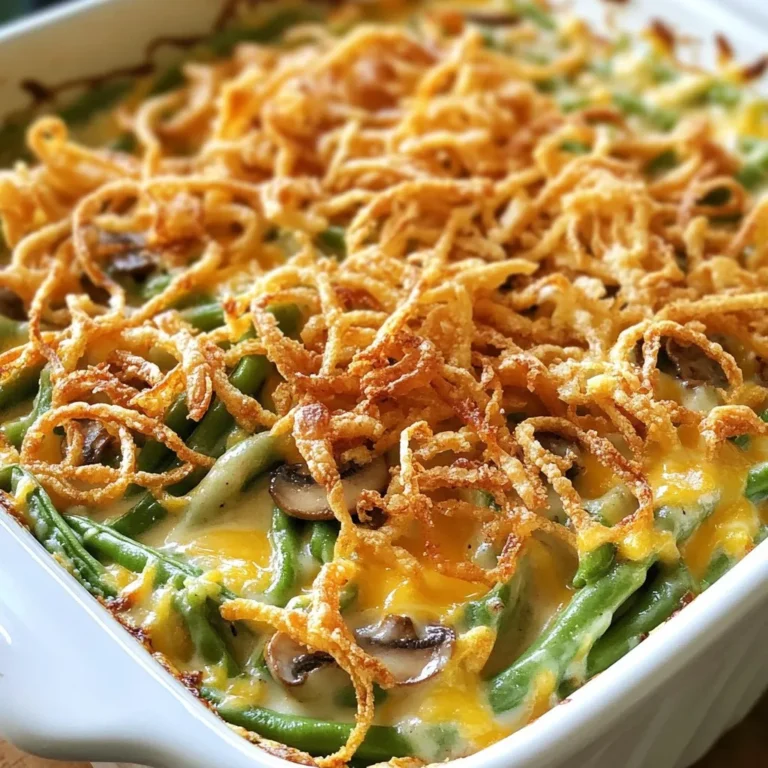
Classic Green Bean Casserole Simple Flavor Delight

Here’s what you need to make garlic butter chicken and potatoes. This simple list includes flavorful items that come together to create a delightful meal. - 4 chicken thighs, bone-in and skin-on - 1 lb baby potatoes, halved - 6 tablespoons unsalted butter, divided - 5 cloves garlic, minced - 1 teaspoon dried thyme - 1 teaspoon paprika - Salt and pepper to taste - Fresh parsley, chopped (for garnish) - Lemon wedges (for serving) Each ingredient plays a key role in this dish. The chicken thighs give you tender meat with crispy skin. The baby potatoes soak up all the rich garlic butter flavor. Butter adds a creamy texture, while garlic gives a punch of taste. Fresh thyme and paprika bring warmth and aroma. Salt and pepper enhance everything. Finally, parsley brightens your plate, and lemon adds a zesty touch. With these ingredients, you can create a satisfying dinner for family or friends. {{ingredient_image_2}} 1. Preheat your oven to 400°F (200°C). This ensures the heat is just right for roasting. 2. In a large skillet, melt 3 tablespoons of butter over medium heat. Wait until it bubbles gently. - Seasoning adds flavor. It's key for tasty chicken. - Generously sprinkle salt, pepper, thyme, and paprika on both sides of the chicken thighs. 1. Place the chicken thighs skin-side down in the skillet. Sear for 7-8 minutes. This makes the skin golden and crispy. 2. Flip the chicken thighs over. Add halved baby potatoes around them in the skillet. 3. In a small bowl, mix the minced garlic with the remaining 3 tablespoons of butter. Drizzle this mix over the chicken and potatoes. 4. Transfer the skillet to the oven. Roast for 25-30 minutes. Check that the chicken reaches 165°F (75°C). The potatoes should be tender. 5. For a crispy finish, turn on the broiler for the last 2-3 minutes. Keep a close eye to avoid burning. 6. After removing from the oven, sprinkle fresh chopped parsley over the dish. This adds color and flavor. 7. Serve hot with lemon wedges on the side. A squeeze of lemon adds a nice touch! Fresh ingredients make all the difference in your dish. Use fresh garlic for a robust taste. Choose organic chicken for better flavor and quality. When cooking, I recommend roasting methods. They lock in moisture and enhance the taste. To get that crispy skin, start by searing the chicken. Heat the skillet until the butter bubbles. Place the chicken skin-side down and let it cook without moving for a good golden-brown color. For extra crispiness, use the broiler at the end. This gives that final touch of crunch. Presenting your dish is key. Serve it right from the skillet for a rustic look. Garnish with fresh parsley to add color. Lemon wedges on the side brighten the flavors. You can also pair this dish with a fresh salad or steamed veggies for a complete meal. Pro Tips Let the Chicken Rest: After cooking, allow the chicken to rest for 5-10 minutes. This helps the juices redistribute, ensuring a moist and flavorful bite. Choose the Right Potatoes: Baby potatoes work best for this recipe due to their size and texture. They cook evenly and absorb flavors beautifully. Fresh Garlic Over Powder: Always use fresh garlic for a more vibrant flavor. It adds a robust aroma and taste that garlic powder simply cannot match. Broiling for Crispiness: If you desire extra crispy skin, use the broiler for the last few minutes of cooking, but watch closely to prevent burning. {{image_4}} You can switch up the protein in this dish. Chicken thighs are juicy and flavorful, but chicken breasts work well too. If you prefer red meat, try beef or pork. For a lighter option, use turkey thighs. Each meat adds a unique taste, but be mindful of cooking times. Breasts cook faster than thighs, so check them early. Adding vegetables can make this meal even better. Carrots, green beans, or bell peppers are great choices. Simply chop them and toss them in with the potatoes. You can also try broccoli or zucchini for a colorful mix. These veggies will soak up the garlic butter flavor, making the dish even more delicious. If you're looking for gluten-free options, this recipe is already safe. Just ensure your butter and seasonings are gluten-free. For dairy-free options, swap the butter for olive oil or coconut oil. You can also use vegan butter. This keeps the dish tasty while meeting dietary needs. To keep your garlic butter chicken and potatoes fresh, use airtight containers. Glass or plastic containers work well. Make sure the dish cools before sealing it up. This helps avoid steam buildup, which can make your food soggy. Store leftovers in the fridge. They will stay good for three to four days. To reheat, use the oven for the best taste. Preheat your oven to 350°F (175°C). Place the chicken and potatoes in a baking dish. Cover with foil to keep moisture in. Heat for about 15-20 minutes. Check if it’s hot all the way through before serving. You can also use a microwave, but the oven gives better flavor. Yes, you can freeze this dish! First, let it cool completely. Then, place it in a freezer-safe container. Make sure to label the container with the date. It will last for up to three months in the freezer. To thaw, move it to the fridge overnight. Reheat in the oven or microwave as mentioned above. Be sure to check that it's hot inside before eating. Enjoy your tasty meal again! It takes about 50 minutes in total. You need 10 minutes to prep and 40 minutes to cook. This includes 25-30 minutes of roasting in the oven. Yes, you can use boneless chicken thighs. They will cook faster than bone-in thighs. Adjust your cooking time to about 20-25 minutes in the oven. You can use regular potatoes, cut into small pieces. Sweet potatoes also work well for a different flavor. Other options include small carrots or parsnips, chopped to similar sizes. Yes, garlic butter chicken and potatoes are great for meal prep. Cook the dish, then store individual portions in airtight containers. It keeps well in the fridge for up to four days. Absolutely! You can cook it in a slow cooker. Just add all the ingredients and cook on low for 6-8 hours or high for 3-4 hours. This dish pairs well with a simple salad or steamed veggies. You can also serve it with rice or crusty bread to soak up the garlic butter sauce. To boost flavor, marinate the chicken thighs for a few hours before cooking. A mix of olive oil, lemon juice, and herbs works well. Yes, you can add fresh or dried herbs. Rosemary and oregano are great choices. They add a nice flavor to the chicken and potatoes. If you don’t have thyme, use Italian seasoning or a mix of dried herbs. Basil or sage can also work fine in this recipe. This blog post covered an easy recipe for garlic butter chicken and potatoes. We looked at the key ingredients, step-by-step cooking instructions, and tips to enhance your dish. Remember to use fresh ingredients for the best flavors. You can also try different proteins and veggies based on your taste. Store leftovers properly to enjoy them later. Keep this recipe handy to impress family and friends with your cooking skills. Happy cooking!

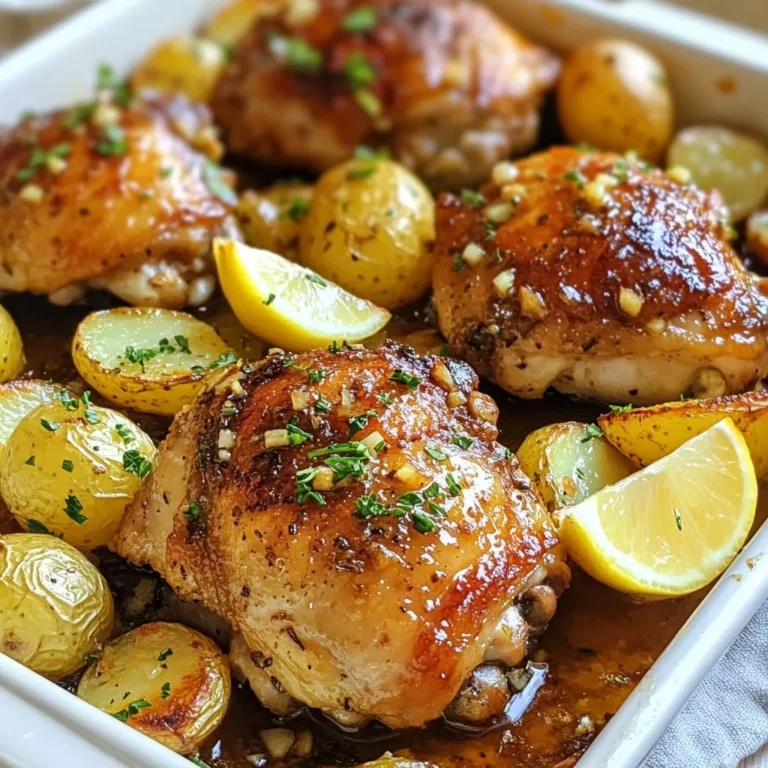
Garlic Butter Chicken & Potatoes Simple Delightful Meal

- 1 lb (450g) boneless, skinless chicken breast - Marinade ingredients: - 3 tablespoons soy sauce - 1 tablespoon fish sauce - 2 tablespoons brown sugar - 1 tablespoon fresh lime juice - 3 cloves garlic, minced - 1 teaspoon freshly grated ginger - Vegetables and garnishes: - 1 red bell pepper, diced - 1/2 cup fresh cilantro, chopped - Optional: sliced red chili or crushed peanuts for garnish The main star of this dish is the chicken. I like to use boneless, skinless chicken breast for its mild flavor and quick cooking time. It’s easy to cut into small, bite-sized pieces. The marinade gives the chicken great taste. I mix soy sauce and fish sauce for saltiness. Brown sugar adds a nice sweetness. Lime juice brightens the dish. Garlic and ginger give it a warm, spicy kick. Don’t forget the veggies! Diced red bell pepper adds color and crunch. Fresh cilantro brightens the dish with its fresh flavor. If you want a bit of heat, add sliced red chili or crushed peanuts on top. This blend of flavors makes Minute Thai Chicken Bites special. You can enjoy them on their own or as part of a larger meal. {{ingredient_image_2}} In a medium bowl, mix the marinade ingredients. Combine soy sauce, fish sauce, brown sugar, lime juice, garlic, and ginger. Whisk well until the brown sugar dissolves. This step is key for flavor. If the sugar is not dissolved, you may have gritty bits in your dish. Cut the chicken into small cubes. Place the cubes in the bowl with the marinade. Toss gently to coat each piece fully. This helps the chicken soak up all the flavor. Let it marinate for about 10 minutes. This short time allows the chicken to absorb the taste without getting mushy. Heat a large skillet over medium-high heat. Add the olive oil and wait until it shimmers. Carefully add the marinated chicken with all the marinade. Spread the chicken evenly in the pan. This step is important for even cooking. Sauté the chicken for 6-8 minutes. Stir occasionally to promote browning. Once the chicken is golden brown, add the diced red bell pepper. Cook for an additional 2-3 minutes. This timing helps keep the pepper crunchy while softening it just enough. Remove the skillet from heat and sprinkle cilantro on top. Toss gently to combine, letting the fresh flavors mix well. To make your Minute Thai Chicken Bites even better, try adding spices. Some great options include: - 1 teaspoon of red pepper flakes for heat - 1 teaspoon of cumin for warmth - 1 teaspoon of coriander for a citrusy kick For garnishes, you can use sliced red chili or crushed peanuts. Fresh lime wedges add brightness, too. These additions can really uplift the dish. Cooking the chicken at medium-high heat is key. This ensures it cooks quickly and evenly. If the heat is too low, the chicken can become rubbery. To avoid overcooking, keep an eye on the chicken. Cook it for 6-8 minutes until golden brown. Use a meat thermometer if you want to be precise; the chicken should reach 165°F (74°C). For a fun serving idea, use a colorful bowl. Place the chicken bites in the center and surround them with lime wedges. Sprinkle extra cilantro on top for a fresh look. When it comes to sides, jasmine rice pairs well. You could also serve it with a light salad. Both options balance the flavors and make the meal complete. Pro Tips Marinate Longer for Deeper Flavor: If time allows, marinate the chicken for at least 30 minutes or even overnight in the refrigerator to enhance the flavor profile. Perfectly Cooked Chicken: Use a meat thermometer to ensure the chicken reaches an internal temperature of 165°F (75°C) for perfectly cooked, juicy bites. Customize the Heat Level: Adjust the amount of red chili or add additional spices like crushed red pepper flakes for a spicier kick according to your taste. Fresh Ingredients Matter: Use fresh herbs and ingredients whenever possible, as they significantly enhance the dish's overall flavor and presentation. {{image_4}} You can switch the chicken with shrimp or tofu. Shrimp cooks quickly, so keep an eye on it. It only needs about 3-5 minutes in the skillet. If you use tofu, choose firm tofu for the best texture. Cut it into small cubes. Cook it for about 5-7 minutes until it's golden and crispy. You can play with the marinade to create sweet or spicy options. Add some honey for sweetness or a dash of sriracha for heat. Instead of soy sauce, try coconut aminos for a different taste. You can also use teriyaki sauce or hoisin sauce for new flavors. Mix and match to find your favorite! To make this recipe gluten-free, use tamari instead of soy sauce. You can also swap fish sauce for a gluten-free version. For vegetarian options, use tofu or tempeh. They soak up flavors well and give a nice texture. This way, everyone can enjoy these tasty bites! To keep your Minute Thai Chicken Bites fresh, follow these tips: - Refrigeration: Store leftovers in the fridge within two hours of cooking. This helps prevent bacteria growth. - Containers: Use airtight containers to seal in flavor. Glass or plastic containers work well. Avoid metal, as it can react with the sauce. When you’re ready to enjoy leftovers, keep these methods in mind: - Stovetop: Heat in a skillet over medium heat. Add a splash of water or broth to keep the chicken moist. Stir frequently until heated through. - Microwave: Place chicken bites in a microwave-safe dish. Cover with a damp paper towel to retain moisture. Heat in short intervals, stirring in between, until warm. If you want to save some chicken bites for later, here’s how to freeze them: - Freezing: Cool the chicken bites completely before freezing. Place them in freezer-safe bags or containers. Remove as much air as possible to prevent freezer burn. - Thawing: To use frozen chicken bites, move them to the fridge overnight. For a quicker option, use the microwave’s defrost setting before cooking. You can add heat by using sliced red chili. Mix it in with the chicken. If you want more kick, use crushed red pepper flakes. You can also try a spicier sauce. Sriracha or chili garlic sauce will work well. Start with a small amount, then taste and adjust. This way, you can get the right level of spice for your taste. Yes, you can make the marinade early. This saves time when you cook. Just mix the marinade ingredients and store it in the fridge. It stays fresh for up to two days. When you are ready, just add the chicken and marinate it. This lets the chicken soak up more flavor. These chicken bites pair well with many sides. You can serve them with jasmine rice or noodles. A fresh salad with lime dressing is also great. If you want something light, try cucumber slices or spring rolls. For a fun option, serve them with dipping sauces like sweet chili sauce or peanut sauce. These chicken bites last about three days in the fridge. Store them in an airtight container. Make sure they cool down before sealing. If you want to keep them longer, consider freezing. They can stay in the freezer for up to two months. Just thaw them overnight in the fridge before reheating. This blog post provided a clear guide to making flavorful Thai chicken bites. You learned about the key ingredients, how to prepare and cook them perfectly, and tips for flavor enhancement. I also shared variations for different proteins and dietary needs. Finally, I covered storage and reheating methods to keep your meals fresh. These insights should help you create delicious meals that impress. Enjoy your cooking journey and the tasty results that follow!

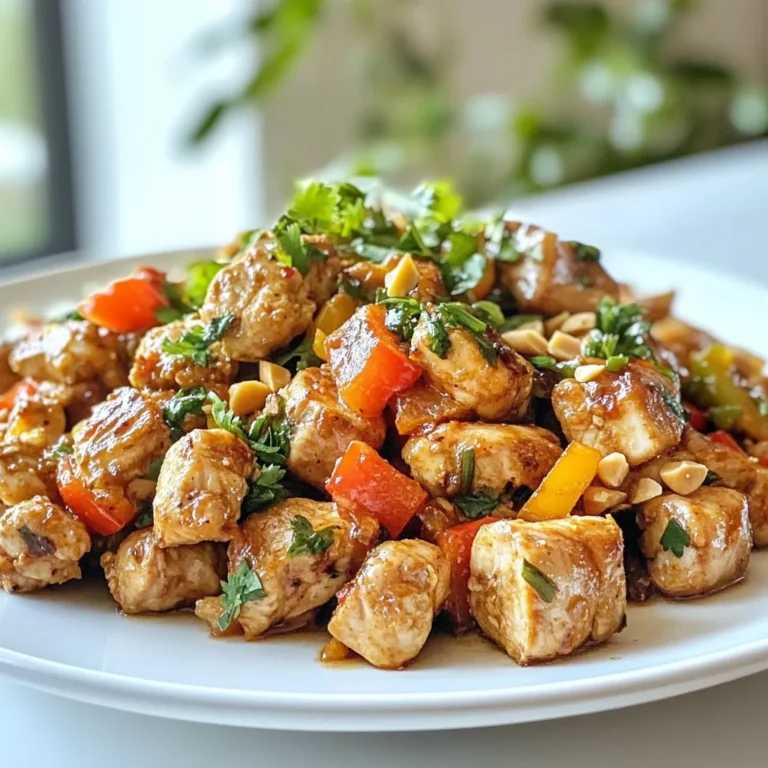
Minute Thai Chicken Bites Flavorful and Easy Recipe

PREV 1 … 31 32 33 … 48 NEXT
meal plan mapper

explore

DessertsDinnerAppetizersDrinks

Our Policies

  • Cookie Policy
  • Copyright Policy
  • Disclaimer
  • GDPR Policy
  • Terms Of Use
Back to Top
  • About
  • Contact Us
  • Privacy Policy
© 2025 meal plan mapper