FREE DINNER EBOOK! Get your copy!
  • Cookie Policy
  • GDPR Policy
  • Disclaimer
  • Terms Of Use
  • Visit my other site: Fun Cookie Recipes
meal plan mapper
  • Home
  • Dinner
  • Desserts
  • Drinks
  • Appetizers
  • Contact
  • About
  • Privacy Policy
  • Home
  • Dinner
  • Desserts
  • Drinks
  • Appetizers
  • Contact
  • About
  • Privacy Policy
  • Cookie Policy
  • GDPR Policy
  • Disclaimer
  • Terms Of Use
Visit my other site: Fun Cookie Recipes

HOME / CATEGORIES /

Latest

- 4 large russet potatoes - 1 medium onion - 3 cloves garlic - 4 cups chicken broth - 1 cup heavy cream - 1 cup shredded sharp cheddar cheese - 1/2 cup sour cream - 4 slices turkey bacon (optional) - 2 green onions (for garnish) - Salt and pepper - 2 tablespoons extra virgin olive oil The base of my potato soup starts with russet potatoes. These potatoes are perfect for a creamy texture. I use one medium onion and three cloves of garlic for flavor. The broth is crucial. I prefer four cups of chicken broth, but vegetable broth works, too, for a vegetarian option. Next, I add cream. One cup of heavy cream brings richness. To enhance the flavor, I stir in one cup of sharp cheddar cheese and a half cup of sour cream. For those who like a bit of crunch, four slices of crispy turkey bacon can be added. Lastly, I use two green onions for garnish and season with salt and pepper. This mix of ingredients creates a warm, hearty soup that feels like a hug in a bowl. Each bite is creamy, cheesy, and satisfying. You can customize it to fit your taste, but I find this blend works best for a classic potato soup. {{ingredient_image_2}} 1. Sauté onion and garlic: Start by heating 2 tablespoons of extra virgin olive oil in a large pot over medium heat. Add the finely chopped onion. Cook for about 5 minutes until it is soft and see-through. Then, stir in 3 cloves of minced garlic. Cook for another 1-2 minutes. Make sure not to burn the garlic. 2. Cook potatoes in broth: Next, toss in 4 large russet potatoes that you’ve peeled and cut into 1-inch cubes. Stir well so the potatoes mix with the onion and garlic. Pour in 4 cups of chicken broth. Make sure all the potatoes are covered. Turn up the heat and bring it to a boil. Once boiling, reduce the heat to a gentle simmer. Cover the pot and let it cook for about 20-25 minutes, or until the potatoes are soft. 3. Blend soup to preferred texture: Once the potatoes are tender, take an immersion blender and carefully blend the soup. Blend it until you reach the texture you like. If you want some chunks, blend only half of it and leave some potato pieces whole. 1. Stir in cream and cheese: Lower the heat and add 1 cup of heavy cream, 1 cup of shredded sharp cheddar cheese, and 1/2 cup of sour cream. Stir until the cheese melts and combines with the soup. Taste it and add salt and freshly ground black pepper as needed. 2. Incorporate turkey bacon (if using): If you like, you can add 4 slices of crispy turkey bacon, chopped into pieces. Fold it gently into the soup. Keep some bacon aside for a crunchy garnish. 3. Serve hot with garnishes: Serve your creamy potato delight hot. Garnish with thinly sliced green onions and any reserved turkey bacon for added flavor and texture. Enjoy every warm spoonful of this delicious soup! Using homemade broth boosts the taste of your potato soup. It adds depth and richness. If you use store-bought broth, choose a low-sodium option. This lets you control the salt level. Salt and pepper are key to the flavor. Taste the soup often while cooking. Adjust the seasoning to suit your liking. To get your desired soup texture, blending is crucial. For a smooth soup, blend all the potatoes until creamy. If you like some chunks, only blend half. This keeps the soup hearty. Remember, blending can be done with an immersion blender right in the pot. This makes cleanup easy! Serving this soup well makes it even better. Use hearty soup bowls to hold the warmth. Garnish with sliced green onions for color. Adding a sprinkle of paprika gives a nice touch. A drizzle of sour cream on top adds creaminess and a lovely look. Enjoy every spoonful! Pro Tips Choose the Right Potatoes: For a creamier texture, opt for russet potatoes as they break down easily and create a rich base for your soup. Control the Creaminess: Adjust the amount of heavy cream and sour cream based on your desired richness. Start with less, and add more to taste. Enhance Flavor with Seasoning: Don't forget to taste and season your soup throughout the cooking process. A little extra salt and pepper can elevate the flavors significantly. Garnish for Presentation: Use sliced green onions not only for freshness but also for a pop of color. A sprinkle of paprika can add visual appeal to your presentation. {{image_4}} You can easily make this soup vegetarian or vegan. To do this, swap out the chicken broth for vegetable broth. This change does not affect the flavor much. For the creamy texture, use plant-based cream and cheese alternatives. These substitutes work well and keep the soup rich and satisfying. You can customize the toppings based on your taste. Instead of turkey bacon, try crispy pancetta or skip meat altogether. You can also use different types of cheese like gouda or pepper jack for a twist. For potatoes, russet is great, but Yukon gold adds a buttery flavor. You can even use sweet potatoes for a unique taste. These swaps let you create a soup that suits your preferences. To store your Outback Steakhouse potato soup, let it cool first. Once it’s cool, transfer it to an airtight container. This helps to keep the flavors fresh. The soup will stay good in the fridge for about 3 to 4 days. Make sure to label the container with the date. This way, you’ll know when to enjoy it. If you want to freeze the soup, it's best to use a freezer-safe container. Pour the cooled soup into the container, leaving some space at the top. This space allows for expansion when the soup freezes. Seal it tightly to avoid freezer burn. You can freeze the soup for up to 3 months. Just remember to label it with the date before putting it in the freezer. When you’re ready to enjoy your soup again, there are a few ways to reheat it. The best method is to use the stove. Pour the soup into a pot over medium heat. Stir often to keep it from sticking. If the soup is too thick, add a little broth or water to reach your desired consistency. You can also use the microwave. Pour the soup into a microwave-safe bowl and cover it loosely. Heat in short bursts, stirring in between. This helps to warm it evenly without losing texture. Enjoy your creamy potato delight! To thicken potato soup, you can choose between flour and cornstarch. Both work well. If you use flour, mix it with cold water to form a paste. Stir this mix into the soup. Let it cook for a few minutes. This helps the soup get thick. Cornstarch is another great choice. Mix equal parts cornstarch with cold water. Then add it to the soup. Like with flour, let it simmer. Both methods will help give that creamy texture we love. Yes, you can make this soup ahead of time. It actually tastes better after resting. To prepare it in advance, cook the soup and let it cool completely. Then, store it in an airtight container. Place it in the fridge for up to three days. If you want to store it longer, freeze it. Just make sure to leave some space in the container. Soups expand when frozen. To reheat, warm it slowly on the stove. Stir often for even heating. Leftover potato soup lasts about three to four days in the fridge. Keep it in a sealed container. If you want to keep it longer, freeze it. Frozen potato soup is good for about two to three months. When you’re ready to eat, thaw it overnight in the fridge. Reheat it on the stove over low heat. Stir often to get the best taste and texture back. Enjoy your creamy delight! We covered how to make a creamy potato soup step by step. You learned about the essential ingredients and methods to enhance flavor and texture. I offered tips on variations to suit dietary needs and how to store leftovers. This soup is simple, comforting, and adaptable. Enjoy making it your own, and savor every warm bowl. Your cozy meal awaits, so get cooking!

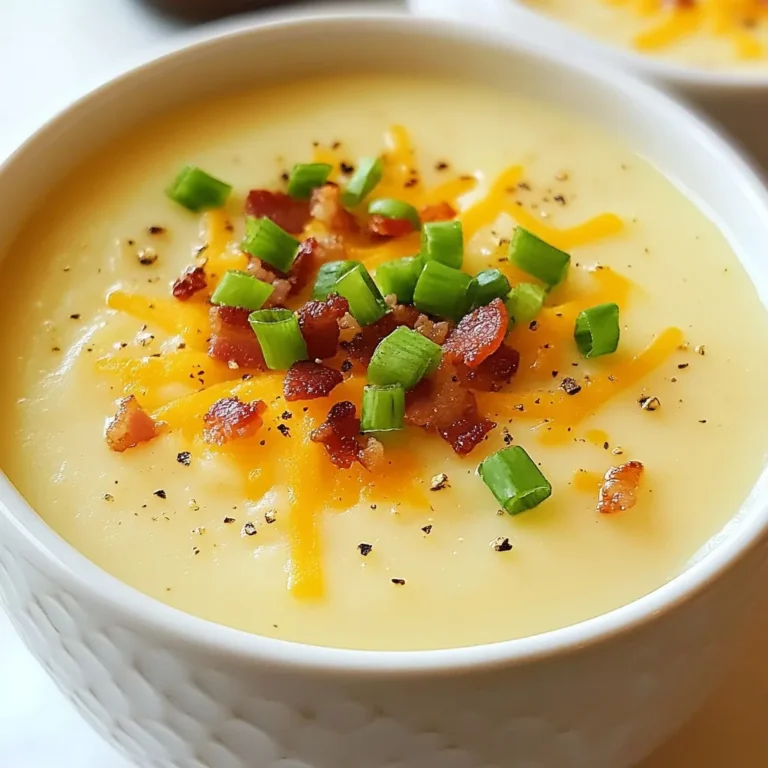
Savory Outback Steakhouse Potato Soup Recipe

To make your strawberry cheesecake cookies, gather these simple ingredients: - 1 cup cream cheese, softened to room temperature - 1/2 cup unsalted butter, softened to room temperature - 1 cup granulated sugar - 1/2 cup packed brown sugar - 1 large egg - 1 teaspoon pure vanilla extract - 2 cups all-purpose flour - 1 teaspoon baking powder - 1/2 teaspoon baking soda - 1/4 teaspoon salt - 1 cup fresh strawberries, hulled and diced - 1/2 cup white chocolate chips (optional but recommended for extra sweetness) Each ingredient plays a key role in the cookie's flavor and texture. The cream cheese gives a rich base, while the butter adds softness. The sugars create sweetness and help with the cookie's golden edges. The egg acts as a binder, keeping everything together. Fresh strawberries bring a burst of flavor and color. If you choose to add white chocolate chips, they provide a creamy sweetness that complements the strawberries. Make sure your ingredients are at room temperature for the best results. This ensures a smooth batter and better mixing. Enjoy gathering these ingredients and get ready for a delightful baking experience! {{ingredient_image_2}} Start by preheating your oven to 350°F (175°C). Take a baking sheet and line it with parchment paper. This helps the cookies come off easily after baking. In a large bowl, add 1 cup of softened cream cheese and 1/2 cup of softened unsalted butter. Use an electric mixer on medium speed. Mix until the blend is smooth and creamy. This should take about 2-3 minutes. Next, add 1 cup of granulated sugar and 1/2 cup of packed brown sugar. Mix again until everything is fluffy and well combined. In another bowl, whisk together 2 cups of all-purpose flour, 1 teaspoon of baking powder, 1/2 teaspoon of baking soda, and 1/4 teaspoon of salt. Make sure these dry ingredients are well mixed. This step ensures your cookies rise nicely. Now, slowly add the dry mix to the wet mix. Stir gently until just combined. Be careful not to overmix! Next, fold in 1 cup of diced fresh strawberries and 1/2 cup of white chocolate chips, if you choose to use them. Use a spatula to mix gently, so you don’t break the strawberries apart too much. Using a cookie scoop or a tablespoon, drop rounded balls of dough onto your prepared baking sheet. Leave about 2 inches of space between each cookie. This space lets them spread while baking. Place the baking sheet in the oven and bake for 10-12 minutes. Look for light golden edges while the centers stay soft. Once the cookies are done, let them cool on the baking sheet for about 5 minutes. After that, transfer them to a wire rack. Allow them to cool completely. This step helps the flavors blend and the texture to set. Enjoy your strawberry cheesecake cookies fresh! To soften cream cheese, take it out of the fridge. Let it sit at room temperature for about 30 minutes. You can also microwave it. Place the cream cheese in a microwave-safe bowl. Microwave on low power for about 10-15 seconds. Check it often. You want it soft, not melted. Baking time can change based on your oven. Start checking the cookies at 10 minutes. If they look light brown on the edges, they are close to done. If they seem too soft, give them 1-2 more minutes. Remember, cookies firm up as they cool. Mixing well is key. Use an electric mixer to blend the cream cheese and butter until fluffy. When adding the sugars, mix until combined and fluffy again. Add the egg and vanilla, then beat until smooth. For the dry ingredients, fold gently. Overmixing can lead to tough cookies! Using pure vanilla extract makes a big difference. It adds depth to the cookie dough. Always add it after the egg. This ensures the flavors blend well. You can also try different extracts like almond for a fun twist! For a lovely presentation, arrange cookies on a nice platter. Dust them lightly with powdered sugar for a sweet touch. Add fresh strawberry slices next to the cookies. This makes the dish look bright and fun! It also enhances the strawberry flavor in each bite. Pro Tips Use Room Temperature Ingredients: Ensure that your cream cheese and butter are at room temperature for a smoother batter and better texture in your cookies. Don’t Overmix the Dough: When combining wet and dry ingredients, mix just until combined to keep the cookies soft and chewy. Overmixing can lead to tough cookies. Chill the Dough for Extra Flavor: If time allows, chill the cookie dough for 30 minutes before baking. This helps the flavors develop and can lead to thicker cookies. Customize Your Mix-Ins: Feel free to substitute the strawberries and white chocolate chips with other fruits or nuts, such as blueberries, raspberries, or pecans, for a unique twist. {{image_4}} You can switch out strawberries for other berries. Raspberries, blueberries, or blackberries work great too. Each berry brings a unique taste. Raspberries add tartness, while blueberries offer sweetness. Just chop them up and fold them into the dough, just like strawberries. If you need a gluten-free cookie, swap all-purpose flour for a gluten-free blend. Look for a blend that has xanthan gum. This helps the cookies hold together. Your cookie will still be soft and tasty. For extra crunch, add nuts like walnuts or pecans. Chop them finely and mix them in. You can also add shredded coconut for a tropical twist. It adds chewiness and flavor. Just fold in about half a cup to keep the balance right. If you want to cut down on sugar, use natural sweeteners. Try honey or maple syrup in place of granulated sugar. Adjust the amount since they are sweeter than sugar. Always taste your dough! You want it perfect before baking. To keep your strawberry cheesecake cookies fresh, store them in an airtight container. This will help lock in moisture and prevent them from drying out. Make sure the cookies are completely cool before placing them in the container. You can layer parchment paper between layers of cookies to avoid sticking. You can freeze these cookies for later enjoyment. First, let them cool completely. Then, place them in a single layer on a baking sheet. Freeze them for about an hour. Once frozen, transfer the cookies to a freezer-safe bag or container. They can last up to three months in the freezer. To maintain freshness, keep cookies at room temperature for up to a week. Make sure to store them away from direct sunlight and heat. If you live in a humid area, consider refrigerating them to prevent spoiling. Always check for any signs of mold before eating. Reheat your cookies for a few seconds in the microwave. Place one cookie on a microwave-safe plate. Heat it for about 10-15 seconds or until warm. This will bring back the soft texture. You can also use an oven. Preheat it to 350°F (175°C) and warm the cookies for about 5-7 minutes. Enjoy them warm for the best taste! Yes, you can use frozen strawberries. Thaw them first and drain any extra liquid. This helps keep the cookie dough from getting too wet. Fresh strawberries give a better taste and texture, but frozen work in a pinch. Check your cookies at 10 minutes. They should be light golden brown on the edges. The centers may look a bit soft, but that’s normal. They will firm up as they cool. You can use mascarpone or ricotta cheese as a substitute. Both provide a creamy texture. The flavor will change slightly, but they will still taste good. One cookie has about 120 calories. It contains 5 grams of fat, 20 grams of carbs, and 1 gram of protein. This may vary based on your ingredients and portion sizes. Store leftover cookies in an airtight container. They will stay fresh for about 5 days at room temperature. You can freeze them for up to 3 months for longer storage. You learned about cookies made with cream cheese and fresh strawberries. I provided detailed steps on mixing ingredients, baking, and cooling. I shared tips to make the process easy and enjoyable. You can also explore different berry options and storage tips to keep your cookies fresh. Remember, baking is fun and allows for creativity. Experiment with flavors and enjoy your tasty treats! Try these cookies yourself, and share with friends for a delightful experience.

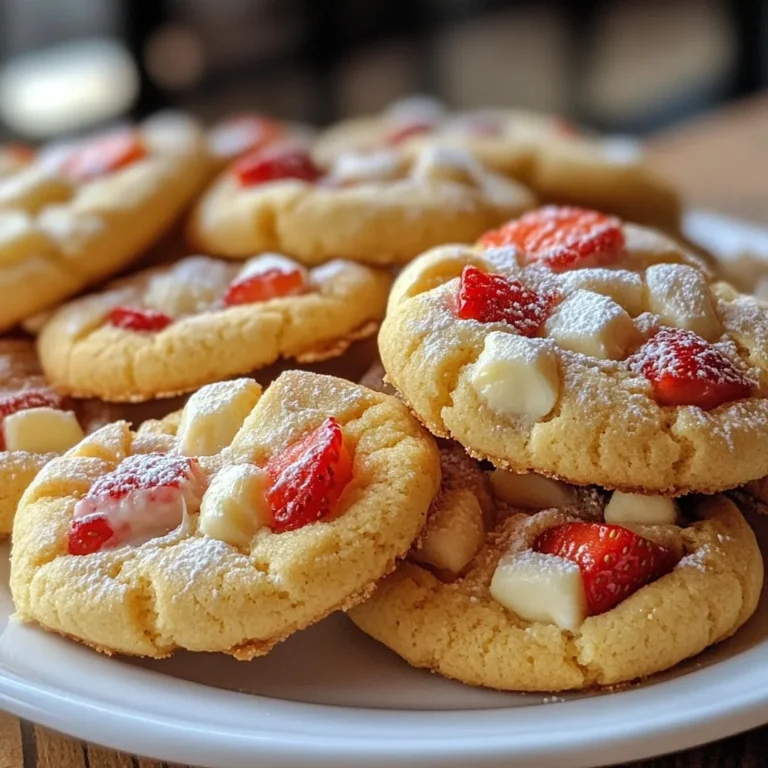
Strawberry Cheesecake Cookies Sweet Delight Recipe

To make Iced Cherry Chai, you need the following items: - 2 cups water - 2 tablespoons loose black tea or 2 black tea bags - 1 tablespoon chai spice blend (cinnamon, cardamom, ginger, cloves) - 1 cup fresh or frozen cherries, pitted - 1/4 cup honey or maple syrup (adjust to taste) - 1 cup milk (dairy or non-dairy like almond or oat milk) - Ice cubes - Fresh mint leaves, for garnish You can swap some ingredients if needed: - Use green tea instead of black tea for a lighter taste. - Substitute agave syrup for honey or maple syrup for a vegan option. - Try coconut milk for a tropical twist. - If you don’t have cherries, use raspberries or strawberries as a fun alternative. Choosing quality ingredients makes a big difference: - Pick fresh cherries when in season for the best flavor. - Select a good quality black tea for a rich base. - For spices, use whole spices when possible. They provide a stronger taste. - Always choose organic or local products when you can. This supports sustainability and adds great flavor. {{ingredient_image_2}} Start by boiling 2 cups of water in a medium saucepan. Once it boils, add 2 tablespoons of loose black tea or 2 black tea bags. Then, mix in 1 tablespoon of chai spice blend. Let this steep for 5 to 7 minutes. It should smell great! This step gives your chai a rich flavor. In a separate small saucepan, pit your cherries. Use 1 cup of fresh or frozen cherries. Add them to the saucepan with a quarter cup of honey or maple syrup. Pour in a splash of water to help. Heat this gently on medium heat for about 5 to 7 minutes. Stir it occasionally. The cherries will soften and create a lovely sauce. After steeping, strain the chai into a pitcher. Allow it to cool for about 10 to 15 minutes. Once it’s cool, mix the cherry sauce into the chai, stirring well. Adjust the sweetness if needed. To serve, take a tall glass and fill it with ice cubes. Pour the cherry chai mixture over the ice, filling it about three-quarters full. Top it off with your choice of milk. Stir lightly to blend. For a nice finish, garnish with fresh mint leaves. Enjoy your refreshing Iced Cherry Chai! When making iced cherry chai, avoid these common mistakes: - Oversteeping the Tea: Steep your tea for only 5-7 minutes. Longer brewing can make it bitter. - Ignoring Sweetness: Taste your drink before serving. Adjust the sweetness to your liking. - Missing Ice: Don’t forget to add enough ice. It keeps your drink cold and refreshing. To make your iced cherry chai even better, try these tips: - Add Citrus: A splash of lemon or lime juice brightens the flavors. - Spice It Up: Add a pinch of nutmeg or star anise to your chai spice blend for extra warmth. - Use Different Sweeteners: Experiment with agave nectar or brown sugar instead of honey. For a stunning iced cherry chai, follow these steps: - Use Clear Glasses: Show off the lovely colors and layers of your drink. - Garnish with Fresh Mint: Place mint leaves on top. They add a pop of color and fresh aroma. - Top with a Cherry: Add a cherry on top for a fun and vibrant touch. These tips will help you create a delicious and visually appealing iced cherry chai that everyone will love! Pro Tips Use High-Quality Tea: Opt for loose leaf black tea for a richer flavor compared to tea bags. Adjust Sweetness to Taste: Start with less sweetener and gradually add more until you achieve your desired taste. Experiment with Spices: Feel free to adjust the chai spice blend to suit your preferences, adding more cinnamon or cardamom as desired. Chill the Tea Properly: Ensure the brewed tea cools completely before mixing with the cherry sauce for the best flavor integration. {{image_4}} You can choose different milks for your Iced Cherry Chai. Dairy milk gives a rich flavor. Almond milk adds a nutty twist. Oat milk is creamy and slightly sweet. Coconut milk makes it tropical. Soy milk is a great choice for a protein boost. Each option changes the drink's taste and texture. Try them all to find your favorite! Fruits can brighten up your Iced Cherry Chai. In summer, use fresh raspberries or peaches. They add a burst of flavor and color. In fall, think about using apples. They pair well with chai spices. In winter, pomegranate seeds offer a tart kick. These seasonal fruits keep the drink exciting all year round! Adding herbs and spices can enhance your Iced Cherry Chai. Fresh mint leaves give a cool touch. Basil adds a sweet, aromatic flavor. For a spicy twist, try a pinch of cayenne or black pepper. You can also add a little vanilla or almond extract for depth. These additions create a unique drink that surprises the taste buds. After making your cherry sauce, let it cool. Place it in an airtight container. You can store it in the fridge for up to one week. For longer storage, freeze it in small portions. This way, you can use it in other recipes or drinks later. If you have leftover brewed tea, cool it to room temperature first. Pour it into a clean, airtight container. Keep it in the fridge for up to three days. When ready to use, check the flavor and smell. If it seems off, it's best to make a fresh batch. Once you make your Iced Cherry Chai, it's best to drink it fresh. If you have leftovers, store them in the fridge. Use a sealed bottle or jar to keep it cold. Enjoy within two days for the best taste. When ready to drink, add a few fresh ice cubes. This helps keep it nice and cool. Iced Cherry Chai is a refreshing drink made from black tea and cherries. It combines the warm flavors of chai spices with sweet cherries. The drink is served cold, making it perfect for hot days. You brew black tea, add chai spices, and mix it with a cherry sauce. Finally, you pour it over ice and add milk. You can customize your Iced Cherry Chai in many ways. Here are some ideas: - Sweeteners: Use honey, maple syrup, or even agave for sweetness. - Milk Options: Choose dairy, almond, oat, or coconut milk based on your taste. - Spices: Try adding nutmeg or vanilla for a unique flavor twist. - Fruits: Replace cherries with strawberries, raspberries, or peaches for different tastes. - Herbs: Add fresh basil or rosemary for a herbal touch. Iced Cherry Chai offers several health benefits: - Antioxidants: Black tea is rich in antioxidants, which help fight free radicals in your body. - Cherries: They are full of vitamins and can reduce inflammation. - Spices: Chai spices like ginger and cinnamon can aid digestion and boost metabolism. - Hydration: This drink keeps you hydrated, especially during warm weather. You can find Cherry Chai ingredients in many places: - Grocery Stores: Most supermarkets carry black tea, chai spices, and cherries. - Health Food Stores: Look for organic cherries and specialty spices here. - Online: Websites like Amazon or local delivery services offer all these items. - Farmers’ Markets: Fresh, seasonal cherries and local honey can often be found here. You now have all the tools to create a delicious Iced Cherry Chai. We covered the best ingredients, tips for brewing, and ways to enhance flavor. I shared common mistakes to avoid and fun variations to try. Finally, I included storage tips so you enjoy every drop. Remember, experimenting will help you find your perfect blend. Enjoy your drink, and share it with friends!

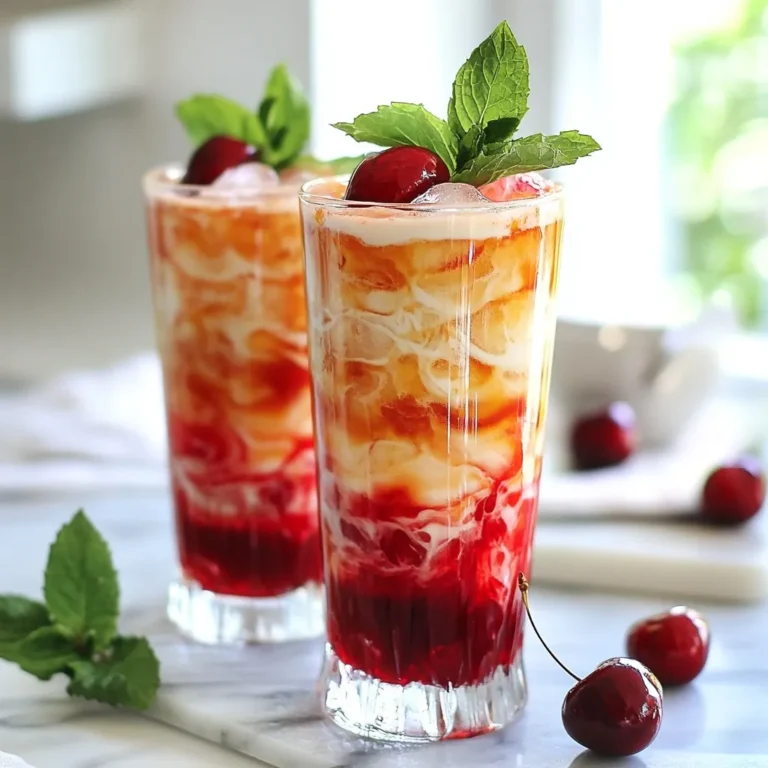
Iced Cherry Chai Refreshing and Simple Recipe

- 1 cup all-purpose flour - 1/2 teaspoon baking soda - 1 teaspoon ground ginger - 1 teaspoon ground cinnamon - 1/4 teaspoon ground cloves - 1/4 teaspoon nutmeg - 1/4 teaspoon salt - 1/2 cup unsalted butter, softened - 3/4 cup packed brown sugar - 2 large eggs - 1/2 cup unsulfured molasses - 1 teaspoon pure vanilla extract - 8 oz chocolate melts (dark or white) - Assorted sprinkles for decoration The main star is unsulfured molasses. It gives the cake its rich flavor and moist texture. Ground spices like ginger, cinnamon, and cloves add warmth and holiday cheer. The butter helps create a soft crumb, while brown sugar brings sweetness and depth. Eggs bind everything, giving structure. Using chocolate melts makes coating easy. They melt smoothly and harden well. Sprinkles add fun, color, and a festive touch. If you need to swap ingredients, here are some easy options: - All-purpose flour: Use gluten-free flour for a gluten-free version. - Unsalted butter: You can use coconut oil or margarine. - Brown sugar: White sugar works, but you’ll lose some flavor. - Molasses: Honey or maple syrup can replace molasses, but the taste will change. - Chocolate melts: Use real chocolate, but temper it for best results. These swaps can help you tailor the recipe to your needs while still keeping it delicious. {{ingredient_image_2}} First, gather your ingredients. You need: - 1 cup all-purpose flour - 1/2 teaspoon baking soda - 1 teaspoon ground ginger - 1 teaspoon ground cinnamon - 1/4 teaspoon ground cloves - 1/4 teaspoon nutmeg - 1/4 teaspoon salt - 1/2 cup unsalted butter, softened - 3/4 cup packed brown sugar - 2 large eggs - 1/2 cup unsulfured molasses - 1 teaspoon pure vanilla extract - 8 oz chocolate melts - Assorted sprinkles Next, preheat your oven to 350°F (175°C). Line an 8x8 inch pan with parchment paper. Leave some paper hanging over the edges. This helps when you remove the cake. In a medium bowl, mix together the flour, baking soda, ginger, cinnamon, cloves, nutmeg, and salt. Whisk until everything is well combined. Set this bowl aside for later. In a large mixing bowl, cream the softened butter with brown sugar. Use an electric mixer on medium speed. Mix for 2-3 minutes until it’s light and fluffy. Add the eggs, one at a time, beating well after each. Then, mix in the molasses and vanilla extract until smooth. Gradually add the dry flour mixture to the wet ingredients. Stir gently until just combined. Do not overmix. This keeps your cake soft and tender. Pour the batter into your prepared pan. Use a spatula to smooth out the top. Bake for 25-30 minutes. Check with a toothpick. It should come out clean when the cake is done. Let the cake cool completely in the pan. After cooling, crumble the cake into fine crumbs using your hands or a fork in a large bowl. Take small amounts of the cake crumbs and roll them into balls about 1 inch wide. Place each ball on a lined baking sheet. Melt the chocolate melts according to package directions. You can use a microwave-safe bowl or a double boiler for this. Dip the tip of each lollipop stick into the melted chocolate. Then, insert the stick into the center of each cake ball. This helps keep the stick in place. Refrigerate the cake pops for 15-20 minutes. This helps them firm up. Once set, coat each cake pop in the melted chocolate. Make sure they are fully covered. Place them back on the lined baking sheet. Before the chocolate hardens, sprinkle your favorite decorations on top. Let the cake pops cool completely at room temperature or chill them in the fridge until the chocolate sets. When making gingerbread cake pops, some common mistakes can ruin your fun. One issue is overmixing the batter. This can make the cake tough, not soft. Always mix until just combined. Another mistake is not cooling the cake completely before crumbling. If it’s warm, you get clumps, not fine crumbs. Lastly, don’t skip refrigerating the cake balls before coating. This step helps the pops hold their shape. Decorating your gingerbread cake pops can be a joyful task! You can use assorted sprinkles for a festive touch. Try using red and green sprinkles for Christmas. Drizzle melted white chocolate over dark chocolate for a nice contrast. You can also use edible glitter for a sparkly look. If you want more fun, add small candy pieces or mini marshmallows on top. Get creative and enjoy the process! Getting the right consistency for your cake pops is key. When mixing your cake batter, ensure the wet and dry ingredients blend well. The mixture should be moist but not runny. After crumbling, the cake should hold together easily when shaped into balls. If it’s too dry, you can add a bit of melted chocolate to help. For coating, melt the chocolate until it’s smooth and fluid. This helps create a nice, even layer on your pops. Pro Tips Chill the Cake Balls: After forming the cake balls, chill them for a while before dipping them in chocolate. This helps them maintain their shape and prevents them from falling apart during the coating process. Use Quality Chocolate: Opt for high-quality chocolate melts for a smoother finish and better flavor. Dark chocolate pairs beautifully with the spices in gingerbread, while white chocolate adds a nice contrast. Experiment with Flavors: Add a pinch of orange zest or a splash of coffee to the cake batter for a unique twist. These flavors complement the spices and enhance the overall taste. Decorate Creatively: Get creative with your sprinkles and toppings. Use edible glitter, crushed candy canes, or even drizzle contrasting chocolate over the pops for a festive touch. {{image_4}} To make gluten-free gingerbread cake pops, swap all-purpose flour for gluten-free flour. Use a blend that works well for baking. I recommend a mix of rice flour, potato starch, and tapioca flour. This change keeps the cake soft and tasty. Follow the same recipe steps and enjoy the same warm spices. While chocolate melts are popular, you can try other coatings. Candy melts come in many colors and flavors. White chocolate adds a sweet touch, while dark chocolate gives a rich taste. You can also use yogurt coating for a tangy twist. Simply melt your choice and coat the cake pops as usual. Get creative with seasonal flavors. Add orange zest for a bright kick or a hint of peppermint for winter cheer. You can mix in chopped nuts or dried fruits for texture. Each variation brings a unique taste to your cake pops. Experiment with spices like cardamom or nutmeg for added warmth. To store your gingerbread cake pops, place them in an airtight container. Make sure to add parchment paper between layers to avoid sticking. Store them at room temperature for up to three days. If you live in a warm area, refrigerate them to keep them fresh longer. You can freeze gingerbread cake pops for later enjoyment. First, place them on a baking sheet and freeze until solid. This usually takes about one hour. Once frozen, transfer them to a freezer-safe bag. They can last for up to three months in the freezer. Just remember to thaw them in the fridge before serving. - Avoid moisture: Keep cake pops in a dry area to prevent sogginess. - Limit exposure: Only take out what you need to keep the rest fresh. - Decorate before serving: Add sprinkles just before serving for a fresh look. These tips will help your gingerbread cake pops stay tasty and fun for any holiday gathering! You can check the cake by inserting a toothpick into the center. If it comes out clean, the cake is done. The edges will also pull away from the pan slightly. Remember, every oven is different, so keep an eye on your cake around the 25-minute mark. Yes, you can prepare the cake pops ahead of time. After forming the balls, you can store them in the fridge for up to three days. Just coat them in chocolate before serving. This makes them perfect for holiday parties! You can use regular chocolate chips if you prefer. Just melt them slowly to avoid burning. White chocolate or candy coating also works well. If you want a fun twist, try using colored candy melts for a festive look! I covered ingredients, steps, tips, and variations for making cake pops. Remember, use quality ingredients for the best flavor. Avoid common mistakes to make sure your cake pops are a hit. Experiment with different flavors and coatings to keep things fun. Store them properly to enjoy their fresh taste longer. With these tricks, you will create delicious cake pops every time. Now, go ahead and try these ideas and impress your friends and family!

Gingerbread Cake Pops Delightful Holiday Treats

To make a fluffy German oven pancake, you need a few simple ingredients. Here’s what you will need: - 4 large eggs - 1 cup whole milk - 1 cup all-purpose flour - 1 teaspoon pure vanilla extract - 1/2 teaspoon fine sea salt - 1/4 cup unsalted butter - Powdered sugar for dusting - Fresh fruits (like mixed berries or sliced bananas) for topping - Maple syrup for drizzling Each ingredient plays a key role in creating a light and airy pancake. The eggs give structure and lift, while the milk adds moisture. The flour helps bind it all together. Vanilla adds a lovely aroma, and salt enhances the flavor. Butter is crucial for that golden crust and rich taste. When you top your pancake with fresh fruits and syrup, it becomes a delightful treat. You can mix and match toppings based on what you like. Fresh berries add a tart burst, while bananas bring sweetness. Enjoy exploring different combinations! {{ingredient_image_2}} Start by preheating your oven to 425°F (220°C). Use a 9x13 inch baking dish or an oven-safe skillet. Place it in the oven while it heats. This helps the pancake rise well. In a medium mixing bowl, crack in 4 large eggs. Whisk them until they are frothy. Slowly add 1 cup of whole milk. Next, add 1 cup of all-purpose flour, 1 teaspoon of pure vanilla extract, and 1/2 teaspoon of fine sea salt. Continue whisking until the batter is smooth and lump-free. Set the bowl aside for now. Carefully take out the hot baking dish or skillet from the oven using oven mitts. Be very careful; it is hot! Add 1/4 cup of unsalted butter to the dish. Tilt and swirl the dish gently until the butter melts and bubbles. Pour the batter into the hot, buttered dish right away. Close the oven door quickly. This keeps the heat in. Bake for 20-25 minutes. Do not open the oven door during this time or the pancake may fall. After 20-25 minutes, check if the pancake is puffed and golden-brown. When done, take it out of the oven. Let it cool a bit before dusting with powdered sugar. Slice the fluffy pancake into wedges. Top each piece with fresh fruits like mixed berries or sliced bananas. Drizzle with maple syrup for extra sweetness. Enjoy your delicious Fluffy German Oven Pancake! To make your German oven pancake fluffy, start with room-temperature eggs. Cold eggs can lead to a dense pancake. Whisk the eggs until frothy. This adds air, helping the pancake rise. Use a hot baking dish with melted butter. The batter needs this heat to puff up. Pour the batter in quickly. This keeps the heat from escaping. Lastly, avoid opening the oven door while baking. Air loss will deflate your pancake. One common mistake is not preheating the baking dish. A cold dish will not create a good rise. Another mistake is over-mixing the batter. Mix just until smooth; lumps are okay. Also, do not open the oven door too soon. This can let out heat and cause the pancake to fall. Lastly, remember to check the baking time. Every oven is different, and timing matters. For mixing, use a large bowl and a whisk. This will help you get a smooth batter. A rubber spatula is great for scraping the bowl. Use a 9x13 inch baking dish or an oven-safe skillet. Both work well for baking. Oven mitts are essential for handling hot dishes. They keep you safe from burns while you bake. Pro Tips Use Room Temperature Ingredients: Allow your eggs and milk to come to room temperature before mixing. This helps to create a smoother batter and contributes to a fluffier pancake texture. Don’t Open the Oven Door: Resist the urge to peek while the pancake is baking. Opening the oven door can cause the pancake to deflate. Keep it closed until it’s time to check for doneness. Experiment with Flavors: Feel free to add spices like cinnamon or nutmeg to the batter for an extra flavor kick. You can also substitute the vanilla with almond extract for a different taste profile. Serving Suggestions: For a delightful presentation, serve with a variety of toppings such as yogurt, honey, or a sprinkle of nuts along with the fruits and syrup. {{image_4}} You can add spices to boost flavor. Consider using cinnamon or nutmeg. A dash of almond extract gives a nice touch too. For a citrus twist, try adding lemon zest. Each of these simple additions makes your pancake unique. Fresh fruits can change your pancake game. Try using strawberries, peaches, or apples. You can also mix berries for a colorful topping. Nuts, like sliced almonds or walnuts, add crunch. For sweetness, drizzle honey or agave syrup on top. If you need gluten-free options, use a gluten-free flour blend. For dairy-free, replace whole milk with almond or oat milk. You can use coconut oil instead of butter for a dairy-free base. These swaps keep the pancake tasty while fitting your diet. To store your leftover Fluffy German Oven Pancake, let it cool first. Place it in an airtight container. You can refrigerate it for up to three days. Make sure to cover it well to keep it fresh. When you are ready to enjoy your leftovers, reheating is key. Preheat your oven to 350°F (175°C). Place the pancake on a baking sheet. Heat it for about 10 minutes or until warm. This keeps the pancake fluffy and tasty. You can freeze the pancake for later use. Cut it into slices and wrap each piece in plastic wrap. Then, place the wrapped slices in a freezer-safe bag. This way, you can enjoy it for up to two months. To thaw, take a slice out and let it sit in the fridge overnight. Reheat as mentioned above. Enjoy your pancake anytime! A Fluffy German Oven Pancake is a large, puffy pancake baked in the oven. It is light and airy, thanks to the eggs. When cooked, it puffs up around the edges and has a soft center. This pancake is often served for breakfast or brunch. It pairs perfectly with sweet toppings like fruit and syrup. Yes, you can prep some parts ahead. You can mix the batter and store it in the fridge for up to two hours. Just before baking, melt the butter in the hot dish. Pour in the batter and bake. This keeps the pancake fluffy and fresh. You can serve this pancake with many tasty sides. Fresh fruits like berries or bananas add color and flavor. Maple syrup drizzled on top gives it sweetness. You might also enjoy it with yogurt or whipped cream for a creamy touch. For drinks, coffee or fresh juice works well. Absolutely! You can adjust the recipe to fit any baking dish. For smaller servings, use an 8x8 inch dish. This will make a thicker pancake. If you want a larger pancake, use a bigger dish like a 10x15 inch one. Just keep an eye on the baking time, as it may change. In this blog post, we explored how to make a fluffy German oven pancake with simple ingredients. You learned step-by-step instructions for mixing, baking, and serving. Tips on achieving the best texture and avoiding common mistakes were discussed. We also covered fun variations, storage methods, and answers to frequently asked questions. Now, you can enjoy this delicious pancake anytime. With a bit of practice, you’ll impress your family and friends. Happy cooking!

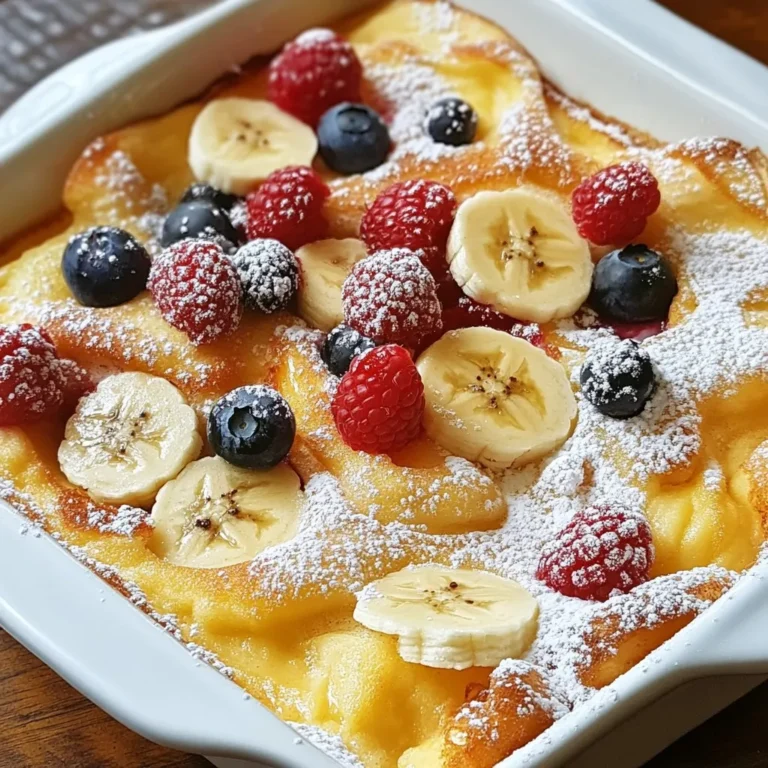
Fluffy German Oven Pancake Simple and Delicious Recipe

- 2 large chicken breasts - 1 cup pretzel crumbs (finely crushed pretzels) - 1/2 cup all-purpose flour - 1 large egg, beaten - 1 tablespoon Dijon mustard - 2 tablespoons honey - 1 teaspoon garlic powder - 1 teaspoon onion powder - Salt and pepper, to taste - Olive oil spray for lightly coating Each ingredient plays a key role in the flavor and texture of the dish. The chicken breasts give the meal its protein base. Pretzel crumbs add a crunchy, salty coating. Flour helps the egg mixture stick to the chicken. Dijon mustard and honey create a sweet and tangy flavor that makes this dish special. If you need to make changes, here are some ideas: - Chicken thighs instead of breasts for a juicier bite. - Gluten-free pretzel crumbs for a gluten-free option. - Honey mustard can be replaced with barbecue sauce for a different taste. - Use almond flour if you want a nutty flavor and texture. These swaps can help you cater to your taste or dietary needs while keeping the dish delicious. When buying ingredients, look for these signs: - Chicken should be pink and firm, not slimy or discolored. - Pretzels should be crunchy and fresh, not stale. - Eggs should have smooth, uncracked shells. - Check the flour for any pests or lumps, ensuring it’s fresh. Choosing quality ingredients can make your Honey Mustard Pretzel Chicken even better. {{ingredient_image_2}} To make honey mustard pretzel chicken, gather all your ingredients first. You need two large chicken breasts, pretzel crumbs, flour, and an egg. You also need Dijon mustard, honey, garlic powder, onion powder, salt, and pepper. This dish takes about 15 minutes to prep and 30 minutes to bake. 1. Preheat your oven to 400°F (200°C). Line a baking sheet with parchment paper. This helps with cleanup and keeps the chicken from sticking. 2. In a shallow bowl, mix pretzel crumbs, garlic powder, onion powder, and a pinch of salt and pepper. Stir well so everything is mixed. 3. Take another bowl and add flour with a sprinkle of salt and pepper. Mix it well too. 4. In a third bowl, beat the egg. Whisk in Dijon mustard and honey until smooth. 5. Take one chicken breast and coat it in the flour mixture. Shake off extra flour. 6. Dip the chicken into the honey mustard egg mix. Make sure it’s well coated and let excess drip back. 7. Now, press the chicken into the pretzel crumbs. Make sure it’s fully coated. Gently press down to help crumbs stick. 8. Place the coated chicken on the baking sheet. Lightly spray the tops with olive oil for a crispy finish. 9. Bake the chicken for 25-30 minutes. It should be golden brown and cooked through. 10. Use a meat thermometer to check that the chicken is 165°F (75°C) inside. 11. Once done, take the chicken out and let it rest for 5 minutes before slicing. This helps keep the juices in. - Prep Time: 15 minutes - Total Baking Time: 25-30 minutes - Oven Temperature: 400°F (200°C) This dish is easy and fun to make. Enjoy every crispy, flavorful bite! To get that perfect crispy coating, you need to follow a few steps. Start with dry chicken. Pat the chicken breasts with a paper towel. This helps the coating stick better. Use fresh pretzel crumbs. Crush them finely for an even texture. Mix the pretzel crumbs with garlic and onion powders for extra flavor. Don't skip the olive oil spray. A light coating helps it get golden and crisp. Bake at 400°F (200°C). This high heat ensures a crunchy texture while keeping the chicken juicy. Using the right tools makes cooking easier. Here are some must-haves: - Baking sheet - Parchment paper - Shallow bowls for coating - Meat thermometer to check chicken doneness These tools help you create a great dish with less mess and stress. Avoid these common mistakes for the best results. First, don’t rush the dredging steps. Each coating needs to stick well for crunch. Second, don’t overcrowd the baking sheet. Give each chicken piece space to cook evenly. Lastly, skip the thermometer at your own risk. Always check the internal temperature. It should reach 165°F (75°C) to ensure safety and tastiness. Pro Tips Use Fresh Ingredients: Fresh chicken and high-quality honey and mustard will elevate the flavor of your dish significantly. Adjust the Crunch: For extra crunch, consider adding crushed nuts to the pretzel crumb mixture. Experiment with Spices: Feel free to customize the seasoning by adding your favorite spices, such as paprika or cayenne pepper, for a kick. Rest Before Serving: Allowing the chicken to rest after baking helps retain moisture, resulting in juicier meat. {{image_4}} You can change the coating for this dish to suit your needs. If you want a gluten-free option, use gluten-free panko instead of pretzel crumbs. This can help you enjoy the same crunch. You can also try crushed cornflakes for a light and airy texture. Another fun option is using crushed tortilla chips to add a different flavor. Each option offers a unique twist to the classic recipe. To boost the flavor, consider adding spices to the pretzel mixture. A teaspoon of smoked paprika can add depth. You might also try a pinch of cayenne for some heat. If you love herbs, consider adding dried thyme or oregano. These small additions can take your chicken to a new level of taste. You can experiment with different combinations to find what you like best. Serving this chicken with sides can enhance your meal. A vibrant salad with mixed greens, cherry tomatoes, and cucumber pairs well. The freshness of the salad balances the crispy chicken. Another great side is roasted vegetables, like asparagus or broccoli. You can also serve it with a small bowl of honey mustard for dipping. This adds extra flavor and fun to your plate. To keep your Honey Mustard Pretzel Chicken fresh, store any leftovers in an airtight container. Place the chicken in the fridge as soon as it cools down. It will last up to three days. If you have extra pretzel crumbs, keep them in a separate container to maintain their crunch. When reheating, use an oven for the best results. Preheat the oven to 350°F (175°C). Place the chicken on a baking sheet and cover it with foil. Heat for about 15 minutes or until it is warm. This helps maintain the crispy coating. You can also use an air fryer for a quick reheat. Set it at 350°F and cook for about 5 minutes. If you want to save some for later, freezing is a great option. Wrap each piece of chicken tightly in plastic wrap, then place them in a freezer-safe bag. They can last up to three months in the freezer. When ready to eat, thaw in the fridge overnight before reheating. Honey mustard chicken is a tasty dish made with chicken, honey, and mustard. The chicken gets a sweet and tangy flavor from the honey and Dijon mustard mix. In this recipe, we coat the chicken in crushed pretzels, giving it a crunchy texture. This dish is both fun to make and delicious to eat. Yes, you can use chicken thighs instead of breasts. Thighs are juicy and flavorful. Just remember to adjust the cooking time. Thighs may take a bit longer to cook fully. Check the internal temperature to ensure it reaches 165°F (75°C). You can tell the chicken is done by using a meat thermometer. Insert it into the thickest part of the chicken. The safe internal temperature is 165°F (75°C). If you don’t have a thermometer, cut into the chicken. The meat should be white, not pink. Yes, this recipe is great for meal prep! You can cook the chicken ahead of time and store it. Just let it cool completely before putting it in the fridge. It will last for about three days. You can reheat it in the oven to keep it crispy. Some tasty side dishes to pair with this chicken are: - Mixed green salad - Roasted vegetables - Mashed potatoes - Steamed broccoli - Sweet potato fries These sides add color and flavor to your meal. They also balance the sweetness of the chicken. This post covered all you need to create Honey Mustard Pretzel Chicken. We discussed fresh ingredients, detailed cooking steps, and helpful tips. Remember to avoid common mistakes for the best results. Feel free to explore different coating options and flavor boosts for a unique twist. Storing leftovers correctly can keep your meal tasty for longer. With this recipe, you’ll impress your family and friends. Now, it’s time to cook up something delicious!

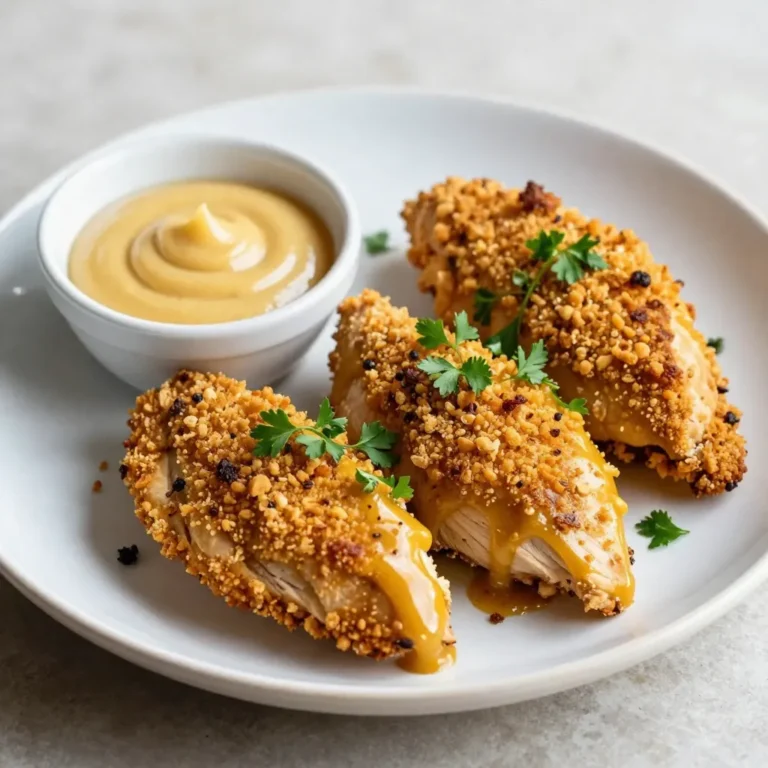
Honey Mustard Pretzel Chicken Crispy and Flavorful Dish

- 1 pound ground beef - 1 cup breadcrumbs - 1/2 cup grated Parmesan cheese - 1/2 cup shredded mozzarella cheese To start, ground beef is the base of our meatloaf. It gives the dish flavor and juiciness. I like to use a mix of cheeses. Parmesan adds a sharp taste, while mozzarella makes it creamy and rich. - 1 small onion, finely chopped - 2 cloves garlic, minced - 1/4 cup fresh parsley, chopped - 1 tablespoon Worcestershire sauce - 1 teaspoon dried oregano - 1 teaspoon dried thyme - 1 teaspoon salt - 1/2 teaspoon black pepper Next, we need some veggies. Onion and garlic add sweetness and aroma. Fresh herbs like parsley make the dish bright and fresh. Worcestershire sauce brings a deep flavor. Oregano and thyme add warmth to every bite. - 1 cup ketchup - Optional garnishes (like fresh parsley) Finally, for the topping, we use ketchup. It gives a sweet and tangy glaze. You can add fresh parsley on top for a nice color. This simple garnish makes the dish look inviting. {{ingredient_image_2}} - First, set your oven to 350°F (175°C). This ensures a great bake. - Grab a 9x5-inch loaf pan. Grease it well to prevent sticking. - In a big bowl, combine 1 pound of ground beef with 1 cup of breadcrumbs. - Add 1 small finely chopped onion and 2 minced garlic cloves. - Mix in 1/2 cup of grated Parmesan and 1/2 cup of shredded mozzarella cheese. - Next, toss in 1/4 cup of chopped fresh parsley. - Crack in 2 large eggs and pour in 1 tablespoon of Worcestershire sauce. - Don’t forget 1 teaspoon each of dried oregano and dried thyme, plus 1 teaspoon of salt and 1/2 teaspoon of black pepper. - Use your hands or a fork to mix. Be gentle; overmixing makes it tough. - Shape the mixture into a loaf. Place it in the greased pan. - Spread 1 cup of ketchup on top. This adds a tasty glaze. - Bake in the preheated oven for 45-55 minutes. It’s done when it hits 160°F (70°C). - Let it rest for 10 minutes before slicing. This keeps it juicy. - Serve warm, with extra ketchup and your favorite sides like mashed potatoes or veggies. - Use a food processor for quick chopping of onion and garlic. - Look for pre-mixed seasoning blends for meatloaf. These save time and add flavor. - To avoid a dry meatloaf, mix ingredients gently. Overmixing makes the loaf tough. - Let the meatloaf rest after baking. This step helps juices spread evenly, keeping it moist. - Serve slices on a bright platter; it makes the dish look more inviting. - Garnish with fresh parsley for color and freshness. Pair it with creamy mashed potatoes and green beans for a complete meal. Pro Tips Use Fresh Herbs: Fresh herbs like parsley add vibrant flavor to your meatloaf. If you can, use fresh instead of dried for a more aromatic dish. Resting Time is Key: Allowing the meatloaf to rest for 10 minutes after baking helps the juices redistribute, ensuring a moist and tender slice. Experiment with Cheese: Try adding different cheeses like cheddar or gouda for unique flavor profiles. Mixing cheeses can elevate the dish to new heights. Customize the Topping: Instead of plain ketchup, mix it with barbecue sauce or add a dash of hot sauce for an extra kick of flavor on top of your meatloaf. {{image_4}} You can easily change the meat in this recipe. Try ground turkey or chicken instead of beef. If you want a lighter option, consider ground lamb or pork for rich flavor. If you need dairy-free options, skip the cheese. Use a vegan cheese substitute to keep the creamy taste. You can also replace eggs with flaxseed meal mixed with water for binding. To boost flavor, add spices and herbs. Try garlic powder, paprika, or cumin for a kick. Fresh herbs like basil or rosemary can brighten the dish. You can also mix in vegetables for added texture and nutrients. Chopped bell peppers, grated carrots, or spinach blend well. These add moisture and flavor without extra work. While ketchup is common, you can use barbecue sauce for a sweet twist. For a tangy flavor, mix mustard with honey. Creative glazes can include a mixture of honey and soy sauce. This adds a tasty glaze that caramelizes nicely during baking. Experiment with flavors to find your favorite topping. - Meatloaf lasts about 3 to 4 days in the fridge. - Store it in an airtight container or wrap it tightly in plastic wrap. - To freeze meatloaf, let it cool completely first. - Wrap it in plastic wrap and then in foil. - It can last up to 3 months in the freezer. - To reheat, thaw it in the fridge overnight. - Heat in the oven at 350°F (175°C) until warmed through. - Turn leftover meatloaf into meatloaf sandwiches. - Chop it up for a tasty meatloaf hash with potatoes. - Use it in a meatloaf pizza for a fun twist. - For meal prep, cut into slices and pack with veggies for lunch. Cooking meatloaf usually takes about 45 to 55 minutes. You want it to reach 160°F (70°C) inside. This ensures it is safe to eat. Always check the center with a meat thermometer. Don’t rush; letting it rest for 10 minutes helps keep it juicy. Yes, you can make meatloaf ahead of time. Prepare it and shape it into a loaf. Wrap it well and store it in the fridge. It can stay fresh for up to 24 hours. You can also freeze it for longer storage. Just thaw it overnight in the fridge before cooking. Meatloaf pairs well with many sides. Here are some great options: - Mashed potatoes - Steamed green beans - Roasted carrots - Creamy coleslaw - Fresh garden salad These sides balance the meatloaf's rich flavors and make a complete meal. To make a tasty meatloaf, gather your ingredients carefully. Mix the ground beef with vegetables, seasonings, and breadcrumbs for the best flavor. Bake it in the oven and enjoy the smell filling your home. Remember, the right toppings can elevate your dish. If you follow these steps, you’ll create a meal everyone loves. Store leftovers properly for another delicious meal later. With these tips, you’ll always impress at the dinner table. Now it's your turn to create your own meatloaf masterpiece!

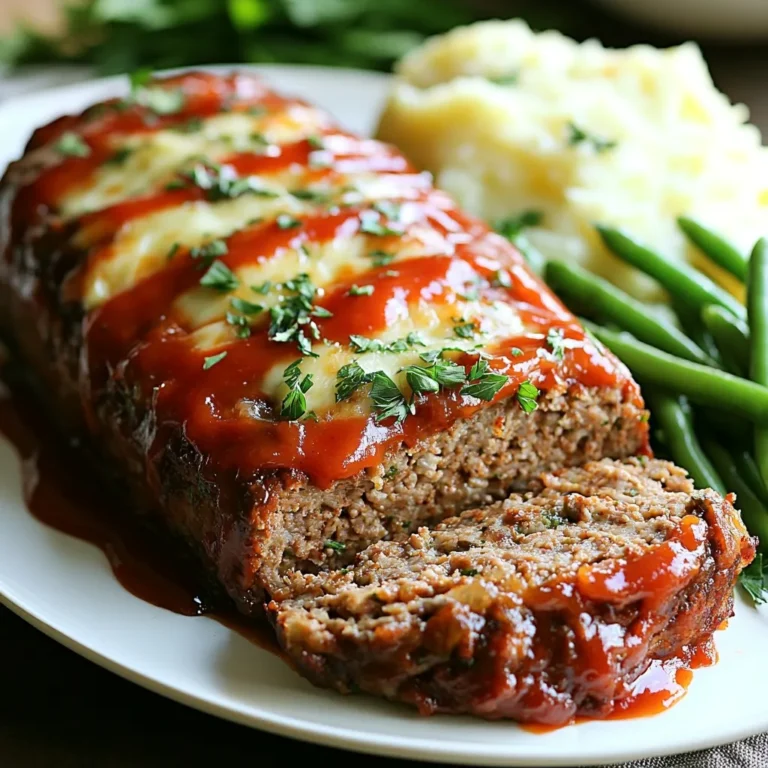
Easy Weeknight Meatloaf Quick and Tasty Recipe

To make classic deviled eggs, you will need a few simple items. Here’s what I use: - 6 large eggs - 3 tablespoons creamy mayonnaise - 1 teaspoon Dijon mustard - 1 teaspoon apple cider vinegar - 1/2 teaspoon garlic powder - 1/2 teaspoon smoked paprika (reserve a pinch for garnish) - 1/4 teaspoon cayenne pepper (or more for extra heat) - Salt, to taste - Fresh chives or parsley, finely chopped, for garnish These ingredients come together to create a tasty filling. The creamy mayo and mustard add richness. The vinegar gives a nice tang. Garlic powder and smoked paprika add depth, while cayenne brings a little kick. Fresh herbs finish the dish with color and flavor. Enjoy the blend of tastes that makes deviled eggs a classic treat. {{ingredient_image_2}} To start, take 6 large eggs and place them in a pot. Fill the pot with cold water until the eggs are fully covered. Turn the heat to medium-high. When the water starts to boil, cover the pot with a lid. Then, turn off the heat and let the eggs sit for 12 minutes. This method cooks the eggs without overcooking them. After 12 minutes, it’s time to cool the eggs quickly. Carefully move them into a bowl filled with ice water. Leave them there for about 5 minutes. This cooling step helps make peeling easier. When the eggs are cool, tap each one on a hard surface. Peel them under running water. The water helps loosen the shells, making peeling a breeze. Now, slice each egg in half from top to bottom. Use a small spoon to scoop out the yolks. Place the yolks in a mixing bowl. Next, add 3 tablespoons of creamy mayonnaise, 1 teaspoon of Dijon mustard, and 1 teaspoon of apple cider vinegar. Also, include 1/2 teaspoon of garlic powder, 1/2 teaspoon of smoked paprika, and 1/4 teaspoon of cayenne pepper. Sprinkle in a pinch of salt. Using a fork, mash these ingredients together. Keep mixing until the filling is smooth and creamy. This mixture should be thick but easy to pipe. It’s time to fill the egg whites! You can use a piping bag or a spoon for this step. If you want a neat look, a piping bag works best. Fill each egg white carefully with the yolk mixture. Make sure to fill them generously. For a great presentation, sprinkle a light dusting of smoked paprika on top of each egg. Finish by adding chopped fresh chives or parsley. This adds a pop of color and flavor. Arrange the deviled eggs on a pretty platter for serving. Enjoy your tasty creation! To avoid green yolks, keep the cooking time short. Boil the eggs for 12 minutes. Then, cool them quickly in ice water. This stops further cooking and keeps yolks bright yellow. When boiling eggs, use a medium-sized pot. Fill it with cold water, covering the eggs completely. Bring the water to a rolling boil over medium-high heat. Once boiling, turn off the heat and cover the pot. Let the eggs sit undisturbed for 12 minutes. If you live at a high altitude, adjust the cooking time. You may need an extra minute or two. For larger eggs, add an extra minute to the boiling time. You can customize spice levels easily with cayenne. Start with 1/4 teaspoon for mild heat. Add more if you like it hot. Try adding a dash of hot sauce for an extra kick. Chopped bacon, pickles, or fresh herbs also add flavor. Experiment with flavors you love! For leftovers, store deviled eggs in an airtight container. They stay fresh in the fridge for up to two days. If making in advance, prepare the filling but fill the egg whites just before serving. This keeps them looking nice and fresh. Pro Tips Egg Freshness: Use fresh eggs for the best flavor and texture. Older eggs tend to be easier to peel, but they may not have the same taste as fresher ones. Spice it Up: Adjust the amount of cayenne pepper to suit your heat preference. You can also experiment with different spices like curry powder or sriracha for a unique twist. Garnishing: For an elegant presentation, use a piping bag to fill the eggs. This will create a beautiful swirl and make your deviled eggs stand out at any gathering. Storage Tips: If you have leftover deviled eggs, store them in an airtight container in the refrigerator. They are best consumed within 2 days for optimal freshness. {{image_4}} You can easily mix up classic deviled eggs by swapping some ingredients. Here are a few ideas: - Chipotle: Add a dash of chipotle for a smoky kick. - Avocado: Use mashed avocado instead of mayonnaise for creaminess. - Bacon: Crumble crispy bacon into the filling for a crunchy bite. You can also play with herbs. Try adding fresh dill or cilantro for a fun twist. For a global flair, think about: - Sriracha: Add it for a spicy Asian vibe. - Curry Powder: This brings a warm flavor you’ll love. - Wasabi: A bold choice for fans of heat. Making deviled eggs look great is easy. Here are some fun plating tips: - Use a colorful serving platter to make the eggs pop. - Arrange them in a circle, or create a fun shape. - Try using small cups for individual servings. For garnishing, consider more than just chives or paprika: - Olives: Slice them for a classy touch. - Peppers: Small bits of bell pepper can add color. - Microgreens: These add a fresh look and taste. When serving, think about the occasion. For parties, add a small sign with the flavor. For brunch, pair them with fresh fruits. These ideas will make your deviled eggs stand out. To keep your deviled eggs fresh, store them in the fridge. Place them in an airtight container. This helps avoid drying out. If you do not have an airtight container, cover the plate with plastic wrap. For best results, eat deviled eggs within two days. The longer they sit, the less fresh they taste. Always check for any off-smells before eating. Can you freeze deviled eggs? No, freezing them is not ideal. The texture of the egg whites changes when frozen. However, you can freeze the filling. To do this, place the yolk mixture in a freezer-safe bag. Remove air before sealing the bag. Thaw the filling in the fridge overnight. This keeps it fresh and ready to use. When ready to serve, fill fresh egg whites with the thawed mixture. This way, you enjoy that creamy taste without the freezer effect. How long can deviled eggs sit out? Deviled eggs can sit out for about two hours. After that, they can spoil. Keep them cool to ensure they stay fresh. What can I substitute for mayonnaise? You can use Greek yogurt or avocado instead of mayonnaise. These options add flavor and creaminess. How do I know if the eggs are fresh? Fresh eggs sink in water. If they float, they are old and should not be eaten. Calories and nutritional breakdown per serving Each serving of deviled eggs has about 100 calories. They provide protein and healthy fats. Dietary adjustments (low-fat, vegan options) For a low-fat option, use less mayonnaise or yogurt. For vegan deviled eggs, try using mashed tofu or chickpeas. Serving size recommendations Typically, two halves per person is a good serving size. Adjust based on your guests and meal type. We explored how to make delicious deviled eggs using simple ingredients. I shared tips for boiling eggs perfectly and filling them smoothly. You learned about unique flavor variations and how to store leftovers safely. These eggs can be a tasty treat for any occasion. Remember, you can make them your own with spices or toppings. Enjoy trying new ideas as you prepare this classic dish!

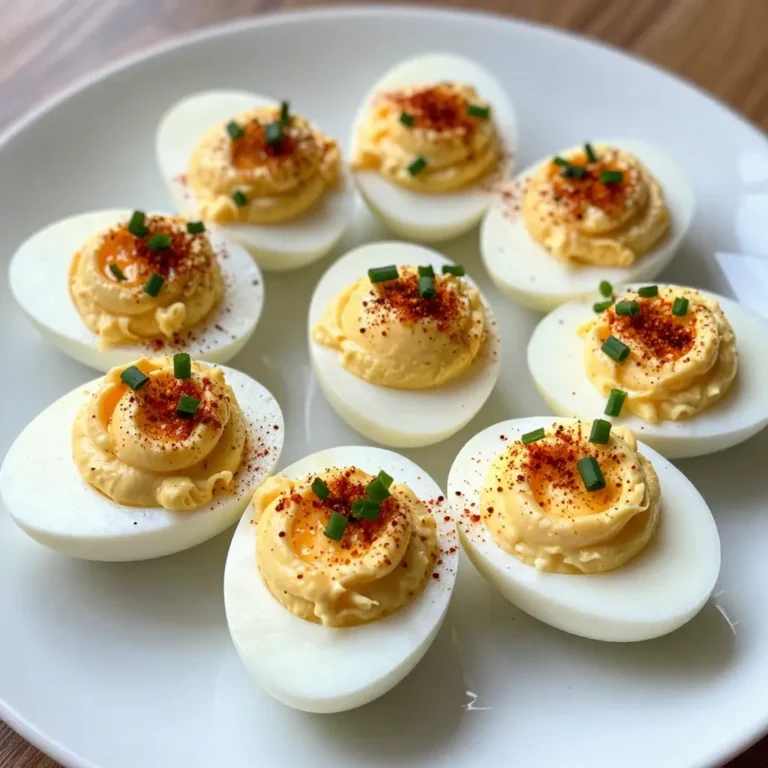
Classic Deviled Eggs Simple and Delicious Recipe

- 200g udon noodles - 3 tablespoons creamy peanut butter - 2 tablespoons soy sauce - 1 tablespoon rice vinegar - 1 tablespoon sesame oil (plus extra for sautéing) - 1 tablespoon honey or maple syrup - 1 red bell pepper, thinly sliced - 1 cup snap peas, trimmed - 2 green onions, sliced (green and white parts separated) - 1 tablespoon sesame seeds - Fresh cilantro for garnish (optional) - Lime wedges for serving This dish is quick and easy. It offers a mix of flavors and textures. The udon noodles provide a nice chew. The peanut sauce adds creaminess and flavor. However, it contains gluten from the soy sauce and noodles. It may not suit those with nut allergies due to peanut butter. - Peanut Butter: Use sunflower seed butter for a nut-free option. - Soy Sauce: Choose tamari for a gluten-free version. - Honey: Maple syrup works well for a vegan-friendly dish. - Udon Noodles: You can swap udon with rice noodles for a gluten-free meal. These swaps keep your meal tasty while catering to dietary needs. Adjusting ingredients can help you enjoy this dish no matter your allergies. {{ingredient_image_2}} To start, bring a large pot of water to a boil. Once it bubbles, add 200g of udon noodles. Cook them for about 4-5 minutes, or until they are soft but still chewy. After that, drain the noodles. Rinse them under cold water to stop the cooking. This step keeps them from getting mushy. Next, grab a medium bowl. In it, mix 3 tablespoons of creamy peanut butter, 2 tablespoons of soy sauce, 1 tablespoon of rice vinegar, and 1 tablespoon of sesame oil. Add 1 tablespoon of honey or maple syrup for sweetness. Whisk until the mix is smooth. If it’s too thick, add a little water until it’s just right. Now, heat a teaspoon of sesame oil in a large skillet over medium heat. When the oil is hot, toss in the thinly sliced red bell pepper and snap peas. Stir the veggies for about 3-4 minutes. They should be bright and slightly tender but still crisp. This adds great color and crunch to your meal. With the veggies ready, add your drained udon noodles to the skillet. Pour the peanut sauce over everything. Use tongs or forks to toss the noodles and veggies together. Make sure every piece is coated with sauce. Cook for another 2-3 minutes, stirring often, until everything is hot. Finally, take the skillet off the heat. Sprinkle sliced green onions, sesame seeds, and fresh cilantro on top. Serve the noodles warm with lime wedges on the side. Squeeze some lime juice over the dish for extra flavor. Enjoy your quick and tasty meal! When making Minute Peanut Udon Noodles, some common mistakes can pop up. Here are a few to watch for: - Overcooking the Noodles: Follow the package time closely. Overcooked noodles become mushy and lose texture. - Not Rinsing the Noodles: Always rinse the cooked noodles with cold water. This stops the cooking and keeps them firm. - Skipping the Sauce Blending: Blend your sauce well. A smooth sauce coats the noodles better and enhances flavor. You can make this meal even faster with a few clever tips: - Prep Ahead: Chop your veggies and mix the sauce before cooking. This cuts down cooking time. - Use Pre-Cooked Noodles: Some stores sell pre-cooked udon noodles. They only need a quick heat in the pan. - One-Pan Cooking: Use the same pan for sautéing and mixing. This saves on dishwashing and keeps flavors together. Want to elevate your peanut udon noodles? Try these simple additions: - Add Heat: Toss in some red pepper flakes or sriracha for spicy flavor. - Fresh Herbs: Add fresh basil or mint for a bright twist. - Citrus Zing: A splash of lime or lemon juice brightens up the flavors immensely. These tips and tricks will make your Minute Peanut Udon Noodles quick and tasty. Happy cooking! Pro Tips Perfectly Cook Udon Noodles: Make sure to cook the udon noodles just until al dente. Rinsing them under cold water after cooking prevents them from sticking together and becoming mushy. Adjusting Sauce Consistency: If your peanut sauce is too thick, add a tablespoon of warm water at a time until it reaches the desired creamy consistency. This ensures it coats the noodles perfectly. Vegetable Crispness: Sauté the vegetables just until they are vibrant and tender-crisp. Overcooking can lead to a loss of color and crunch, which enhances the overall texture of the dish. Garnishing for Flavor: Fresh herbs like cilantro and a squeeze of lime add brightness to the dish. Don't skip the garnishes; they elevate the flavor and presentation significantly! {{image_4}} For a vegan meal, skip the honey and use maple syrup instead. Check your soy sauce to ensure it is gluten-free. You can also choose gluten-free udon noodles. They are made from rice flour, which gives you that chewy texture without gluten. Want to add protein? Tofu is a great choice. Simply press and cube the tofu, then sauté it until golden. If you prefer meat, chicken works well too. Cook the chicken in the skillet before adding the vegetables. This way, it gets nice and juicy. Get creative with your meal! Avocado adds creaminess and healthy fats. Carrots bring sweetness and crunch. You can slice them thin and toss them in with the other veggies. Try adding some chopped peanuts for extra crunch or a handful of spinach for more greens. The options are endless! To keep your peanut udon noodles fresh, store them in an airtight container. This helps lock in moisture and flavor. Make sure the noodles cool down to room temperature before sealing. Keeping vegetables separate from the noodles prevents sogginess. Reheat your udon noodles in a pan over low heat. Add a splash of water or a bit of sesame oil to help them steam. Stir gently until heated through. You can also use the microwave. Just cover the noodles with a damp paper towel to keep them moist. You can freeze peanut udon noodles, but it's best to freeze just the plain noodles. Cooked vegetables don't freeze well. Place cooled noodles in a freezer bag, squeezing out all air. They can last up to three months. When ready to eat, thaw them in the fridge overnight before reheating. Udon noodles cook in about 4-5 minutes. Follow the package instructions for best results. After cooking, drain and rinse them under cold water. This step keeps them firm and prevents mushiness. Yes, you can use other noodles. Rice noodles or soba noodles work well too. Just adjust the cooking time based on the noodle type. Remember, each noodle has its own cooking time. If you need a substitute for peanut butter, try almond butter or sunflower seed butter. Both options give a nice nutty flavor. You can also use tahini for a different twist. To add heat, include chili flakes or sriracha to the sauce. You can also toss in sliced fresh chili peppers while sautéing the veggies. Start with a little and add more to taste. In this blog post, we explored making udon noodles with a tasty peanut sauce. We covered essential ingredients, dietary options, and tips to boost flavors. I shared step-by-step cooking instructions to help you avoid common mistakes. Remember, you can customize your dish with proteins and creative add-ins. Proper storage and reheating tips ensure your meal stays fresh. So, gather your ingredients and enjoy this easy, delicious meal!

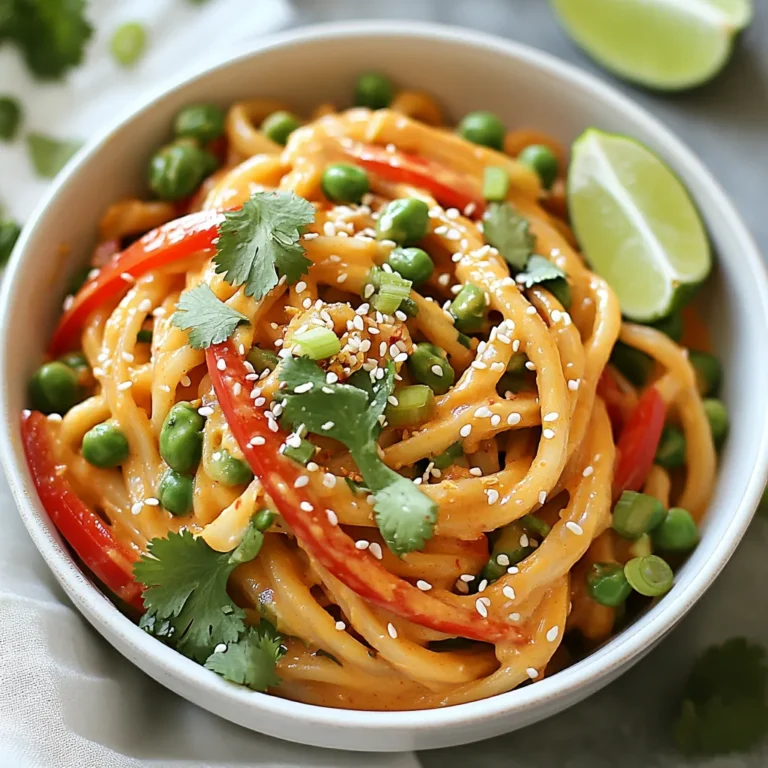
Minute Peanut Udon Noodles Quick and Tasty Meal

- 2 medium sweet potatoes, peeled and diced into 1-inch cubes - 1 can (15 oz) black beans, thoroughly rinsed and drained - 1 cup corn (fresh or frozen) - 1 teaspoon ground cumin - 1 teaspoon smoked paprika - 1/2 teaspoon chili powder - 2 tablespoons extra-virgin olive oil - Salt and freshly ground black pepper to taste - 1 ripe avocado, sliced into wedges - 1 cup cherry tomatoes, halved - 1/2 cup red onion, finely chopped - 1 cup cooked quinoa or brown rice (your choice) - Fresh cilantro leaves for garnish - Lime wedges for serving - Quinoa or brown rice alternatives - Suggested toppings like hot sauce or cheese Each serving of these sweet potato taco bowls is around 400 calories. You get about 60 grams of carbs, 15 grams of fat, and 12 grams of protein. This meal is not only filling but also packed with nutrients. Sweet potatoes give you fiber and vitamins. Black beans add protein and more fiber. Corn gives you some natural sweetness. These bowls are a great way to enjoy a balanced meal. You can change the ingredients to fit your taste or needs. So, you can easily swap in different grains or toppings. {{ingredient_image_2}} Start by preheating your oven to 425°F (220°C). This high heat will help the sweet potatoes roast nicely. Next, peel and dice 2 medium sweet potatoes into 1-inch cubes. You want them to cook evenly. In a large mixing bowl, add the diced sweet potatoes. Drizzle 2 tablespoons of extra-virgin olive oil over them. Then, sprinkle 1 teaspoon of ground cumin, 1 teaspoon of smoked paprika, and 1/2 teaspoon of chili powder on top. Finally, add salt and freshly ground black pepper to taste. Toss everything gently. Make sure each piece of sweet potato is coated well. Spread the seasoned sweet potato cubes on a baking sheet. Arrange them in a single layer for even cooking. Place the baking sheet in your preheated oven. Roast the sweet potatoes for 25-30 minutes. Halfway through, flip them to ensure they brown nicely on all sides. You want them to be tender and crisp at the edges. While the sweet potatoes roast, prepare your bean and corn mixture. In a separate bowl, combine 1 can of thoroughly rinsed and drained black beans, 1 cup of corn (fresh or frozen), halved cherry tomatoes, and finely chopped red onion. For seasoning, add a pinch of salt and squeeze in some lime juice. This will brighten the flavors. Mix everything well and set it aside for later. Once the sweet potatoes are done, take them out and let them cool for a few minutes. To assemble your taco bowls, start with a generous scoop of cooked quinoa or brown rice as the base. Then layer on the roasted sweet potatoes. Next, add the colorful black bean and corn mixture. Finally, arrange avocado slices on top for a creamy touch. To finish, sprinkle fresh cilantro leaves for a burst of flavor and serve with lime wedges on the side. Enjoy the vibrant layers and tasty flavors! To ensure even roasting of sweet potatoes, cut them into uniform 1-inch cubes. This size helps them cook at the same rate. After tossing them with olive oil and spices, spread them out on the baking sheet. Make sure they are not crowded; this allows hot air to circulate. Flip the sweet potatoes halfway through cooking. This step ensures they brown nicely and get crispy edges. You can boost the flavor of your taco bowls with more spices. Try adding garlic powder or onion powder for depth. A pinch of cayenne pepper can add a kick. If you love fresh herbs, add chopped cilantro or parsley. Lime zest or a splash of lime juice brightens the dish. You can also mix in some smoked chipotle for a smoky heat. For visual appeal, serve your taco bowls in deep, colorful dishes. Start with a base of quinoa or brown rice. Layer the roasted sweet potatoes, then add the black bean and corn mix. Top it with sliced avocado for creaminess. Finish with fresh cilantro and lime wedges on the side. A drizzle of your favorite hot sauce can add a pop of color and flavor. These steps make the dish look as good as it tastes! Pro Tips Roasting Perfection: To achieve perfectly crispy sweet potatoes, make sure they are cut into uniform pieces and spread out in a single layer on the baking sheet. Add Some Heat: If you enjoy spicy flavors, consider adding diced jalapeños or a sprinkle of cayenne pepper to the black bean-corn mixture for an extra kick. Meal Prep Friendly: This recipe is great for meal prep! You can roast the sweet potatoes and prepare the bean mixture in advance for quick assembly during the week. Freshness Boost: For added flavor, consider adding a drizzle of olive oil and a sprinkle of sea salt on the avocado just before serving to enhance its creaminess. {{image_4}} You can easily make Sweet Potato Taco Bowls gluten-free and vegan. The main ingredients already fit these needs. Sweet potatoes and black beans are naturally gluten-free. For a vegan option, skip any dairy toppings. This dish is healthy and packed with flavor without needing animal products. If you want to mix things up, try using different grains or beans. Instead of quinoa, you can use brown rice, farro, or even cauliflower rice. Each will bring a unique flavor and texture. For beans, swap black beans for pinto beans or chickpeas. These changes can add new tastes to your bowls. You can create fun flavor profiles with Sweet Potato Taco Bowls. For a Southwestern twist, add jalapeños or a smoky chipotle sauce. If you prefer Mediterranean flavors, use olives, feta cheese, and a drizzle of olive oil. For an Asian-inspired bowl, add sesame oil, soy sauce, and green onions. Each style gives the dish a fresh look and taste. To store leftovers, let your taco bowls cool down first. Use airtight containers to keep them fresh. They can last up to three days in the fridge. Make sure to separate the toppings, like avocado and tomatoes, to keep them fresh longer. When you're ready to enjoy your leftovers, reheat them gently. Use the microwave on medium power for about one to two minutes. Stir halfway to heat them evenly. If you have a toaster oven, that works great too. Just pop them in for about 10 minutes at 350°F. This keeps the sweet potatoes crispy. If you want to store your taco bowls for longer, freezing is a good option. Place the cooled bowls in freezer-safe containers. They can last up to three months in the freezer. When you’re ready to eat them, thaw overnight in the fridge. Reheat as mentioned above for the best taste. To make Sweet Potato Taco Bowls vegan, focus on simple swaps. Use plant-based ingredients. For instance, replace any cheese with avocado or a vegan sour cream. You can also add nutritional yeast for a cheesy flavor without dairy. Check your spices too; most are vegan, but always read the labels. Yes, you can use many types of beans! Pinto beans, kidney beans, or chickpeas work well. Pinto beans give a creamy texture. Kidney beans add a hearty bite. Chickpeas offer a nutty flavor. Each bean will change the taste a bit, so pick your favorite! Sweet Potato Taco Bowls pair well with many sides. Consider a fresh green salad for crunch. You could also serve tortilla chips for some extra texture. Salsa or guacamole enhances the taste too. A light lime vinaigrette can brighten everything up! This blog post covered how to make delicious Sweet Potato Taco Bowls. You learned about the main ingredients, optional additions, and how to roast and layer them. We explored tips for cooking, flavor enhancement, and eye-catching presentation. Dietary modifications and storage tips were also discussed to help you adapt and preserve your meals. With these insights, you can create a tasty and healthy dish that wins everyone over. Happy cooking!

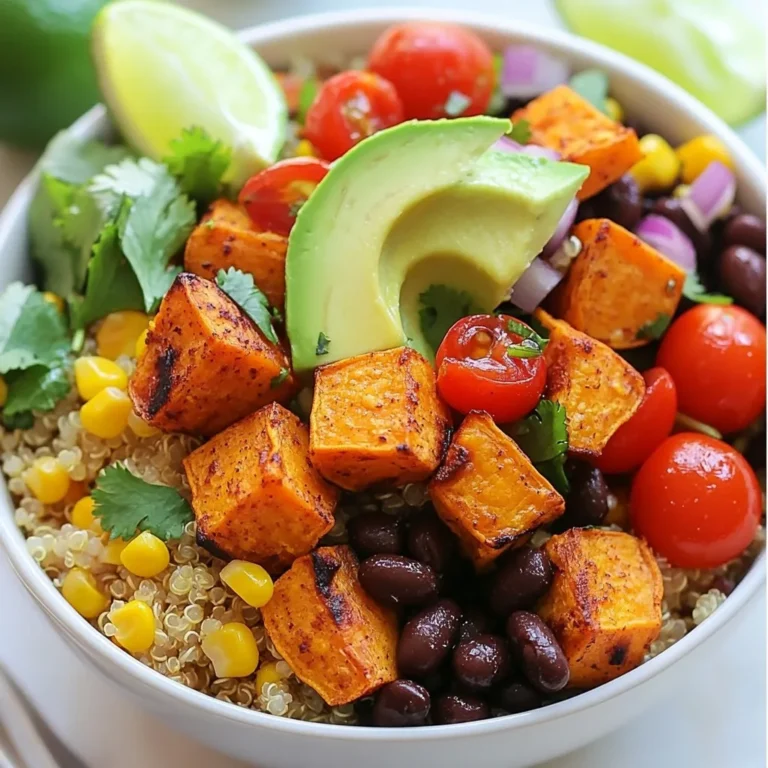
Sweet Potato Taco Bowls Flavorful and Easy Meal Option

PREV 1 … 32 33 34 … 48 NEXT
meal plan mapper

explore

DessertsDinnerAppetizersDrinks

Our Policies

  • Cookie Policy
  • Copyright Policy
  • Disclaimer
  • GDPR Policy
  • Terms Of Use
Back to Top
  • About
  • Contact Us
  • Privacy Policy
© 2025 meal plan mapper