FREE DINNER EBOOK! Get your copy!
  • Cookie Policy
  • GDPR Policy
  • Disclaimer
  • Terms Of Use
  • Visit my other site: Fun Cookie Recipes
meal plan mapper
  • Home
  • Dinner
  • Desserts
  • Drinks
  • Appetizers
  • Contact
  • About
  • Privacy Policy
  • Home
  • Dinner
  • Desserts
  • Drinks
  • Appetizers
  • Contact
  • About
  • Privacy Policy
  • Cookie Policy
  • GDPR Policy
  • Disclaimer
  • Terms Of Use
Visit my other site: Fun Cookie Recipes

HOME / CATEGORIES /

Latest

For these rich vegan fudgy brownies, you will need the following: - 1 cup almond butter (or any nut butter of your choice) - 1 cup pure maple syrup - 1/2 cup unsweetened cocoa powder - 1 teaspoon vanilla extract - 1/2 cup oat flour (or whole wheat flour) - 1/4 teaspoon baking soda - 1/4 teaspoon sea salt - 1/2 cup dairy-free dark chocolate chips - 1/4 cup chopped walnuts or pecans (optional for added crunch) You can enhance your brownies with these extras: - A pinch of espresso powder for a rich coffee flavor - 1/2 teaspoon of peppermint extract for a minty twist - A handful of dried fruit, like cherries or cranberries, for sweetness If you have nut allergies, here are some great swaps: - Use sunflower seed butter instead of almond butter. - Replace oat flour with a gluten-free flour mix. - Choose carob chips instead of chocolate chips for a nut-free option. These substitutions keep your brownies tasty and safe! {{ingredient_image_2}} Start by preheating your oven to 350°F (175°C). Next, take an 8x8 inch baking pan and line it with parchment paper. Make sure to leave some paper hanging over the sides. This helps you lift the brownies out later without a mess. In a large mixing bowl, combine 1 cup of almond butter and 1 cup of pure maple syrup. Use a whisk or spatula to mix them well. You want a smooth and creamy blend. This step is key for the moist texture of your brownies. Now, gradually add 1/2 cup of unsweetened cocoa powder and 1 teaspoon of vanilla extract to the wet mix. Stir until everything is well combined. After that, sift in 1/2 cup of oat flour, 1/4 teaspoon of baking soda, and 1/4 teaspoon of sea salt. Gently fold these dry ingredients into the wet mixture. Don't overmix; a few lumps are okay. Fold in 1/2 cup of dairy-free dark chocolate chips and, if you like, 1/4 cup of chopped walnuts or pecans. This adds great texture. Pour the brownie batter into your prepared pan and spread it evenly. Bake for 25-30 minutes. Check doneness with a toothpick; it should have a few moist crumbs. Let the brownies cool in the pan for about 10 minutes. Then, lift them out using the parchment paper. Cool completely on a wire rack before slicing. Enjoy! To make fudgy brownies, use almond butter for moisture. This rich nut butter adds creaminess. Also, don’t overmix the batter. Mixing too much can add air and make them cake-like. Bake just until a toothpick shows moist crumbs, not clean. This keeps them soft and fudgy. Accurate measurements lead to great results. Use a kitchen scale if possible. One cup of almond butter should weigh about 240 grams. For cocoa powder, make sure to spoon it into the cup, then level it off. This avoids packing it down, which could add too much cocoa. A few mistakes can ruin your brownies. First, don’t skip the parchment paper. It helps with easy removal. Second, check your oven temperature with a thermometer. Ovens can be off, affecting bake time. Lastly, let brownies cool completely before cutting. This helps them hold their shape and texture. Pro Tips Choose Your Nut Butter: Using different nut butters can change the flavor profile of your brownies. Almond butter gives a nutty taste, while peanut butter adds a classic touch. Don’t Overmix: When combining your dry and wet ingredients, mix until just combined. Overmixing can result in denser brownies rather than the desired fudgy texture. Cooling Time Matters: Allow the brownies to cool completely before slicing. This helps them set and retain their fudgy consistency, making them easier to cut into perfect squares. Customize with Toppings: Feel free to add your favorite toppings like coconut flakes, additional nuts, or even a drizzle of nut butter on top for extra flavor and texture. {{image_4}} To make nut-free vegan brownies, swap almond butter for sunflower seed butter. This change keeps the brownies rich and creamy without nuts. You can also use pumpkin seed butter for a unique flavor. Both options work well and maintain the fudgy texture. For gluten-free brownies, replace oat flour with a gluten-free flour blend. You can also use almond flour or coconut flour. Adjust the amount slightly, as these flours might absorb more moisture. This way, you still enjoy perfect, fudgy brownies! Want to enhance your brownies? Add flavor! A teaspoon of espresso powder gives a nice coffee kick. For a minty twist, add a few drops of peppermint extract. Try mixing in chocolate chips or dried fruit for extra fun. Each flavor addition makes your brownies unique and exciting! To keep your brownies fresh, store them in an airtight container. Place parchment paper between layers to prevent sticking. You can keep them at room temperature for up to 3 days. If you want them to last longer, store them in the fridge for up to a week. Just remember to cover them well to maintain their fudgy texture. Freezing is a great way to save extras. Cut the brownies into squares, then wrap each piece tightly in plastic wrap. Place the wrapped brownies in a zip-top bag. They can freeze for up to 3 months. When you’re ready to enjoy, just pull out a square and let it thaw at room temperature. Reheating can bring back the warm, gooey goodness of your brownies. Preheat your oven to 350°F (175°C). Place the brownies on a baking sheet and cover them with foil. Heat for about 10 minutes, or until warm. You can also use the microwave. Heat a single brownie for about 10-15 seconds. Enjoy the melty chocolate chips! Yes, you can use other nut butters. Peanut butter, cashew butter, or sunflower seed butter work well. Just keep the same amount as in the recipe. Each nut butter brings its own unique flavor. For example, peanut butter adds a rich, nutty taste. Sunflower seed butter is great if you need a nut-free option. To make your brownies sweeter, add more maple syrup. You can increase it by a few tablespoons. Another option is to mix in a bit of coconut sugar or agave syrup. You can also use sweet chocolate chips instead of dark ones. Taste the batter before baking. Adjust sweetness as you like. If your brownies turn out dry, check your baking time next time. Overbaking can dry them out quickly. Make sure to pull them from the oven once a toothpick shows moist crumbs. You can also add a splash of plant-based milk to the batter next time. This helps keep them moist. Finally, serve your brownies with a scoop of dairy-free ice cream for extra moisture. This article covers all you need for making delicious brownies. We discussed key ingredients, step-by-step instructions, and helpful tips. You learned about nut-free and gluten-free options, plus fun flavor twists. I shared how to store leftovers and answered common questions. Now, you've got the tools to bake your perfect batch. Trust your skills and enjoy every bite!

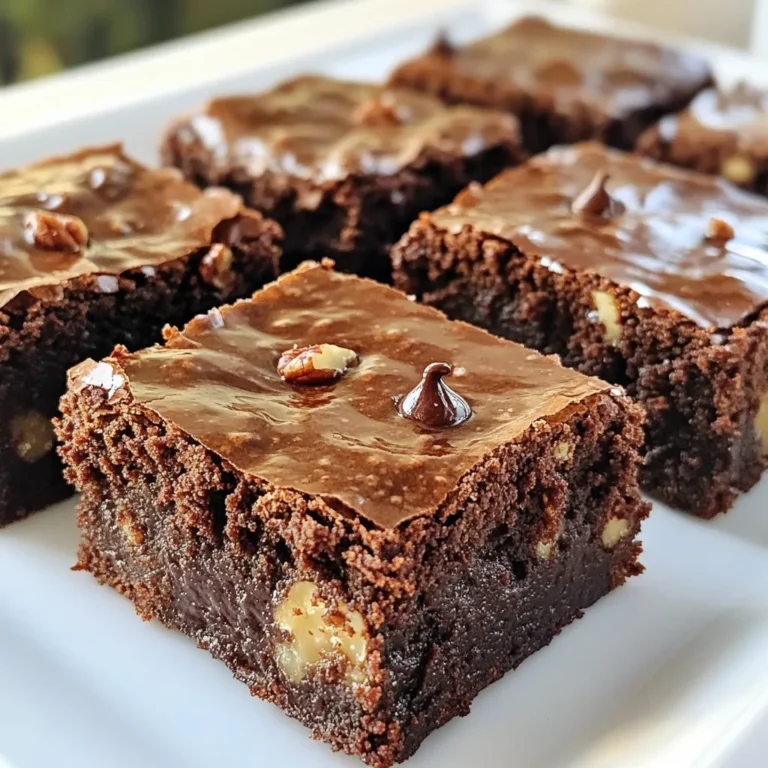
Best Vegan Fudgy Brownies Rich and Decadent Treat

- 8 rice paper wrappers - 1 cup red cabbage, thinly shredded - 1 cup carrots, julienned - 1 cup cucumbers, julienned - 1 cup bell peppers (assorted colors), thinly sliced - 1 ripe avocado, sliced - 1 cup fresh mint leaves, gently rinsed - 1 cup fresh cilantro leaves, gently rinsed - 1/4 cup sesame seeds, toasted - 1/4 cup creamy peanut butter - 2 tablespoons low-sodium soy sauce - 2 tablespoons freshly squeezed lime juice - 1 teaspoon honey or agave syrup I love using fresh ingredients for my rainbow veggie spring rolls. Each color brings its own flavor and health benefits. You’ll need rice paper wrappers as your base. These wrappers are light and easy to use. They hold everything together and add a nice texture. For the veggies, I like to use red cabbage, carrots, cucumbers, bell peppers, and avocado. Each veggie adds crunch and color. Red cabbage is great for its crunch, and it looks beautiful. Carrots add sweetness, while cucumbers bring a refreshing taste. Bell peppers give a nice pop of color and flavor. Don't forget the creamy avocado for richness! Fresh herbs are key too. I use mint and cilantro for their bright flavors. They add freshness and make the rolls taste even better. Lastly, I sprinkle toasted sesame seeds on top for a nutty crunch. They also add a lovely visual touch. For the dipping sauce, I mix creamy peanut butter, low-sodium soy sauce, fresh lime juice, and honey or agave syrup. This sauce balances the fresh flavors of the spring rolls. It adds a bit of sweetness and tang, which is simply delicious. When you gather these ingredients, you set yourself up for a fun cooking experience. Enjoy the process of making these colorful rolls! {{ingredient_image_2}} Start by washing all your vegetables. This keeps them clean and safe to eat. Use a sharp knife to cut the vegetables into thin, even pieces. For carrots and cucumbers, julienne them into thin strips. Julienning makes them easy to roll and look nice. Shred the red cabbage into fine pieces for a crunchy texture. Thin slices of bell peppers add color and flavor. Next, soak the rice paper wrappers. Fill a shallow dish with warm water. It should be deep enough for the wrappers to fully submerge. Take one rice paper wrapper and dip it in the water for about 10-15 seconds. You want it soft but not too mushy. Remove it carefully and let it rest on a clean surface. Now it’s time to assemble your spring rolls. Place the soaked wrapper flat on a damp kitchen towel. This helps prevent sticking. In the center, layer your vegetable fillings. Start with the red cabbage, then add carrots, cucumbers, and bell peppers. Don’t forget avocado slices for creaminess. Add fresh mint and cilantro on top for a burst of flavor. Sprinkle toasted sesame seeds for crunch. To roll the spring roll, gently fold in the sides of the wrapper. Start rolling from the bottom, tucking in the fillings. Keep it tight as you roll up to the top. Make sure it seals well. Repeat this with the rest of the wrappers and fillings. Each roll should be colorful and packed with flavor! To make great spring rolls, the rolling technique is key. Start by soaking rice paper in warm water. This makes it soft and easy to work with. If the rice paper sticks, try placing it on a damp kitchen towel. It helps keep things from sticking. When you layer your fillings, keep them in the center. Start with red cabbage, then add carrots, cucumbers, bell peppers, and avocado. This ensures even distribution of flavors. Don't overstuff the wrapper. A small handful of each vegetable works best. For a beautiful display, arrange your spring rolls in a circle on a colorful platter. Place the dipping sauce in a small bowl at the center. This draws the eye and makes your dish pop. Garnish with fresh mint leaves around the platter. This adds color and a fresh scent. You can also sprinkle some toasted sesame seeds on top for added crunch. You can adjust the dipping sauce to match your taste. If you like it sweeter, add more honey or agave syrup. For a zestier flavor, squeeze in extra lime juice. If you're feeling adventurous, try different dipping sauces. Options like hoisin sauce or spicy sriracha can add a fun twist to your spring rolls. Pro Tips Fresh Ingredients: Always use the freshest vegetables and herbs to enhance the flavor and texture of your spring rolls. Perfect Soaking: Soak the rice paper just until it's pliable; over-soaking can make it too fragile to roll. Rolling Technique: Tuck the filling tightly as you roll to create a compact spring roll that holds its shape. Custom Dipping Sauce: Feel free to experiment with the dipping sauce by adding spices or different nut butters for a unique twist. {{image_4}} You can change the veggies in your spring rolls based on what you like. Use seasonal vegetables for the best taste. For example, try zucchini in summer or butternut squash in fall. Adding proteins can make your rolls heartier. You can include tofu for a vegetarian option or shrimp for seafood lovers. Both options give a nice twist to the classic recipe. Herbs and spices can change the taste of your spring rolls. Consider adding basil or cilantro for a fresh kick. A hint of ginger can also brighten the flavors. You can even incorporate sauces into the filling. Adding a bit of hoisin sauce or sriracha brings a fun zing to your rolls. It’s all about what flavors you enjoy the most! If you need gluten-free options, look for rice paper wrappers labeled as gluten-free. They work just as well for the rolls. For vegan sauces, use plant-based ingredients instead of dairy. For instance, swap creamy peanut butter with a nut-free alternative. This way, everyone can enjoy these tasty rolls! To keep leftover spring rolls fresh, store them in the fridge. I recommend using an airtight container. This method helps prevent them from drying out. You should also place a damp paper towel inside the container. This will help keep the rolls moist. The rolls can last up to three days when stored properly. If you want to enjoy them later, avoid stacking them directly on top of each other. Use parchment paper between layers to prevent sticking. It ensures they stay nice and intact until you're ready to eat. For the dipping sauce, store it in a clean jar or container with a tight lid. This will keep the flavors fresh. If you make extra sauce, it can last in the fridge for about a week. Be sure to check for any changes in smell or texture before using. If you want to use the sauce later, consider freezing it in ice cube trays. Once frozen, transfer the cubes to a freezer bag. This way, you can easily grab a portion whenever you need it! Just thaw it in the fridge before serving. To keep spring rolls from sticking, try these simple tips: - Use damp cloths: Place a damp kitchen towel between layers of spring rolls. - Store with space: Avoid stacking rolls directly on top of each other. - Use cornstarch: Lightly dust the rolls with cornstarch before storing. - Wrap tightly: Ensure each roll is sealed well to reduce moisture. These steps will help you enjoy fresh, non-sticky spring rolls later. Yes, you can make spring rolls ahead of time! Here’s how: - Prep the veggies: Cut and store your veggies in airtight containers. - Soak wrappers: Soak your rice paper just before wrapping. This keeps them fresh. - Wrap and store: Wrap the rolls and place them in the fridge. Use damp cloths to prevent sticking. - Eat within a day: For best taste, eat them within 24 hours. This way, you can enjoy them for lunch or a quick snack. For a stunning presentation, follow these ideas: - Colorful platter: Arrange the rolls on a vibrant serving platter. - Dipping sauce: Serve with the dipping sauce in a small bowl in the center. - Garnish: Add extra mint leaves around the platter for freshness. - Cut and display: Cut rolls in half to show off the colorful filling. These tips make your spring rolls a hit at any gathering! You can make fresh, vibrant spring rolls with simple steps and tasty ingredients. We covered everything from choosing the right veggies to crafting a scrumptious dipping sauce. Remember, the key to perfect rolls is in how you prepare and assemble. Don’t hesitate to try new flavors and combinations! These rolls are versatile and great for sharing. Store any leftovers properly to keep them fresh. Enjoy crafting your unique spring rolls, and impress your family with your culinary skills.

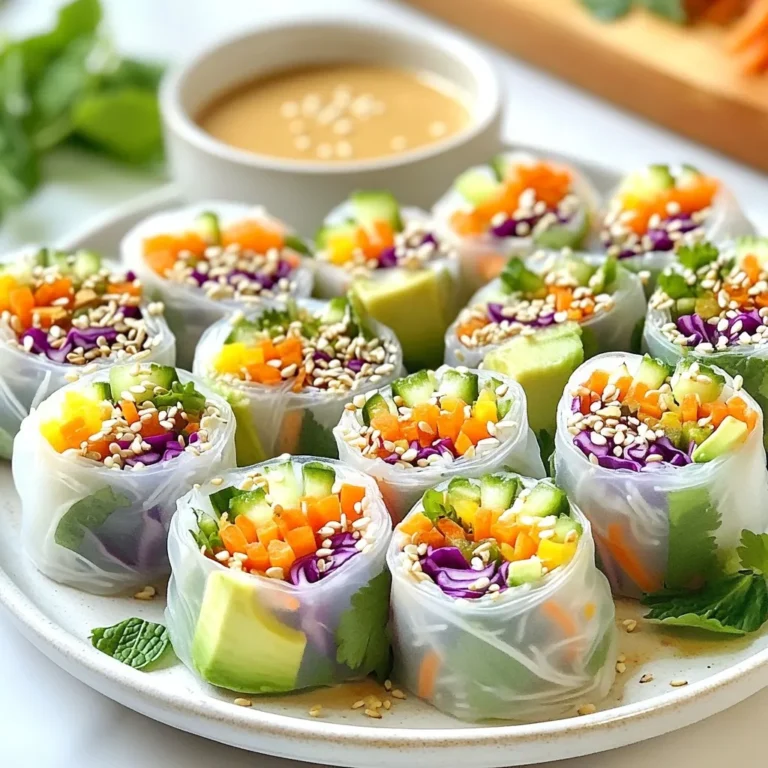
Rainbow Veggie Spring Rolls Refreshing and Colorful Dish

- 2 ¾ cups all-purpose flour - 1 teaspoon baking soda - ½ teaspoon baking powder - ½ teaspoon salt - ½ cup unsalted butter, softened - 1 cup granulated sugar - 1 large egg - 1 teaspoon vanilla extract - 1 cup sour cream - ½ teaspoon almond extract (optional) - Colored sugar or sprinkles for decoration You can replace sour cream with plain yogurt or buttermilk. Both work well in cookies. If you want a nutty flavor, you may skip the almond extract. Use more vanilla instead for a sweet taste. To make these cookies, gather the following tools: - Mixing bowls for dry and wet ingredients - Electric mixer for creaming butter and sugar - Baking sheets to hold the cookies in the oven - Parchment paper to prevent sticking on the baking sheets This list keeps your baking smooth and fun. Enjoy creating your cookies! {{ingredient_image_2}} 1. Preheat your oven to 350°F (175°C). This step is key for even baking. 2. Line two baking sheets with parchment paper. This helps cookies not to stick. 3. In a medium bowl, whisk together the following dry ingredients: - 2 ¾ cups all-purpose flour - 1 teaspoon baking soda - ½ teaspoon baking powder - ½ teaspoon salt Make sure these are well mixed, then set this bowl aside. 1. In a large bowl, cream together: - ½ cup unsalted butter, softened - 1 cup granulated sugar Use an electric mixer to beat these for about 3 to 5 minutes. You want a light and fluffy texture. 2. Add in 1 large egg and mix until blended. 3. Pour in: - 1 teaspoon vanilla extract - ½ teaspoon almond extract (optional) Mix until just combined. 4. Gradually add in 1 cup sour cream. Stir until the mixture is smooth and creamy. 5. Slowly fold the dry ingredients into the wet mixture. Use a spatula or wooden spoon. Stop mixing when no flour streaks remain. It’s okay if a few lumps are there. 1. Use a tablespoon or cookie scoop to drop dough onto the prepared sheets. Leave about 2 inches between each cookie. 2. For extra fun, sprinkle colored sugar or sprinkles on top of each dough ball before baking. 3. Place the trays in the oven and bake for 10-12 minutes. Watch for the edges to turn lightly golden. The centers should stay soft. 4. After baking, let cookies sit on the sheets for about 5 minutes. This allows them to set. Then, gently transfer them to a wire rack to cool completely. To get a soft center, use room temperature butter. Soft butter mixes better and gives a lighter cookie. Mix your dough until just combined. Overmixing can make cookies tough. A few lumps in the dough are okay. Add some fun with colored sugar or sprinkles on top. Just sprinkle them on before baking. For a sweet touch, try a simple icing. Mix powdered sugar with a splash of milk. Drizzle it on cooled cookies for extra flair. Present cookies on a nice plate or a tiered stand. This makes them look special. Pair your cookies with milk or tea. Both drinks work well and enhance the cookie flavor. Enjoy sharing these treats with friends and family! Pro Tips Chill the Dough: For thicker cookies, chill the dough for about 30 minutes before baking. This helps prevent spreading and results in a chewier texture. Use Fresh Ingredients: Ensure your baking powder and baking soda are fresh for the best rise. Old leavening agents can lead to flat cookies. Experiment with Flavors: Feel free to substitute the almond extract with other flavors like lemon or orange zest for a different twist on these cookies. Perfect Cooling: Allow cookies to cool completely on a wire rack to avoid sogginess. This ensures they maintain their structure and texture. {{image_4}} You can easily change the flavor of your sour cream sugar cookies. One fun way is by adding chocolate chips. Just mix in a cup of semi-sweet or milk chocolate chips. This makes your cookies rich and sweet. Another great option is to incorporate citrus zest. You can use zest from lemons, limes, or oranges. Just add one tablespoon of zest to the dough. The zest brightens the flavor and adds a fresh taste. If you want to make these cookies gluten-free, use a gluten-free flour blend. Brands like Bob's Red Mill or King Arthur Flour work well. You may need to adjust the baking time. Gluten-free cookies may bake faster, so watch them closely. The texture might differ slightly. They can be a bit more crumbly. But they’ll still taste amazing! Toppings can make your cookies even more fun. You can use different types of sprinkles. Try rainbow sprinkles for a festive look or chocolate sprinkles for a rich touch. You can also add nuts or dried fruit. Chopped pecans or walnuts add crunch. Dried cranberries or cherries add a sweet twist. Mix these in before you scoop your dough. This way, each cookie will have a unique bite! To keep your sour cream sugar cookies fresh, store them in an airtight container. This helps prevent them from drying out. You can also add a slice of bread in the container. The bread will keep the cookies soft. If you want to stack the cookies, place parchment paper between each layer. This way, they won’t stick together. You can freeze unbaked dough for later use. Start by scooping the dough into balls. Place them on a baking sheet lined with parchment paper. Freeze them until solid, which takes about one hour. After that, transfer the dough balls to a freezer-safe bag. Label the bag with the date and type of cookie. When you’re ready to bake, take out the dough and let it thaw in the fridge overnight. Bake as you normally would, adding a couple of extra minutes to the baking time. When stored properly, your cookies will last about one week at room temperature. Keep them in a cool, dry place away from sunlight. If you notice any changes in texture or smell, it’s time to toss them. Signs of spoilage include a hard texture, off smell, or visible mold. Always trust your senses when it comes to food safety! Can I use low-fat sour cream? Yes, you can use low-fat sour cream. It will change the texture slightly. Your cookies may be a bit less rich but still taste great. I often find low-fat sour cream works well when I want a lighter cookie. What should I do if my cookies turn out flat? If your cookies spread too much, check your butter. It should be softened but not melted. Also, make sure you measure your flour correctly. Too little flour can cause flat cookies. Chill the dough for 30 minutes next time. This helps them hold their shape while baking. Can I make the dough ahead of time? Yes, you can! Make the dough and chill it in the fridge. It keeps well for up to 3 days. This way, you can bake fresh cookies whenever you want. How can I ensure even baking? To bake evenly, rotate your baking sheets halfway through. This helps cookies bake uniformly. Also, space them well on the sheet. Leave about 2 inches between each cookie to allow for spreading. Can I substitute butter with margarine? You can use margarine instead of butter. However, butter gives a richer flavor. If you use margarine, choose one with a high fat content. This helps maintain the cookie's texture. What happens if I skip the almond extract? If you skip almond extract, your cookies will still taste good. The vanilla will shine more without it. If you want to keep the flavor, try adding a bit more vanilla. This article covered the key steps to bake delicious cookies, from ingredients to storage. You learned about ingredient substitutes and tools you need. I shared tips for perfect texture and decorating ideas. The variations section showed fun ways to change the recipe, and I explained how to store and freeze your cookies properly. Baking cookies can be easy and fun. With practice, you'll create tasty treats everyone will enjoy!

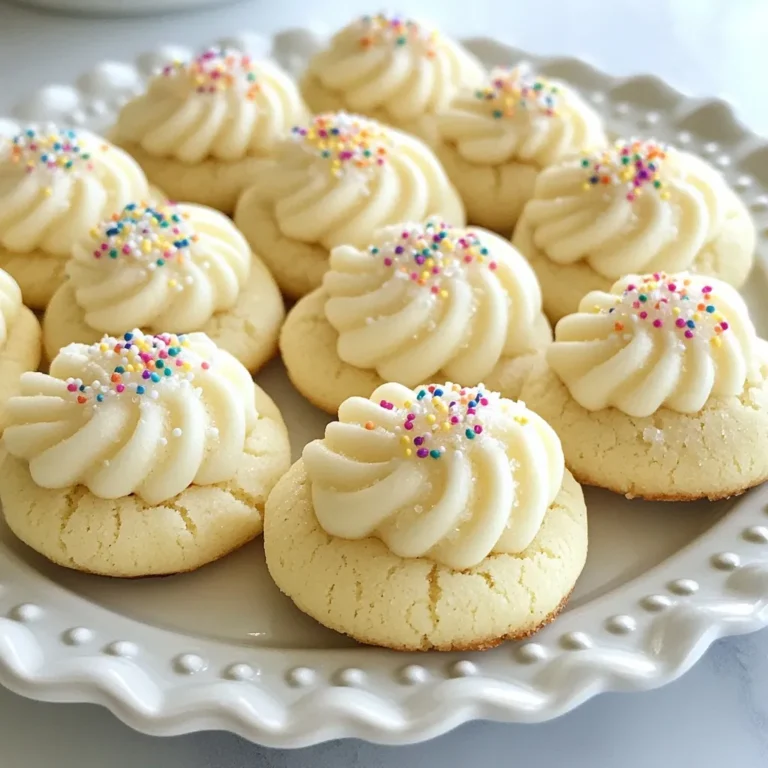
Sour Cream Sugar Cookies Delightful and Easy Recipe

- 1 lb boneless, skinless chicken thighs - 1 can creamy coconut milk - 2 tablespoons red curry paste - 1 tablespoon vegetable oil - 1 vibrant red bell pepper - 1 cup fresh green beans - 1 tablespoon fish sauce - 1 tablespoon brown sugar - Fresh basil leaves - Cooked jasmine rice Gather your ingredients before cooking. This makes the process smooth and easy. Start with 1 pound of boneless, skinless chicken thighs. I like using thighs for their juicy flavor. Next, grab 1 can of creamy coconut milk. This gives the dish its rich base. You will need 2 tablespoons of red curry paste. This adds the authentic Thai flavor. Don’t forget 1 tablespoon of vegetable oil to cook the chicken. For vibrant color, use 1 red bell pepper. Thinly slice it to mix well with the curry. You will also need 1 cup of fresh green beans. Trim and halve them for even cooking. Add 1 tablespoon of fish sauce. This boosts the flavor profile. Include 1 tablespoon of brown sugar to balance the spices. Finally, fresh basil leaves will add a lovely touch when serving. Pair the curry with fluffy cooked jasmine rice for a satisfying meal. These ingredients come together to create a quick and delicious Thai red curry chicken. Enjoy the process and the flavors! {{ingredient_image_2}} - Heat 1 tablespoon of vegetable oil in a skillet over medium-high heat. - Add 1 lb of diced chicken thighs. Sauté for 5-7 minutes until golden brown and cooked through. - Stir in 2 tablespoons of red curry paste. Coat all the chicken pieces well. - Gradually pour in 1 can of creamy coconut milk. Mix it all together to create a rich sauce. - Incorporate 1 vibrant red bell pepper, thinly sliced, and 1 cup of fresh green beans, trimmed and halved. - Season with 1 tablespoon of fish sauce and 1 tablespoon of brown sugar. Let it simmer for about 10 minutes. This will let the flavors meld nicely. - Once the vegetables are tender and the sauce thickens, remove from heat. Serve hot over jasmine rice. Top with fresh basil leaves for a lovely finish. - Use fresh ingredients for maximum flavor: Fresh vegetables and herbs make a big difference. Choose bright, crisp bell peppers and vibrant green beans. Fresh basil adds a fragrant touch at the end. - Adjust spice levels to your preference: If you like it spicy, add more red curry paste. For a milder dish, start with less. Taste as you go to find your perfect balance. - How to plate the dish attractively: Serve the curry in shallow bowls. Place a generous mound of jasmine rice in the center. This makes the dish look inviting and colorful. - Garnishing suggestions with basil: Top your curry with fresh basil leaves. This adds a pop of green and enhances the dish's aroma. You can also sprinkle some red chili flakes for extra color and heat. Pro Tips Marinate for Extra Flavor: Consider marinating the chicken thighs in a mixture of red curry paste and coconut milk for at least 30 minutes before cooking. This will enhance the flavors and tenderness of the chicken. Customize Your Veggies: Feel free to swap in your favorite vegetables like zucchini, carrots, or snap peas. Just make sure to cut them to similar sizes for even cooking. Adjust the Spice Level: If you prefer a milder curry, start with half the amount of red curry paste and add more to taste as it cooks. This way, you can control the heat to your liking. Use Fresh Herbs: Fresh basil is a great garnish, but don't hesitate to add other herbs like cilantro or mint for a different flavor profile. They can add a refreshing touch to the dish. {{image_4}} You can switch the chicken for tofu or shrimp. Tofu is a great option for a vegetarian dish. It absorbs flavors well and adds protein. Use firm tofu, cut into cubes. Cook it until golden for best results. Shrimp cooks quickly and adds a nice texture. Use peeled and deveined shrimp. Add them after the curry sauce thickens. This way, they stay tender and juicy. You can also try other meats like beef or pork. Just cut them into small pieces. Adjust cooking time based on the meat’s thickness. Feel free to change the vegetables in this dish. Use what you have at home. Carrots, zucchini, or snap peas work well. They add color and crunch. Seasonal veggies can make your curry even better. In spring, use asparagus or peas. In fall, try butternut squash or broccoli. Each veggie adds its own flavor and texture. Experiment with different combinations to keep things fun! To keep your Thai red curry chicken fresh, use these tips: - Refrigerator Storage: Place the curry in an airtight container. It will last for 3 to 4 days. - Freezer Storage: If you need to keep it longer, freeze it in a freezer-safe container. It can last for up to 3 months. Make sure to let the curry cool before sealing. This helps avoid condensation inside the container. When reheating your curry, keep the flavor and texture intact with these methods: - Stovetop Method: Pour the curry into a saucepan. Heat it over medium heat. Stir it often to avoid sticking. - Microwave Method: Place the curry in a microwave-safe bowl. Cover it with a microwave-safe lid. Heat it in short bursts, stirring in between. To maintain texture, add a splash of coconut milk if it looks too thick. This will help bring back the creaminess. Enjoy your meal again! Serve Thai Red Curry over fluffy jasmine rice. The rice helps soak up the rich sauce. I love to create a mound of rice in the center of the bowl. Then, I ladle the curry around it. This makes a beautiful presentation. Fresh basil leaves on top add a pop of color. You can also serve it with lime wedges for a zesty kick. Yes, you can easily make this dish vegetarian. Swap the chicken for firm tofu. Make sure to cube the tofu and sauté it until golden. You can also add more veggies like mushrooms or carrots. For a vegan version, replace fish sauce with soy sauce. This keeps the flavor while making it plant-based. To adjust the spice level, start by using less red curry paste. You can add it a little at a time. If you want more heat, try adding sliced jalapeños or a dash of chili flakes. Always taste as you go. This way, you can find the heat that suits you best! Thai Red Curry is a delicious meal you can make at home. We explored the fresh ingredients, step-by-step cooking, and useful tips to perfect your dish. You can customize it with different proteins or veggies for variety. Remember to store leftovers correctly to keep them tasty. Enjoy exploring the balance of flavors in this dish. Cooking can be fun and easy with the right steps and ingredients. Dive into your kitchen and create a meal everyone will love!

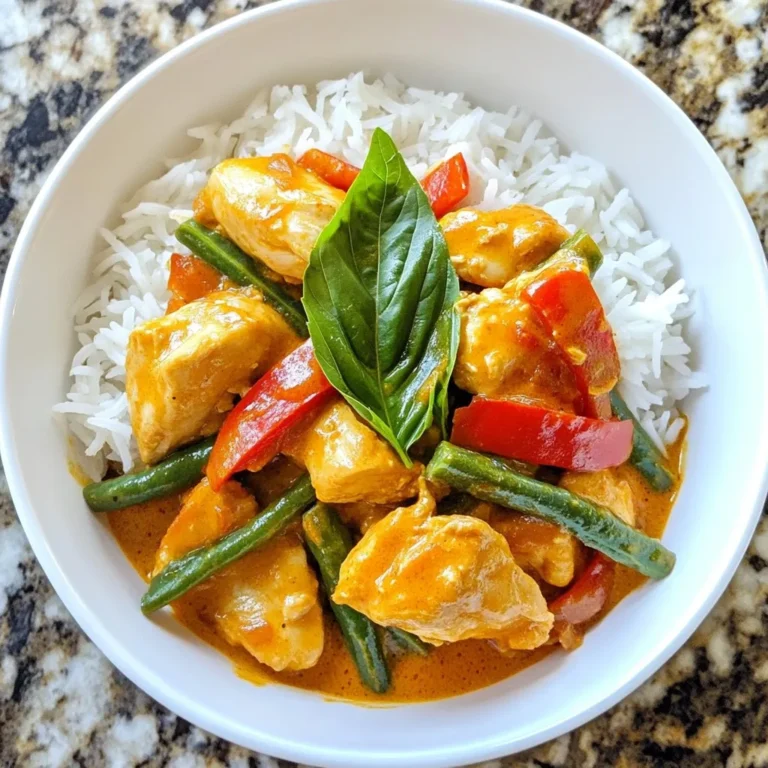
Quick Thai Red Curry Chicken Flavorful Weeknight Meal

To make the best caramel pecan sticky buns, you need the right ingredients. Here’s what you will need: - 2 cups all-purpose flour - 1 cup milk, warmed to about 110°F (43°C) - 1/4 cup granulated sugar - 1 packet (2 1/4 teaspoons) active dry yeast - 1/4 cup unsalted butter, melted - 1 large egg - 1 teaspoon vanilla extract - 1/2 teaspoon salt - 1 cup pecans, coarsely chopped - 1/2 cup light brown sugar, packed - 1/4 cup light corn syrup - 1/4 cup unsalted butter (for caramel) - 1 tablespoon ground cinnamon These ingredients combine to create a soft dough and a sticky caramel layer. The warmth of the milk helps activate the yeast. The butter adds richness, while the sugar and cinnamon give the buns their sweet flavor. You can feel the excitement as you gather these items. Each ingredient plays a key role in the final dish, making it a delightful treat that is hard to resist. {{ingredient_image_2}} First, activate the yeast. In a small bowl, mix warm milk, granulated sugar, and active dry yeast. Let it sit for about five minutes. You will see bubbles forming. This means your yeast is ready. Next, in a large bowl, whisk together melted butter, egg, vanilla extract, and salt. Once mixed, add the frothy yeast mixture. Stir well to combine. Now, gradually add all-purpose flour to the wet mix. Stir until a soft dough forms. Transfer the dough to a floured surface. Knead the dough for five to seven minutes until it feels smooth and elastic. Shape your kneaded dough into a ball and place it in a greased bowl. Cover it with a kitchen towel. Find a warm, draft-free spot for the dough to rise. Let it sit for about one hour. The dough should double in size when it's ready. While the dough rises, prepare the caramel. In a medium saucepan, mix brown sugar, light corn syrup, and butter. Heat it over medium heat, stirring until smooth. When it bubbles, remove it from heat. Now, fold in the chopped pecans. Once the dough has risen, roll it out on a floured surface. Aim for a rectangle about 12 by 15 inches. Brush the rolled dough with melted butter. Evenly sprinkle brown sugar and ground cinnamon over the surface. Starting at the long edge, roll the dough tightly into a log. Slice the log into 12 equal pieces. Place each piece cut side down in the prepared baking pan with the caramel mixture. Cover the pan with a clean towel. Let the buns rise again for about 30 minutes. Preheat your oven to 350°F (175°C). After the second rise, bake the buns for 25 to 30 minutes. They should be golden brown and puffed. Once baked, cool the buns in the pan for five minutes. Invert the pan onto a serving platter. Enjoy your caramel pecan sticky buns warm and gooey! To get the best sticky buns, I have a few tips for you. First, roll the dough evenly. This helps the buns cook evenly. Aim for a rectangle that is about 12x15 inches. When you cut the rolls, make sure to use a sharp knife. This keeps the edges clean and helps the buns rise well. To avoid over-baking, keep an eye on the buns. They should turn golden brown, not dark. If you see them getting too dark, cover the pan with foil. This stops them from burning. Always check with a toothpick. If it comes out clean, your buns are ready. When serving your sticky buns, warm them up for the best taste. A drizzle of warm caramel sauce on top makes them even better. You can also garnish with whole pecans. This adds a nice crunch and looks pretty. Sometimes, the dough won't rise. This can happen if the yeast is old. Always check the expiration date on the packet. The milk should be warm but not hot. If it’s too hot, it can kill the yeast. If your caramel burns or doesn’t set, try lowering the heat while cooking. Stir it often to keep it from sticking. If it’s too runny, let it cook a bit longer. The right texture should be thick but pourable. Pro Tips Activate the Yeast: Make sure your milk is at the right temperature (110°F or 43°C) to properly activate the yeast. Too hot can kill the yeast, while too cold will not activate it. Kneading Technique: When kneading the dough, use the heel of your hand to push the dough away from you, then fold it back over itself. This helps develop gluten for a better texture. Perfect Rise: For the best rise, let the dough rise in a warm, draft-free area. You can create this environment by placing the bowl in an oven that’s turned off but has the light on. Serving Suggestion: Serve the sticky buns warm for the best experience. You can also drizzle with extra caramel sauce and sprinkle with whole pecans for added indulgence. {{image_4}} You can swap pecans for other nuts. Walnuts add a rich taste and crunch. Almonds bring a light flavor and nice texture. Both options work well in the caramel layer. Just chop them coarsely like you would with pecans. This change can give your sticky buns a new twist. Want to mix things up? Try adding chocolate chips or dried fruit. Chocolate chips add a sweet surprise. They melt and create gooey pockets in your buns. Dried fruit, like raisins or cranberries, gives a fruity kick. Both options make the sticky buns more fun and flavorful. For a healthier twist, consider whole grain flour. It adds fiber and nutrients. You can use whole wheat or spelt flour instead of all-purpose flour. Reducing sugar is another smart choice. You can cut down the brown sugar or use a sugar substitute. This way, you still enjoy the sticky buns without too much sugar. To keep your sticky buns fresh, wrap them well in plastic wrap. Place them in the fridge to maintain moisture. This method helps avoid drying out. They will stay good for up to a week. For longer storage, consider freezing them. To freeze, place the sticky buns in an airtight container. You can also use freezer bags. Make sure to remove as much air as possible. They can last for about three months in the freezer. To reheat your sticky buns, use the oven for the best texture. Preheat your oven to 350°F (175°C). Place the buns on a baking sheet. Cover them with foil to keep them moist. Heat for about 10 to 15 minutes. If you're in a hurry, the microwave works too. Heat in short bursts of 15 seconds. Check often to avoid drying them out. For a tasty twist, serve your leftover buns warm with a drizzle of caramel sauce. You can also top them with fresh pecans. This adds crunch and flavor. Enjoy your delicious treat! Caramel pecan sticky buns stay fresh for about three days at room temperature. Store them in an airtight container to keep them soft. You can also refrigerate them for up to a week, but they may lose some fluffiness. Yes, you can make the dough ahead of time. After kneading, place it in the fridge for up to 24 hours. Just let it come to room temperature before the second rise. You can use honey or maple syrup as a corn syrup substitute. Both options provide sweetness and a nice texture. Just remember that the flavor may change slightly. Sticky buns and cinnamon rolls are similar but not the same. Sticky buns have a caramel layer at the bottom, while cinnamon rolls are usually just filled with cinnamon sugar. The caramel gives sticky buns their gooey texture. Yes, you can make this recipe vegan. Use plant-based milk and replace butter with a vegan alternative. Substitute the egg with flaxseed meal or applesauce. The final taste will still be delicious! Making caramel pecan sticky buns is fun and rewarding. You start with easy steps, from activating yeast to mixing dough. Layer in the pecans and bake until golden. Keep your buns soft and flavorful with our tips. Don't shy away from adding different nuts or flavors. Store extras well and reheat for tasty treats later. With practice, you’ll master this delicious recipe. Enjoy each sweet bite!

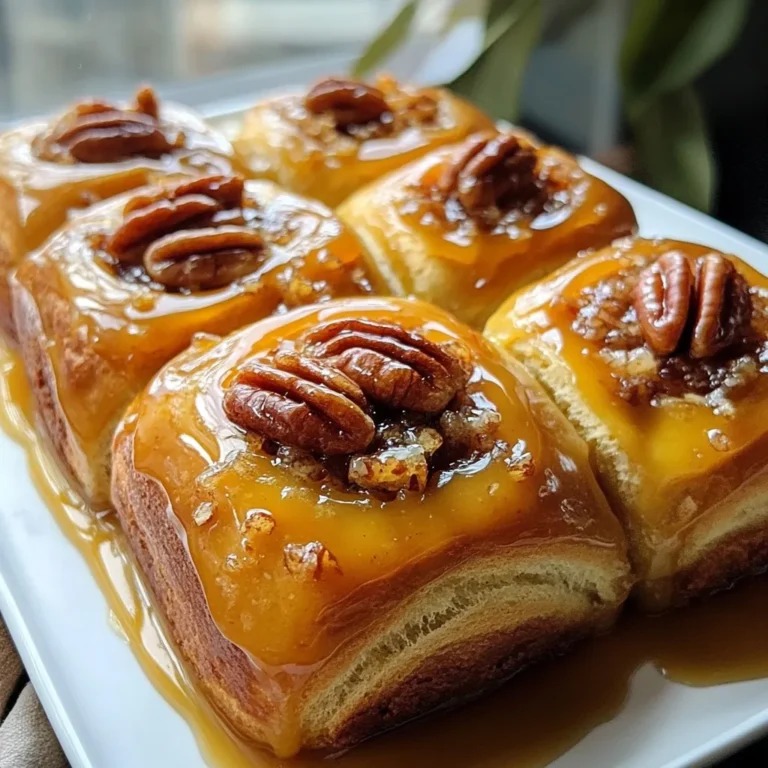
Caramel Pecan Sticky Buns Irresistible and Flaky Delight

- 3 cups all-purpose flour - 1/4 cup granulated sugar - 1 packet (2 1/4 tsp) active dry yeast - 1 teaspoon salt - 1/2 cup milk, warmed to about 110°F - 1/4 cup unsalted butter, melted and slightly cooled - 2 large eggs, at room temperature - 1 teaspoon vanilla extract - 1/2 cup packed brown sugar - 1/2 cup pecans, coarsely chopped - 1/2 cup pure maple syrup - 1 teaspoon ground cinnamon - 1/4 teaspoon ground nutmeg - 1 tablespoon butter (for greasing the pan) Gather these ingredients before you start. The all-purpose flour forms the dough base. Granulated sugar adds sweetness. Active dry yeast helps the dough rise, while salt enhances flavor. Warm milk activates the yeast. Unsalted butter gives richness, and eggs add moisture. Vanilla extract boosts flavor depth. For the filling, brown sugar brings caramel notes. Chopped pecans add crunch and flavor. Pure maple syrup makes the sticky layer sweet. Ground cinnamon and nutmeg lend warmth and spice. Lastly, use butter to grease your baking dish for easy release. Each ingredient works together to create a delightful breakfast treat. {{ingredient_image_2}} - Mix 1 cup of flour, granulated sugar, yeast, and salt in a large bowl. - In a separate bowl, combine warmed milk, melted butter, eggs, and vanilla. Whisk until smooth. - Gradually add the milk mixture to the flour mix. Stir with a spoon until the dough starts to form. - Add the rest of the flour, half a cup at a time. Mix until a shaggy dough is formed. - Transfer the dough to a floured surface. Knead for 6 to 8 minutes until smooth. - Shape the dough into a ball. Place it in a greased bowl. - Cover the bowl with a towel and let it rise for 1 hour, or until it doubles in size. - While the dough rises, mix brown sugar, chopped pecans, maple syrup, cinnamon, and nutmeg in a small bowl. Set it aside. - Once the dough has risen, punch it down to release air. - Roll it out on a floured surface into a rectangle, about 12 by 18 inches. - Spread the remaining butter over the dough. Sprinkle the maple pecan filling on top evenly. - Starting from one long edge, roll the dough tightly into a log. - Cut the log into 12 equal pieces with a sharp knife. - Preheat your oven to 350°F (175°C). Grease a 9x13 inch baking dish. - Pour any leftover maple syrup mixture into the dish. Arrange the sliced buns cut side up in the dish. - Cover the dish with a towel and let the buns rise for another 30 minutes. - Bake for 25 to 30 minutes, until golden brown and your kitchen smells amazing. To make perfect sticky buns, you need the right dough. The dough should be soft and slightly sticky, but not too wet. Feel the dough as you knead it. It should bounce back when you poke it. For rising, warmth is key. Place the bowl in a warm spot, like near the oven. This helps the dough grow and become fluffy. Cover it with a towel to keep warmth in. Check for doneness by looking at the buns. They should be golden brown on top. At 25 to 30 minutes, insert a toothpick. It should come out clean. Drizzling warm maple syrup over the buns makes them shine. It adds sweetness and looks great. Use a spoon to drizzle it just before serving. Cream cheese frosting can add a rich flavor. Mix cream cheese with a little maple syrup for a tasty topping. This adds a nice contrast to the sticky buns. Garnish your buns with chopped pecans. Sprinkle them on top to add crunch. It also makes the buns look appealing on the plate. Pro Tips Fresh Ingredients: Always use fresh yeast and high-quality maple syrup to enhance the flavor of your sticky buns. Perfect Rise: Ensure your dough rises in a warm environment; you can place it in an oven with just the light on for an ideal temperature. Cutting Technique: Use a sharp knife or dental floss to cut the dough log for cleaner edges and less squishing of the rolls. Serving Suggestion: Serve warm and drizzle with additional maple syrup for an extra indulgent treat that will impress your guests. {{image_4}} You can change the flavor of your sticky buns with simple swaps. Here are a few ideas: - Substituting different nuts: Try walnuts or almonds instead of pecans. You can even mix nuts for a fun texture. - Incorporating dried fruits: Add raisins, cranberries, or chopped apples to the filling. This adds sweetness and a burst of flavor. - Using different extracts: Swap vanilla extract for almond or maple extract. This gives a new twist to the classic taste. If you have special diet needs, you can still enjoy these sticky buns. - Gluten-free alternatives: Use a gluten-free flour blend instead of all-purpose flour. This way, everyone can enjoy them. - Vegan substitutions: Replace eggs with flaxseed meal and use almond milk instead of regular milk. Use vegan butter too. - Lower sugar options: Cut back on brown sugar and maple syrup. You can also use a sugar substitute if you like. These variations make your Maple Pecan Sticky Buns customizable for different tastes and diets. Enjoy experimenting with your favorite flavors! - Room temperature storage: Keep your sticky buns in an airtight container. They stay fresh for about two days at room temperature. Place a paper towel inside to absorb moisture. - Refrigerating: If you want to keep them longer, refrigerate the buns. Store them in a sealed container. They can last up to five days, but they may dry out slightly. - Freezing before or after baking: You can freeze sticky buns before baking. Slice the dough and place the pieces on a baking sheet. Freeze until firm, then transfer to a freezer bag. For baked buns, let them cool first. Wrap them tightly and freeze for up to three months. - Reheating frozen buns: To reheat, thaw the buns overnight in the fridge. Bake them at 350°F for 10-15 minutes. This warms them up and makes them soft again. You can also microwave them for about 20-30 seconds if you're in a hurry. Can I make the dough ahead of time? Yes, you can make the dough ahead. After kneading, let it rise. Then, cover it and keep it in the fridge overnight. This way, you can bake fresh buns in the morning. How can I make these buns more fluffy? To make your buns fluffier, ensure the dough rises well. Use warm milk to activate the yeast. Also, don't skip the second rise after cutting the buns. This extra time helps them puff up. Can I substitute maple syrup with something else? You can use honey or agave syrup as a substitute. However, these will alter the flavor slightly. Maple syrup gives a unique taste that pairs well with pecans. What do I do if my dough doesn’t rise? If your dough doesn’t rise, check your yeast's freshness. Warmth is key, so try placing it in a warm spot. If it still doesn't rise, you may need to start over with new yeast. How long can I store Maple Pecan Sticky Buns? You can store them at room temperature for 2 days. For longer storage, wrap them and place them in the fridge for up to a week. They also freeze well for up to 3 months. Making Maple Pecan Sticky Buns is fun and easy. We covered all the key ingredients, from flour to nuts. You learned step-by-step instructions for mixing, rising, and baking. I shared tips for perfecting your buns, including great ways to present them. Don’t forget about variations and storage options, too. Now, you’re ready to impress friends and family with your baking skills. Enjoy the sweet rewards of your hard work!

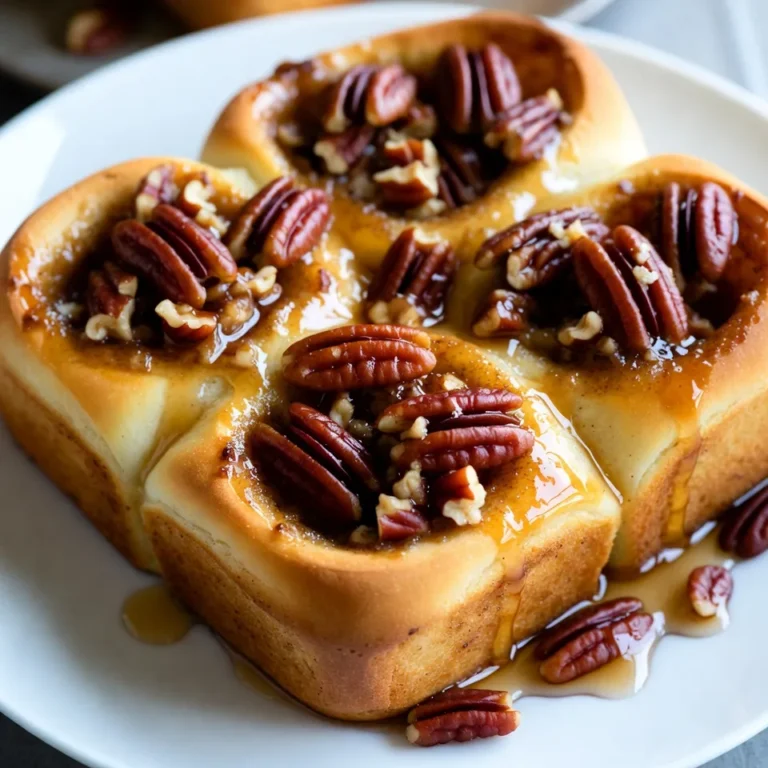
Maple Pecan Sticky Buns Irresistible Breakfast Treat

To make your cinnamon sugar pretzel bites, gather these ingredients: - 1 1/2 cups warm water (110°F to 115°F) - 2 tablespoons granulated sugar - 1 packet (2 1/4 teaspoons) active dry yeast - 4 cups all-purpose flour - 1 teaspoon salt - 1/4 cup baking soda - 1 large egg, beaten (for egg wash) - 1/2 cup unsalted butter, melted - 1/2 cup granulated sugar (for coating) - 2 teaspoons ground cinnamon You can make some changes if you need to. Here are a few options: - Use brown sugar instead of granulated sugar for a deeper flavor. - Swap all-purpose flour with bread flour for extra chewiness. - Try using coconut oil instead of unsalted butter for a dairy-free version. To create these delightful bites, make sure you have: - Medium and large mixing bowls - Wooden spoon or spatula - Clean kitchen cloth - Slotted spoon - Baking sheet - Parchment paper - Pastry brush - Pot for boiling water With these ingredients and tools, you’re ready to create a delicious snack that everyone will love! {{ingredient_image_2}} Making cinnamon sugar pretzel bites is fun and simple. Follow these steps: 1. Activate the yeast. 2. Mix the dough. 3. Knead until smooth. 4. Let it rise. 5. Shape and boil the bites. 6. Bake and coat in cinnamon sugar. 1. Activate the yeast: In a medium bowl, mix 1 1/2 cups of warm water, 2 tablespoons of sugar, and the yeast. Stir gently. Let it sit for 5 minutes. You want it to look frothy. 2. Mix the dough: In a large bowl, whisk 4 cups of flour and 1 teaspoon of salt. Pour the yeast mixture into the flour. Stir with a wooden spoon until a shaggy dough forms. 3. Knead until smooth: Turn the dough onto a floured surface. Knead for 5-7 minutes. The dough should feel smooth and elastic. 4. Let it rise: Grease a large bowl with oil. Place the dough inside and cover it with a cloth. Let it rise for about 1 hour. It should double in size. 5. Shape and boil the bites: Preheat your oven to 425°F (220°C). Punch down the dough. Cut it into small pieces. Roll them into balls. Boil 10 cups of water and add 1/4 cup of baking soda. Drop in 8-10 bites at a time for 30 seconds. Remove with a slotted spoon. 6. Bake and coat: Place the boiled bites on a baking sheet. Brush with a beaten egg. Bake for 12-14 minutes until golden brown. Mix 1/2 cup sugar and 2 teaspoons cinnamon in a bowl. While warm, coat the bites in melted butter, then toss in the cinnamon sugar mixture. - Always use warm water. Too hot can kill the yeast; too cold won't activate it. - Knead the dough well. This helps build gluten, making the bites chewy. - Make sure to let the dough rise in a warm place. A cold spot can slow the process. - If the dough feels sticky, sprinkle a little more flour while kneading. To get the best texture, knead the dough well. Knead it for about 5 to 7 minutes. The dough should feel smooth and elastic. If it feels sticky, add a little more flour. When you shape the bites, keep them uniform. This helps them bake evenly. Boiling them in baking soda water gives that classic pretzel chew. Don’t skip this step; it makes a big difference! One common mistake is not letting the dough rise enough. Make sure it doubles in size before shaping. If your water is too hot or too cold, the yeast may not activate. Aim for 110°F to 115°F. Finally, don’t overcrowd the pot when boiling. This can cause them to stick together. Work in small batches for the best results. After baking, brush the pretzel bites with melted butter. This adds rich flavor and helps the cinnamon sugar stick. Mix 1/2 cup sugar with 2 teaspoons cinnamon for the perfect coating. For a fun twist, try adding a pinch of nutmeg or vanilla to the sugar mix. You can also dip them in cream cheese or chocolate sauce for extra yum! Pro Tips Yeast Activation: Ensure your water temperature is between 110°F and 115°F for optimal yeast activation. Too hot can kill the yeast, while too cold won’t activate it properly. Dough Consistency: When kneading the dough, it should be smooth and elastic. If it’s too sticky, add a bit more flour, but avoid adding too much as it can make the pretzel bites tough. Boiling Technique: Boiling the pretzel bites in baking soda water gives them that classic pretzel flavor and chewy texture. Make sure the water is at a rolling boil before adding the bites. Cinnamon Sugar Coating: For the best flavor, toss the warm pretzel bites in the cinnamon-sugar mixture immediately after brushing them with melted butter. This ensures the sugar sticks well. {{image_4}} You can make your cinnamon sugar pretzel bites even sweeter. Try serving them with chocolate or caramel dips. To make a chocolate dip, melt chocolate chips in a bowl. You can use milk chocolate, dark chocolate, or even white chocolate. If you prefer caramel, melt caramel candies with a splash of cream. This adds a fun twist and makes your bites extra special. If you like savory snacks, cheese-stuffed pretzel bites are a great choice. Just roll out the dough and place a small cube of cheese inside. Seal the dough around the cheese, then boil and bake as usual. You can use any cheese you like, such as cheddar or mozzarella. This version is perfect for cheese lovers and adds a delicious surprise inside. For those who need a gluten-free option, you can substitute regular flour with gluten-free all-purpose flour. Make sure the flour blend contains xanthan gum, which helps with texture. Follow the same steps in the recipe. Your cinnamon sugar pretzel bites will still be soft and tasty. Everyone can enjoy these bites, no matter their diet. Store your leftover pretzel bites in an airtight container. This keeps them soft and fresh. If you leave them out, they may get hard quickly. You can place parchment paper between layers to avoid sticking. Make sure to consume them within two days for the best taste. To reheat your pretzel bites, preheat your oven to 350°F (175°C). Place them on a baking sheet. Heat for about 5-7 minutes until warm. This method keeps them soft and tasty. You can also microwave them, but they may get chewy. You can freeze pretzel bites for later. Let them cool completely before freezing. Place them in a freezer-safe bag or container. They can last for up to three months in the freezer. To enjoy, thaw them in the fridge overnight, then reheat as mentioned above. Enjoy your tasty snack whenever you want! Homemade pretzel bites stay fresh for about 2 to 3 days when stored at room temperature. To keep them longer, seal them in an airtight container. If you want to store them even longer, freeze them. They can last up to 3 months in the freezer. Yes, you can prepare the dough ahead of time. After kneading, place it in the fridge for up to 24 hours. Just bring it back to room temperature before shaping and boiling. You can also shape and boil them ahead of time, then bake them fresh when you're ready to serve. Cinnamon sugar pretzel bites taste great on their own! However, you can enhance the experience with dips. Try serving them with cream cheese frosting, chocolate sauce, or caramel dip. These pairings add a delightful touch to every bite. If your dough isn't rising, check the yeast. It needs warmth and moisture to activate. Make sure your water is between 110°F to 115°F. If it’s too hot or too cold, the yeast won’t work. Also, ensure you're using fresh yeast. If your dough still doesn’t rise, it may need more time in a warm spot. Making pretzel bites is fun and easy. We covered ingredients, tools, and steps needed. You learned tips for texture and flavor. Variations bring sweet and savory options to your table. Proper storage helps keep them fresh for days. In the end, enjoy your pretzel bites with family or friends. Happy baking!

Cinnamon Sugar Pretzel Bites Irresistible Homemade Snack

- 1 ½ cups graham cracker crumbs - ½ cup unsalted butter, melted - ¼ cup granulated sugar - 1 (14 oz) can sweetened condensed milk - ½ cup fresh key lime juice (about 15-20 limes) - 3 large egg yolks - 1 tablespoon lime zest - ½ teaspoon salt - Whipped cream for topping - Lime slices for garnish You don't need much to make these bars. Here’s what you will use: - 8x8-inch baking dish - Mixing bowls - Whisk - Measuring cups and spoons - Spatula - Knife for cutting If you can't find key limes, you can use regular limes. The taste will change, but it still tastes great. For the crust, you can replace graham crackers with digestive biscuits. If you want a dairy-free option, use coconut cream instead of sweetened condensed milk. You can also swap the unsalted butter for vegan butter if needed. {{ingredient_image_2}} First, set your oven to 350°F (175°C). This step makes sure your pie bars bake evenly. If your oven is not ready, the crust may not bake right. In a bowl, mix 1 ½ cups of graham cracker crumbs, ½ cup of melted unsalted butter, and ¼ cup of granulated sugar. Stir until it feels moist and crumbly. Next, grease an 8x8-inch baking dish. Press the crumb mix into the bottom firmly. It should be flat and even. Bake for 10 minutes, until golden. Once done, take it out and let it cool. While the crust cools, grab another bowl. Whisk together 1 can of sweetened condensed milk, ½ cup of fresh key lime juice, 3 egg yolks, 1 tablespoon of lime zest, and ½ teaspoon of salt. Mix well until smooth. This filling is the star of your bars, so make sure it’s blended nicely. Now, pour the key lime mix over the cooled crust. Spread it evenly. Put the dish back in the oven and bake for 15-20 minutes. Look for a slight jiggle in the center; this means it's ready. After baking, let the bars cool for 30 minutes at room temperature. Then, chill them in the fridge for at least 2 hours. This helps them firm up before you cut them. When serving, cut into squares and top with whipped cream and a slice of lime. Enjoy this tasty treat! To make the best crust, use fresh graham cracker crumbs. You can crush whole crackers in a food processor for a finer texture. Mix the crumbs with melted unsalted butter and granulated sugar. Press the mixture firmly into your baking dish. Bake until it is lightly golden. This step ensures a crunchy base for your bars. Fresh key limes give the best flavor. You will need about 15-20 limes for half a cup of juice. Roll the limes before cutting to get more juice. Use a microplane to zest the limes. The zest adds a bright touch and enhances the flavor. Always strain the juice to remove any pulp or seeds. When mixing the filling, whisk the sweetened condensed milk, key lime juice, egg yolks, lime zest, and salt until smooth. It should have a creamy texture without lumps. Pour it slowly over the cooled crust. Bake until it’s just set, with a slight jiggle in the center. This ensures a creamy and smooth filling that melts in your mouth. Pro Tips Use Fresh Limes: For the best flavor, always opt for fresh key limes instead of bottled juice. Fresh limes provide a vibrant taste that elevates the pie bars. Chill Thoroughly: Allow the bars to chill for at least 2 hours after baking. This step is crucial for achieving the perfect texture and helps the filling set properly. Uniform Slices: To cut the bars into even squares, use a sharp knife dipped in warm water. Wiping the knife between cuts will help maintain clean edges. Customize the Topping: Get creative with your toppings! Try adding crushed graham crackers, lime zest, or even toasted coconut for an extra layer of flavor and texture. {{image_4}} You can make mini key lime pie bars for fun bite-sized treats. Use a mini muffin tin instead of a baking dish. Press the crust mixture into each cup. Pour the lime filling on top, filling each cup about three-quarters full. Bake them just like the larger bars. They take less time to cook, so watch them closely. These mini bars are perfect for parties or gatherings. Toppings can make your key lime pie bars even more special. Try adding fresh fruit like berries or mango. You can also sprinkle toasted coconut on top for some crunch. A drizzle of chocolate or caramel sauce can add a sweet twist. Keep the whipped cream, as it pairs well with the tart lime flavor. Get creative and mix flavors that you love. If you want to try something new, use different bases for your crust. You can substitute graham cracker crumbs with crushed vanilla wafers or shortbread cookies. For a gluten-free option, use almond flour or gluten-free cookies. Each option gives a unique flavor to your bars. Experiment to find your favorite crust. To keep your Key Lime Pie Bars fresh, store them in the fridge. Use an airtight container. This helps prevent them from drying out. If you don’t have a container, cover them tightly with plastic wrap. Make sure the bars are completely cool before storing. This keeps the texture just right. When stored well, these bars last up to five days in the fridge. After that, they may lose their fresh taste. If you notice any change in texture or smell, it’s best to toss them. Always check for signs of spoilage before enjoying. You can freeze these bars if you want to save some for later. Cut them into squares first. Wrap each square in plastic wrap. Then place them in a freezer-safe bag or container. These bars can be frozen for up to three months. When ready to eat, thaw them in the fridge overnight. Enjoy them cool for a refreshing treat! Key limes are small, round, and green. They have a strong, tart flavor. They are different from regular limes, which are larger and yellow. Key limes grow best in warm, humid places. They are often used in desserts, like key lime pie. Their juice gives a bright taste that makes dishes pop. You can use bottled lime juice, but fresh juice is better. Fresh key lime juice gives a stronger flavor. Bottled juice may taste less vibrant. If you use bottled juice, check the label for added sugars. It may change the taste of your bars. For best results, stick with fresh key limes. The bars are done when the filling is set. You want a slight jiggle in the middle. This means they are cooked but still creamy. Keep an eye on them in the oven. Overbaking can make the filling tough. Trust your senses; they will smell great when done! Yes, you can make these bars ahead of time. They taste even better after chilling. You can bake them a day in advance. Just cover them well and store them in the fridge. When you're ready to serve, cut and top with whipped cream. This makes for an easy dessert! Making Key Lime Pie Bars is fun and easy. We went through all the key steps. We covered ingredients, equipment, and substitutions. Then, we walked through the baking process. I shared tips for a perfect crust and variations to try. Lastly, I explained how to store your bars. I hope this guide helps you enjoy making these tasty treats! Every bite is worth the effort. Enjoy sharing your delicious bars with family and friends!

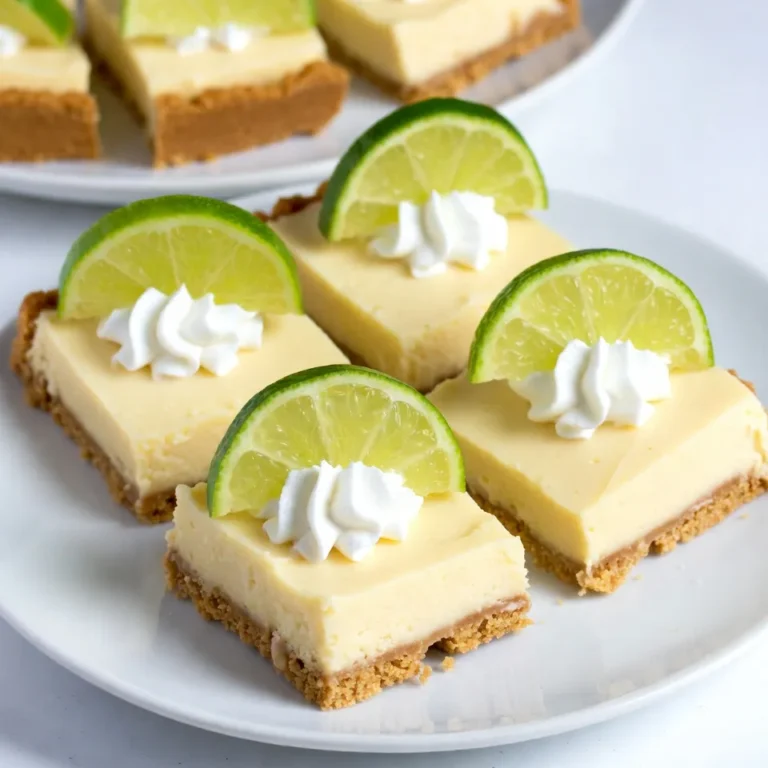
Key Lime Pie Bars Delightful and Easy to Make

The right ingredients make this dish shine. Here’s what you need: - Chicken - 1 lb (450g) boneless, skinless chicken thighs, cut into bite-sized pieces - Peanut Sauce Ingredients - 1/4 cup creamy peanut butter - 1/4 cup soy sauce (or tamari for a gluten-free option) - 1/4 cup coconut milk - 2 tablespoons honey (or maple syrup for a vegan alternative) - 1 tablespoon fresh lime juice - 2 cloves garlic, minced - 1 tablespoon fresh ginger, grated - Vegetables and Garnishes - 2 tablespoons vegetable oil (for sautéing) - 1 red bell pepper, sliced into thin strips - 1 cup broccoli florets, cut small - 1/4 cup chopped green onions (for garnish) - 1 tablespoon sesame seeds (for garnish) - Cooked jasmine rice or rice noodles, for serving Each ingredient plays a key role in bringing flavor and texture. The chicken gives a nice protein base. The peanut sauce is creamy and full of taste. The vegetables add color and crunch. Use fresh ingredients for the best results. Enjoy the cooking process! {{ingredient_image_2}} To make the peanut sauce, grab a medium mixing bowl. Add 1/4 cup of creamy peanut butter. Then, pour in 1/4 cup of soy sauce, 1/4 cup of coconut milk, and 2 tablespoons of honey. Squeeze in 1 tablespoon of fresh lime juice. Next, add 2 cloves of minced garlic and 1 tablespoon of grated ginger. Whisk all these ingredients together until you have a smooth and creamy mixture. Set this sauce aside for later. Now, heat 2 tablespoons of vegetable oil in a large skillet over medium-high heat. Once the oil is hot, add 1 pound of bite-sized chicken thighs to the skillet. Cook the chicken for about 5 to 7 minutes. Stir occasionally to ensure even cooking. When the chicken turns golden-brown, it is ready. After the chicken is cooked, it’s time to add some color. Toss in 1 sliced red bell pepper and 1 cup of small broccoli florets. Stir-fry these for about 3 to 4 minutes. You want the vegetables to be tender but still crisp. This adds a nice crunch to your dish. Next, pour your prepared peanut sauce over the chicken and vegetables in the skillet. Stir well, making sure everything is coated with that delicious sauce. Let it cook for another 2 to 3 minutes. This helps the flavors mix together nicely. To serve, place your Thai peanut chicken over cooked jasmine rice or rice noodles. For a final touch, sprinkle some chopped green onions and sesame seeds on top. These add flavor and a nice crunch. You can even serve it in colorful bowls to make it look extra inviting. A lime wedge on the side is a great idea for a zesty squeeze before eating. To get the right sauce texture, mix well. Use creamy peanut butter for smoothness. If the sauce feels too thick, add a bit more coconut milk. This will give it a nice flow. If it’s too thin, add more peanut butter. The goal is a silky sauce that coats the chicken perfectly. For juicy chicken, choose thighs over breasts. Thighs have more fat, which keeps them moist. Cook them on medium-high heat. This gives them a nice golden-brown color. Make sure not to overcook them. Five to seven minutes is usually enough. You want them cooked through but still tender. Vegetables add crunch and color to your dish. Add them right after the chicken is done. Stir-fry them for about three to four minutes. This keeps them crisp and vibrant. Broccoli and bell peppers should stay bright and tender. Avoid cooking them too long, or they will get mushy. Pro Tips Use High-Quality Peanut Butter: Opt for natural peanut butter without added sugars or oils to enhance the flavor of the sauce. Customize the Veggies: Feel free to add other vegetables like snap peas or carrots for additional color and nutrition. Marinate for Extra Flavor: If you have time, marinate the chicken in the peanut sauce for 30 minutes before cooking to deepen the flavor. Adjust the Spice Level: For a kick, add some red pepper flakes or sriracha to the peanut sauce to spice things up! {{image_4}} To make a vegetarian or vegan Thai peanut chicken, swap the chicken for tofu. Use firm tofu and cut it into bite-sized pieces. For the sauce, replace honey with maple syrup. This keeps it sweet and plant-based. You can also add more veggies, like carrots and snap peas. They add color and crunch to the dish. You can easily make this dish gluten-free. Use tamari instead of soy sauce. Tamari has a similar taste but lacks gluten. Also, double-check that your peanut butter is gluten-free. Many brands are safe, but it’s good to confirm. Serve it with rice or gluten-free noodles to keep it tasty. If you like heat, add chili flakes or sriracha to the sauce. Start with a small amount and taste as you go. You can also toss in sliced jalapeños when cooking the chicken. For an extra kick, serve it with a side of hot sauce. This gives you full control over the spice level. Once you finish your tasty Thai peanut chicken, let it cool. Place it in an airtight container. You can store it in the fridge for up to three days. If you want to keep it longer, think about freezing it. Just make sure to separate it into smaller portions. This way, you can take out only what you need. To reheat, you have a few good options. You can use the microwave, which is quick and easy. Place your chicken in a microwave-safe dish, cover it, and heat for about 1-2 minutes. Stir halfway through to heat evenly. If you prefer the stove, heat it in a skillet over medium heat. Add a splash of water or coconut milk to keep it moist. Stir until it’s hot. Freezing is a smart choice for longer storage. Put the cooled chicken in a freezer-safe container. It can last for up to three months in the freezer. When you’re ready to eat, move it to the fridge to thaw overnight. You can also microwave it on the defrost setting. Just be careful not to heat it too long. Once thawed, reheat it as explained above. Enjoy your meal again! You can use almond butter or cashew butter. Sunflower seed butter works too. Each will change the taste a bit. Choose what fits your diet best. Yes, this dish is great for meal prep. Cook the chicken and veggies, then store. Keep the peanut sauce separate until ready to serve. This keeps everything fresh and tasty. Jasmine rice is a classic choice. It soaks up the sauce well. Rice noodles are also yummy. A simple salad with cucumber and carrots adds a fresh crunch. Yes, you can use chicken breast. It will cook faster and be leaner. Just be careful not to overcook it. This keeps the chicken juicy and tender. Thai Peanut Chicken is mild. The peanut butter and coconut milk balance the heat. You can add chili flakes if you like more spice. Adjust it to your taste! This blog post covered the essential ingredients, step-by-step cooking, and helpful tips for Thai Peanut Chicken. I shared how to make a creamy peanut sauce, cook juicy chicken, and achieve the perfect vegetable texture. You can also explore tasty variations like vegan options or spicy twists. Remember to store leftovers correctly and follow reheating tips to enjoy this dish later. With these insights, you're ready to create a delicious meal that satisfies your cravings. Enjoy cooking and feel confident trying new flavors!

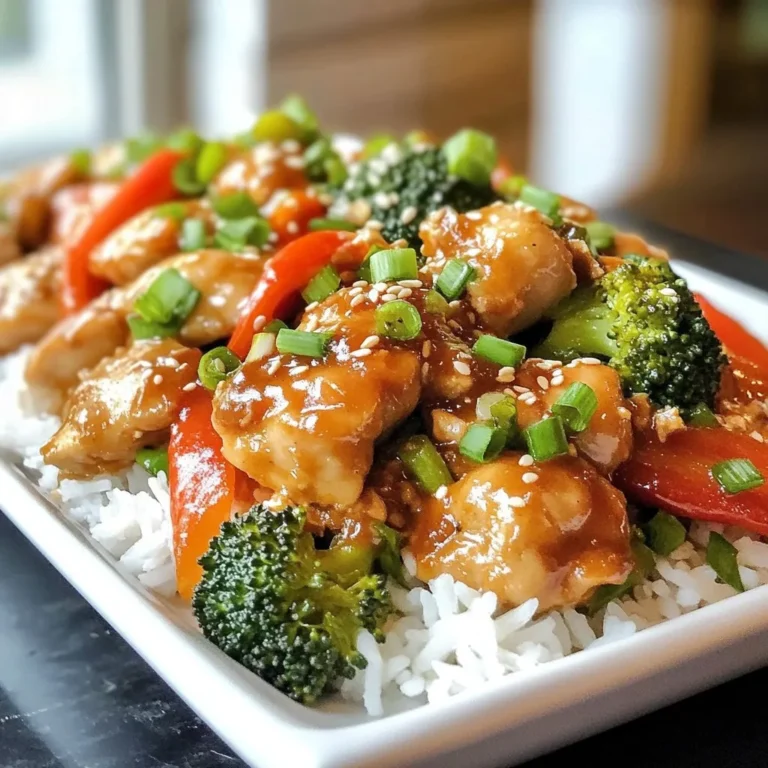
Thai Peanut Chicken Flavorful Weeknight Dinner Recipe

To make this tasty roasted tomato soup, you'll need the following ingredients: - 2 pounds of ripe tomatoes, halved - 1 medium onion, quartered - 4 cloves of garlic, peeled - 3 tablespoons of olive oil - Salt and freshly ground black pepper, to taste - 2 cups of vegetable broth - 1 teaspoon of balsamic vinegar - 1 teaspoon of sugar (optional, for added sweetness) - ½ cup of fresh basil leaves, torn (plus extra for garnish) - ½ cup of heavy cream (or coconut cream for a vegan alternative) If you don't have some ingredients, here are great substitutes: - Tomatoes: Try canned tomatoes for out-of-season options. - Onion: Shallots or leeks work well in a pinch. - Garlic: Garlic powder can add flavor but use less. - Olive Oil: Avocado oil or sunflower oil are good choices. - Vegetable Broth: Chicken broth can be used for a non-vegetarian version. - Balsamic Vinegar: Red wine vinegar adds similar acidity. - Sugar: Maple syrup or honey can add sweetness if desired. - Basil: Oregano or thyme can replace basil for a different taste. - Cream: For a lighter option, use milk or a nut cream substitute. Each ingredient plays a key role in the soup's flavor and health: - Tomatoes: Packed with vitamins and antioxidants, they give the soup its base. - Onion: Adds sweetness and depth while providing fiber and vitamins. - Garlic: Known for its health benefits, it boosts flavor and adds aroma. - Olive Oil: A healthy fat that helps absorb nutrients from the tomatoes. - Salt and Pepper: Essential for enhancing all the flavors in your soup. - Vegetable Broth: Adds richness and depth without extra calories. - Balsamic Vinegar: Gives a tangy note that balances the sweetness of tomatoes. - Sugar: Optional, but it can help round out the flavors in the soup. - Basil: Fresh basil adds a fragrant, herbal note and is rich in vitamins. - Cream: Adds creaminess, making the soup feel luxurious and smooth. This soup is not just tasty but also loaded with nutrients. Enjoy creating this delicious dish with ingredients that work well together! {{ingredient_image_2}} First, gather all your ingredients. You need: - 2 pounds of ripe tomatoes, halved - 1 medium onion, quartered - 4 cloves of garlic, peeled - 3 tablespoons of olive oil - Salt and freshly ground black pepper, to taste - 2 cups of vegetable broth - 1 teaspoon of balsamic vinegar - 1 teaspoon of sugar (optional) - ½ cup of fresh basil leaves, torn - ½ cup of heavy cream (or coconut cream for a vegan option) Next, preheat your oven to 425°F (220°C). This step is key for great roasting. In a large bowl, mix the halved tomatoes, quartered onion, and peeled garlic. Pour in 2 tablespoons of olive oil. Then, sprinkle with salt and black pepper. Toss until everything is well coated. Spread the tomato mix onto a large baking sheet. Make sure they are in a single layer. This helps them roast evenly. Place the baking sheet in the oven. Roast for 30-35 minutes. Look for caramelized tomatoes with soft texture and slightly charred edges. This brings out rich flavors. Remove the roasted vegetables from the oven. Carefully transfer them to a large pot. Pour in 2 cups of vegetable broth. Add 1 teaspoon of balsamic vinegar and sugar if you want a bit of sweetness. Heat over medium, bringing the mix to a gentle simmer. Let it cook for about 10 minutes. This time helps the flavors combine well. After simmering, remove the pot from heat. Stir in the torn basil leaves. This will add a fresh taste to your soup. For a smooth texture, use an immersion blender to puree the soup. If you like it chunkier, blend only half or mash with a fork. Return the pureed soup to low heat. Stir in ½ cup of heavy cream. Taste and adjust salt and pepper if needed. Heat through gently, but do not boil. Now, you have a delicious, creamy roasted tomato soup ready to enjoy! To get the best flavor from your tomatoes, roast them well. Here are some tips: - Use ripe tomatoes. They should be bright and fragrant. - Cut them in half for even cooking. - Spread them out on the baking sheet. This helps them roast, not steam. - Keep the oven at 425°F (220°C). This high heat caramelizes the edges. - Roast for 30-35 minutes. Look for soft, slightly charred tomatoes. You can tweak the flavors to suit your taste. Here’s how: - Add more garlic for a stronger flavor. - Use more basil for a fresh, herbal note. - If you like sweetness, add a teaspoon of sugar. - Balsamic vinegar adds depth. It balances the tomato's acidity. - Don’t forget salt and pepper. They enhance all the flavors. If you want a vegan soup, swap the cream easily. Here are some great options: - Use coconut cream for a rich, creamy texture. - Almond milk gives a lighter feel. - Cashew cream adds a nice, nutty flavor. - For a thicker option, blend soaked cashews with water. - Each choice brings a unique taste to your soup. By following these tips and tricks, you elevate your roasted tomato soup. Enjoy the process and make it your own! Pro Tips Choose the Right Tomatoes: For the best flavor, select ripe, in-season tomatoes. Heirloom varieties are particularly delicious for roasting and offer a rich sweetness. Add Depth with Spices: Consider adding herbs like thyme or oregano to the roasting vegetables for added complexity, enhancing the overall flavor profile of the soup. Blend for Texture: Adjust the texture of your soup to your preference. A smooth puree provides a luxurious mouthfeel, while a chunkier version offers heartiness. Garnish Creatively: Elevate your dish with creative garnishes. A dollop of pesto or a sprinkle of croutons can add texture and visual appeal to your roasted tomato basil soup. {{image_4}} You can easily boost the flavor of your roasted tomato soup. Here are some ideas: - Oregano: Add 1 teaspoon for a warm, earthy taste. - Thyme: Use fresh or dried thyme for a fresh twist. - Red pepper flakes: Sprinkle in some heat for a spicy kick. - Smoked paprika: This adds a lovely smoky flavor to the soup. Experiment with these spices to find what you love. Mixing different herbs can create unique versions of the soup. Keeping it vegan and gluten-free is simple! Here’s how: - Coconut cream: Swap heavy cream for coconut cream for a rich, creamy texture. - Gluten-free broth: Ensure your vegetable broth is gluten-free. - Sugar: You can use agave syrup or maple syrup instead of sugar for sweetness. These swaps keep the soup delicious and inclusive for all diets. Garnishing your soup makes it look and taste better. Here are some fun ideas: - Fresh basil: Add torn basil leaves for a fresh pop of flavor. - Olive oil drizzle: A drizzle of good olive oil adds richness. - Croutons: Top with homemade croutons for crunch. - Chili oil: A splash of chili oil gives a spicy touch. These garnishes not only enhance the look but add layers of taste to your soup. Enjoy your culinary creativity! To keep your roasted tomato soup fresh, store it in an airtight container. Allow it to cool down before sealing. This step helps prevent condensation, which can make the soup watery. Place the container in the fridge if you plan to eat it within three days. When you’re ready to enjoy your soup again, pour it into a pot. Heat it over low to medium heat on the stove. Stir often to avoid sticking. You can also use a microwave. Just heat it in a microwave-safe bowl for about two minutes. Stir halfway through to ensure even heating. If you want to save your soup for later, freezing is a great option. Cool the soup completely before freezing. Use freezer-safe bags or containers. Leave some space at the top because the soup will expand when frozen. It will stay good for up to three months. To reheat, thaw it overnight in the fridge and then warm it on the stove. You can serve roasted tomato soup with several sides. A classic pairing is a grilled cheese sandwich. The gooey cheese complements the soup's rich flavor. You can also try crusty bread or garlic toast. Both add a nice crunch and make dipping fun. For a lighter option, consider a fresh salad. A simple green salad with vinaigrette can balance the meal. Roasted tomato soup can last for about 3 to 5 days in the fridge. Store it in an airtight container to keep it fresh. If you want to enjoy it longer, you can freeze it. Frozen soup can last for about 3 months. Just remember to cool it completely before freezing. This helps prevent ice crystals from forming. Yes, you can make roasted tomato soup ahead of time. This soup tastes even better the next day. The flavors deepen as it sits. Just follow the recipe, then cool it and store it. When you’re ready to eat, reheat it gently on the stove. Stir in the cream right before serving for the best taste. This blog post showed you how to make roasted tomato soup from start to finish. We covered ingredients, step-by-step cooking, and helpful tips. You learned about substitutes, flavor tweaks, and even how to store leftovers. Remember, cooking is fun and gives you many choices. Don't be afraid to try new things or make the soup your own. Enjoy making this dish and share it with others!

Roasted Tomato Soup Flavorful and Easy Recipe

PREV 1 … 33 34 35 … 48 NEXT
meal plan mapper

explore

DessertsDinnerAppetizersDrinks

Our Policies

  • Cookie Policy
  • Copyright Policy
  • Disclaimer
  • GDPR Policy
  • Terms Of Use
Back to Top
  • About
  • Contact Us
  • Privacy Policy
© 2025 meal plan mapper