FREE DINNER EBOOK! Get your copy!
  • Cookie Policy
  • GDPR Policy
  • Disclaimer
  • Terms Of Use
  • Visit my other site: Fun Cookie Recipes
meal plan mapper
  • Home
  • Dinner
  • Desserts
  • Drinks
  • Appetizers
  • Contact
  • About
  • Privacy Policy
  • Home
  • Dinner
  • Desserts
  • Drinks
  • Appetizers
  • Contact
  • About
  • Privacy Policy
  • Cookie Policy
  • GDPR Policy
  • Disclaimer
  • Terms Of Use
Visit my other site: Fun Cookie Recipes

HOME / CATEGORIES /

Latest

- 1 lb large shrimp, peeled and deveined - 1 cup all-purpose flour - 1/2 cup cornmeal The main ingredients for Firecracker shrimp tacos are simple yet delicious. Large shrimp form the star of this dish. They should be fresh and peeled to save time. All-purpose flour and cornmeal create a crispy coating that makes the shrimp extra tasty. - 1 teaspoon smoked paprika - 1 teaspoon garlic powder - 1/2 teaspoon cayenne pepper (adjust for spiciness) - Sea salt and freshly cracked black pepper to taste Seasonings bring the shrimp to life. Smoked paprika adds a warm, deep flavor. Garlic powder gives it a nice kick, while cayenne pepper adds heat. Adjust the cayenne based on your spice preference. Always finish with sea salt and black pepper for balance. - 1 ripe avocado, sliced - 1 cup shredded green cabbage - Fresh cilantro, roughly chopped - Lime wedges (for serving) Toppings elevate the tacos. Sliced avocado offers creaminess that pairs well with the crispy shrimp. Shredded cabbage adds a nice crunch. Fresh cilantro gives a burst of flavor. Lime wedges are essential for that zesty finish. Don’t skip them! Enjoy each bite, and feel free to mix and match toppings to suit your taste. {{ingredient_image_2}} To make the buttermilk mixture, combine 1/2 cup of buttermilk with 1 tablespoon of hot sauce. Stir it well until mixed. This mixture adds flavor and keeps the shrimp moist. Marinate the shrimp for at least 15 minutes. This time allows the shrimp to soak up the spice from the buttermilk. In a bowl, mix together 1 cup of all-purpose flour, 1/2 cup of cornmeal, 1 teaspoon of smoked paprika, 1 teaspoon of garlic powder, and 1/2 teaspoon of cayenne pepper. Add sea salt and black pepper to taste. This coating gives the shrimp a nice crunch. Make sure you mix well so every bite is flavorful. After marinating, take each shrimp out of the buttermilk. Let the excess buttermilk drip off before dredging. Coat each shrimp in the flour mixture. Shake off any extra flour to avoid clumps. Heat about an inch of vegetable oil in a frying pan over medium-high heat. When the oil is shimmering, add the shrimp in batches. Fry each side for 2-3 minutes until golden brown. Use a plate lined with paper towels to drain excess oil. To warm the corn tortillas, use another skillet over medium heat. Warm each tortilla for about 30 seconds on each side. Look for a slight char to add flavor. This step makes the tortillas soft and easy to fold for your tacos. Start with a warm tortilla. Place a generous amount of crispy shrimp in the center. Top with sliced avocado and a handful of shredded green cabbage. The cabbage adds a nice crunch. For a fresh touch, sprinkle chopped cilantro on top. Finally, serve with lime wedges to squeeze over the tacos for a zesty kick. Enjoy the bursts of flavor with each bite! To get that crunchy texture, use vegetable oil or canola oil. Both oils heat well and fry shrimp perfectly. Always check the oil temperature. It should be hot, but not smoking, around 350°F. Adjust your heat as needed. If it’s too hot, the shrimp may burn. If it’s too cool, they’ll be greasy. For a tasty twist, try using yogurt or coconut milk instead of buttermilk. Both options add great flavor. You can also add lime juice or garlic to your marinade for extra zest. Letting shrimp marinate for 15 to 30 minutes allows them to soak in flavors. Serve these tacos with a side of rice and beans for a complete meal. A fresh salad pairs well too, adding crunch and color. For drinks, try a light beer or a fruity soda. They balance the spice of the shrimp nicely. Enjoy your meal with friends for a fun taco night! Pro Tips Choose the Right Shrimp: Opt for large, fresh shrimp for the best texture and flavor. Frozen shrimp can also work, but be sure to thaw them properly before marinating. Adjusting Spice Levels: Feel free to modify the cayenne pepper according to your heat preference. For a milder version, reduce the amount or leave it out entirely. Perfectly Crispy Coating: Make sure to shake off excess flour after dredging the shrimp to avoid clumping, which can prevent the coating from becoming crispy. Serving Suggestions: These tacos pair wonderfully with a side of spicy salsa or a refreshing mango salsa for an added burst of flavor! {{image_4}} You can change the shrimp in this recipe. Chicken works great. Use boneless, skinless chicken thighs or breasts. Cut them into small pieces, then follow the same marinating and frying steps. Tofu is another option. Firm tofu absorbs flavors well. Press it to remove water, then cut it into cubes. Marinate and coat just like the shrimp. Spices can change the taste of your tacos. Try adding cumin or onion powder for a different kick. Fresh herbs like cilantro or parsley add a bright taste. You can also balance sweet and spicy. Mix in honey or maple syrup for sweetness. Adjust the cayenne pepper for more or less heat. This way, you can make it just how you like it. Garnishing makes tacos appealing. Add lime wedges for extra zing. Crumbled feta or queso fresco gives a creamy touch. Use colorful toppings, like diced tomatoes or radishes, for a visual pop. For serving, stack the tacos on a wooden board. This creates a fun, casual vibe. You can also serve them in individual baskets lined with parchment paper. To keep your leftover shrimp fresh, store them in an airtight container. Place a paper towel inside to absorb moisture. This helps maintain crispiness. Store them in the fridge for up to three days. For best results, keep the toppings separate. Wrap tortillas in foil or plastic wrap to avoid drying out. To reheat shrimp, use a skillet over medium heat. Add a splash of oil to prevent sticking. Warm them for about three minutes, flipping halfway. For tortillas, heat them in a dry skillet for 30 seconds on each side. This brings back their softness and flavor. You can freeze cooked shrimp for later use. Allow them to cool completely before freezing. Place shrimp in a single layer on a baking sheet to prevent sticking. Once frozen, transfer them to a freezer-safe bag. To thaw, leave shrimp in the fridge overnight. Use them in tacos or salads for a quick meal. You should marinate the shrimp for at least 15 minutes. This time lets the flavors soak in. If you want a stronger taste, you can marinate them for up to 30 minutes. Just don't go longer, as the shrimp can become mushy. Yes, you can easily make these tacos gluten-free. Simply swap the all-purpose flour with a gluten-free flour blend. You can also use cornmeal alone for the coating. Make sure to check the corn tortillas to ensure they are gluten-free. If you don’t have buttermilk, you can make a quick substitute. Mix 1/2 cup of milk with 1/2 tablespoon of lemon juice or vinegar. Let it sit for about 5 minutes. This will create a tangy flavor similar to buttermilk. The spice level can vary. The cayenne pepper adds heat, but you can adjust it. For milder tacos, use less cayenne. If you love spice, add more hot sauce or cayenne. Taste as you go to find your perfect heat. To cook shrimp properly, watch for their color. They should turn pink and opaque. This usually takes about 2-3 minutes per side in the hot oil. To be sure, cut one open; it should be white and firm inside. In this article, we explored how to make delicious Firecracker Shrimp Tacos. We covered the key ingredients like shrimp, flour, and cornmeal. You learned about marinating, coating, and cooking methods to get the perfect crunch. We also shared tips for toppings and serving. Remember, you can adapt these tacos with different proteins or spices. Have fun experimenting! Enjoy sharing your tasty creations with friends and family. Your culinary skills will shine with this dish.

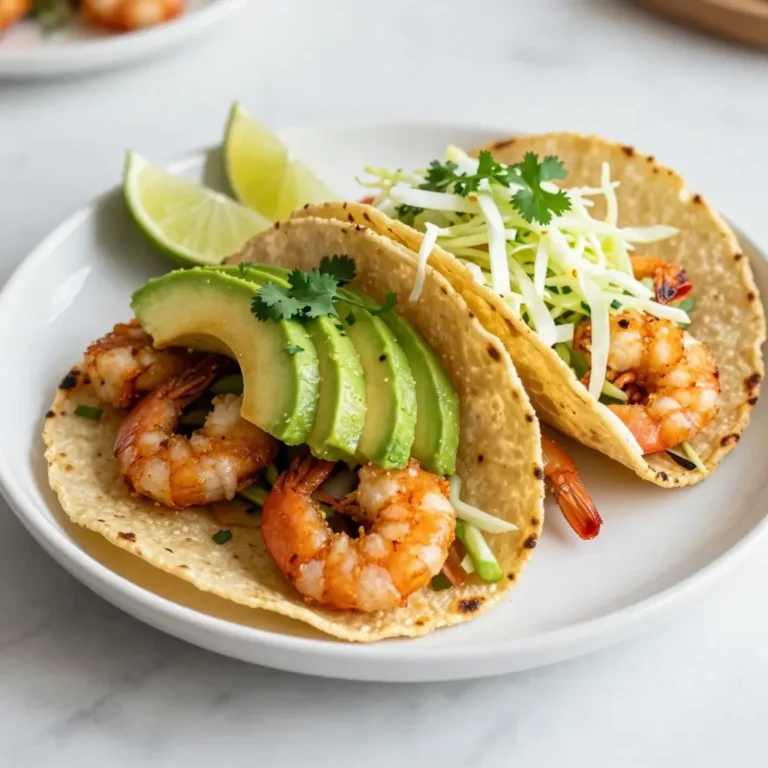
Firecracker Shrimp Tacos Flavorful and Easy Recipe

- 200g spaghetti or fettuccine - 100g cream cheese, softened - 2 large eggs, at room temperature - 100g grated Parmesan cheese, plus extra for serving - 150g pancetta or turkey bacon, diced into small pieces - 2 cloves garlic, finely minced - 1 tablespoon olive oil - Sea salt and freshly cracked black pepper, to taste - Fresh parsley, finely chopped, for garnish You need a few simple ingredients to make creamy carbonara. Start with pasta. Spaghetti or fettuccine works best. You will also want cream cheese for that rich flavor. Eggs add creaminess too. Parmesan cheese gives a lovely salty taste. Pancetta or turkey bacon is key for a nice crunch. Garlic adds depth. Olive oil helps cook the pancetta. Lastly, season with salt and pepper to taste. Fresh parsley brings color and freshness to the dish. - Extra grated Parmesan cheese - Freshly cracked black pepper - Additional chopped parsley For garnishes, consider adding more Parmesan on top. It makes the dish look fancy. Freshly cracked black pepper adds a nice kick. Chopped parsley not only looks pretty but also adds flavor. You can mix and match these garnishes to your liking. - Use cream cheese alternatives like Greek yogurt for a lighter option. - Swap pancetta with bacon or even mushrooms for a vegetarian take. - Replace Parmesan with nutritional yeast for a dairy-free option. If you don't have cream cheese, try Greek yogurt. It gives a similar taste but is lighter. You can replace pancetta with bacon for a different flavor. For a vegetarian version, use mushrooms instead. If you want a dairy-free meal, nutritional yeast works well as a Parmesan substitute. These swaps keep your dish tasty and fun! {{ingredient_image_2}} To start, fill a large pot with water. Add a good amount of salt. Bring it to a vigorous boil. Now, add 200g of spaghetti or fettuccine. Cook it according to the package directions. Aim for al dente, which usually takes about 8-10 minutes. Before draining, save 1 cup of the pasta water. Drain the pasta and set it aside. In a medium mixing bowl, add 100g of softened cream cheese. Crack in 2 large eggs, at room temperature. Add 100g of grated Parmesan cheese. Sprinkle in a pinch of sea salt and freshly cracked black pepper. Use a whisk to mix everything until it’s smooth and creamy. Make sure there are no lumps. Set this mixture aside for later. Heat a large skillet over medium heat. Drizzle in 1 tablespoon of olive oil. Once the oil is hot, add 150g of diced pancetta or turkey bacon. Cook it for about 5-7 minutes, until it’s golden brown and crispy. In the last minute, add 2 cloves of finely minced garlic. Stir it in, but watch out—don’t burn the garlic! Now, lower the heat to the minimum setting. Add the drained pasta to the skillet with the crispy pancetta and garlic. Toss it gently to combine. Gradually pour in the cream cheese mixture. Stir continuously to keep the eggs from scrambling. Make sure every strand of pasta gets coated in the creamy sauce. If it gets too thick, add the reserved pasta water a little at a time. Adjust until it’s creamy and just right. To get that smooth and creamy sauce, follow these steps: - Use room-temperature eggs. Cold eggs can curdle. - Mix cream cheese and eggs well until there are no lumps. - Add a bit of reserved pasta water to adjust the sauce texture. This helps it cling to the pasta. Slowly stir the sauce into the pasta. This keeps it creamy and smooth. The key is to mix gently and avoid high heat. High heat can scramble the eggs, ruining your dish. Here are a few common errors I see often: - Skipping the reserved pasta water can make your sauce too thick. - Overcooking the pancetta will lead to a burnt taste. Cook until golden brown. - Adding the cream cheese mixture too fast can cause the eggs to cook unevenly. Always pour slowly. Keep an eye on the garlic as it cooks. It can burn quickly and turn bitter. Want to save time? Here are some quick tips: - Prep all your ingredients before cooking. Chop the pancetta and mince the garlic early. - Use a pot with a wide base for faster pasta cooking. - Cook the pasta while you prep the sauce. This cuts down on cooking time. These small steps can make your cooking process smoother and faster. Enjoy your creamy carbonara in no time! Pro Tips Use Room Temperature Eggs: Bringing your eggs to room temperature helps them to emulsify better with the cream cheese, resulting in a smoother sauce. Reserve Pasta Water: Always reserve some pasta water before draining. This starchy water is perfect for adjusting the consistency of your sauce. Don’t Overcook the Pancetta: Cook the pancetta until it’s just crispy; overcooking can lead to a tough texture that doesn't meld well with the creamy sauce. Serve Immediately: Creamy carbonara is best enjoyed fresh. Serve it right after preparation to ensure the sauce remains luscious and creamy. {{image_4}} To make a vegetarian creamy carbonara, skip the pancetta. Use sautéed mushrooms for a meaty texture. I love using shiitake or cremini mushrooms. They add umami flavor without meat. Also, add some peas or spinach for color and nutrition. The cream cheese and eggs still provide that rich, smooth sauce. It’s a delightful twist on the classic recipe! If you want to add protein, use chicken. Start with diced, cooked chicken breast. Sauté it with the pancetta or turkey bacon for extra flavor. You can also use rotisserie chicken for quick prep. Just shred it before mixing with the sauce. This version keeps all the creamy goodness while making it more filling. For a gluten-free version, choose gluten-free pasta. Many brands offer great alternatives that taste amazing. You can also try zucchini noodles, known as zoodles. They are light and healthy. Just remember to cook them less, as they need only a few minutes. The creamy sauce will still coat them well, giving you a tasty meal. To keep your creamy carbonara fresh, let it cool first. Then, place it in an airtight container. Make sure to store it in the fridge. It will stay good for about three days. If you want to keep it longer, consider freezing it. When it's time to eat your leftovers, heat them gently. You can use a skillet on low heat. Add a splash of water or a little olive oil to keep it creamy. Stir it often to avoid burning. You can also use the microwave. Just cover it loosely to prevent splatter. Heat in short bursts, stirring in between. If you want to freeze your carbonara, it’s best to do so before adding the eggs. Cook the pasta and pancetta, then mix everything else. Let it cool, then freeze in a safe container. It can last up to three months. When ready to eat, thaw it overnight in the fridge. Reheat slowly, adding extra cheese or cream to bring back the creaminess. Carbonara is an Italian pasta dish. It uses simple ingredients. The main ones are eggs, cheese, and pork. The dish is creamy and rich. Traditionally, it includes guanciale, which is Italian cured pork. However, many people use pancetta or bacon today. Yes, you can! While spaghetti is classic, you can switch it up. Fettuccine, penne, or even gluten-free pasta work well. Choose one that you enjoy. Just make sure to cook it al dente for the best texture. To make dairy-free carbonara, swap cream cheese with a plant-based option. Use dairy-free cheese or a mix of silken tofu and nutritional yeast. This will keep it creamy without dairy. You can also use a bit of almond milk for extra richness. This recipe offers a twist on traditional carbonara. Authentic carbonara uses fewer ingredients and no cream. However, my version adds cream cheese for extra creaminess. It still gives a delicious taste and is easy to make. In this post, I shared how to make a creamy carbonara with simple steps. We covered all the essential ingredients, plus optional garnishes and substitutions for your needs. I provided step-by-step instructions to guide you through each stage, ensuring a delicious result. Remember the tips to avoid common mistakes, and explore variations like vegetarian or gluten-free options. When storing leftovers, follow my tips for maximum flavor. Enjoy your cooking adventure and savor each bite of this tasty dish!

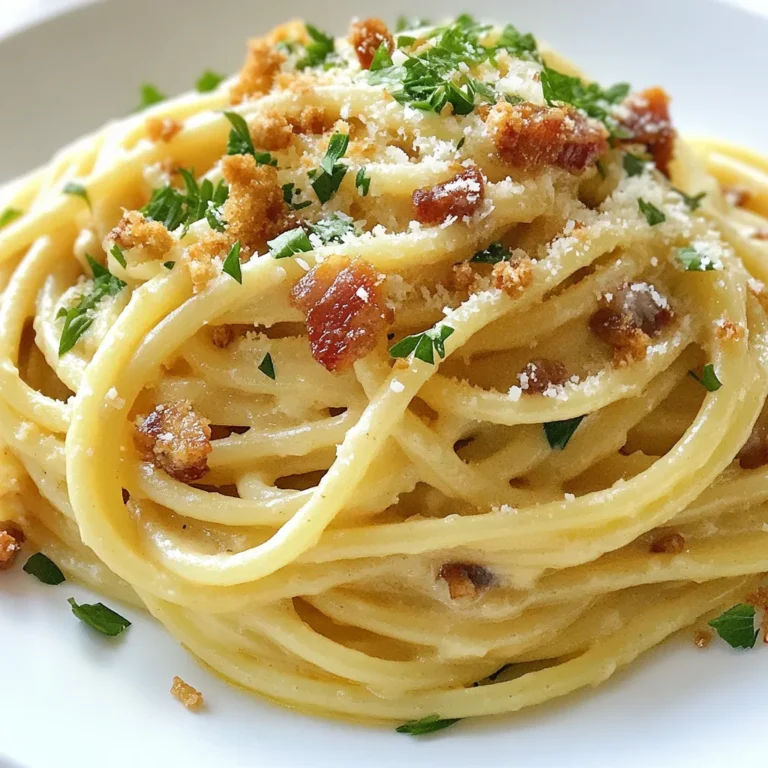
Creamy Carbonara Pasta Quick and Delicious Meal

- 1 pound ground turkey - 1 cup fresh spinach, finely chopped - 1/2 cup feta cheese, crumbled - 1/4 cup breadcrumbs - 1/4 cup grated Parmesan cheese - 1 large egg - 1 clove garlic, minced - 1/2 teaspoon dried oregano - 1/2 teaspoon salt - 1/4 teaspoon freshly ground black pepper - Marinara sauce for serving - 1 tablespoon olive oil for cooking The main ingredients in this recipe are key to its flavor and texture. Ground turkey is lean and healthy. It becomes juicy and tasty when mixed with finely chopped spinach and crumbled feta cheese. Spinach adds vitamins, while feta offers a salty kick. Next, the additional ingredients help bind and flavor the meatballs. Breadcrumbs and grated Parmesan cheese add a nice crunch. The egg keeps the meatballs together. Garlic, oregano, salt, and pepper bring out all the flavors in the dish. For an extra touch, you can use marinara sauce when serving. It adds a warm, rich flavor. A little olive oil helps the meatballs brown nicely in the oven. These ingredients combine to make a simple yet delicious meal. {{ingredient_image_2}} 1. Preheat your oven to 400°F (200°C). This helps the meatballs cook evenly. 2. Line a baking sheet with parchment paper. This will stop the meatballs from sticking. 3. In a large bowl, mix together the ground turkey, finely chopped spinach, crumbled feta, breadcrumbs, grated Parmesan, minced garlic, dried oregano, salt, black pepper, and the egg. 1. Use your hands or a sturdy spoon to blend the ingredients well. Make sure spinach and feta are spread out. 2. Shape the mixture into meatballs about 1.5 inches wide. This size cooks well. 3. Place the meatballs on the baking sheet. Leave space between them so they cook evenly. 1. Drizzle olive oil over the meatballs. This helps them brown nicely. 2. Bake in the oven for 20-25 minutes. The meatballs should be golden brown. 3. Check the internal temperature with a meat thermometer. They need to reach 165°F (74°C) to be safe to eat. To make the best meatballs, mix your ingredients well. This helps distribute the flavors evenly. Use your hands or a strong spoon for this task. Aim for meatballs about 1.5 inches wide. This size cooks evenly and stays juicy. You can choose between baking and pan-frying. Baking is simple and healthier. It allows the meatballs to cook without extra oil. If you prefer pan-frying, add olive oil to a hot pan. Cook until brown on all sides for a crispy texture. Always use a meat thermometer to check doneness. The internal temperature should reach 165°F (74°C). This ensures your meatballs are safe to eat and perfectly cooked. For a stunning dish, arrange the meatballs on a nice platter. Garnish with fresh basil for color and flavor. Place a bowl of warm marinara sauce in the middle. This makes for a great dip and adds a delicious touch. Pair these meatballs with a fresh salad or steamed veggies. Serve them over pasta or with crusty bread for a complete meal. Enjoy the burst of flavor from the spinach and feta in every bite! Pro Tips Use Fresh Ingredients: Fresh spinach and high-quality feta cheese will enhance the flavor and texture of your meatballs. Don't Overmix: When combining the ingredients, mix just until incorporated to keep the meatballs tender. Experiment with Herbs: Try adding fresh herbs like parsley or dill for an extra layer of flavor in your meatballs. Check Internal Temperature: Use a meat thermometer to ensure the meatballs reach 165°F (74°C) for safe consumption. {{image_4}} You can easily modify this recipe to fit your needs. For gluten-free meatballs, swap regular breadcrumbs for gluten-free options. Many brands offer good alternatives. You can even use ground oats or almond flour. These options keep the texture while making it gluten-free. If you want a dairy-free version, replace feta cheese with tofu or a plant-based cheese. Crumbled tofu works well and soaks up flavors nicely. Nutritional yeast can also add a cheesy taste. Spice up your meatballs by adding herbs or spices. Fresh herbs like basil or parsley add great flavor. You can also try adding red pepper flakes for some heat. This gives your meatballs a fun twist. If you want to change the protein, use ground chicken or lean beef. Each type adds a different taste. Feel free to experiment with flavors until you find your favorite mix. You can change how you serve these meatballs. Try making sliders instead. Simply use smaller portions and place them on mini buns. This is perfect for parties. You can also serve them as appetizers or a main course. Pair them with a fresh salad or pasta. These options make for a great meal or snack, no matter the occasion. To store leftovers in the fridge, place meatballs in an airtight container. This keeps them fresh. You can keep them in the fridge for about three days. Enjoy them within this time for the best taste and safety. For freezing meatballs, let them cool first. Then, arrange them in a single layer on a baking sheet. Once frozen, transfer them to a freezer-safe bag or container. They can last up to three months in the freezer. When you're ready to eat, thaw them in the fridge overnight. You can reheat meatballs in the oven or microwave. For the oven, preheat to 350°F (175°C). Bake for about 15 minutes until warm. The oven helps keep them crispy. If using the microwave, heat on medium power for two to three minutes. This way, they stay moist but may lose some crunch. Enjoy your meatballs hot and flavorful! Yes, you can use frozen spinach. Just make sure to thaw and drain it well. Frozen spinach has a softer texture than fresh. This can change how the meatballs feel. If you want a firmer bite, fresh is best. You can swap ground turkey with ground chicken or lean beef. Both options will work well. If you want a lighter taste, ground chicken is great. For a richer flavor, lean beef is a good choice. Check the internal temperature of the meatballs. They should reach 165°F (74°C). You can use a meat thermometer for this. The meatballs will also look golden brown on the outside when done. I love serving these meatballs with marinara sauce. You can drizzle it on top or serve it on the side for dipping. Placing fresh basil leaves around the platter makes it look pretty. You can serve them as an appetizer or a main dish. Yes, you can make them ahead! Prepare the meatballs, then store them in the fridge for up to a day. For longer storage, freeze them. Just thaw before cooking. This makes meal prep easy and quick! The Spinach Feta Turkey Meatballs recipe combines simple ingredients for a tasty dish. Ground turkey, fresh spinach, and feta cheese create a healthy base. You can customize it with extras like breadcrumbs and spices. Remember to check cooking times and temperatures for best results. Storage tips help keep your leftovers fresh. Whether you serve them as appetizers or a main course, these meatballs impress. By trying different variations, you can make this dish fit any diet or occasion. Experiment and enjoy the flavors!

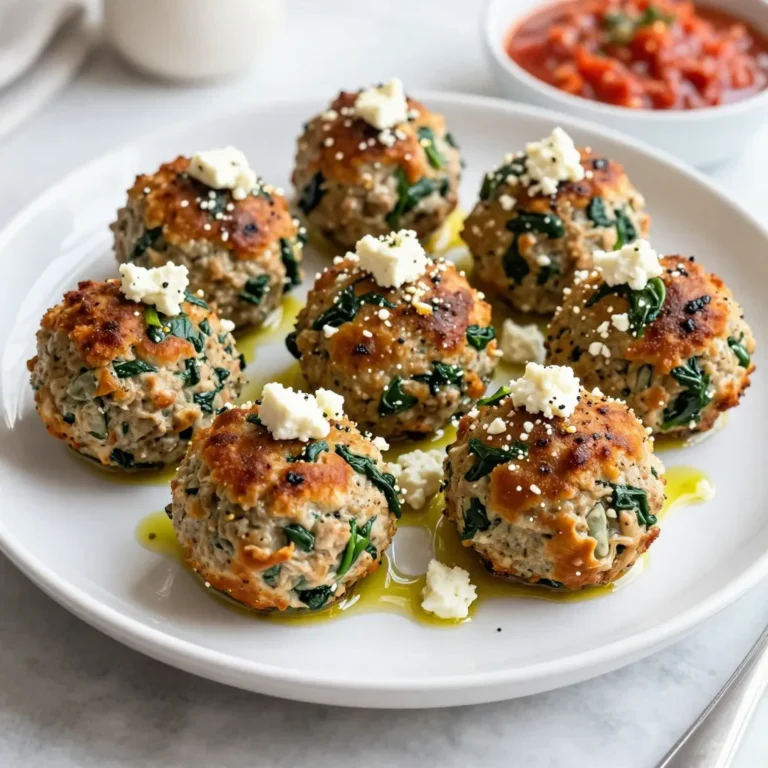
Spinach Feta Turkey Meatballs Simple and Healthy Recipe

- 1 sheet of puff pastry, thawed - 1 cup cooked ham, diced into small pieces - 1 cup sharp cheddar cheese, shredded - 1/2 cup cream cheese, softened to room temperature - 1 tablespoon Dijon mustard - 1 egg, beaten (for egg wash) - 1 tablespoon fresh chives, finely chopped (optional for garnish) - Salt and freshly ground black pepper to taste The puff pastry is the star of this dish. It gives a light, flaky texture. Choose a quality brand for the best result. The cooked ham adds a rich, savory flavor. I prefer using diced ham for a better bite. Sharp cheddar cheese brings a bold taste. It melts beautifully and complements the ham. Cream cheese adds creaminess and helps bind the filling. Dijon mustard gives a slight tang, which brightens each bite. Fresh chives add color and a mild onion flavor, making them an optional but tasty garnish. If you want to change things up, you can use other meats. Turkey or chicken work well in place of ham. For cheese, try mozzarella or gouda for different flavors. If you need a dairy-free option, use a plant-based cream cheese. You can also skip the mustard if you prefer a milder taste. Feel free to add vegetables too. Spinach or bell peppers can add great color and nutrition. These simple swaps keep the recipe fresh and fun! {{ingredient_image_2}} Start by preheating your oven to 400°F (200°C). This step is important for getting a nice, crisp pastry. While the oven heats, prepare your baking sheet. Line it with parchment paper to stop the pockets from sticking. This makes cleanup easy too! Next, take your thawed puff pastry sheet. Place it on a lightly floured surface. Use a rolling pin to smooth out any creases. Then, grab a sharp knife or pizza cutter. Cut the pastry into four equal squares. Make sure they are even for the best cooking results! Now, it’s time to create the filling. In a medium mixing bowl, combine the diced ham, shredded cheddar cheese, softened cream cheese, and Dijon mustard. If you like, fold in chopped chives for an extra flavor boost. Don't forget to season with salt and black pepper to taste. This mixture should be tasty and creamy! Take one square of puff pastry and place a generous spoonful of the ham and cheese mixture in the center. Be careful not to overfill it. Fold the pastry over the filling to create a triangle shape. Press the edges firmly to seal. For a fun touch, use a fork to crimp the edges! Before baking, brush the tops of each pocket with the beaten egg. This egg wash helps give the pastry a beautiful golden-brown color. It also adds a nice sheen to the finished dish, making it look extra appetizing. Place the filled pockets on your prepared baking sheet. Bake them in your preheated oven for 15-20 minutes. Watch closely for a puffed, golden-brown finish. Once baked, take them out and let them cool for a few minutes. Serve warm, and enjoy your delightful ham and cheese puff pastry pockets! To get the best puff pastry, keep it cold. Warm pastry doesn’t puff well. Thaw it in the fridge, not on the counter. Roll it out gently to avoid tearing. Cut even squares for uniform pockets. Use a sharp knife for clean edges. You can boost the taste by adding more ingredients. Try adding diced onions or peppers. Fresh herbs like thyme or parsley work great too. For a spicy kick, consider adding jalapeños. These add-ins make each bite exciting. They also help you personalize your pockets. A few mistakes can spoil your puff pastry pockets. First, don’t overfill them. This makes sealing hard and causes leaks. Second, remember to crimp the edges well. This keeps the filling inside while baking. Lastly, skip the egg wash at your own risk. It gives a shiny, golden finish. Pro Tips Perfect Puff Pastry: Ensure your puff pastry is fully thawed and cold before rolling it out. This will help maintain its flaky texture during baking. Flavor Boost: Experiment with different types of cheese or add herbs like thyme or rosemary to the filling for an extra layer of flavor. Sealing Techniques: For a stronger seal, brush a little water along the edges of the pastry before crimping. This helps the edges stick together better during baking. Serving Suggestions: Pair these pockets with a tangy dipping sauce, like a honey mustard or a spicy aioli, for a delightful contrast of flavors. {{image_4}} You can change up the cheese in your ham and cheese puff pastry pockets. Try using mozzarella for a milder flavor. Swiss cheese adds a nice nutty taste. If you like a kick, pepper jack works great too. Each cheese brings its own fun twist to the dish. Mix and match cheeses for even more flavor! You can make these pockets even better by adding veggies. Spinach, bell peppers, or mushrooms all work well. Chop them small so they fit nicely in the pockets. You can also add spices for more flavor. A little garlic powder or paprika can really spice things up. Fresh herbs like basil or parsley can add a bright taste too. Want to try something new? You can make sweet puff pastry pockets! Instead of ham and cheese, use sweet cream cheese mixed with fruit. Berries or apples are great choices. Add a sprinkle of sugar and cinnamon for an extra treat. Bake as usual for a fun dessert. Sweet or savory, these pockets are sure to please! Store any leftover ham and cheese puff pastry pockets in an airtight container. This keeps them fresh. You can keep them in the fridge for up to three days. Make sure they cool completely before sealing them up. This step helps avoid sogginess. To reheat, preheat your oven to 350°F (175°C). Place the pockets on a baking sheet. Heat them for about 10-15 minutes. This method keeps the pastry crisp. You can also use a microwave, but it may make the pastry less crunchy. If you prefer the microwave, heat in short bursts of 30 seconds. You can freeze these pockets for up to two months. Before freezing, place them in a single layer on a baking sheet. Once frozen, transfer them to a freezer-safe bag. This prevents them from sticking together. When ready to eat, no need to thaw. Just bake them at 400°F (200°C) for about 20-25 minutes or until golden brown. Yes, you can use other meats. Chicken or turkey work great too. You can even use leftover roast beef. Just make sure to chop it small, like the ham. To reheat, preheat your oven to 350°F (175°C). Place the pockets on a baking sheet. Heat them for about 10-15 minutes. This keeps the pastry crispy and the filling warm. Absolutely! You can prepare the filling and fill the pastry squares. Then, cover and chill them in the fridge for a few hours. Bake them just before serving for the best taste. Many sauces go well with these pockets. Try honey mustard for a sweet touch. Barbecue sauce adds a smoky flavor. Ranch dressing also makes a tasty dip. We explored making delicious ham and cheese puff pastry pockets. We covered all the ingredients, from key details to possible substitutions. The step-by-step guide helps you prep, fill, and bake perfectly. You learned tips to enhance flavor and avoid common mistakes. We even looked at variations and storage tips to keep your pockets fresh. Now, it's time to create your tasty treats. Enjoy your cooking journey!

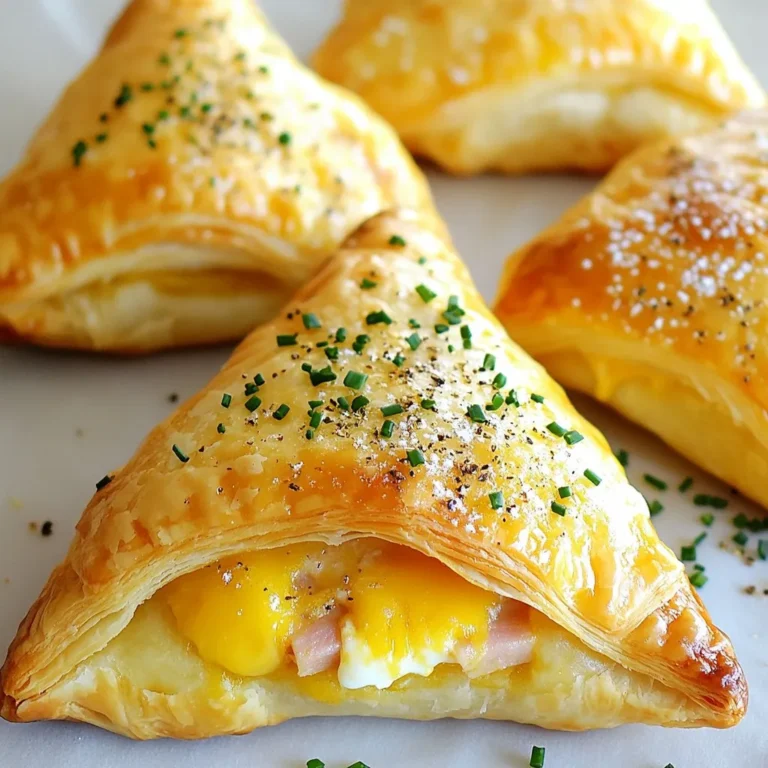
Ham and Cheese Puff Pastry Pockets Savory Delight

- 1 cup all-purpose flour - 2 tablespoons granulated sugar - 1 tablespoon baking powder - 1/2 teaspoon salt - 1 cup milk - 1 large egg - 2 tablespoons unsalted butter, melted - 1 teaspoon pure vanilla extract - 1/4 cup packed brown sugar - 1 tablespoon ground cinnamon - 1/4 cup unsalted butter, softened - 1/2 cup cream cheese, softened - 1 cup powdered sugar - 2 tablespoons milk When I make cinnamon roll pancakes, I enjoy using simple, fresh ingredients. Each one plays a key role in creating that soft, flavorful delight. First, the main ingredients come together to form a fluffy pancake batter. The flour, sugar, baking powder, and salt mix well for the base. Then, I add milk, a large egg, melted butter, and vanilla. Each helps create the perfect texture. Next, I focus on the cinnamon filling. The brown sugar and cinnamon create that classic cinnamon roll taste. Softened butter helps it stick together so I can swirl it into the pancakes later. Finally, I prepare the cream cheese frosting. Using softened cream cheese, powdered sugar, and a bit of milk, this frosting adds a rich touch. It brings the whole dish together and makes it feel special. With these ingredients, you can create wonderful cinnamon roll pancakes that impress everyone at the breakfast table! {{ingredient_image_2}} - Step 1: Prepare the Dry Ingredients In a large bowl, mix 1 cup of all-purpose flour, 2 tablespoons of granulated sugar, 1 tablespoon of baking powder, and 1/2 teaspoon of salt. Make sure they blend well. Set this bowl aside for later. - Step 2: Mix the Wet Ingredients In another bowl, combine 1 cup of milk, 1 large egg, 2 tablespoons of melted unsalted butter, and 1 teaspoon of pure vanilla extract. Whisk these ingredients together until the mixture is smooth. - Step 3: Combine Wet and Dry Ingredients Slowly pour the wet mixture into the dry ingredients. Use a spatula to stir gently. Mix until just combined. It’s okay if there are a few lumps; overmixing can make the pancakes tough. - Step 4: Make the Cinnamon Swirl Mixture In a small bowl, mix 1/4 cup of packed brown sugar and 1 tablespoon of ground cinnamon. This mixture will create the sweet swirl in your pancakes. - Step 5: Heat the Cooking Surface Preheat a non-stick skillet or griddle over medium heat. Lightly grease it with cooking spray or a small amount of butter. This helps prevent sticking. - Step 6: Cook the Pancakes Pour about 1/4 cup of batter onto the skillet. Then, drizzle some cinnamon swirl mixture in a spiral over the batter. Use a toothpick to swirl it gently into the pancake. - Step 7: Flip and Finish Cooking Cook for about 3-4 minutes. Watch for bubbles forming on the surface. Carefully flip the pancake and cook for another 2-3 minutes until it turns golden brown. - Step 8: Repeat the Process Keep going with the remaining batter and cinnamon mixture. Adjust the heat if the pancakes start to brown too quickly. - Step 9: Prepare the Cream Cheese Frosting In a medium bowl, beat together 1/2 cup of softened cream cheese, 1 cup of powdered sugar, and 2 tablespoons of milk. Mix until smooth and creamy. - Step 10: Serve and Present Stack the warm pancakes on plates. Drizzle or dollop the cream cheese frosting on top. For a fun twist, add a sprinkle of cinnamon or chopped nuts for added flavor and texture. - Avoid Overmixing: Mix the wet and dry ingredients gently. You want a few lumps to keep them light. If you mix too much, your pancakes can get tough. - Adjust Cooking Temperature as Needed: Cook on medium heat. If your pancakes brown too fast, lower the heat. You want them golden, not burned. - Add Fresh Fruits or Nuts: Top your pancakes with berries or sliced bananas. Nuts like pecans or walnuts add crunch and flavor. - Drizzling Extra Cinnamon or Maple Syrup: A swirl of cinnamon or a drizzle of syrup boosts sweetness. It makes the pancakes even more delicious. - Not Preheating the Skillet: Always preheat your skillet. This ensures even cooking and helps your pancakes rise well. - Using Cold Ingredients: Let your milk and eggs come to room temperature. Cold ingredients can make your batter dense and flat. Pro Tips Use Room Temperature Ingredients: Allow the milk, egg, and butter to reach room temperature before mixing. This helps create a smoother batter and fluffier pancakes. Don’t Overmix the Batter: Mix until just combined. Overmixing can lead to tough pancakes. A few lumps are perfectly fine! Adjust the Heat: If pancakes are browning too quickly, reduce the heat. Cooking at the right temperature ensures they cook evenly without burning. Experiment with Toppings: Besides cream cheese frosting, try adding fruits like bananas or berries, or even a drizzle of maple syrup for extra flavor! {{image_4}} You can make your cinnamon roll pancakes even more fun. Here are two tasty ideas: - Vanilla Bean Cinnamon Roll Pancakes: Add one tablespoon of vanilla bean paste to the batter. This will give your pancakes a rich vanilla flavor. It pairs well with the cinnamon filling. You’ll love how the vanilla shines through! - Pumpkin Spice Cinnamon Roll Pancakes: For a fall twist, mix in one cup of pumpkin puree and one teaspoon of pumpkin spice. This makes the pancakes taste warm and cozy. They are perfect for chilly mornings. Want to enjoy these pancakes while sticking to your diet? Here are some options: - Gluten-Free Options: Use gluten-free all-purpose flour instead of regular flour. Make sure the baking powder is also gluten-free. This keeps the pancakes soft and tasty. - Vegan Adaptations: To make these pancakes vegan, swap the egg for a flax egg. Mix one tablespoon of flaxseed meal with three tablespoons of water. Let it sit for a few minutes until it thickens. Use almond milk instead of regular milk, and replace the butter with coconut oil. If you want to serve your pancakes in new ways, try these ideas: - Cinnamon Roll Pancake Bake: Layer your pancakes in a baking dish. Drizzle with cream cheese frosting and bake at 350°F for about 15 minutes. This creates a warm, gooey breakfast that everyone will love. - Cinnamon Roll Pancake Stacks: Stack your pancakes high and drizzle frosting on each layer. Add a sprinkle of cinnamon or some chopped nuts on top for a beautiful finish. This makes a stunning presentation at brunch! To keep your cinnamon roll pancakes fresh, store them in the fridge. Place the pancakes in an airtight container. This helps to keep them from drying out. If you don’t have a container, you can wrap them tightly in plastic wrap. Make sure to cool them to room temperature before you store them. This prevents moisture buildup. When you want to enjoy the leftovers, you can reheat them easily. You have two main options: stovetop or microwave. - Stovetop: Heat a non-stick skillet over low heat. Add a tiny bit of butter for flavor. Place the pancakes in the skillet. Heat for about 2-3 minutes on each side. This keeps them soft and tasty. - Microwave: If you’re in a hurry, you can use the microwave. Place one pancake on a microwave-safe plate. Cover it with a damp paper towel. Heat for about 20-30 seconds. Check to make sure it is warm throughout. For the oven, preheat it to 350°F (175°C). Place the pancakes on a baking sheet. Cover them with foil to keep moisture in. Heat for about 10-15 minutes. Freezing your pancakes is a great way to save them for later. - Freezing Individual Pancakes: Let the pancakes cool completely. Stack them with parchment paper between each one. Place the stack in a freezer bag and squeeze out any air. This helps prevent freezer burn. - Best Practices for Freezing Frosting: For the cream cheese frosting, place it in a small airtight container. You can also use freezer bags. Make sure to label them with the date. When you’re ready to use it, thaw it in the fridge overnight. To make your pancakes fluffy, use fresh baking powder. This ingredient helps them rise. Mix the wet and dry ingredients gently. Overmixing can make them dense. A few lumps in the batter are just fine. Also, let the batter rest for a few minutes. This helps it become airier. Yes, you can make the batter ahead of time. Store it in the fridge for up to 24 hours. When you’re ready to cook, stir it gently. If it thickens, add a splash of milk. This helps it return to a good consistency. Just remember, fresh pancakes taste best! For toppings, try cream cheese frosting. It adds a sweet, tangy flavor. You can also drizzle maple syrup for extra sweetness. Fresh fruits like berries or sliced bananas work well too. Nuts like pecans or walnuts add a nice crunch. A sprinkle of cinnamon can make the stack even better! Cinnamon Roll Pancakes blend classic flavors in a fun way. We explored key ingredients, step-by-step cooking, and unique serving ideas. Use tips to avoid common mistakes and enjoy delicious results. Whether you stick with the classic or try a variation, these pancakes are a treat. Store and reheat leftovers easily for more enjoyment. Get creative with toppings, and make every bite special. Enjoy your pancake adventure!

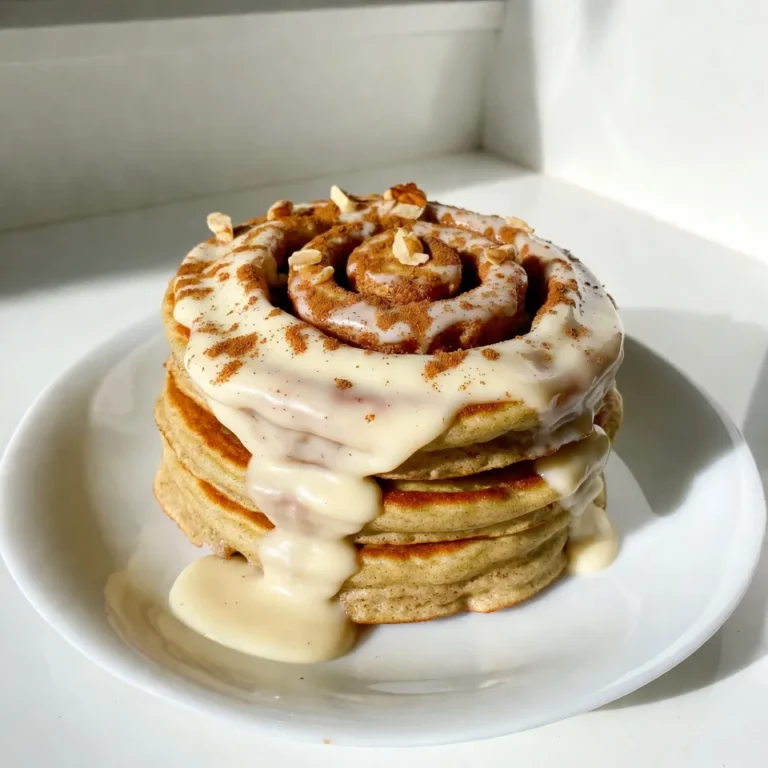
Cinnamon Roll Pancakes Soft and Flavorful Delight

- 2 cups fresh strawberries, hulled and thinly sliced - 1 pound angel food cake, cubed - 2 cups heavy cream To make a great trifle, start with fresh strawberries. Look for ripe, red berries. The taste of fresh strawberries makes the dessert shine. You can use homemade or store-bought angel food cake. This cake is light and fluffy. Heavy cream is essential for the whipped topping. It creates a rich and creamy layer. - 1/4 cup granulated sugar - 1/2 cup powdered sugar - 1 teaspoon pure vanilla extract We add granulated sugar to the strawberries. This helps them release their juices and become sweet. Powdered sugar is used in the whipped cream. It adds a smooth sweetness. Vanilla extract gives the cream a warm flavor. These sweeteners create a lovely balance in your trifle. - Fresh mint leaves - Additional berries Garnishing is important for a nice look. Fresh mint leaves add a pop of green. They also bring a fresh taste. You can add more berries on top for color. This makes your trifle not just tasty but also pretty. {{ingredient_image_2}} To start, I combine 2 cups of fresh strawberries, hulled and thinly sliced, with 1/4 cup of granulated sugar and 1 teaspoon of lemon juice in a medium bowl. I toss them gently to coat the strawberries well. This is the key step for flavor. I let the mixture rest for about 15 minutes. This resting time allows the strawberries to soften and release their juices. The result is a sweet, syrupy mix that will add moisture and flavor to the trifle. Next, I whip the cream. I pour 2 cups of heavy cream into a large mixing bowl. Using an electric mixer on medium speed, I whip the cream until soft peaks form. This means I stop when the cream starts to hold its shape but is still soft. Now, I gradually add 1/2 cup of powdered sugar and 1 teaspoon of pure vanilla extract. I continue whipping until I achieve firm peaks. This means the cream holds its shape well and is perfect for layering. Now comes the fun part: assembling the trifle! I start by adding a generous layer of cubed angel food cake at the bottom of a trifle dish or individual glasses. This is about 1 pound of cake, either store-bought or homemade. Next, I spoon a layer of the macerated strawberries over the cake. I make sure to include some of the sweet juice. This ensures the cake absorbs flavor without getting too soggy. After the strawberries, I add a luscious layer of whipped cream. I smooth it out gently with a spatula for an even finish. I repeat this layering process, alternating between angel food cake, strawberries, and whipped cream. I keep going until all my ingredients are used. Finally, I top it off with a layer of whipped cream. To make it look stunning, I garnish the top with a few fresh strawberries and mint leaves. This brightens up the trifle and adds a nice touch. To make great whipped cream, start with cold heavy cream. Use a clean bowl and beaters. This helps the cream whip up quickly. Avoid overwhipping. It can turn grainy and lose its smoothness. Aim for soft peaks first. Then, add the powdered sugar and vanilla slowly. Keep whipping until you see firm peaks. This means the cream will hold its shape well. When you layer your trifle, think about how it will look. Begin with cake at the bottom. Then, add strawberries and whipped cream. Make sure each layer is even. This helps with the final look. To prevent soggy layers, let the strawberries sit with sugar for just 15 minutes. This draws out some juice but keeps them firm. Chill your trifle before serving. Cold layers taste best and look great. Use clear glasses or a trifle dish. It shows off the beautiful layers of cake, fruit, and cream. Garnish with extra strawberries and mint. This adds color and freshness. Serve with a spoon, and let everyone dig in! Pro Tips Use Fresh Strawberries: Always opt for fresh, ripe strawberries for the best flavor and texture. Look for bright red berries with a shiny exterior. Chill Your Cream: For the best whipped cream, chill your mixing bowl and beaters before whipping. Cold utensils help the cream whip up faster and hold its shape better. Layering Technique: When layering, ensure each layer is even and reaches the edges of the dish for a beautiful presentation. This also helps with even flavor distribution. Make Ahead: You can prepare the components ahead of time. Store the whipped cream and macerated strawberries separately in the fridge and assemble just before serving for optimal freshness. {{image_4}} You can change the flavor of your trifle by using different fruits. Blueberries and peaches work great! They add a new taste and color. You can also swap the angel food cake for pound cake. This will give you a denser base that pairs well with the creamy layers. Each fruit or cake choice brings a new twist to this classic dessert. If you want a dairy-free or vegan version, use coconut cream instead of heavy cream. It whips up nicely and adds a tropical taste. For the cake, try a vegan sponge cake. There are many great recipes online. If you need gluten-free options, use gluten-free cake mixes. These simple swaps make the trifle friendly for many diets. The toppings make your trifle unique. You can add sauces or jams for extra flavor. A berry sauce drizzled on top is a nice touch. Experimenting with flavored whipped cream can also be fun! Try adding cocoa powder for chocolate cream or a splash of orange zest for a citrus kick. This way, each trifle can be a new experience. You can store your Strawberry Shortcake Trifle in the fridge for up to three days. To keep it fresh, cover it tightly with plastic wrap or a lid. This prevents air from drying it out. Also, try to keep the trifle in the coldest part of the fridge. This will help maintain the cream's texture and flavor. Can you freeze Strawberry Shortcake Trifle? Yes, but it's best to freeze only the components. The cake and strawberries freeze well, but the whipped cream does not. For freezing, place the cake and strawberries in airtight containers. They can be frozen for up to two months. When ready to use, thaw them overnight in the fridge. This keeps them fresh and tasty. Before serving, check the trifle for freshness. If it seems a bit soggy, you can add a new layer of whipped cream. This will brighten it up and add a nice texture. If the strawberries look too soft, you can replace them with fresh ones. Adjusting these small details can make your trifle look and taste great again. To make the cream stiffer, you can use a few simple tricks. First, chill your mixing bowl and beaters before whipping. Cold tools help the cream whip better. Second, add cornstarch or gelatin to the cream. These ingredients can help hold the shape of the whipped cream longer. Use one tablespoon of cornstarch or one teaspoon of gelatin for two cups of cream. Just mix them in before whipping. Lastly, whip the cream to firm peaks. This means the cream should stand tall and not fall over. Yes, you can prepare the trifle in advance! Make it a day ahead for the best flavor. Just keep it in the fridge. Layer the ingredients as normal, but do not add the whipped cream until just before serving. This keeps the cream light and fluffy. You can also prepare the strawberries and cake ahead of time. Store them in separate containers. When it’s time to serve, layer the whipped cream on top and enjoy! You have many options for fruits in your trifle. Here are some fun ideas: - Blueberries add a pop of color and flavor. - Peaches bring a sweet and juicy touch. - Raspberries offer a tart contrast to the sweet cream. - Bananas add a creamy texture and good taste. - Tropical fruits like mango or pineapple can give a refreshing twist. Feel free to mix and match fruits based on what’s in season. This keeps your trifle exciting and new! To prevent the cake from getting soggy, layer with care. First, use a thicker layer of cake at the bottom. This helps absorb less juice from the strawberries. You can also lightly toast the cake before using. This gives it a slight crispness that helps. Next, don’t let the strawberries sit too long before layering. Use them right after mixing with sugar. Lastly, assemble your trifle just before serving when possible. This keeps all the layers fresh and tasty! The blog post explored how to make a delicious Strawberry Shortcake Trifle. We discussed key ingredients like strawberries, heavy cream, and angel food cake. I shared steps to prep strawberries, whip cream, and assemble the trifle. Tips on creating layers and serving suggestions enhance your trifle experience. Remember, variations in fruits and dietary needs can make this dessert fit everyone. For the best flavor and texture, follow the storage guidelines. Enjoy crafting your trifle and impressing your guests!

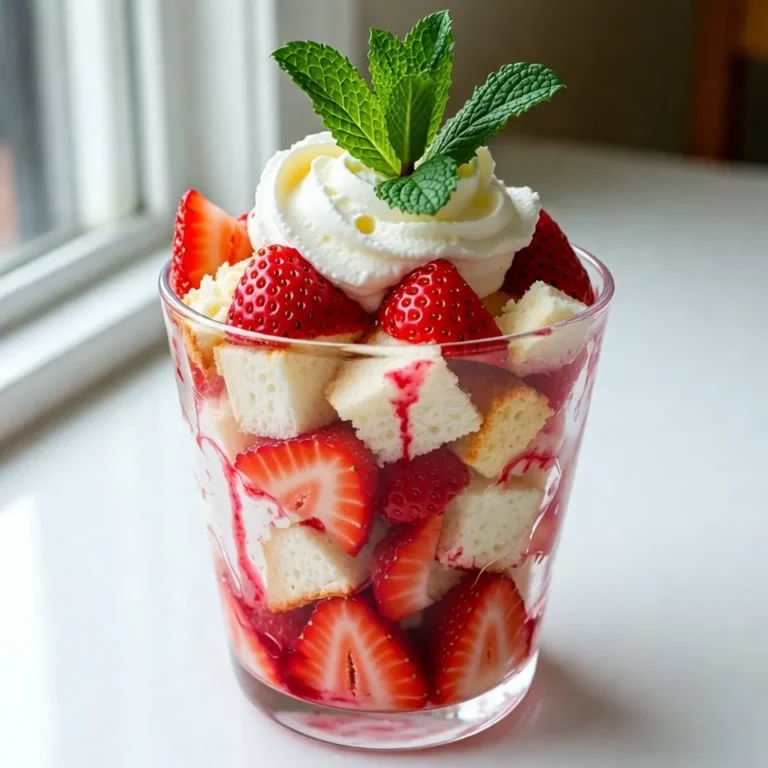
Strawberry Shortcake Trifle Delightful and Simple Treat

- 1 cup all-purpose flour - ½ cup powdered sugar - ¼ teaspoon salt - ½ cup unsalted butter, softened - 2 large eggs - 1 cup granulated sugar - 2 tablespoons fresh lemon zest - ⅓ cup freshly squeezed lemon juice - 1 cup fresh raspberries - 1 tablespoon cornstarch - ¼ teaspoon baking powder - Additional powdered sugar for dusting These ingredients come together to make the perfect Raspberry Lemonade Bars. Each one plays a key role in creating that sweet and zesty flavor. The flour forms the base crust, giving it a nice texture. Powdered sugar adds sweetness and helps the crust stay soft. The salt balances the flavors. Softened butter makes it easy to mix. The eggs and granulated sugar create a light and fluffy filling. Fresh lemon zest and juice give that bright, tangy taste. Fresh raspberries add a burst of flavor and color. Tossing them with cornstarch helps them keep their shape. Baking powder gives the filling a bit of lift. Finally, using extra powdered sugar for dusting adds a lovely finish. Each bite will be a delightful mix of sweet and tart! {{ingredient_image_2}} - Preheat the oven to 350°F (175°C). - Grease or line an 8x8 inch baking pan with parchment paper. - In a bowl, whisk together 1 cup of flour, ½ cup of powdered sugar, and ¼ teaspoon of salt. - In another bowl, cream ½ cup of softened butter until it is smooth. - Gradually mix the flour blend into the butter. Combine until it forms a soft dough. - Press this dough evenly into the bottom of your prepared pan. - Bake for 15 to 20 minutes until it turns a light golden brown. - In a separate bowl, beat 2 large eggs and 1 cup of granulated sugar until fluffy. - Add 2 tablespoons of lemon zest and ⅓ cup of lemon juice. Mix until smooth. - In a small bowl, toss 1 cup of fresh raspberries with 1 tablespoon of cornstarch. - Fold the raspberries gently into the lemon mixture. - Once the crust is done, pour the lemon-raspberry mixture over the hot crust. - Bake for an additional 20 to 25 minutes. The filling should be set and the edges slightly golden. - Allow the bars to cool completely in the pan. - Once cool, slice into squares or bars. - Dust with additional powdered sugar just before serving for a lovely finish. - Use softened butter. Softened butter blends well, making the crust light. - Avoid overmixing the lemon-raspberry filling. This keeps the texture smooth and creamy. - Garnish with lemon slices and fresh raspberries. This adds color and makes the bars pop. - These bars are perfect for picnics and summer gatherings. They are easy to share and enjoy. - Do not overbake. This can lead to dry bars that lose their soft texture. - Always use cornstarch for the raspberries. It helps the filling set and keeps it from being runny. Pro Tips Chill the Bars Before Serving: Allow the baked bars to cool completely in the pan, then refrigerate for at least an hour. This helps the layers set better and makes cutting neater. Use Fresh Ingredients: For the best flavor, opt for fresh lemons and raspberries. Fresh ingredients enhance the tartness and brightness of the bars. Adjust Sweetness: If you prefer a sweeter treat, feel free to increase the granulated sugar in the filling by a couple of tablespoons. Taste the lemon mixture before pouring it onto the crust. Experiment with Flavors: Add a splash of vanilla extract or a hint of almond extract to the lemon filling for a unique twist on the classic flavor profile. {{image_4}} You can switch fresh raspberries for frozen ones. Just be sure to thaw them first. This change works well when fresh raspberries are hard to find. You can also try other citrus fruits. Lime or orange juice gives a nice twist to the bars. If you need a gluten-free option, use almond flour instead of regular flour. This swap keeps the bars tasty while meeting dietary needs. You can also lower the sugar by using sweeteners like honey or agave. These options keep your dessert sweet without all the sugar. Want to jazz up your bars? Add fresh herbs like mint. This gives a cool flavor that pairs well with lemon. You can mix in other fruits too. Blueberries or strawberries add color and taste. These additions make your bars unique and fun to eat. To keep your Raspberry Lemonade Bars fresh, store them in an airtight container. This helps them stay moist and flavorful. You can layer them between parchment paper to prevent sticking. A glass or plastic container works well for storage. Just make sure it seals tightly. To freeze your Raspberry Lemonade Bars, first cut them into squares. Next, place each piece on a baking sheet lined with parchment paper. Freeze them for about two hours until firm. Once frozen, transfer the bars to a freezer-safe bag. Label the bag with the date and type of treat. To thaw, leave them in the fridge overnight, or let them sit at room temperature for about 30 minutes. These bars last about 3 days at room temperature. For best flavor, store them in the fridge, where they can last up to a week. Enjoy them chilled for a refreshing treat on warm days! Yes, you can switch up the fruit! Here are some great options: - Blueberries: They pair well with lemon. - Strawberries: A classic choice for a sweet twist. - Blackberries: Their tartness adds depth to the flavor. - Peaches: Fresh, juicy slices can brighten the bars. You can even mix fruits for a fun blend. Just keep the same measurements! To cut back on the sugar, try these tips: - Use less granulated sugar in the filling. Start with ¾ cup instead of 1 cup. - Swap some sugar for a sugar substitute like stevia or monk fruit. - Add a bit more lemon juice. It boosts flavor and balances sweetness. Taste as you go to find your perfect balance! For clean slices, follow these steps: - Use a sharp knife. A dull knife squishes the bars. - Lightly dust the knife with powdered sugar. It helps prevent sticking. - Wipe the knife with a damp cloth between cuts. This keeps edges neat. Cut the bars while they are cool for the best results. Yes, these bars are great for making in advance! Here’s how: - Bake and cool the bars completely. - Store them in an airtight container in the fridge for up to a week. - For longer storage, freeze them. Wrap each bar in plastic wrap, then place in a freezer bag. Let them thaw in the fridge overnight before serving. In this post, we explored how to make delicious lemon-raspberry bars. We covered all the ingredients, step-by-step instructions, and helpful tips to perfect your treat. Remember, keep butter soft and don’t overmix your filling. You can also experiment with different fruits or make these bars gluten-free. With proper storage, these delightful snacks will last longer. Enjoy making and sharing these bars at your next gathering. Your friends and family will love them!

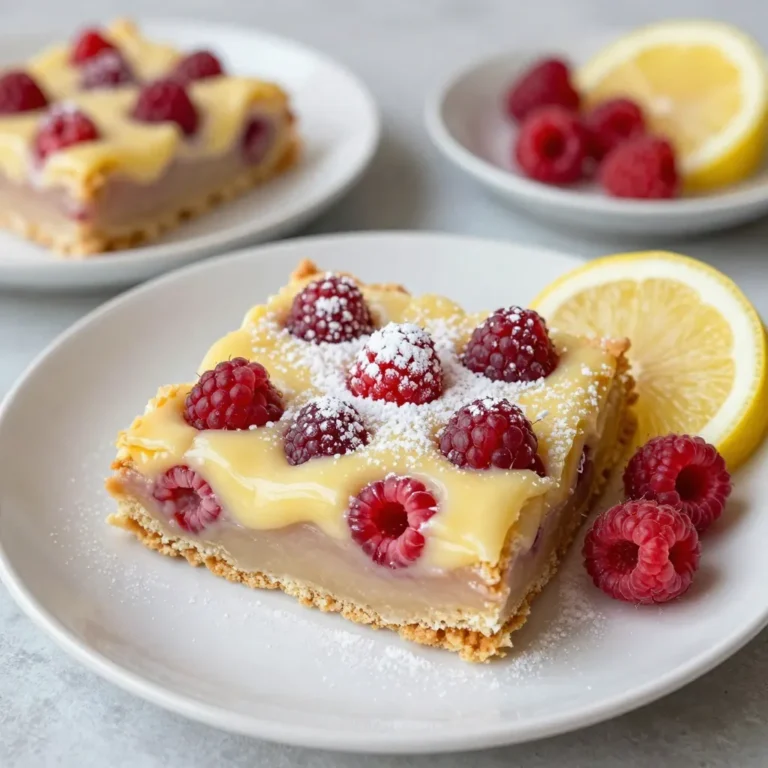
Raspberry Lemonade Bars Delightful Summer Treat

- 4 large whole wheat tortillas - 1 cup shredded cheese (cheddar or cheese blend) - 1 bell pepper (red or yellow), diced - 1 small zucchini, diced - 1 cup corn kernels (fresh or frozen) - 1 cup black beans, rinsed and drained - 1 small red onion, diced - 2 cloves garlic, minced - 2 tablespoons olive oil - 1 teaspoon ground cumin - 1 teaspoon chili powder - Salt and black pepper, to taste - Fresh cilantro, chopped (for garnish) - Salsa and sour cream (for serving) You can change some ingredients based on what you like. Instead of whole wheat tortillas, you can use corn tortillas or spinach tortillas. For cheese, try mozzarella or pepper jack. If you want to skip the beans, add more corn or some cooked quinoa. You can also mix in other veggies like mushrooms or spinach. When you pick vegetables, look for firm and bright ones. Bell peppers should have smooth skin and feel heavy for their size. Choose zucchini that is small to medium, with shiny skin. For onions, pick ones that are dry and heavy. Fresh garlic should smell strong and have no soft spots. Always pick veggies in season for the best flavor and price. {{ingredient_image_2}} Start by washing all your veggies. I love using fresh ingredients for the best taste. Dice one bell pepper, one small zucchini, and one small red onion. Make sure to keep them small for easy cooking. Mince two cloves of garlic as well. This adds great flavor to the filling. Heat one tablespoon of olive oil in a large skillet over medium heat. Add the diced red onion first and sauté it for about 3-4 minutes until it turns translucent. Then, toss in the minced garlic, bell pepper, and zucchini. Stir these together, cooking for another 5 minutes. You want them to be tender and vibrant. Next, add one cup of corn and one cup of rinsed black beans to the skillet. Don't forget to sprinkle in one teaspoon of ground cumin and one teaspoon of chili powder. Season with salt and black pepper to taste. Stir everything well and cook for another 2-3 minutes until heated through. Remove the skillet from heat. This filling is colorful and packed with flavor. Grab your large whole wheat tortillas. On one half of each tortilla, layer some shredded cheese. Spoon a good amount of the veggie mix over the cheese. Top it off with a bit more cheese. This helps hold the quesadilla together. Now, fold each tortilla in half. In another skillet, heat the remaining tablespoon of olive oil over medium heat. Place one folded quesadilla in the skillet and cook for about 3-4 minutes on each side. You want the tortilla to be golden brown and crispy. Once done, set it aside and repeat with the rest. After cooking, let the quesadillas cool for a minute. Cut each one into wedges for easy serving. Garnish with fresh chopped cilantro. Serve with salsa and sour cream on the side. Enjoy your tasty and healthy loaded veggie quesadillas! Choosing the right cheese makes a big difference. I love using cheddar for its sharp taste. A cheese blend can add depth with various flavors. Here are some great options: - Cheddar - Monterey Jack - Mozzarella - Pepper Jack for a kick Mixing cheeses can create a rich, gooey texture. Remember to shred your cheese for better melting. A crispy tortilla takes a few simple steps. Start by using medium heat to avoid burning. Use enough oil to coat the skillet. Here’s how: - Heat the skillet before adding the quesadilla. - Cook each side for 3-4 minutes. - Press down gently with a spatula for even crisping. - Flip carefully to keep the filling in place. A golden-brown color shows your tortilla is ready! For bright veggies, high heat works wonders. Sautéing quickly keeps them colorful and crisp. Follow these tips: - Cut your veggies into similar sizes for even cooking. - Add garlic later to avoid burning. - Stir often to cook evenly. - Season with salt when veggies are nearly done. These steps ensure your fillings are both tasty and visually appealing. Pro Tips Prep Your Veggies: Prepare all your vegetables ahead of time to save on cooking time and ensure even cooking. Cheese Choices: Experiment with different cheeses like pepper jack for a spicy kick or mozzarella for a milder flavor. Serving Suggestions: Pair your quesadillas with guacamole for added creaminess and flavor. Cook in Batches: If making multiple quesadillas, cook them in batches to maintain consistent heat and crispiness. {{image_4}} You can easily make these quesadillas vegan and gluten-free. Use gluten-free tortillas instead of whole wheat. For cheese, try vegan cheese. Many brands melt well and taste great. You can also skip the cheese entirely and load up on veggies. Add extra beans for more protein and fiber. Want to add protein? Chicken or tofu works well. For chicken, use cooked and shredded meat. Mix it with the veggies in the skillet. If you prefer tofu, press it to remove excess water. Then, dice it and sauté until golden. Both options boost flavor and make the quesadillas heartier. If you love heat, add jalapeños. Slice them thin and mix them into the veggie filling. You can also serve quesadillas with hot sauce. A drizzle adds a nice kick. Don’t forget to taste the filling first. Adjust the spice level to fit your taste! To store leftover quesadillas, let them cool first. Place them in an airtight container. Make sure to separate the layers with parchment paper. This prevents sticking. Store them in the fridge for up to three days. To reheat quesadillas, use a skillet over medium heat. Add a little olive oil for crispiness. Cook each side for 2-3 minutes. You want them hot and crispy again. For a faster method, use the microwave. Heat for about 30 seconds, but the texture won't be as good. To freeze, wrap each quesadilla in plastic wrap. Then, place them in a freezer bag. Remove as much air as possible to prevent freezer burn. They can stay frozen for up to three months. When ready, thaw in the fridge overnight before reheating. Enjoy your tasty meal anytime! Yes, you can make quesadillas ahead of time. Prepare the filling and let it cool. Then, fill the tortillas and store them in the fridge. Wrap them well to keep them fresh. When you are ready to eat, just cook them in a skillet. They will taste great! Serve the quesadillas hot and crispy. Cut them into wedges for easy sharing. Arrange them on a platter. Sprinkle fresh cilantro on top for color. Add small bowls of salsa and sour cream on the side. This makes it fun for everyone to dip and enjoy! You can change the fillings based on what you like. Try different veggies such as mushrooms, spinach, or carrots. For extra flavor, add spices like paprika or oregano. You can also mix in cooked chicken or tofu for protein. The choices are endless! You learned about the best ingredients for veggie quesadillas. We covered fresh vegetables, cooking tips, and how to choose the right cheese. You can add protein or make vegan options too. Remember, storing leftovers and reheating them well keeps the flavor great. Feel free to try different ingredients, making this dish your own. Happy cooking!

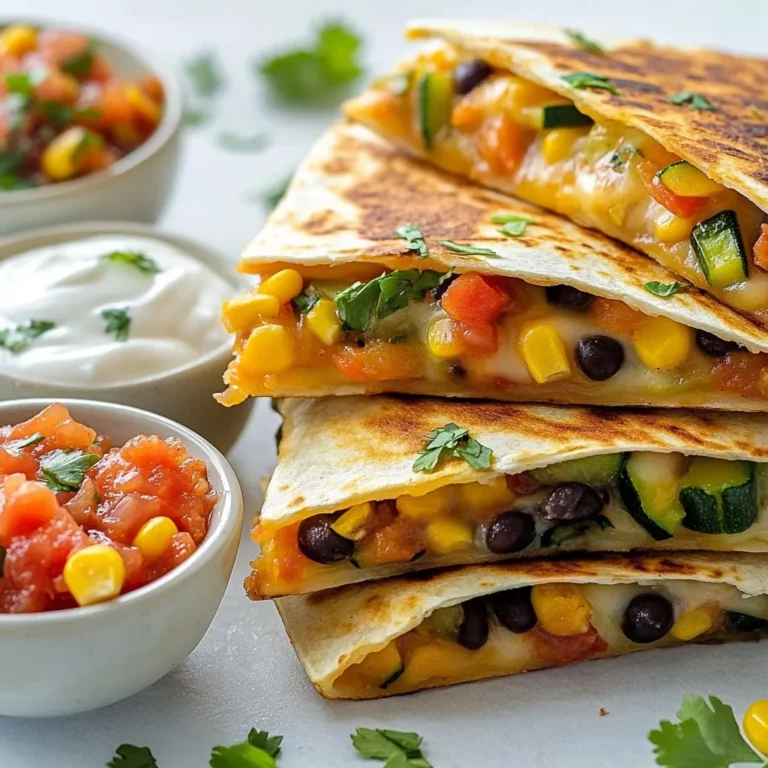
Loaded Veggie Quesadillas Flavorful and Healthy Meal

To make Buffalo Chicken Pinwheels, you need the following: - 2 cups shredded cooked chicken - 1/2 cup cream cheese, softened - 1/2 cup buffalo sauce (your choice of hot sauce) - 1 cup shredded sharp cheddar cheese - 1/2 cup finely chopped celery - 1/4 cup green onions, sliced thin - 4 large flour tortillas (burrito size) - 1/4 cup ranch dressing (for dipping) - Optional: fresh parsley, finely chopped for garnish These ingredients make a tasty, fun snack for any gathering. If you have allergies or dietary needs, here are some good swaps: - Chicken: Use shredded turkey or tofu for a vegetarian option. - Cream Cheese: Try dairy-free cream cheese or hummus to keep it vegan. - Buffalo Sauce: For a milder flavor, use barbecue sauce instead. - Tortillas: Gluten-free tortillas work well for a gluten-free option. - Cheddar Cheese: Swap for dairy-free cheese or omit it entirely. These substitutions keep the recipe safe for everyone. Using the right brands can elevate your dish. Here are my top picks: - Buffalo Sauce: Frank’s RedHot is a classic choice for authentic flavor. - Cream Cheese: Philadelphia cream cheese offers a rich, creamy texture. - Cheddar Cheese: Tillamook sharp cheddar adds a nice bite. - Tortillas: Mission flour tortillas are soft and easy to roll. - Ranch Dressing: Hidden Valley ranch dressing is a fan favorite. These brands help you achieve the best taste in your pinwheels. {{ingredient_image_2}} To start, gather your ingredients. You need shredded cooked chicken, cream cheese, and buffalo sauce. In a mixing bowl, add 2 cups of shredded chicken. Next, scoop in 1/2 cup of softened cream cheese. Pour in 1/2 cup of your favorite buffalo sauce. Use a fork to mix until smooth and creamy. Then, add 1 cup of shredded sharp cheddar cheese. Toss in 1/2 cup of finely chopped celery and 1/4 cup of thinly sliced green onions. Stir everything together until well combined. This filling should taste spicy and rich. Now, take a large flour tortilla and lay it flat on a clean surface. Spoon about 1/4 of your chicken mixture into the center of the tortilla. Spread the filling gently, leaving about an inch of space at the edges. This space helps when you roll it up. Start rolling from one end, keeping the filling snug inside. Roll tightly but not too tight to avoid tearing the tortilla. Repeat this for the other tortillas until all are filled. Once you roll all the tortillas, wrap each one tightly in plastic wrap. Place them in the fridge for at least 30 minutes. This step helps the pinwheels firm up, making them easier to slice. After chilling, take them out of the fridge. Use a sharp knife to cut each roll into bite-sized pieces, around 1 to 1.5 inches thick. Arrange the pinwheels on a colorful platter. Drizzle some ranch dressing on top and add fresh parsley if you like. This makes them look appealing and ready to serve! To get a creamy filling, start with softened cream cheese. This makes mixing easy. Combine it well with shredded chicken and buffalo sauce. Use a fork or spatula to mix until smooth. If you want extra creaminess, try adding a splash of ranch dressing. This will give your filling a rich taste. When rolling, lay your tortilla flat and add the filling in the center. Spread it evenly, leaving some space at the edges. Start rolling from one side, keeping the filling tight. Roll gently but firmly. This helps keep the filling inside. If you feel it’s too loose, try to roll it again more tightly. To stop pinwheels from unrolling, chill them in plastic wrap. This firms up the filling. After chilling, slice them with a sharp knife. Be gentle while cutting. If they still unroll, you can use toothpicks to hold them together. Just remember to remove the toothpicks before serving. Pro Tips Use Leftover Chicken: This recipe is perfect for using up leftover rotisserie chicken, saving you time and enhancing flavor. Customize Your Heat: Adjust the amount of buffalo sauce to suit your spice tolerance; you can even mix in a milder sauce for a more balanced flavor. Chill Before Slicing: Allowing the pinwheels to chill in the refrigerator helps them hold their shape when slicing, resulting in cleaner cuts. Garnish for Appeal: A sprinkle of fresh parsley not only adds color but also a hint of freshness that complements the spicy filling. {{image_4}} You can make your buffalo chicken pinwheels spicy or mild. The key is in the buffalo sauce. If you love heat, use a hot sauce that has a kick. If you prefer a milder taste, go for a less spicy sauce. You can also mix buffalo sauce with ranch dressing to tone it down. This mix gives you flavor without too much heat. Adjust the amount to fit your taste, and everyone can enjoy their own version. Feel free to add more ingredients to your pinwheels. For a crunch, add diced bell peppers or shredded carrots. You can use different cheeses too. Creamy blue cheese or pepper jack cheese can change the taste. For extra flavor, try adding spices like garlic powder or paprika. You can also toss in cooked bacon for a savory twist. Customizing these pinwheels makes them fun and unique for any gathering. Serve your buffalo chicken pinwheels with tasty dips. Ranch dressing is a classic choice. You can also serve blue cheese dressing for a bold flavor. Pair the pinwheels with crunchy veggies like celery sticks or carrot sticks. They add a fresh crunch to your snack. For drinks, iced tea or a light beer pairs well with the spicy taste. These combinations make your snack time more enjoyable and satisfying. To keep your buffalo chicken pinwheels fresh, wrap them tightly in plastic wrap. This seals in moisture and flavor. You can also place them in an airtight container. Make sure the container is sealed well to prevent air from getting in. Store them in the fridge until you're ready to serve. This keeps them cool and safe to eat. If you want to enjoy warm pinwheels, you can reheat them easily. Preheat your oven to 350°F (175°C). Place the pinwheels on a baking sheet. Heat for about 10 minutes or until warm. You can also use a microwave for quick reheating. Just place a few on a microwave-safe plate and heat for about 20-30 seconds. Buffalo chicken pinwheels can last in the fridge for up to 3 days. After that, the taste and texture may change. If you want to keep them longer, you can freeze them. Wrap each pinwheel tightly in plastic wrap and then place them in a freezer bag. They can last up to 2 months in the freezer. When you’re ready to eat them, thaw in the fridge overnight before reheating. Enjoy your tasty snack anytime! Yes, you can use rotisserie chicken. It saves time and adds great flavor. Just shred the chicken and mix it with the other ingredients. You will get a tasty filling without much work. This option makes the recipe quicker and still delicious. You can keep pinwheels in the fridge for about three days. Make sure to wrap them tightly in plastic wrap. This keeps them fresh and prevents them from drying out. If you need them to last longer, consider freezing them. Ranch dressing is a classic choice. Its cool creaminess balances the heat from the buffalo sauce. You can also try blue cheese dressing for a bold flavor. If you like extra spice, a spicy mayo or sriracha can be fun. This blog post covered each step to make delicious buffalo chicken pinwheels. We explored all the ingredients, helpful substitutions, and the best brands to use. The step-by-step guide showed you how to prepare, roll, and slice the pinwheels perfectly. We also shared tips to keep your filling creamy and your pinwheels from unrolling. In the end, these tasty snacks can be made your own with fun variations. Store them properly to enjoy later. Try out these ideas, and enjoy your cooking!

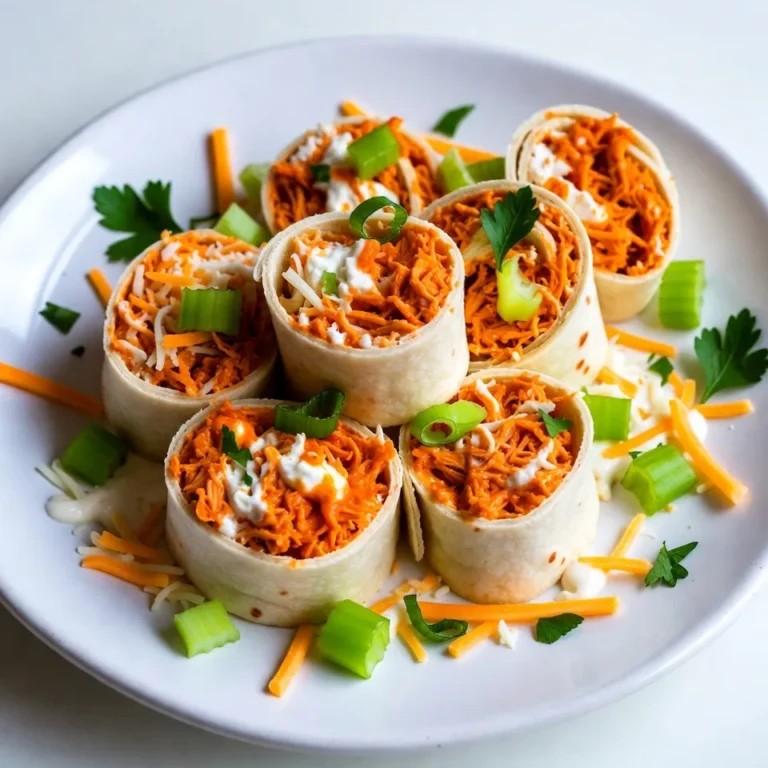
Buffalo Chicken Pinwheels Flavorful and Easy Snack

To make these tasty Greek chicken bowls, you'll need: - 2 boneless, skinless chicken breasts - 2 tablespoons extra-virgin olive oil - 1 teaspoon dried oregano - 1 teaspoon garlic powder - Salt and freshly cracked black pepper to taste - 1 cup cooked quinoa or couscous - 1 cup cherry tomatoes, halved - 1 medium cucumber, diced - 1/2 medium red onion, thinly sliced - 1 cup feta cheese, crumbled - 1/4 cup kalamata olives, pitted and halved - 2 tablespoons fresh lemon juice - A handful of fresh parsley, chopped These ingredients create a fresh and vibrant dish that is both filling and delicious. If you have dietary needs, you can easily change some ingredients: - Chicken: Swap chicken breasts for thighs or use tofu for a vegetarian dish. - Grains: Use brown rice or farro instead of quinoa or couscous. - Dairy: Go for a dairy-free feta or skip the cheese for a lighter meal. - Olives: If you dislike olives, try capers for a briny touch. These swaps let you customize the recipe to fit your taste. You can add extra flavors and textures with these toppings: - Sliced avocado for creaminess - Roasted red peppers for a sweet kick - Crushed red pepper flakes for heat - Extra lemon wedges for a zesty finish These options bring variety to your bowls and make each meal unique. Enjoy experimenting! {{ingredient_image_2}} Start with the chicken breasts. In a bowl, mix olive oil, oregano, garlic powder, salt, and pepper. This blend gives the chicken great flavor. Add the chicken to the bowl and coat it well. Cover the bowl and let it sit. You can marinate for 30 minutes at room temperature or refrigerate for two hours for deeper taste. The longer it sits, the more flavorful it becomes. Heat your grill or skillet to medium-high. Once hot, place the marinated chicken breasts on it. Cook for 6-7 minutes on each side. You want the chicken to reach 165°F (75°C) inside. This ensures it is safe to eat. When the chicken is done, take it off the heat. Let it rest for 5 minutes. This keeps the juices inside and makes the chicken tender. While the chicken cooks, prepare your base. In a large bowl, mix cooked quinoa or couscous, cherry tomatoes, cucumber, red onion, and kalamata olives. Add fresh lemon juice to this mix. Gently toss everything to combine. Now, slice the rested chicken into strips. In each bowl, place a layer of the quinoa or couscous mix. Add the chicken on top, followed by crumbled feta cheese. Finally, sprinkle chopped parsley for a bright finish. To get juicy and tender chicken, marinate it well. Use olive oil, oregano, and garlic powder. Let it sit for at least 30 minutes. If you have time, refrigerate it for up to two hours. This adds great flavor. When cooking, preheat your grill or skillet. Cook each side for 6-7 minutes. Make sure the chicken hits 165°F (75°C). Let it rest for 5 minutes before slicing. This keeps the juices inside. Want to make your Greek chicken bowls pop? Use fresh lemon juice. It adds a bright taste. Crumbled feta cheese brings a creamy texture. Don't forget kalamata olives for saltiness. You can also use fresh herbs like parsley or dill. They add freshness and color. For a little heat, try adding red pepper flakes. These simple additions can elevate your meal. Meal prep can save you time. Cook extra quinoa or couscous ahead of time. Store it in the fridge for quick meals. You can also grill more chicken. Slice it and keep it in an airtight container. Mix your veggies ahead too. Just add the lemon juice right before serving. This way, everything stays fresh. With these tips, you can enjoy Greek chicken bowls any night of the week! Pro Tips Marinate for Maximum Flavor: Allow the chicken to marinate for at least 2 hours in the refrigerator. This will enhance the flavors and tenderness of the chicken significantly. Check Internal Temperature: Use a meat thermometer to ensure the chicken reaches an internal temperature of 165°F (75°C) for safe consumption and optimal juiciness. Customize Your Bowls: Feel free to add or substitute vegetables such as bell peppers, zucchini, or spinach to the quinoa or couscous mixture for added nutrition and flavor. Garnish for Presentation: A sprinkle of fresh herbs like dill or mint can elevate the dish's visual appeal and add an extra layer of flavor. {{image_4}} If you want a meatless twist, try using chickpeas or lentils. Both options add protein and texture. You can roast them with olive oil, garlic, and oregano for extra flavor. Use the same marinade from the chicken on these legumes. They soak up those tasty herbs and spices well. This way, you keep the dish hearty without the meat. You can swap quinoa or couscous for other grains. Brown rice or farro works great too. These grains add a unique taste and texture. They all hold up well with the fresh veggies and chicken. Try experimenting with barley for a nutty flavor. Each grain gives a different spin on the dish while keeping it healthy. Feel free to mix up the veggies in your bowl. You can add bell peppers, spinach, or even roasted zucchini. Fresh herbs like mint or dill can brighten the dish. The key is to use what you love or what you have on hand. This keeps the bowls vibrant and adds a personal touch to each serving. To keep your Greek chicken bowls fresh, let them cool first. Place the leftovers in an airtight container. This helps keep out air and moisture. Store the container in the fridge. Your meal will stay good for about three to four days. Make sure to separate the chicken from the salad mix to keep the flavors intact. When you want to enjoy your leftovers, reheat them gently. You can use a microwave or a skillet. If using a microwave, cover the bowl with a lid or a damp paper towel. This prevents drying out. Heat in short bursts, stirring in between. For the skillet, add a splash of olive oil to keep the chicken moist. Heat over medium until warm throughout. If you want to save your Greek chicken bowls for later, freezing is a great option. Pack the chicken and salad mix in separate containers. This way, they won’t lose texture in the freezer. You can freeze them for up to three months. When ready to enjoy, thaw in the fridge overnight. Reheat as mentioned above for the best taste! Yes, you can use chicken thighs instead of breasts. Chicken thighs stay juicy and tender. They also add a richer flavor to your Greek chicken bowls. Just adjust the cooking time to ensure they reach 165°F (75°C) inside. To make this recipe ahead of time, marinate the chicken earlier in the day. You can store it in the fridge for up to two hours. Cook the chicken, then let it cool. Store it in the fridge for up to three days. Prepare the quinoa or couscous and chop the veggies. Store them separately. When ready to eat, just assemble your bowls! Many sides go well with Greek chicken bowls. Here are some tasty options: - Grilled vegetables like zucchini and bell peppers - Tzatziki sauce for dipping - A light Greek salad - Pita bread for a fun twist These sides balance the flavors and make your meal more filling. This blog post covered the key parts of making Greek chicken bowls. We explored main ingredients, cooking steps, and tips for great flavor. You can customize these bowls to fit your taste or diet. Remember to store leftovers well for future meals. By following these simple steps, you can make a tasty meal. Enjoy trying new variations and toppings. With all these ideas, your Greek chicken bowls will impress anyone. Happy cooking!

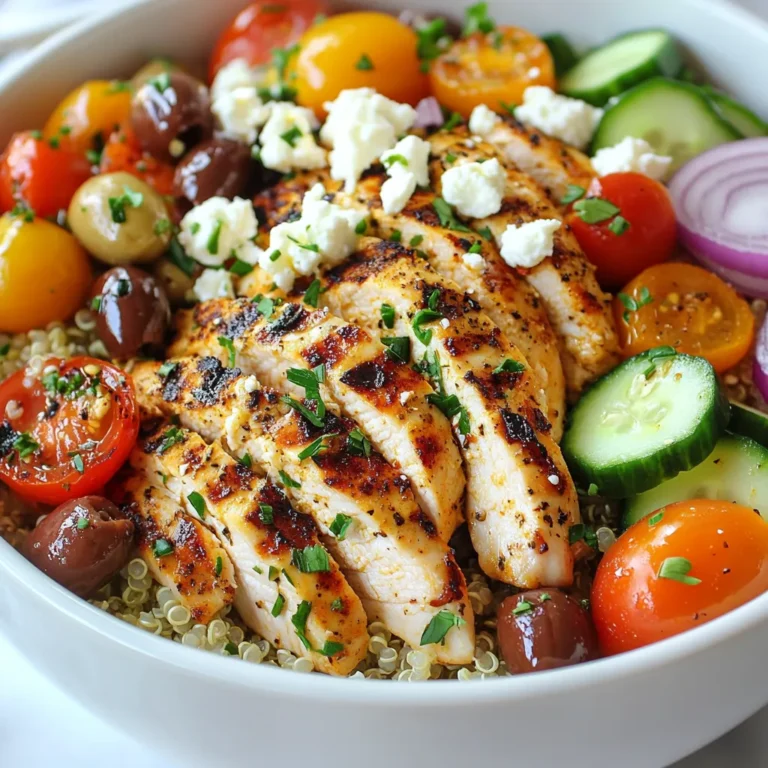
Simple Greek Chicken Bowls Flavorful and Easy Meal

PREV 1 … 34 35 36 … 48 NEXT
meal plan mapper

explore

DessertsDinnerAppetizersDrinks

Our Policies

  • Cookie Policy
  • Copyright Policy
  • Disclaimer
  • GDPR Policy
  • Terms Of Use
Back to Top
  • About
  • Contact Us
  • Privacy Policy
© 2025 meal plan mapper