FREE DINNER EBOOK! Get your copy!
  • Cookie Policy
  • GDPR Policy
  • Disclaimer
  • Terms Of Use
  • Visit my other site: Fun Cookie Recipes
meal plan mapper
  • Home
  • Dinner
  • Desserts
  • Drinks
  • Appetizers
  • Contact
  • About
  • Privacy Policy
  • Home
  • Dinner
  • Desserts
  • Drinks
  • Appetizers
  • Contact
  • About
  • Privacy Policy
  • Cookie Policy
  • GDPR Policy
  • Disclaimer
  • Terms Of Use
Visit my other site: Fun Cookie Recipes

HOME / CATEGORIES /

Latest

- 1 ½ cups all-purpose flour - 1 cup granulated sugar - ½ cup unsalted butter, softened - 2 large eggs - 1 teaspoon pure vanilla extract - 1 teaspoon baking powder - ½ teaspoon baking soda - ¼ teaspoon fine sea salt - ½ cup whole milk - Zest of 1 medium lemon - ½ cup fresh raspberries (plus more for garnish) - 2 tablespoons fresh lemon juice Here are some easy conversions for your baking needs: - 1 cup = 240 ml - ½ cup = 120 ml - 1 teaspoon = 5 ml - ½ teaspoon = 2.5 ml - ¼ teaspoon = 1.25 ml If you have allergies or want to swap ingredients, here are some ideas: - Use coconut oil instead of butter for a dairy-free option. - Substitute almond milk for whole milk if you're lactose intolerant. - If eggs are a concern, flax eggs can work as a substitute. Mix 1 tablespoon of ground flaxseed with 2.5 tablespoons of water for one egg. - For a gluten-free option, use a gluten-free all-purpose flour blend. These tips help you adapt the recipe to your needs while keeping the flavor intact. Enjoy baking! {{ingredient_image_2}} Start by preheating your oven to 350°F (175°C). This step is key for even baking. Grab a standard cupcake tray and line it with paper liners. This makes it easy to remove the cupcakes later. In a large bowl, cream together ½ cup of softened butter and 1 cup of granulated sugar. Use an electric mixer on medium speed for about 3-4 minutes. The mix should become light and fluffy. Next, add 2 large eggs one at a time. Make sure to mix well after each egg. Then, stir in 1 teaspoon of pure vanilla extract until everything is smooth. In another bowl, sift together 1 ½ cups of all-purpose flour, 1 teaspoon of baking powder, ½ teaspoon of baking soda, and ¼ teaspoon of fine sea salt. This helps to break up any lumps. Gradually add this dry mix to the butter mixture, alternating with ½ cup of whole milk. Start with a third of the dry mix, then half of the milk. Repeat until all is combined. Mix gently; do not overmix. Now, fold in the zest of 1 medium lemon, 2 tablespoons of fresh lemon juice, and ½ cup of fresh raspberries. Be careful not to mash the berries as you fold them in. Scoop the batter into your lined cupcake tray, filling each liner about two-thirds full. This allows space for rising. Place the tray in the oven and bake for 18-20 minutes. You can check if they are done by inserting a toothpick into the center of a cupcake. It should come out clean. Once baked, let the cupcakes cool in the pan for 5 minutes. After that, transfer them to a wire rack to cool completely. While the cupcakes cool, make the frosting. In a bowl, beat together 1 cup of softened unsalted butter and 4 cups of powdered sugar. Add 2 tablespoons of fresh lemon juice and a few smashed raspberries. Mix until creamy and smooth. If the frosting is too thick, adjust it with more sugar or a splash of milk. Once the cupcakes are completely cool, you can frost them. Use a piping bag or a knife to spread the raspberry lemon frosting on each cupcake. Make it look nice with a swirl on top. Finally, garnish each cupcake with a fresh raspberry and a light sprinkle of lemon zest. This simple touch makes them look even more special. To keep your cupcakes moist, use fresh ingredients. Always check the dates on your eggs and baking items. Be sure to cream the butter and sugar well. This helps create a light and fluffy base. Always mix the wet and dry ingredients gently. Overmixing can lead to dry cupcakes. Adding whole milk also helps keep them moist. If you want extra moisture, try adding a bit of sour cream or yogurt to the batter. For the best frosting, make sure your butter is softened. Cold butter will not blend well. Beat the butter alone first, then add powdered sugar gradually. This creates a smooth texture. If your frosting is too thick, add a splash of milk. If it is too thin, add more powdered sugar. Use a piping bag for a pretty swirl. Garnish with fresh raspberries for a pop of color and flavor. This makes each cupcake look special! To help your cupcakes rise evenly, bake them in a preheated oven. Use an oven thermometer to check the temperature. Fill each cupcake liner about two-thirds full. This allows space for the cupcakes to rise without spilling over. Rotate the cupcake tray halfway through baking. This ensures even heat distribution. Always check for doneness with a toothpick. If it comes out clean, your cupcakes are ready! Pro Tips Use Fresh Ingredients: The flavor of your cupcakes will greatly benefit from using fresh raspberries and lemons. Make sure they are ripe and juicy for the best results. Don’t Overmix the Batter: Once you combine the wet and dry ingredients, mix just until incorporated. Overmixing can lead to dense cupcakes, so be gentle! Adjust Frosting Consistency: If your frosting is too thick, add a splash of milk to achieve the desired creamy texture. If it's too thin, gradually add more powdered sugar until it's perfect for piping. Cool Completely Before Frosting: Ensure your cupcakes are completely cooled before frosting to prevent the icing from melting and losing its shape. {{image_4}} To make vegan raspberry lemonade cupcakes, swap the eggs and butter. Use flax eggs instead of regular eggs. Mix 1 tablespoon of ground flaxseed with 2.5 tablespoons of water for each egg. For butter, use coconut oil or vegan butter. You can also try almond or soy milk instead of whole milk. These changes keep the flavor fresh and bright. If you need gluten-free cupcakes, use a gluten-free all-purpose flour blend. Be sure it has xanthan gum to help with texture. This blend will keep your cupcakes soft and light. You can also add a bit of cornstarch for extra fluffiness. Just replace the flour cup for cup with the blend. Want to add more flavor? Try mixing in different berries. Blueberries or strawberries work well and add a nice twist. You could also add a touch of lemon zest or juice for a stronger lemon flavor. Experiment with different flavors to find your perfect mix. These small changes make your cupcakes even more exciting! To keep your Raspberry Lemonade Cupcakes fresh, store them in an airtight container. This will help maintain their moisture. You can keep them at room temperature for up to two days. If your kitchen is warm, the fridge is a better option. Just remember, cold storage can change the texture. To freeze your cupcakes, let them cool completely first. Then, wrap each cupcake tightly in plastic wrap. Place the wrapped cupcakes in a freezer-safe bag or container. They can stay in the freezer for about three months. When you're ready to enjoy them, thaw them at room temperature. For longer shelf life, avoid frosting the cupcakes until you're ready to serve. Frosted cupcakes can last for about three days at room temperature. If you need to frost and store, use a simple buttercream that holds up well. Always check for signs of spoilage before eating. You can boost the lemon flavor by adding more lemon zest. Use the zest of two lemons instead of one. You can also add an extra tablespoon of fresh lemon juice for more zing. If you want, try a lemon extract for a stronger taste. Just a teaspoon will do! Yes, you can use frozen raspberries! They will work just fine. Just make sure to thaw them first and drain any excess liquid. This helps keep your batter from becoming too wet. Fold them in gently to avoid mushy bits in your cupcakes. If you're looking for an egg substitute, use 1/4 cup of unsweetened applesauce for each egg. Another option is to use a flax egg. Mix one tablespoon of ground flaxseed with three tablespoons of water. Let it sit for about five minutes until it thickens. These cupcakes will last for about three days at room temperature in an airtight container. If you want them to stay fresh longer, store them in the fridge for up to a week. You can also freeze them for up to three months. Just wrap them well to avoid freezer burn. Enjoy your treats! You learned how to make delicious raspberry lemonade cupcakes. We covered the right ingredients, conversion for measurements, and how to handle allergens. The step-by-step guide showed you how to bake and frost your cupcakes. I shared tips to keep them moist and help with frosting. We explored fun variations, including vegan and gluten-free options. Finally, I explained how to store your cupcakes for longer freshness. Baking can be fun and simple. Use these steps to impress your friends and family!

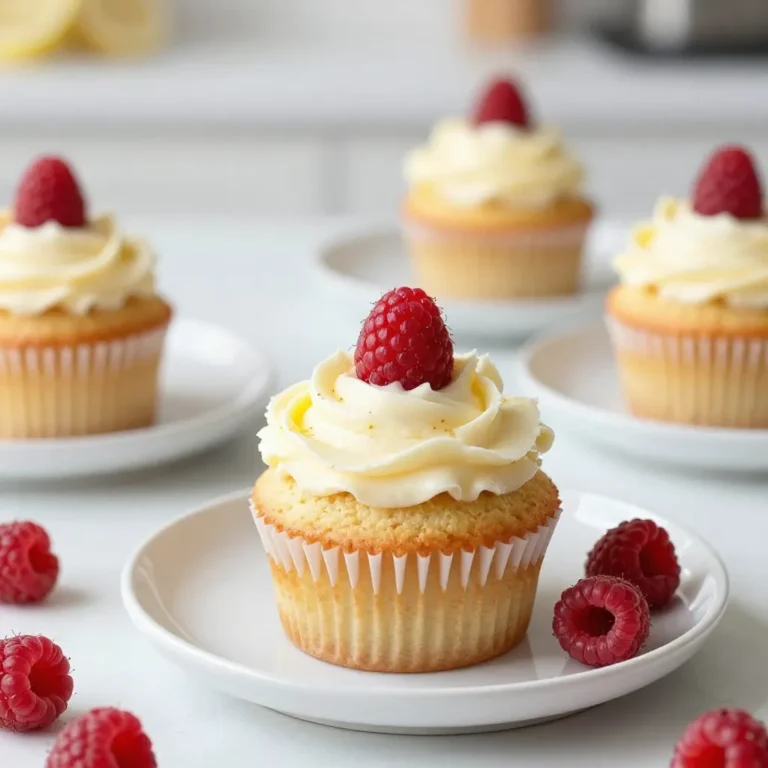
Raspberry Lemonade Cupcakes Easy and Refreshing Treat

- 2 cans (15 oz each) sliced peaches in syrup, drained - 1 cup sugar - 1 teaspoon ground cinnamon - 1 box (15.25 oz) yellow cake mix - 1 cup unsalted butter, melted - 1/2 cup chopped pecans (for added crunch) - Vanilla ice cream (for serving) Serve the dump cake warm in bowls. Top each serving with a scoop of vanilla ice cream. You can also add a slice of fresh peach or a mint leaf for a nice touch. This makes your dessert not only tasty but also pretty. {{ingredient_image_2}} 1. Preheat your oven to 350°F (175°C). 2. Grease a 9x13 inch baking dish with non-stick spray or butter. 3. In a large bowl, mix the drained peaches, sugar, and cinnamon. 4. Gently stir until the peaches are coated with the sugar mixture. 5. Pour the peach mixture evenly into the prepared baking dish. 6. Sprinkle the dry yellow cake mix over the peaches. Do not stir it. 7. Carefully drizzle the melted butter over the cake mix, covering it all. 8. If using, sprinkle the chopped pecans on top for extra crunch. 1. Place the baking dish in the preheated oven. 2. Bake for 45-50 minutes. Look for a golden brown and bubbly top. 3. The butter will soak into the cake mix, creating a nice crust. 1. Remove the cake from the oven. Let it cool for a few minutes. 2. Serve it warm for the best taste. 3. A scoop of vanilla ice cream on top makes it even better! 4. For a fun touch, add a slice of fresh peach or a mint leaf when serving. To make the best Peach Cobbler Dump Cake, follow a few simple steps. First, use ripe peaches for a sweeter taste. If you use canned peaches, drain them well to avoid extra liquid. Mix the peaches with sugar and cinnamon for great flavor. After that, layer the dry cake mix evenly over the peaches. This helps create a nice crust when baked. Pour melted butter over the cake mix without stirring. This step keeps the topping crispy and golden. One common mistake is mixing the cake batter too much. You want to keep it dry and fluffy. Another mistake is not preheating the oven. Baking at the right temperature makes a big difference. Don't skip the cooling time after baking. Letting it sit helps the flavors blend well. Lastly, be careful not to overbake. A golden top is what you want, not a burnt one. To boost flavor, add vanilla extract to the peach mix. You can also sprinkle in some nutmeg for warmth. For a crunchier texture, toss in chopped pecans or walnuts on top. Serve with a scoop of vanilla ice cream for a creamy contrast. If you want a twist, try adding a bit of lemon juice to the peaches. This brightens the overall taste. Remember, little changes can lead to big flavor! Pro Tips Use Fresh Peaches: If you have access to fresh peaches, slice them up for an even more flavorful and juicy cake. Butter Coverage: Ensure the melted butter covers the cake mix evenly to achieve a perfectly crispy top. Serve Warm: This cake is best enjoyed warm, so consider serving it straight from the oven with a scoop of vanilla ice cream. Customize Your Nuts: Feel free to substitute pecans with walnuts or almonds for a different nutty flavor. {{image_4}} You can switch up the fruit in this dump cake. Berries, cherries, or apples work great. Just replace the peaches. For berries, use mixed berries or just blueberries. With apples, slice them thin and mix with sugar and cinnamon. This keeps the same sweet taste and warm feel. Not a fan of yellow cake mix? Try white or chocolate cake mix instead. Each flavor brings a new twist to the cake. White cake mix keeps the flavor light. Chocolate cake adds richness. Both still pair well with the fruit. Want a gluten-free version? Use a gluten-free cake mix. Many brands offer great taste without gluten. For a vegan option, swap the butter for coconut oil or vegan butter. Use a plant-based cake mix too. This way, everyone can enjoy your tasty dessert! To store your leftover Peach Cobbler Dump Cake, let it cool first. Then, place it in an airtight container. You can keep it in the fridge for about 3 to 5 days. Make sure to seal it well to keep it fresh. If you want to enjoy it later, consider freezing it. If you want to freeze your cake, slice it into portions first. Wrap each piece tightly in plastic wrap. Then, put the wrapped slices into a freezer bag or container. This way, you can grab just what you need. It will stay good in the freezer for up to 3 months. Just remember to label the bag with the date. To reheat, take a slice out of the fridge or freezer. If it’s frozen, let it thaw in the fridge overnight. For a quick reheat, use the microwave. Heat it for 20-30 seconds, checking to avoid overheating. If you prefer the oven, preheat it to 350°F (175°C) and bake for about 10-15 minutes. Serve warm, topped with a scoop of vanilla ice cream for a treat! Yes, you can use fresh peaches. Slice about 6-8 ripe peaches. Peel them if you like. They will add a fresh flavor to your dump cake. Just remember to add a bit of sugar. Fresh peaches can be less sweet, so taste as you go. You can adjust the sugar in the recipe. If you like it less sweet, reduce the sugar by half a cup. If you want more sweetness, add more sugar to taste. You can also use brown sugar for a richer flavor. I love serving this cake with vanilla ice cream. The cold ice cream melts into the warm cake. You can also add whipped cream or fresh fruit. A sprinkle of cinnamon on top adds a nice touch too. Peach Cobbler Dump Cake lasts about 3-4 days in the fridge. Make sure to store it in an airtight container. Reheat it gently before serving for the best taste. Peach cobbler dump cake is simple and fun to make. I have shared key ingredients, tips, and serving ideas that will help you create the best dessert. Remember to explore fruit options and try different cake mixes for tasty twists. Storing leftovers properly can keep your dessert fresh. I hope you enjoy making and sharing this sweet treat with family and friends. With these steps, you’ll impress everyone at your next gathering!

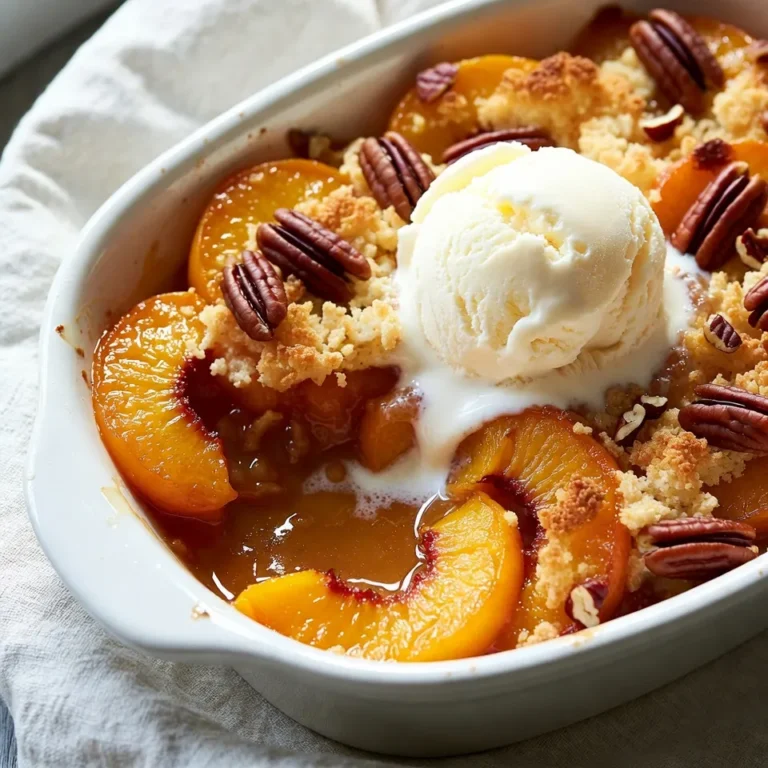
Peach Cobbler Dump Cake Simple and Sweet Recipe

- 1 cup unsalted butter, softened to room temperature - 1 cup packed brown sugar - 1/2 cup granulated sugar - 2 large eggs at room temperature - 1 teaspoon pure vanilla extract - 3 cups all-purpose flour, sifted - 1 teaspoon baking soda - 1/2 teaspoon fine sea salt - 1 cup white chocolate chips - 1 cup semi-sweet chocolate chips - 1 cup chopped macadamia nuts (optional, for a gourmet touch) - Flaky sea salt for a finishing sprinkle Using high-quality ingredients makes a big difference. Choose fresh, unsalted butter for a rich flavor. The brown sugar should be packed tightly for the right sweetness. Look for pure vanilla extract, not imitation, to get the best taste. Sift your flour to remove lumps and get a light texture. For the chocolate chips, select a brand that you love. Good chocolate enhances the overall flavor. And if you decide to use macadamia nuts, pick ones that are whole or roughly chopped for a nice crunch. You can add a few extras to make these cookies even better. Chopped nuts like pecans or walnuts work well if you want a twist. Try adding a bit of instant coffee for a deeper flavor. You could also mix in dried fruits like cranberries or cherries for a different taste. Lastly, a sprinkle of flaky sea salt on top adds a nice contrast to the sweetness. These options let you create a cookie that is truly your own. {{ingredient_image_2}} To make Marry Me Cookies, start with simple steps. First, gather your ingredients. You need butter, sugars, eggs, flour, baking soda, salt, and chocolate chips. Have your baking sheets and parchment paper ready too. Preheat your oven to 350°F (175°C) for the best baking results. 1. Creaming: In a large bowl, mix softened butter with brown and granulated sugar. Use a hand mixer for about 2-3 minutes. You want it light and fluffy. 2. Adding Eggs: Add the eggs one by one. Mix well before each addition. This helps make the dough smooth. Then, stir in the vanilla extract. 3. Dry Ingredients: In another bowl, sift together flour, baking soda, and salt. This keeps your cookies soft and fluffy. 4. Combining: Slowly add the dry mix to the wet ingredients. Mix gently. You want it just combined to avoid tough cookies. 5. Chocolate Chips and Nuts: Fold in white chocolate chips, semi-sweet chips, and macadamia nuts if you like. Make sure they spread evenly in the dough. 6. Scoop: Use a tablespoon or cookie scoop to drop dough mounds on lined baking sheets. Leave about 2 inches between each mound. 7. Sprinkling: Before baking, add a pinch of flaky sea salt on top. This enhances the flavor and adds a nice touch. 8. Baking: Place the sheets in the oven and bake for 10-12 minutes. Look for light golden edges. The centers will firm as they cool. 9. Cooling: Let the cookies sit on the sheets for 5 minutes. Then, transfer them to wire racks to cool completely. This helps keep them soft. For the best taste and look, serve the cookies warm. Arrange them on a pretty platter. Add a few chocolate chips around the cookies for style. A light dusting of powdered sugar can make them even more special. Enjoy these cookies with friends or family. They are sure to impress! When making Marry Me Cookies, watch out for these errors: - Overmixing the dough: This can make cookies tough. Mix just until combined. - Using cold butter: Softened butter blends better with sugars. Let it sit out first. - Skipping the salt: A pinch of flaky sea salt enhances the sweet flavor. Don’t skip it. - Not measuring flour properly: Use a spoon to scoop flour into the cup. Level it with a knife. Getting the right texture is key. Follow these tips: - Cream butter and sugars well: Aim for a light and fluffy mix. This adds air and helps cookies rise. - Use room temperature eggs: They mix better. Cold eggs can lead to uneven dough. - Avoid overbaking: Cookies should look slightly soft in the center. They firm up as they cool. - Cool on racks: This prevents sogginess. Let air circulate around the cookies. Want to impress? Try these ideas: - Add spices: A dash of cinnamon or nutmeg gives warmth and depth. - Decorate with chocolate drizzle: Melt chocolate and drizzle over cooled cookies for flair. - Use different nuts: Try walnuts or pecans for a unique crunch. - Make cookie sandwiches: Fill two cookies with cream cheese frosting for a fun twist. These tips can help you create cookies that are not just good but truly unforgettable! Pro Tips Use Room Temperature Ingredients: Ensure your butter and eggs are at room temperature for a smoother batter and better texture. Don't Overmix the Dough: Mix the dry ingredients into the wet just until combined to keep the cookies tender and chewy. Chill the Dough: For thicker cookies, chill the dough for at least 30 minutes before baking to prevent excessive spreading. Experiment with Mix-Ins: Feel free to substitute the chocolate chips or nuts with your favorites, like dried fruits or different types of chocolate! {{image_4}} You can make gluten-free Marry Me Cookies easily. Substitute all-purpose flour with a 1:1 gluten-free flour blend. Look for one that contains xanthan gum. This helps mimic the texture of regular cookies. Follow the same recipe steps. You’ll still enjoy a chewy and delicious treat. To make vegan Marry Me Cookies, replace the butter with coconut oil or vegan butter. For the eggs, use flax eggs. Mix one tablespoon of ground flaxseed with three tablespoons of water. Let it sit for five minutes to thicken. Use non-dairy chocolate chips to keep it vegan. These cookies will be just as yummy! You can mix things up with different flavors. Here are some ideas: - Nutty Delight: Add chopped walnuts or pecans for extra crunch. - Coconut Bliss: Stir in shredded coconut for a tropical twist. - Minty Fresh: Use mint chocolate chips for a fresh flavor. - Spicy Pumpkin: Add pumpkin spice for a fall-inspired cookie. Feel free to experiment. You might find a new favorite! To keep your Marry Me Cookies fresh, store them in an airtight container. This helps keep moisture in and prevents them from going stale. Place a piece of bread in the container with the cookies. The bread will help keep them soft for longer. You can also store cookies at room temperature, away from sunlight. If you want to keep them for more than a week, refrigeration is a good option. Just remember, cookies can become a bit hard in the fridge, so let them sit at room temperature before enjoying. Freezing Marry Me Cookies is easy and a great way to save some for later. First, let the cookies cool completely. Once they are cool, place them in a single layer on a baking sheet. Freeze them for about an hour. This prevents them from sticking together. After one hour, transfer the cookies to a freezer-safe bag or container. Make sure to remove excess air from the bag. They can last up to three months in the freezer. When you're ready to enjoy them, simply thaw at room temperature. To reheat your Marry Me Cookies, preheat your oven to 350°F (175°C). Place the cookies on a baking sheet. Heat them for about 5 to 7 minutes. This warms them up and makes them soft again. If you prefer, you can also use a microwave. Just heat them for 10 to 15 seconds. Be careful not to overheat, or they might become tough. Enjoy your warm cookies with a glass of milk or a cup of coffee! Marry Me Cookies stand out due to their rich flavors and textures. You get a mix of white and semi-sweet chocolate chips. This blend adds depth and sweetness that is hard to resist. The macadamia nuts offer a delightful crunch. They make each bite fun and exciting. Then, the sprinkle of flaky sea salt brings out the sweetness even more. This contrast makes the cookies really special. Yes, you can easily make a smaller batch of Marry Me Cookies. Just cut the ingredients in half. For example, use half a cup of butter instead of one cup. This lets you enjoy fresh cookies without extra leftovers. You can also use one egg instead of two. Keep the baking time the same, but check them a bit earlier. This way, you can adjust to your needs. You can make Marry Me Cookies extra special for a proposal. First, shape the cookies into hearts for a romantic touch. Use cookie cutters for fun shapes. Second, add a note with the cookies. Write a sweet message or the proposal itself. Lastly, serve them in a lovely box or on a nice plate. This makes the moment even more memorable. In this post, we explored the key ingredients for Marry Me Cookies and how to prepare them. I shared tips for perfect texture and avoiding common mistakes. You learned about different variations, including gluten-free and vegan options. Plus, I explained how to store and freeze your cookies. As you bake, remember that these cookies are about love and joy. Enjoy sharing them with others, or keep them for yourself. Happy baking!

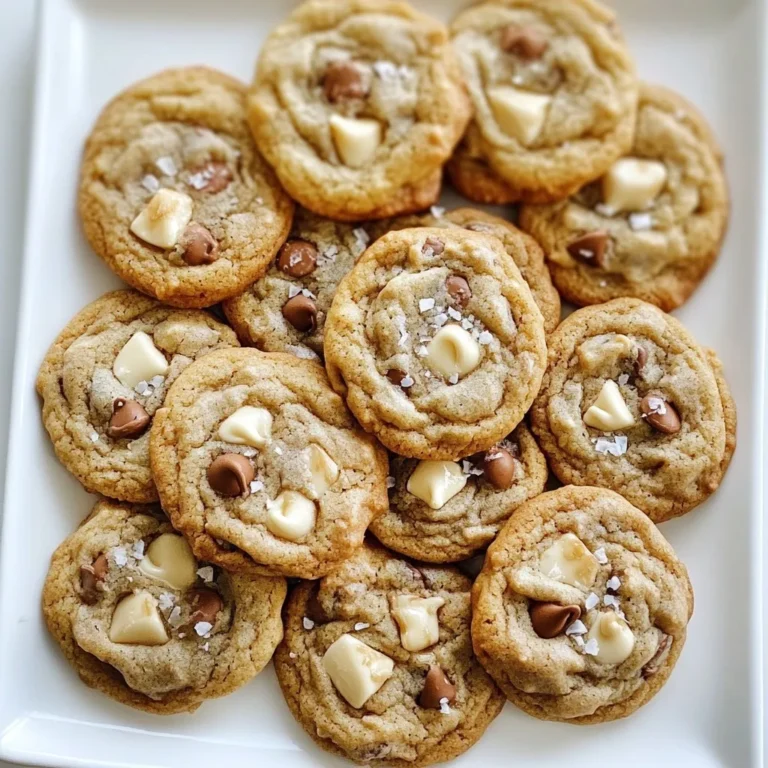
Marry Me Cookies Irresistible Treat for Everyone

- 1 pound ground beef - 12 ounces pasta (penne or fusilli) - 1 medium onion, finely chopped - 2 cloves garlic, minced - 1 can (14 oz) diced tomatoes with juices - 3 cups beef broth - 1 cup heavy cream - 1 cup grated Parmesan cheese - 1 teaspoon Italian seasoning - Salt and freshly ground black pepper to taste - 2 tablespoons olive oil - Fresh parsley, chopped (for garnish) - Large pot or Dutch oven - Wooden spoon - Measuring cups - Measuring spoons - Knife and cutting board - Serving bowls If you want to switch things up, here are some easy swaps: - Ground beef: Try ground turkey or chicken for a lighter dish. - Pasta: Use gluten-free pasta for a gluten-free option. - Heavy cream: Substitute with half-and-half or coconut milk for a lighter sauce. - Parmesan cheese: Use Pecorino Romano or a dairy-free cheese for a different flavor. - Diced tomatoes: Swap for fresh tomatoes or a can of tomato sauce if you prefer. {{ingredient_image_2}} 1. Start by gathering all your ingredients. This makes cooking easier and faster. 2. Finely chop the onion and mince the garlic. Set them aside for later use. 3. Measure out the pasta, beef broth, and heavy cream. Keep them handy. 1. In a large pot or Dutch oven, heat 2 tablespoons of olive oil over medium heat. 2. Once the oil is hot, add the chopped onion and minced garlic. Sauté for about 3-4 minutes. You want the onion to be soft and clear. 3. Next, increase the heat to medium-high. Add 1 pound of ground beef to the pot. Cook it for around 5-7 minutes. Break it apart with a wooden spoon as it browns. If there is too much fat, drain it. 4. Stir in 1 can of diced tomatoes with juices, 3 cups of beef broth, and 1 teaspoon of Italian seasoning. Mix well and bring it to a gentle simmer. 5. Add 12 ounces of pasta into the pot, making sure it is well mixed. Ensure all pasta is submerged in the broth. 6. Cover the pot and let it cook for 10-12 minutes. Stir occasionally to stop the pasta from sticking. The pasta should be firm but tender. 7. Lower the heat and stir in 1 cup of heavy cream and 1 cup of grated Parmesan cheese. Cook for another 2-3 minutes. Stir often until the sauce is thick and creamy. 8. Taste your pasta and season with salt and freshly ground black pepper. Adjust to your liking. 9. Remove the pot from heat and let it rest for a few minutes before serving. - Always stir the sauce well after adding cream and cheese. This helps mix everything evenly. - Cook on low heat after adding cream. High heat can make it separate. - If the sauce seems too thick, add a splash of beef broth or water to loosen it. When making creamy one pot beef pasta, a few mistakes pop up often. First, don’t skip draining excess fat from the beef. This keeps your dish lighter and tastier. Second, avoid overcooking the pasta. It should be al dente to absorb the creamy sauce without becoming mushy. Lastly, don’t forget to stir the pot occasionally. This prevents sticking and ensures even cooking. You can easily boost the flavor of your dish. Try adding a splash of red wine with the broth. This adds depth and richness. Fresh herbs, like basil or thyme, can brighten the taste. For heat, sprinkle in red pepper flakes. You can also mix in some sautéed mushrooms or spinach for extra nutrients and flavor. Garnishing adds a nice touch to your creamy beef pasta. Fresh parsley is a great choice. It adds color and a fresh taste. You can also sprinkle extra Parmesan cheese on top for richness. For a bit of crunch, add toasted pine nuts or breadcrumbs. Serve in warm bowls for a cozy feel, making your meal even more inviting. Pro Tips Use Fresh Herbs: Fresh parsley not only adds a pop of color but also enhances the flavor profile. Consider adding basil or oregano for an extra layer of taste. Customize Your Pasta: Experiment with different pasta shapes like farfalle or rotini to create a unique texture that holds the sauce well. Adjust the Creaminess: If you prefer a lighter dish, you can substitute half-and-half for the heavy cream or use Greek yogurt for a tangy twist. Leftover Storage: Store any leftovers in an airtight container in the fridge. Reheat gently on the stove with a splash of beef broth to revive the creamy texture. {{image_4}} You can easily make this dish vegetarian. Swap the ground beef for plant-based meat crumbles. Another option is to use lentils. They add great protein and texture. You can also add veggies for color and flavor. Consider using bell peppers, mushrooms, or spinach. These will blend well with the creamy sauce. While penne or fusilli works great, feel free to try other pasta shapes. Spaghetti or rotini can also work well. Just adjust the cooking time based on the pasta type. Whole wheat or gluten-free pasta can fit into this recipe too. These options keep the meal healthy and accessible for all diets. If you want more variety, consider using different proteins. Ground turkey or chicken can replace beef. These options are leaner and still tasty. For a fun twist, try shrimp or diced chicken. They will cook quickly and add a fresh flavor to the dish. Experiment with these variations to find your favorite version! To store leftovers, let the pasta cool first. Then, place it in an airtight container. This keeps it fresh for up to three days in the fridge. Make sure to seal the container well to avoid any odors from other foods. You can freeze creamy one pot beef pasta too. Portion it into freezer-safe bags or containers. Label each bag with the date. It stays good for up to three months in the freezer. When ready to eat, just thaw it overnight in the fridge before reheating. To reheat, use a pot on low heat. Add a splash of beef broth or water to restore creaminess. Stir frequently to prevent sticking. You can also use the microwave. Heat it in short bursts, stirring in between. This keeps the pasta creamy and delicious. Yes, you can use other meats. Ground turkey or chicken works well. These options can be lighter than beef. You can also try venison or pork for a unique taste. Just follow the same steps in the recipe. To add heat, mix in crushed red pepper flakes. Start with a small pinch and taste. You can also add diced jalapeños or hot sauce. These ingredients will boost the flavor and spice level. Adjust to fit your taste. If you want a lighter option, use half-and-half. Another choice is coconut cream for a dairy-free version. For a healthier twist, try Greek yogurt. Just stir it in at the end to keep the texture creamy. We covered the important ingredients and tools needed for your dish. You learned how to prepare, cook, and get the creamy texture just right. I shared common errors to avoid and tasty ways to enhance flavor. You now know different variations, including vegetarian options. In conclusion, cooking can be fun and simple with the right steps. Enjoy experimenting with your meals, and don't be afraid to make it your own. Happy cooking!

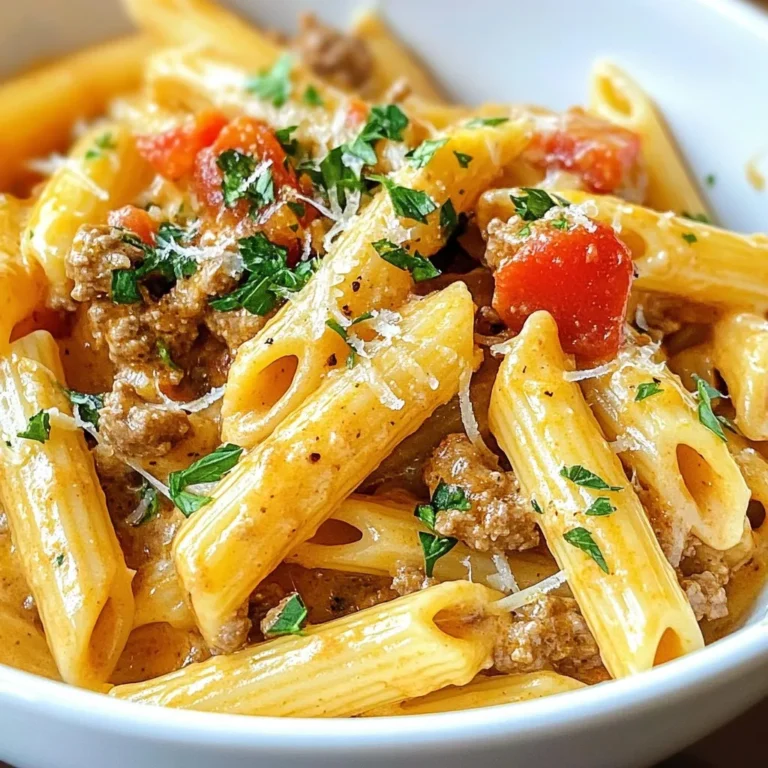
Creamy One Pot Beef Pasta Simple and Satisfying Meal

To make Grilled Chicken Broccoli Bowls with Garlic Sauce, you need fresh and tasty ingredients. Here’s a detailed list to guide you: - Chicken - 2 boneless, skinless chicken breasts - Vegetables - 2 cups broccoli florets - Grains - 1 cup cooked quinoa or brown rice - Marinade Components - 1 tablespoon olive oil - 3 cloves garlic, minced - 2 tablespoons soy sauce (or tamari for gluten-free) - 1 tablespoon honey or maple syrup - 1 tablespoon fresh ginger, grated - Salt and freshly ground black pepper to taste - Garnishes - Sesame seeds for garnish - Fresh cilantro for garnish (optional) Each ingredient plays a key role. The chicken provides protein, while the broccoli adds nutrients. Quinoa or brown rice gives you fiber and fullness. The marinade brings all the flavors together. Remember, fresh ingredients yield the best taste. {{ingredient_image_2}} Start by seasoning both sides of the chicken breasts with salt and pepper. Then, mix minced garlic, soy sauce, honey, and grated ginger in a bowl. This creates a tasty marinade. Coat the chicken with this mix and let it sit. A good time to marinate is at least 20 minutes. For better flavor, let it sit in the fridge for up to 2 hours. Preheat your grill to medium-high heat. It should be hot enough to sear the chicken. Place the marinated chicken on the grill. Cook it for 6-8 minutes per side. You want a nice char and an internal temperature of 165°F (75°C). Once done, take it off the grill. Let it rest for a few minutes before slicing. While the chicken cooks, bring a pot of water to a rolling boil. Put a steamer basket over the pot and add the broccoli florets. Cover it and steam for about 4-5 minutes. You want the broccoli to be bright green and tender-crisp. Don’t let it overcook! If you haven’t cooked quinoa or brown rice yet, do this now. Rinse the grains well. Cook them in water or broth according to the package instructions. This usually takes around 15-20 minutes until fluffy. Now, it’s time to put it all together! In each serving bowl, add a scoop of quinoa or rice at the bottom. Then, add a layer of the steamed broccoli. Finally, place the sliced grilled chicken on top. You can use the leftover marinade as a sauce, but make sure to cook it first. For a different sauce, mix more minced garlic, a splash of soy sauce, and a bit of olive oil in a small bowl. Drizzle this over each bowl for added flavor. Common Grilling Mistakes Grilling can be tricky. Many people flip the chicken too soon. Wait until it releases from the grill before turning. Another mistake is overcrowding the grill. Give each piece space for even cooking. Lastly, avoid opening the lid too often. This releases heat and slows cooking. Marination Tips Marinating chicken adds flavor and tenderness. Use a mix of soy sauce, garlic, ginger, and honey. Coat the chicken well and let it sit for at least 20 minutes. For better taste, marinate for up to 2 hours. This makes a big difference in taste. How to Achieve Tender-Crisp To get tender-crisp broccoli, use a steamer basket. Boil water in a pot, then place the broccoli in the steamer. Cover it and steam for 4-5 minutes. Watch it closely! You want bright green and a little crunch. Overcooking makes it mushy. Pairing Ideas Serve these bowls with fresh lime wedges for a zesty kick. You can also add avocado slices for creaminess. If you like heat, try a drizzle of sriracha or chili oil. This adds a punch to the dish. Don't forget a sprinkle of sesame seeds for a nice crunch. Pro Tips Marinate for Maximum Flavor: Allow the chicken to marinate for at least 20 minutes, but for the best results, aim for 1-2 hours in the refrigerator. This enhances the flavor and tenderness of the chicken. Perfectly Cooked Chicken: Use a meat thermometer to ensure your chicken reaches an internal temperature of 165°F (75°C). This guarantees that it is fully cooked while remaining juicy. Steaming Broccoli: Steam the broccoli until it’s bright green and just tender, about 4-5 minutes. This retains nutrients and keeps the broccoli vibrant and crisp. Customize Your Bowls: Feel free to add other vegetables or toppings such as sliced bell peppers, avocado, or a squeeze of lime juice to personalize your bowls and add extra flavor. {{image_4}} You can easily change the protein in this dish. Here are some options: - Vegan Options: Try marinated tofu or tempeh. Both soak up flavors well. Grill them just like chicken. They add a tasty twist. - Alternative Meats: You can use turkey or pork instead of chicken. Both cook similarly and bring different flavors. The grain is key to your bowl. Here are some thoughts: - Quinoa vs. Brown Rice: Quinoa has a light, nutty taste. It’s also packed with protein. Brown rice is chewier and more filling. Choose based on your mood and needs. - Other Grain Suggestions: Consider farro, barley, or couscous. Each adds unique textures and flavors to your bowl. You can spice things up with flavors. Here are some ideas: - Adding Spices: Try adding smoked paprika or chili flakes. Both enhance the dish with warmth and depth. - Different Sauces: Experiment with peanut sauce or sriracha. Each option brings new taste and excitement to your meal. To store leftovers, let the Grilled Chicken Broccoli Bowls cool. Place them in airtight containers. This helps keep them fresh. You can store them in the fridge for up to three days. When you are ready to eat, check for any signs of spoilage. If you want to freeze your bowls, you can do that too! First, cool the bowls completely. Then, store them in freezer-safe containers. Make sure to remove as much air as possible before sealing. These bowls can last in the freezer for up to three months. Just remember to label them with the date. When it's time to enjoy your leftovers, reheating them right is key. You can use a microwave for quick warming. Heat in short bursts, stirring in between. Aim for one to two minutes, until hot. If you prefer the oven, preheat it to 350°F (175°C). Place the bowls on a baking sheet and cover with foil. Heat for about 15-20 minutes. This method keeps the chicken juicy and the broccoli crisp. Enjoy your meal! You can tell the chicken is fully cooked by checking its internal temperature. Use a meat thermometer to ensure it reaches 165°F (75°C). The chicken should look white and juices should run clear. If you cut into it, there should be no pink inside. Rest the chicken for a few minutes before slicing. This helps keep it juicy. Yes, you can make this recipe ahead of time! Cook the chicken, broccoli, and grains. Store them separately in airtight containers. When you're ready to eat, just reheat everything in the microwave or on the stove. This meal is great for meal prep and saves time during busy days. These bowls pair well with a few side dishes. You could serve a simple salad with a light dressing. Roasted sweet potatoes or a fresh cucumber salad also work great. If you like heat, try some spicy roasted chickpeas. These sides add flavor and make your meal more filling. Yes, you can use frozen broccoli! Just steam it according to the package instructions. Frozen broccoli is often just as nutritious as fresh. Make sure not to overcook it, so it stays bright green and tender-crisp. This makes it a quick and easy option for busy cooks. This article covered key steps to create tasty chicken bowls. We discussed fresh ingredients like chicken, veggies, and grains. I guided you through marinating, grilling, and steaming techniques. You learned to layer flavors and make garlic sauce with leftover marinade. In the end, these bowls are easy and fun to make. Don't hesitate to try variations or experiment with flavors. Enjoy making delicious meals that meet your taste and dietary needs. Happy cooking!

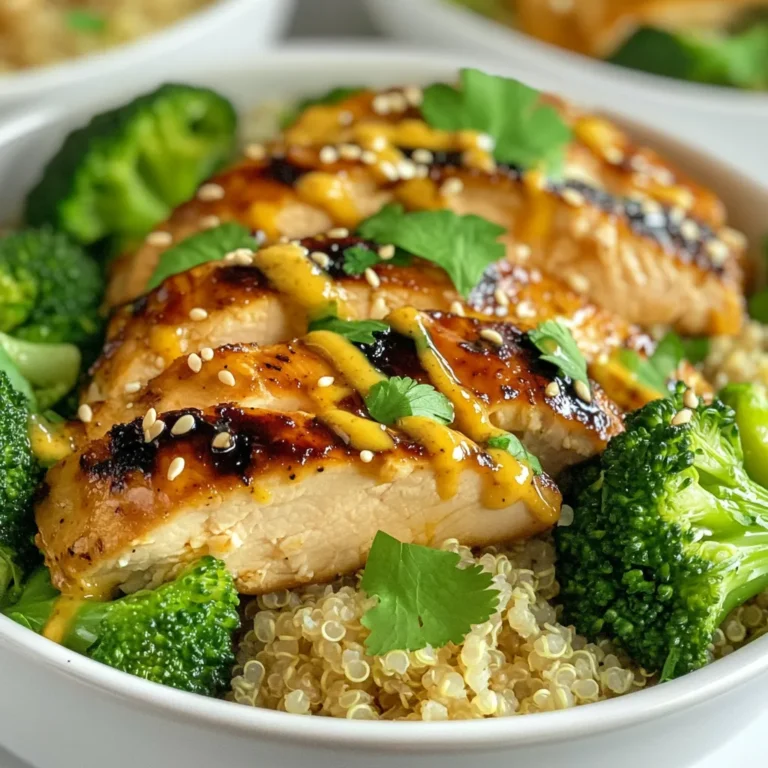
Grilled Chicken Broccoli Bowls with Garlic Sauce Delight

- 2 boneless, skinless chicken breasts - 1 cup coconut milk - 2 tablespoons fresh lime juice - Zest of 1 lime - 1 tablespoon honey - 1 teaspoon garlic powder - 1 teaspoon ginger powder - Salt and pepper, to taste - 1 cup jasmine rice - 1 3/4 cups chicken broth (or water) - 1 cup cherry tomatoes, halved - 1 ripe avocado, sliced - 1/4 cup fresh cilantro, chopped - Lime wedges for serving These key ingredients make the Coconut Lime Chicken Bowls fresh and bright. The chicken gets a rich flavor from the coconut milk and lime juice. The jasmine rice forms a perfect base, soaking up the sauce. - Additional fresh cilantro - Sliced jalapeños for heat - Chopped green onions - Sesame seeds for crunch Add these garnishes to boost the dish's flavor and look. Fresh cilantro brightens each bite, while jalapeños add a spicy kick. - Steamed vegetables like broccoli or green beans - A light salad with mixed greens - Crispy tortilla chips with salsa Pair these bowls with sides that balance the dish. Steamed veggies add nutrients and color, while a salad provides a refreshing crunch. Enjoy your meal with crispy chips for a fun twist! {{ingredient_image_2}} First, gather your mixing bowl. Combine the coconut milk, lime juice, lime zest, honey, garlic powder, ginger powder, and a pinch of salt and pepper. Whisk until everything blends well. Add the chicken breasts, making sure they get coated. Cover the bowl with plastic wrap. Place it in the fridge for at least 30 minutes, or up to 2 hours for more flavor. Next, grab a medium saucepan. Bring the chicken broth or water to a boil. Once it bubbles, add your jasmine rice and stir it briefly. Reduce the heat to low. Cover the pot with a lid and let it simmer for about 15 minutes. The rice should absorb all the liquid. After that, remove it from heat and let it sit covered for 5 more minutes to fluff up. Now, heat a non-stick skillet over medium heat. Take the chicken breasts out of the marinade. Keep the marinade for later. Place the chicken in the skillet. Cook for about 6 to 7 minutes on each side. The chicken should reach 165°F (75°C) inside. Once done, take it out and let it rest for a few minutes. Slice it into strips. In the same skillet, pour in the reserved marinade. Turn up the heat a little and bring it to a gentle simmer. Cook for about 3 to 5 minutes until the sauce thickens slightly. Stir occasionally so it doesn't stick. To build your bowls, start with jasmine rice as the base. Divide it equally among serving bowls. Layer each bowl with sliced chicken, halved cherry tomatoes, and avocado slices. Drizzle the thickened coconut lime sauce over each bowl for extra flavor. Sprinkle fresh chopped cilantro on top of each bowl. Serve with lime wedges on the side. This adds a burst of flavor to your meal. Enjoy your colorful and tasty Coconut Lime Chicken Bowls! To make the chicken tender and juicy, I recommend pan-searing. This method gives a great flavor and color. Start with a hot, non-stick skillet. Add a little oil to prevent sticking. Cook each side for about 6-7 minutes. Always check the internal temperature. It should reach 165°F (75°C) for safe eating. Letting the chicken rest for a few minutes after cooking helps keep it juicy. Slicing it too soon can let all the juices escape. For perfect, fluffy jasmine rice, rinse it first. This removes excess starch. Use a 1:1.75 ratio of rice to liquid. For this dish, chicken broth adds flavor. Bring the broth to a boil before adding the rice. Stir briefly and cover the pot. Cook on low heat for 15 minutes. After cooking, let it sit covered for 5 more minutes. This step allows the rice to steam and become fluffy. Fluff it gently with a fork before serving. To get the sauce just right, use the marinade after cooking the chicken. Pour it into the same skillet and raise the heat. Let it simmer for 3-5 minutes. Stir it often to avoid sticking. The sauce will thicken as it cooks. If it gets too thick, add a splash of water or chicken broth. This helps keep it smooth and pourable. A well-balanced sauce will enhance the dish's flavor without overpowering it. Pro Tips Marinate Longer for Flavor: The longer you marinate the chicken, the more flavorful it will be. Aim for at least 2 hours, or even overnight, for the best results. Use Fresh Ingredients: Fresh lime juice and zest will provide a more vibrant flavor compared to bottled juice. Consider using fresh herbs for garnish as well. Check Chicken Doneness: Always use a meat thermometer to ensure the chicken reaches an internal temperature of 165°F (75°C) for safe consumption. Customize Your Bowls: Feel free to add or substitute toppings like corn, black beans, or grilled peppers for added texture and flavor in your bowls. {{image_4}} You can switch out the chicken for other proteins. Shrimp works well in this dish. Just cook the shrimp for about 3-4 minutes until they turn pink. Tofu is another great choice for a plant-based option. Press and cube firm tofu, then marinate it like the chicken. Cook it in the skillet until golden brown. You can also try beef or pork. Just make sure to adjust the cooking time based on the protein you choose. To make this meal vegetarian, skip the chicken and use hearty veggies. I love using bell peppers, zucchini, and mushrooms. Sauté the veggies in the same skillet after marinating them. They soak up the coconut flavor nicely. You can also add chickpeas for extra protein. This way, you get a colorful, filling bowl packed with nutrients. Want to boost the taste? Add a pinch of red pepper flakes for heat. You can also mix in some fresh herbs like basil or mint for a twist. A splash of soy sauce or fish sauce can deepen the flavor further. Try adding a drizzle of sesame oil before serving for extra richness. Each change can make your coconut lime chicken bowls unique and fun! After making Coconut Lime Chicken Bowls, you may have some tasty leftovers. Store them in an airtight container. This keeps the chicken and rice fresh. Place them in the fridge. They stay good for about three days. If you want to keep them longer, consider freezing. When it's time to eat leftovers, you can reheat them easily. For the best results, use the stovetop. Heat a skillet over medium heat. Add a splash of water or broth to help steam the chicken and rice. Stir frequently until everything is warm. You can also use a microwave. Just cover your bowl with a microwave-safe lid or wrap. Heat in short bursts, stirring in between, until hot. If you want to freeze your Coconut Lime Chicken Bowls, it’s simple! Let everything cool down first. Then, place the chicken and rice in a freezer-safe bag or container. Try to remove as much air as you can. This helps prevent freezer burn. Label your container with the date. You can keep them in the freezer for up to three months. When you’re ready to eat, thaw in the fridge overnight and reheat as mentioned above. Yes, you can use frozen chicken. Just remember to thaw it completely first. This helps the chicken marinate well. If you skip this step, the flavors won’t soak in as much. Plan ahead so you can enjoy the best taste! If you don't have coconut milk, use almond milk or soy milk. These alternatives work well in this recipe. You can add a bit of shredded coconut for extra flavor. Dairy milk can also be used, but it will change the taste. Keep this in mind when making your choice. To add some heat, you can use chili flakes or fresh jalapeños. Mix them into the marinade for a kick. Another option is to serve with a spicy sauce on the side. You can also add hot sauce directly to the bowls for extra spice. Adjust the heat to match your taste! This blog post covered key ingredients, step-by-step cooking, helpful tips, delicious variations, and storage info. You learned how to marinate chicken, cook fluffy rice, and make a tasty sauce. I shared options for protein swaps and how to spice things up. Remember, you can store and reheat leftovers easily. My final thought is to enjoy the process. Cooking is not just about the food but also about having fun! Experiment with flavors and make the recipe yours.

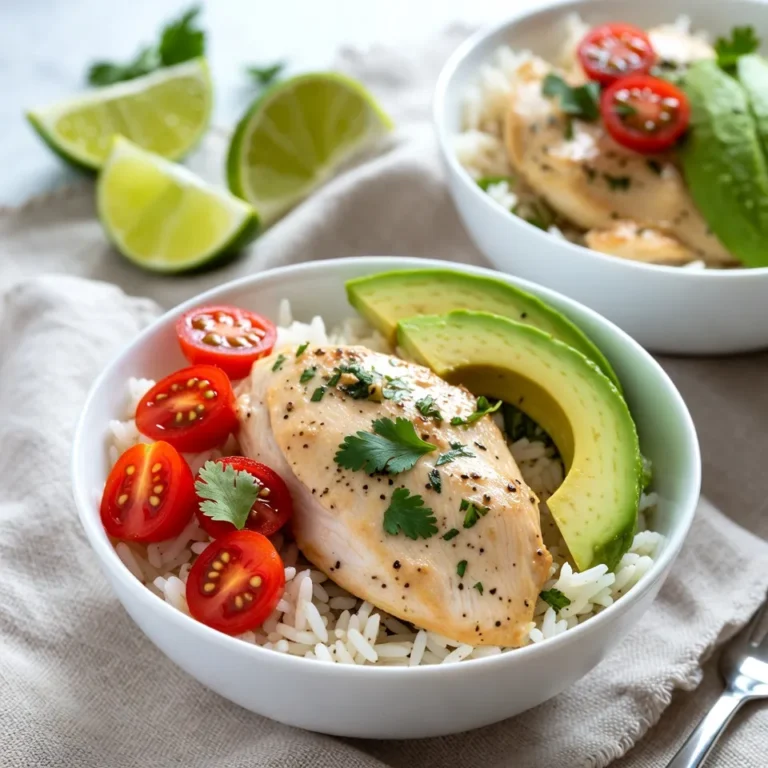
Coconut Lime Chicken Bowls Fresh and Flavorful Meal

- 1 cup all-purpose flour - 1 tablespoon baking powder - 1 teaspoon ground cinnamon - 2 tablespoons granulated sugar - 1 cup whole milk - 1/4 cup unsalted butter, melted - 1 large egg - 1 teaspoon vanilla extract To make these churro waffles, you need just a few basic ingredients. The flour provides the main structure. Baking powder helps the waffles rise. Ground cinnamon and sugar give them that classic churro flavor. Whole milk adds creaminess, while melted butter brings richness. The egg helps bind everything together, and vanilla extract adds a nice touch. - 1/2 cup granulated sugar - 2 teaspoons ground cinnamon The magic happens with the cinnamon sugar coating. Mix the sugar and cinnamon in a dish. This step gives the waffles their sweet, crunchy outer layer. Coating them while warm makes the sugar stick better. - Chocolate sauce - Caramel sauce - Whipped cream For a fun twist, consider adding toppings. Drizzle chocolate or caramel sauce over the waffles. A dollop of whipped cream makes them extra special. You can go wild with your favorites! {{ingredient_image_2}} 1. Start by preheating your waffle iron. This ensures even cooking. Follow the manufacturer's guide for the best results. 2. In a medium bowl, mix the dry ingredients. Combine 1 cup of flour, 1 tablespoon of baking powder, 1/2 teaspoon of salt, 1 teaspoon of cinnamon, and 2 tablespoons of sugar. Whisk thoroughly. 3. In a separate bowl, combine the wet items. Whisk together 1 large egg, 1 cup of whole milk, 1/4 cup of melted butter, and 1 teaspoon of vanilla extract. Make sure the butter isn't hot. 1. Carefully pour the wet mixture into the dry ingredients. Stir gently until just combined. A few lumps are okay; don't overmix. 2. Lightly coat the waffle iron with non-stick spray. This helps prevent sticking. 3. Pour enough batter onto the waffle iron to cover the surface. This is usually about 1/2 to 3/4 cup, depending on your iron. Close the lid and cook. It takes about 4-5 minutes for a golden finish. 1. While the waffles cook, prepare the cinnamon sugar. In a shallow dish, mix 1/2 cup of sugar and 2 teaspoons of cinnamon. 2. Once the waffles are done, remove them from the iron. Quickly dip each waffle in the cinnamon sugar mixture. Make sure both sides are coated well. 3. For a great look, stack the churro waffles on a colorful plate. Dust with extra cinnamon sugar and drizzle chocolate or caramel sauce on top. You can also add whipped cream for a fun touch. To make the best churro waffles, avoid overmixing the batter. Mix just until you see no dry flour. Small lumps are okay. This keeps your waffles light and fluffy. For a golden brown finish, keep an eye on the cooking time. Each waffle iron is different. Typically, it takes about 4-5 minutes. The waffles should look crisp and golden when done. Choose a good waffle iron for even cooking. A Belgian-style iron gives you thick, fluffy waffles. Non-stick spray is key to easy removal. Spray it lightly before adding the batter. This helps the waffles release easily and keeps them intact. Pick the right sauces for drizzling. Chocolate or caramel sauce pairs perfectly with churro waffles. You can also try both! Adding extra toppings makes it fun. Consider whipped cream, fresh fruit, or nuts. A sprinkle of cinnamon sugar on top adds a nice touch. Enjoy your delicious creation! Pro Tips Use Room Temperature Ingredients: Ensuring your egg and milk are at room temperature helps to create a smoother batter, resulting in fluffier waffles. Don’t Overmix the Batter: Mixing the batter until just combined will keep the waffles tender. A few lumps are okay! Experiment with Toppings: While chocolate or caramel sauce is delicious, consider adding fresh fruit, whipped cream, or even a scoop of ice cream for an extra indulgent treat. Keep Waffles Warm: If cooking multiple batches, keep the finished waffles warm in a low oven (around 200°F) until ready to serve without losing their crispiness. {{image_4}} You can make your churro waffles even more fun. Try adding chocolate chips to the batter. The melted chocolate will add a great taste. You can also mix in nutmeg or cardamom for a new spice twist. Both spices pair well with cinnamon. They will give your waffles a unique flavor. Want to make your churro waffles gluten-free? Use gluten-free flour. Many brands work great for this recipe. For those who avoid dairy, swap whole milk with almond or oat milk. These options still give a creamy texture. Both changes let everyone enjoy these tasty treats. Churro waffles are great on their own, but you can get creative. Try making churro waffle ice cream sandwiches. Just add a scoop of your favorite ice cream between two waffles. You can also top your waffles with fresh fruit. Berries or banana slices add freshness and color. These options make your dish even more exciting and delicious. To keep your churro waffles fresh, store them properly. Place them in an airtight container. Make sure they cool down first. This way, they won’t get soggy. You can refrigerate them for up to three days. If you want to save them for later, freezing is a great option. Wrap each waffle in plastic wrap. Then, place them in a freezer bag. They can last up to three months in the freezer. Just remember to label the bag with the date. When you’re ready to enjoy your waffles again, reheating is key. The best method is using a toaster or an oven. Preheat your oven to 350°F (175°C). Place the waffles on a baking sheet and heat for about 5-7 minutes. This will help keep them crispy. If you use a microwave, be careful. Microwaving can make them soft. Heat for only about 10-15 seconds. If you want them crispier, you can finish them in a toaster after microwaving. In the fridge, churro waffles last about three days. After that, they may lose their taste and texture. If you freeze them, they can stay good for up to three months. Just remember, the sooner you eat them, the better they taste! Yes, you can make the batter ahead of time. Just mix the dry and wet ingredients separately. Store the dry mix in an airtight container. You can keep the wet mix in the fridge for up to two days. When ready to cook, combine them and stir gently. This method saves time and helps you enjoy fresh churro waffles faster. You know the waffles are done when they are golden brown. Look for steam to stop coming from the waffle iron. Most waffle irons have a light that indicates when they are ready. If you’re unsure, open the iron slightly to check the color. Perfect waffles should be crisp on the outside and soft inside. Yes, you can make churro waffles without a waffle iron. You can use a skillet or griddle instead. Just pour the batter into the pan and cook on medium heat. Flip them when bubbles form on the surface. Cook until both sides are golden brown. This method gives you a different shape but keeps the delicious taste. This post covered making delicious churro waffles from scratch. You learned about key ingredients, step-by-step cooking, and helpful tips. I also shared ways to personalize your waffles with toppings and flavors. Remember, mastering these steps leads to a fun treat for everyone. Embrace the creativity in your cooking, and enjoy every bite of these tasty waffles!

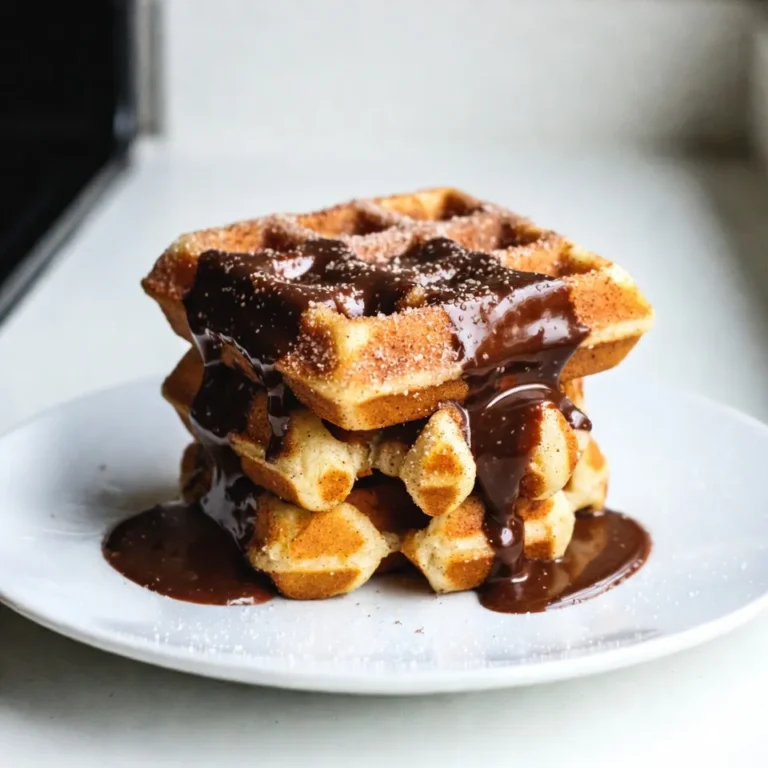
Cinnamon Sugar Churro Waffles Irresistible Treat

- 2 cups rolled oats - 1 cup mashed ripe bananas - 1 cup fresh or frozen blueberries - 1/4 cup honey or pure maple syrup - 1/4 cup coconut oil - 1/2 teaspoon pure vanilla extract - 1/2 teaspoon ground cinnamon - 1/4 teaspoon fine sea salt - 1/4 cup finely chopped nuts - 1/4 cup mini chocolate chips (optional) For these blueberry oatmeal breakfast bars, you need simple and healthy ingredients. Rolled oats are the base, giving texture and fiber. Bananas add natural sweetness and moisture. Blueberries bring a burst of flavor and antioxidants. You can choose honey or maple syrup for sweetness. Coconut oil helps bind everything together and adds healthy fats. Vanilla extract enhances the flavors. Cinnamon adds warmth, while a bit of sea salt balances the sweetness. Chopped nuts add crunch and healthy fats. If you like, sprinkle in some mini chocolate chips for a fun twist. - Calories per serving: About 150 - Key vitamins and minerals: Blueberries are high in vitamin C and fiber. Oats provide iron and magnesium. - Comparison with store-bought breakfast bars: These bars are often lower in sugar and free from preservatives. They are fresher and healthier. These ingredients create a nutritious treat that fits well in your morning routine or as a snack. Enjoy knowing you made something delicious and good for you! {{ingredient_image_2}} 1. Preheat your oven to 350°F (175°C). 2. Line an 8x8 inch baking dish with parchment paper. 3. In a large bowl, mix 2 cups of rolled oats, 1/4 teaspoon fine sea salt, and 1/2 teaspoon ground cinnamon. Set it aside. 4. In another bowl, mash 2 ripe bananas until smooth. 5. Add 1/4 cup melted coconut oil, 1/4 cup honey or maple syrup, and 1/2 teaspoon pure vanilla extract to the bananas. Mix well. 1. Pour the banana mixture over the dry oat mixture. Stir until combined. 2. Gently fold in 1 cup of blueberries and 1/4 cup of chopped nuts. 3. If you like, add 1/4 cup of mini chocolate chips. Make sure everything is evenly mixed. 4. Transfer the mixture to your baking dish. Use a spatula to spread it out evenly and press it down. 1. Place the dish in the oven. Bake for 25-30 minutes. 2. The edges will turn golden brown. A toothpick should come out clean from the center. 3. After baking, let the dish cool for 10-15 minutes. 4. Use the parchment paper to lift the bars out of the dish. 5. Move the bars to a wire rack and let them cool completely before slicing into 12 bars. - How to ensure bars hold together: Press the mixture firmly into the baking dish. This helps the bars stick well. Use a spatula for even pressure. The combination of oats, bananas, and coconut oil aids in binding. - Adjusting sweetness levels: Taste the mixture before baking. If you prefer sweeter bars, add more honey or maple syrup. You can also use mashed dates or applesauce for natural sweetness. - Alternatives for gluten-free options: Use certified gluten-free oats if needed. You can substitute the oats with ground almonds. This keeps the texture while staying gluten-free. - Presentation ideas for serving: Cut the bars into squares and place them on a bright plate. Drizzle with honey for added appeal. A sprinkle of cinnamon on top looks great too. - Best times to enjoy: These bars work well for breakfast or a quick snack. They are perfect for busy mornings or afternoon cravings. - Pairing with beverages: Enjoy your bars with a glass of milk or a cup of tea. Fresh fruit smoothies also complement these tasty treats nicely. Pro Tips Use Ripe Bananas: The riper the bananas, the sweeter your bars will be. Look for bananas with brown spots for optimal flavor. Experiment with Nuts: Try different types of nuts for varied texture and flavor. Pecans or hazelnuts can add a delicious twist. Storage Tips: Keep the bars in an airtight container at room temperature for up to 5 days, or freeze them for longer storage. Customize Your Mix-ins: Feel free to add other fruits, seeds, or your favorite nut butter to the mixture for added nutrition and taste. {{image_4}} You can easily change these bars to fit your taste. Here are some fun ideas: - Substituting different fruits: Try using raspberries or strawberries instead of blueberries. Each fruit brings its own flavor and sweetness. - Adding seeds or swapping nuts: You can add chia seeds or flaxseeds for extra nutrition. If you prefer, swap walnuts for almonds or pecans. - Adjusting flavors with spices: Add a pinch of nutmeg or ginger for a warm touch. These spices can enhance the taste of the bars. You can modify these bars to meet different dietary needs. Here’s how: - Making it vegan-friendly: Replace honey with agave syrup or maple syrup. This keeps it sweet without using animal products. - Low-sugar alternatives: Use mashed dates or stevia in place of honey. This keeps the bars sweet without extra sugar. - High-protein options: Add a scoop of protein powder to the wet ingredients. This boosts the protein without changing the flavor much. To keep your blueberry oatmeal breakfast bars fresh, store them in an airtight container. This helps keep moisture out and flavor in. You can use a glass or plastic container with a tight-fitting lid. If you want to keep them longer, wrap each bar in plastic wrap before placing them in the container. This adds an extra layer of protection. These bars last about three days at room temperature. If you place them in the fridge, they can stay fresh for up to a week. For longer storage, freeze the bars. Wrap each bar in plastic wrap and then put them in a freezer bag. They can last for up to three months in the freezer. When you’re ready to eat, just thaw them overnight in the fridge or use the microwave for a quick warm-up. Can I use quick oats instead of rolled oats? Yes, you can use quick oats. They will make the bars softer. Quick oats absorb moisture faster than rolled oats. How can I make these bars without bananas? You can use unsweetened applesauce instead. It adds moisture and sweetness. Use 1 cup of applesauce for each cup of mashed banana. What is the best way to reheat the bars? To reheat, place a bar in the microwave for 10-15 seconds. This warms the bar without drying it out. Can I serve these bars cold? Yes, serving them cold is fine. They taste great straight from the fridge. How to cut the bars for serving? Use a sharp knife to cut into 12 even squares. Cutting while the bars are cool helps keep them intact. Are these bars good for meal prep? Absolutely! These bars store well and make a quick snack. They last up to a week in the fridge. You now have a clear guide to making homemade breakfast bars. With simple ingredients like oats, bananas, and blueberries, you can create a healthy treat. The step-by-step instructions ensure great results each time. Remember to store them properly for freshness. Feel free to get creative with flavors and ingredients. These bars are perfect for breakfast or a quick snack. Enjoy the benefits of a delicious, nutrient-packed option that you made yourself!

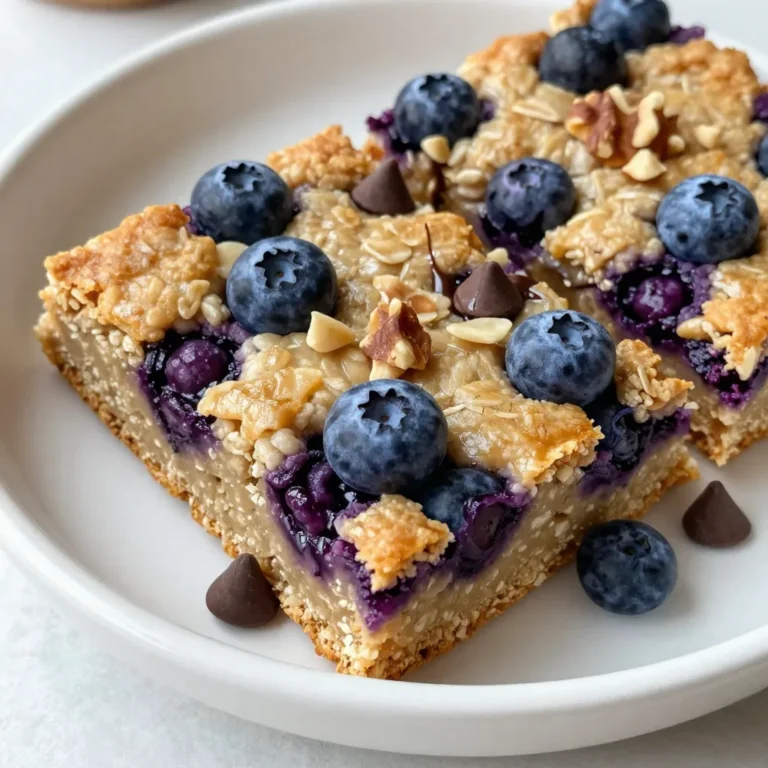
Blueberry Oatmeal Breakfast Bars Healthy Snack Idea

- 1 lb sirloin steak - 4 tablespoons unsalted butter - 4 cloves garlic, minced - Fresh herbs: rosemary and thyme - Salt and black pepper - Fresh parsley The first step to making garlic butter steak bites is gathering all your ingredients. You need one pound of sirloin steak. This cut is tender and juicy, perfect for quick cooking. Cut it into one-inch cubes. The smaller size helps it cook fast and evenly. Next, you will need four tablespoons of unsalted butter. Butter adds richness and flavor. It also helps to create that delicious garlic butter sauce. Garlic is crucial for this dish. Use four cloves of garlic and mince them well. This makes sure the garlic flavor spreads throughout the steak. Fresh herbs like rosemary and thyme add a final touch to your dish. Use one teaspoon of fresh rosemary and one teaspoon of fresh thyme. They bring aromatic flavors that complement the steak. For seasoning, you will need salt and black pepper to taste. These simple ingredients enhance the natural flavor of the steak. Lastly, for a pop of color, you can use fresh parsley as an optional garnish. It brightens up the dish and adds freshness. Now that you have all your ingredients, you are ready to make these tasty garlic butter steak bites. {{ingredient_image_2}} - Seasoning the steak cubes: First, take your sirloin steak and cut it into 1-inch cubes. Then, season these cubes well with salt and black pepper. Make sure to cover all sides. This step is key to making the steak taste great. When you season, you bring out the rich flavors in the meat. - Importance of seasoning for flavor enhancement: Proper seasoning adds depth to your dish. Salt enhances natural flavors. It makes the steak taste more like steak. Black pepper adds a gentle kick. Without good seasoning, the steak can taste bland. - Heating the skillet: Grab a large skillet and add a tablespoon of olive oil. Place it over medium-high heat. Wait until the oil shimmers. This shows the skillet is hot enough for cooking. - Searing the steak: Add the seasoned steak cubes to the skillet in a single layer. Don’t overcrowd the pan; this helps the meat brown evenly. Sear them for about 2-3 minutes on one side. Then flip and cook for another 2-3 minutes. This gives you a lovely medium-rare finish. - Incorporating the garlic butter: Once the steak bites are nicely browned, lower the heat to medium. Add 4 tablespoons of unsalted butter, 4 cloves of minced garlic, fresh rosemary, and thyme into the skillet. The butter will melt, creating a rich sauce. - Basting for flavor infusion: Take a spoon and scoop up the melted garlic butter. Pour it over the steak bites for about 1-2 minutes. This adds an amazing flavor to the steak and makes the garlic smell incredible. - Garnishing with parsley: When the garlic is fragrant, remove the skillet from the heat. Toss in fresh chopped parsley for a pop of color. This not only looks great but adds a fresh taste to the dish. These steps will help you create a flavorful and simple meal that shines on any table. Enjoy your cooking! To get the perfect sear on your steak bites, follow these steps: - Use a hot skillet. Heat it until you see a shimmer. - Don’t overcrowd the pan. Leave space between each piece. - Sear for about 2-3 minutes on each side. For the ideal internal temperature, aim for medium-rare. This is around 130°F (54°C). Use a meat thermometer for accuracy. To boost the flavor of your garlic butter steak bites, you can add more herbs and spices. Here are some ideas: - Try adding a pinch of red pepper flakes for heat. - Consider using fresh oregano or basil for a different twist. Pair your steak bites with sides like roasted veggies or mashed potatoes. A simple garlic aioli also works well as a sauce. For a fun and creative way to serve your steak bites, consider these ideas: - Use a wooden board for a rustic look. - Garnish with extra parsley for color. - Offer toothpicks for easy eating. This makes them perfect for parties or casual dinners. Enjoy your meal with a crisp salad or a side of bread. Pro Tips Perfectly Seasoned: Don't be shy with the salt and pepper! A generous seasoning before cooking enhances the steak's natural flavors. High Heat for Searing: Make sure your skillet is hot before adding the steak. This ensures a nice crust forms on the outside while keeping the inside juicy. Let it Rest: After cooking, let the steak bites rest for a few minutes. This allows the juices to redistribute, making the meat more tender. Experiment with Herbs: Feel free to customize the herbs used in the garlic butter. Fresh oregano, basil, or even a hint of chili flakes can add unique flavors. {{image_4}} You can use more than just sirloin for this dish. Here are some great options: - Ribeye: Juicy and flavorful, cooks quickly. - Filet mignon: Tender and rich, needs less cooking time. - Flank steak: Lean and flavorful, best when marinated. Cooking times vary by cut. For example: - Ribeye: 3-4 minutes for medium-rare. - Filet mignon: 2-3 minutes for medium-rare. - Flank steak: 4-5 minutes, slice against the grain for tenderness. Want to spice things up? Add chili flakes or a bit of mustard. This gives a nice kick! Using different butters can also change the game. Try: - Herbed butter: Adds fresh notes. - Garlic butter: For a rich, classic taste. - Spicy butter: Mix in some sriracha or hot sauce for heat. Make your steak bites even more fun! Use skewers for grilling. This makes them easy to eat and great for parties. You can also add vegetables. Try: - Bell peppers: Add color and sweetness. - Zucchini: Light and fresh, pairs well with steak. - Cherry tomatoes: Juicy and add a pop of flavor. Experimenting with these variations can make your garlic butter steak bites even more delicious! To store garlic butter steak bites, let them cool first. Place the cooled steak bites in an airtight container. This keeps them fresh. In the fridge, they last about 3 to 4 days. Always check for smell or color changes before eating. For the best taste, reheat steak bites in a skillet. Heat a little olive oil over medium heat. Add the steak and warm it for about 2-3 minutes. This method keeps the meat juicy. You can also use the microwave. Place the steak bites in a microwave-safe dish. Heat in short bursts of 30 seconds. Stir often to keep them from drying out. To freeze leftovers, let them cool completely. Place the steak bites in a freezer-safe bag. Squeeze out the air before sealing. They can last for about 2 to 3 months in the freezer. When ready to eat, thaw them overnight in the fridge. For quick defrosting, use the microwave on the defrost setting. After thawing, reheat them in a skillet to regain their flavor and texture. Yes, you can! Here are some great substitutes: - Ribeye: Rich and tender, cook for about 3-4 minutes per side. - Filet Mignon: Very tender, cook for about 2-3 minutes per side. - Flank Steak: Lean and flavorful, cook for about 4-5 minutes per side. - Strip Steak: Juicy and meaty, cook for about 3-4 minutes per side. Yes, it is safe if cooked properly. The USDA recommends cooking steak to at least 145°F. This temperature kills harmful bacteria. Always use a meat thermometer to check. Resting the steak for 3 minutes after cooking also helps ensure safety. There are many great side dishes to pair with steak bites: - Garlic mashed potatoes: Creamy and smooth, they balance the rich flavors. - Roasted vegetables: Broccoli, carrots, or Brussels sprouts add color and taste. - Salad: A fresh green salad can lighten the meal nicely. - Rice or quinoa: These grains soak up the juices well. You can prepare the steak bites in advance. Here’s how: 1. Season the steak cubes as usual. 2. Store them in an airtight container in the fridge. 3. Cook them just before serving. This keeps them fresh and tasty. 4. If you like, make the garlic butter ahead too. Just melt the butter and mix in garlic and herbs. Store it in the fridge until ready to use. This blog post outlined a simple recipe for garlic butter steak bites. We discussed the key ingredients, including sirloin steak, garlic, and fresh herbs. I shared step-by-step instructions for preparation and cooking, along with valuable tips for flavor and presentation. You can explore variations in cuts of steak and enhance flavors with spices or different butters. Lastly, I'll help you store and reheat the bites for future enjoyment. Enjoy your cooking journey and impress your guests with these delicious bites!

Garlic Butter Steak Bites Flavorful and Simple Meal

To create these fun and tasty Funfetti Cheesecake Bars, you will need: - 1 ½ cups graham cracker crumbs - ½ cup unsalted butter, melted - 1 cup granulated sugar - 16 oz cream cheese, softened - 2 large eggs - 1 teaspoon pure vanilla extract - ½ cup sour cream - ½ cup rainbow sprinkles (plus extra for garnish) - Pinch of salt You can swap some ingredients for a twist: - Use chocolate graham crackers for a chocolatey crust. - Replace sour cream with plain Greek yogurt for a tangy taste. - Use flavored cream cheese for added zest, like strawberry or vanilla. - Try coconut flakes instead of sprinkles for a tropical vibe. Here are some key tips for the best results: - Always use softened cream cheese; it blends easier. - Make sure your eggs are at room temperature for a smooth filling. - Choose high-quality vanilla extract for richer flavor. - Use fresh rainbow sprinkles that won’t bleed colors when mixed in. - Keep the crust firm by pressing it down well before baking. These tips ensure your Funfetti Cheesecake Bars are a hit at any party! {{ingredient_image_2}} First, preheat your oven to 325°F (163°C). This step is key for even baking. Next, grab an 8x8-inch baking pan. Line it with parchment paper, letting the edges hang over the sides. This will help you lift the bars out easily later. In a medium bowl, combine 1 ½ cups of graham cracker crumbs and ½ cup of melted butter. Add ¼ cup of granulated sugar to this mix. Stir it until you see a crumbly texture. Press this mixture firmly into the bottom of your lined baking pan. This forms a solid crust for your cheesecake bars. In a large bowl, beat 16 oz of softened cream cheese with an electric mixer. Mix until it is smooth. Gradually add ¾ cup of granulated sugar. Keep mixing until all lumps are gone. Now, add 2 large eggs one at a time. Mix well after each egg. Then, pour in 1 teaspoon of pure vanilla extract and ½ cup of sour cream. Mix until everything is smooth and blended. Now it's time to add the fun! Gently fold in ½ cup of rainbow sprinkles with a spatula. Be careful not to over-mix. Pour the cheesecake batter over the crust, smoothing it out with a spatula. Bake the bars for 30-35 minutes. The center should be set but still jiggle a bit. After baking, turn off the oven but leave the bars inside for 1 hour to cool slowly. Once they cool, let them reach room temperature. Then, chill the bars in the fridge for at least 4 hours or overnight for the best taste. To make your cheesecake smooth, start with room temperature cream cheese. Cold cream cheese clumps up and makes mixing hard. Use a hand mixer to beat the cream cheese until it's creamy. Gradually add sugar while mixing. This way, the sugar blends well and helps keep the texture smooth. Mix in eggs one at a time. This helps keep air bubbles out, ensuring a creamy filling. Finally, fold in your sprinkles gently. Over-mixing can break the sprinkles and turn the batter a dull color. When adding sprinkles, choose high-quality rainbow sprinkles. They hold their color better when baked. Add them to the batter after mixing in the eggs and flavors. Use a spatula to fold them in gently. This keeps the colors bright and the sprinkles intact. If you want a festive look, add a few more sprinkles on top before serving. This makes your funfetti cheesecake bars even more appealing. One common mistake is over-mixing the batter. Over-mixing can cause air bubbles, leading to cracks when baking. Another mistake is not letting the cheesecake cool slowly. If you take it out of the oven too soon, it may sink in the middle. Also, avoid skipping the chilling step. Chilling helps the bars set properly, making them easier to cut. Lastly, make sure to use enough parchment paper. This helps you lift the bars out easily for cutting and serving. Pro Tips Use Room Temperature Ingredients: Ensure your cream cheese and eggs are at room temperature for a smoother batter, which helps prevent lumps in your cheesecake filling. Don’t Overmix: When folding in the sprinkles, mix gently to avoid breaking them and losing their vibrant colors. This will keep your cheesecake looking festive. Chill Overnight: For the best texture and flavor, refrigerate the cheesecake bars overnight. This allows the flavors to meld and the texture to set perfectly. Garnish Freely: Don’t hold back on the sprinkles when garnishing! A generous sprinkle of rainbow sprinkles on top before serving enhances the festive appearance of your bars. {{image_4}} Add chocolate to your Funfetti cheesecake bars for a tasty twist. Start by folding in ½ cup of mini chocolate chips into the cheesecake batter. This step gives each bite a creamy, rich flavor. You can also drizzle melted chocolate on top for extra flair. The mix of chocolate with sprinkles creates a fun look. To make gluten-free Funfetti cheesecake bars, swap the graham cracker crumbs for gluten-free ones. You can find these at most stores. Ensure your sprinkles are also gluten-free. This way, everyone can enjoy these sweet treats! The flavor stays just as good, and no one will miss the gluten. You can easily change your Funfetti cheesecake bars for any holiday. For Halloween, use orange and black sprinkles. For Christmas, use red and green sprinkles. In spring, try pastel colors. You can even add flavors like peppermint or pumpkin spice during the fall. Each season, you can create a fresh look and feel. This keeps your dessert fun and festive for all occasions! Store leftover Funfetti cheesecake bars in an airtight container. Make sure the bars are cool before you cover them. Place a piece of parchment paper between layers to avoid sticking. This keeps them fresh and tasty. You can freeze these bars for later enjoyment. First, let them cool completely. Then, cut them into squares. Wrap each square in plastic wrap. Place the wrapped bars in a freezer-safe bag or container. They will stay good for up to three months in the freezer. Funfetti cheesecake bars last about five days in the fridge. Keep them stored well to stay fresh. If you notice any change in smell or texture, it’s best to toss them. Enjoy your bars within the first few days for the best taste and texture. Yes, you can use low-fat cream cheese. It will still give a nice taste. The texture may be a bit different. You might find the bars slightly less creamy. If you want a lighter option, this is a good choice. You can use crushed cookies like Oreos or vanilla wafers. These can add a fun twist. If you want a gluten-free option, try ground almonds or gluten-free cookies. Each choice will change the flavor a bit, so pick what you like best. The bars are done when the edges look set. You should see a slight jiggle in the middle. They will firm up as they cool. If they look too wobbly, give them a few more minutes. Always let them cool before cutting into squares for best results. This blog post covered all you need to make funfetti cheesecake bars. We looked at the ingredient list and swaps for your needs. Step-by-step instructions walked you through prepping, baking, and cooling. Tips helped you avoid common mistakes and achieve that smooth texture. We also explored fun variations and how to store leftovers properly. Enjoy making these tasty treats, and feel free to get creative with your flavors!

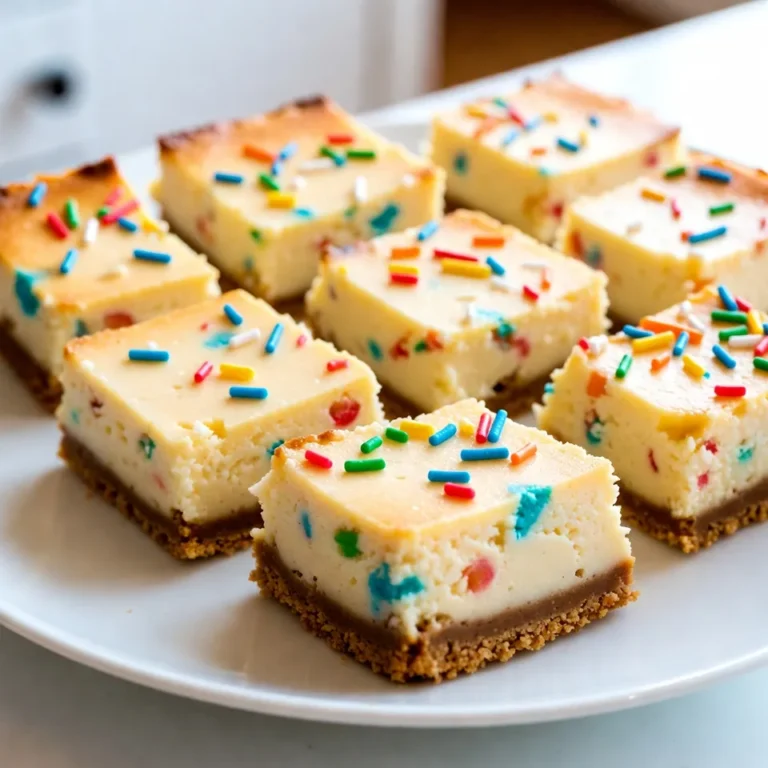
Funfetti Cheesecake Bars Delightful Party Treat

PREV 1 … 36 37 38 … 48 NEXT
meal plan mapper

explore

DessertsDinnerAppetizersDrinks

Our Policies

  • Cookie Policy
  • Copyright Policy
  • Disclaimer
  • GDPR Policy
  • Terms Of Use
Back to Top
  • About
  • Contact Us
  • Privacy Policy
© 2025 meal plan mapper