FREE DINNER EBOOK! Get your copy!
  • Cookie Policy
  • GDPR Policy
  • Disclaimer
  • Terms Of Use
  • Visit my other site: Fun Cookie Recipes
meal plan mapper
  • Home
  • Dinner
  • Desserts
  • Drinks
  • Appetizers
  • Contact
  • About
  • Privacy Policy
  • Home
  • Dinner
  • Desserts
  • Drinks
  • Appetizers
  • Contact
  • About
  • Privacy Policy
  • Cookie Policy
  • GDPR Policy
  • Disclaimer
  • Terms Of Use
Visit my other site: Fun Cookie Recipes

HOME / CATEGORIES /

Latest

To create a tasty Quinoa Tabouli Salad, you need these key ingredients: - 1 cup quinoa, thoroughly rinsed - 2 cups water - 1 large cucumber, diced into small cubes - 2 large tomatoes, diced into bite-sized pieces - 1 red onion, finely chopped - 1 cup fresh parsley leaves, finely chopped - 1/2 cup fresh mint leaves, finely chopped - 1/4 cup extra virgin olive oil - 1/4 cup freshly squeezed lemon juice (about 2-3 lemons) - Salt and freshly ground black pepper to taste Each ingredient plays a role in the dish. The quinoa adds protein and fiber. Fresh veggies provide crunch and flavor. Olive oil and lemon juice give a bright finish. Using fresh ingredients is key for flavor and health. Fresh parsley and mint bring bright notes. They make the salad taste lively. Fresh tomatoes and cucumbers add juiciness. They also provide vital vitamins. Freshness ensures your salad is vibrant and appealing. You can easily customize your salad. Here are some ideas: - Use farro or bulgur instead of quinoa for a different texture. - Add bell peppers for extra crunch and color. - Mix in chickpeas for added protein and heartiness. - Swap lemon juice for lime juice for a zesty twist. - Use different herbs like cilantro or basil for unique flavors. Feel free to experiment and make this salad your own! {{ingredient_image_2}} To start, bring 2 cups of water to a rolling boil in a medium saucepan. This step is crucial for cooking the quinoa just right. Once the water is boiling, add 1 cup of rinsed quinoa. Lower the heat to a gentle simmer. Cover the pan and cook for about 15 minutes. The quinoa should be fluffy, and all the water should be absorbed. After cooking, remove the pan from heat. Allow the quinoa to cool to room temperature. You can speed up cooling by exposing it to air. While the quinoa cools, it’s time to prepare the fresh veggies. Take 1 large cucumber and dice it into small cubes. Then, dice 2 large tomatoes into bite-sized pieces. Next, finely chop 1 red onion. In a large mixing bowl, combine the diced cucumber, tomatoes, and chopped onion. Mix gently to blend the flavors. This will give your salad a fresh and vibrant base. Once the quinoa has cooled, add it to the bowl with the veggies. Mix everything thoroughly to ensure even distribution. Now, fold in 1 cup of finely chopped fresh parsley and 1/2 cup of finely chopped fresh mint. These herbs add a burst of flavor. Next, in a separate small bowl, whisk together 1/4 cup of extra virgin olive oil and 1/4 cup of freshly squeezed lemon juice. Add a pinch of salt and pepper to taste. Drizzle this dressing over the quinoa salad mixture. Toss gently to coat all ingredients evenly. Taste the salad and adjust seasoning if needed. Finally, cover it and refrigerate for at least 30 minutes. This resting time allows the flavors to meld beautifully. To make fluffy quinoa, first rinse it well. Rinsing removes the bitter coating called saponin. Next, use the right water-to-quinoa ratio. I find that two cups of water for one cup of quinoa works best. Bring the water to a boil before adding the quinoa. Once you add it, lower the heat and cover the pot. Cook for about 15 minutes until the water is gone. After cooking, let it sit for a few minutes. This lets the steam finish cooking it. Fluff it with a fork for that perfect texture. When chopping veggies for your salad, keep your knife sharp. A sharp knife works better and is safer to use. Start with a clean cutting board to avoid cross-contamination. For cucumbers and tomatoes, cut them into small, even pieces. This helps them mix well in the salad. For the onion, chop it finely. This lets its flavor spread throughout the dish. Lastly, wash your herbs well. Dry them before chopping to keep them fresh and crisp. To improve the flavor of your salad, taste as you go. Start with basic salt and pepper. After mixing in the dressing, add more if needed. A squeeze of extra lemon juice can brighten the taste. You can also try adding garlic powder for a kick. If you love spice, a pinch of cayenne pepper can be nice. Remember, fresh herbs like parsley and mint pack a lot of flavor. Use them generously to make your salad pop! Pro Tips Rinse Your Quinoa: Always rinse quinoa under cold water before cooking to remove its natural coating, called saponin, which can impart a bitter taste. Chill Before Serving: Allowing the salad to chill for at least 30 minutes before serving helps the flavors to meld and enhances the overall taste. Fresh Herbs Matter: Use fresh herbs for the best flavor; dried herbs will not give the same vibrant taste and aroma to your tabouli salad. Customize Your Veggies: Feel free to add or substitute vegetables like bell peppers or radishes to suit your taste and make the salad even more colorful. {{image_4}} Quinoa Tabouli is naturally gluten-free. This makes it a great choice for many diets. You can enjoy it without worry. To keep it vegan, ensure your dressing does not have any animal products. The salad is packed with plant-based goodness. Want to make your salad heartier? You can add proteins like chickpeas or black beans. About one cup of chickpeas will boost its nutrition. You can also toss in diced grilled chicken or shrimp. These options will make the dish a full meal. Feel free to mix in different herbs and veggies. Basil and cilantro can add a nice twist. You can also try bell peppers or avocados. Each addition brings a new flavor. This salad is fun because you can change it every time! To keep your quinoa tabouli salad fresh, store it in an airtight container. This helps prevent air from spoiling the flavors. If you have a large batch, divide it into smaller portions. This way, you only open what you need, keeping the rest fresh longer. Place the container in the fridge right after serving. This salad tastes best cold, so there’s no need to reheat it. When stored properly, the salad lasts about 3 to 5 days in the fridge. Always check for any off smells or changes in texture before eating. If the salad looks good, it’s likely still safe to eat. Making quinoa tabouli salad ahead of time is easy and smart. You can prepare it up to 2 days before you plan to eat it. Just mix all your ingredients and let them sit in the fridge. This gives the flavors time to blend, making the salad even tastier. Just remember to keep the dressing separate if you want your salad to stay crisp. Mix it in right before serving for the best taste. Quinoa is a tiny seed that cooks like a grain. It has lots of protein, fiber, and vitamins. Quinoa is gluten-free, making it great for those with allergies. It also has antioxidants that help fight disease. Eating quinoa can boost your energy and keep you full longer. This makes it a smart choice for meals. Yes, you can use other grains. Some good choices are bulgur, farro, or couscous. Each grain gives a different taste and texture. Bulgur cooks quickly and has a nutty flavor. Farro is chewy and adds heartiness. Couscous is light and fluffy. Just remember to adjust cooking times based on the grain you choose. You can store Quinoa Tabouli Salad in the fridge for about 3 to 5 days. Make sure to keep it in an airtight container. The flavors will get better as it sits. However, the veggies may lose some crunch over time. If you want the salad to last longer, don’t add the dressing until you’re ready to eat. Quinoa Tabouli Salad combines fresh ingredients, easy steps, and personal touches. You learned how to cook quinoa perfectly and prepare crisp veggies. I shared tips for fluffy quinoa and seasoning to boost flavor. Don't forget to try different grains and variations to suit your taste. Proper storage keeps leftovers fresh. Enjoy this dish as a healthy meal or snack. Embrace the fun of making it your own!

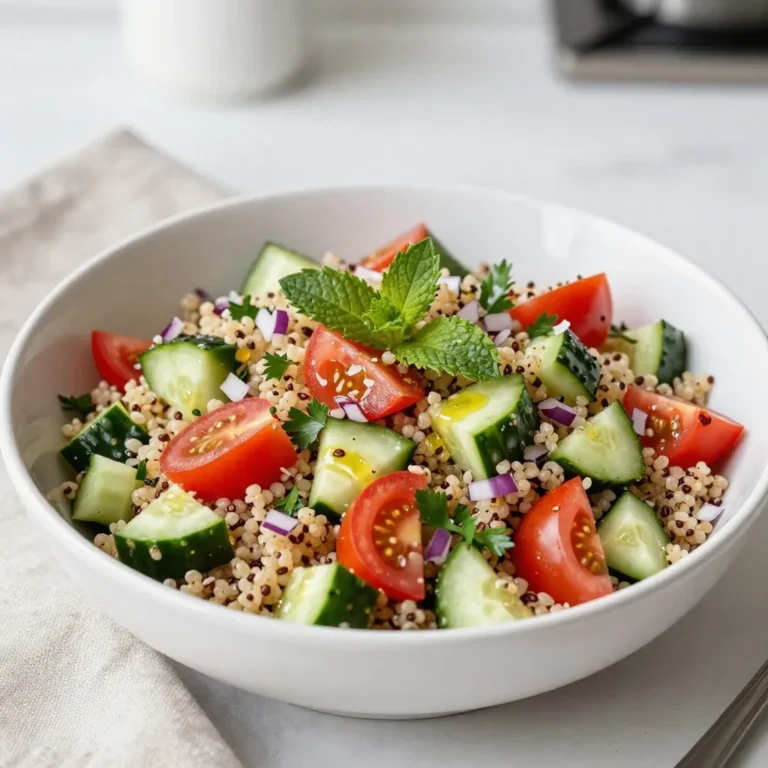
Satisfying Quinoa Tabouli Salad Fresh and Light Dish

Dry Ingredients - 1 ¾ cups all-purpose flour - 1 ½ teaspoons baking powder - 1 teaspoon baking soda - ½ teaspoon salt - ½ cup unsweetened cocoa powder Sugars and Butter - 1 cup granulated sugar - ½ cup brown sugar, packed - ¾ cup unsalted butter, softened to room temperature Eggs and Vanilla - 2 large eggs, at room temperature - 1 teaspoon pure vanilla extract Additional Components - 1 cup buttermilk, at room temperature - 1 cup boiling water - 1 cup semi-sweet chocolate chips - 1 cup dark chocolate ganache - 1 cup milk chocolate frosting Each ingredient plays a key role in making this cake rich and tasty. The flour gives the cake structure, while the cocoa adds deep chocolate flavor. The sugars make it sweet and moist, and the butter gives it creaminess. Eggs help bind everything together, and vanilla adds a nice aroma. The buttermilk keeps it soft, while boiling water helps create a nice, rich batter. Finally, chocolate chips and frosting add even more chocolate joy! {{ingredient_image_2}} Preheat your oven to 350°F (175°C). Grease and flour three 9-inch round cake pans. This helps the cakes release easily after baking. In a big bowl, sift together the flour, baking powder, baking soda, salt, and cocoa powder. This step adds air and removes lumps. Set this mixture aside for later. In another large bowl, cream the granulated sugar, brown sugar, and softened butter. Use an electric mixer for about 3-4 minutes until it’s light and fluffy. This creates a nice base for the cake. Add the eggs one at a time. Beat well after each egg. Then, stir in the vanilla extract. This adds flavor and moisture. Gradually mix in the dry ingredients with the butter-sugar mix. Alternate with the buttermilk. Start and end with the dry mix. Stir gently to avoid overmixing. Carefully add the boiling water to the batter. It will look thin, which is okay! Next, fold in the semi-sweet chocolate chips. This gives the cake extra chocolate flavor. Pour the batter evenly into the prepared pans. Bake for 30-35 minutes. Check with a toothpick; it should come out clean. Let the cakes cool in the pans for 10 minutes. Then, move them to wire racks to cool completely. In a small saucepan, heat 1 cup of heavy cream over medium heat. Wait for it to simmer, then remove it from heat. Pour the hot cream over 8 oz. of finely chopped dark chocolate. Stir until it melts and is smooth. Let it cool at room temperature until it thickens. In a mixing bowl, beat ½ cup of softened butter with 1 cup of milk chocolate using an electric mixer. Mix until smooth. Gradually add 2 cups of powdered sugar. Mix until combined. Add a splash of milk to make it spreadable. Place the first layer of the cooled cake on a stand or plate. Spread a generous layer of dark chocolate ganache on top. Add the second layer and repeat with more ganache. Finally, place the third layer on top. Cover the entire cake with the milk chocolate frosting. Smooth the sides and top as you like. Chill the cake for about 30 minutes. This helps the frosting set. Before serving, decorate the top with chocolate shavings or curls. This adds a nice touch and looks beautiful. Enjoy your rich and decadent triple chocolate layer cake! To make a perfect triple chocolate layer cake, follow these tips: - Use room temperature ingredients. This helps the batter mix better. - Preheat your oven. Always set it to 350°F (175°C) before baking. - Grease and flour your pans. This makes it easy to take the cake out later. - Sift dry ingredients. This adds air and keeps lumps out of your batter. A moist cake is key to a great dessert. Here’s how to achieve that: - Add boiling water. This makes the batter thin but very moist. - Use buttermilk. It adds flavor and moisture. - Do not overmix. Mix just until combined to keep the cake light. - Cool cakes properly. Let them cool in pans for 10 minutes before moving them. The ganache and frosting add rich flavors. Here are some tips for both: - For ganache: Heat cream until it simmers, then pour over chopped chocolate. Stir until smooth. - Cool ganache before use. Let it thicken slightly for the best spreading. - For frosting: Beat butter and milk chocolate together until creamy. - Add powdered sugar gradually. This prevents clumps and helps with texture. These tips ensure your triple chocolate layer cake will impress everyone! Pro Tips Use Room Temperature Ingredients: Ensure that your butter, eggs, and buttermilk are at room temperature. This helps create a smoother batter and allows for better incorporation of air, resulting in a lighter cake. Don’t Overmix: When combining the dry and wet ingredients, mix until just combined. Overmixing can lead to a dense cake, so be gentle with the batter. Check for Doneness: Use a toothpick to check if your cakes are done baking. Insert it into the center of the cake; if it comes out clean or with a few moist crumbs, it’s ready to come out of the oven. Chill the Cake Layers: After baking, let the cake layers cool completely before frosting. Chilling them in the refrigerator for a short time can make them easier to handle and frost. {{image_4}} You can change the flavor to make this cake your own. For example, try white chocolate. It adds a sweet and creamy taste. Use white chocolate chips in the batter and a white chocolate ganache on top. You can also mix in orange or raspberry zest for a fresh twist. These flavors create a fun surprise for your taste buds. If you need a gluten-free cake, it's easy to adjust. Replace the all-purpose flour with a gluten-free flour blend. Make sure it has a good binding agent like xanthan gum. This helps the cake hold together and rise well. You can also check for gluten-free baking powder and baking soda. These swaps keep the cake tasty and fluffy. Decorating your cake can make it even more fun. You can use fresh berries like strawberries or raspberries on top for color. Nuts like chopped almonds or hazelnuts can add crunch. If you want something sweet, try chocolate shavings or curls. They look fancy and taste great. You can even add a drizzle of caramel or berry sauce for extra flair. To keep your Triple Chocolate Layer Cake fresh, store it in an airtight container. You can also cover it well with plastic wrap. Place it at room temperature for up to three days. If your kitchen is warm, refrigerate the cake to maintain its quality. Always allow it to come to room temperature before serving. This helps keep the flavors vibrant and rich. If you want to save some cake for later, freezing is a great option. First, let the cake cool completely. Wrap each layer in plastic wrap carefully. Then, place the wrapped layers in a freezer-safe bag or container. You can freeze the cake for up to three months. To use, thaw it overnight in the fridge. This helps keep the cake moist and delicious. If you want a warm slice of cake, you can reheat it easily. Preheat your oven to 350°F (175°C). Place a slice on a baking sheet and put it in the oven for about 10 minutes. You can also use the microwave for a quick option. Heat the slice for 15 to 20 seconds. Be careful not to overheat, as it can dry out the cake. Enjoy your warm, rich chocolate treat! You can use plain yogurt or sour cream. Mix one cup of yogurt with one tablespoon of water to thin it out. Another option is to mix one cup of milk with one tablespoon of vinegar or lemon juice. Let it sit for about five minutes. This will create a similar effect to buttermilk. Yes, you can bake the cake layers a day in advance. Let them cool completely. Wrap each layer tightly in plastic wrap. Store them in the fridge overnight. You can frost and assemble the cake the next day for the best results. To prevent sinking, make sure to bake the cake at the right temperature. Do not open the oven door too soon. Also, avoid overmixing the batter. This can lead to a dense cake that sinks in the middle. Store leftover cake in an airtight container at room temperature for up to three days. If you want it to last longer, place it in the fridge. You can also freeze slices for up to three months. Wrap them well in plastic wrap before freezing. To make this cake gluten-free, swap the all-purpose flour for a gluten-free flour blend. Look for a blend that contains xanthan gum. This helps with the cake's texture. Follow the rest of the recipe as it is for best results. You learned how to bake a delicious cake from scratch. We covered all the key steps, from mixing the right ingredients to baking and decorating. You also discovered tips for keeping your cake moist and flavorful. Remember, you can try different flavors and storage methods too! Baking might seem tricky, but it gets easier with practice. Now, you’re ready to impress your friends and family with your new skills. Enjoy every slice!

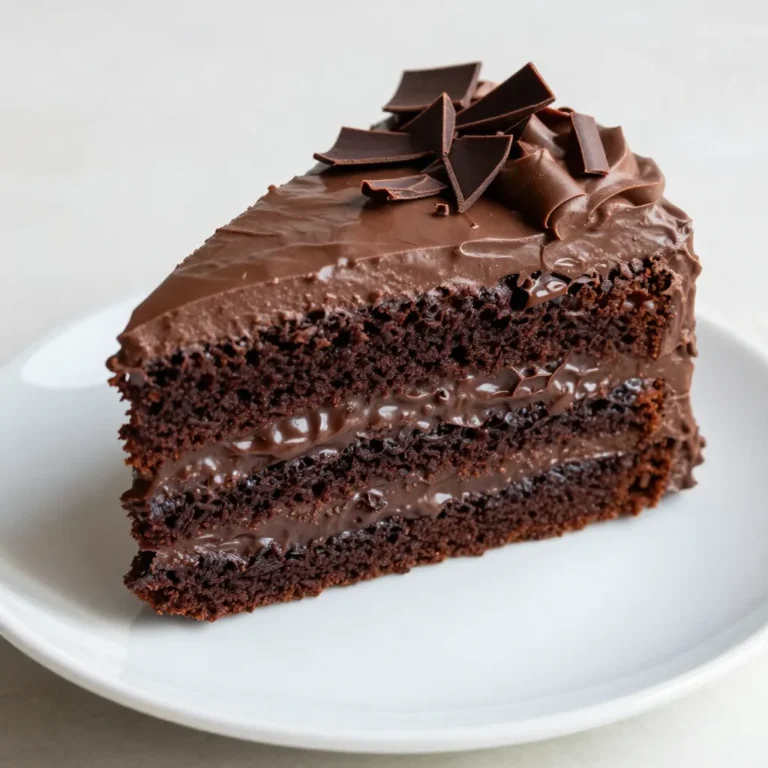
Triple Chocolate Layer Cake Rich and Decadent Delight

- 4 boneless, skinless chicken thighs - 1 cup long-grain white rice - 2 cups chicken broth (low-sodium recommended) - 1 cup heavy cream - 1 medium onion, diced - 3 cloves garlic, minced - 1 cup frozen peas - 1 teaspoon dried thyme - 1 teaspoon paprika - Salt and pepper to taste - 2 tablespoons olive oil - Fresh parsley, chopped (for garnish) When you gather your ingredients, it's key to measure them correctly. For the chicken, you want four thighs, which gives you juicy and tender meat. Use one cup of long-grain white rice. This rice cooks well and keeps a nice texture. For the broth, two cups will give your dish the right amount of moisture. The heavy cream adds richness, so make sure to use one cup. When it comes to the onion, chop one medium onion. You need three cloves of garlic, minced to add flavor. A cup of frozen peas adds color and sweetness. For the spices, a teaspoon each of dried thyme and paprika will elevate the dish. Finally, salt and pepper enhance the taste. Use two tablespoons of olive oil for cooking. If you don't have chicken thighs, you can use chicken breasts or drumsticks. Both will work fine. For the rice, brown rice can be a healthy swap, but cook it longer. If you want a lighter option, you can replace heavy cream with half-and-half or coconut milk. If you lack fresh peas, canned peas or even green beans can work. Don't worry if you don't have thyme; oregano or Italian seasoning can be great substitutes. Use any mild oil if you don’t have olive oil, like canola or vegetable oil. Adjust as needed to fit your taste and pantry! {{ingredient_image_2}} First, gather your chicken thighs. I always use boneless and skinless thighs for this dish. They stay juicy and tender. Next, season them well. Use salt, pepper, paprika, and thyme. The spices really boost the flavor. Coat each piece evenly. This step makes a big difference in taste. Now, heat olive oil in a large skillet. Set the heat to medium-high. When the oil shimmers, add the chicken thighs. Sear them for about 5 to 6 minutes on each side. You want them to turn a nice golden-brown color. This step locks in flavors and gives a great texture. Once done, remove the chicken and place it on a plate. In the same skillet, add chopped onion. Sauté for about 3 to 4 minutes. Stir it often until the onion turns soft and translucent. This step brings out the natural sweetness of the onion. After that, add minced garlic. Cook it for just 1 more minute. The garlic will become fragrant. This aroma makes your kitchen come alive! Toasting the rice is simple and fun. First, you add the long-grain white rice to the skillet with the onions and garlic. Stir it well. Let it toast for about two minutes. This step brings out the rice's flavor. You will notice a light, nutty aroma. It is an easy way to make your rice taste better. Next, it’s time for the chicken broth. Pour in two cups of low-sodium chicken broth slowly. As you pour, use a wooden spoon to scrape the bottom of the skillet. This helps lift all those tasty bits stuck to the pan. Bringing this mixture to a gentle simmer is key. The steam will start to rise, and you’ll know it’s almost time to add the chicken back in. After the broth is simmering, return the seared chicken thighs to the skillet. Cover it with a lid and reduce the heat to low. Let it cook for about 20 minutes. This allows the rice to soak up the broth and become tender. After 20 minutes, check if the rice is done. If it feels firm, add a splash of broth or water. Cover it again and cook until the rice is fluffy. This step ensures your dish will be creamy and full of flavor. Pro Tips Choose the Right Chicken: Opt for bone-in chicken thighs for extra flavor and moisture, but if you prefer boneless, ensure they are well-seasoned before cooking. Deglaze the Pan: Always scrape the bottom of the skillet while adding the broth to ensure all the flavorful bits are incorporated into the dish. Monitor Rice Consistency: Check the rice periodically after 20 minutes; add more liquid as needed to achieve a fluffy texture without overcooking. Enhance Creaminess: For an even richer sauce, consider adding a tablespoon of cream cheese along with the heavy cream for added depth. {{image_4}} To make the sauce creamy, pour in one cup of heavy cream. This adds rich flavor. Then, add one cup of frozen peas. Stir gently to mix them well. This step makes the dish colorful and tasty. Now, let the mixture simmer for about five minutes. Simmering helps the sauce thicken. Keep an eye on the pot and stir occasionally. If you want a thicker sauce, you can simmer a bit longer. Before serving, taste the sauce. Adjust the flavor with salt and pepper. This is your chance to make it perfect. Remember, a little change can bring out the best taste. Serve this sauce over the chicken and rice. Enjoy this creamy delight! To get fluffy rice, follow these steps: - Rinse the rice under cold water. This removes extra starch, which can make rice sticky. - Use the right ratio of liquid to rice. For long-grain white rice, a 2:1 ratio of broth to rice works great. - Let the rice rest after cooking. This lets it steam and become fluffier. - Avoid lifting the lid while it cooks. This keeps steam trapped inside. You can boost the flavor of your creamy smothered chicken and rice with these tips: - Add fresh herbs like thyme or rosemary for extra aroma. - Mix in a splash of lemon juice for brightness. - Experiment with spices like cumin or chili powder for a kick. - Stir in grated cheese before serving for extra creaminess. Serve your dish in a deep bowl for a cozy feel. Here are some ideas to make it even better: - Top with freshly chopped parsley for color and flavor. - Pair it with a crisp side salad for balance. - Serve with buttery garlic bread to soak up the sauce. - Add a splash of hot sauce for those who like heat. Enjoy your creamy smothered chicken and rice! Yes, you can use brown rice. However, it takes longer to cook. Brown rice usually needs about 40-45 minutes. You should also use a bit more broth. Add an extra half cup when cooking. This will help make sure the rice gets tender. Keep an eye on it as you cook. To store leftovers, let the dish cool first. Then, place it in an airtight container. You can keep it in the fridge for up to 3 days. If you want to keep it longer, you can freeze it. Put it in a freezer-safe container. It will last for about 2-3 months in the freezer. When you're ready to eat, thaw it in the fridge overnight and reheat on the stove or in the microwave. Creamy Smothered Chicken & Rice pairs well with many sides. A crisp green salad is a great choice. You can also serve buttery garlic bread for a comforting touch. Steamed vegetables like broccoli or green beans add color and nutrition. For a fresh twist, try a fruit salad or roasted veggies. These sides will make your meal even more special. In this post, we explored the ingredients needed for the creamy smothered chicken and rice. We detailed how to prepare the chicken, toast the rice, and create a rich sauce. I shared tips for perfecting your dish, like cooking practices and tasty pairings. Remember, you can substitute rice types and store leftovers easily. Enjoy this dish as a comforting meal any time. Now, you're ready to impress with your cooking skills!

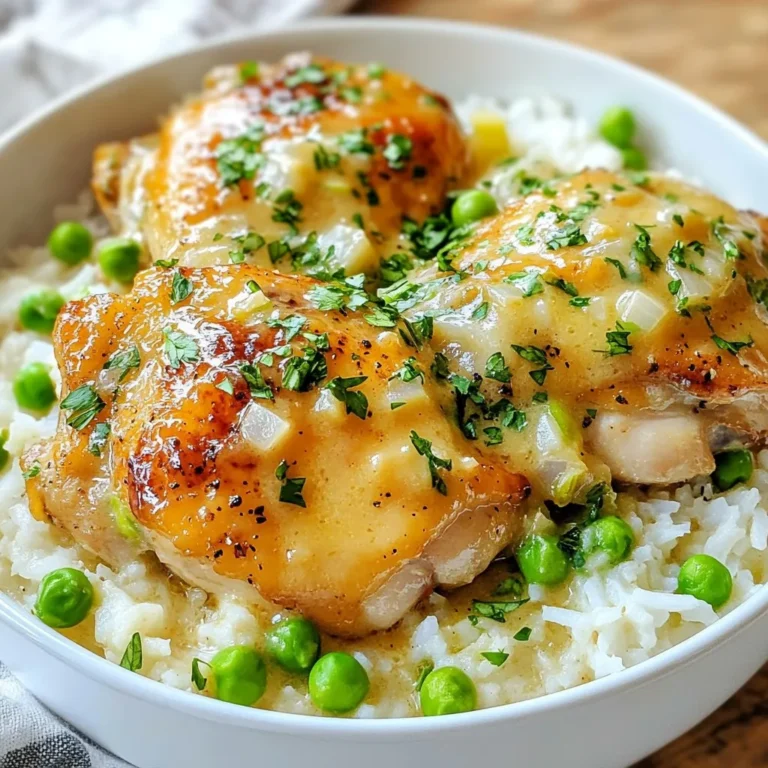
Creamy Smothered Chicken & Rice Tasty One-Pot Meal

- 1 sheet of puff pastry, thawed - 2 large onions, thinly sliced - 2 tablespoons olive oil - 1 tablespoon balsamic vinegar - 4 ounces goat cheese, crumbled - 1 tablespoon fresh rosemary, finely chopped - 1 tablespoon honey - Salt and freshly ground black pepper, to taste - 1 egg, beaten (for egg wash) - For puff pastry, use phyllo dough or a gluten-free crust. - Swap goat cheese with feta or ricotta for a different flavor. - Use white or yellow onions if you can’t find sweet onions. - Honey can be replaced with maple syrup for a vegan option. Puff Pastry: This pastry is light and flaky. It creates a great base for the tart. It puffs up while baking, giving a nice texture. Onions: Sweet onions work best for caramelization. They become soft and rich in flavor. They add a sweet touch to the tart. Goat Cheese: This cheese is creamy and tangy. It melts well and adds depth to each bite. It pairs nicely with the sweet onions. Balsamic Vinegar: This vinegar adds a hint of acidity. It balances the sweetness of the onions and honey. Cooking is all about balance. These ingredients work together to create a delicious tart. {{ingredient_image_2}} Start by setting your oven to 400°F (200°C). This temperature helps the pastry puff up nicely. A hot oven makes a crispy crust. Preheating is key for a perfect bake. Heat 2 tablespoons of olive oil in a large skillet over medium heat. Add 2 large, thinly sliced onions along with a pinch of salt. Stir the onions every few minutes. Cook for about 15-20 minutes. Look for a rich, golden brown color. If they stick, lower the heat and add a splash of water. This keeps them from burning. Once the onions are caramelized, pour in 1 tablespoon of balsamic vinegar. This adds a deep flavor. Stir well and cook for another 2 minutes. Then, take the skillet off the heat and set aside. On a floured surface, roll out the thawed puff pastry. Aim to smooth out any creases. Next, transfer the pastry to a baking sheet lined with parchment paper. Fold the edges inward to create a border around the tart. Now, spoon the caramelized onions evenly over the pastry. Be careful not to touch the edges. Crumble 4 ounces of goat cheese and sprinkle it over the onions. Add 1 tablespoon of finely chopped fresh rosemary. Season with salt and freshly ground black pepper to taste. Finally, drizzle 1 tablespoon of honey on top for a touch of sweetness. Grab a pastry brush and apply a beaten egg wash to the edges of the puff pastry. This step gives the tart a shiny, golden finish. Place the tart in your preheated oven and bake for 20-25 minutes. Keep an eye on it. The pastry should puff up and turn golden brown. Once done, take it out and let it cool for about 5 minutes. Slice it up and serve warm or at room temperature. You can even add some fresh rosemary on top for a nice touch. To get sweet, rich onions, cook them slowly. Use medium heat and add a pinch of salt. Stir them often for about 15-20 minutes. If they stick, lower the heat. A splash of water helps too. For a deeper flavor, drizzle balsamic vinegar at the end. This adds a nice tang and enhances the sweetness. Start with thawed puff pastry. Roll it out gently on a floured surface. Make sure there are no big creases. Place it on a parchment-lined baking sheet. Fold the edges inward to form a border. This will help hold in the filling. Brush the edges with a beaten egg for a nice shine. This tart pairs well with white wine. A crisp Sauvignon Blanc complements the cheese and onions. For herbs, try thyme or parsley. Both add freshness. Serve with a side salad for crunch and balance. This makes a lovely meal and impresses guests. Pro Tips Use Fresh Ingredients: Fresh goat cheese and high-quality olive oil will elevate the flavors of your tart, making it even more delicious. Control the Caramelization: Patience is key when caramelizing onions. Stir them occasionally and keep the heat on medium to achieve that perfect golden color without burning. Experiment with Herbs: While rosemary pairs beautifully with goat cheese, feel free to experiment with other herbs like thyme or sage for a unique flavor profile. Serving Suggestions: This tart pairs wonderfully with a light salad or a glass of white wine, making it perfect for entertaining guests. {{image_4}} You can make this tart even better by adding vegetables. Spinach brings a nice green color and soft texture. Just sauté it briefly, so it wilts before adding it to the tart. Mushrooms also work well. Use any type you like, such as button or cremini. Sauté them until they are soft and golden. This adds depth and earthy flavor to your dish. While goat cheese shines in this recipe, you can swap it for other cheeses. Feta cheese gives a crumbly texture and tangy taste. If you enjoy bold flavors, try blue cheese. It adds a sharp, creamy richness. You can even mix different cheeses for a unique flavor profile. Just remember to adjust the salt, as some cheeses can be saltier than others. If you need a gluten-free option, don't worry! You can use gluten-free puff pastry. Many brands offer this choice now. You can also try a quinoa crust or a cauliflower crust for a healthy twist. Both alternatives add a new texture and flavor. Just make sure to follow the baking times for each crust type for best results. To store leftover tart, let it cool completely. Wrap it tightly in plastic wrap or foil. You can also use an airtight container. Store it in the fridge. This keeps it fresh for up to three days. Reheating the tart is easy. Preheat your oven to 350°F (175°C). Place the tart on a baking sheet. Heat it for about 10-15 minutes. This will warm it through and keep the crust crispy. You can also microwave it for a quick option. Just heat in short bursts to avoid sogginess. You can freeze the tart for later use. Wrap it well in plastic wrap and then foil. This keeps out air and prevents freezer burn. It can last up to two months in the freezer. To enjoy, let it thaw in the fridge overnight. Then, reheat as described above. Enjoy your delicious tart even after some time! Caramelizing onions takes about 15-20 minutes. Start over medium heat with olive oil and a pinch of salt. Keep stirring until they turn golden brown. If they stick, add a splash of water to help them along. This slow cooking brings out their sweet flavor. Yes, you can make the tart ahead of time. Prepare the caramelized onions and the pastry base. Store them separately in the fridge. When ready to serve, assemble the tart and bake. This way, you can enjoy fresh flavors without stress. You can serve this tart with a simple salad. A fresh green salad with a light vinaigrette works well. You may also pair it with a glass of white wine. This dish goes nicely with a crisp Sauvignon Blanc. The tart's rich flavors balance the meal perfectly. You now have all the tools to make a delicious caramelized onion goat cheese tart. We covered the key ingredients and their substitutes. You learned step-by-step instructions for making the tart, plus tips for great results. You also discovered tasty variations and storage options. Now, you can explore this dish in your kitchen. Have fun experimenting with flavors, and enjoy sharing it with others. Cooking is about joy and creativity, so dive in and savor every bite!

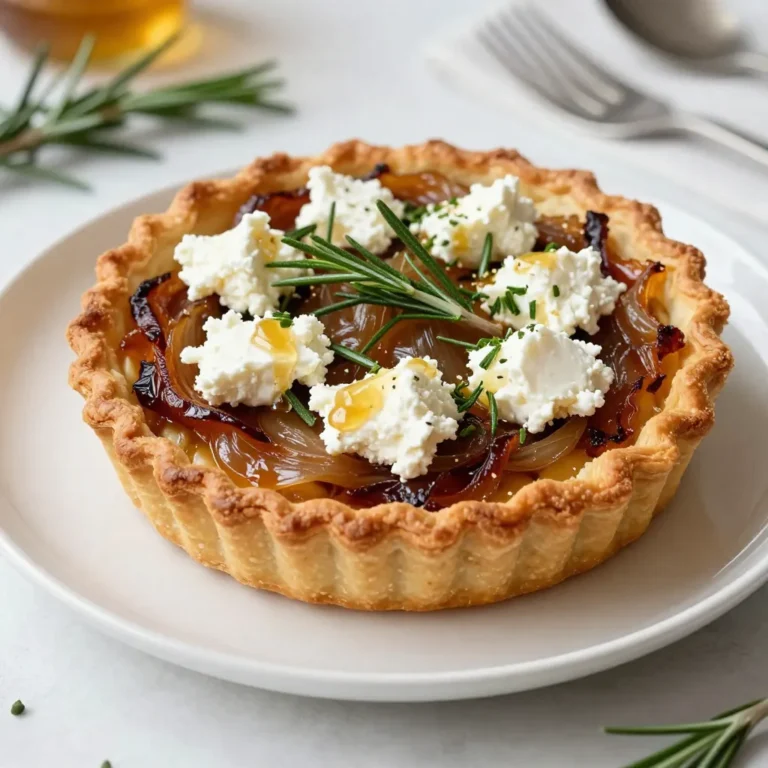
Caramelized Onion Goat Cheese Tart Delightful Bite

- 1 cup rolled oats - 1/2 cup creamy peanut butter - 1/4 cup honey or maple syrup - 1/4 cup mini chocolate chips - 1/4 cup ground flaxseed - 1/2 teaspoon vanilla extract - 1/4 teaspoon salt - Optional: Additional crushed nuts or shredded coconut for coating You can swap honey for maple syrup if you want a vegan option. If you prefer a nut-free snack, use sun butter instead of peanut butter. You can also replace mini chocolate chips with dried fruit to cut back on sugar. Want more protein? Add a scoop of your favorite protein powder to the mix. - Rolled oats: Packed with fiber, oats support heart health and keep you full. - Creamy peanut butter: This ingredient provides healthy fats and protein, giving you energy. - Honey or maple syrup: These natural sweeteners add energy and flavor without refined sugars. - Mini chocolate chips: A little treat! They satisfy sweet cravings and add fun to your bites. - Ground flaxseed: Rich in omega-3 fatty acids, flaxseed promotes good digestion and heart health. - Vanilla extract: This adds flavor and can have calming effects on the mind and body. - Salt: Just a pinch enhances all the flavors and helps balance sweetness. - Optional coatings (nuts or coconut): These add extra crunch and nutrients, like healthy fats and fiber. Using these ingredients not only makes tasty energy bites but also gives you a healthy snack option! {{ingredient_image_2}} To make these peanut butter energy bites, gather your ingredients. You need rolled oats, creamy peanut butter, honey or maple syrup, mini chocolate chips, ground flaxseed, vanilla extract, and salt. Optional toppings like crushed nuts or shredded coconut can add flavor. This recipe takes about 15 minutes to prep and 30 minutes to chill. Start by mixing the dry ingredients. In a large bowl, combine 1 cup of rolled oats, 1/4 cup of ground flaxseed, and 1/4 teaspoon of salt. Stir them together well. In a separate bowl, mix 1/2 cup of creamy peanut butter, 1/4 cup of honey or maple syrup, and 1/2 teaspoon of vanilla extract. Stir until smooth. Now, pour the wet mixture into the dry ingredients. Stir until everything is mixed well. Gently fold in 1/4 cup of mini chocolate chips. Make sure they spread evenly in the mix. Once mixed, cover the bowl with plastic wrap and place it in the fridge for 30 minutes. Chilling helps the mixture firm up. After chilling, take the bowl out. Use your hands to roll the mixture into small balls, about 1 inch in size. If you like, roll each ball in crushed nuts or shredded coconut for extra flavor. Lastly, store the bites in an airtight container in the fridge. They will stay fresh for up to a week. Enjoy your tasty snacks! To make the best energy bites, follow these steps closely. First, mix the dry ingredients well. This ensures that your oats and flaxseed blend evenly. Next, prepare the wet mixture until it is smooth. Mixing the peanut butter, honey, and vanilla carefully will help create a nice texture. When you combine the wet and dry mixes, stir until every bit of dry mix is coated. After adding chocolate chips, fold them in gently. This keeps the bites from crumbling later. One common mistake is not chilling the mixture. Skipping this step makes it hard to shape the bites. Another mistake is not measuring ingredients properly. Too much peanut butter can make the bites too sticky. Also, avoid over-mixing when you add chocolate chips. This can break them and make your bites less tasty. Lastly, don’t skip the optional coating. Rolling your bites in crushed nuts or coconut makes them even better! You need a few basic tools to make these energy bites. Start with a large mixing bowl for combining the ingredients. A spatula works well for stirring. You’ll also need a separate bowl for the wet mix. An airtight container is essential for storing your bites. If you like a nice shape, use a cookie scoop to help form uniform balls. Finally, keep some plastic wrap handy for chilling your mixture. These tools will make your cooking process smoother and more fun! Pro Tips Use Natural Peanut Butter: Opt for natural peanut butter without added sugars or hydrogenated oils for a healthier snack. Adjust Sweetness: Depending on your taste preferences, you can increase or decrease the amount of honey or maple syrup used. Experiment with Mix-ins: Feel free to add dried fruits, seeds, or protein powder to customize your power bites to your liking. Freezing for Longevity: For longer storage, freeze the bites in a single layer on a baking sheet, then transfer to an airtight container. {{image_4}} You can change the flavor of your peanut butter energy bites easily. Try adding shredded coconut for a tropical taste. Almond butter can replace peanut butter for a nutty twist. If you like spice, add a pinch of cinnamon or a drop of almond extract. Want something fruity? Toss in dried cranberries or raisins for a burst of flavor. These small swaps keep your snacks fresh and fun! You can make these bites fit many diets. To make them vegan, swap honey for maple syrup. This keeps the sweetness while being plant-based. For gluten-free bites, ensure your oats are certified gluten-free. This simple change allows everyone to enjoy these tasty treats without worry. Always check labels for hidden gluten in other ingredients. Get creative with mix-ins! Chia seeds or pumpkin seeds add extra crunch and nutrition. You can also add protein powder for a boost. If you want a richer taste, try using dark chocolate chips. You can even mix in nut butter alternatives or crushed nuts for more texture. The options are endless, so feel free to experiment and find your favorite combo! To keep your energy bites fresh, place them in an airtight container. Store them in the refrigerator. They will stay fresh for up to one week. This way, you can enjoy a quick snack anytime. If you want to keep them longer, freezing is a great option. Lay the energy bites on a baking sheet. Make sure they are not touching. Freeze them for about two hours. Once firm, transfer the bites to a freezer bag. They can last up to three months in the freezer. Just thaw them in the fridge before eating. Leftover energy bites are perfect for snacking. You can eat them straight from the fridge. They make a great post-workout boost. Try pairing them with yogurt or fruit for a fun treat. You can also crumble them over oatmeal for added flavor. Peanut Butter Energy Bites last for up to one week in the fridge. Store them in an airtight container. This keeps them fresh and tasty. If you want to keep them longer, you can freeze them. They will stay good in the freezer for about three months. Yes, you can make these bites without honey. You can use maple syrup instead. This keeps the bites sweet and sticky. You can also try using agave syrup if you prefer. Each option gives a unique flavor twist. Yes, Peanut Butter Energy Bites are healthy snacks. They are rich in protein and fiber. The oats and flaxseed provide good nutrients. Peanut butter gives healthy fats, while chocolate chips add a touch of sweetness. Enjoy these bites as a great snack to keep your energy up! You learned how to make tasty energy bites with simple steps. We covered the key ingredients, their benefits, and fun variations. I shared tips to avoid common mistakes and how to store your treats. Remember, you can customize these bites to suit your tastes and dietary needs. Enjoy making these snacks that boost your energy and health! Now get creative and have fun in the kitchen!

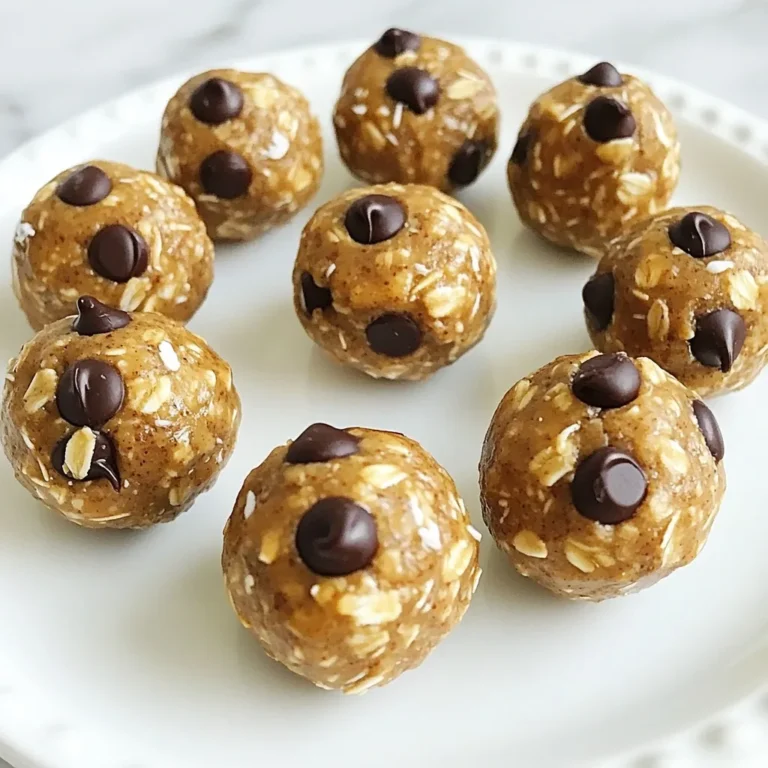
Peanut Butter Energy Bites Quick and Tasty Snack

- 1 package (16 oz) of refrigerated pizza dough - 4 tablespoons unsalted butter, melted - 4 cloves garlic, finely minced - 1/2 cup freshly grated Parmesan cheese - 1 tablespoon fresh parsley, finely chopped - 1 teaspoon dried Italian herbs (a mix of oregano, basil, and thyme) - 1/2 teaspoon salt - 1/4 teaspoon freshly ground black pepper For the best flavor, I recommend using Kraft or Bel Gioioso for Parmesan cheese. They offer a fresh taste that elevates the knots. For butter, Kerrygold is a great choice, as it has a rich, creamy quality. When picking pizza dough, look for brands like Pillsbury or Trader Joe's for reliable results. If you're out of fresh garlic, you can use garlic powder. Use about 1 teaspoon. For the butter, olive oil works well too, but it will change the taste slightly. If you want a lower-fat option, use a blend of Greek yogurt and herbs to brush on the knots. If you can't find fresh parsley, dried parsley can work, but fresh adds a nice touch. {{ingredient_image_2}} To start, preheat your oven to 400°F (200°C). This sets the stage for baking. Next, line a baking sheet with parchment paper. The paper makes cleanup simple. Now, lightly flour your work surface. This keeps the dough from sticking. Unwrap one package of refrigerated pizza dough. Roll it out into a rectangle. Aim for a thickness of about 1/4 inch. This thickness helps the knots bake evenly. Use a sharp knife or pizza cutter to slice the dough. Cut strips that are roughly 1 inch wide and 6 inches long. Take each strip of dough and tie it into a knot. Tuck the ends under the knot to keep its shape. Place the knots on your prepared baking sheet. Make sure to space them out evenly. In a small bowl, mix melted butter, minced garlic, salt, black pepper, and dried Italian herbs. Whisk it all together until well combined. Brush this garlic butter mixture over each knot. Make sure they are well coated. This step packs in flavor. Sprinkle freshly grated Parmesan cheese over the knots. Then add chopped parsley for color. Place the baking sheet in the oven and bake for 12-15 minutes. Watch for a golden brown color and a nice aroma. Shaping the knots can be fun! Start by rolling the dough strips gently. Avoid pressing too hard. When tying the knots, make sure to keep the shape loose. A tight knot can bake unevenly. If you want a more rustic look, don't worry about perfection. Each knot can have its own unique twist. Enjoy the process, and remember, practice makes perfect! To make your knots fluffy, start with room temperature dough. This helps it rise better. Roll your dough to about 1/4 inch thick. If it's too thick, the knots will be dense. Cut the strips evenly. Each strip should be about 1 inch wide and 6 inches long. When tying the knots, make sure to tuck the ends under. This keeps the shape intact while baking. Lastly, don’t skip the butter-brushing step. It adds moisture and flavor. For extra flavor, add more garlic! You can use up to six cloves if you love garlic. Fresh herbs make a big difference too. Try mixing in some fresh basil or thyme. If you want a kick, sprinkle a little red pepper flakes on top before baking. You can also swap Parmesan for mozzarella or cheddar. Each cheese brings a unique taste to the knots. Remember, fresh ingredients always give the best results. One common mistake is not preheating your oven. If the oven isn’t hot enough, your knots may not rise well. Another mistake is overcrowding the baking sheet. Give each knot space to expand. Brush the garlic butter mixture generously; if you don’t, the knots may taste bland. Lastly, don’t forget to check the knots while they bake. Ovens can vary, and you don’t want them burnt. A golden-brown color means they are perfect! Pro Tips Use Fresh Ingredients: For the best flavor, opt for fresh garlic and freshly grated Parmesan cheese instead of pre-packaged versions. Experiment with Seasonings: Feel free to add your favorite herbs or spices to the garlic butter mixture for a personalized touch. Keep an Eye on Baking Time: Every oven is different, so start checking the knots around the 10-minute mark to prevent over-baking. Serve Warm: These knots are best enjoyed warm out of the oven, so serve them immediately for the ultimate flavor experience. {{image_4}} When it comes to cheese, you have fun choices for these knots. While Parmesan shines, you can switch it up. Try using mozzarella for a gooey pull. A mix of mozzarella and Gouda offers a rich flavor. You can also use Asiago for a sharper taste. Each cheese brings a unique twist. Herbs can change the flavor profile of your knots. If you want a fresh taste, use basil or chives. For a bolder flavor, add rosemary or thyme. You can even use a mix of dried herbs if fresh ones aren't available. Each option adds its own charm. Adding extras to your knots makes them even more exciting. Try mixing in sun-dried tomatoes for a sweet touch. You can also add cooked bacon bits for a savory kick. For a spicy bite, sprinkle in some crushed red pepper flakes. Each add-in creates a new flavor experience. To keep your garlic Parmesan knots fresh, let them cool first. Place the knots in an airtight container. If you stack them, add a layer of parchment paper to prevent sticking. Store them in the fridge for up to three days. This helps keep the flavor and texture. If you want to freeze your knots, let them cool completely. Place them in a single layer on a baking sheet. Freeze them for about an hour. Once solid, transfer the knots to a freezer-safe bag. They can last for up to three months in the freezer. Just make sure to label the bag with the date. To reheat your garlic Parmesan knots, preheat the oven to 350°F (175°C). Spread the knots on a baking sheet. Bake them for about 10 minutes until warm. If you want a bit of crispness, broil them for one to two minutes. You can brush them with some melted butter for extra flavor too! To make Garlic Parmesan Knots, start by preheating your oven to 400°F (200°C). Line a baking sheet with parchment paper for easy cleanup. Lightly flour your work surface and roll out the refrigerated pizza dough into a rectangle about 1/4 inch thick. Cut it into strips that are about 1 inch wide and 6 inches long. Tie each strip into a knot, tucking the ends underneath to secure it. Arrange the knots on the baking sheet. In a bowl, mix melted butter, minced garlic, salt, black pepper, and dried Italian herbs. Brush this mixture over each knot. Sprinkle grated Parmesan cheese and chopped parsley on top. Bake for 12-15 minutes or until golden brown. Yes, you can use homemade dough! If you have your favorite pizza dough recipe, feel free to make it. The key is to ensure the dough is soft and pliable. Homemade dough can add a fresh taste to your knots. Just follow the same steps for cutting and tying them. The baking time may vary slightly, so keep an eye on them. These knots pair perfectly with a variety of dips and sides. Serve them with marinara sauce for a classic touch. Garlic knots also go well with creamy ranch or a zesty pesto dip. For a complete meal, enjoy them alongside a fresh salad or soup. Their flavor enhances any dish, making them a favorite at gatherings. This post covered how to make great Garlic Parmesan Knots. We looked at ingredients, cooking steps, and useful tips. You can try different cheeses and herbs to switch things up. Proper storage keeps your knots fresh. Remember to avoid common mistakes for the best results. Now, you have the tools to create tasty knots at home. Happy cooking! Enjoy your time in the kitchen!

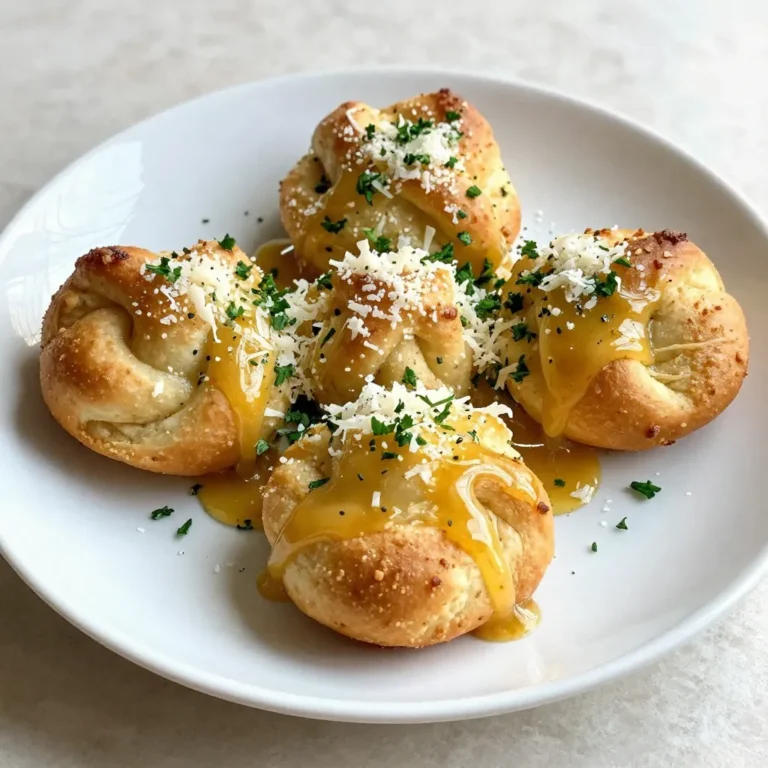
Garlic Parmesan Knots Irresistible Flavor in Every Bite

- 12 oz spaghetti - 1 lb ground turkey or beef - 1 medium onion, finely chopped - 2 cloves garlic, minced - 1 bell pepper (choose your favorite color), diced - 1 can (15 oz) black beans, rinsed and drained - 1 can (15 oz) diced tomatoes (with juice) - 1 cup corn (frozen or canned, drained if using canned) - 2 cups chicken or vegetable broth - 2 tablespoons taco seasoning - 1 cup shredded cheddar cheese - Salt and pepper to taste - Fresh cilantro, chopped (for garnish) - Sour cream, for serving The ingredients for One-Pot Taco Spaghetti are simple and tasty. You start with 12 oz of spaghetti, which is the heart of the dish. Next, you need 1 lb of ground turkey or beef for protein. A medium onion adds sweetness and flavor, while 2 cloves of minced garlic give a nice kick. Choose a bell pepper you like; it can be red, green, or yellow for color and crunch. For the additional ingredients, grab a 15 oz can of black beans. Rinse and drain them first. You will also need a 15 oz can of diced tomatoes with their juice. A cup of corn adds sweetness; you can use frozen or canned. Use 2 cups of chicken or vegetable broth for a savory base. The taco seasoning, about 2 tablespoons, brings in that classic taco flavor. Don't forget 1 cup of shredded cheddar cheese for creaminess. You can adjust salt and pepper to your taste. Finally, fresh cilantro makes a bright garnish, and sour cream adds a creamy finish when serving. With these ingredients, you will create a delicious and quick meal that everyone will love! {{ingredient_image_2}} Start by heating a splash of olive oil in a large pot over medium heat. When the oil is hot, add the finely chopped onion, diced bell pepper, and minced garlic. Sauté the vegetables for about 5 minutes. They should become tender and smell great. Next, add the ground turkey or beef to the pot. Cook the meat, stirring regularly for 6 to 7 minutes. Make sure it’s fully browned and cooked through. If there’s extra fat, carefully drain it out. Now, sprinkle the taco seasoning over the meat. Stir well to coat everything evenly with the spices. Pour in the diced tomatoes, black beans, corn, and broth. Mix everything together until well combined. This mixture will be the base of your taco spaghetti. Increase the heat to bring the mixture to a rolling boil. Once boiling, add the spaghetti. Push it down gently into the sauce as much as you can. Now, reduce the heat to medium-low and cover the pot. Let it simmer for about 12 to 15 minutes. Stir occasionally to keep the spaghetti from sticking. The pasta should be cooked through and absorb most of the liquid. If it looks too dry, add a bit more broth or water. When the spaghetti is cooked to your liking, stir in the shredded cheddar cheese. Keep stirring until the cheese melts and makes the dish creamy. Taste your taco spaghetti and add salt and pepper as needed. Remove the pot from the heat and let it sit for a few minutes. This helps it thicken slightly before serving. Finally, garnish with fresh cilantro for a pop of color and flavor. To prevent pasta from sticking, stir it often. This keeps it loose and helps it cook evenly. Adding a splash of olive oil to the pot can also help. Make sure the heat is not too high. Too much heat can lead to uneven cooking. Stirring every few minutes will help your pasta cook just right. You can add extra toppings to make your dish pop. Try sliced jalapeños for heat or diced avocado for creaminess. A sprinkle of lime juice can brighten the flavors too. If you like it spicy, add more taco seasoning or some chili powder. Adjust the spice level to fit your taste. For serving, place the taco spaghetti in individual bowls. Top each bowl with a dollop of sour cream. This adds creaminess to every bite. Fresh cilantro gives a nice color and a burst of freshness. You can also serve it with tortilla chips on the side for crunch. Pro Tips Choose the Right Meat: Ground turkey is a leaner option, while ground beef provides more flavor. Select based on your preference for health or taste. Customize Your Veggies: Feel free to add other vegetables like zucchini or mushrooms to enhance nutrition and flavor. Adjust Spice Level: If you like it spicy, add diced jalapeños or extra taco seasoning to kick up the heat! Make It Ahead: This dish stores well! Prepare it ahead and reheat for easy meals throughout the week. {{image_4}} You can easily change this recipe to fit your needs. If you want a vegetarian or vegan option, swap the meat for lentils or mushrooms. These add great texture and flavor. You can also use plant-based ground meat if you prefer that. For different protein choices, try chicken or even shrimp. Just adjust cooking times for different meats to ensure they cook through. If you need gluten-free options, use gluten-free spaghetti. There are many brands that taste great. You can also try whole wheat spaghetti for a healthier choice. Want to get creative? Use different pasta shapes like penne or fusilli. These shapes hold the sauce well and make eating fun. To spice things up, add unexpected ingredients like jalapeños or hot sauce. You can even include ingredients like olives or avocado for extra flavor. For regional variations, think about using taco spices from different cultures. Try adding cumin for a Mexican twist or curry powder for an Indian flavor. Each change will give you a new take on this dish! To store your leftover taco spaghetti, place it in an airtight container. Make sure to cool it down first. This keeps it fresh and safe to eat later. You can store it in the fridge for up to 3 days. After that, the taste and texture may change. You can freeze taco spaghetti for longer storage. First, let it cool completely. Then, divide it into portions and place them in freezer-safe bags. Make sure to remove excess air. You can freeze it for up to 3 months. To reheat, thaw it in the fridge overnight. Heat it in a pot over low heat, adding a splash of broth if needed. Leftover taco spaghetti is very versatile. You can use it in a taco salad for a fresh twist. Just mix with greens and add your favorite toppings. Another idea is to stuff it into bell peppers and bake. You can enjoy it with a side of garlic bread or a fresh green salad for a complete meal. Yes, you can use different meats. Ground chicken or pork works well too. Each meat adds a unique flavor. Turkey is leaner, while beef offers a richer taste. Adjust cooking times slightly based on the meat used. This dish takes about 30 minutes total. You’ll spend 10 minutes prepping ingredients. Cooking the spaghetti takes about 12-15 minutes. It’s quick and easy, perfect for busy nights. Yes, you can prep this meal ahead. Cook it and store it in the fridge. It stays fresh for up to three days. When ready to eat, just reheat it on the stove. Add a splash of broth if it seems dry. Absolutely! You can add bell peppers, zucchini, or spinach. These veggies boost nutrition and flavor. Just chop them small so they cook well. Mix them in when you sauté the onion and garlic. This one-pot taco spaghetti is simple and fun to make. You learned about essential ingredients like ground turkey, beans, and cheese. I shared tips to enhance flavor and presented ways to change it up. Remember, you can swap meat or pasta for variety. Store leftovers properly to enjoy later. In the end, this dish is great for any meal. Try it out and make it your own!

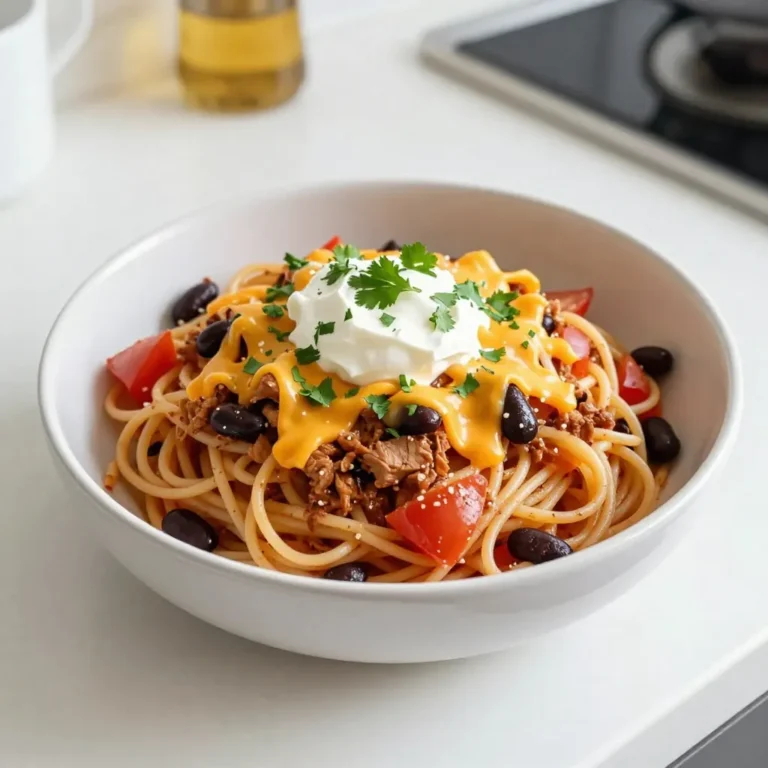
One-Pot Taco Spaghetti Quick and Flavorful Meal

- 500g chicken breast, diced into bite-sized pieces - 1 medium onion, finely chopped - 2 cloves garlic, minced - 1-inch piece of fresh ginger, grated - 1 can (400ml) full-fat coconut milk - 2 tablespoons vegetable oil (canola or sunflower) - 2 teaspoons ground cumin - 1 teaspoon ground coriander - 1 teaspoon turmeric powder - 1 teaspoon garam masala - Salt, to taste - Cooked basmati rice or warm naan bread, for serving Chicken Korma is a rich dish that needs quality ingredients. The chicken breast gives a tender bite. I always choose full-fat coconut milk for a creamy finish. The onion, garlic, and ginger add depth to the flavor. The spices are key. Ground cumin and coriander provide warmth. Turmeric gives a lovely color, while garam masala adds a touch of sweetness. Each spice plays a role in creating that classic Korma taste. - Ground almonds - Fresh cilantro Adding ground almonds thickens the sauce and adds a nutty flavor. Fresh cilantro brings brightness to the dish. You can use these to enhance your Korma or skip them if you prefer a simpler version. {{ingredient_image_2}} Sautéing onions and aromatics Heat vegetable oil in a large frying pan over medium heat. Add finely chopped onion. Cook for about 5 minutes. The onion should turn soft and translucent. Next, add minced garlic and grated ginger. Stir and cook for 2 more minutes. You want to smell those fragrant aromas! Browning the chicken Now, add the diced chicken to the pan. Sauté the chicken for 7-8 minutes. Turn the pieces often until they are browned on all sides. This step adds a nice flavor to the dish. Adding spices and coconut milk After browning the chicken, sprinkle ground cumin, coriander, turmeric, and garam masala over it. Stir well to coat the chicken with spices. Let it cook for 2 minutes. This helps the spices release their full flavor. Then, pour in the can of coconut milk. Scrape the bottom of the pan to get any tasty bits. Mix everything well and bring it to a gentle simmer. Simmering for perfect texture Next, add ground almonds to the coconut milk mixture. Season with salt to taste. Let the korma simmer gently for 15-20 minutes. Stir occasionally until the sauce thickens. The chicken needs to cook through, reaching 75°C or 165°F. Taste it and adjust the salt if needed. Once done, remove it from heat. Garnish with fresh cilantro leaves before serving. Achieving the right consistency To get that perfect creamy sauce, watch your cooking time. When you add the coconut milk, let it simmer gently. This helps the flavors meld together. Stir the pot occasionally. This will keep the sauce from sticking. If it's too thin, simmer longer to thicken it. If it's too thick, add a splash of water or more coconut milk. Spice adjustments for flavor You can change the spices to match your taste. Want it spicier? Add more garam masala or a pinch of chili powder. For a milder dish, hold back on the spices. Remember, the key is balance. Taste as you go. This will help you find the right flavor that works for you. Best accompaniments Serve your Chicken Korma with fluffy basmati rice or warm naan bread. These sides soak up the delicious sauce. You can also add a simple cucumber salad. It adds a fresh crunch that balances the creamy dish well. Presentation tips When plating, use a deep, wide bowl. Pour the korma in and drizzle some coconut milk on top. This makes it look even more inviting. Add a sprig of fresh cilantro on the top for color. It adds a nice touch and freshness. Pro Tips Use Fresh Spices: For the best flavor, opt for fresh spices whenever possible. Ground spices can lose their potency over time, so consider grinding whole spices just before use for a more robust taste. Marinate the Chicken: If you have extra time, marinating the chicken in yogurt and spices for a few hours can enhance the flavor and tenderness of the meat. Adjust the Heat: Customize the heat level by adding fresh chilies or chili powder to the dish. Start with a small amount and increase to your preference. Garnish Creatively: Besides cilantro, consider topping the korma with toasted coconut flakes, sliced almonds, or a drizzle of lime juice for added flavor and visual appeal. {{image_4}} You can make a delicious vegetarian korma by swapping chicken for tofu or chickpeas. Tofu gives a nice texture, while chickpeas add heartiness. Use about 400g of either, diced or drained. When cooking, adjust the time. Tofu needs about 5-7 minutes to brown, while chickpeas need only heating through. Korma has many regional twists from across India. In some areas, cooks add different nuts or dried fruits. For example, in Mughlai cooking, you might see cashews or raisins for a sweet touch. In South India, cooks might add curry leaves or coconut for a unique flavor. Each variation adds character and depth to this dish. To store leftovers of Chicken Korma, let it cool down first. Place it in a container. I recommend using an airtight container to keep it fresh. You can store it in the fridge for up to three days. When you want to eat it again, just reheat it on the stove or in the microwave. If you want to freeze your Chicken Korma, put it in a freezer-safe container. Leave some space at the top, as it will expand when frozen. You can freeze it for up to three months. When you are ready to eat it, thaw it overnight in the fridge. To reheat, warm it gently on the stove. Stir it well to keep it creamy and smooth. Enjoy your delicious Korma again! What is Chicken Korma? Chicken Korma is a rich and creamy Indian dish. It has tender chicken pieces in a flavorful sauce. The sauce features spices like cumin, coriander, and garam masala. Coconut milk adds a smooth texture and sweetness. This dish often garnishes with fresh cilantro. You serve it with basmati rice or naan bread. Is Chicken Korma spicy? Chicken Korma is not very spicy. It has warm flavors, but it is mild overall. The spices add depth without heat. If you prefer more heat, you can add chili peppers. Adjusting spices lets you control the heat level. How long does it take to make? Making Chicken Korma takes about 40 minutes. You can prep your ingredients in about 15 minutes. Cooking takes the remaining 25 minutes. This dish cooks quickly, making it great for weeknight meals. Alternatives for coconut milk If you don’t have coconut milk, you can use heavy cream. You can also try plain yogurt or almond milk for a lighter option. Each choice will change the flavor slightly, but they will still work well. Can I use frozen chicken? Yes, you can use frozen chicken for this recipe. Just make sure to thaw it first. You can thaw chicken in the fridge overnight or use the microwave. Cooking time may increase if using frozen chicken. Ensure the internal temperature reaches 165°F for safety. This blog gives you a clear guide to making Chicken Korma. We covered essential ingredients like chicken, coconut milk, and spices. I shared step-by-step instructions, cooking tips, and serving ideas. You can also explore vegetarian options and variations from different regions. Store your leftovers properly, and refer to the FAQs for common questions. Enjoy experimenting with flavors and make this dish your own!

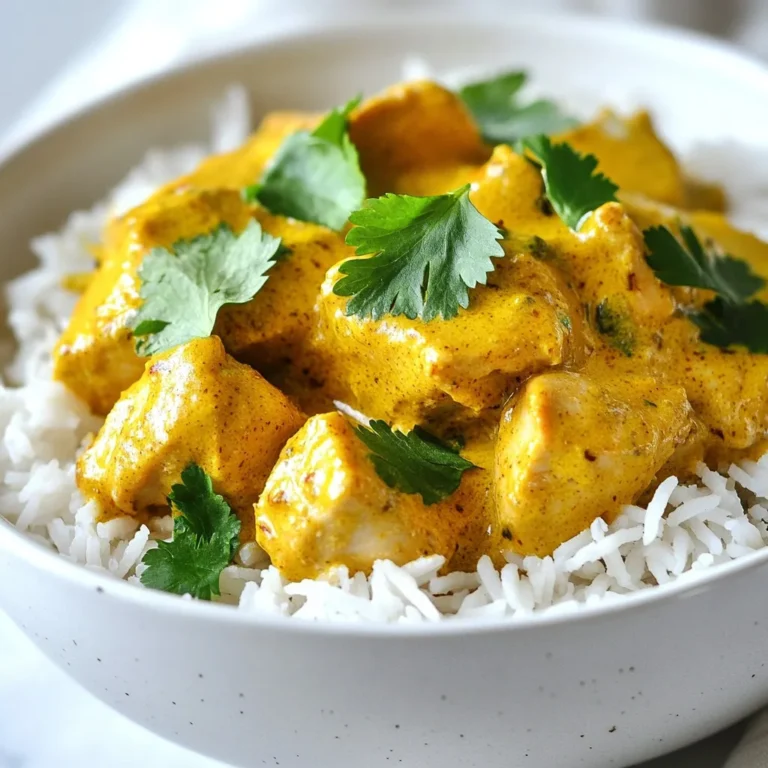
Chicken Korma Rich and Flavorful Indian Dish

- 12 soft slider buns - 1 lb ribeye steak, thinly sliced - 1 bell pepper (red or green) - 1 medium onion - 2 tablespoons olive oil - 1 teaspoon garlic powder - Salt and freshly cracked black pepper - 8 oz provolone cheese (sliced or shredded) - 1/4 cup mayonnaise (optional) - Fresh parsley (for garnish) In this section, I want to focus on the key ingredients that make these Philly cheesesteak sliders truly special. The main star is the ribeye steak. It’s tender and full of flavor. Slice it thin against the grain for the best bite. The bell pepper adds a nice crunch. You can choose either red or green, depending on your taste. Red peppers are sweeter, while green peppers have a sharper taste. The onion is also key. It adds sweetness when sautéed, making the filling so good. Next, we have the olive oil. It helps cook the veggies and adds a bit of richness. The seasoning is simple. Garlic powder gives a nice flavor boost. Don't forget salt and pepper to taste. The cheese is a must! Provolone melts beautifully, making the sliders rich and creamy. You can use sliced cheese or shredded for quicker melting. Finally, mayonnaise is optional, but it adds a nice creaminess. Fresh parsley isn’t just for looks; it also adds freshness to each bite. These ingredients come together to create a fun, tasty dish that everyone will love. {{ingredient_image_2}} - Preheat the oven to 350°F (175°C). - In a large skillet, pour 2 tablespoons of olive oil. Heat it over medium heat. - Add 1 medium onion, sliced into rings, and 1 bell pepper, sliced. - Sauté these for 5-7 minutes. They should become soft and sweet. - Now, add 1 lb of sliced ribeye steak to the skillet. - Season the steak with 1 teaspoon of garlic powder, salt, and pepper. - Cook while stirring for 5-6 minutes until the steak is browned. - Remove the skillet from heat and mix in half of the 8 oz provolone cheese. - Slice 12 soft slider buns in half and place the bottoms in a baking dish. - If you like, spread 1/4 cup of mayonnaise on the bottom halves. - Spoon the steak mixture onto the buns. Make sure each one is filled well. - Place the remaining cheese slices on top of the filling. - Cover the dish with aluminum foil and bake for 10 minutes. - Uncover and bake for another 5-10 minutes until the cheese is bubbly and golden. - Let the sliders cool for a few minutes before slicing. - Finally, sprinkle fresh chopped parsley on top for color and flavor. - Use high-quality ribeye steak. It makes a big difference in taste. - Allow cheese to melt slightly before assembling. This helps create a gooey texture. - Present sliders on a wooden board. It looks rustic and inviting. - Pair with pickles or chips. They add a nice crunch and balance. - Let sliders cool for a few minutes before slicing. This helps you get clean cuts. Pro Tips Choose the Right Steak: For the best flavor and tenderness, opt for ribeye steak. Thinly slicing it against the grain will ensure a melt-in-your-mouth experience. Customize Your Peppers: Mixing bell peppers can add a range of flavors. Red peppers bring sweetness, while green peppers add a slight bitterness, creating a balanced taste. Cheese Melting Tips: Use shredded provolone for quicker melting. If you prefer slices, cover the sliders with foil during the first baking phase to encourage melting. Keep It Moist: Adding a layer of mayonnaise to the buns not only enhances flavor but also keeps them moist and prevents them from getting soggy. {{image_4}} You can swap provolone for cheddar or Swiss. Each cheese gives a unique taste. Cheddar adds a sharp flavor, while Swiss melts nicely. If you like spice, try pepper jack. It adds a nice kick to the sliders. Get creative with toppings and add-ins. Sautéed mushrooms add a rich flavor. You can also toss in jalapeños for heat. For a sweet touch, top with caramelized onions. Different sauces like barbecue or ranch can change the flavor too. If you're gluten-free, don't worry! Use gluten-free slider buns for the same taste. Lettuce wraps are a fun option too. They keep the flavors intact while being lighter. To store leftover sliders, place them in an airtight container. This keeps them fresh. You can also wrap them tightly in foil or plastic wrap. Make sure to refrigerate within two hours of cooking. For best taste, reheat them in the oven. Set your oven to 350°F (175°C). Heat for about 10 to 15 minutes until warm. You can freeze Philly cheesesteak sliders before or after baking. If freezing before, assemble the sliders and wrap them tightly in plastic wrap. Then, place them in a freezer bag. For freezing after baking, let them cool completely. Wrap them in foil or plastic wrap and store in a freezer bag. To reheat from frozen, bake at 350°F (175°C) for about 25 to 30 minutes. Cover with foil for the first 20 minutes to keep them moist. Remove the foil to brown the tops. Enjoy! To slice ribeye for sliders, aim to cut against the grain. This helps keep the meat tender. Hold the steak steady with one hand. Use a sharp knife for clean cuts. Aim for thin slices, around 1/8 inch thick. This will make each bite easy to chew and full of flavor. Proper slicing makes a big difference in taste and texture. Yes, you can prepare the filling in advance. Cook the steak, onions, and peppers as the recipe states. Let it cool and store in the fridge. When you're ready, assemble the sliders. This saves time on the day of your party. Just warm the filling before putting it on the buns. This way, you have fresh and hot sliders in no time. You can use other meats like chicken or pork. Thinly slice cooked chicken for a lighter option. Pulled pork is another great choice, adding a different flavor. Ground beef also works well if you prefer a classic taste. Each meat brings its own unique twist to the sliders. Feel free to experiment with your favorite proteins! In this post, we explored making delicious ribeye steak sliders. You learned about the main ingredients, including the steak, cheese, and spices. I shared step-by-step instructions, cooking tips, and ways to personalize your sliders. You also discovered how to store or freeze leftovers for later. These sliders promise great taste and fun meals. Try different cheeses and toppings for unique flavors. Enjoy your cooking adventure!

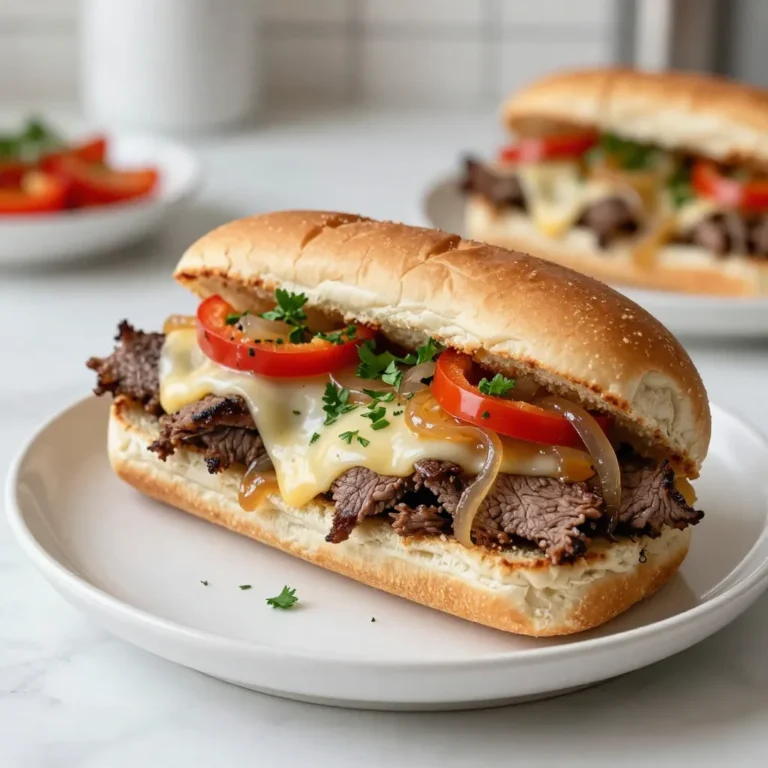
Philly Cheesesteak Sliders Tasty Easy Party Dish

- 2 lbs boneless, skinless chicken thighs - 4 ears of corn, husked and kernels carefully removed - 1 cup cream cheese, softened to room temperature - 1 cup sour cream The main ingredients for Slow Cooker Street Corn Chicken make this dish hearty and tasty. I love using boneless, skinless chicken thighs. They stay juicy and tender as they cook. Fresh corn adds a sweet crunch and vibrant color. Cream cheese and sour cream create a creamy, rich sauce. This mix makes every bite a delight. - 1 teaspoon chili powder - 1 teaspoon garlic powder - 1 teaspoon smoked paprika - 1/2 teaspoon ground cumin - Salt and freshly cracked black pepper to taste - 1 cup crumbled feta cheese - 1/4 cup fresh cilantro, finely chopped (for garnish) - 1 lime, cut into wedges (for serving) Seasoning is key to great flavor. I use chili powder for a warm kick. Garlic powder brings a nice depth. Smoked paprika adds a hint of smokiness. Ground cumin gives a touch of earthiness. Don't forget salt and pepper to taste! For garnishing, I love crumbled feta cheese. It adds a salty creaminess that ties the dish together. Fresh cilantro brightens up each serving. Finally, lime wedges add a zesty finish. Squeezing lime over the top makes it even better! {{ingredient_image_2}} Start by placing the chicken thighs in the slow cooker. Lay them flat at the bottom. Make sure they form one even layer. This helps the chicken cook well and keeps it juicy. Avoid stacking the thighs on top of each other. If you do, some may not cook through. In a bowl, mix the cream cheese and sour cream. Add chili powder, garlic powder, smoked paprika, and cumin. Blend these until smooth. You can use a hand mixer or a spatula. The goal is to have a creamy, lump-free blend. Once it’s ready, spread this mixture over the chicken. Make sure you cover each thigh well. This adds flavor to every bite. Cover the slow cooker with its lid. Cook on low for 6-7 hours or high for 3-4 hours. The chicken should be very tender when done. To check, use two forks to shred the chicken in the slow cooker. Mix the shredded chicken with the corn and creamy sauce. This will ensure every piece is coated. After shredding, fold in the feta cheese gently. This allows the cheese to melt slightly and mix in. Serve hot with cilantro and lime wedges. To ensure even cooking and flavor, start by layering the chicken thighs flat in your slow cooker. This step helps the chicken cook uniformly. Next, spread the creamy mixture over the chicken. This allows all the spices to blend well. The corn should be added last, ensuring it sits on top. This way, it steams well and adds moisture. Season the dish with just the right amount of salt and pepper. Taste it before serving to adjust flavors if needed. For a great presentation, serve the chicken in bowls. I like to add a sprinkle of fresh cilantro on top for color. Lime wedges on the side add a zesty twist. You could pair this dish with warm tortillas or serve it over fluffy rice. This adds more texture and makes the meal hearty. If you want to impress, consider a colorful salad as a side. Using a reliable slow cooker makes a difference. I recommend one with a capacity of at least 6 quarts. This size lets you cook enough for the whole family. Look for a slow cooker with a programmable timer. It allows you to set cook times easily. A good mixing bowl and a hand mixer help blend the creamy sauce well. You'll also need two forks for shredding the chicken after cooking. Pro Tips Use Fresh Corn: For the best flavor, opt for fresh corn on the cob rather than frozen or canned. The sweetness and crunch of fresh corn will enhance the overall dish. Adjust Spice Levels: If you prefer a spicier dish, feel free to increase the amount of chili powder or add in diced jalapeños for an extra kick. Make Ahead: This dish can be prepared in advance. Simply shred the chicken and mix it with the sauce, then store it in the refrigerator for up to 2 days before serving. Serve with Sides: Pair this dish with warm tortillas or over fluffy rice to create a more filling meal that is perfect for sharing. {{image_4}} You can change some ingredients to suit your taste. For cheese, try using goat cheese or cream cheese. If you prefer a different spice, use taco seasoning or paprika. You can also swap sour cream for Greek yogurt. This will make the dish lighter but still creamy. If you need a gluten-free option, check your spices. Most are safe, but always read the labels. For a low-carb meal, skip the corn or use cauliflower rice instead. You can also add more chicken or veggies to keep it filling. Add local flavors to make this dish unique. For a Mexican twist, mix in some diced jalapeños or fresh corn salsa. If you love Southern flavors, add some hot sauce or smoked sausage. You can also finish with avocado slices or pickled onions for a fun garnish. To store leftover slow cooker street corn chicken, let it cool first. Place the chicken in an airtight container. It will stay fresh in the fridge for up to four days. Make sure to cover it well to prevent drying out. When you are ready to eat the leftovers, reheat them gently. You can use the microwave for quick heating. Heat it in a bowl, covered with a damp paper towel. This helps keep it moist. Stir halfway through to heat evenly. You can also reheat it on the stove over low heat. Stir often to avoid burning. Freezing is a great way to keep this dish longer. Place the cooled chicken in a freezer-safe bag or container. Remove as much air as possible to prevent freezer burn. It can last up to three months in the freezer. When you want to eat it, thaw it overnight in the fridge. Reheat it as mentioned above for the best taste. Yes, you can use frozen corn. Frozen corn is sweet and convenient. It also cooks well in the slow cooker. Just add it straight from the bag. No need to thaw. This saves time and effort. Fresh corn has a great crunch, but frozen works too. If you want to make more, cook it longer. For every extra pound of chicken, add about 30 minutes. Use a meat thermometer to check the chicken. It should reach 165°F to be safe. Larger batches may need an hour on low or 30 minutes on high. Yes, you can prep it the night before. Layer the chicken and cream cheese mix in the slow cooker. Cover and store it in the fridge. In the morning, turn on the slow cooker. This way, you save time on busy days. Enjoy a warm meal when you get home! In this post, I covered a tasty slow cooker street corn chicken recipe. We explored the key ingredients, like chicken thighs, fresh corn, and spices. I shared step-by-step instructions to make this dish easy for anyone. You learned cooking tips, variations for different diets, and how to store leftovers. This meal is simple, fun to make, and packed with flavor. Try it out for a delicious meal!

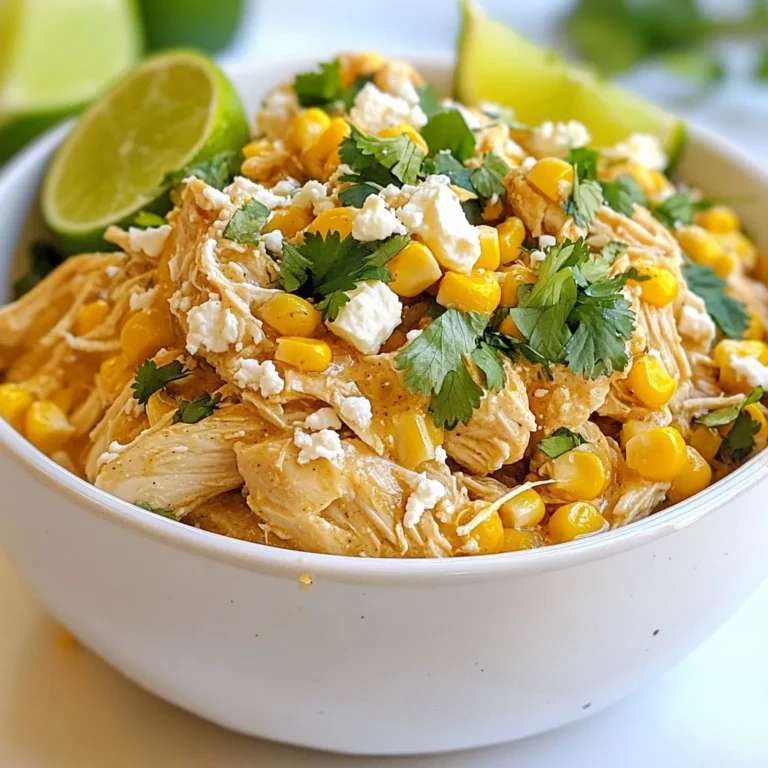
Slow Cooker Street Corn Chicken Easy Family Delight

PREV 1 … 37 38 39 … 48 NEXT
meal plan mapper

explore

DessertsDinnerAppetizersDrinks

Our Policies

  • Cookie Policy
  • Copyright Policy
  • Disclaimer
  • GDPR Policy
  • Terms Of Use
Back to Top
  • About
  • Contact Us
  • Privacy Policy
© 2025 meal plan mapper