FREE DINNER EBOOK! Get your copy!
  • Cookie Policy
  • GDPR Policy
  • Disclaimer
  • Terms Of Use
  • Visit my other site: Fun Cookie Recipes
meal plan mapper
  • Home
  • Dinner
  • Desserts
  • Drinks
  • Appetizers
  • Contact
  • About
  • Privacy Policy
  • Home
  • Dinner
  • Desserts
  • Drinks
  • Appetizers
  • Contact
  • About
  • Privacy Policy
  • Cookie Policy
  • GDPR Policy
  • Disclaimer
  • Terms Of Use
Visit my other site: Fun Cookie Recipes

HOME / CATEGORIES /

Latest

To make delicious Raspberry Cheesecake Brownies, you will need: - 1 cup unsalted butter, melted - 1 1/4 cups granulated sugar - 1 cup brown sugar, packed tightly - 4 large eggs, at room temperature - 1 teaspoon vanilla extract - 1 cup all-purpose flour - 1/2 cup unsweetened cocoa powder - 1/4 teaspoon salt - 8 ounces cream cheese, softened to room temperature - 1/4 cup powdered sugar - 1/2 teaspoon vanilla extract (for the cheesecake layer) - 1 cup fresh raspberries (plus extra for garnish) Quality matters in baking. Start with the best butter. Look for unsalted butter for control over salt levels. Fresh eggs should be large and at room temperature. This helps them mix better. Choose pure vanilla extract over imitation for more flavor. For the flour, all-purpose is best, but check for freshness. Fresh raspberries should be plump and vibrant. Avoid mushy or dull ones. If you need to replace ingredients, there are options. For butter, use coconut oil or vegan butter. Instead of eggs, try flax eggs or applesauce. For the cream cheese, use a dairy-free cream cheese product. You can also use gluten-free flour if needed. Just make sure it’s a 1:1 substitute. These swaps keep the taste and texture close to the original. {{ingredient_image_2}} Start by preheating your oven to 350°F (175°C). Grab a 9x13 inch baking pan. Grease it with cooking spray or line it with parchment paper. This will help you remove the brownies easily later. In a large bowl, mix the melted butter, granulated sugar, and brown sugar. Whisk them until smooth and creamy. Next, add the eggs one at a time. Beat well after adding each egg. Stir in 1 teaspoon of vanilla extract until blended. In another bowl, sift together the flour, cocoa powder, and salt. Gradually add this dry mix to the wet mix, stirring gently. Be careful not to overmix. In a separate bowl, beat the softened cream cheese with powdered sugar. Add 1/2 teaspoon of vanilla extract and mix until it’s light and fluffy. Gently fold in 1 cup of fresh raspberries. Try not to break them up too much. This will keep your cheesecake layer looking pretty. Pour half of the brownie batter into the prepared pan. Use a spatula to spread it evenly. Then, spread the cheesecake mixture over the brownie layer. Pour the rest of the brownie batter on top. Use the spatula to cover the cheesecake layer completely. Take a toothpick or knife and swirl it through the layers. This creates a lovely marbled effect. Place the pan in the preheated oven. Bake for 30 to 35 minutes. The brownies are done when a toothpick inserted in the center comes out with a few moist crumbs. Let the brownies cool completely in the pan on a wire rack. Once cooled, cut them into squares and enjoy! To get that perfect brownie texture, use good quality butter. Melt the butter until it is smooth. Mix the sugars with the butter until creamy. This step helps create a nice, fudgy base. When you add eggs, make sure they are at room temperature. This helps them blend well. Stir in the vanilla extract for extra flavor. Combine your dry ingredients gently. Overmixing can lead to tough brownies. Overmixing can ruin the soft texture you want. Mix just until the flour and cocoa disappear. If you see dry spots, that is okay! They will disappear as they bake. Use a spatula to fold ingredients carefully. This method keeps the batter light. Remember, a few lumps are fine. They won’t affect the final taste. To make a lovely marble effect, pour half the brownie batter in first. Then add the cheesecake layer on top. Gently drop the rest of the brownie batter over the cheesecake. Use a toothpick or knife to swirl. Start at one corner and make a figure-eight motion. Don’t mix too much; you still want to see layers. This technique makes your brownies look stunning and tasty! Pro Tips Room Temperature Ingredients: Ensure that your eggs and cream cheese are at room temperature before mixing. This helps create a smoother batter and a creamier cheesecake layer. Don’t Overmix: When combining the dry ingredients with the wet ingredients, mix just until combined. Overmixing can lead to dense brownies instead of the desired fudgy texture. Swirling Technique: For a beautiful marbled effect, use a toothpick or knife to swirl the layers gently. Avoid mixing them too much to maintain distinct layers. Cooling Time: Allow the brownies to cool completely in the pan before cutting. This helps them set properly and makes it easier to achieve clean, even squares. {{image_4}} You can make these brownies gluten-free with a simple swap. Use gluten-free flour instead of all-purpose flour. Look for a blend that includes xanthan gum. This will help keep the texture nice. Your brownies will still be rich and fudgy. Enjoy the same great taste without gluten! Want to mix it up? Add different fruits to your brownies. Strawberries, blueberries, or even mango work well. You can use fresh or frozen fruit. Just make sure to adjust the sugar if the fruit is very sweet. This keeps your brownies balanced. Experimenting with flavors can lead to tasty new treats! You can change the chocolate type for a new twist. Try white chocolate for a sweeter flavor or dark chocolate for more richness. If you use dark chocolate, your brownies may taste more intense. This small change can give your brownies a whole new character. Enjoy finding your favorite chocolate match! To keep your Raspberry Cheesecake Brownies fresh, store them in an airtight container. This method prevents them from drying out. You can also wrap individual squares in plastic wrap for easy grab-and-go treats. If you have leftovers, place parchment paper between layers to avoid sticking. If you want to enjoy these brownies later, freezing is a great option. Cut them into squares first. Then, wrap each square tightly in plastic wrap, followed by aluminum foil. This double wrapping protects them from freezer burn. To thaw, simply place them in the fridge overnight. For a warm treat, you can microwave them for a few seconds before serving. These brownies can last about 3 to 4 days at room temperature. For the best taste, eat them within the first couple of days. If stored in the fridge, they can last up to a week. Just remember, the cream cheese layer makes them a bit more perishable. Always check for any signs of spoilage before enjoying! To cut brownies well, use a sharp knife. Make sure the brownies are cool. For clean cuts, wipe the knife with a damp cloth after each slice. This keeps the edges neat. You can also use a plastic knife for easy cutting. It helps avoid sticking and tearing. Yes, you can use frozen raspberries. Just thaw and drain them first. This helps reduce excess moisture. Frozen berries may break apart more easily. But they will still taste great and add flavor to your brownies. Check the brownies at 30 minutes. Insert a toothpick into the center. If it comes out with a few moist crumbs, they are ready. If it comes out wet with batter, bake for a few more minutes. Avoid overbaking to keep them soft and fudgy. You can make these brownies ahead of time. They store well in the fridge for up to a week. Just cover them tightly to keep them fresh. For longer storage, freeze the brownies. They last for up to three months. Just thaw them in the fridge before serving. In this post, we covered the key ingredients and steps for making delicious brownies. You learned how to ensure the right texture and create a stunning marble effect. I shared variations for different tastes, along with smart storage tips. These brownies are perfect for any occasion, and making them can be fun and easy. Enjoy experimenting with flavors and techniques. Your baking journey starts here, so dive in and impress everyone with your tasty treats!

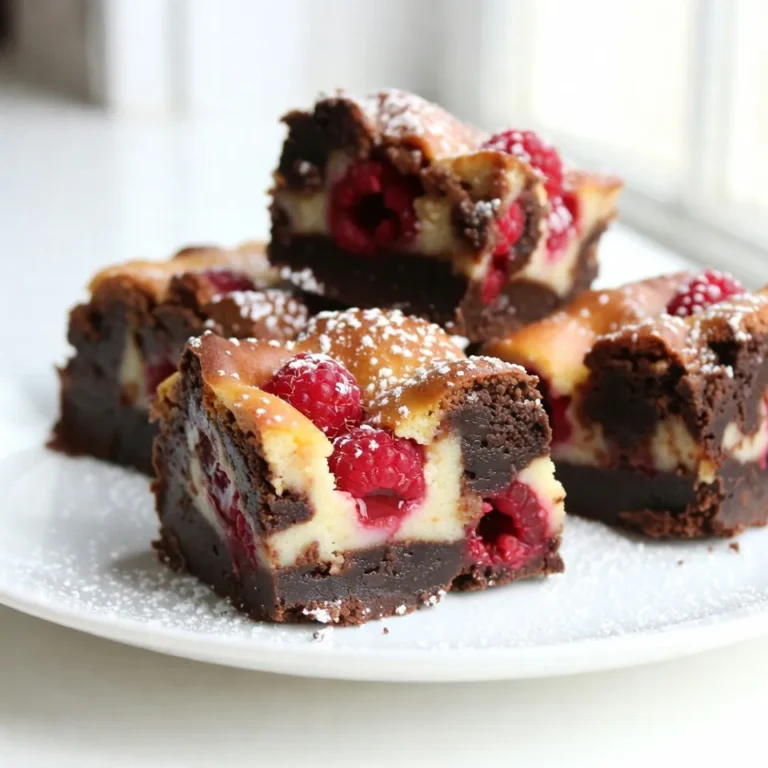
Raspberry Cheesecake Brownies Irresistible Dessert Delight

- 2 cups mixed salad greens (arugula, spinach, and kale) - 1 cup cooked quinoa - 1 cup butternut squash, peeled and cubed - 1/2 cup pomegranate seeds - 1/2 cup feta cheese, crumbled - 1/4 cup walnuts, roughly chopped - 1/4 cup dried cranberries - 1/4 cup olive oil - 2 tablespoons apple cider vinegar - 1 tablespoon maple syrup When I create a salad, I want it to burst with flavor. This Pomegranate Autumn Harvest Salad does just that. You start with mixed salad greens like arugula, spinach, and kale. Each green adds a unique crunch and taste. Then, you have cooked quinoa, which makes the salad hearty. It’s rich in protein and keeps you full. Next, the star of the show is roasted butternut squash. When you roast it, the natural sugars caramelize, giving it a sweet and nutty flavor. The warm squash contrasts perfectly with the fresh greens. Now, let’s talk about fun add-ins. Pomegranate seeds add a pop of color and a sweet-tart zing. Crumbled feta cheese brings in a creamy texture that balances the crunch. I love adding walnuts for a nutty crunch and dried cranberries for a chewy sweetness. The dressing is simple yet delicious. Olive oil gives a smooth base, while apple cider vinegar adds tang. A touch of maple syrup sweetens it just right. This dressing ties all the flavors together and makes each bite memorable. {{ingredient_image_2}} 1. Preheat the oven: Start by setting your oven to 400°F (200°C). This heat is perfect for roasting the squash. 2. Cooking quinoa: While the oven heats, rinse 1 cup of quinoa under cold water. Then, cook it following package instructions. Usually, you simmer it in water or broth until it becomes fluffy. When done, fluff it with a fork and let it cool. 1. Seasoning and baking times: Cut 1 cup of peeled butternut squash into cubes. Spread them on a baking sheet. Drizzle with 1 tablespoon of olive oil. Sprinkle with salt and pepper. Roast the squash for 25-30 minutes. 2. Visual cues for doneness: Look for a golden-brown color and fork-tender texture. The squash should be soft and slightly caramelized. 1. Combining salad ingredients: In a large bowl, mix 2 cups of salad greens, the cooled quinoa, roasted butternut squash, 1/2 cup of pomegranate seeds, 1/2 cup of crumbled feta cheese, 1/4 cup of walnuts, and 1/4 cup of dried cranberries. 2. Tossing with dressing: In a small bowl, whisk together 1/4 cup of olive oil, 2 tablespoons of apple cider vinegar, 1 tablespoon of maple syrup, salt, and pepper. Drizzle this dressing over the salad. Gently toss everything until all the ingredients are well coated. To balance flavors, use fresh herbs like parsley or mint. These herbs brighten the dish. You can also add a splash more apple cider vinegar for extra tang. Taste as you go to find your perfect mix. For crunch and freshness, use crisp greens. Arugula, spinach, and kale work well together. Mix them right before serving to keep them crisp. Serve the salad in a large, shallow bowl. This makes it easy for guests to take what they want. You can also plate individual servings for a fancy touch. It looks nice and saves time. Garnish the salad with extra pomegranate seeds and a few walnut pieces. This adds color and texture. Try a drizzle of extra dressing on top for a great look. To adjust servings for gatherings, simply double or triple the ingredients. Keep the same ratios for flavor. For ingredient substitutions, swap quinoa with farro or barley. These grains add a new taste and texture. You can also replace feta with goat cheese for a different flavor. Pro Tips Roasting Perfection: Ensure your butternut squash is cut into uniform pieces for even roasting. This helps achieve that perfect caramelization and tenderness. Quinoa Cooking: Rinse quinoa thoroughly before cooking to remove its natural coating, saponin, which can impart a bitter taste. This step is essential for a deliciously fluffy result. Dressing Balance: Taste your dressing before adding it to the salad. Adjust the sweetness of the maple syrup or the acidity of the vinegar to suit your personal preference. Garnishing for Flair: Add extra pomegranate seeds and walnut pieces as a garnish for an appealing presentation. It enhances the visual appeal and adds a satisfying crunch in every bite. {{image_4}} For those who follow a vegan diet, you can skip the feta cheese and use a vegan cheese alternative. Many brands offer creamy options that melt beautifully. You can also use tahini or avocado for creaminess. If gluten is a concern, quinoa is naturally gluten-free. Just ensure that any additional ingredients, like the dressing, are also gluten-free. Look for tamari instead of soy sauce if you want to boost flavor while keeping it safe. In autumn, you can swap in other vegetables like roasted carrots or Brussels sprouts. These can add even more color and flavor to your salad. If you want a twist, try adding sliced apples or pears instead of pomegranate. For cheese, blue cheese or goat cheese can give a sharp flavor. Each option offers a unique taste that complements the salad well. To boost protein, grilled chicken is a great choice. Season it simply with salt and pepper, then grill until cooked. You can also use marinated tofu for a plant-based option. For more protein, mix in extra quinoa. You could also try adding chickpeas or black beans. They add a hearty texture and pair well with the salad's flavors. To keep your Pomegranate Autumn Harvest Salad fresh, store it in an airtight container. This helps keep the greens crisp and the flavors vibrant. Layer the heavier ingredients, like butternut squash and quinoa, at the bottom. Place the greens on top to avoid wilting. If you have dressing left, store it separately. This prevents sogginess. You may not need to reheat the salad, but if you want to enjoy warm butternut squash, do it carefully. Use the microwave on low power for a short time. Avoid heating the salad dressing, as it can lose flavor. Serve the salad cold or at room temperature for the best taste. The salad lasts about 3 days in the fridge. Check for signs of spoilage like brown or slimy greens. If the pomegranate seeds look dry or shriveled, it’s time to toss them. Always trust your senses when it comes to food safety. Yes, you can prepare this salad ahead of time. To do this, follow these meal prep tips: - Store Ingredients Separately: Keep the salad greens, quinoa, and roasted squash in different containers. This helps to keep everything fresh. - Add Dressing Later: Wait to add the dressing until just before serving. This keeps the greens crisp and prevents sogginess. - Chill in the Fridge: You can store the ingredients in the fridge for up to two days. This way, you have a quick meal ready to go! Pomegranates pack a punch of health benefits. Here are some key points: - Rich in Antioxidants: Pomegranates are full of antioxidants. These help fight free radicals in your body. - Good for Heart Health: Eating pomegranates may lower blood pressure and improve cholesterol levels. - High in Vitamins: They provide vitamin C, which boosts your immune system, and vitamin K, which is good for bones. - Low in Calories: Pomegranate seeds are low in calories. They add flavor without adding too much to your diet. Yes, you can use frozen butternut squash in this salad. Here’s how to do it: - No Need to Thaw: You can roast frozen butternut squash without thawing it first. Just add a few extra minutes to the cooking time. - Check for Seasoning: Frozen squash may have less flavor than fresh. Add a pinch more salt and pepper to enhance the taste. - Watch Cooking Time: Keep an eye on the squash as it cooks. Roasting times may vary, so check for tenderness and browning. This salad recipe brings together fresh greens, quinoa, and roasted butternut squash. You enhance it with tasty add-ins like pomegranate seeds and feta. Follow the clear steps for perfect cooking and assembling. Remember to balance flavors and present it well. Incorporate variations to suit your diet or the season. Storing leftovers properly keeps it fresh longer. Enjoy this hearty salad, packed with nutrition and flavor. It's simple to make and great for any occasion.

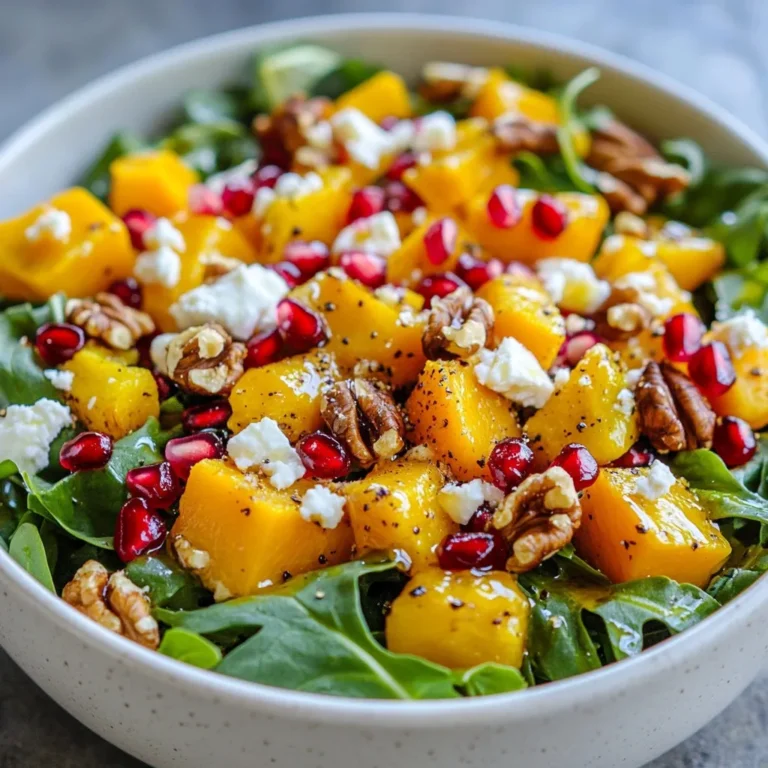
Pomegranate Autumn Harvest Salad Flavorful and Fresh

- 2 cups Greek yogurt (your choice of plain or flavored) - 1 cup granola (select your favorite flavor) - 1 cup mixed berries (such as strawberries, blueberries, and raspberries) - 2 tablespoons honey or maple syrup - 1 teaspoon vanilla extract - Fresh mint leaves for a garnish Greek yogurt parfait jars are simple yet delightful. You can use plain or flavored yogurt. I love using Greek yogurt for its rich taste and creamy texture. Granola adds a nice crunch. You can pick your favorite flavor. I like to use honey or maple syrup to sweeten the yogurt. Just a little bit does the trick! Mixed berries bring a burst of flavor. Strawberries, blueberries, and raspberries all work well. You can mix and match based on what you have. You can also add vanilla extract for more flavor. Fresh mint leaves make a lovely garnish. They add a pop of color and taste. These ingredients make a delicious treat. You can enjoy them any time of day! {{ingredient_image_2}} First, take a medium bowl. Add 2 cups of Greek yogurt. You can use plain or any flavored kind you like. Next, pour in 1 teaspoon of vanilla extract. Then, add 2 tablespoons of honey or maple syrup. Blend these ingredients well until smooth. You want a creamy texture that tastes good. Taste the mixture and adjust the sweetness if needed. If you want it sweeter, add a bit more honey or syrup. Now, grab your jars or glasses. Start by adding a generous layer of the yogurt mixture. Fill each jar about one-third full. Next, sprinkle a layer of your favorite granola on top. Press it down gently with the back of a spoon. This makes a solid base. After that, add a handful of mixed berries. You can use strawberries, blueberries, or raspberries. Spread them evenly across the jars for color and flavor. Continue layering by adding more yogurt. Then, follow with another layer of granola and another handful of berries. Repeat this process until the jars are almost full. Make sure to end with a layer of berries on top. This gives a lovely finish. For a special touch, drizzle a bit of honey or syrup over the berries. You can also add fresh mint leaves to make it look pretty. Enjoy your Greek yogurt parfait jars! To make your parfait look pretty, focus on even layers. Start with Greek yogurt, filling one-third of the jar. This base holds everything in place. Next, sprinkle granola on top. Press it down gently with a spoon. This step keeps the granola stable and adds a nice crunch. Add a layer of mixed berries next. Use a mix of colors for a fun look. Repeat this process until you reach the top of the jar. These parfait jars shine at breakfast or as a snack. They are quick, tasty, and healthy. Serve them right away for the best taste. For a lovely display, place the jars on a wooden board. Add extra berries and mint leaves around them. This setup makes your treat look even more inviting. You can switch up the yogurt and granola based on your taste. For yogurt, try coconut or almond options if you want a change. If you like a different granola flavor, feel free to experiment. For sweeteners, use agave or stevia if you prefer less sugar. Adjust these ingredients to fit your diet needs while keeping the parfait delicious. Pro Tips Layering Technique: For best results, layer your ingredients in a clear glass to showcase the beautiful colors of the yogurt, granola, and berries. Yogurt Choices: Experiment with different flavors of Greek yogurt, such as honey or vanilla, to create unique parfait combinations. Make-Ahead Option: Prepare the yogurt and granola ahead of time, storing them separately until you’re ready to layer for a quick and easy breakfast. Garnish for Appeal: Fresh mint not only adds a pop of color but also enhances the flavor; don’t skip this garnish for a restaurant-quality touch. {{image_4}} You can use different yogurt flavors to make your parfaits exciting. Try strawberry, vanilla, or even blueberry yogurt for a burst of taste. Seasonal fruits also add fun. In summer, use fresh peaches or cherries. In fall, add apples or pears for a cozy twist. Toppings can take your parfaits to the next level. Nut butters like almond or peanut butter add creaminess. You can also sprinkle chocolate chips or seeds for crunch. For a tropical vibe, add coconut flakes or dried fruits like raisins and apricots. These toppings not only taste great but also boost nutrition. If you need gluten-free options, select gluten-free granola. This way, everyone can enjoy the treat. For vegan substitutions, use coconut yogurt instead of Greek yogurt. You can also choose dairy-free granola to keep it plant-based. These adjustments make the parfaits suitable for many diets. To keep your parfaits fresh, use airtight jars. Glass or plastic containers work well. They seal tightly and stop air from getting inside. Always layer your parfaits in the jars. This keeps the yogurt, granola, and berries separate. It prevents the granola from getting soggy. Your parfaits will last about three days in the fridge. After that, the berries may lose their best taste. You can freeze parfaits, but avoid freezing granola. It can become too soft. Instead, freeze just the yogurt and berries. When ready, let them thaw in the fridge overnight. To remix your stored parfaits, start by stirring the layers. This can help mix flavors again. If the granola feels soft, add a fresh layer on top. This will give you that crunchy bite again. Enjoy the taste of fresh parfaits, even after storage! You can easily change the ingredients to fit your taste. For yogurt, try coconut or almond yogurt. If you want different flavors, use strawberry or vanilla yogurt. For granola, choose one with nuts, seeds, or even chocolate. You can also mix in some nuts for extra crunch. Want more flavor? Add spices like cinnamon or nutmeg. You can also try adding a splash of orange juice for a citrusy zing! Yes, you can make these parfaits a day in advance. Just layer them in jars and store them in the fridge. The best time to make them is the night before. This gives the flavors time to blend. When storing, cover the jars tightly to keep them fresh. Remember, the granola may get soggy if left too long. To prevent this, store granola separately and add it just before eating. Greek yogurt is rich in protein. One cup can give you about 20 grams of protein. It also contains probiotics, which help your gut health. The mixed berries add vitamins and antioxidants. Strawberries boost your vitamin C, while blueberries are high in fiber. Granola adds healthy fats and energy. Just watch the sugar content if you pick sweetened varieties. Overall, this parfait is a tasty way to enjoy a healthy snack! Greek yogurt parfaits are simple, fun, and tasty. You can mix Greek yogurt with granola and fresh berries. Add honey or mint if you want extra flavor. Layer them well for a nice look. These parfaits are great for breakfast or snacks. You can even make them ahead. Whether you stick to the basics or try fun variations, enjoy every bite. Stay creative and make it your own!

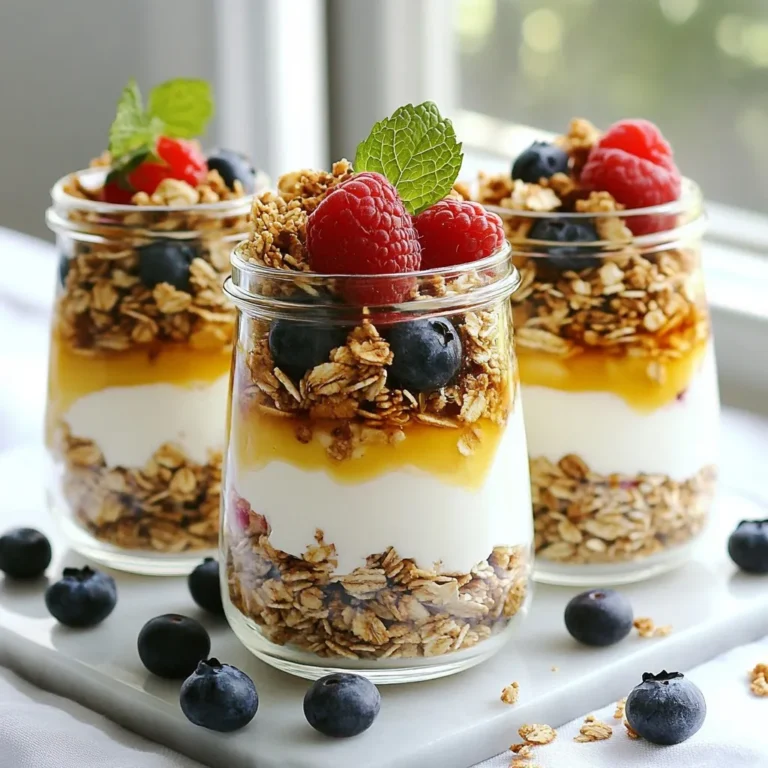
Greek Yogurt Parfait Jars Delicious and Simple Treat

- 1 cup all-purpose flour - 1 teaspoon baking powder - 1 teaspoon baking soda - 1 teaspoon ground cinnamon - 1/2 teaspoon ground nutmeg - 1/4 teaspoon ground ginger - 1/4 teaspoon salt - 4 large eggs - 1 cup granulated sugar - 1/2 cup vegetable oil - 1 teaspoon pure vanilla extract - 1 1/2 cups finely grated carrots - 1/2 cup crushed pineapple, thoroughly drained - 1 cup cream cheese, softened to room temperature - 1/4 cup powdered sugar - 1 teaspoon fresh lemon juice - Chopped pecans or walnuts for garnish (optional) Gathering the right ingredients is key to making a great spiced carrot cake roll. Start with your dry ingredients. Combine flour, baking powder, baking soda, and spices. The spices add warmth and flavor. Don't forget the salt; it enhances the sweetness. Next, collect your wet ingredients. You'll need eggs, sugar, oil, and vanilla. The eggs help bind the cake. The sugar adds sweetness. The oil keeps it moist. Carrots and pineapple bring natural sweetness and moisture. Grate those carrots finely to blend well. Finally, for the cream cheese filling, you need softened cream cheese, powdered sugar, and lemon juice. This filling will bring a tangy balance to the sweet cake. Feel free to add chopped nuts as a garnish. They add a nice crunch and flavor. By using high-quality ingredients, your cake will taste amazing. Now, you're ready to start baking! {{ingredient_image_2}} - Preheat oven to 375°F (190°C) - Prepare a jelly roll pan Start by preheating your oven. Set it to 375°F (190°C). This heat will help your cake rise nicely. Next, find a jelly roll pan. Line it with parchment paper. Leave some paper hanging over the edges. This helps you lift the cake out later. Lightly grease the paper to prevent sticking. - Whisk together flour, baking powder, baking soda, spices, and salt Take a medium bowl. Add 1 cup of all-purpose flour. Then, add 1 teaspoon of baking powder and 1 teaspoon of baking soda. Next, sprinkle in 1 teaspoon of ground cinnamon, 1/2 teaspoon of ground nutmeg, 1/4 teaspoon of ground ginger, and 1/4 teaspoon of salt. Use a whisk to mix these ingredients well. This mix gives your cake flavor and helps it rise. - Beat eggs and sugar until thick - Add oil and vanilla In a large bowl, crack 4 large eggs. Add 1 cup of granulated sugar. Use an electric mixer on medium speed. Beat the mixture for about 3-5 minutes. It should look thick and pale. Now, slowly add 1/2 cup of vegetable oil. Add 1 teaspoon of pure vanilla extract too. Continue mixing until everything blends well. - Fold in carrots and pineapple - Mix wet and dry ingredients without overmixing Next, take 1 1/2 cups of finely grated carrots and 1/2 cup of crushed pineapple. Make sure the pineapple is well drained. Gently fold them into the egg mixture. Then, take your dry mix and add it to the wet mix. Fold gently until just combined. Be careful not to overmix. This keeps your cake light and fluffy. - Pour batter into the pan - Bake for 15-20 minutes Pour the batter into your prepared jelly roll pan. Spread it evenly across the pan. Now, place it in your preheated oven. Bake for about 15-20 minutes. To check if it’s done, insert a toothpick in the center. If it comes out clean, your cake is ready! - Invert onto a towel dusted with powdered sugar - Roll the cake and let it cool While the cake bakes, get a clean kitchen towel. Dust it generously with powdered sugar. Once the cake is done, take it out of the oven. Quickly invert it onto the prepared towel. Gently peel off the parchment paper. Starting from one short end, roll the cake up tightly with the towel. Let it cool completely in this rolled shape for about 30 minutes. - Beat cream cheese filling - Spread and re-roll cake before chilling In a mixing bowl, combine 1 cup of softened cream cheese, 1/4 cup of powdered sugar, and 1 teaspoon of fresh lemon juice. Beat the mixture until smooth and creamy. Once your cake has cooled, gently unroll it from the towel. Spread the cream cheese filling evenly across the cake. Carefully re-roll the cake without the towel. Make sure the seam side is down. Wrap it in plastic wrap and chill for at least 1 hour before serving. To ensure your spiced carrot cake roll bakes properly, follow these steps: - Preheat your oven to 375°F (190°C). This helps the cake rise well. - Line your jelly roll pan with parchment paper. Leave some paper overhang to help later. - Grease the parchment lightly. This will make it easy to lift the cake out. To test if the cake is done, use a toothpick: - Insert the toothpick into the center of the cake. - If it comes out clean, your cake is ready. If not, bake for a few more minutes. Rolling the cake can be tricky. Here are some tips to avoid cracks: - After removing the cake from the oven, invert it onto the prepared towel. Do this quickly to keep it warm. - Dust the towel generously with powdered sugar. This helps prevent sticking and cracking. - Start rolling from one short end. Roll it tightly but gently. This keeps the shape nice. Presentation adds charm to your dish. Here are some ideas: - Dust the top of the rolled cake with powdered sugar. This gives it a lovely finish. - For garnishes, consider using chopped pecans or walnuts. They add a nice crunch. - You can also add sweet carrot decorations or edible flowers for a fun touch. Pro Tips Ensure Even Grating: Use a box grater or food processor to finely grate the carrots for a smooth and even texture in your cake. Cooling with Towel: Dusting the kitchen towel with powdered sugar before rolling the cake helps prevent sticking and adds sweetness. Chill for Perfect Slices: Refrigerating the rolled cake for at least an hour allows the filling to set, making it easier to slice without squishing. Experiment with Spices: Feel free to adjust the spices in the cake to your preference; adding a pinch of cardamom or allspice can elevate the flavor profile. {{image_4}} You can swap out some ingredients for healthier options. Using applesauce instead of oil cuts fat and adds moisture. It keeps the cake soft and tasty. You can also use alternative sweeteners like honey or maple syrup. These add unique flavors while reducing refined sugar. Want to change up the flavor? Add raisins or nuts to the batter for a fun twist. Chopped walnuts or pecans give nice crunch. You can also play with spice blends. Try adding allspice or cardamom for a different taste. These spices can make your cake even more exciting. If you want a different filling, consider using mascarpone or Greek yogurt. Both will give you a rich and creamy texture. You can also flavor your cream cheese with vanilla, orange zest, or even coconut. These options add a fun twist to your cake roll. You can keep your spiced carrot cake roll in the fridge for about 3-4 days. To store it, wrap the roll in plastic wrap. This helps keep it moist and fresh. You can also place it in an airtight container for extra protection. Just remember to remove any nuts if you add them as a garnish before wrapping. If you want to save the cake roll for later, freezing is a great option. Slice it into pieces for easier thawing. Wrap each piece tightly in plastic wrap. Then, place them in a freezer-safe bag or container. This way, they stay tasty for up to 2-3 months. To thaw, take a piece out and leave it in the fridge overnight. This keeps the texture nice and soft. For leftovers, store them the same way as the whole roll. Just wrap any remaining pieces well. If you want to reheat, do it gently in the microwave. Heat for just a few seconds at a time, checking often. This way, you will avoid overcooking it. Enjoy each bite of your delicious carrot cake roll! A cake roll is a thin sheet of cake that is baked, rolled, and filled. It has a soft texture and is often filled with cream or fruit. A regular cake is thicker and baked in a pan without rolling. Cake rolls can be more delicate, while regular cakes are denser. Yes, you can make this recipe gluten-free. Use a gluten-free all-purpose flour blend instead of regular flour. This swap works well in most recipes. Be sure to check your other ingredients, too, as some may contain gluten. You can test if the cake is fully baked by inserting a toothpick into the center. If it comes out clean or with a few crumbs, the cake is done. It should spring back when lightly touched. If you see wet batter, it needs more time in the oven. You should grate fresh carrots for this recipe. Grating helps them cook evenly and blend into the batter. Whole carrots will not work well as they will not soften properly during baking. Use a box grater or food processor for the best results. To add more moisture, you can include crushed pineapple or applesauce. These ingredients help keep the cake moist. You could also try adding a bit more oil or yogurt to the batter. Just be cautious not to add too much, or it may change the cake's texture. This blog post shared a simple recipe for a delicious cake roll. We covered all the ingredients, both dry and wet, and the cream cheese filling that adds flavor. I explained the step-by-step process of baking and rolling the cake, plus tips for success. Remember, you can make fun variations and store leftovers easily. Baking can be a joy, so try this recipe and impress everyone with your skills. Enjoy each bite of your homemade cake roll!

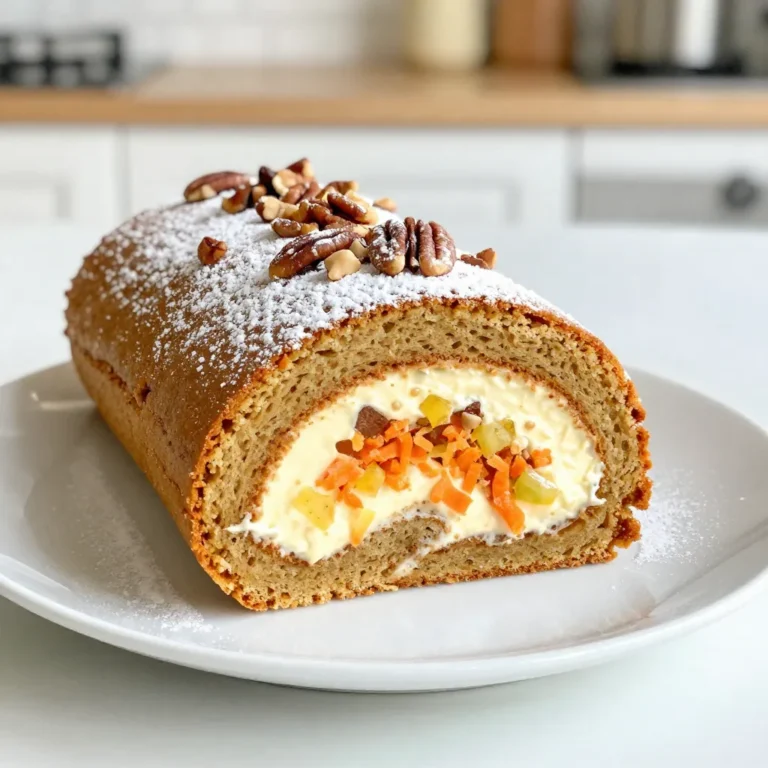
Spiced Carrot Cake Roll Delightful and Easy Recipe

- 2 medium chicken breasts, diced into bite-sized pieces - 2 cups fresh spinach, roughly chopped - 1 cup cherry tomatoes, halved - 3 cloves garlic, minced - 1 teaspoon Italian seasoning blend - 1/2 teaspoon red pepper flakes (optional for heat) - 3 tablespoons extra virgin olive oil - 1/2 cup heavy cream - Salt and freshly cracked pepper to taste - Grated Parmesan cheese for garnish You will need: - A large skillet - A cutting board - A sharp knife - A spatula or wooden spoon - Measuring spoons - A serving dish This recipe serves 2 people. Here’s the nutritional breakdown per serving: - Calories: 550 - Protein: 40g - Fat: 39g - Carbohydrates: 8g - Fiber: 2g - Net Carbs: 6g This dish is great for anyone on a keto diet. The high protein and healthy fats keep you full. Plus, the low carbs fit perfectly into your meal plan. Enjoy the mix of flavors while staying on track! {{ingredient_image_2}} 1. Heat 2 tablespoons of olive oil in a large skillet over medium heat. 2. Add diced chicken. Season with salt, pepper, and Italian seasoning. 3. Sauté chicken for 6-8 minutes until golden brown and cooked through. 4. Remove chicken from the skillet and set aside on a plate. 5. Add the last tablespoon of olive oil to the same skillet. 6. Toss in minced garlic and optional red pepper flakes. 7. Sauté for 1 minute until garlic is fragrant. 8. Add halved cherry tomatoes and cook for 2-3 minutes. 9. Add chopped spinach and stir until it wilts, about 1-2 minutes. 10. Reduce heat to low and pour in heavy cream. Stir well. 11. Bring the cream to a gentle simmer. 12. Return cooked chicken to the skillet. Stir to combine. 13. Simmer for an additional 2-3 minutes to meld flavors. 14. Taste and adjust seasoning with salt and pepper. 15. Remove from heat and serve immediately. 16. Garnish with freshly grated Parmesan cheese. - Prep time: 10 minutes - Total cooking time: 25 minutes - This recipe serves 2 people. Enjoy it as a main dish on a weeknight! To make this dish stand out, use fresh ingredients. Fresh spinach and ripe tomatoes bring great flavor. Cut the chicken into small pieces for even cooking. Make sure the skillet is hot before adding the chicken. This helps it brown nicely. Sauté the chicken until it's golden and no longer pink inside. Remove it from the skillet to keep it juicy. For extra flavor, use fresh garlic. It gives a nice kick to the dish. Adding red pepper flakes adds heat, but it's optional. You can also try fresh herbs like basil or parsley. They brighten the meal. Drizzling a bit of lemon juice before serving can enhance the taste. Finally, generous Parmesan cheese on top adds richness. Avoid crowding the skillet with chicken. This can cause steaming instead of browning. If you skip the resting time for chicken, it may dry out. Don’t overcook the spinach; it should just wilt. Lastly, taste your dish before serving to adjust salt and pepper. This ensures the best flavor. Pro Tips Perfectly Cooked Chicken: Ensure your chicken is cooked through by using a meat thermometer; it should read 165°F (75°C) in the thickest part. Fresh Spinach: Use fresh spinach for better flavor and texture; wilted or frozen spinach can make the dish watery. Customize the Heat: Adjust the amount of red pepper flakes based on your heat preference; start with a pinch and add more if you like it spicy. Serving Suggestions: Pair this dish with a side salad or cauliflower rice for a complete keto meal. {{image_4}} If you want to lower the carbs, swap heavy cream for unsweetened coconut milk. This change still gives a creamy texture while keeping it keto-friendly. You can also use cauliflower rice instead of traditional rice. It’s a great way to soak up the sauce. Feel free to add more veggies for extra flavor. Bell peppers, zucchini, or mushrooms work well here. You might like to include some cooked bacon for an extra crunch. Just sauté it before adding the chicken. This recipe is very flexible! For dairy-free options, use a non-dairy cream. Almond or cashew cream can replace heavy cream. If you're avoiding chicken, try shrimp or tofu. They absorb flavors well and provide a different protein source. Just make sure to adjust cooking times as needed. After enjoying your Keto Chicken Spinach Tomato Skillet, let it cool to room temp. Place leftovers in an airtight container. Store in the fridge for up to three days. Make sure to keep it sealed to keep flavors fresh. To reheat, use a skillet over medium heat. Add a splash of water or broth to keep it moist. Heat until warm, stirring often. You can also microwave it for 1-2 minutes. Make sure to check that it’s hot all the way through. If you want to freeze, place the cooled dish in a freezer-safe container. It can last up to three months. When ready to eat, thaw it in the fridge overnight. Reheat as mentioned above. Avoid refreezing after it has been thawed. A keto diet is low in carbs and high in fats. It helps your body enter a state called ketosis. In ketosis, your body burns fat for energy. This can lead to weight loss and more energy. You eat foods like meats, fish, eggs, nuts, and healthy fats. You avoid grains, sugar, and most fruits. It’s simple but needs careful planning. Yes, you can use frozen spinach or tomatoes. They are convenient and still healthy. Frozen spinach can be added directly to the skillet. Just make sure to drain excess water before cooking. Frozen tomatoes work well, too. They may change the texture, but the taste stays great. To make this dish dairy-free, swap heavy cream for coconut milk. Coconut milk gives a creamy texture without dairy. You can also use almond milk, but it may not be as creamy. Skip the Parmesan cheese or use a dairy-free cheese instead. This keeps the dish tasty and suitable for dairy-free diets. You can serve this dish with a fresh salad. A simple green salad with olive oil works well. You can also pair it with cauliflower rice. Cauliflower rice is low in carbs and adds a nice texture. For a heartier option, serve it with zucchini noodles. They soak up the sauce and make a filling meal. In this post, we explored making a Keto Chicken Spinach Tomato Skillet. We covered essential ingredients, cooking tools, and detailed steps. I shared time guides and serving sizes, along with key tips for success. Variations allow flexibility for diets, and proper storage helps keep leftovers fresh. Remember, cooking is a fun journey. Enjoy experimenting with flavors and adaptations to make this dish your own!

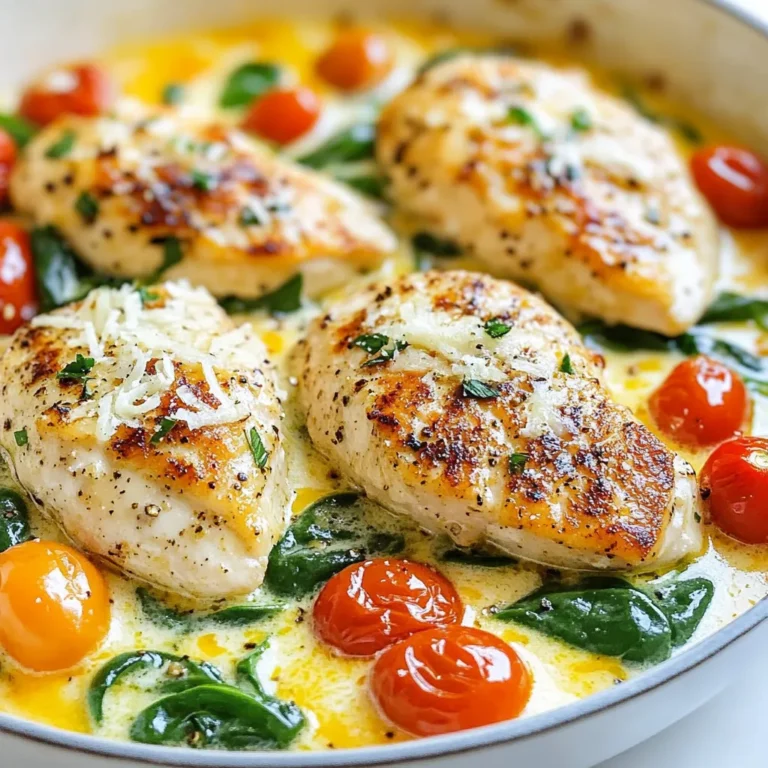
Keto Chicken Spinach Tomato Skillet Easy Weeknight Meal

- 4 boneless, skinless chicken breasts - 1 cup basmati rice - 2 cups chicken broth - 1 medium onion, finely chopped - 3 cloves garlic, minced - 1 lemon (juiced and zested) - 2 tablespoons olive oil - 1 tablespoon fresh thyme leaves (or 1 teaspoon dried thyme) - 1 tablespoon fresh parsley, chopped - 1 teaspoon dried oregano - Salt and pepper to taste - Optional: Lemon wedges and fresh herb sprigs for garnish To make lemon herb chicken and rice, you need simple, fresh ingredients. First, the chicken is key. Choose 4 boneless, skinless chicken breasts for a tender bite. Basmati rice provides a fluffy base. Use 1 cup for a filling side. The broth is vital. Two cups of chicken broth add flavor to the rice. Aromatics bring depth. One medium onion, finely chopped, and three cloves of minced garlic will do the trick. Now, let’s talk about the herbs. They make the dish shine. You’ll need fresh thyme leaves, fresh parsley, and dried oregano. If fresh thyme is not available, use dried thyme instead. Don’t forget the lemon! One fresh lemon gives zest and juice. Lastly, have salt and pepper on hand for seasoning. For extra flair, you can add optional garnishes like lemon wedges or fresh herb sprigs. These ingredients blend perfectly for a flavorful, zesty meal. Enjoy gathering them for your next cooking adventure! {{ingredient_image_2}} To make your chicken tasty, you need to marinate it well. Start by mixing olive oil, lemon juice, lemon zest, fresh thyme, dried oregano, salt, and pepper in a bowl. Whisk until everything blends nicely. Tips for Effective Marination - Use a glass or ceramic bowl for marinating. - Make sure all chicken pieces are coated. - Cover the bowl to keep the flavors in. Recommended Marination Times - Marinate at room temperature for at least 30 minutes. - For stronger flavor, refrigerate for up to 2 hours. Now that your chicken is marinated, it's time to cook. Heat a tablespoon of olive oil in a large skillet over medium heat. Take the chicken from the marinade, leaving behind any extra liquid. Place the chicken in the skillet. Searing Techniques - Cook each side for 5-7 minutes until golden brown. - Avoid moving the chicken too much while it cooks. Internal Temperature Guideline - Use a meat thermometer to check. - Chicken should reach 165°F for safety. While the chicken rests, focus on the rice. Use the same skillet to add your onions and garlic. Sautéing Aromatics - Cook for 3-4 minutes until the onions turn soft. - Stir often to keep garlic from burning. Cooking the Rice Perfectly - Add basmati rice to the skillet and stir for 1-2 minutes. - Pour in chicken broth and bring to a boil. - Once boiling, lower the heat, cover, and simmer for 15 minutes. Your chicken and rice are ready to come together. Fluffing the Rice - Use a fork to fluff the rice gently. - Taste the rice and adjust seasoning with salt and pepper if needed. Arranging the Dish - Slice the rested chicken and place it on the rice. - Sprinkle fresh parsley for color and flavor. Using Fresh vs. Dried Herbs I always recommend using fresh herbs when possible. Fresh thyme and parsley add a bright taste. If you only have dried herbs, that’s okay! Use less than you would with fresh. About a teaspoon of dried thyme works well. Adjusting Seasoning to Taste Taste your dish as you cook! Start with a little salt and pepper. You can always add more later. If you want more zing, a splash of lemon juice can help. This simple tip can make a big difference. Best Skillet for Searing A non-stick skillet is my go-to for searing chicken. It helps to prevent sticking and makes cleanup easier. Make sure it’s large enough to fit all the chicken breasts without crowding. Ideal Pot for Cooking Rice For cooking rice, use a heavy-bottomed pot with a lid. This helps the rice cook evenly. A pot that holds at least 2 quarts is a good choice. It gives the rice enough room to expand as it cooks. Garnishing Ideas Garnish your dish with lemon wedges and fresh herb sprigs. This adds color and makes the meal look fancy. A sprinkle of parsley over the chicken also adds a nice touch. Serving Suggestions Serve the chicken and rice on a large platter. This makes it easy for everyone to help themselves. For a fun twist, you can add a side salad or some steamed veggies. Pro Tips Marination Time Matters: Allowing the chicken to marinate for at least 1 hour enhances its flavor and tenderness. If time permits, marinate overnight in the refrigerator for the best results. Perfect Rice Every Time: Rinse the basmati rice under cold water before cooking to remove excess starch, which prevents it from becoming sticky and helps achieve fluffy grains. Use a Meat Thermometer: To ensure the chicken is cooked perfectly, use a meat thermometer to check that the internal temperature reaches 165°F. This prevents overcooking and keeps the meat juicy. Garnish for Flavor: Fresh herbs and lemon wedges not only add visual appeal but also enhance the dish’s flavor. Squeeze fresh lemon juice over the top just before serving for an extra zesty kick. {{image_4}} You can switch up the rice to make this dish even more exciting. Basmati rice is great, but wild rice adds a nutty flavor and chewy texture. Jasmine rice gives a sweet aroma and fluffy finish. Both options can work well with the lemon and herbs. If you want to try something different from chicken, there are great options available. Tofu is a fantastic choice for a plant-based meal. It soaks up flavors and adds protein. Fish, like salmon or tilapia, can also bring a nice touch. Just adjust the cooking time for fish to ensure it cooks through. Adding vegetables can take this dish to the next level. Try bell peppers, spinach, or peas for a colorful twist. You can also switch the herbs. Basil or cilantro can add a fresh taste. Feel free to mix and match to find your perfect flavor combo! To store leftovers, cool the lemon herb chicken and rice to room temperature. Place it in an airtight container. This keeps the dish fresh and prevents it from drying out. Store it in the fridge for up to three days. When you want to enjoy it again, check for any off smells or colors before eating. If you want to save the meal for later, freezing is a great option. First, let the chicken and rice cool completely. Then, divide them into portions. Use freezer-safe bags or containers for storage. Label each bag with the date. You can freeze the dish for up to three months. This way, you can enjoy a quick meal anytime! When you’re ready to eat, reheating properly ensures great taste and texture. For best results, use the microwave or stovetop. If using a microwave, cover the dish and heat in short bursts, stirring in between. Add a splash of chicken broth if it seems dry. On the stovetop, warm it gently over low heat. Stir frequently to heat evenly and avoid burning. Enjoy your flavorful meal just like it was freshly made! Yes, you can use brown rice. Just keep in mind that it takes longer to cook. Brown rice usually takes about 40-50 minutes. You will need to add more chicken broth, about 3 cups, to ensure it cooks well. Make sure to check for doneness before serving. To keep the chicken juicy, marinate it well. Use a mix of lemon juice, olive oil, and spices. This adds flavor and moisture. After cooking, let the chicken rest for a few minutes. This helps keep the juices inside. Serve it right away for the best taste. Leftovers can be stored in the fridge for 3-4 days. Keep them in an airtight container. If you want to store them longer, freeze them. They can last up to 3 months in the freezer. When ready to eat, reheat gently in the microwave or on the stove. In this post, we explored preparing a tasty chicken and rice dish. We covered essential ingredients, from chicken to herbs. I shared step-by-step instructions for marinating, cooking, and combining the flavors. Effective tips helped enhance taste and presentation. We looked at variations for different rice types and proteins, ensuring you can customize your meal. Finally, I provided storage and reheating advice to keep your dish fresh. With these insights, you can create a delicious and satisfying meal every time. Enjoy cooking and experimenting with flavors!

Lemon Herb Chicken and Rice Flavorful Dinner Idea

To make a tasty winter veggie pot pie, you need: - 1 tablespoon olive oil - 1 medium onion, finely diced - 2 cloves garlic, minced - 2 medium carrots, peeled and diced - 2 celery stalks, diced - 1 medium potato, peeled and cut into small cubes - 1 cup frozen peas - 1 cup butternut squash, peeled and diced - 1 teaspoon dried thyme - 1 teaspoon dried rosemary - 1 cup vegetable broth - 1 cup unsweetened almond milk (or regular milk) - 1 tablespoon cornstarch mixed with 2 tablespoons water (slurry) - Salt and freshly ground black pepper to taste - 1 sheet of puff pastry or a pie crust, thawed - 1 egg, beaten (for egg wash, optional) These ingredients create a hearty filling. They come together to warm you up on cold days. You can change things up with these optional ingredients: - Mushrooms for a rich flavor - Spinach or kale for added greens - Sweet potatoes for a sweeter taste - Peppers for color and crunch Feel free to swap or add vegetables based on what you have. This pot pie can be your canvas. Good seasoning makes a big difference. Here are some tips: - Use fresh herbs if you can find them. They add bright flavors. - A pinch of nutmeg gives warmth to the filling. - Try adding a splash of soy sauce for depth. - For a kick, a dash of hot sauce works well. Seasoning is key for making your winter veggie pot pie pop. Don’t be afraid to taste and adjust! {{ingredient_image_2}} First, gather all your ingredients. You will need: - 1 tablespoon olive oil - 1 medium onion, finely diced - 2 cloves garlic, minced - 2 medium carrots, peeled and diced - 2 celery stalks, diced - 1 medium potato, peeled and cut into small cubes - 1 cup frozen peas - 1 cup butternut squash, peeled and diced - 1 teaspoon dried thyme - 1 teaspoon dried rosemary - 1 cup vegetable broth - 1 cup unsweetened almond milk (or regular milk) - 1 tablespoon cornstarch mixed with 2 tablespoons water (slurry) - Salt and freshly ground black pepper to taste - 1 sheet of puff pastry or a pie crust, thawed - 1 egg, beaten (for egg wash, optional) Chop the veggies first. This makes cooking easier and faster. Dice the onion, garlic, carrots, celery, and potato. Set them aside. Heat your skillet over medium heat. Add the olive oil and let it warm up. Once hot, add the onion and garlic. Sauté until the onion is soft, about 3-4 minutes. Now, toss in the carrots, celery, and potato. Cook these for about 5-7 minutes. You want them to soften but not get mushy. After that, add the butternut squash and frozen peas. Sprinkle in the thyme and rosemary. Stir everything together for 2 more minutes. Next, pour in the vegetable broth and almond milk. Mix well and bring it to a gentle simmer. This should take about 2-3 minutes. Once simmering, stir in the cornstarch slurry. Keep stirring until the filling thickens, about 2 minutes. Taste it and add salt and pepper to your liking. Transfer the filling to a greased pie dish. Spread it evenly. Now, take your puff pastry or pie crust and cover the filling. Trim any excess from the edges. Cut slits in the top to let steam escape. If you want a shiny finish, brush the beaten egg over the pastry. This step is optional but adds a nice touch. Now, place the pot pie in your preheated oven at 400°F (200°C). Bake for 25-30 minutes. Keep an eye on it. You want the crust to be golden brown and puffed up. When it's done, remove the pot pie from the oven. Let it cool for a few minutes before serving. This helps the filling set. Enjoy your hearty winter veggie pot pie! To get that perfect golden crust, follow these simple steps. First, make sure your oven is preheated to the right temperature, 400°F (200°C). This heat helps the pastry rise and turn golden. Before baking, brush the top of the crust with beaten egg. This gives a nice shine and color. If you want a crispier crust, keep an eye on your pot pie. Bake it until it's puffed and golden brown, usually 25 to 30 minutes. You can easily make this pot pie vegan. Swap the butter or egg wash for plant-based milk. Use a vegan pie crust instead of puff pastry. For a gluten-free option, choose a gluten-free pie crust. Make sure to check all your ingredients, like vegetable broth and cornstarch, to ensure they are gluten-free. This way, everyone can enjoy your hearty dish. To enhance the taste of your winter veggie pot pie, think about adding fresh herbs. Fresh thyme or parsley can lift the flavors. You can also mix in a splash of soy sauce or nutritional yeast for a savory depth. Consider adding a pinch of smoked paprika or chili flakes if you like a bit of heat. These flavor boosters can make your pot pie stand out even more. Pro Tips Use Seasonal Veggies: Incorporate whatever seasonal vegetables you have on hand for the freshest flavors and textures. Thicken Wisely: If you prefer a thicker filling, increase the cornstarch slightly or allow the mixture to simmer longer before adding it to the pie crust. Golden Crust: For an extra golden crust, brush the puff pastry with a mixture of beaten egg and a splash of milk before baking. Rest Before Serving: Let the pot pie rest for about 10 minutes after baking to allow the filling to set, making it easier to serve. {{image_4}} You can swap in any veggies you love. For spring, try asparagus or peas. In summer, zucchini and bell peppers shine. Fall brings hearty roots like parsnips and sweet potatoes. Winter is perfect for kale or Brussels sprouts. Just remember to cut them small. This way, they cook evenly and blend well in the pie. Adding protein boosts the pie's heartiness. Firm tofu works great. Just cube it and sauté with the onions. Another option is lentils. Cook red or green lentils until soft, then mix them in. This adds texture and makes the dish filling. Both options keep the pot pie healthy and satisfying. You can choose different crusts for your pot pie. If you need gluten-free, look for almond or rice flour crusts. These give a nice crunch and flavor. Whole wheat crust is another option. It adds a nutty taste and more fiber. Feel free to experiment with store-bought or homemade crusts. Each choice changes the dish in fun ways. After you enjoy your pot pie, let it cool down first. Place any leftovers in an airtight container. This keeps the filling fresh and prevents the crust from getting soggy. You can store it in the fridge for up to three days. If you want to save it longer, freezing is a great option. To freeze your winter veggie pot pie, follow these steps: - Make sure the pot pie is completely cool. - Wrap it tightly in plastic wrap or aluminum foil. - Place it in a freezer-safe container or bag. This way, it can stay good for up to three months. When you want to eat it, thaw it in the fridge overnight before reheating. When you are ready to enjoy your pot pie again, reheat it in the oven. Preheat the oven to 350°F (175°C). Remove any plastic wrap or foil before placing it in the oven. Bake for about 20-25 minutes, or until it is heated through. This method keeps the crust crispy and the filling warm. If you are in a hurry, you can use a microwave, but the crust may not be as crispy. Enjoy your comforting meal! Yes, you can use fresh vegetables! Fresh veggies add great taste and texture. Just make sure to chop them into small pieces. This helps them cook evenly. You may need to adjust the cooking time slightly. Fresh carrots, peas, and butternut squash work well. The pot pie is done when the crust is golden brown. You should see the filling bubbling through the slits. Bake it for 25-30 minutes at 400°F (200°C). Keep an eye on it during the last few minutes. If the crust browns too fast, cover it with foil. Absolutely! You can make the filling a day early. Just cool it down and store it in the fridge. When you’re ready to bake, spread the filling in the pie dish. Then, add the crust and bake as usual. This saves time and keeps your meal stress-free. You now have all the tools to make a great winter veggie pot pie. We covered key ingredients, cooking steps, and tips for a golden crust. Don’t forget to explore variations for added fun. When you store leftovers, you help keep your dish fresh for later. I hope you feel inspired to create your own pot pie masterpiece. Enjoy the warm flavors and the smiles it brings!

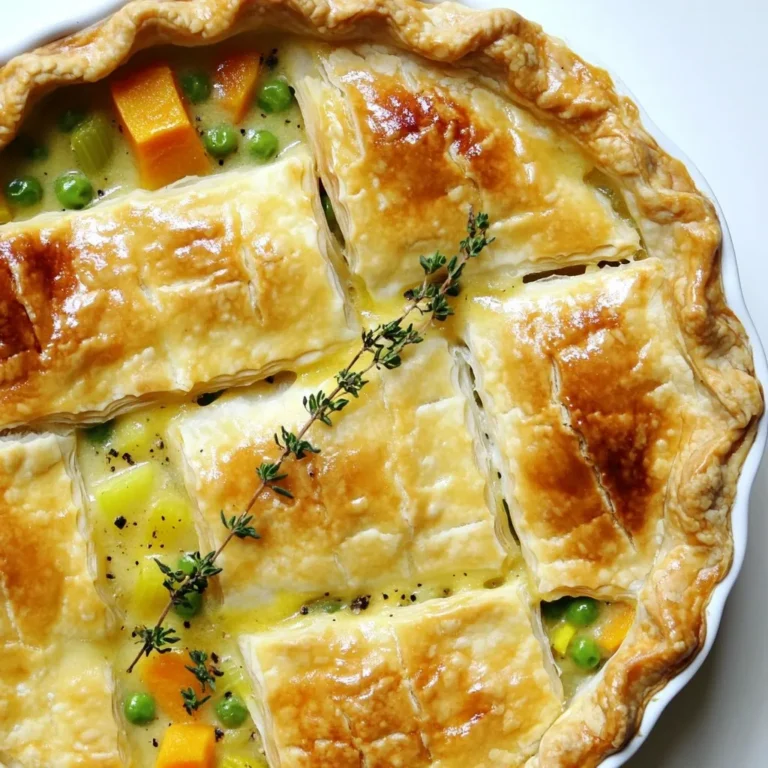
Winter Veggie Pot Pie Flavorful and Hearty Comfort Food

- 2 lbs Yukon Gold potatoes, peeled and cut into 1-inch cubes - 4 cloves garlic, minced finely - 1 cup heavy cream, warmed - 1 cup sharp cheddar cheese, freshly shredded - 1/2 cup cream cheese, softened to room temperature - 4 tablespoons unsalted butter - Sea salt and freshly cracked black pepper, to taste - 2 tablespoons fresh chives, finely chopped (for garnish) Choosing the right potatoes I love using Yukon Gold potatoes for this dish. They are creamy and buttery. Their smooth texture makes them perfect for mashing. You can also use Russets if you want fluffier potatoes. The importance of fresh garlic Fresh garlic adds a strong and rich flavor. I always use minced garlic for a bold taste. Avoid garlic powder, as it lacks depth. Fresh garlic enhances the comfort of these mashed potatoes. Cheese options for different flavors Sharp cheddar gives a tangy kick. For a milder taste, use mild cheddar. You can also try gouda or pepper jack for a fun twist. Mixing different cheeses can add layers of flavor and richness. {{ingredient_image_2}} To start, peel and cut 2 pounds of Yukon Gold potatoes into 1-inch cubes. This size helps them cook evenly. Place the potatoes in a large pot and cover them with cold water. Add a generous pinch of sea salt for flavor. Bring the pot to a boil over medium-high heat. Once it boils, lower the heat to medium and let the potatoes simmer gently. Cook for about 15 to 20 minutes. You want them tender, so a fork should glide through easily. While the potatoes cook, prepare the garlic butter. In a small saucepan, melt 4 tablespoons of unsalted butter over medium heat. Add 4 cloves of minced garlic to the melted butter. Sauté gently for 2 to 3 minutes, just until the garlic smells good but isn’t brown. This step adds a rich garlic flavor to the butter. Remove it from heat and set aside. After draining the cooked potatoes, return them to the pot. Let them sit for a minute to steam off any extra moisture. Then, mash the potatoes using a potato masher or a sturdy fork until smooth and creamy. Pour in 1 cup of warmed heavy cream and 1/2 cup of softened cream cheese. Add the sautéed garlic butter as well. Mix everything together until it is luxuriously creamy. Now, fold in 1 cup of freshly shredded sharp cheddar cheese. Stir until it melts and combines well. Taste and adjust with sea salt and freshly cracked black pepper. Transfer your cheesy garlic mashed potatoes to a warm serving bowl. Finish with a sprinkle of finely chopped chives for color and flavor. Enjoy! To achieve creaminess, focus on Yukon Gold potatoes. They have a buttery texture that makes for smooth mashed potatoes. Cook them just right, so they stay tender. Overcooking can lead to a watery texture. To avoid lumps in mashed potatoes, ensure you mash them while hot. Use a potato masher or a sturdy fork. If you prefer a silky finish, try a ricer. Gradually mix in the cream and cheese. This helps create that dreamy, creamy consistency. Spices and herbs add depth to your mashed potatoes. Garlic is a star in this dish. For extra flavor, consider adding black pepper, paprika, or even a pinch of nutmeg. Fresh herbs like parsley or thyme can brighten the dish. For cheese options, sharp cheddar is a classic choice. If you want a different flavor, try Gruyère or pepper jack. Each cheese brings a unique taste that can change the whole dish. Choose a warm serving bowl for your cheesy garlic mashed potatoes. A shallow bowl allows for better presentation. This also helps keep them warm longer. Garnishing with chives adds color and flavor. You can also sprinkle extra cheese or crispy bacon bits for a fun twist. Make your dish stand out by layering flavors and textures. Pro Tips Choose the Right Potatoes: Yukon Gold potatoes are ideal for creamy mashed potatoes due to their buttery flavor and smooth texture. Avoid waxy potatoes as they can lead to a gluey consistency. Infuse the Cream: Warm the heavy cream before adding it to the potatoes. You can even infuse it with herbs or spices during warming for an extra flavor boost. Don't Overmix: Once you add the cheese and cream, mix just until combined. Overmixing can make your mashed potatoes gummy instead of fluffy. Serve Warm: Mashed potatoes can cool quickly, so serve them immediately after preparation. If needed, keep them warm in a low oven, covered, until ready to serve. {{image_4}} You can make cheesy garlic mashed potatoes healthier by choosing low-fat dairy. Use low-fat cream cheese and milk instead of heavy cream. This swap cuts calories but keeps the creaminess. Adding veggies boosts the nutrition. Try mixing in steamed broccoli or spinach. Both add color and vitamins to your dish. To change the taste, add herbs like rosemary or thyme. These herbs bring a fresh flavor that pairs well with garlic. For a spicy kick, mix in chopped jalapeños or use pepper jack cheese. This will give your mashed potatoes a fun heat that many enjoy. Seasonal changes can make your dish exciting. Roasted garlic adds depth and sweetness. Caramelized onions give a nice, rich flavor, too. Using sweet potatoes gives a twist to the classic recipe. They add a subtle sweetness that balances well with garlic. To keep your cheesy garlic mashed potatoes fresh, store them properly. After your meal, let the leftovers cool down. Then, place them in an airtight container. They will last in the fridge for about three to five days. If you want to keep them longer, freezing is a great option. - For freezing, use a freezer-safe container or heavy-duty freezer bags. - Label the bags with the date for easy tracking. - They can last up to three months in the freezer. When it’s time to enjoy your leftovers, reheating them the right way is key. You want to keep them creamy and delicious. - Oven Method: Preheat your oven to 350°F (175°C). Place the mashed potatoes in an oven-safe dish. Cover it with foil to prevent drying out. Heat for about 20-30 minutes, stirring halfway through. - Microwave Method: Scoop a portion into a microwave-safe bowl. Add a splash of milk or cream for moisture. Heat in short bursts, around 30 seconds each, stirring in between. This helps keep the texture smooth. These methods ensure your cheesy garlic mashed potatoes taste just as good as when you first made them. How do I make my mashed potatoes less sticky? To avoid sticky potatoes, choose Yukon Gold or Russet potatoes. These types have more starch, which helps keep them fluffy. After boiling, make sure to drain them well. Let them steam for a moment before mashing. This step helps remove extra moisture. Can I prepare cheesy garlic mashed potatoes in advance? Yes, you can make these mashed potatoes ahead of time. Prepare them as directed, then store them in the fridge. When ready to serve, reheat gently on the stove or in the oven. Stir in a little extra cream if they seem dry. What type of potatoes are best for mashing? Yukon Gold potatoes are the best choice for mashing. They have a creamy texture and rich flavor. Russet potatoes also work well, but they can be a bit drier. If you prefer a mix, you can use both types together. What can I substitute for heavy cream? You can use whole milk or half-and-half instead of heavy cream. For a lighter option, use low-fat milk. Just note that the texture may be less creamy. You can also add a bit of butter to enhance the richness. Is there a dairy-free option for this recipe? Yes, you can make a dairy-free version. Use almond milk or coconut milk in place of heavy cream. For cheese, try a dairy-free cheese alternative. You can also use vegan butter for a full dairy-free dish. What main dishes pair well with cheesy garlic mashed potatoes? These mashed potatoes go well with many main dishes. They are great with roasted chicken, beef, or pork. You can also serve them alongside grilled vegetables for a lighter meal. How to elevate the dish for special occasions? To make this dish special, try adding truffle oil or sautéed mushrooms. You can also mix in some crispy bacon bits or caramelized onions. For a fancy touch, serve them in individual ramekins garnished with fresh herbs. In this article, we covered how to make cheesy garlic mashed potatoes. We looked at key ingredients, cooking steps, and tips for perfect texture and flavor. You can use Yukon Gold potatoes and fresh garlic for the best taste. Adding cheese enhances flavor, while healthy options can fit your needs. Don’t forget about storage and reheating tips for your leftovers. Now, you can create a delicious side dish that impresses everyone at your table. Enjoy your cooking adventure and make these mashed potatoes your own!

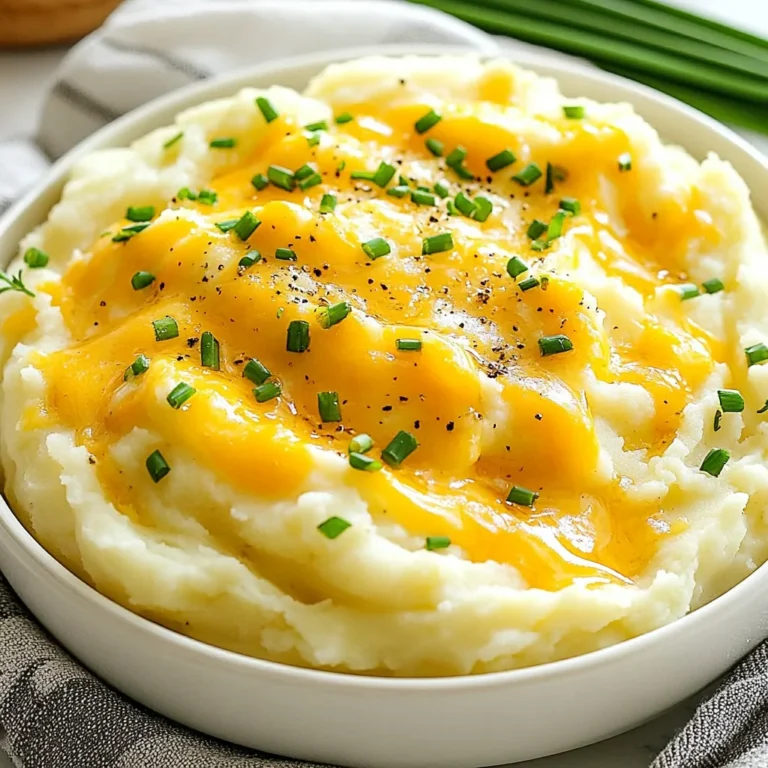
Cheesy Garlic Mashed Potatoes Creamy and Comforting Dish

- 6 medium russet potatoes, peeled and cut into 1-inch cubes - 1 medium onion, finely diced - 3 cloves of garlic, minced - 4 cups of low-sodium vegetable broth - 1 cup of unsweetened almond milk (or your choice of low-calorie milk alternative) - 1 cup of frozen corn kernels - 1 teaspoon of dried thyme - 1 teaspoon of smoked paprika - Sea salt and freshly ground black pepper, to taste - 2 green onions, thinly sliced (for garnish) - Fresh parsley, roughly chopped (for garnish) You can make this soup your own! Here are a few ideas: - For a spicy kick, add a pinch of cayenne pepper. - Swap almond milk for coconut milk for a tropical twist. - Add cooked bacon bits for a savory bite. - Toss in diced carrots for extra color and nutrients. - Replace russet potatoes with sweet potatoes for a sweeter taste. This soup is not just tasty; it's also nutritious! Here’s a quick look: - Calories per serving: About 150 - Protein: 4g - Carbohydrates: 30g - Fat: 2g - Fiber: 4g - Sodium: 300mg This soup packs flavor without heavy calories. Perfect for a warm lunch or dinner! Enjoy this creamy, satisfying dish, knowing it's also good for you. {{ingredient_image_2}} Start by peeling and cutting the potatoes into 1-inch cubes. Next, finely dice the onion and mince the garlic. Place all these ingredients into the slow cooker. Add the frozen corn evenly on top. This mix brings great flavor and texture. Now, pour in 4 cups of low-sodium vegetable broth. This broth gives the soup depth. Add 1 cup of unsweetened almond milk for creaminess. Next, sprinkle in 1 teaspoon of dried thyme and 1 teaspoon of smoked paprika. Don’t forget to season with sea salt and freshly cracked black pepper to taste. Cover the slow cooker with its lid. Set it to cook on low for 6 to 8 hours. If you are in a hurry, cook it on high for 3 to 4 hours. Stir occasionally, if you can. This helps mix the flavors well. The potatoes should be fork-tender when done. Once the cooking time is up, grab an immersion blender. Blend the soup directly in the slow cooker. You can blend it until smooth or leave some chunks for texture. If you prefer a chunkier soup, blend only half of it. This gives a nice contrast in every bite. After blending, taste the soup. This is the moment to adjust the flavors. Add more salt or pepper if needed. Each bite should feel balanced and just right. This step makes a big difference in how your soup will taste. For the best texture, blend only half the soup. This keeps some potato chunks. You can also use an immersion blender for smoothness. If you want a thicker soup, add less broth at first. If it’s too thick, add more broth slowly until it feels just right. Garnishes make your soup pop. I love using sliced green onions for a fresh bite. Fresh parsley adds color and flavor too. For a creamy touch, drizzle a little almond milk on top. You can even sprinkle a bit of smoked paprika for an extra kick. One common mistake is overcooking the potatoes. Check them after 6 hours on low. If they are fork-tender, it’s time to blend. Another mistake is skipping the seasoning. Taste as you go, and adjust salt and pepper. This will bring out the soup's best flavors. Pro Tips Choose the Right Potatoes: Russet potatoes are ideal for this soup as they become creamy when cooked. If you prefer a different flavor, try Yukon Gold potatoes for a buttery taste. Customize the Creaminess: For a richer soup, you can add a splash of heavy cream or a dollop of Greek yogurt after blending. To keep it skinny, stick with almond milk. Add More Veggies: Enhance the nutritional value by incorporating additional vegetables like carrots, celery, or bell peppers. Just chop them finely and add them in at the beginning. Perfect Storage: This soup freezes beautifully! Store in airtight containers for up to 3 months. Just reheat on the stove, adding a bit more broth if needed to adjust the consistency. {{image_4}} To make this soup vegan, simply use vegetable broth and almond milk. These ingredients keep it creamy and rich without any dairy. You can also add more veggies like carrots or celery for added flavor and nutrients. If you want a low-carb soup, swap potatoes for cauliflower. Cauliflower gives a smooth texture without the carbs. You can follow the same steps in the recipe. Just make sure to adjust cooking time since cauliflower cooks faster than potatoes. You can play with the ingredients to suit your taste. For example, use garlic powder instead of fresh garlic. If you don’t have almond milk, any low-calorie milk works well. You can also add spices like cumin for a different flavor kick. After enjoying your delicious soup, let it cool down first. Pour any leftovers into an airtight container. This keeps the soup fresh. Store it in the fridge for up to five days. Make sure you label the container with the date. This helps you remember when you made it. Freezing this potato soup is easy and smart. Use freezer-safe bags or containers. Leave some space at the top for expansion. The soup can freeze well for up to three months. When ready to eat, thaw it in the fridge overnight. This keeps the flavor and texture intact. Reheating your soup is simple. You can use the microwave or the stove. If using a microwave, heat in short bursts. Stir after each burst to avoid hot spots. On the stove, pour the soup into a pot. Heat over low to medium heat, stirring often until warm. Add a splash of almond milk if it seems thick. To add heat, try using cayenne pepper. Start with a small amount, about 1/4 teaspoon. You can adjust it based on your taste. Another option is to add chopped jalapeños or a splash of hot sauce. These will give the soup a nice kick without overpowering the other flavors. Yes, you can! While russet potatoes give a great texture, you can use Yukon Gold or red potatoes. These types will add a different flavor and creaminess. Just remember to cut them into 1-inch cubes for even cooking. This soup can last up to five days in the fridge. Just make sure to store it in an airtight container to keep it fresh. When ready to eat, reheat it on the stove or in the microwave until warm. This blog post covered everything you need for a great soup. We explored main ingredients, optional add-ins, and nutrition facts. Step-by-step instructions guided you through preparation and cooking. Tips helped you perfect texture and avoid common mistakes. We also shared variations for different diets and storage methods to keep leftovers fresh. In conclusion, follow these steps, and enjoy your homemade soup. It can warm your days and satisfy your taste buds!

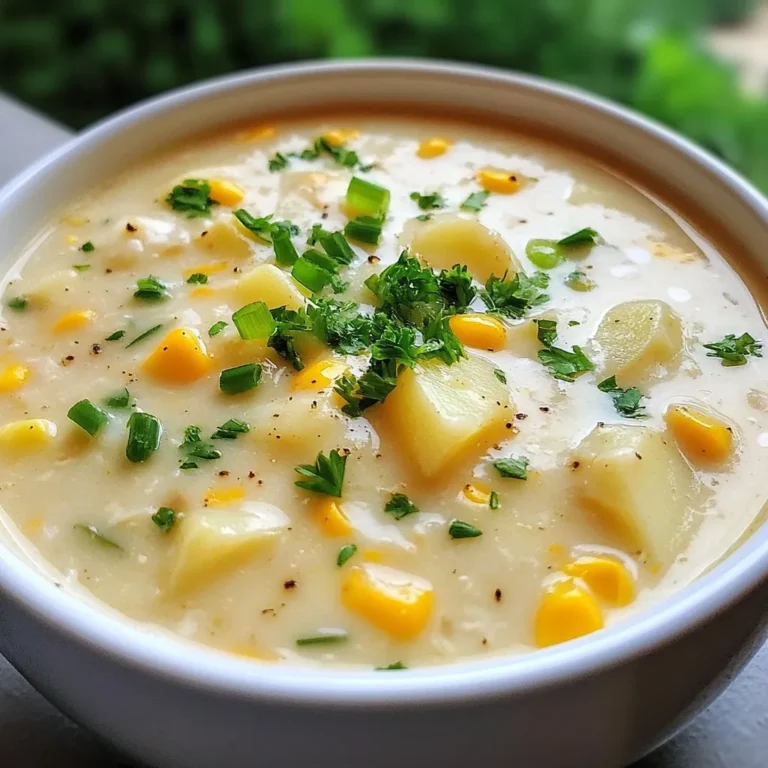
Skinny Slow Cooker Potato Soup Creamy and Satisfying

- 2 boneless, skinless chicken breasts, cubed - 2 cups fresh broccoli florets - 1 cup quinoa, rinsed - 2 tablespoons olive oil, divided - 3 cloves garlic, minced - 1 tablespoon fresh ginger, finely grated - 3 tablespoons low-sodium soy sauce - 1 tablespoon honey - 1 teaspoon sesame oil - Salt and pepper to taste - 1 teaspoon sesame seeds, for garnish - 2 green onions, thinly sliced, for garnish - Bell peppers for a pop of color - Carrots for sweetness and crunch - Spinach for extra greens - Crushed peanuts for added texture - Chicken: Packed with protein, it helps build and repair muscles. - Broccoli: Full of vitamins C and K, it supports your immune system and bone health. - Quinoa: A great grain that provides fiber and essential amino acids for energy. - Olive Oil: Contains healthy fats which promote heart health and reduce inflammation. - Garlic: Known for its antioxidant properties, it boosts your immune system. - Ginger: Aids digestion and adds a spicy kick to your meal. - Soy Sauce: Adds flavor while being low in calories. - Honey: A natural sweetener that can help soothe sore throats. - Sesame Oil: Rich in antioxidants, it enhances heart health. - Green Onions: Provide a fresh taste and are low in calories. - Sesame Seeds: High in calcium, they support bone health. These ingredients work together to create a meal that is not just tasty but also full of nutrients. Each bite gives you a boost of energy and health benefits. {{ingredient_image_2}} Start by rinsing 1 cup of quinoa in cold water. This removes any bitterness. Use a fine-mesh sieve for this step. In a medium saucepan, mix the rinsed quinoa with 2 cups of water. Bring this to a boil over high heat. After it boils, reduce the heat to low. Cover the pot and let it simmer for 15 minutes. The water should fully absorb. Then, take it off the heat and let it sit for another 5 minutes. Fluff the quinoa gently with a fork and set it aside. While your quinoa cooks, heat 1 tablespoon of olive oil in a large skillet over medium heat. Add 2 cubed chicken breasts to the skillet. Season the chicken with salt and pepper. Cook the chicken for 5 to 7 minutes. Stir occasionally until it turns golden brown and is cooked through. Once your chicken is nearly done, push it to one side of the skillet. Add another tablespoon of olive oil to the pan. Then, add 3 minced garlic cloves, 1 tablespoon of finely grated ginger, and 2 cups of broccoli florets. Sauté these together for 4 to 5 minutes. Stir often until the broccoli is tender but still bright green. In a small bowl, whisk together 3 tablespoons of low-sodium soy sauce, 1 tablespoon of honey, and 1 teaspoon of sesame oil. Once mixed well, pour this sauce over the chicken and broccoli in the skillet. Stir to coat everything evenly. Let it cook together for an extra 2 minutes so the flavors meld nicely. To assemble your bowls, divide the fluffy quinoa among four serving bowls. Top each bowl generously with the savory chicken and broccoli mixture. Finish the bowls by sprinkling 1 teaspoon of sesame seeds on top. Add sliced green onions for a fresh touch. Serve these bowls hot for a delightful meal! Enjoy the mix of flavors and textures in every bite. The best way to cook chicken for this dish is pan-searing. This method gives you a nice golden crust. Use medium heat and add oil to the pan. Season the chicken with salt and pepper. Cook for 5-7 minutes until it is golden brown and fully cooked. For extra flavor, you can marinate the chicken in soy sauce before cooking. This adds a nice depth to the dish. To cook broccoli so it stays bright green, steam it lightly. Add the florets to boiling water for just 2-3 minutes. Then, transfer them to ice water. This method keeps the color and crunch. If you sauté the broccoli, do it quickly. Add it to the pan when the chicken is almost done. Cook it for 4-5 minutes with garlic and ginger for great taste. You can change the sauce to suit your taste. For a spicy kick, add red pepper flakes. If you like it sweet, use more honey or maple syrup. Add lime juice for a tangy twist. If you want a nutty flavor, mix in some peanut butter. Try different sauces, like teriyaki or hoisin, to keep things exciting. Pro Tips Use Fresh Ingredients: Always opt for fresh broccoli and high-quality chicken to enhance the flavor and nutritional value of your dish. Perfectly Cooked Quinoa: Ensure you rinse the quinoa thoroughly to remove bitterness and let it sit covered after cooking to achieve a fluffy texture. Adjust the Sauce: Feel free to modify the soy sauce and honey ratio based on your taste preference, adding more honey for sweetness or soy sauce for saltiness. Meal Prep Friendly: This dish can be made in advance and stored in the fridge for up to three days. Just reheat before serving! {{image_4}} You can easily make a vegetarian version of this meal. Substitute chicken with firm tofu. Press the tofu to remove excess water, then cube it. Cook the tofu until golden brown, just like the chicken. You can also add more veggies, like bell peppers or carrots, to boost flavor and nutrition. This dish is nearly gluten-free! Just replace low-sodium soy sauce with tamari. Tamari is a gluten-free soy sauce alternative. Ensure that all other ingredients are also gluten-free. This way, you can enjoy your bowls without worry. If you want to switch up proteins, try shrimp or tempeh. Shrimp cooks quickly and adds a nice seafood flavor. If you choose tempeh, slice it thinly and sauté it just like chicken. Both options keep the dish tasty and satisfying while adding variety. After making your Chicken & Broccoli Bowls, let them cool down. Place leftovers in an airtight container. These bowls will stay fresh in the fridge for up to three days. Make sure to separate the chicken, broccoli, and quinoa if possible. This helps keep the texture nice when you reheat them. To reheat your bowls, the microwave is a quick option. Put your bowl in and heat for about 1-2 minutes. Stir halfway through to heat evenly. You can also use a skillet on low heat. Add a little water or oil to keep everything moist. Heat for about 5 minutes, stirring often. This will keep the chicken tender and the broccoli bright. You can freeze your Chicken & Broccoli Bowls too! Just cool them completely first. Use freezer-safe containers or bags. These bowls can last up to three months in the freezer. When you're ready to eat, thaw them overnight in the fridge. Then reheat using the tips above. This way, you can enjoy a healthy meal anytime! Yes, you can use frozen broccoli. It is quick and easy. Just add it to the pan directly. Cook it for a few extra minutes. This way, you still get the crunch and color. The taste remains delicious and nutritious. If you don't have quinoa, use brown rice or couscous. Both options are great. They add texture and flavor. Brown rice gives a nutty taste. Couscous cooks fast and is fluffy. You can also try farro for a different texture. To lower the calories, use less oil and soy sauce. You can also skip the honey. Add more veggies to fill your bowl. This keeps the meal satisfying without extra calories. Yes, meal prepping is a smart choice! Cook everything ahead of time. Store the chicken, broccoli, and quinoa in separate containers. This helps keep them fresh. When you’re ready to eat, just mix and enjoy! This article covered a tasty quinoa bowl recipe. We explored key ingredients and their health benefits. You learned step-by-step cooking tips, from chicken prep to sauce making. We shared variations for different diets and storage tips for leftovers. Remember, cooking can be fun and easy! Feel free to customize these bowls to your taste. Try meal prepping for quick lunches. Enjoy your cooking adventure!

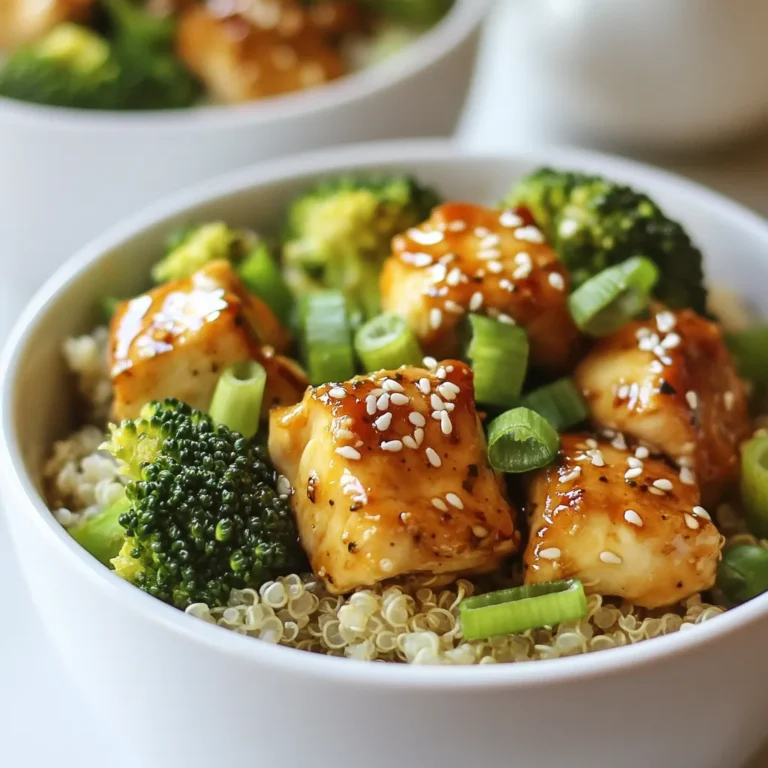
Chicken & Broccoli Bowls Simple and Nutritious Meal

PREV 1 … 38 39 40 … 47 NEXT
meal plan mapper

explore

DessertsDinnerAppetizersDrinks

Our Policies

  • Cookie Policy
  • Copyright Policy
  • Disclaimer
  • GDPR Policy
  • Terms Of Use
Back to Top
  • About
  • Contact Us
  • Privacy Policy
© 2025 meal plan mapper