FREE DINNER EBOOK! Get your copy!
  • Cookie Policy
  • GDPR Policy
  • Disclaimer
  • Terms Of Use
  • Visit my other site: Fun Cookie Recipes
meal plan mapper
  • Home
  • Dinner
  • Desserts
  • Drinks
  • Appetizers
  • Contact
  • About
  • Privacy Policy
  • Home
  • Dinner
  • Desserts
  • Drinks
  • Appetizers
  • Contact
  • About
  • Privacy Policy
  • Cookie Policy
  • GDPR Policy
  • Disclaimer
  • Terms Of Use
Visit my other site: Fun Cookie Recipes

HOME / CATEGORIES /

Latest

- 1 pound ground beef (or ground turkey) - 1 cup creamy ricotta cheese - 1/2 cup finely grated Parmesan cheese In this dish, the main ingredients create a rich and satisfying base. The ground beef or turkey brings protein and flavor. I prefer using ground beef for its juiciness, but turkey is a great low-calorie choice. Ricotta cheese adds creaminess and moisture. It ensures that the meatballs stay tender. Parmesan cheese gives a nice salty kick and depth of flavor. - 1/4 cup almond flour - Alternative options For a low-carb option, I use almond flour. It binds the meatballs without adding many carbs. If you want alternatives, you can try coconut flour or crushed pork rinds. Both options work well but may change the taste slightly. - 2 cloves garlic, minced - 1 teaspoon dried oregano - 1 teaspoon dried basil - Salt and freshly cracked black pepper to taste - 1/4 cup fresh parsley, chopped (for garnish) Seasoning is key to flavor. I like to add minced garlic, oregano, and basil. These herbs bring a classic Italian taste to the meatballs. Don't forget salt and pepper! They enhance all the flavors. For garnish, fresh parsley not only looks good but adds a fresh taste. It brightens the dish and makes it more appetizing. {{ingredient_image_2}} First, preheat your oven to 400°F (200°C). This step ensures your meatballs cook evenly and quickly. While the oven heats, prepare your baking sheet. Line it with parchment paper. This will help with cleanup and prevent sticking. Next, grab a large mixing bowl. In this bowl, combine the ground beef or turkey, creamy ricotta cheese, and finely grated Parmesan cheese. Add the almond flour, minced garlic, and the beaten egg. Then, sprinkle in the dried oregano and basil. Don’t forget a good pinch of salt and pepper. When mixing, use your hands. This helps you feel the texture. Mix until everything is just combined. Be careful not to overmix. Overmixing can make the meatballs tough. Now, scoop out portions of the mixture. Roll them into meatballs about 1.5 inches wide. Place each meatball on the prepared baking sheet. Make sure to leave space between them. This helps them cook evenly. Bake the meatballs in the preheated oven for 20-25 minutes. They should be cooked through and golden brown on the outside. While they bake, you can heat the marinara sauce in a saucepan. Stir it occasionally until it warms up. Once the meatballs are done, gently add them to the sauce. Let them simmer together for about 5 minutes. This allows the meatballs to soak up the rich sauce flavor. Serve them hot, and enjoy the delicious taste! To get soft and juicy meatballs, do not overmix the ingredients. When you combine the meat, cheeses, and seasonings, use your hands gently. This keeps the meatballs tender. Aim for a mix that is just combined. You want a nice balance between moist and firm. The right amount of almond flour helps hold everything together without making them dry. Getting the flavors right is key. Use a balanced mix of garlic, oregano, and basil. A teaspoon of each works well. These herbs add a great taste without being too strong. When you add the marinara sauce to the meatballs, let them simmer together. This allows the meatballs to soak up the sauce’s flavors. It makes a big difference to how tasty they are when served. How you plate the meatballs can impress your guests. Start by placing them in a shallow bowl. Pour warm marinara sauce over them for a nice look. For a gourmet touch, add extra grated Parmesan on top. Finally, sprinkle fresh parsley for color. This makes your dish not only tasty but also beautiful to see. Pro Tips Use Fresh Herbs: Fresh parsley, basil, or oregano can elevate the flavor of your meatballs significantly compared to dried herbs. Monitor Baking Time: Keep an eye on the meatballs towards the end of the baking time to prevent overcooking and drying them out. Experiment with Sauces: Try different types of marinara or even a creamy Alfredo sauce for a unique twist on serving your meatballs. Chill the Mixture: If you have time, chill the meatball mixture for about 30 minutes before baking for firmer meatballs that hold their shape better. {{image_4}} If you want to switch things up, try turkey meatballs. Ground turkey offers a leaner option. It still holds flavor well and keeps the meatballs juicy. If you prefer a plant-based choice, consider vegan meatballs. Use lentils or chickpeas as a base. You can mix them with ricotta for creaminess. This change adds a fun twist to the dish. You can vary the cheese in your meatballs. Substitute ricotta with cottage cheese for a different taste. Cream cheese works well too, adding richness. For a unique flavor, try goat cheese. Mixing different herbs can also change the game. Try thyme for a fresh twist or rosemary for earthiness. Experimenting with herbs adds depth to each bite. You can choose between homemade and store-bought sauces. Making your own gives you control over the ingredients. However, many store-bought sauces are tasty and convenient. Just check for sugar-free options. Brands like Rao's and Primal Kitchen offer great low-carb choices. These sauces pair well with the meatballs and keep your meal low in carbs. To store your low carb ricotta meatballs, start by letting them cool down. Once they are cool, place them in an airtight container. They will last in the fridge for about three days. If you want to keep them longer, freezing is a great option. For freezing, wrap each meatball in plastic wrap, then place them in a freezer-safe bag. They can stay frozen for up to three months without losing flavor. When reheating your meatballs, the best method is to use the oven or stovetop. If using the oven, set it to 350°F (175°C) and place the meatballs on a baking sheet. Heat them for about 15 minutes. If using the stovetop, place the meatballs in a pan with a bit of marinara sauce. Heat on medium until warmed through. To keep the texture nice, avoid microwaving, as it can make them rubbery. These meatballs are perfect for meal prep! You can make a big batch and use them in various ways. Try adding them to salads, wraps, or even zoodles (zucchini noodles). Portion the meatballs into single servings. This way, you can grab a meal when you need it. With these easy steps, your low carb ricotta meatballs will be ready to enjoy anytime. Yes, ricotta cheese is very versatile. You can use it in many ways: - Lasagna: Spread it between layers for added creaminess. - Pasta dishes: Mix it into sauces for a rich texture. - Desserts: Blend it into cheesecake or pancakes for a protein boost. - Dips: Combine with herbs and spices for a tasty spread. To check if your meatballs are done, use a meat thermometer. The internal temperature should reach 160°F (71°C) for beef or turkey. If you don't have a thermometer, cut one open. The meat should be brown inside, with no pink. You can serve these meatballs with many great sides: - Zucchini noodles: A low-carb alternative to pasta. - Cauliflower rice: Another healthy side that pairs well. - Salad: A fresh green salad balances the meal. - Roasted vegetables: Try bell peppers, broccoli, or asparagus. Pairing ideas: - For a full low-carb meal, combine meatballs with marinara sauce and a side of zucchini noodles. - Serve meatballs over a bed of fresh spinach for a delicious twist. You learned how to make delicious low-carb ricotta meatballs. We covered key ingredients like ground beef, cheeses, and low-carb flours. You also learned to prep your oven, mix ingredients, and form perfect meatballs. Remember, tips on texture and flavor can make your dish shine. Don’t forget to explore different protein options and sauces. Storing and reheating meatballs correctly ensures great taste later. By following these steps, you can enjoy satisfying meals while keeping carbs low. Now, it’s time to enjoy your culinary creations!

Low Carb Ricotta Meatballs Flavorful Low-Carb Dish

- Chicken 1 lb boneless, skinless chicken thighs, cut into bite-sized pieces - Coating ingredients - 1/2 cup cornstarch - 1/4 cup all-purpose flour - 2 large eggs, beaten - Sauce ingredients - 1 teaspoon fresh ginger, minced - 1 teaspoon garlic, minced - Juice and zest of 1 large orange - 1/4 cup soy sauce - 1/4 cup granulated sugar - 2 tablespoons rice vinegar - 1 teaspoon sesame oil - 1/2 teaspoon red pepper flakes (adjust according to spice preference) - Green onions 2 green onions, finely chopped (for garnish) - Sesame seeds Sesame seeds (for garnish) {{ingredient_image_2}} First, mix cornstarch and flour in a bowl. This will make a great coating. Take each piece of chicken and dip it in beaten eggs. Make sure it is well-coated. Then, roll it in the cornstarch-flour mix. This will give your chicken a crispy texture. After coating, set the chicken aside on a plate while you heat the oil for frying. Next, heat the vegetable oil in a large pan over medium-high heat. When the oil is hot and shimmering, add the coated chicken pieces. Fry them in batches. Avoid overcrowding the pan. Fry each batch for about 5 to 7 minutes. You want them golden brown and cooked through. Once done, remove the chicken and let it drain on paper towels. Now, it's time to sauté the aromatics. In a separate pan, add minced ginger and garlic over medium heat. Sauté for about 30 seconds. You want to smell that wonderful fragrance but be careful not to burn them. For the orange sauce, combine fresh orange juice, orange zest, soy sauce, sugar, rice vinegar, sesame oil, and red pepper flakes in a bowl. Whisk it well until the sugar is dissolved. This mix gives the dish its zesty flavor. Pour the orange sauce into the pan with the ginger and garlic. Turn the heat up and bring it to a simmer. Let it cook for 3 to 5 minutes. Stir occasionally until the sauce thickens slightly. Now, it’s time to coat the chicken with the sauce. Add the fried chicken pieces to the simmering sauce. Use tongs or a spatula to toss and coat each piece well. Cook for an extra 2 to 3 minutes to heat everything through. Finally, remove the pan from heat. Transfer the orange chicken onto serving plates. Garnish with finely chopped green onions and a sprinkle of sesame seeds. This adds color and texture. You are now ready to serve this delicious dish! To get crispy chicken, use cornstarch and flour. This mix gives a great crunch. Make sure to coat each piece well. Also, fry the chicken in batches. If you add too much at once, the oil cools down. This makes the chicken soggy. Fry in small groups for the best results. You can adjust the sweetness and spice levels of your sauce. If you like it sweeter, add more sugar. For extra heat, add more red pepper flakes. Using fresh ingredients makes a big difference. Fresh ginger and garlic give a better taste than dried ones. Always use freshly squeezed orange juice for a bright flavor. For serving, place the orange chicken over steamed rice. This adds a nice touch. You can also use fried rice for more flavor. For garnish, sprinkle chopped green onions over the top. Add sesame seeds for crunch. To impress, place fresh orange slices on the plate. This not only looks great but adds a burst of color and aroma. Pro Tips Use Fresh Ingredients: Always opt for fresh ginger and garlic for the best flavor in your orange chicken. Fresh ingredients enhance the aroma and taste of the dish. Adjust Spice Levels: Feel free to modify the amount of red pepper flakes according to your spice preference. Start with a smaller amount and add more if you like it spicier. Double the Sauce: If you love extra sauce, consider doubling the orange sauce ingredients for a more generous coating over the chicken and rice. Perfect Frying Temperature: Ensure the oil is hot enough before adding the chicken to achieve that crispy texture. If the oil is too cool, the chicken will absorb more oil and become greasy. {{image_4}} You can use shrimp or tofu instead of chicken. Shrimp cooks fast, so reduce frying time to 3-4 minutes. Tofu needs more care. Press it to remove water, then cut it into cubes. Coat it like chicken, but fry for 5-6 minutes until crispy. You can change the sauce by adding different citrus fruits. Try lime or grapefruit juice to twist the flavor. You can also mix in spices like ginger or five-spice powder. This adds depth and warms up the dish. Consider baking the chicken instead of frying it. Preheat your oven to 400°F and bake for about 20 minutes. This reduces oil but keeps it tasty. You can also cut down the sugar. Use a natural sweetener like honey or maple syrup for a healthier touch. Store leftover orange chicken in the fridge. It stays fresh for about 3 to 4 days. Use airtight containers to keep the chicken moist. Glass or plastic containers work well. You can also use freezer bags for easy storage. Just remove as much air as possible before sealing. To reheat, use the stove or microwave. On the stove, heat it in a pan over low heat. This keeps the chicken crispy. Add a splash of water if the sauce is thick. In the microwave, heat in short bursts. Stir between each burst to avoid overcooking. This will help keep the chicken juicy and tasty. Orange chicken comes from Chinese-American cuisine. It is not found in China. This dish mixes sweet and tangy flavors. It became popular in the U.S. in the 1980s. The dish often includes crispy chicken and a zesty orange sauce. It shows how cultures mix and create new tastes. Yes, you can make orange chicken ahead of time. Cook the chicken and sauce separately. Store them in airtight containers. The chicken stays fresh in the fridge for up to three days. For best taste, eat it within two days. For reheating, use a pan over medium heat. Add a splash of water or extra sauce to keep it moist. Stir until it warms through. This helps keep the chicken crispy. To make orange chicken spicier, add more red pepper flakes. You can also use fresh chili peppers. Slice them thin and mix them in the sauce. Another option is to include sriracha or chili paste. Start with a small amount and taste as you go. This way, you can find your perfect heat level. This blog post covered how to make delicious orange chicken. We explored key ingredients, including chicken, coating, and sauce components. I shared step-by-step instructions for preparing and cooking, along with tips for perfect texture and flavor. You can even try variations with different proteins or healthier methods. Remember to store your leftovers properly for best taste later. Now, get ready to enjoy your homemade orange chicken! You’ll impress your family and friends with this tasty dish.

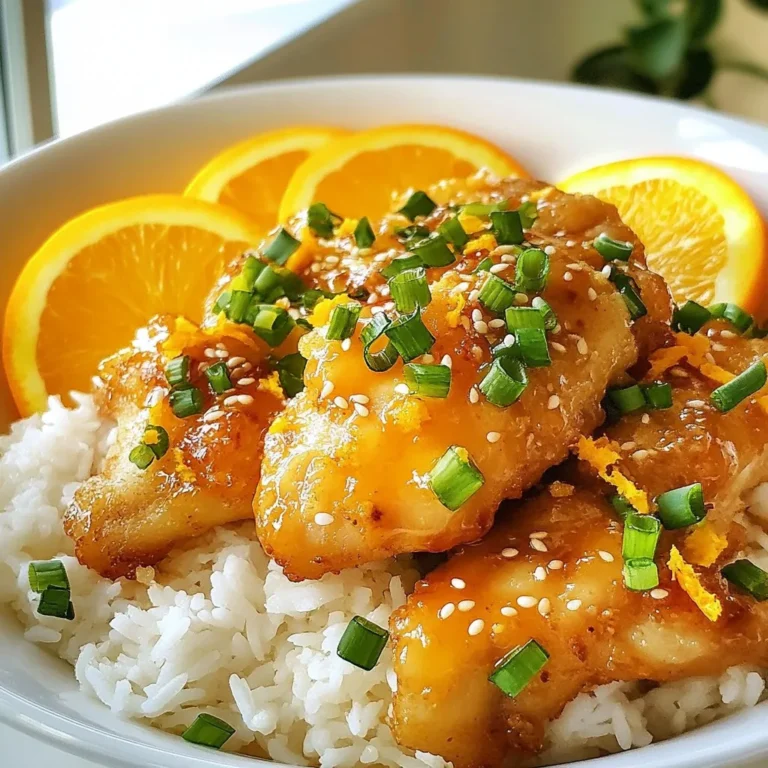
Classic Orange Chicken Flavorful and Easy Recipe

This dish needs a few key ingredients to shine. Here’s what you need: - 1 package (16 oz) gnocchi - 1 cup sun-dried tomatoes, chopped (packed in oil) - 1 cup heavy cream - 1 cup fresh spinach, roughly chopped - 2 cloves garlic, finely minced - 1 tablespoon olive oil - ½ cup freshly grated Parmesan cheese - Salt and freshly ground black pepper to taste - Fresh basil leaves, for garnish These ingredients create a rich, creamy sauce that perfectly coats the gnocchi. While the main ingredients are fantastic, you can add more for extra flavor. Consider using: - Crushed red pepper for heat - Lemon zest for brightness - Artichoke hearts for a unique twist These options can take your dish to the next level! Sometimes, you may need to swap ingredients. Here are some easy substitutions: - For gnocchi, you can use pasta if needed. - Use coconut cream instead of heavy cream for a dairy-free version. - If you don’t have sun-dried tomatoes, try cherry tomatoes or roasted red peppers. Always taste as you go! Adjust seasonings to fit your taste and make the dish your own. {{ingredient_image_2}} Start by boiling salted water in a large pot. Once the water is boiling, add the gnocchi. Cook them according to the package instructions. They are done when they float to the top, which takes about 2-3 minutes. Drain the gnocchi and set them aside for later. In a large skillet, heat the olive oil over medium heat. Add the minced garlic and sauté it for about 1 minute. Watch closely so the garlic doesn’t burn. Next, add the chopped sun-dried tomatoes to the skillet. Cook them for another 2-3 minutes. This allows the tomatoes to soak up the garlic flavor. Now, pour in the heavy cream while stirring. Keep stirring until the mixture simmers gently. This helps the flavors to develop. Add the chopped spinach and let it wilt for 1-2 minutes. Stir in the freshly grated Parmesan cheese. Mix until the cheese melts completely into the sauce. Taste and adjust the seasoning with salt and freshly ground black pepper. Finally, add the drained gnocchi to the skillet. Toss them gently to coat each piece in the creamy sauce. Let everything cook for an additional 2 minutes. Remove from heat and serve hot. Garnish with fresh basil leaves for a burst of flavor. Enjoy your delicious creamy sun-dried tomato gnocchi! To make the sauce creamy, use heavy cream. It adds richness that blends well. Heat the cream slowly. This helps it mix with the sun-dried tomatoes. Stir constantly while cooking. This way, you avoid lumps and get a smooth sauce. If you want extra flavor, add a pinch of nutmeg. It complements the cream and tomatoes perfectly. Cooking gnocchi is simple but key to great texture. Start with salted boiling water. This enhances the flavor of the gnocchi. When you add them, wait for them to float. That means they are ready! Drain them gently, so they stay intact. Avoid overcooking, as they can become mushy. Toss them with a little olive oil to keep them from sticking. For a stunning look, serve the gnocchi in shallow bowls. This allows the sauce to shine. Garnish with fresh basil leaves for color and aroma. You can drizzle a bit of olive oil on top for extra richness. Serve with crusty bread to soak up the sauce. This makes the meal feel special and inviting. Pro Tips Use Quality Sun-Dried Tomatoes: For the best flavor, opt for sun-dried tomatoes packed in oil rather than dry ones. The oil enhances the creaminess of the sauce. Don’t Overcook the Spinach: Add the spinach just before serving to retain its vibrant color and nutrients. This also prevents it from becoming mushy in the sauce. Adjust the Creaminess: If you prefer a lighter sauce, consider using half-and-half instead of heavy cream. This will still provide a creamy consistency while reducing calories. Experiment with Cheese: While Parmesan is traditional, try adding a mix of cheeses like mozzarella or goat cheese for different flavor profiles and textures in your dish. {{image_4}} This dish is already vegetarian, thanks to gnocchi and fresh veggies. You can add more vegetables to make it even better. Consider adding: - Bell peppers - Mushrooms - Zucchini - Peas These veggies complement the sun-dried tomatoes and spinach. You can sauté them with garlic for extra flavor. If you need a gluten-free option, use gluten-free gnocchi. Many brands offer tasty alternatives made from potato or rice flour. Check the package for cooking times, as they may vary from regular gnocchi. To change the flavor profile, try these additions: - Protein: Add grilled chicken, shrimp, or chickpeas for extra protein. - Herbs: Fresh herbs like thyme or oregano can brighten the dish. - Cheese: Swap Parmesan for feta or goat cheese for a tangy twist. - Spices: A pinch of red pepper flakes can add heat. These adjustments keep the dish fun and exciting. You can easily make it your own! To store leftovers, place the creamy gnocchi in an airtight container. Make sure the container is sealed tightly. Store it in the fridge for up to three days. Label the container with the date to keep track. To reheat, place the gnocchi in a skillet over medium heat. Add a splash of water or cream to help it heat evenly. Stir often until warmed through. You can also use the microwave. Heat in short bursts, stirring in between to avoid uneven heating. You can freeze this dish for later use. First, let the gnocchi cool to room temperature. Then, transfer it to a freezer-safe container. Make sure to leave some space at the top for expansion. It will stay good for up to two months. When ready to eat, thaw in the fridge overnight before reheating. The best way to cook gnocchi is to boil it. Start with salted water in a large pot. Bring the water to a boil. Add the gnocchi and watch them closely. They cook fast! When they float, they are ready. This usually takes about 2-3 minutes. Drain them gently and set them aside. This method gives you light and fluffy gnocchi. Yes, you can use homemade gnocchi for this recipe. In fact, homemade gnocchi can add a special touch. Just make sure to cook it the same way. Boil it until it floats, just like store-bought gnocchi. Homemade gnocchi may have a different texture but will work well with the creamy sauce. To make this dish dairy-free, swap out the heavy cream and cheese. Use a plant-based cream instead, like coconut or almond cream. Nutritional yeast can replace Parmesan cheese. It adds a cheesy flavor without dairy. You can also add more sun-dried tomatoes for extra flavor. This way, you still get a creamy and tasty dish! This blog post covered everything you need to make creamy sun-dried tomato gnocchi. We explored key ingredients, cooking steps, and expert tips. You learned about delicious variations, storage methods, and common questions. With this guide, you can create a tasty meal that impresses others. Enjoy the process and have fun. Cooking should be simple and enjoyable! Now, go ahead and make your own version.

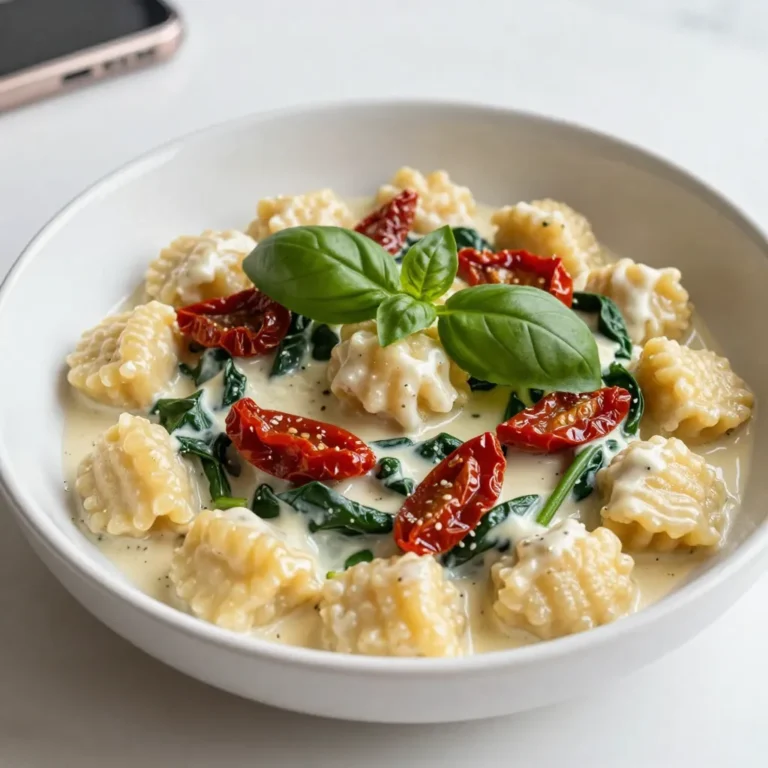
Creamy Sun-Dried Tomato Gnocchi Flavorful and Easy Dish

To make a rich cream of mushroom soup, you need these key ingredients: - 500g fresh mushrooms (button and cremini are best), sliced - 1 medium onion, finely chopped - 2 cloves garlic, finely minced - 3 tablespoons unsalted butter - 2 tablespoons all-purpose flour - 4 cups vegetable broth (low-sodium preferred) - 1 cup heavy cream or coconut cream (for dairy-free) - 1 teaspoon dried thyme - Salt and freshly cracked pepper to taste - Fresh parsley, finely chopped (for garnish) These ingredients create a base that is both creamy and full of flavor. The mushrooms give the soup its earthy taste. The butter and cream add richness, while the thyme adds a lovely herbal note. You can adjust this recipe to suit your taste. Here are some optional ingredients: - Add a splash of white wine for depth - Include a pinch of nutmeg for warmth - Toss in some chopped celery or carrots for extra veggies - Use different mushroom types, like shiitake or portobello These options let you play with flavors. Feel free to mix and match to find what you love best. If you have dietary needs, here are some simple swaps: - Use olive oil instead of butter for a vegan option - Swap heavy cream for coconut cream for dairy-free - Use gluten-free flour instead of all-purpose flour These substitutions keep the soup tasty while meeting your dietary needs. Enjoy creating your version! {{ingredient_image_2}} Start by melting 3 tablespoons of unsalted butter in a large pot over medium heat. Once the butter is melted, add 1 medium onion, finely chopped. Sauté the onion for about 5 minutes. You want it to be soft and translucent. Then, add 2 minced garlic cloves to the pot. Stir for 1 minute until the garlic smells great. Be careful not to let it brown. Now, gently add 500 grams of sliced mushrooms. I like to use a mix of button and cremini mushrooms for flavor. Stir them often as they cook for about 10 minutes. The mushrooms will release their juices and become tender. This step adds a rich taste to the soup. Once the mushrooms are tender, sprinkle 2 tablespoons of all-purpose flour over them. Stir well to combine, cooking for about 2 minutes. This helps remove the raw flour taste. Slowly pour in 4 cups of vegetable broth while stirring. This keeps lumps from forming. Bring the soup to a gentle simmer. Add 1 teaspoon of dried thyme, and season with salt and pepper to taste. Let it simmer for 15 minutes to blend the flavors. After simmering, use an immersion blender to puree the soup until smooth. If you use a standard blender, be careful when transferring it back to the pot. Finally, lower the heat and stir in 1 cup of heavy cream or coconut cream. Adjust seasoning as needed. Serve warm and enjoy! To make your soup truly creamy, use heavy cream or coconut cream. When you add it, keep the heat low. This prevents the cream from curdling. Blend the soup until it is smooth. This step helps mix in the cream well. You can adjust the thickness by adding more or less broth. Herbs and spices are key to boosting flavor. Dried thyme adds a lovely earthiness. You can also try fresh thyme for a brighter taste. A pinch of nutmeg can add warmth and depth. Don’t forget salt and pepper; they enhance all the flavors. Taste as you go to find the right balance. One common mistake is overcooking the garlic. It can turn bitter if browned. Also, don’t skip sautéing the onions; they build a solid base. Avoid adding the cream too soon; always add it after blending. Lastly, make sure to blend until smooth. This gives your soup a rich texture. Pro Tips Use a Variety of Mushrooms: Combining different types of mushrooms, such as button and cremini, adds depth and complexity to the flavor of your soup. Don't Rush the Sauté: Allow the onions and garlic to fully soften and become fragrant before adding mushrooms. This builds a stronger flavor base. Adjust the Creaminess: For a lighter soup, use less cream or substitute with coconut cream. For extra creaminess, consider adding a bit more cream at the end. Garnish with Fresh Herbs: Fresh parsley not only adds color but also brightens the flavors. Experiment with other herbs like thyme or chives for variation. {{image_4}} To make this soup vegan, swap heavy cream for coconut cream. This change keeps the rich taste and texture. Use vegetable broth to ensure a plant-based option. Always check for low-sodium broth to control salt levels. This way, you can enjoy a creamy soup without dairy. You can boost the protein in your soup by adding beans or lentils. Cook them in with the mushrooms to blend flavors. Tofu also works well; add it when you blend the soup. For a heartier meal, shredded chicken or turkey makes a good choice. Just add it at the end to warm through. Feel free to add other veggies to your soup. Carrots or celery bring sweetness and crunch. Spinach or kale adds color and nutrients. Just chop them small and add them with the mushrooms. This way, you can customize your soup based on what you have on hand. To keep your cream of mushroom soup fresh, store it in a sealed container. Make sure it cools down to room temperature before sealing. Place it in the fridge for up to 4 days. If you have leftovers, avoid adding garnishes until you serve it. This helps keep the soup fresh and tasty. You can freeze this soup if you want to save it for later. To freeze, let the soup cool completely. Pour it into freezer-safe bags or containers. Leave some space at the top for expansion. It can last for about 3 months in the freezer. When you need it, just pull it out and thaw it in the fridge overnight. When you’re ready to enjoy your soup again, reheat it gently. Pour it into a pot over low heat. Stir it often to avoid sticking. If it seems too thick, add a splash of broth or water. You can also reheat it in the microwave, but stir halfway through for even warmth. Enjoy it hot with a sprinkle of fresh parsley on top! Cream of mushroom soup can last about 3 to 4 days in the fridge. Store it in an airtight container to keep it fresh. Always check for any signs of spoilage before eating. Yes, you can make cream of mushroom soup in advance. It tastes even better the next day as the flavors blend. Just cool it down before putting it in the fridge. Reheat it gently on the stove or in the microwave. Yes, you can use dried mushrooms if fresh ones are not available. Just soak them in warm water for about 20 to 30 minutes before using. This will help them soften and add great flavor to your soup. In this article, we explored how to make a tasty cream of mushroom soup. We discussed key ingredients and how to customize your soup. You learned simple steps for cooking and thickening it. I shared tips for perfect creaminess and flavor. We also looked at variations for different diets and storage methods. Remember, this soup is flexible. You can make it your own. Enjoy creating, tasting, and sharing your delicious results!

Cream of Mushroom Soup Rich and Flavorful Recipe

Here’s what you need for your creamy avocado cilantro dressing: - 1 ripe avocado - 1 cup fresh cilantro leaves, tightly packed - 1 small garlic clove, peeled - 2 tablespoons freshly squeezed lime juice - 1/4 cup Greek yogurt or a plant-based yogurt alternative - 1/4 cup extra virgin olive oil - 1 teaspoon honey or maple syrup for sweetness - Salt and black pepper to taste - Water (as needed for thinning) These simple ingredients come together to create a rich, creamy dressing. The avocado provides a smooth base, while cilantro adds a fresh burst of flavor. Lime juice brightens the mix, and garlic gives it a nice kick. The yogurt adds creaminess, and olive oil brings richness. Honey or maple syrup balances the flavors perfectly. Lastly, salt and pepper enhance everything. When you gather these ingredients, choose ripe avocados for the best taste. Fresh cilantro will give your dressing a vibrant flavor. Don't skip the lime juice; it makes a huge difference. With these ingredients ready, you’ll create a dressing that’s not just tasty but also colorful and healthy. {{ingredient_image_2}} To cut an avocado, start by slicing it in half. Be careful not to cut too deep. Next, twist the two halves to separate them. Remove the pit by gently tapping it with a knife and twisting. Now, take a spoon and scoop out the creamy flesh into your blender. You want to get every bit of that green goodness! Add the fresh cilantro leaves to the blender first. Next, toss in the peeled garlic clove. This order helps blend the flavors well. After that, squeeze in the fresh lime juice. This will add a nice zesty kick. Scoop in the Greek yogurt for creaminess and pour in the extra virgin olive oil for richness. Finally, add honey for a touch of sweetness. Blend the mixture on high speed for about 30 seconds. You want it silky smooth. If the dressing seems too thick, add water one tablespoon at a time. Blend again after each addition until you reach your desired texture. Taste your dressing and season it with salt and black pepper. Blend it briefly to mix in the seasonings. Adjust the flavor as needed. If you want more zing, add more lime juice or salt. After blending, transfer the dressing to a clean container with a lid. Refrigerate it for at least 30 minutes. Chilling enhances the flavors and makes it taste even better. To make this dressing shine, you need the best avocado. Look for avocados that yield slightly when you press them gently. This means they are ripe and ready to use. The best types for dressing are Hass avocados. They have a creamy texture and rich flavor. You can also try Fuerte avocados, which are smooth and slightly nutty. If you want a vegan version, you can skip Greek yogurt. Instead, use plant-based yogurt made from almond or coconut. For sweetness, swap honey with maple syrup. This keeps the dressing tasty and friendly for everyone. You can easily adjust the flavor of this dressing. If you want more zing, add extra lime juice. For a bolder taste, toss in more garlic. You can also add spices like cumin or a pinch of chili powder. Fresh herbs like dill or parsley can add unique flavors. This lets you create a dressing that suits your taste. Pro Tips Choose Ripe Avocados: Ensure your avocados are perfectly ripe for the creamiest texture. A ripe avocado will yield slightly to gentle pressure when squeezed. Adjusting Consistency: If the dressing is too thick, add a tablespoon of water at a time until you reach your desired consistency for drizzling or dipping. Flavor Enhancement: Allow the dressing to chill in the fridge for at least 30 minutes. This rest period helps the flavors meld and intensify beautifully. Substitutions: Feel free to experiment with different herbs like parsley or basil if you're looking for a unique twist on the traditional cilantro flavor. {{image_4}} You can make this dressing even better by adding different herbs. Try parsley for a fresh taste or basil for a sweet note. If you like spice, throw in a jalapeño. This adds heat and depth. Remove seeds for a milder kick. Blend it all together for a zesty twist. If you want a change from yogurt, try cashew cream. Soak cashews in water to soften them first. Blend them until smooth. This keeps the dressing creamy and rich. For a lighter option, skip the oil. Use more water instead. This lets you enjoy the flavors without extra fat. This dressing pairs well with many dishes. Drizzle it over salads for a fresh touch. It also works great as a dip for veggies. Try it with tortilla chips for a fun snack. You can even use it in wraps or sandwiches. The creamy texture enhances any meal. To keep your creamy avocado cilantro dressing fresh, use a glass jar or an airtight container. These containers help keep air out and maintain flavor. To prevent browning, press plastic wrap directly onto the surface of the dressing before sealing it. This cuts off air contact, which helps retain that bright green color. Your dressing will last about 3 to 5 days in the fridge. Use it within this time for the best taste. Check for signs that the dressing has gone bad. If you see any discoloration or notice a sour smell, it's best to toss it. You can freeze avocado dressing, but it may change in texture. To freeze, pour the dressing into an ice cube tray. Once frozen, transfer the cubes to a freezer bag. When ready to use, thaw it in the fridge overnight. Stir well before using to get the texture back. Yes, you can use frozen avocados. Just thaw them first. Frozen avocados may be softer, so blend well. They still offer great flavor and texture. You can use lemon juice if you don’t have lime. It gives a nice tang. Apple cider vinegar works too, but it will change the taste a bit. To spice it up, add jalapeños or red pepper flakes. Start with a small amount. Blend and taste, then add more if you want extra heat. Yes, this dressing is great for meal prep. Store it in a sealed container. It keeps well in the fridge for about one week. You can use dry herbs, but fresh herbs taste best. If you use dried, use less. About one tablespoon of dried cilantro equals one cup of fresh. This blog post shared a simple guide to making a fresh avocado dressing. You learned about key ingredients, step-by-step instructions, and helpful tips. I also covered variations and storage info for your dressing. In closing, this dressing adds flavor and nutrition to meals. With practice, you’ll master it and customize it to your liking, impressing yourself and others. Enjoy making this healthy addition to your kitchen!

Creamy Avocado Cilantro Dressing Flavorful & Easy Recipe

- 1 lb ground turkey - 1/2 cup panko breadcrumbs - 1/4 cup green onions, finely chopped - 2 cloves garlic, minced - 1 tablespoon fresh ginger, grated I love starting with the main ingredients. Ground turkey is lean and easy to work with. Panko breadcrumbs add a nice crunch. Finely chopped green onions give a fresh taste. Minced garlic brings a savory depth. Fresh ginger adds a warm spice. - 1 egg, lightly beaten - 1/4 cup teriyaki sauce (plus extra for glazing) - 1 tablespoon sesame oil - Salt and pepper to taste Next, we mix in the additional ingredients. The egg helps bind everything together. Teriyaki sauce adds a sweet and savory flavor. Sesame oil gives a nice nuttiness. A sprinkle of salt and pepper enhances all the tastes. - Sesame seeds - Extra green onions Finally, garnishes finish the dish. Sesame seeds add a delightful crunch. Extra green onions provide brightness and color. These small touches make your teriyaki turkey meatballs look and taste amazing! {{ingredient_image_2}} Start by preheating your oven to 400°F (200°C). This step warms the oven for even cooking. Next, line a baking sheet with parchment paper. This helps prevent the meatballs from sticking and makes clean-up easier. Grab a large mixing bowl. Add 1 pound of ground turkey. Then, mix in 1/2 cup of panko breadcrumbs and 1/4 cup of finely chopped green onions. Next, add 2 minced cloves of garlic and 1 tablespoon of grated fresh ginger. Pour in 1 lightly beaten egg, along with 1/4 cup of teriyaki sauce and 1 tablespoon of sesame oil. Season with salt and pepper to taste. Use your hands or a spoon to mix everything together until combined well. With slightly damp hands, take portions of the mixture. Roll them into meatballs about 1-2 inches wide. Place these meatballs on the lined baking sheet, giving them space to cook evenly. Bake the meatballs in the preheated oven for 20-25 minutes. Keep an eye on them; they should be fully cooked and show no pink inside. After the meatballs finish baking, remove them from the oven. Drizzle them with extra teriyaki sauce for flavor. Place them back in the oven for 5 more minutes. This step helps the sauce thicken and glaze the meatballs for a shiny finish. Once done, let the meatballs cool for a few minutes on the baking sheet. Then, transfer them to a serving platter. For a nice touch, sprinkle sesame seeds on top. Add extra chopped green onions for freshness and crunch. Enjoy your tasty teriyaki turkey meatballs! To get the best texture for your meatballs, mix the ingredients well. I like to use my hands for this. It helps blend everything nicely. Make sure the ground turkey and panko are evenly mixed. This gives the meatballs a great bite. When you handle the mixture, keep your hands damp. This also helps prevent sticking. Fresh ingredients make a big difference in flavor. Use fresh garlic and ginger for a zesty kick. They bring out the best taste in your meatballs. For teriyaki sauce, I recommend brands like Kikkoman or Soy Vay. These sauces have a good balance of sweet and salty. They can elevate the flavor of your turkey meatballs. Shape your meatballs to be about 1 to 2 inches in diameter. This size helps them cook evenly. When baking, keep an eye on them. They should take about 20 to 25 minutes. To check if they are done, cut one in half. There should be no pink inside. This ensures they are safe to eat. Pro Tips Moisture Matters: To keep your turkey meatballs juicy, do not overmix the meat mixture. Just combine until ingredients are incorporated. Seasoning Boost: For an extra flavor kick, consider adding a splash of soy sauce or a dash of chili flakes to the mixture. Perfectly Shaped: Using a small cookie scoop can help you achieve evenly sized meatballs, ensuring they cook at the same rate. Glazing Trick: For a shiny finish, apply the teriyaki glaze during the last few minutes of baking, allowing it to caramelize without burning. {{image_4}} You can switch up the meat if you want. Ground chicken works great instead of turkey. It keeps the dish light and tasty. Another option is to go vegetarian. Use lentils or mushrooms to create a hearty meatball. Cooked lentils mash easily and have a nice texture. Mushrooms add a rich flavor and stay moist in the oven. Want to kick up the flavor? Add spices like sriracha for some heat. This gives your meatballs a nice kick. You can also try different glazes. Try honey, soy sauce, or even a bit of orange juice. Each glaze can change the whole taste of your meatballs. How you serve these meatballs can change things up, too. Serve them over noodles for a filling meal. You can also toss them on a salad for a lighter dish. If you love grilling, skewer the meatballs on sticks. This makes for a fun and tasty barbecue option. To store leftovers, let the teriyaki turkey meatballs cool down. Place them in an airtight container. This keeps them fresh and safe to eat later. In the fridge, these meatballs last for about three to four days. Always check for any off smells before using them. For proper freezing, arrange the meatballs in a single layer on a baking sheet. Freeze them for about one to two hours until solid. Then, transfer them to a freezer-safe bag or container. Make sure to remove as much air as possible. This helps prevent freezer burn. When you're ready to eat, thaw the meatballs overnight in the fridge. Reheat them in the oven or microwave until hot. Making teriyaki turkey meatballs in advance is a smart choice. You can prepare the mixture a day ahead and keep it in the fridge. This saves time on busy days. For the best results, shape the meatballs before cooking. You can also bake them in advance and store them. Just remember to glaze them right before serving for that fresh taste. Teriyaki turkey meatballs take about 20 to 25 minutes to cook in the oven. Preheat your oven to 400°F (200°C). Bake until the meatballs are firm and no pink shows inside. To ensure they are done, you can use a meat thermometer. The internal temperature should reach 165°F (74°C). This method gives you juicy meatballs every time. Yes, you can use store-bought teriyaki sauce for quick prep. Look for a sauce that has a good balance of sweet and salty flavors. This can save you time; just pour it into the meatball mixture and glaze after baking. Many brands have great options, so choose one that fits your taste. I love serving these meatballs with steamed rice or stir-fried veggies. The rice absorbs the teriyaki sauce, making each bite flavorful. You can also pair them with a crisp salad or noodles for a fun twist. These combinations make a complete meal that everyone enjoys. These teriyaki turkey meatballs are not strictly keto-friendly due to the panko breadcrumbs. They add carbs to the recipe. If you're on a keto diet, you can replace panko with almond flour or crushed pork rinds. This keeps the meatballs low in carbs while still being tasty. You now know how to make delicious teriyaki turkey meatballs. We discussed key ingredients like ground turkey, panko breadcrumbs, and seasonings. I walked you through each step, from mixing to baking. I shared tips for better texture and flavor. You can also switch proteins and store leftovers easily. Try these ideas to enjoy flavorful meals. Now, you have the tools to create your own tasty variations without stress. Dive in and have fun cooking!

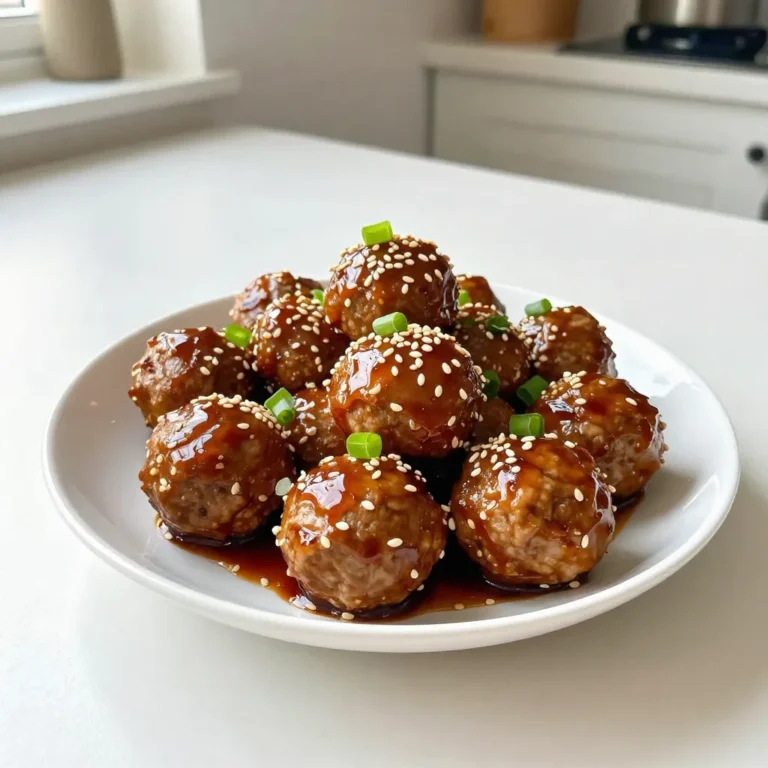
Teriyaki Turkey Meatballs Flavorful and Easy Recipe

- 2 ¼ cups all-purpose flour - ¼ cup granulated sugar - 2 teaspoons baking powder - ½ teaspoon salt - ¾ cup milk, warmed (about 110°F) - ¼ cup unsalted butter, melted - 1 large egg, at room temperature - 1 tablespoon ground cinnamon - ½ cup light brown sugar, packed - 1 cup semi-sweet or dark chocolate chips - 2 tablespoons unsweetened cocoa powder - 1 teaspoon pure vanilla extract - For the glaze: - 1 cup powdered sugar - 2 tablespoons milk - ½ teaspoon pure vanilla extract Each ingredient plays a key role in making these chocolate cinnamon rolls soft and sweet. The all-purpose flour gives the rolls structure. Granulated sugar adds sweetness, while brown sugar adds a rich flavor. Baking powder helps the rolls rise. Warmed milk and melted butter keep the dough moist. The egg enriches the dough, making it tender. Ground cinnamon, cocoa powder, and vanilla extract create a delicious filling that pairs perfectly with chocolate chips. For the glaze, powdered sugar, milk, and vanilla extract create a smooth, sweet topping. This glaze adds shine and flavor, making the rolls even more delightful. Gather these ingredients, and you are ready to bake up something special! {{ingredient_image_2}} 1. Mixing dry and wet ingredients: Start by taking a large mixing bowl. Add 2 ¼ cups of all-purpose flour, ¼ cup of granulated sugar, 2 teaspoons of baking powder, and ½ teaspoon of salt. Whisk them together well, so you have no lumps. In a separate bowl, mix ¾ cup of warmed milk, ¼ cup of melted unsalted butter, and 1 large egg. Whisk this mixture until it is smooth. Gradually combine the wet mix with the dry mix, stirring gently until just combined. The dough will be slightly sticky. 2. Kneading the dough: Place the dough on a floured surface. Knead it gently for about 3-4 minutes. You want the dough to be smooth and elastic. This part is fun! It helps build the dough's strength. 3. Resting the dough: Cover the dough with a clean kitchen towel. Let it rest in a warm spot for 10-15 minutes. This resting time helps the dough relax and makes it easier to roll out later. 1. Blending filling ingredients: In a small bowl, mix together 1 tablespoon of ground cinnamon, ½ cup of packed light brown sugar, 2 tablespoons of unsweetened cocoa powder, and 1 teaspoon of pure vanilla extract. This will make a sweet and rich filling. 2. Rolling out the dough: After resting, take the dough and roll it out into a rectangle shape, about 12x18 inches. Make sure the surface is floured to prevent sticking. This is where the fun begins as you see your dough take shape! 1. Spreading butter and filling: Use a brush or the back of a spoon to spread melted butter over the dough. Make sure to cover every part. Then, sprinkle the cinnamon mixture evenly on top, and don’t forget to add 1 cup of chocolate chips! 2. Rolling and slicing the dough: Start at one long edge and tightly roll the dough into a log. Make sure it stays even. Once rolled, pinch the seam to seal it well. Next, use a sharp knife to slice the log into 12 equal pieces. 3. Rising and baking the rolls: Place the slices in a greased 9x13-inch baking dish, leaving space between each roll. Cover them with a towel and let them rise in a warm place for about 30 minutes, until they double in size. Preheat your oven to 350°F (175°C) during this time. Bake the rolls for 20-25 minutes. They should be golden brown on top when done. To get the right dough, start with the correct flour amount. Use 2 ¼ cups of all-purpose flour. The dough should feel slightly sticky but not overly wet. Knead the dough for about 3-4 minutes. This helps develop gluten, which gives the rolls structure. After kneading, let the dough rest. Cover it with a towel and allow it to relax for 10-15 minutes. This step makes rolling easier. For a rich flavor, try different types of chocolate. Semi-sweet chocolate chips work well, but dark chocolate adds depth. You can also use milk chocolate for a sweeter taste. If you want to mix it up, consider adding nuts, like walnuts or pecans. Dried fruits, like raisins, also add a nice chew. These can enhance the filling and give a unique twist. Before baking, always check your oven temperature. Preheat it to 350°F (175°C). This ensures even cooking. When the rolls go in, keep an eye on them. They should bake for 20-25 minutes. Look for a golden brown color on top. To check for doneness, gently press on a roll. It should spring back lightly. If it does, your rolls are ready! Pro Tips Use Room Temperature Ingredients: Ensuring your egg and milk are at room temperature helps the dough come together more easily and rise better. Don’t Skip the Resting Period: Allowing the dough to rest after kneading helps to relax the gluten, resulting in a softer and fluffier roll. Experiment with Chocolates: Try using different types of chocolate chips, like white chocolate or peanut butter chips, to customize the flavor of your rolls. Serve Warm for Best Taste: These rolls are best enjoyed fresh out of the oven while they are still warm, as the chocolate will be melty and delicious. {{image_4}} You can add nuts and fruits for extra texture and flavor. Consider using chopped walnuts or pecans for crunch. Diced apples or mashed bananas also work well. You can also explore adding spices. A pinch of nutmeg or cardamom can boost the flavor. Try mixing in a bit of chili powder for a fun kick. Glazes can change the whole feel of your chocolate cinnamon rolls. A rich chocolate glaze is a great option. Melt semi-sweet chocolate and mix in some cream. Drizzle it over the rolls for a decadent touch. If you prefer something tangy, a cream cheese glaze is perfect. Simply blend cream cheese, powdered sugar, and a splash of milk until smooth. This will add a tangy sweetness to your rolls. If you need gluten-free options, use a gluten-free flour blend. This will keep the rolls soft and tasty. For vegan adjustments, switch the milk for almond or oat milk. Replace the butter with coconut oil or vegan butter. Use flax eggs instead of a regular egg. These swaps keep your rolls delicious while meeting dietary needs. To keep your chocolate cinnamon rolls fresh, follow these tips: - Refrigeration: Place leftover rolls in an airtight container. Store them in the fridge for up to 3 days. The rolls will stay soft and tasty. If you want, you can also wrap them in plastic wrap before placing them in the container. - Freezing Instructions: If you want to save rolls for later, freeze them. Wrap each roll in plastic wrap. Then, place them in a freezer-safe bag or container. They will last for up to 2 months. To enjoy them, thaw the rolls overnight in the fridge before reheating. To enjoy your rolls warm again, use these methods: - Oven Method: Preheat your oven to 350°F (175°C). Place the rolls on a baking sheet. Cover them with foil to keep them moist. Heat for about 10-15 minutes. - Microwave Method: Place one or two rolls on a plate. Cover them with a damp paper towel. Heat for 15-20 seconds. This keeps them soft but avoid overheating. To keep your rolls from drying out, remember to cover them while reheating. Enjoy those gooey, chocolatey bites just like fresh! You can make these rolls the night before. After rolling and cutting the dough, place the slices in the baking dish. Cover them with plastic wrap and put them in the fridge. In the morning, take them out and let them sit at room temperature for 30 minutes. Then, bake as usual. This method saves time and gives you fresh rolls in the morning. Yes, you can use whole wheat flour. It may change the texture a bit. The rolls may be denser and less fluffy. To help with this, you can mix half all-purpose flour and half whole wheat flour. This blend keeps the rolls light while adding a healthy twist. Serve these rolls warm for the best taste. You can drizzle the glaze over them just before serving. Pair them with a hot cup of coffee or a glass of milk. For a fun twist, add a scoop of ice cream on top. Enjoy these rolls on a large platter to impress guests. You learned how to create amazing chocolate cinnamon rolls from scratch. We covered the right ingredients, step-by-step instructions, and helpful tips. I also shared variations and storage advice to fit your needs. These rolls are fun to make and taste great. Enjoy sharing them with family and friends. With practice, you'll master this recipe and create your own unique twists. Now, get baking and treat yourself to delicious, homemade rolls!

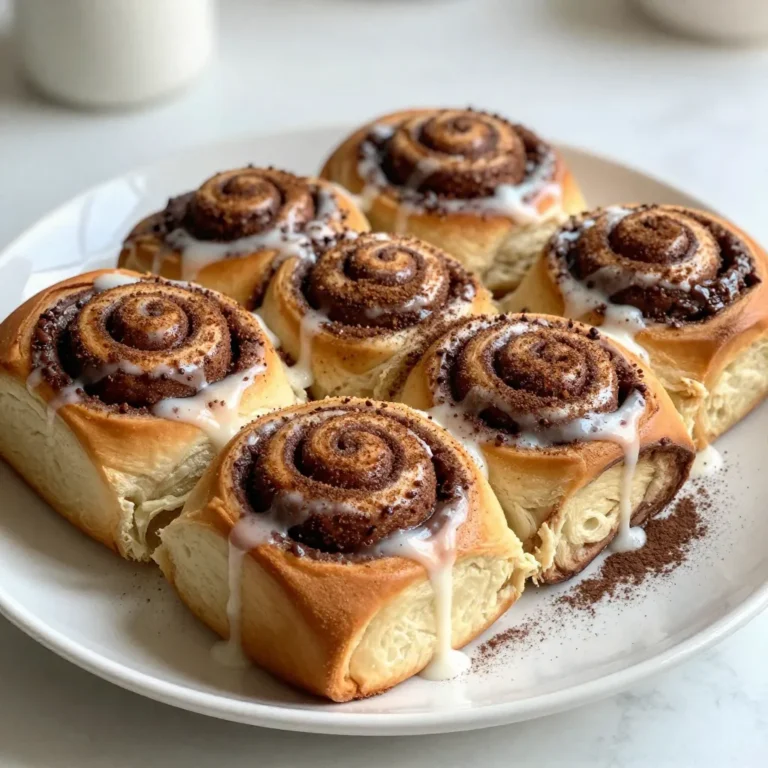
Chocolate Cinnamon Rolls Easy and Delicious Recipe

Here’s what you need to make Everything Bagel Deviled Eggs: - 6 large eggs - 3 tablespoons mayonnaise - 1 teaspoon Dijon mustard - 1 teaspoon apple cider vinegar - Salt and freshly cracked black pepper, to taste - 1 tablespoon everything bagel seasoning, plus extra for garnish - Fresh chives, finely chopped, for garnish Gather these ingredients to create a tasty treat. The large eggs form the base, while mayonnaise gives the filling its creaminess. Dijon mustard adds a slight tang, and apple cider vinegar brings brightness. Don’t forget salt and black pepper to enhance flavor. Everything bagel seasoning adds a unique twist, and fresh chives give a pop of color and taste. Each ingredient plays a role in making these deviled eggs both flavorful and fun! {{ingredient_image_2}} To start, place six large eggs in a medium saucepan. Cover them with cold water, leaving about an inch above the eggs. Heat the water to a boil over medium heat. Once it boils, cover the pot, remove it from heat, and let the eggs sit for 12 minutes. This method ensures you get perfectly cooked eggs every time. Cooling the eggs in ice water is key. It stops the cooking process and helps with peeling. After 12 minutes, move the eggs to a bowl filled with ice water. Let them cool for 5 to 10 minutes. This step makes peeling much easier and keeps the yolks bright. Peeling eggs can be tricky. Once they cool, tap each egg gently on a hard surface to crack the shell. Peel them under cold running water. The water helps remove the shell cleanly, leaving the egg intact. Next, slice the peeled eggs in half lengthwise. Carefully scoop the yolks into a mixing bowl, and place the egg whites on a decorative serving plate. This step sets the stage for the creamy filling. Now, add three tablespoons of mayonnaise, one teaspoon of Dijon mustard, one teaspoon of apple cider vinegar, and a pinch of salt and freshly cracked black pepper to the yolks. Mix the ingredients with a fork until smooth and creamy. This mixture makes the filling rich and flavorful. To fill the egg whites, use a spoon or a piping bag. Make sure to heap the yolk mixture into each egg white half. This gives the eggs a nice, generous look. For the finishing touch, sprinkle the tops with extra everything bagel seasoning. You can also add finely chopped fresh chives for a burst of color and flavor. Serving these deviled eggs chilled or at room temperature enhances their taste. Enjoy them as a snack or appetizer! To make perfect hard-boiled eggs, start with cold water. This helps keep the eggs from cracking. You can also use an Instant Pot for an easier method. Just add a cup of water and place the eggs on a rack. Cook on high pressure for 5 minutes and let them sit. To avoid green rings around the yolks, cool the eggs quickly in an ice bath. This stops the cooking process and keeps the color bright. You can enhance the flavor in many ways. Try adding a dash of hot sauce or smoked paprika. For a twist, mix in some crumbled bacon or pickles. These add a nice crunch and flavor. Fresh herbs like dill or parsley also work well. They complement the everything bagel seasoning nicely. Serve these deviled eggs chilled for the best taste. If you prefer, they can be left at room temperature for a short time. For a fun presentation, arrange them on a colorful platter. You can garnish with extra everything bagel seasoning and chives for a vibrant look. This will impress guests at any gathering! Pro Tips Fresh Eggs for Easier Peeling: Use eggs that are at least a week old for boiling. Fresher eggs tend to be harder to peel due to the lower pH of the egg white, which makes them stick to the shell. Customize Your Seasoning: Feel free to adjust the amount of everything bagel seasoning according to your taste. You can even mix in some other spices like paprika or cayenne for a unique twist. Perfectly Smooth Filling: For an ultra-smooth yolk mixture, consider using a food processor instead of a fork. This will help eliminate any lumps and give a creamy texture. Make Ahead for Convenience: You can prepare the deviled eggs a few hours in advance. Just fill the egg whites and store them in the refrigerator until ready to serve, adding the garnish just before serving. {{image_4}} Want to add some heat to your deviled eggs? Try adding spicy ingredients. Here are some great options: - Hot sauce: A few drops can make a big difference. - Chili powder: This adds warmth and depth of flavor. - Cayenne pepper: Use it sparingly for a real kick. Adjusting spice levels is easy. Start with a little heat and taste. You can always add more, but you can't take it away! If you want a vegan version, I have some great substitutes. For mayonnaise, use: - Silken tofu: Blend it until smooth for creaminess. - Avocado: This gives a rich texture and flavor. For egg replacements, try: - Chickpeas: Mash them well for a similar texture. - Tofu: Use firm tofu for a great base. You can make these eggs even more fun with toppings. Here are some ideas: - Bacon bits: They add a nice crunch and flavor. - Pickled jalapeños: These give a tangy, spicy kick. - Olives: Slice them thin for a savory touch. Pair your deviled eggs with beverages like: - Sparkling water: It cleans the palate well. - Light beer: This pairs nicely with the flavors. - White wine: Choose a crisp option to match the dish. To keep your leftover deviled eggs fresh, use an airtight container. Make sure the container fits snugly to prevent air from spoiling the eggs. Store them in the fridge at a temperature below 40°F. They will stay good for about 3 to 4 days. Always check for any off smells or changes in texture before eating. You can freeze deviled eggs, but the texture may change. If you do freeze them, only freeze the filling, not the egg whites. To reheat, let the filling thaw in the fridge overnight. Then, refill the egg whites and enjoy. This method helps keep the flavor intact while still being convenient. Yes, you can use store-bought mayonnaise. It saves time and still tastes great. Just make sure to choose a good quality brand. You can keep deviled eggs in the fridge for up to two days. Store them in an airtight container to keep them fresh. Absolutely! You can use yellow, spicy, or whole grain mustard. Each type adds a unique flavor to the eggs. Everything bagel seasoning is rich in flavor and low in calories. It often contains seeds like sesame and poppy, which provide healthy fats. Plus, garlic and onion add antioxidants. To make your deviled eggs creamier, add more mayonnaise. You can also mix in some cream cheese or Greek yogurt for extra smoothness. You now know how to create tasty everything bagel deviled eggs. We covered ingredients, cooking methods, and fun variations. You learned expert tips on storage and serving too. Get creative with flavors and enjoy these eggs at your next party. With practice, you can impress friends and family. Trust me, they will love your delicious dishes!

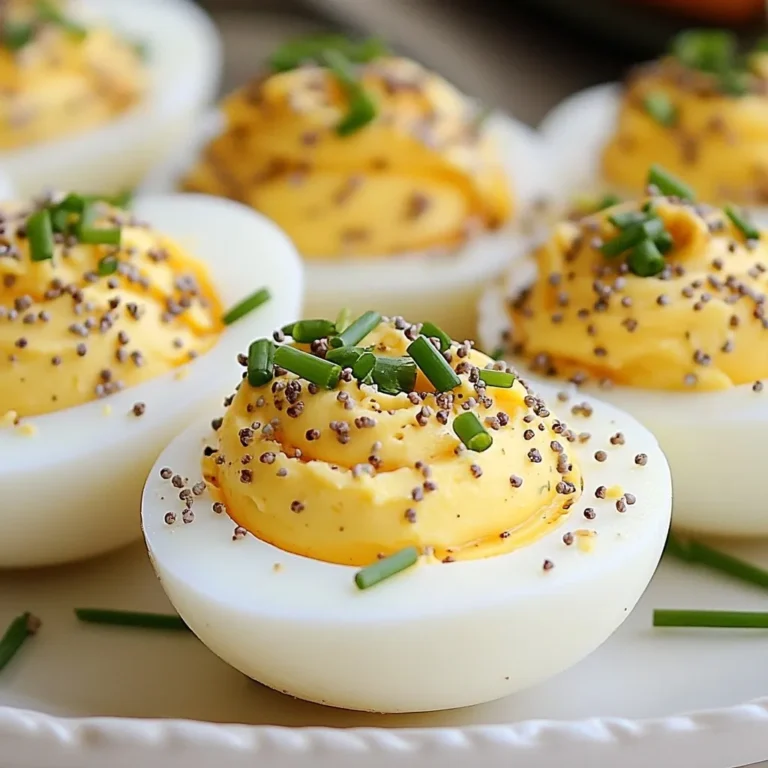
Everything Bagel Deviled Eggs Flavorful and Easy Recipe

To make classic deviled eggs, you need simple, fresh ingredients: - 6 large eggs - 3 tablespoons creamy mayonnaise - 1 teaspoon tangy Dijon mustard - 1 teaspoon white vinegar - 1/4 teaspoon smoky paprika - Salt and freshly cracked pepper to taste - Fresh chives or parsley, finely chopped (for a vibrant garnish) These ingredients create a rich and creamy filling that is hard to resist. The eggs provide protein, while the mayonnaise and mustard add creaminess and flavor. The white vinegar gives a nice tang that balances the richness. For those who want to add a twist, consider these optional ingredients: - 1/2 teaspoon zesty pickle relish Adding pickle relish gives the deviled eggs an extra punch of flavor. This touch enhances the classic taste and adds a bit of crunch. You can mix it in with the yolk filling for a delightful surprise. Feel free to experiment with other flavors, but remember to keep the balance right! {{ingredient_image_2}} First, place 6 large eggs in a medium saucepan. Cover them with cold water by about an inch. This helps them cook evenly. Set the heat to medium-high and bring the water to a rapid boil. Once boiling, cover the pot with a lid. Remove it from heat and let the eggs sit for 12 minutes. This method gives you perfect hard-boiled eggs. After 12 minutes, carefully move the eggs to an ice bath. Let them cool for 5 to 10 minutes. This stops the cooking and makes peeling easier. Once the eggs are cool, tap each one on the countertop. Crack the shell gently, then peel the eggs. To make peeling easier, do this under a gentle stream of running water. Slice each egg in half lengthwise. Use a small spoon to scoop out the yolks and place them in a mixing bowl. Be careful to keep the egg whites intact. Use a fork to mash the yolks until smooth. Add 3 tablespoons of creamy mayonnaise, 1 teaspoon of Dijon mustard, 1 teaspoon of white vinegar, and 1/4 teaspoon of smoky paprika. Season with salt and pepper to taste. If you want more flavor, stir in 1/2 teaspoon of pickle relish. Now, it’s time to fill the egg whites. Use a spoon or a piping bag to refill each white with yolk mix. Make sure to fill them generously. To finish, sprinkle a light dusting of smoked paprika on top of the filled eggs. Add finely chopped fresh chives or parsley for a pop of color. Arrange the deviled eggs on a platter for a beautiful presentation. Enjoy your delicious classic deviled eggs! To make perfect deviled eggs, start with large eggs. Place them in a pot and cover them with cold water. The water should be about an inch above the eggs. Heat the pot on medium-high until it boils. Once boiling, cover the pot and turn off the heat. Let the eggs sit for 12 minutes. This method ensures the yolks are firm and bright yellow. Peeling eggs can be tricky. To make it easier, transfer the eggs to an ice bath right after boiling. Let them cool for 5-10 minutes. Crack the eggs gently on your countertop. Peel them under running water. This helps remove the shell cleanly and keeps the egg whites intact. Presentation makes a big difference. Arrange the deviled eggs on a nice platter. For extra flair, sprinkle smoked paprika on top. Use fresh chives or parsley as a garnish. You can also add edible flowers for a fun touch. These small details make the dish look gourmet and inviting. Pro Tips Fresh Eggs Matter: For the best results, use eggs that are at least a week old. Fresh eggs are harder to peel, while older eggs separate from the shell more easily. Perfect Boiling Technique: Always cover the eggs with water and remove from heat once boiling. This helps to prevent overcooking, which can lead to a greenish yolk. Enhance Flavor: Experiment with different ingredients in the yolk mixture, such as sriracha for heat or avocado for creaminess, to create your unique twist on classic deviled eggs. Piping for Presentation: Use a piping bag to fill the egg whites for a professional look. This creates a beautiful swirl and ensures each egg is evenly filled. {{image_4}} You can make deviled eggs even more exciting with fun flavor twists. Here are a few ideas: - Bacon bits: Add crunchy bits of cooked bacon for a savory touch. - Sriracha: Mix in a bit of this hot sauce for some heat. - Avocado: Swap out some mayo for creamy avocado for a fresh taste. - Curry powder: A dash adds warmth and spice, giving a unique flavor. You can also try different herbs like dill or cilantro to change the taste. Each addition can create a new favorite. How you present your deviled eggs can make them shine at any gathering. Try these tips: - Colorful toppings: Use bright toppings like diced tomatoes or olives. - Egg cups: Serve them in small cups for a fancy look. - Edible flowers: Use these as a garnish for a beautiful touch. - Layered styles: Stack the eggs on a tiered stand for a stunning display. These ideas can elevate the look of your dish and impress your guests. If you have guests with dietary needs, there are great options. For vegan deviled eggs, try this: - Chickpeas: Use mashed chickpeas instead of egg yolks. - Cashew cream: Blend soaked cashews for a creamy base. - Nutritional yeast: Add this for a cheesy flavor without dairy. These options can make your deviled eggs fit for everyone. Enjoy playing with flavors while keeping everyone happy! To store leftover deviled eggs, cover them with plastic wrap. This keeps them fresh and moist. Place the eggs in the fridge immediately. They stay good for up to two days. If you see any browning, that means they are losing freshness. Always check for any odd smells before eating them again. You can make deviled eggs ahead of time. Just boil and peel the eggs as usual. Then, store the egg whites in one container and the yolk mixture in another. Keep both containers in the fridge. Fill the egg whites with the yolk mixture right before serving. This helps keep them fresh and tasty. The best eggs for deviled eggs are large, fresh eggs. Fresh eggs have a firmer white and richer yolk. This makes for a creamier filling. Look for eggs with no cracks and a clean shell. Yes, you can make deviled eggs a day in advance. Prepare the filling and store it in the fridge. Keep the egg whites separate until serving. This helps them stay fresh and tasty. To prevent eggs from cracking, use room temperature eggs. Place them in cold water before heating. Avoid high heat and bring water to a boil slowly. This helps the eggs cook evenly and reduces cracks. Deviled eggs are simple but tasty snacks. You learned about essential and optional ingredients. We covered step-by-step instructions for preparing and filling them. Tips on boiling and peeling eggs will help you succeed. Creative variations can impress your guests. Remember, leftover deviled eggs last in the fridge. You can even make them a day ahead. Enjoy sharing your delicious creations at your next gathering!

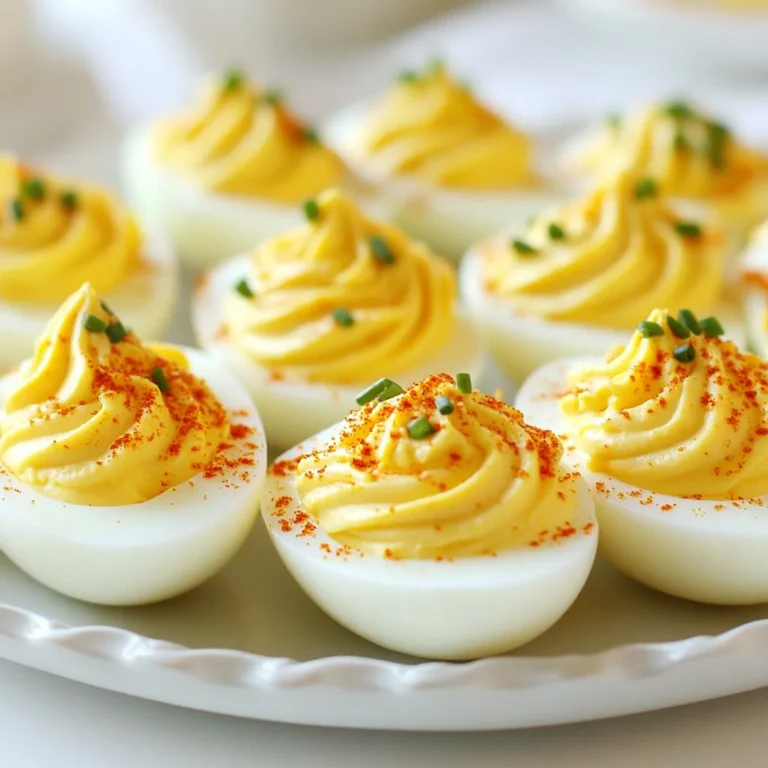
Classic Deviled Eggs Irresistible Flavor in Every Bite

- 2 boneless, skinless chicken breasts - 1 cup all-purpose flour - 2 large eggs, beaten - 1 cup panko breadcrumbs - 1 teaspoon dried Italian seasoning - ½ cup freshly grated Parmesan cheese - 1 cup marinara sauce - 1 cup shredded mozzarella cheese - Salt and freshly ground black pepper - Olive oil for frying - Fresh basil leaves for garnish - Garlic powder for a hint of flavor - Red pepper flakes for some heat - Fresh parsley for extra color - Lemon zest for a fresh twist - Three shallow dishes for the breading process - A large skillet for frying - A baking dish for the oven - A meat mallet to pound the chicken - A sharp knife for slicing and serving - Paper towels for patting the chicken dry When you gather these ingredients and tools, you set yourself up for success. Each item plays a role in making your Chicken Parmesan crispy, cheesy, and full of flavor. Don't skip the optional ingredients; they can take your dish to the next level! {{ingredient_image_2}} Start by gathering your chicken breasts. Use two boneless, skinless breasts for the best results. Pat the chicken dry with paper towels. This keeps the breading from getting soggy. Season both sides of the chicken with salt and freshly ground black pepper. This step adds flavor to the meat. Next, set up your breading station. You need three shallow dishes for this. - In the first dish, mix 1 cup of all-purpose flour with a pinch of salt and pepper. - In the second dish, beat 2 large eggs until they are smooth. - In the third dish, combine 1 cup of panko breadcrumbs, 1 teaspoon of dried Italian seasoning, and ½ cup of freshly grated Parmesan cheese. Now, take each chicken breast. First, coat it in the flour mixture. Shake off any extra flour. Then, dip it into the beaten eggs. Let the excess egg drip off. Finally, coat the chicken with the breadcrumb mix. Press down gently to make sure it sticks well. Heat olive oil in a large skillet over medium heat. You want enough oil to cover the bottom. Once the oil is hot and shimmering, carefully add the breaded chicken. Fry each piece for about 4-5 minutes on each side. Look for a golden brown color. After frying, place the chicken in a baking dish. Spoon marinara sauce over each piece, covering them well. Sprinkle shredded mozzarella cheese on top. Make sure to use enough cheese to cover each chicken breast. Now, bake the dish in a preheated oven at 375°F (190°C) for 15-20 minutes. The cheese should melt and bubble. It should also turn a lovely golden brown. After baking, let the dish sit for a few minutes. This helps the cheese set. Garnish with fresh basil leaves for the final touch. Enjoy your Chicken Parmesan! To make your Chicken Parmesan extra crispy, follow these steps: - Use panko breadcrumbs. They create a light and crunchy texture. - Add Italian seasoning to the breadcrumbs. This boosts flavor and crunch. - Double-bread the chicken. Coat it twice for a thicker, crispier layer. - Fry in hot oil. Make sure the oil shimmers before adding chicken. These tips help you get that perfect crunch with every bite. Here are some mistakes to watch out for when making Chicken Parmesan: - Skipping the drying step. Always pat the chicken dry first. This helps the breading stick better. - Not seasoning enough. A pinch of salt and pepper on the chicken makes a big difference. - Overcrowding the pan. Fry in batches to keep the oil hot and achieve even cooking. - Forgetting to let the cheese melt. Bake long enough for a bubbly, golden topping. Avoiding these pitfalls will lead to a more delicious dish. To serve Classic Chicken Parmesan, consider these ideas: - Pair it with spaghetti. Toss the pasta in olive oil and garlic for a tasty side. - Add a fresh salad. A simple green salad with vinaigrette complements the dish well. - Garnish with fresh basil. This adds color and a burst of flavor. - Serve with crusty bread. It’s perfect for soaking up extra sauce. These serving suggestions enhance the meal and make it even more enjoyable. Pro Tips Use Fresh Ingredients: Always opt for fresh herbs and quality cheese to elevate the flavor of your Chicken Parmesan. Double Fry for Extra Crispiness: For an extra crunchy coating, fry the chicken twice, allowing it to rest for a few minutes between fryings. Let It Rest: After baking, let the Chicken Parmesan sit for a few minutes before serving. This helps the cheese to set and makes slicing easier. Experiment with Sauces: Feel free to switch up the marinara sauce with a white sauce or pesto for a unique twist on the classic Chicken Parmesan. {{image_4}} To make gluten-free chicken Parmesan, you can swap the flour and panko. Use gluten-free flour and gluten-free breadcrumbs. These options will still give you that crispy texture. When frying, be careful to avoid cross-contamination. You want to keep everything gluten-free. This way, everyone can enjoy a tasty meal! You can change up the cheeses in your chicken Parmesan. Try using provolone or gouda for a new flavor. Mixing mozzarella with a bit of feta adds a nice salty touch. Feel free to experiment! Each cheese brings its own taste and texture. You might find a new favorite combo. Adding vegetables can make your chicken Parmesan even better. You can roast zucchini, bell peppers, or spinach and place them on the side. This not only boosts flavor but also adds color to your plate. A side of spaghetti tossed in olive oil and garlic complements the dish well. You can also serve it with a fresh salad for extra crunch. These additions make your meal balanced and delicious! To store leftover Chicken Parmesan, first let it cool. Place it in an airtight container. Make sure to cover the top tightly. You can keep it in the fridge for up to three days. If you want to store it longer, freezing is a great option. When you reheat Chicken Parmesan, aim to keep it crispy. Preheat your oven to 350°F (175°C). Place the chicken on a baking sheet. Cover it lightly with foil to prevent drying. Bake for about 15-20 minutes. Check that it's heated through before serving. This method helps the cheese stay gooey while keeping the coating crispy. Freezing Chicken Parmesan is easy. First, let it cool completely. Wrap each piece tightly in plastic wrap. Then, place the wrapped pieces in a freezer bag or container. Label it with the date. You can freeze it for up to three months. When ready to eat, thaw it in the fridge overnight before reheating. Enjoy your meal without the fuss! You can use regular breadcrumbs if you need to. They work well, but they might not be as crispy. You can also use crushed cornflakes for a fun crunch. For gluten-free options, try ground almonds or gluten-free breadcrumbs. Each choice gives a unique texture and flavor to your Chicken Parmesan. Yes, you can prepare Chicken Parmesan ahead of time. You can bread the chicken and fry it, then store it in the fridge. When you're ready to eat, just add the marinara and cheese, then bake it. This method saves time and keeps the flavors fresh. A classic side dish is spaghetti. Toss it in olive oil and garlic for a simple, tasty pairing. You can also serve a fresh salad with greens and a light dressing. Garlic bread is another great option. It adds a nice crunch and flavor to your meal. You learned how to make Chicken Parmesan from scratch. We covered key ingredients, cooking steps, and tips for the best results. You now know how to elevate the dish with options like gluten-free breading or adding veggies. Remember to store your leftovers properly and reheat them for tasty meals later. With these tools and techniques, you can create a delicious Chicken Parmesan that impresses everyone. Enjoy your cooking journey!

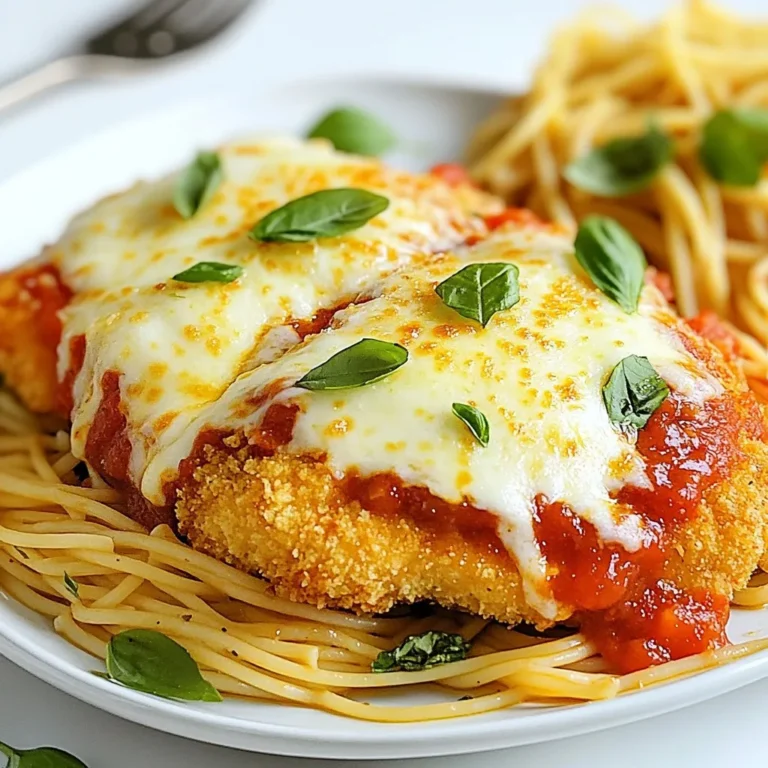
Classic Chicken Parmesan Savory and Simple Recipe

PREV 1 … 40 41 42 … 47 NEXT
meal plan mapper

explore

DessertsDinnerAppetizersDrinks

Our Policies

  • Cookie Policy
  • Copyright Policy
  • Disclaimer
  • GDPR Policy
  • Terms Of Use
Back to Top
  • About
  • Contact Us
  • Privacy Policy
© 2025 meal plan mapper