FREE DINNER EBOOK! Get your copy!
  • Cookie Policy
  • GDPR Policy
  • Disclaimer
  • Terms Of Use
  • Visit my other site: Fun Cookie Recipes
meal plan mapper
  • Home
  • Dinner
  • Desserts
  • Drinks
  • Appetizers
  • Contact
  • About
  • Privacy Policy
  • Home
  • Dinner
  • Desserts
  • Drinks
  • Appetizers
  • Contact
  • About
  • Privacy Policy
  • Cookie Policy
  • GDPR Policy
  • Disclaimer
  • Terms Of Use
Visit my other site: Fun Cookie Recipes

HOME / CATEGORIES /

Latest

To make Coconut Curry Dumpling Soup, you need some key items: - 1 cup all-purpose flour - 1/2 teaspoon salt - 1/2 cup warm water - 1 tablespoon olive oil - 1 can (14 oz) coconut milk - 2 cups vegetable broth - 2 tablespoons red curry paste - 1 tablespoon soy sauce - 1 tablespoon lime juice - 1 cup mushrooms, sliced - 1 cup spinach, chopped - 1/2 cup carrots, julienned - Fresh cilantro, chopped (for garnish) These ingredients create a rich and creamy soup that bursts with flavor. If you want to make the soup even better, consider these optional ingredients: - Red chili flakes for added spice - Extra lime wedges for serving - Fresh ginger for a zesty twist These extras enhance the taste and make your dish unique. You can easily swap out some ingredients to fit your needs: - Use whole wheat flour instead of all-purpose flour for a healthier option. - Swap vegetable broth with chicken broth if you prefer. - For a vegan option, ensure your red curry paste is free of fish sauce. These substitutes keep the soup tasty while meeting your dietary needs. {{ingredient_image_2}} To start, grab a medium mixing bowl. Combine 1 cup of all-purpose flour with 1/2 teaspoon of salt. Next, slowly add in 1/2 cup of warm water and 1 tablespoon of olive oil. Use a fork to mix well until it looks crumbly. Now, knead the dough on a floured surface for about 5 minutes. You want it smooth and elastic. Once done, cover the dough with a towel and let it rest for 20 minutes. For the broth, take a large pot. Add 1 can of coconut milk, 2 cups of vegetable broth, 2 tablespoons of red curry paste, 1 tablespoon of soy sauce, and 1 tablespoon of lime juice. Stir it well to dissolve the red curry paste fully. Turn the heat to medium and let the mixture simmer gently, stirring now and then. When your broth starts to simmer, it’s time to add some color! Toss in 1 cup of sliced mushrooms, 1/2 cup of julienned carrots, and 1 cup of chopped spinach. Let the soup cook for about 5-7 minutes. The veggies should be tender but still bright. After resting, take the dough and divide it into small pieces, about the size of a tablespoon. Roll each piece into a ball, then flatten it a bit in your hands. Drop the dumplings gently into the simmering soup one at a time. Let them cook for 10-12 minutes. They are done when they float to the top. Now, it’s time to taste your broth. If it needs more flavor, adjust with a bit of salt or lime juice. For those who like spice, sprinkle in some red chili flakes. This step adds a kick that makes the dish even better. Enjoy your flavorful Coconut Curry Dumpling Soup! For great dumplings, keep the dough smooth. Knead it well on a floured surface. Resting the dough helps it become soft and stretchy. Make sure to work with small pieces of dough. This keeps them even and easy to manage. Cooking the dumplings until they float means they are fully cooked. Do not overcrowd the pot; it can lead to uneven cooking. To boost flavor, taste the broth as you cook. You can add more salt if needed. A splash of lime juice gives a nice zing. If you like spice, mix in red chili flakes. Fresh herbs can also enhance taste. Try adding basil or mint for a unique twist. You can even mix in other vegetables like bell peppers or zucchini if you wish. Serve the soup in deep bowls for a nice look. Ensure each bowl has a good amount of dumplings and veggies. Garnish with fresh cilantro for color and flavor. Adding lime wedges on the side gives guests a fun way to personalize their soup. For a spicy kick, sprinkle red chili flakes on top. This makes the dish pop and adds a final touch. Pro Tips Use Fresh Ingredients: Fresh vegetables will not only enhance the flavor of your soup but also provide more vibrant colors and nutrients. Customize the Spice Level: Adjust the amount of red curry paste and chili flakes according to your spice preference. Start with less and add more as needed. Rest the Dumpling Dough: Allowing the dough to rest helps relax the gluten, resulting in softer dumplings that are easier to shape and cook. Garnish for Presentation: A sprinkle of fresh cilantro not only adds flavor but also makes the dish visually appealing. Lime wedges on the side can enhance the overall experience. {{image_4}} You can easily add protein to your soup. For chicken, use boneless pieces. Cut them into small cubes. Add them to the broth before you add the vegetables. Cook until they are no longer pink. This takes about 10 minutes. For tofu, use firm or extra-firm tofu. Cut it into cubes and add it with the vegetables. Tofu takes less time to cook. It will soak up the flavors well. To make this soup vegan, you can skip the chicken. The recipe is already plant-based with the coconut milk and broth. Use vegetable broth instead of chicken broth. You can also add more veggies like bell peppers or zucchini. They add flavor and color. If you want a protein boost, add chickpeas. They are tasty and filling. You can play with the spice levels in this soup. If you like heat, try adding different spices. For a warm flavor, add cumin or coriander. For a bit of kick, add cayenne pepper. You can also try chili paste. Adjust the amount to your taste. Start with a small pinch, then add more if needed. Each spice adds a unique flavor to the soup. To keep your leftover soup fresh, let it cool first. Pour the soup into airtight containers. Seal them tightly and store in the fridge. Your soup will stay good for about 3 to 4 days. Always check for any signs of spoilage before enjoying the leftovers. If you want to keep the soup longer, freezing is a great option. Use freezer-safe containers or bags for storage. Leave some space at the top of the containers to allow for expansion. Label each container with the date. The soup can last up to 3 months in the freezer. When you’re ready to eat, just thaw it in the fridge overnight. To reheat, pour the soup into a pot. Heat it over medium-low heat. Stir often to ensure it heats evenly. If the soup is too thick, add a splash of water or broth to loosen it. You can also microwave it. Use a microwave-safe bowl and cover it loosely. Heat in short intervals, stirring in between. Enjoy your warm Coconut Curry Dumpling Soup! The dumplings take about 10 to 12 minutes to cook. You can tell they are done when they float on the surface of the soup. This means they are fully cooked and ready to enjoy. Yes, you can use alternatives like almond milk or soy milk. However, these will change the flavor and creaminess of the soup. Coconut milk adds a rich taste that pairs well with the curry. To add spice, you can mix in red chili flakes or a dab of hot sauce. Start with a small amount and taste before adding more. This way, you can control the heat level just right for your taste. Yes, you can prepare the soup base ahead of time. Just store it in the fridge. When ready to eat, heat it up and cook the dumplings fresh. This keeps them soft and tasty. In this article, we explored making coconut curry dumpling soup. You learned about key ingredients and how to prepare the dumplings and broth. We shared tips for perfect dumplings and serving suggestions for great presentation. Don’t forget to try out variations for protein or spice levels. Store leftovers properly to enjoy them later. This soup is tasty, versatile, and sure to impress anyone who tries it. Enjoy your cooking!

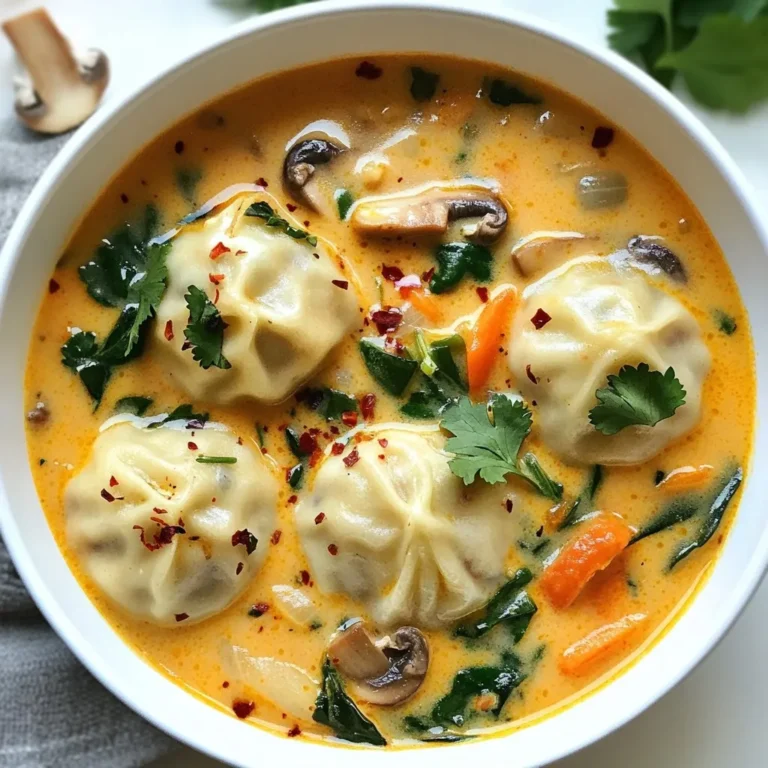
Coconut Curry Dumpling Soup Flavorful and Simple Recipe

For a rich and hearty veggie packed minestrone soup, gather these key ingredients: - 1 tablespoon extra virgin olive oil - 1 medium onion, finely diced - 2 cloves garlic, minced - 2 medium carrots, diced into small cubes - 2 celery stalks, diced - 1 medium zucchini, diced - 1 cup fresh green beans, trimmed and chopped into bite-sized pieces - 1 cup fresh spinach, roughly chopped - 1 can (14 oz) diced tomatoes in juice - 4 cups low-sodium vegetable broth - 1 can (15 oz) cannellini beans, drained and rinsed thoroughly - 1 teaspoon dried oregano - 1 teaspoon dried basil - Sea salt and freshly cracked black pepper to taste - 1 cup small pasta (such as ditalini or elbow macaroni) - Grated Parmesan cheese for serving (optional) To elevate your soup, consider adding: - A splash of lemon juice for brightness - Fresh basil leaves for a fragrant touch - Red pepper flakes for a hint of spice - Chopped kale or Swiss chard for extra greens Let’s break down the health benefits of some key ingredients: - Spinach: Rich in vitamins A, C, and K, plus iron and calcium. - Carrots: Packed with beta-carotene, good for vision and skin health. - Cannellini beans: High in protein and fiber, they help keep you full. - Zucchini: Low in calories, it adds volume and nutrients without extra calories. This veggie packed minestrone soup not only warms you up but also fills you with nutrients! {{ingredient_image_2}} 1. Start by heating the olive oil in a large pot over medium heat. 2. Add the diced onion and sauté until soft, about three minutes. 3. Mix in the minced garlic and cook for one more minute. 4. Toss in the diced carrots and celery. Cook for two to three minutes. 5. Add the diced zucchini, green beans, and spinach. Stir and cook for four to five minutes. 6. Pour in the diced tomatoes and vegetable broth. Bring to a gentle boil. 7. Once boiling, add the rinsed cannellini beans, oregano, basil, salt, and pepper. 8. Reduce heat to low and let simmer for ten minutes. 9. Stir in the small pasta and continue to simmer for another ten to twelve minutes. 10. Taste and adjust seasoning as needed. If too thick, add broth or water. 11. Serve hot, garnished with Parmesan cheese if desired. - Chop vegetables first: This saves time during cooking. - Use canned beans: They are quick and easy. Just drain and rinse. - Measure spices ahead: Having everything ready helps you stay organized. - Prep in batches: Chop all your veggies at once to speed things up. - Sautéing: This brings out the flavors of your onions and garlic. - Simmering: Gently cooking allows the soup to blend flavors well. - Tasting often: This helps ensure your soup is well-seasoned. - Adjusting texture: You can add more broth if the soup gets too thick. To make the best minestrone soup, start with fresh veggies. Use seasonal produce for the best taste. Make sure to chop your ingredients into similar sizes. This helps them cook evenly. Sauté the onions and garlic well; this builds a rich flavor base. Always taste your soup as it cooks. Adjust the seasoning to your liking. Besides the classic oregano and basil, try adding a bay leaf for depth. A pinch of red pepper flakes gives a nice kick. For a richer flavor, add a splash of balsamic vinegar. Fresh herbs like parsley or thyme can brighten the dish. If you love cheese, sprinkle some grated Parmesan at the end for creaminess. One common mistake is overcooking the pasta. Cook it just until al dente, so it stays firm. Another mistake is not adding enough salt. Salt enhances the natural flavors of the veggies. Lastly, don't skip the broth; it adds essential flavor. If your soup is too thick, add more broth or water to reach your desired consistency. Pro Tips Use Fresh Vegetables: Fresh vegetables not only enhance the flavor of the soup but also provide the best texture and nutritional value. Customize Your Pasta: Feel free to experiment with different types of small pasta, such as farro or quinoa pasta, for a unique twist on the classic minestrone. Adjust Thickness: If you prefer a brothier soup, simply add more vegetable broth or water until you reach your desired consistency. Garnish for Flavor: A sprinkle of fresh herbs or a drizzle of high-quality olive oil before serving can elevate the dish and add an aromatic touch. {{image_4}} You can easily make this minestrone soup vegetarian or vegan. This recipe is already meat-free, making it a great choice. To keep it vegan, just skip the optional Parmesan cheese on top. You can add nutritional yeast for a cheesy flavor without dairy. If you have allergies or special diets, you can swap some ingredients. For gluten-free options, use gluten-free pasta. Instead of cannellini beans, you can use chickpeas or black beans. If you prefer a different veggie, try adding bell peppers, kale, or sweet potatoes. To give your minestrone a different taste, try adding spices. A pinch of red pepper flakes can add heat. You might like a splash of lemon juice for brightness. For an Italian twist, add fresh basil or parsley just before serving. Each change can make your soup special! To store leftover minestrone soup, let it cool first. Once cool, pour it into an airtight container. Make sure to leave some space at the top for expansion when freezing. Seal the container tightly to keep out air and moisture. Store it in the fridge for up to three days. If you want to keep it longer, follow the freezing tips below. Freezing is a great way to extend the life of your minestrone soup. Use a freezer-safe container or heavy-duty freezer bags. Divide the soup into smaller portions for easy use later. Label each container with the date. This way, you’ll know how long it has been in the freezer. Properly stored, your soup can last up to three months in the freezer. When you’re ready to enjoy your soup again, thaw it in the fridge overnight. For quick reheating, you can use the microwave or stovetop. If using the microwave, heat in 1-minute intervals, stirring in between. On the stovetop, pour the soup into a pot and heat over medium heat. Stir often until it’s hot all the way through. If the soup is too thick, add a splash of broth or water to reach your desired consistency. Enjoy your comforting bowl of minestrone! To make your minestrone soup thicker, you can mash some of the beans. Use a fork to mash a portion of the cannellini beans right in the pot. This adds creaminess without changing the flavor. Another way is to add more pasta. Just keep an eye on the cooking time, as pasta absorbs liquid. If you want a smooth texture, blend a cup of the soup and stir it back in. Yes, you can use many different vegetables in your minestrone soup. Some great options include bell peppers, kale, or peas. You can also use seasonal veggies like squash or pumpkin. Just remember to chop them small, so they cook evenly. The key is to keep the flavor balance, so mix and match based on what you love. Minestrone soup can last in the fridge for about 3 to 5 days. Make sure you store it in an airtight container. When you reheat, check that it heats all the way through. If it seems too thick, add a splash of broth or water to loosen it up. For a protein boost, you can add cooked chicken or turkey. If you want to keep it vegetarian, try adding tofu or chickpeas. Both options work well in soup and add great texture. You can also sprinkle in some nuts or seeds for crunch and extra nutrition. Minestrone soup is a great meal that anyone can make. We covered the must-have ingredients, the steps to cook, and tips to get it just right. You can try fun variations for different diets, and learn smart storage methods too. Remember, cooking is about experimenting and making it your own. Don’t hesitate to mix flavors or swap veggies. Enjoy your tasty, homemade minestrone soup, and share it with friends!

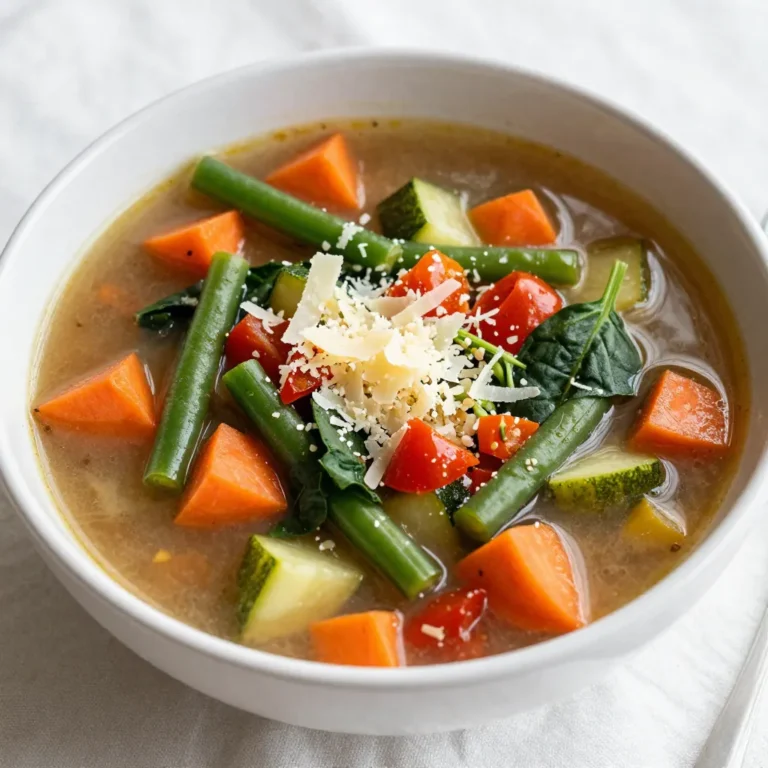
Veggie Packed Minestrone Soup Healthy and Comforting

- 2 boneless, skinless chicken breasts - 1 cup panko breadcrumbs - 1/2 cup finely grated Parmesan cheese - 1 teaspoon garlic powder - 1 teaspoon dried oregano - 1/2 teaspoon salt - 1/2 teaspoon freshly ground black pepper - 1 cup marinara sauce - 1 cup shredded mozzarella cheese - Fresh basil leaves (optional) To make Air Fryer Chicken Parmesan, you need simple yet tasty ingredients. Start with two boneless, skinless chicken breasts. These will be your main stars. The panko breadcrumbs give a great crunch. I always use one cup for the best texture. Next, grab half a cup of finely grated Parmesan cheese. It adds a rich flavor. For seasonings, you’ll need garlic powder, dried oregano, salt, and freshly ground black pepper. Each brings its own twist to the dish. You only need a teaspoon of garlic powder and oregano. A half teaspoon each of salt and pepper works well. Don’t forget the toppings! You will need a cup of marinara sauce and a cup of shredded mozzarella cheese. These will make your chicken juicy and cheesy. If you want a fresh touch, add some basil leaves for garnish. They look pretty and taste great! With these ingredients, you are ready to create a crunchy and flavorful meal that everyone will love. Enjoy cooking! {{ingredient_image_2}} Set your air fryer to 400°F (200°C). This step ensures even cooking. In a shallow dish, mix these ingredients: - 1 cup panko breadcrumbs - 1/2 cup finely grated Parmesan cheese - 1 teaspoon garlic powder - 1 teaspoon dried oregano - 1/2 teaspoon salt - 1/2 teaspoon freshly ground black pepper Stir well so the spices blend nicely with the breadcrumbs. Take each chicken breast and dip it into the beaten egg. Make sure it’s fully covered. Then, coat it with the breadcrumb mixture. Press down firmly to get a good layer on both sides. Place the coated chicken in a single layer in the air fryer. Cook it for 10 minutes. After that, flip the chicken using tongs. Cook for an extra 5 minutes or until the chicken is golden brown and reaches 165°F inside. Once the chicken is cooked, spoon marinara sauce over each piece. Then, sprinkle shredded mozzarella cheese on top. Return the chicken to the air fryer for 2 to 3 minutes. This will melt the cheese and make it bubbly and delicious. Now, your Air Fryer Chicken Parmesan is ready to enjoy! To make your chicken truly crispy, use panko breadcrumbs. They are lighter and crunchier than regular breadcrumbs. This gives your chicken a perfect crunch. Avoid overcrowding in the air fryer. If you pack too much chicken in, it won’t cook evenly. Cook in batches if needed. Chicken breast sizes can vary. Thicker pieces need more time. For even cooking, use a meat thermometer. Aim for an internal temperature of 165°F. This ensures the chicken is safe and juicy. Always preheat your air fryer. This step is key to getting that nice crust. Skipping the egg wash is another mistake. The egg helps the breadcrumbs stick well. Don’t skip this step if you want great flavor and texture. Pro Tips Chicken Thickness: For even cooking, ensure your chicken breasts are of uniform thickness. You can pound them to about 1 inch thick if they’re uneven. Breadcrumb Coating: For an extra crispy crust, let the coated chicken sit for a few minutes before air frying. This helps the breadcrumbs adhere better. Cheese Melting: If you want a beautifully melted cheese topping, cover the chicken loosely with aluminum foil during the last few minutes of cooking to trap heat. Serving Suggestions: Pair your chicken parmesan with a side of garlic bread or a light salad to complement the dish and add freshness. {{image_4}} You can switch things up with different cheeses. Provolone adds a nice, sharp flavor. White cheddar gives a creamy twist. Both melt well and taste great on chicken. Feel free to mix your favorites for a unique taste. Just remember, the cheese should be melty and delicious. Want to enhance the flavor? Try adding Italian seasoning to the breadcrumb mix. Fresh herbs, like basil or parsley, bring a bright taste. Mix these into the panko before coating your chicken. It’s a simple way to make a big difference in flavor. You don’t have to stick with chicken breasts. Chicken thighs are juicy and full of flavor. They cook well in the air fryer, too. You can also use turkey cutlets for a leaner option. Both alternatives keep the dish tasty while offering variety. To store leftovers, let the chicken cool first. Place it in an airtight container. This keeps it fresh longer. Store in the fridge for up to three days. Make sure the chicken is not too hot when you put it in the fridge. This helps avoid condensation. You can freeze cooked Chicken Parmesan too. Wrap each piece tightly in plastic wrap. Then, put it in a freezer bag. Squeeze out the air before sealing the bag. This helps prevent freezer burn. You can freeze it for up to three months. When you're ready to eat, thaw it in the fridge overnight. To reheat, the best method is the air fryer. This keeps it crunchy. Set the air fryer to 350°F (175°C) and cook for about 5 minutes. If you don't have an air fryer, use an oven. Preheat the oven to 350°F (175°C) and cover the chicken with foil. This stops it from drying out. Heat for about 10-15 minutes until warm. Enjoy the flavor and crunch just like fresh! Yes, you can use regular breadcrumbs. However, panko is lighter and crunchier. Panko gives a better texture and crispness to the chicken. If you prefer regular breadcrumbs, choose a fine type for a smoother crunch. You have many tasty options! Here are some great sides: - Mixed salad with a light vinaigrette - Garlic bread for extra crunch - Steamed vegetables like broccoli or green beans - Pasta tossed with marinara sauce These sides will balance the meal and enhance flavors. To make this dish gluten-free, use gluten-free breadcrumbs. Many brands offer great options. You can also use crushed rice cereal or ground almonds as alternatives. Make sure your marinara sauce is gluten-free too. This way, everyone can enjoy this delicious meal! This blog post covered how to make Air Fryer Chicken Parmesan. You learned about the key ingredients, including chicken, panko, and cheese. I shared step-by-step instructions for cooking and tips for crispiness. You can try variations, store leftovers, and reheat properly. Air Fryer Chicken Parmesan is easy and fun to make. Enjoy this tasty dish with your favorite sides for a perfect meal. Remember, small changes can lead to big taste!

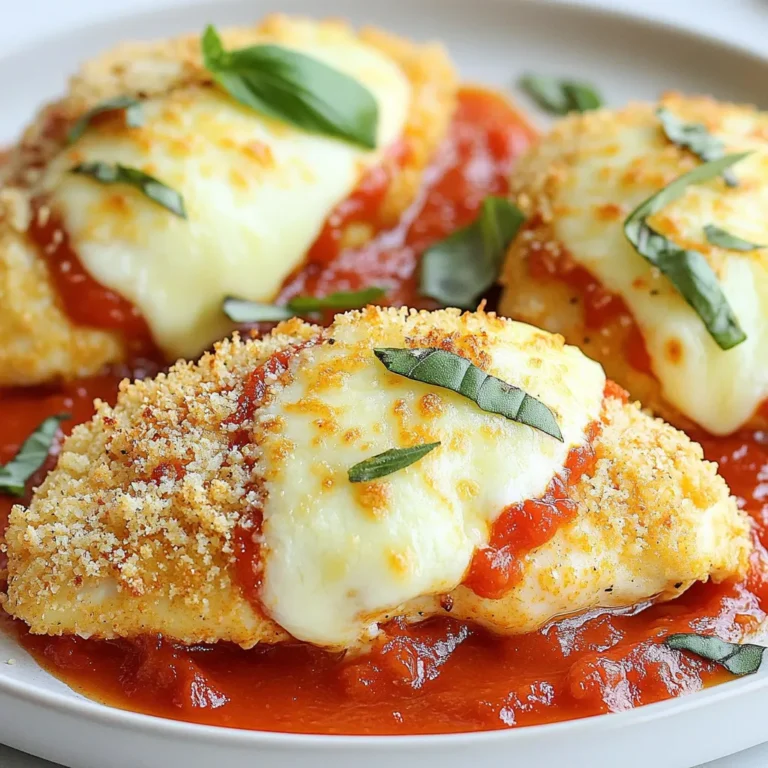
Air Fryer Chicken Parmesan Crunchy and Flavorful Meal

Here are the simple ingredients you need for Overnight Cinnamon Apple Oats: - 1 cup rolled oats - 1 ½ cups almond milk (or any milk of your choice) - 1 medium apple, cored and diced - 1 tablespoon pure maple syrup (or honey) - 1 teaspoon ground cinnamon - ½ teaspoon pure vanilla extract - ¼ cup Greek yogurt (optional) - A handful of walnuts or pecans, roughly chopped - A pinch of salt Each ingredient plays a key role. The rolled oats form the base. Almond milk adds creaminess. Diced apples bring sweetness and crunch. Maple syrup or honey adds a touch of sweetness. Ground cinnamon gives that warm, cozy flavor. Vanilla extract enhances the taste, while Greek yogurt adds extra creaminess. Nuts provide a nice crunch and extra nutrients. Finally, salt balances all the flavors. When you gather these ingredients, make sure they are fresh. The quality of your oats and apples can really make a difference. Choose a sweet apple variety for the best flavor. This recipe is flexible too. Feel free to switch out the milk or nuts based on what you have at home. Enjoy the fun of customizing this dish to your taste! {{ingredient_image_2}} 1. In a medium bowl or a large mason jar, combine 1 cup of rolled oats and 1 ½ cups of almond milk. Stir well until the oats soak up the milk. 2. Next, add 1 medium diced apple, 1 tablespoon of maple syrup, 1 teaspoon of ground cinnamon, ½ teaspoon of vanilla extract, and a pinch of salt. If you want extra creaminess, add ¼ cup of Greek yogurt now. Mix the ingredients until everything is well combined. 3. Taste the mixture. If you want it sweeter, add more maple syrup or more cinnamon to your liking. 4. Cover the bowl with plastic wrap or seal the mason jar. Place it in the fridge overnight or for at least 4 to 6 hours. This soaking time helps the oats absorb all the flavors and liquid. 5. When you're ready to eat, take the oats out of the fridge. Stir them well. If they seem too thick, add a splash of almond milk to make them creamy. 6. Before serving, sprinkle the top with a handful of chopped walnuts or pecans. This adds a nice crunch and flavor to your dish. Enjoy your tasty Overnight Cinnamon Apple Oats! You can easily change how sweet your oats are. If you want less sweetness, use less maple syrup or honey. You can also swap these for mashed bananas or unsweetened applesauce. Both options add flavor and moisture without too much sugar. For an even creamier texture, add Greek yogurt to your oats. It gives a nice, thick feel and adds protein too. You can also try different types of milk. Almond milk is light, but whole milk or oat milk will make your oats richer. Experiment with what you like best! Cinnamon is key to this recipe. I suggest using ground cinnamon for a warm taste. If you want more spice, try adding a bit more, but start with a teaspoon. You can also use cinnamon sticks for a different flavor. Just remove them before serving! Pro Tips Use Fresh Apples: Choose crisp and sweet apples like Honeycrisp or Fuji for the best flavor and texture in your overnight oats. Customize the Sweetness: Adjust the amount of maple syrup or honey based on the sweetness of your apples and personal preference. Add More Texture: Incorporate additional toppings like dried fruits or seeds in the morning for extra flavor and crunch. Make It Vegan: To keep your overnight oats plant-based, stick with almond milk and maple syrup, and skip the Greek yogurt or use a dairy-free alternative. {{image_4}} You can change up the fruit in your oats. Bananas add a creamy texture. Slice them and mix them in. Berries like blueberries or strawberries also work well. They add a nice pop of color and flavor. You can even try peaches or pears for a twist. Just pick your favorite fruits and enjoy! Chopped nuts or seeds can add crunch. Walnuts and pecans are great, but you can try almonds or hazelnuts too. If you want a nut-free option, sprinkle on pumpkin seeds or sunflower seeds. They give a nice bite and add healthy fats. Choose what you like best to make it yours! To make this recipe vegan, simply swap out dairy. Use almond milk or coconut milk instead of cow's milk. You can skip the Greek yogurt or use a plant-based yogurt for creaminess. Maple syrup is already vegan, so you’re all set there. These swaps make this dish perfect for everyone! You can store your overnight cinnamon apple oats in the fridge for up to five days. This is great for meal prep! Use a mason jar or a tight container. These options keep the oats fresh and tasty. Always ensure that the lid is on tight. This helps prevent any unwanted smells from other foods in the fridge. To freeze the oats, pour them into freezer-safe containers. Leave some space at the top, as the oats will expand. You can store them for up to three months. When you're ready to eat, just take one out and thaw it in the fridge overnight. This method keeps the oats creamy and delicious. If you want to reheat the oats, place them in a bowl and add a splash of almond milk. This helps to keep them from getting too thick. Heat in the microwave for about one minute. Stir halfway through to make sure they heat evenly. Enjoy your warm, tasty oats just like fresh! Yes, you can use quick oats. Quick oats cook faster and absorb liquid more quickly. They will make your oats softer. But, rolled oats give a better texture. If you like a chewier bite, stick with rolled oats. To make the oats gluten-free, choose certified gluten-free oats. Regular oats can be cross-contaminated with gluten. Always check the label. This simple swap makes the dish safe for those with gluten issues. Overnight Cinnamon Apple Oats have great nutrition. Here’s a breakdown per serving: - Calories: About 300 - Carbohydrates: 45 grams - Fiber: 8 grams - Protein: 10 grams - Fat: 9 grams The oats provide energy, while apples add vitamins. Greek yogurt boosts protein, making this meal hearty. You should refrigerate the oats. Leaving them out can spoil the ingredients. The cold helps the oats absorb the almond milk and flavors. It also keeps the mix fresh and safe to eat. You can serve many things with these oats. Consider pairing them with: - Fresh fruit like bananas or berries - A dollop of yogurt for creaminess - A cup of tea or coffee for a warm drink - A sprinkle of granola for extra crunch These sides add variety and make your breakfast even better. You learned how to make Overnight Cinnamon Apple Oats step by step. We covered ingredients, tips, and variations for your taste. You can sweeten it how you like and add fruits or nuts for fun. Remember, these oats store well in the fridge and freeze nicely too. Experiment with your toppings and feel free to ask any questions. Enjoy this easy, healthy breakfast in a way that fits your style. Brown sugar, honey, or even a scoop of peanut butter can make it special. Keep it simple, fresh, and delicious!

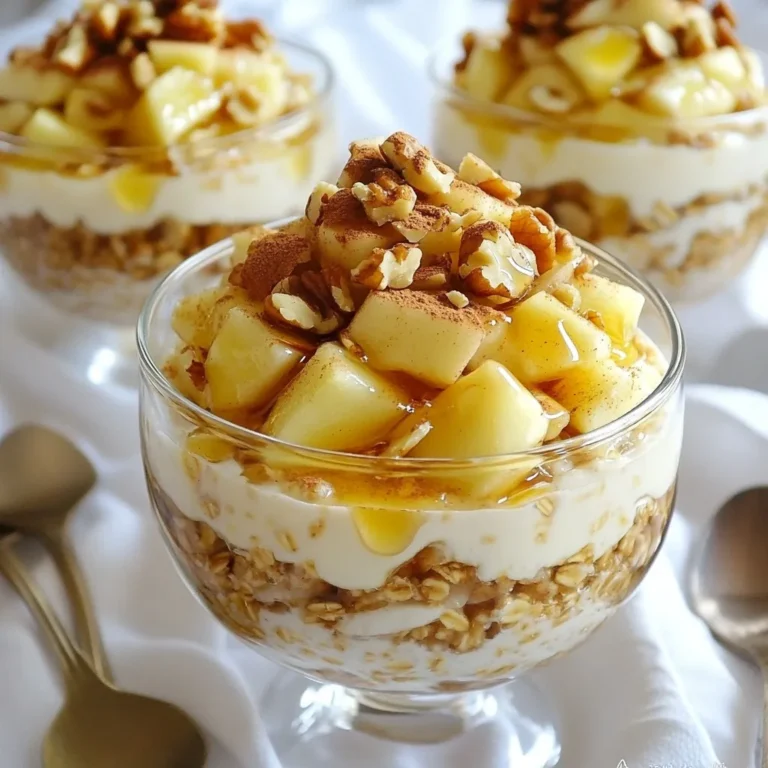
Overnight Cinnamon Apple Oats Creamy and Easy Recipe

- 4 boneless, skinless chicken breasts - 1 cup fresh mozzarella cheese, diced - 1 large tomato, diced - 1/2 cup fresh basil leaves, finely chopped - 2 tablespoons balsamic glaze - 2 tablespoons olive oil - 3 cloves garlic, minced - Salt and pepper, to taste - 1 teaspoon Italian seasoning - Toothpicks or kitchen twine - Skillet - Baking dish When preparing Caprese stuffed chicken, the quality of your ingredients matters. Start with fresh, boneless, skinless chicken breasts. These are easy to work with and cook evenly. The fresh mozzarella cheese should be soft and creamy. This cheese melts beautifully and adds a rich taste to your dish. Choose a ripe, large tomato for the best flavor. Diced tomatoes provide a juicy burst in each bite. Fresh basil leaves bring a fragrant, herbal note. You can chop them finely to mix well with the other filling ingredients. For seasoning, balsamic glaze adds a sweet tang. Olive oil keeps the chicken moist and enhances flavor. Minced garlic gives a punch of zest. Italian seasoning adds warmth and depth. Don’t forget to adjust salt and pepper to your taste. You will also need a few tools. Toothpicks or kitchen twine help secure the chicken after stuffing. A skillet cooks the chicken evenly before baking. Finally, a baking dish holds the chicken while it finishes cooking in the oven. Gathering these ingredients and tools ensures a smooth cooking process. You will be well on your way to a delicious Caprese stuffed chicken! {{ingredient_image_2}} - Preheating the oven: Start by preheating your oven to 375°F (190°C). This helps the chicken cook evenly and stay juicy. - Preparing the Caprese filling: In a bowl, mix 1 cup of diced fresh mozzarella, 1 large diced tomato, and 1/2 cup of finely chopped basil leaves. Add a pinch of salt and pepper. This mixture creates a fresh and bright flavor. - Butterflying the chicken: Take each chicken breast and carefully slice it lengthwise. Don’t cut all the way through; you want to make a pocket to hold the filling. - Stuffing the chicken breasts: Fill each butterflied chicken breast with the Caprese mixture. Use toothpicks or kitchen twine to secure the opening. This keeps all that tasty filling inside. - Seasoning and searing the chicken: Rub the outside of the stuffed chicken with 2 tablespoons of olive oil, 3 minced garlic cloves, and a sprinkle of Italian seasoning. Season with salt and pepper. Then, heat a skillet over medium heat and sear the chicken for 3-4 minutes on each side until golden brown. - Baking in the oven: Place the seared chicken in a baking dish. Drizzle with 2 tablespoons of balsamic glaze for extra flavor. Bake in the preheated oven for 25-30 minutes. Make sure the chicken reaches an internal temperature of 165°F (75°C) for safe eating. To keep the chicken tender and juicy, always butterfly the breasts. This creates a pocket for the filling. Sear the chicken to lock in moisture. Cook the chicken until it reaches an internal temperature of 165°F (75°C). Use a meat thermometer for accuracy. For extra flavor, marinate the chicken in olive oil and garlic. A simple mix of salt, pepper, and Italian seasoning works well too. Fresh ingredients like basil and mozzarella give the best taste. Dried herbs can work, but fresh adds a vibrant touch. For plating, place the stuffed chicken on a clean plate. Drizzle with balsamic glaze for a shiny finish. Add fresh basil leaves on top for color. You can also serve it with a side of roasted veggies to make it look great on the table. Pro Tips Keep It Fresh: Use the freshest mozzarella and basil you can find for the best flavor and texture in your Caprese filling. Perfectly Seasoned: Don’t be shy with the salt and pepper; seasoning the chicken inside and out enhances the overall taste of the dish. Resting Time: Allow the chicken to rest after baking; this helps the juices redistribute, making the chicken more tender and juicy when sliced. Flavor Boost: For an extra layer of flavor, consider marinating the chicken in olive oil, garlic, and herbs for a few hours before stuffing. {{image_4}} You can change the cheese in this dish. Try using provolone or goat cheese. These options bring a different taste. Each cheese adds its unique flavor to the chicken. You can also switch up the herbs. If you don’t have fresh basil, use parsley or oregano. Both herbs can brighten the dish nicely. Experiment with what you like best. Grilling is a fun way to cook Caprese stuffed chicken. It adds a smoky flavor that many enjoy. Just be sure to watch the chicken closely. It cooks faster on the grill than in the oven. A slow cooker is another great option. This method keeps the chicken moist and tender. Cook on low for about 4-6 hours. You can still add the balsamic glaze for a tasty finish. Pair your Caprese stuffed chicken with fresh salad or roasted veggies. A light side dish complements the rich flavors well. You can also serve it with pasta for a heartier meal. To make it part of a larger meal, include some garlic bread or rice. These sides round out your dinner nicely. Don’t forget to drizzle extra balsamic glaze on the plate for added flavor and flair. After enjoying your Caprese stuffed chicken, you might have some leftovers. To keep them fresh, store the chicken in an airtight container. Make sure to refrigerate it within two hours of cooking. This helps prevent bacteria growth. If you plan to eat it later, you can freeze the chicken. Wrap it tightly in plastic wrap, then in foil. This double wrapping keeps the chicken safe in the freezer for up to three months. When you want to enjoy your leftovers, reheating them correctly is key. The best method is to heat them in the oven. Preheat your oven to 350°F (175°C) and place the chicken in a baking dish. Cover it with foil to keep moisture in. Heat for about 20 minutes or until it's warm all the way through. You can also use a microwave, but be careful not to dry it out. Heat it in short bursts and check often. Always ensure that the chicken reaches an internal temperature of 165°F (75°C) for safety. In the fridge, your Caprese stuffed chicken lasts about three to four days. If you freeze it, it can last for up to three months. However, to know if your leftovers are still good, check for signs of spoilage. Look for any changes in smell, color, or texture. If it smells off or has a strange color, it’s best to toss it. What can I substitute for mozzarella cheese? You can use provolone or goat cheese. Both add a nice flavor. For a lighter option, try ricotta. Each cheese brings a unique taste to your dish. Can I make this recipe ahead of time? Yes, you can prepare the stuffed chicken and refrigerate it. Just make sure to bake it before serving. This saves time on busy days. How do I know when the chicken is fully cooked? Check the internal temperature using a meat thermometer. It should read 165°F (75°C). This ensures the chicken is safe to eat and juicy. Is this recipe gluten-free? Yes, Caprese stuffed chicken is gluten-free. All ingredients used are naturally gluten-free. Enjoy without worry if you’re avoiding gluten. Can I make it dairy-free? Absolutely! You can use dairy-free cheese. Options like almond or cashew cheese work well. They melt nicely and give great flavor. What are the nutritional facts for Caprese Stuffed Chicken? This dish is rich in protein and low in carbs. Each serving has about 300 calories, 30 grams of protein, and 15 grams of fat. Nutritional values may vary based on ingredients used. You learned how to make Caprese Stuffed Chicken with simple steps. We covered the main ingredients, like chicken, mozzarella, and basil. I shared tips for cooking the chicken perfectly and ways to make it your own. You can even store leftovers easily. Try this dish for your next meal. It's tasty and fun to prepare. Enjoy sharing it with friends or family!

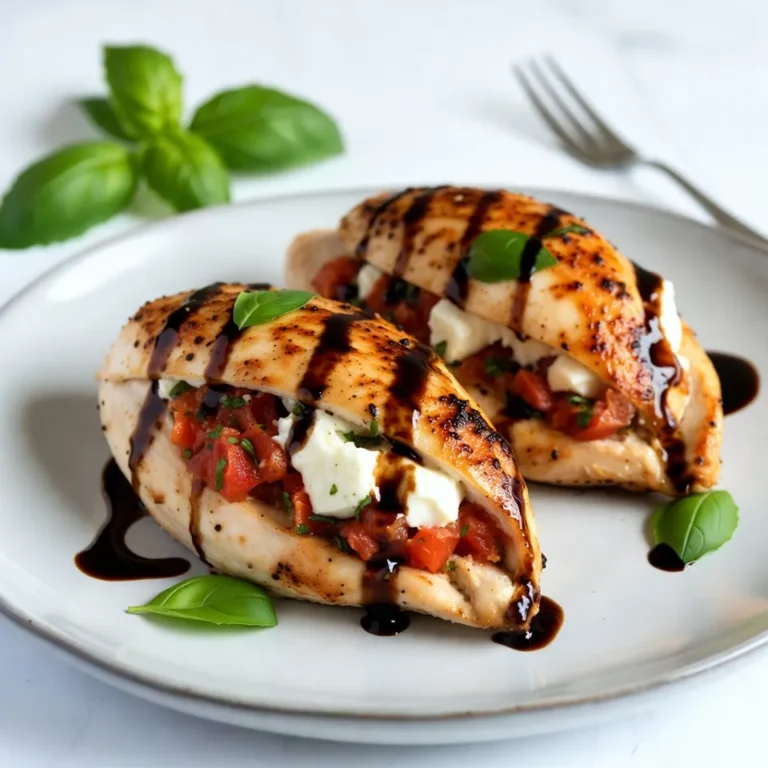
Caprese Stuffed Chicken Flavorful and Easy Recipe

- 1 pound ground beef (or turkey for a lighter option) - 1/2 cup breadcrumbs (choose panko for extra crunch) - 1/4 cup freshly grated Parmesan cheese - 1/4 cup fresh parsley, finely chopped - 2 cloves garlic, minced - 1 large egg, beaten - Salt and freshly ground black pepper to taste These are the heart of your meatballs. Ground beef gives a rich flavor, while turkey offers a leaner choice. Panko breadcrumbs add a nice crunch. Fresh parsley and garlic bring bright flavors, making every bite tasty. - 1/2 cup honey - 1/4 cup soy sauce (substitute with tamari for a gluten-free version) - 2 tablespoons rice vinegar - 1 teaspoon sesame oil - 1 teaspoon fresh ginger, grated - 1/2 teaspoon red pepper flakes (optional for a kick) This sauce is the star of the dish. Honey adds sweetness, and soy sauce gives it depth. Rice vinegar balances the flavors. Sesame oil and ginger add warmth and aroma. If you like heat, red pepper flakes give an extra kick. - Fresh green onions, sliced for garnish - Sesame seeds for topping These extras can make your dish pop. Sliced green onions add color and freshness. Sesame seeds give a lovely crunch and look great on the plate. {{ingredient_image_2}} To start, grab a big bowl. In this bowl, mix 1 pound of ground beef or turkey. Add 1/2 cup of breadcrumbs for texture. Next, sprinkle in 1/4 cup of grated Parmesan cheese and 1/4 cup of finely chopped fresh parsley. Then, toss in 2 minced garlic cloves and 1 beaten egg. Don’t forget to add a pinch of salt and black pepper. Use your hands or a spoon to mix well. You want everything to blend nicely. Now it’s time to shape the meatballs. Take a small amount of the mixture and roll it into a ball about 1 inch wide. This size helps them cook evenly. Place each meatball on a plate or board as you go. Keep forming until you use all the mixture. In a separate bowl, make the honey garlic sauce. Combine 1/2 cup of honey with 1/4 cup of soy sauce. Add 2 tablespoons of rice vinegar and 1 teaspoon of sesame oil for flavor. Grate in 1 teaspoon of fresh ginger. If you like some heat, add 1/2 teaspoon of red pepper flakes. Whisk everything together until it’s smooth and well mixed. Next, take your slow cooker. Carefully place the meatballs inside it. Try to arrange them in a single layer for even cooking. Pour the honey garlic sauce over the meatballs, ensuring they are fully coated. Cover the slow cooker and set it on low for 4 to 5 hours or high for 2 to 3 hours. The meatballs will soak up all the yummy flavors. When they’re done, gently take them out and let them rest for a few minutes. If you want a thicker sauce, simmer the leftover sauce in a pan over medium heat until it thickens. To make sure your meatballs stay tender, use a mix of ground beef and breadcrumbs. The breadcrumbs help hold moisture, which keeps them soft. Don't overwork the meat when mixing; just combine until everything is mixed well. This keeps air in the meatballs, making them light and fluffy. Cooking them on low heat in the slow cooker also helps. The slow cooking breaks down the meat, adding flavor and tenderness. If you want a thicker sauce, there are easy ways to do this. After cooking, transfer the leftover sauce to a saucepan. Heat it over medium heat and let it simmer. This reduces the sauce and thickens it nicely. You can also mix a bit of cornstarch with water to make a slurry. Add this to the sauce while it simmers, stirring until it thickens. This gives you a rich, sticky glaze for your meatballs. Honey garlic meatballs pair well with many sides. Try serving them over fluffy steamed rice or noodles. This helps soak up the tasty sauce. You can also add a fresh salad with crunchy veggies for a nice contrast. For a fun twist, serve them as appetizers with toothpicks. Garnish the platter with sesame seeds and green onions for a pop of color. These small touches enhance the look and flavor of your meal. Pro Tips Use Lean Meat: Opt for lean ground beef or turkey to keep the meatballs juicy while reducing grease. Chill Before Cooking: Refrigerate formed meatballs for about 30 minutes before cooking to help them hold their shape. Customize the Sauce: Experiment with different sauces or add ingredients like hoisin sauce for a unique flavor twist. Serve with Sides: Pair the meatballs with steamed vegetables, rice, or noodles to create a complete meal. {{image_4}} You can swap ground beef for turkey or chicken. Both choices keep the dish light. Turkey has a mild taste. It works well in this recipe. Chicken adds a nice flavor too. For vegetarians, use plant-based meat. It can mimic the texture of real meat. You still get the same taste with honey garlic sauce. To make this dish gluten-free, choose tamari instead of soy sauce. This simple change keeps the flavor intact. Check the breadcrumbs too. Use gluten-free panko for that extra crunch. These small swaps let everyone enjoy the meal. If you like heat, add red pepper flakes. They bring a nice kick to the meatballs. You can also use sriracha in the sauce. Just a little can spice things up. If you want more heat, try diced jalapeños. Adjust to your taste for the perfect balance. To store leftover meatballs, first let them cool. Once cooled, place them in an airtight container. Keep the meatballs in the fridge for up to three days. If you made extra honey garlic sauce, store it separately. This keeps the meatballs fresh and flavorful. If you want to freeze the meatballs, follow these steps: - Allow the meatballs to cool completely. - Place them in a single layer on a baking sheet. - Freeze them for about one hour. This helps them keep their shape. - Once frozen, transfer them to a freezer bag. - Label the bag with the date. You can freeze them for up to three months. When you’re ready to enjoy your meatballs again, here are some tips: - For frozen meatballs, thaw them in the fridge overnight. - To reheat, place them in a microwave-safe dish. Add a splash of water to keep them moist. - Heat on medium power for a few minutes, checking often. - You can also reheat them in a saucepan over medium heat. Stir them gently until warm. - If you want a crispy texture, use the oven. Bake at 350°F for about 15-20 minutes. This gives them a nice crust. Yes, you can make the meatballs ahead of time. Form the meatballs and place them on a baking sheet. Cover them and store in the fridge for up to 24 hours. You can also freeze them for longer storage. Just thaw before cooking. Serve honey garlic meatballs with a variety of sides. Here are some great options: - Steamed rice - Noodles - Stir-fried vegetables - A fresh salad These sides soak up the tasty sauce well. If you make larger meatballs, increase the cooking time. For meatballs about 1.5 inches, cook for 6-7 hours on low or 3-4 hours on high. Always check if they are cooked through with a meat thermometer. They should reach 165°F. Yes, you can use different sauces. Try sweet and sour sauce or BBQ sauce for a twist. You can also make a teriyaki sauce for a different flavor. Adjust the other ingredients as needed to match the new sauce. You learned how to make tasty honey garlic meatballs from scratch. We covered essential ingredients, a simple cooking method, and helpful tips. Remember, you can adjust the meat, make it spicy, or store leftovers easily. Whether for a meal or a party, these meatballs are fun and flexible. Enjoy experimenting with flavors and serving ideas. Cooking should be enjoyable and delicious!

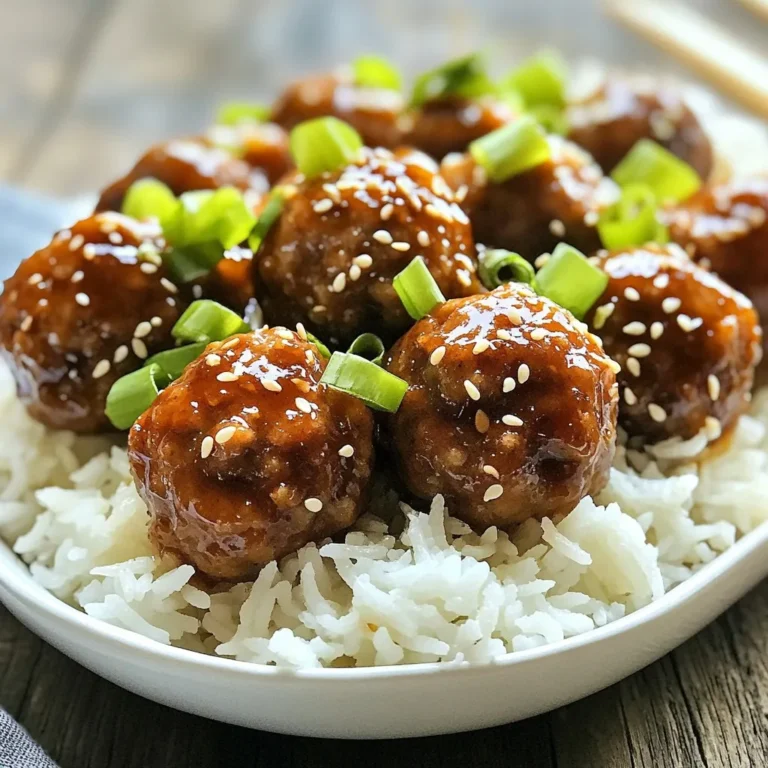
Slow Cooker Honey Garlic Meatballs Tasty and Easy Recipe

You need rolled oats for the base. I prefer old-fashioned oats. They give a nice texture. For nut butter, choose creamy or crunchy peanut butter. Both work well in this recipe. The nut butter adds flavor and binds the mixture together. For sweetness, I use honey or maple syrup. Both options taste great. You will need about 1/3 cup of your chosen sweetener. This helps the balls stick together too. Adding 1 teaspoon of pure vanilla extract boosts the flavor. A pinch of sea salt balances the sweetness. Chia seeds are packed with omega-3s. You’ll want 1/4 cup for nutrition. Ground flaxseed adds fiber and helps with texture. I use 1/4 cup in my mix. If you want a treat, add mini dark chocolate chips. About 1/4 cup will do. These are optional but make the energy balls more fun! {{ingredient_image_2}} First, grab a large mixing bowl. Add 1 cup of rolled oats. You can use old-fashioned oats for better texture. Next, scoop in 1/2 cup of peanut butter. You can choose creamy or crunchy based on your taste. Pour in 1/3 cup of honey or maple syrup for sweetness. This will help bind the mixture. Mix all these ingredients well using a sturdy spatula or spoon. You want a smooth and creamy mixture. Then, add 1/4 cup of chia seeds. They are great for omega-3s. Next, sprinkle in 1/4 cup of ground flaxseed. This adds fiber to your energy balls. If you'd like, toss in 1/4 cup of mini dark chocolate chips for a little indulgence. Lastly, add 1 teaspoon of pure vanilla extract and a pinch of sea salt. This will enhance all the flavors. Stir until everything is evenly mixed. If the mixture feels too dry, add a splash of water or more honey. If it's too sticky, just add a bit more oats. Now it’s time to shape the mixture into balls. Use your hands to scoop out tablespoon-sized portions. Roll them gently between your palms. You should get about 16 to 20 energy balls. If you want them larger or smaller, just adjust the size you scoop. Once rolled, place the energy balls on a baking sheet lined with parchment paper. Make sure to leave some space between each ball. This helps them not stick together later. After shaping the energy balls, it’s time to chill them. Place the baking sheet in the refrigerator for at least 30 minutes. This will help them firm up. Once chilled, you can enjoy them right away or store them for later. Keep them in an airtight container in the fridge. They will stay fresh for about a week. Enjoy these tasty snacks anytime you need a quick boost of energy! To get the best texture for your energy balls, start with the right mix. If your mix feels too dry, add a splash of water or honey. This small step makes a big difference. If it feels too sticky, sprinkle in more oats or ground flaxseed. You want the mixture to hold together well. It should be sticky but not overly wet. Aim for a mix that rolls easily into balls without falling apart. How you present your energy balls can make them more fun to eat. Use a bright platter to showcase them. You can also fill a mason jar for a cute snack. Consider adding colorful sprinkles or coconut flakes on top. This adds a fun twist and makes them look appealing. A good look can make your snack stand out at parties or gatherings. You can change the flavors in your energy balls easily. For a nutty twist, try adding almond butter or sunflower seed butter. Want something sweet? Toss in dried fruit like raisins or cranberries. If you love chocolate, mix in additional dark chocolate chips or cocoa powder. These simple changes let you create your unique snack each time you make them. Experiment and find your favorite combo! Pro Tips Use Natural Sweeteners: Opt for honey or maple syrup for a healthier alternative to refined sugars that also adds moisture. Customize Your Add-ins: Feel free to mix in other ingredients like dried fruits, nuts, or protein powder to suit your taste and nutritional needs. Store Properly: Keep your energy bites in an airtight container in the fridge for up to a week or freeze them for longer shelf life. Experiment with Flavors: Try adding spices like cinnamon or nutmeg for an extra flavor boost, or swap in different nut butters for variety. {{image_4}} To make vegan peanut butter energy balls, replace honey with maple syrup. Maple syrup gives a sweet taste. It also keeps the recipe plant-based. Using creamy or crunchy peanut butter works perfectly. You can enjoy the same great taste while sticking to vegan rules. If you need gluten-free energy balls, check your oats. Use certified gluten-free rolled oats to avoid any gluten. The other ingredients, like peanut butter and maple syrup, are also gluten-free. This way, everyone can enjoy these tasty bites without worry. You can add nuts or dried fruits to boost flavor. Chopped almonds, walnuts, or pecans add crunch. Dried cranberries or raisins bring a sweet twist. Mix in about 1/4 cup of your chosen nuts or fruits. These additions make your energy balls even more fun and tasty! Keep your peanut butter energy balls in an airtight container. This step helps them stay fresh. Place a piece of parchment paper between layers if you stack them. This keeps them from sticking. Store them in the fridge for up to one week. This way, you can grab a quick snack any time. You can also freeze these energy balls for longer storage. First, place them on a baking sheet to freeze individually. Once frozen, transfer them to a freezer bag or container. They can last up to three months in the freezer. When you want one, just take it out and let it thaw for a bit. The shelf life of your energy balls depends on how you store them. In the fridge, they last one week. In the freezer, they last about three months. Use glass jars or plastic containers for best results. Make sure to label them with the date. This helps you know when to enjoy them. Yes, you can! Almond butter, cashew butter, or sunflower seed butter work well. Each nut butter gives a unique taste and texture. Just make sure it is creamy for easy mixing. If you use a different nut butter, the flavor will change a bit, but that can be fun! To cut sugar, use less honey or maple syrup. You can also replace them with mashed bananas or unsweetened applesauce. These swaps keep the energy balls sweet but with less sugar. Always taste as you mix to find your perfect balance of sweetness. If you want to skip oats, try using ground nuts or seeds. You can also use puffed rice or quinoa for a different crunch. Be aware that the texture may change, but it can still taste great! Adjust the other ingredients to keep the mixture sticky enough to form balls. Peanut butter energy balls combine oats, nut butters, and sweeteners for tasty snacks. You can mix in seeds or fruits for extra flavor and nutrition. Follow the simple steps to make and store them well. Keep the right texture with tips for presentation and variations like vegan or gluten-free. These energy balls are great for a quick bite or post-workout boost. Enjoy your homemade treats that are easy to customize!

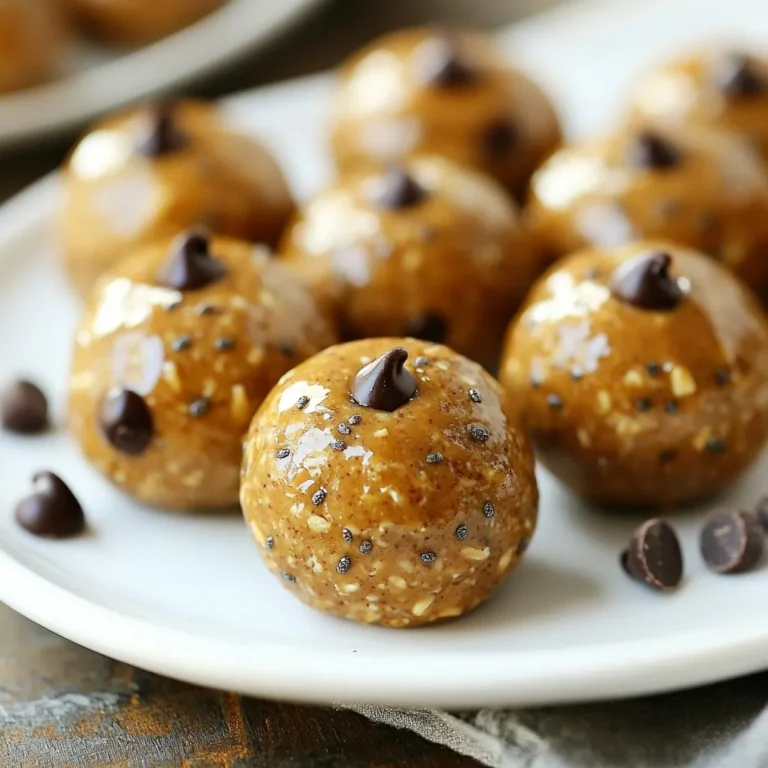
Peanut Butter Energy Balls Easy and Tasty Recipe

- 1 loaf of brioche bread, sliced into thick pieces - 4 large eggs - 2 cups whole milk - 1 cup heavy cream - 1/2 cup granulated sugar - 2 teaspoons vanilla extract - 1 teaspoon ground cinnamon - 1/4 teaspoon salt - 1/2 cup brown sugar (for the caramelized topping) - Fresh berries, for garnish - Powdered sugar, for dusting You can choose fresh, high-quality ingredients for the best taste. Use organic eggs for a richer flavor. Fresh berries like strawberries or blueberries add color and taste. If you like a hint of zest, try adding a bit of orange or lemon zest. This brightens the dish and gives it a unique twist. If you need a dairy-free option, swap whole milk and heavy cream for almond milk and coconut cream. For a gluten-free version, use gluten-free bread. You can also replace granulated sugar with coconut sugar or maple syrup for a healthier sweetener. These changes keep the dish delicious while meeting different dietary needs. {{ingredient_image_2}} Start with a large bowl. Add 4 large eggs, 2 cups of whole milk, and 1 cup of heavy cream. Then, mix in 1/2 cup of granulated sugar, 2 teaspoons of vanilla extract, 1 teaspoon of ground cinnamon, and 1/4 teaspoon of salt. Whisk everything together until smooth. This custard will give your French toast a rich flavor. Take your loaf of brioche bread. Slice it into thick pieces. Arrange those slices in a greased 9x13 inch baking dish. Overlap the bread slightly to fit it all in. This layering helps the custard soak in evenly. Pour your prepared custard over the bread slices. Make sure to cover every piece. Use a spatula to gently press down on the bread. This step is key to ensure every slice soaks well in the custard. Cover the dish tightly with plastic wrap. Place it in the refrigerator for the night. The bread needs time to absorb the custard. This also helps to enhance the flavor and texture. The next morning, preheat your oven to 350°F (175°C). Once it's ready, take the dish out of the fridge and remove the plastic wrap. Bake the French toast for 35-40 minutes. Look for a golden brown top and set custard. After baking, let the dish cool for 5-10 minutes. Then, sprinkle 1/2 cup of brown sugar evenly over the top. Use a kitchen torch to caramelize the sugar. Aim for a rich amber color. If you don’t have a torch, use your broiler for 1-2 minutes. Watch it closely to avoid burning. Let the caramelized sugar cool a bit until it hardens. Serve your French toast warm. Add fresh berries on top for color and flavor. Finish with a dusting of powdered sugar. This adds a sweet touch and makes it look beautiful. Enjoy your creation! To get the best flavor, use thick slices of brioche. I find that a full loaf works great. When you layer the bread, make sure each piece overlaps slightly. This helps them soak evenly. Pour the custard mix over the bread slowly. Press down gently to ensure every slice is wet. Let this sit for a minute to soak in more. For that crunchy topping, sprinkle brown sugar evenly across the baked dish. Use a kitchen torch for best results. Move the torch in small circles. Watch as the sugar bubbles and turns amber. If you don’t have a torch, broil it for a minute or two. Keep a close eye on it to avoid burning. Bake your French toast at 350°F (175°C). This temperature cooks it evenly and keeps it moist. Make sure to check it around the 30-minute mark. If the top looks too brown, cover it with foil. This will help it finish cooking without over-browning. Let it cool for a few minutes before serving. This helps set the custard. Pro Tips Use Day-Old Bread: For best results, use slightly stale brioche, as it absorbs the custard mixture better without falling apart. Experiment with Flavors: Feel free to add a splash of liqueur, like Grand Marnier, or spices such as nutmeg for an additional flavor twist. Even Soaking: Ensure that all bread slices are evenly soaked in the custard by gently pressing them down after pouring the mixture over them. Serving Temperature: For the best texture and flavor, serve the French toast warm right after caramelizing the topping. {{image_4}} You can use different types of bread for this recipe. Brioche is soft and sweet, but challah works well too. You might also try sourdough for a tangy taste. If you want whole grain, whole wheat bread adds fiber. Each bread will give a unique flavor and texture. Add fruits or nuts to enhance your French toast. Fresh berries add bright color and taste. You can include bananas or apples for sweetness. Chopped nuts, like pecans or walnuts, give a nice crunch. You can also sprinkle in chocolate chips for a fun twist. Play around with flavors to make it your own! To make a vegan version, swap eggs with flaxseed meal mixed with water. Use almond milk or oat milk instead of dairy. For gluten-free, choose gluten-free bread. Make sure all other ingredients are gluten-free too. These changes keep the recipe tasty while meeting dietary needs. After making Overnight Crème Brûlée French Toast, let it cool completely. Cover the dish tightly with plastic wrap. Store it in the fridge for up to three days. This keeps the flavors fresh and ready to enjoy. If you want to save some for later, freeze the French toast. First, cool it down. Then, cut it into individual portions. Wrap each piece in plastic wrap and place them in a freezer bag. This way, you can enjoy them for up to three months. Just remember to label the bag with the date! To reheat, first take the French toast out of the fridge or freezer. If frozen, let it thaw overnight in the fridge. Preheat your oven to 350°F (175°C). Place the French toast in a baking dish and cover it with foil. Bake for about 15-20 minutes for refrigerated pieces, or 25-30 minutes if frozen. If you want to re-crisp the top, remove the foil for the last 5 minutes. Enjoy it warm with berries and a dusting of powdered sugar! Yes, you can prepare this dish the night before. This recipe is designed for overnight soaking. After soaking, cover the dish tightly and place it in the fridge. This allows the bread to absorb the custard well. The next morning, you simply bake it. To reheat leftover French toast, place it in the oven. Preheat your oven to 350°F (175°C). Bake for about 10-15 minutes until warm. You can also use a microwave for quick reheating. Just cover it with a wet paper towel and heat for about 30 seconds. Yes, you can use different sugars for the topping. While brown sugar gives a rich flavor, you can try white sugar or coconut sugar. Each sugar will create a distinct taste and texture. Just make sure to caramelize it evenly for the best results. Yes, you can make this recipe dairy-free. Substitute whole milk and heavy cream with almond milk or oat milk. Use a dairy-free cream alternative too. The texture and flavor may change slightly, but it will still be delicious. You can tell when the custard is set by checking the center of the dish. It should feel firm to the touch and not jiggle. A golden brown top also indicates that it's done. If unsure, use a toothpick to check for doneness. If it comes out clean, it’s ready! This blog post covered how to make delicious French toast. We discussed the key ingredients, including fresh options and substitutions. Step-by-step, we looked at preparing, soaking, and baking the dish. Tips for perfect results and various flavor options added extra flair. I shared storage tips to keep your leftovers fresh. In summary, this French toast recipe is easy and adaptable. You can please everyone with different tastes and diets. Enjoy your creation and impress your family with this tasty dish!

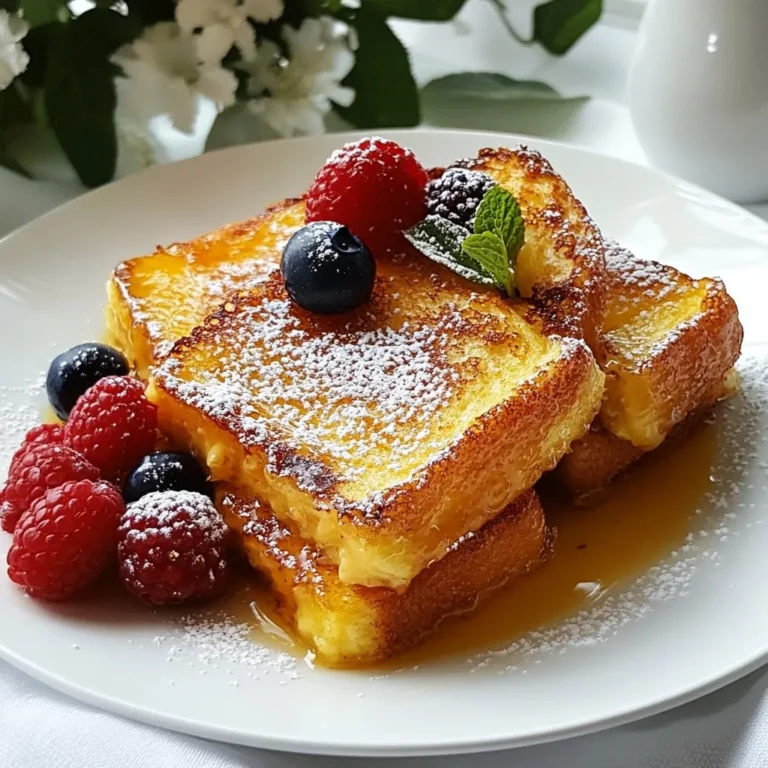
Overnight Crème Brûlée French Toast Delightful Recipe

- 9 lasagna noodles - 2 cups ricotta cheese - 2 cups shredded mozzarella cheese, divided - 1 cup grated Parmesan cheese - 1 pound ground beef or Italian sausage - 1 jar (24 oz) marinara sauce - 1 medium onion, finely diced - 3 cloves garlic, minced - 1 teaspoon dried oregano - 1 teaspoon dried basil - 1/2 teaspoon red pepper flakes (optional for heat) - 1 cup fresh spinach, chopped (or thawed frozen spinach) - 1 cup heavy cream - Salt and pepper to taste - Fresh basil leaves, for garnish (optional) To make Creamy Million Dollar Lasagna, you need fresh and flavorful ingredients. Start with lasagna noodles. They form the base of your dish. Choose good-quality cheeses like ricotta, mozzarella, and Parmesan. These cheeses give the lasagna its rich and creamy texture. Next, pick your ground meat. You can use beef or Italian sausage based on your taste. Marinara sauce adds a classic touch. It brings both flavor and moisture. Don't forget the vegetables! Onion, garlic, and spinach add depth. They also boost the nutrition of your meal. Use dried herbs like oregano and basil to flavor the meat sauce. A pinch of red pepper flakes can add a little kick. Heavy cream makes the cheese layer smooth and creamy. Finally, keep salt and pepper on hand to season everything perfectly. Enjoy gathering these ingredients; each one plays a part in creating a delicious meal! {{ingredient_image_2}} Preheating your oven is key to a great lasagna. A hot oven helps bake the dish evenly. Set your oven to 375°F (190°C). This temperature gets the cheese bubbly and golden. Cook the lasagna noodles in a large pot with salted water. Bring the water to a boil. Add the noodles and cook until al dente. This means they should be firm but not hard. Drain the noodles and spread them out so they don't stick together. You can toss them with a little olive oil if needed. In a large skillet, heat over medium heat. Add your ground beef or Italian sausage. Then, add the finely diced onion and minced garlic. Cook while stirring until the meat is brown and the onions are soft, about 5 to 7 minutes. If there’s extra fat, drain it off. Now, stir in the marinara sauce. Add dried oregano, dried basil, red pepper flakes, and a pinch of salt and pepper. Let this simmer on low heat for about 10 minutes. This lets all the flavors mix well. Fold in the chopped spinach and then remove from heat. In a mixing bowl, combine the ricotta cheese, half of the shredded mozzarella, grated Parmesan cheese, and heavy cream. Add a touch of salt and pepper. Mix until it’s smooth and creamy. This layer adds richness to the lasagna. Grab a 9x13 inch baking dish. Start the layering process with a spoonful of meat sauce at the bottom. Place three lasagna noodles on top of the sauce. Spread half of the creamy cheese mixture over the noodles. Follow this with another layer of meat sauce. Keep repeating: noodles, creamy mixture, and meat sauce. End with a final layer of noodles topped with the last of the meat sauce and the remaining mozzarella cheese. Cover your baking dish with aluminum foil. Make sure the foil does not touch the cheese. Place it in the preheated oven. Bake for 25 minutes. After that, remove the foil and bake for another 15 minutes. The lasagna is done when it is bubbly and the cheese is golden. Once you take the lasagna out of the oven, let it rest for 10 to 15 minutes. This resting time is important. It allows the layers to set. It also makes slicing the lasagna easier. Enjoy your delicious creation after this waiting period! To create a great cheese mixture, use equal parts ricotta and heavy cream. This will give you a rich texture. Add half of the mozzarella and all the Parmesan. Mix them well. I like to add a pinch of salt and pepper for taste. If you want a hint of flavor, add a touch of garlic powder or nutmeg. This makes a creamy layer that melts beautifully. To keep your lasagna from getting soggy, avoid excess moisture. Drain the spinach well if using fresh or frozen. Cook the meat until brown and let it cool slightly before mixing with the sauce. Use a thick marinara sauce, as thin sauce adds water. Layer carefully, and do not over-sauce. This helps keep every layer distinct and delicious. For a beautiful presentation, cut the lasagna into neat squares. Garnish each slice with fresh basil leaves. Serve with a crisp green salad and warm garlic bread. This adds fresh flavor and crunch. You can also add a sprinkle of red pepper flakes for spice. Enjoy every bite of your creamy million-dollar creation! Pro Tips Choose the Right Noodles: Use no-boil lasagna noodles for a quicker assembly and a more tender texture, as they absorb moisture from the sauce while baking. Layer Smart: Ensure each layer has a good balance of cheese and meat sauce to prevent the lasagna from being too dry or too soggy. Let It Rest: Always allow the lasagna to sit for 10-15 minutes after baking. This resting time helps the layers firm up, making it easier to slice and serve. Make Ahead: Consider assembling the lasagna a day in advance and storing it in the fridge. The flavors will deepen overnight, and it can go straight from the fridge to the oven when you're ready to bake. {{image_4}} You can make a great vegetarian version of this lasagna. Just swap the meat for veggies. I love using mushrooms, zucchini, and bell peppers. They give a nice flavor and texture. Sauté the veggies with onion and garlic until soft. Then, mix them with the marinara sauce. This change keeps the dish hearty and tasty. For those who need a gluten-free meal, you have options! Use gluten-free lasagna noodles. You can find these in many stores. Also, check for gluten-free marinara sauce. This way, you can enjoy the same creamy taste without the gluten. Want to make your lasagna even creamier? Try adding more heavy cream to the cheese mix. You can also add more layers of cheese. Mixing in some ricotta or extra mozzarella can elevate the flavor. This will make your lasagna rich and dreamy with every bite. To store your lasagna, let it cool first. Use an airtight container. It will stay fresh for up to five days. If you want, you can also cover it with plastic wrap. This helps keep it moist. If you have a large portion, cut it into smaller pieces. This makes it easier to eat later. Remember to label the container with the date. Freezing lasagna is a great way to save it for later. First, let it cool completely. Then, wrap it tightly in plastic wrap. After that, place it in a freezer-safe container or bag. You can freeze it for up to three months. To reheat, let it thaw in the fridge overnight. This keeps the creaminess intact. When reheating, the goal is to keep it creamy and tasty. Preheat your oven to 350°F (175°C). Place the lasagna in an oven-safe dish. Add a splash of milk or cream on top. This helps keep it moist. Cover it with foil to prevent drying. Heat for about 30 minutes or until warm throughout. Enjoy your delicious lasagna just like fresh! This lasagna gets its name from its rich flavors and creamy layers. First, I use two types of cheese: ricotta and mozzarella. The ricotta adds a smooth texture, while the mozzarella gives that delicious gooeyness. I also add heavy cream, which brings a luxurious creaminess to each bite. Plus, I use fresh spinach for a pop of color and added nutrition. The meat sauce, made with ground beef or Italian sausage, is savory and filling. All these ingredients come together to create a dish that feels gourmet and special. Yes, you can prepare this lasagna ahead of time. Just follow these steps: - Assemble the lasagna as directed. - Cover it tightly with foil or plastic wrap. - Store it in the fridge for up to 24 hours before baking. If you want to freeze it, let it cool completely before wrapping. It can last in the freezer for up to three months. Just remember to bake it straight from the freezer; it may need a little extra time in the oven. Reheating lasagna can be tricky, but I have some tips to keep it moist: - Preheat your oven to 350°F (175°C). - Place your lasagna in an oven-safe dish. - Add a splash of water or extra cream on top to create steam. - Cover the dish with foil to prevent it from drying out. Heat it for about 20-25 minutes, or until it’s warm all the way through. This method keeps the lasagna creamy and flavorful. This blog post covered all you need to make a great lasagna. You learned about the key ingredients and step-by-step cooking instructions. We also shared tips to avoid sogginess and enhance flavor. Plus, you got ideas for vegetarian and gluten-free options. Don't forget to store leftovers properly. With these tips, you can enjoy perfect lasagna every time. Take your time and have fun in the kitchen. Your homemade lasagna will impress everyone!

Creamy Million Dollar Lasagna Rich and Flavorful Recipe

- 1 cup unsalted butter, cubed - 2 cups granulated sugar - 4 large eggs, at room temperature - 1 teaspoon vanilla extract - 1 cup all-purpose flour - 1/2 cup unsweetened cocoa powder - 1/4 teaspoon salt - 1/2 cup semi-sweet chocolate chips (optional) - For the Raspberry Cheesecake Swirl: - 8 oz cream cheese, softened to room temperature - 1/3 cup granulated sugar - 1 large egg, at room temperature - 1/2 teaspoon vanilla extract - 1 cup fresh raspberries (or frozen raspberries, thawed and drained) You can swap fresh raspberries for frozen ones. Just make sure to thaw and drain them first. This keeps the brownies from getting too watery. If you prefer, you can use other berries like blueberries or strawberries. Each will add a unique twist to the flavor. For the cream cheese, you can use a low-fat version if you want a lighter treat. I also recommend using high-quality chocolate chips. They make a big difference in taste. - 9x13 inch baking pan - Medium saucepan - Mixing bowls - Electric mixer - Rubber spatula - Knife or toothpick for swirling - Wire rack for cooling Having these tools handy will make your baking experience smoother. Make sure your oven is preheated to 350°F (175°C) before you start mixing. This way, your brownies will bake evenly and turn out just right. {{ingredient_image_2}} Start by preheating your oven to 350°F (175°C). While that heats up, grab a 9x13 inch baking pan. Lightly grease it with butter or use parchment paper. If you use parchment, let it hang over the edges. This helps when you remove the brownies later. Next, melt 1 cup of unsalted butter in a medium saucepan over low heat. Once the butter is melted, take it off the heat. Stir in 2 cups of granulated sugar until combined. Allow it to cool slightly; this keeps the eggs from scrambling when added. Add 4 large eggs, one at a time, mixing well after each. Then, stir in 1 teaspoon of vanilla extract until smooth. In a separate bowl, whisk together 1 cup of all-purpose flour, 1/2 cup of unsweetened cocoa powder, and 1/4 teaspoon of salt. Gradually fold the dry mix into the wet mix using a spatula. Mix until just combined. If you like, add 1/2 cup of semi-sweet chocolate chips for extra flavor. In another bowl, beat 8 oz of softened cream cheese with 1/3 cup of granulated sugar. Use an electric mixer until it’s creamy and smooth. Add 1 large egg and 1/2 teaspoon of vanilla extract. Mix until there are no lumps. Gently fold in 1 cup of fresh raspberries. It’s okay if some raspberries break; just keep some whole for texture. Pour the brownie batter into the greased baking pan. Spread it evenly. Then, drop spoonfuls of the raspberry cheesecake mix over the brownie batter. Use a knife or toothpick to gently swirl the two mixtures. Be careful not to overmix; you want a nice marbled look. Bake in your preheated oven for 30-35 minutes. The brownies are done when a toothpick comes out with a few moist crumbs. Let them cool in the pan for about 15 minutes. If using parchment paper, lift the brownies out carefully. Cool completely on a wire rack before cutting into squares. Enjoy your delightful treat! To bake the best brownies, start with room temperature ingredients. This helps the batter mix better. Use a light hand when mixing; overmixing can make them tough. Make sure to check your oven's temperature with a thermometer. Ovens can vary, and this ensures even baking. For a stunning swirl, drop spoonfuls of the cheesecake mix onto the brownie batter. Use a knife or toothpick to create swirls. Do not overmix; you want distinct layers. A gentle touch helps keep the raspberry pieces whole, adding beauty and texture. Serve these brownies on a colorful platter. You can dust them with powdered sugar for a nice look. A drizzle of melted chocolate adds an elegant touch. Pair them with a scoop of vanilla ice cream for a delicious treat. Enjoy these brownies at parties or cozy nights at home! Pro Tips Use Room Temperature Ingredients: Ensuring that your eggs and cream cheese are at room temperature will help create a smoother batter and cheesecake mixture, leading to a better texture in your brownies. Don't Overmix: When swirling the raspberry cheesecake mixture into the brownie batter, be cautious not to overmix. A few gentle swirls will create a beautiful marbled effect without blending the two mixtures completely. Check for Doneness: Keep an eye on your brownies as they bake. The toothpick test is key—remove them from the oven when a toothpick comes out with a few moist crumbs, ensuring they stay fudgy. Cool Before Cutting: Allow your brownies to cool completely in the pan before slicing. This helps them set properly and makes for cleaner cuts, resulting in beautiful squares. {{image_4}} You can switch up the fruit in these brownies. Fresh strawberries make a great choice. They add sweetness and a nice color. Blueberries work well, too, bringing a burst of flavor. If you like tartness, try blackberries. Just remember to adjust the sugar if the fruit is sweeter or more tart. If you want to make these brownies gluten-free, swap all-purpose flour with almond flour or a gluten-free blend. For a dairy-free option, use coconut oil instead of butter. Choose dairy-free cream cheese for the swirl. This way, you can still enjoy that creamy texture without dairy. You can change the chocolate for different tastes. Dark chocolate gives a rich flavor. Use more or less cocoa to adjust the taste. White chocolate adds sweetness and creaminess. You could even mix dark and white chocolate for a unique twist. Just keep in mind the balance of flavors when you do! To keep your Raspberry Cheesecake Swirl Brownies fresh, store them in an airtight container. Use parchment paper between layers to prevent sticking. This helps maintain their soft texture. You can also wrap them tightly in plastic wrap. Keep them in a cool, dry spot, away from direct sunlight. Freezing is a great option if you want to save some brownies for later. First, let them cool completely. Then, cut them into squares. Wrap each square in plastic wrap. Place them in a freezer-safe bag or container. Label the bag with the date for easy tracking. These brownies can last up to three months in the freezer. When stored properly, the brownies last about 5-7 days at room temperature. If you refrigerate them, they can last about 10 days. Freezing extends their life significantly. Just remember to thaw them at room temperature when you're ready to enjoy! Yes, you can use frozen raspberries. Just thaw them and drain any extra juice. This will keep the swirl bright and tasty. Check for doneness by inserting a toothpick in the center. If it comes out with a few moist crumbs, the brownies are ready. They should not have wet batter on the toothpick. Absolutely! Adding nuts like walnuts or pecans gives a nice crunch. Just fold them into the brownie batter before baking. This adds texture and flavor to your brownies. To cut brownies evenly, use a sharp knife. Dip it in hot water and dry it off before slicing. This helps make clean cuts and keeps the edges neat. In this blog post, I shared how to make delicious raspberry cheesecake brownies. We covered the ingredients, including tips for substitutions. I gave you step-by-step instructions and shared baking tips for perfect results. We also explored variations, storage info, and frequently asked questions to help you out. Now, you’re ready to bake these tasty brownies. Enjoy the rich flavors and creamy swirls. I can't wait for you to try this recipe!

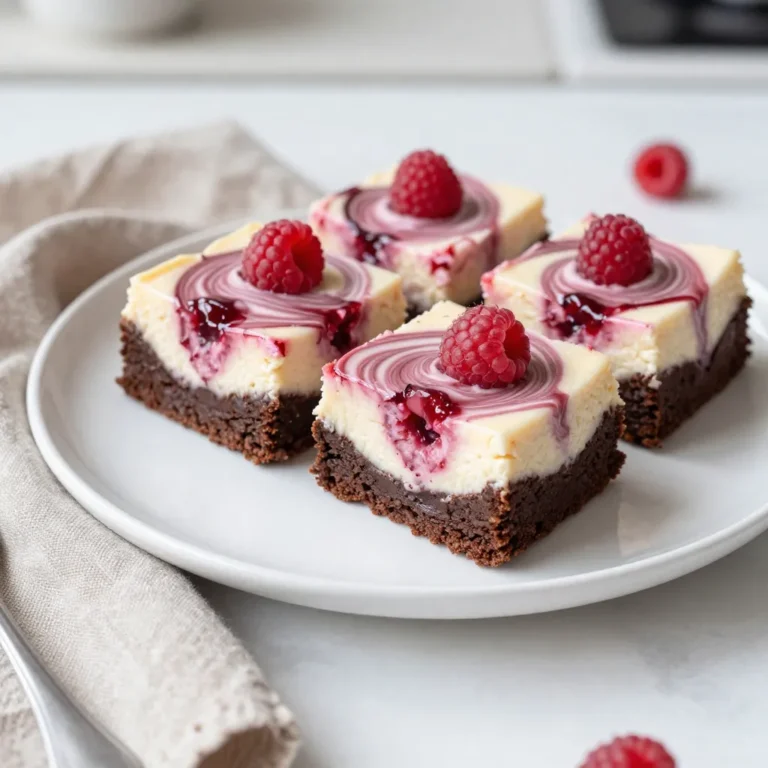
Raspberry Cheesecake Swirl Brownies Delightful Treat

PREV 1 … 41 42 43 … 47 NEXT
meal plan mapper

explore

DessertsDinnerAppetizersDrinks

Our Policies

  • Cookie Policy
  • Copyright Policy
  • Disclaimer
  • GDPR Policy
  • Terms Of Use
Back to Top
  • About
  • Contact Us
  • Privacy Policy
© 2025 meal plan mapper