FREE DINNER EBOOK! Get your copy!
  • Cookie Policy
  • GDPR Policy
  • Disclaimer
  • Terms Of Use
  • Visit my other site: Fun Cookie Recipes
meal plan mapper
  • Home
  • Dinner
  • Desserts
  • Drinks
  • Appetizers
  • Contact
  • About
  • Privacy Policy
  • Home
  • Dinner
  • Desserts
  • Drinks
  • Appetizers
  • Contact
  • About
  • Privacy Policy
  • Cookie Policy
  • GDPR Policy
  • Disclaimer
  • Terms Of Use
Visit my other site: Fun Cookie Recipes

HOME / CATEGORIES /

Latest

- 1 lb ground beef (80/20) - 1 lb ground turkey - 1 cup seasoned breadcrumbs - 3/4 cup whole milk - 1/4 cup ketchup - 1/4 cup barbecue sauce - 1 large onion, finely chopped - 2 cloves garlic, minced - 2 large eggs - 1 teaspoon Worcestershire sauce - 1 tablespoon Dijon mustard - 1 teaspoon dried thyme - 1 teaspoon dried oregano - Salt and freshly ground pepper to taste These main ingredients create a rich and tasty meatloaf. The mix of ground beef and turkey keeps it tender and moist. The breadcrumbs soak in milk, adding fluffiness. Ketchup and barbecue sauce add sweetness and tang. Onion and garlic give it a savory kick. - 1/2 cup shredded cheddar cheese - Fresh parsley, finely chopped (for garnish) Adding cheese can make your meatloaf even more delicious. It melts in, giving a creamy texture. Fresh parsley adds a pop of color and freshness on the plate. - 1 teaspoon dried thyme - 1 teaspoon dried oregano - Salt and freshly ground pepper to taste Thyme and oregano bring depth to the flavor. They work well with the meat and sauces. Adjust salt and pepper to your taste. These seasonings make your meatloaf stand out. Feel free to experiment with different herbs. You can use basil or rosemary for a twist. Remember, cooking is all about making it your own! {{ingredient_image_2}} Start by preheating your oven to 350°F (175°C). This temperature is perfect for a tender meatloaf. Lightly grease a standard loaf pan to stop sticking. In a large bowl, mix the ground beef and ground turkey. Be gentle. Overworking the meat will make it tough. In another bowl, soak the seasoned breadcrumbs in milk for about 5 minutes. This step adds moisture and flavor. After soaking, add the breadcrumbs to the meat mixture. Then, mix in the ketchup, barbecue sauce, chopped onion, minced garlic, eggs, Worcestershire sauce, Dijon mustard, dried thyme, oregano, salt, and pepper. Use your hands or a spatula to combine everything. Avoid overmixing to keep it fluffy. If you want cheese, fold in the shredded cheddar gently. Now it’s time to shape the meat mixture. Place it into the greased loaf pan. Form it into a loaf and smooth out the top. This helps it cook evenly. Put the pan in the oven and bake for 60 to 70 minutes. Use a meat thermometer to check for doneness. The internal temperature should reach 160°F (70°C). This ensures the meatloaf is safe to eat and fully cooked. When the meatloaf is done, take it out of the oven. Let it rest in the pan for 10 minutes. This resting time helps the juices spread throughout the meatloaf. It keeps it moist and tender. After resting, slice the meatloaf and serve it warm. For a nice touch, sprinkle chopped parsley on top. This adds color and flavor. Enjoy your meal with your favorite sides! To keep your meatloaf tender, don't overmix the meat. Gently combine the ground beef and turkey until they just blend. Overworking the meat makes it tough. Adding soaked breadcrumbs helps too. They keep the meat moist and fluffy. Letting the meatloaf rest after baking is key. This allows the juices to settle, keeping it juicy. When mixing meat, use your hands or a spatula. This helps you control the mix better. Always combine the wet and dry ingredients in separate bowls first. This way, you mix them evenly without overworking the meat. If you add cheese, fold it in gently. This keeps the mixture cohesive without breaking it apart. To enhance flavor, try adding different sauces or spices. You can swap ketchup for salsa or BBQ sauce for a twist. Fresh herbs like basil or parsley offer bright notes. Consider adding diced peppers or mushrooms for extra texture. You can also top the meatloaf with more sauces before baking. This creates a flavorful glaze that adds richness. Pro Tips Mix Gently: Combine the meats and ingredients gently to maintain a tender texture; overmixing can lead to a dense meatloaf. Soak the Breadcrumbs: Allow the breadcrumbs to soak in milk for at least 5 minutes to ensure they add moisture and fluffiness to the meatloaf. Rest Before Slicing: Let the meatloaf rest for about 10 minutes after baking; this helps retain its juices and makes for cleaner slices. Add Cheese Wisely: If using cheese, fold it in gently to avoid breaking up the meat mixture, ensuring an even distribution without compromising structure. {{image_4}} You can try different meats for this meatloaf. Mixing ground beef with ground pork adds flavor. You can also use all turkey for a lighter dish. Some people enjoy using lamb for a unique twist. Each meat brings its own taste and texture. Just remember to keep the fat content balanced. A good mix keeps the meatloaf moist and tender. For a vegetarian meatloaf, use lentils or black beans. These options provide protein and texture. You can blend in chopped vegetables like mushrooms, carrots, or zucchini for extra flavor. If you want a vegan version, skip the eggs and use flaxseed meal as a binder. Mix 1 tablespoon of flaxseed meal with 3 tablespoons of water. Let it sit for a few minutes to thicken. Get creative with flavors in your meatloaf. Try adding spices like smoked paprika or chili powder for heat. You can also mix in grated cheese for a creamy texture. Toppings can elevate your dish too. A layer of barbecue sauce or ketchup adds sweetness. You can also top it with crispy bacon or a sprinkle of fresh herbs. These small changes make a big impact on taste. To store leftover meatloaf, first, let it cool. Place it in an airtight container. This keeps it fresh and tasty. You can also wrap it tightly in plastic wrap or aluminum foil. Make sure to store it in the fridge. Leftover meatloaf stays good for about three to four days. To reheat meatloaf, use the oven for the best taste. Preheat your oven to 350°F (175°C). Place the meatloaf in a baking dish. Cover it with foil to keep it moist. Heat for about 20 to 30 minutes. You can also use the microwave for quick reheating. Just slice the meatloaf and place it on a microwave-safe plate. Heat in short bursts until hot, about 2 to 3 minutes. To freeze meatloaf, slice it first or keep it whole. Wrap each slice in plastic wrap. Then, place it in a freezer bag. Remove as much air as you can to prevent freezer burn. You can freeze meatloaf for up to three months. When ready to eat, thaw it in the fridge overnight. Then, reheat it as needed. A meatloaf earns the name "Million Dollar" because of its rich flavor and texture. This recipe mixes ground beef and turkey, which gives it depth. The blend of sauces, like ketchup and barbecue, also adds a sweet twist. Seasoned breadcrumbs soaked in milk keep it moist. Finally, optional cheddar cheese brings a creamy touch. All these elements create a dish that feels special and indulgent. Yes, you can use different meats! Ground pork or chicken can replace beef or turkey. For a leaner option, try ground chicken breast. Each meat brings its unique taste and texture. Just remember, the fat content affects juiciness. A good mix of lean and fatty meat helps keep the loaf moist and flavorful. To check if the meatloaf is done, insert a meat thermometer into the thickest part. It should read 160°F (70°C). This ensures it is safe to eat. If you don’t have a thermometer, check for clear juices when you cut into it. The meatloaf should be firm but still slightly springy. Let it rest for ten minutes after baking for the best texture. This guide covered all you need for a great Million Dollar Meatloaf. We explored important ingredients like meat, herbs, and spices. You learned step-by-step how to mix, bake, and serve your meatloaf perfectly. I shared tips for keeping it tender and ways to add unique flavors. Plus, we discussed how to store and reheat leftovers. Now you can enjoy this delicious dish again and again. Embrace the joy of cooking and make your own delicious memories with every bite.

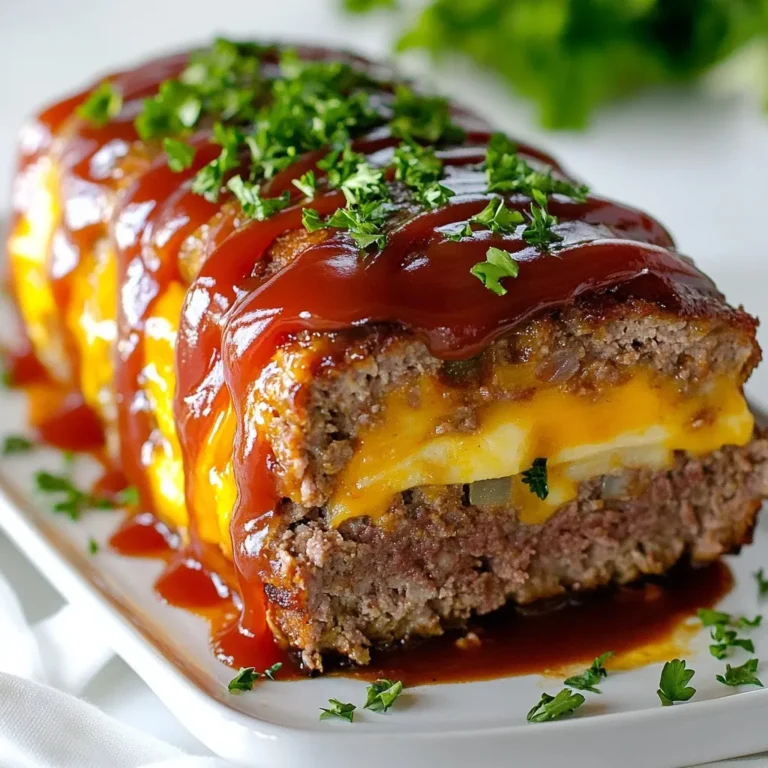
Tender Million Dollar Meatloaf Perfect for Dinner

- 1 pound ground beef (80/20 blend) - 4 slices of hearty rye bread - 4 slices of Swiss cheese - 1 large onion, thinly sliced - 2 tablespoons unsalted butter, divided - 1 tablespoon olive oil - Salt and pepper to taste - 1/4 cup mayonnaise - 1 tablespoon Dijon mustard - 1 tablespoon ketchup - 1 tablespoon sweet pickle relish - 1 teaspoon garlic powder - 1 teaspoon onion powder - 1 teaspoon smoked paprika When I make a grilled patty melt, the right ingredients make all the difference. The beef is key. I use an 80/20 blend for flavor and juiciness. Rye bread is my go-to because it adds depth and texture. Swiss cheese melts beautifully, giving that creamy goodness we crave. The onion is a game changer. When you slice it thin, it caramelizes perfectly. I cook it until it’s golden and sweet. The butter and olive oil help bring out its rich flavor. Don’t forget salt and pepper for seasoning. They bring out the best in meat and onions. Now, let’s talk about the secret sauce. This sauce is what makes the melt special. It combines mayonnaise, Dijon mustard, ketchup, and sweet pickle relish. The garlic and onion powder add layers of taste. Smoked paprika gives it a subtle kick. Mix these well, and let it chill. This helps the flavors mingle and become even tastier. With these ingredients, you’re set for a delicious grilled patty melt that is sure to impress! {{ingredient_image_2}} To start, grab a small bowl. Add these ingredients: - 1/4 cup mayonnaise - 1 tablespoon Dijon mustard - 1 tablespoon ketchup - 1 tablespoon sweet pickle relish - 1 teaspoon garlic powder - 1 teaspoon onion powder - 1 teaspoon smoked paprika Mix all these together until smooth. Cover the bowl and put it in the fridge. This helps the flavors blend nicely while you cook the rest. Next, heat a large skillet over medium heat. Add 1 tablespoon of olive oil. Once hot, toss in your thinly sliced onion. Sauté them for about 10-15 minutes. Stir occasionally. You want them to turn a deep golden brown. Add a pinch of salt, then set them aside. Now it’s time for the beef. Divide 1 pound of ground beef into four equal parts. Shape each part into a patty, about ½ inch thick. Season both sides with salt and pepper. Preheat your grill or skillet over medium-high heat. Cook the patties for 3-4 minutes on each side for medium-rare. In the last minute, add a slice of Swiss cheese on each patty. Cover to help the cheese melt. In a new skillet, melt the remaining 1 tablespoon of butter over medium heat. Place two slices of rye bread in the skillet. Spread a spoonful of your secret sauce on top of the bread. When the bottom is golden brown, flip the bread and repeat on the other side. Remove it from the skillet and set aside. Do the same for the remaining bread slices. Take one slice of toasted rye and put it on a plate. Layer a cheesy beef patty on top, then add a spoonful of caramelized onions. Place another slice of toasted rye on top. Spread some secret sauce on that slice for extra flavor. Put the assembled sandwich back in the skillet. If needed, add a bit more butter. Grill each side for 2-3 minutes until the bread is crispy and golden brown. Everything should be hot. Once done, slice the sandwiches in half and serve right away. For a nice touch, add extra secret sauce on the side for dipping. Enjoy your delicious grilled patty melt! To make great grilled patties, start with good seasoning. I use salt and pepper. Season both sides of the beef well. This simple step boosts flavor. You can also mix in herbs or spices if you like. For even cooking, preheat your grill or skillet. Aim for medium-high heat. Place patties gently on the grill. Don’t press down on them; this keeps juices inside. Cook for 3-4 minutes on each side for medium-rare. Adjust the time for your preferred doneness. The secret sauce is key to flavor. You can try different ingredients to make it your own. For a spicy kick, add hot sauce or cayenne pepper. If you want it sweeter, mix in more relish. You can also add fresh herbs like dill or parsley for a twist. Experiment with these options to find your favorite. The more you personalize it, the better it gets! For the bread, I recommend hearty rye. It adds great flavor and texture. You can also use sourdough or whole wheat bread. Both are tasty and hold up well. If you want an alternative to rye, try ciabatta or even a bagel. These choices make the sandwich unique. Remember, the bread should be sturdy enough to hold the filling. Pro Tips Use High-Quality Beef: For the best flavor and juiciness, opt for a freshly ground beef blend with a higher fat content, like 80/20. Perfectly Caramelize Onions: Low and slow is the key! Sauté onions on medium-low heat for a deeper, sweeter flavor and avoid burning. Toast the Bread Well: Make sure the bread is well-toasted before assembling the sandwich; this will help keep it crisp and prevent sogginess. Customize Your Secret Sauce: Feel free to adjust the ingredients in the secret sauce to suit your taste; adding a dash of hot sauce can give it a nice kick! {{image_4}} You can make a tasty vegetarian patty melt. Use black bean or veggie patties instead of beef. They add a nice texture and flavor. For cheese, try mozzarella or cheddar. These options melt well and taste great. You can add more toppings to your patty melt. Consider crispy bacon or sautéed mushrooms. They add depth and richness. You can also try other spreads. A bit of avocado or spicy mustard boosts flavor. Swiss cheese is classic, but there are many choices. You can use sharp cheddar or pepper jack for a kick. Mixing cheeses gives a unique taste. Try combining mozzarella and gouda for a creamy blend. To keep your leftover patty melts fresh, store them in an airtight container. Place parchment paper between layers to prevent sticking. Refrigerate them within two hours of cooking. This will help keep the flavors intact and maintain texture. When you're ready to eat, reheating properly is key. Use a skillet over low heat. This helps avoid dry patties. Heat for about 5-7 minutes. Flip them halfway through to warm evenly. You can also cover the skillet to trap moisture. For extra flavor, add a little butter while reheating. For your secret sauce, proper storage is essential. Transfer it to a clean, airtight container. Keep it in the fridge right after making it. This prevents bacteria and keeps the sauce tasty. The shelf life of the sauce is about one week. If you notice any changes in smell or color, it's best to discard it. For longer storage, consider freezing in small portions. This way, you can enjoy it anytime without losing flavor. It takes about 15 minutes to prepare and 25 minutes to cook. You can grill a patty melt in about 8-10 minutes. This includes cooking the patties and toasting the bread. For perfect results, aim for a total time of around 40 minutes from start to finish. Yes, you can make the secret sauce ahead of time. Mix all the sauce ingredients and store it in the fridge. This will let the flavors blend well. It stays fresh for up to a week. Just give it a quick stir before using. Grilled patty melts go great with several side dishes. Try serving them with crispy fries, onion rings, or a fresh salad. You can also add pickles or coleslaw for a nice crunch. These sides make your meal feel complete and satisfying. Yes, you can freeze grilled patty melts. Wrap each sandwich tightly in foil or plastic wrap. They can last up to three months in the freezer. When you’re ready to eat, thaw them in the fridge overnight. Then, reheat them in the oven or skillet until hot. Grilled patty melts are a tasty treat you can master. We covered the ingredients, steps, tips, and even variations. Each step helps you create a delicious sandwich everyone will love. Remember to fine-tune your secret sauce and try new toppings. Explore different cheeses to find your favorite mix. Whether cooking for yourself or friends, this classic meal shines. With practice, you’ll grill the perfect patty melt every time. Enjoy your cooking journey!

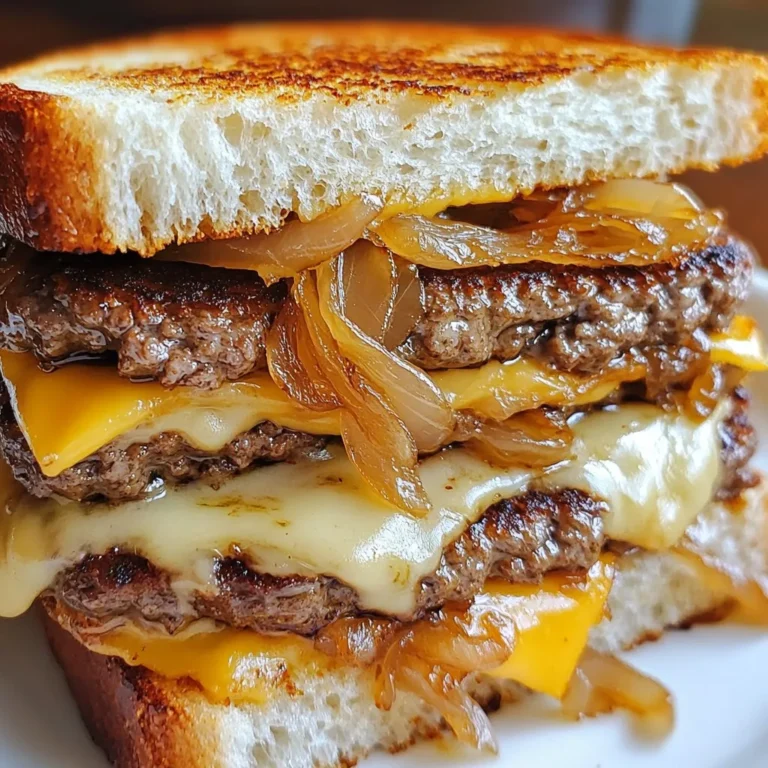
Grilled Patty Melt with Flavorful Secret Sauce

- 1 lb large shrimp, peeled and deveined - 2 tablespoons Cajun seasoning - 1 tablespoon olive oil - 4 small corn tortillas The shrimp are the star of this dish. I love using large shrimp for a nice bite. Cajun seasoning adds a kick of flavor. You can buy it or make your own blend. Olive oil helps the spices stick and gives a nice sear. Corn tortillas are soft and perfect for holding all the goodness. - 1 cup shredded red cabbage - 1 ripe avocado, sliced - 1/2 cup sour cream - Fresh cilantro, for garnish Red cabbage provides a crunchy texture and a pop of color. Sliced avocado adds creaminess to each bite. I always add sour cream for a cool contrast to the spicy shrimp. Fresh cilantro gives a burst of freshness and flavor. These toppings make each taco fun and colorful. - Juice of 1 lime - Salt and freshly cracked black pepper, to taste Lime juice brightens the dish with acidity. A pinch of salt and cracked black pepper enhances all the flavors. This simple mix of seasonings makes the tacos taste fresh and lively. Don't skip the lime—it brings everything together! {{ingredient_image_2}} First, I take 1 pound of large shrimp, peeled and deveined. In a medium bowl, I mix the shrimp with 2 tablespoons of Cajun seasoning, 1 tablespoon of olive oil, and a pinch of salt and pepper. I toss everything well, ensuring each shrimp gets coated in the spices. This adds a great kick! Next, I heat a non-stick skillet over medium-high heat. When the skillet is hot, I add the seasoned shrimp in a single layer. I cook them for about 2-3 minutes on each side. The shrimp will turn opaque and curl slightly, showing they are done. I remove them from the heat once they look perfect! To warm the corn tortillas, I place them in a dry skillet over medium heat. I let each side heat for about 30 seconds. The goal is for them to be soft and pliable. This keeps the tortillas from cracking when I fill them. Now it's time to assemble the tacos! I start by putting a generous layer of shredded red cabbage on each warmed tortilla. The crunch adds a nice texture. Next, I top each with a portion of the cooked shrimp. Then, I add a few slices of ripe avocado and a dollop of sour cream. To finish, I squeeze fresh lime juice over each taco. This brightens the flavors! I like to garnish with fresh cilantro for a pop of color and taste. Serve the tacos right away, and don’t forget extra lime wedges for more flavor! - Ensuring shrimp are cooked properly: Cook shrimp until they turn opaque and curl slightly. This usually takes about 2-3 minutes on each side. - Avoiding overcooking the shrimp: Watch the color change closely. Overcooked shrimp become tough and rubbery. Remove them from heat once they are fully cooked. - Making tacos visually appealing: Use a colorful platter for serving. Arrange the tacos neatly, showcasing the fresh ingredients. - Ideas for serving suggestions: Add lime wedges and a small bowl of extra sour cream on the side. This adds color and gives guests options. - Alternate toppings: Try adding diced tomatoes, sliced jalapeños, or crumbled feta for new flavors. - Adjusting spice levels: If you like it spicy, add more Cajun seasoning or hot sauce. For milder tacos, use less seasoning and add more toppings like avocado. Pro Tips Fresh Ingredients: Always use fresh shrimp for the best flavor and texture. Frozen shrimp can work in a pinch, but fresh will elevate your tacos significantly. Adjusting Spice Levels: If you're sensitive to spice, reduce the amount of Cajun seasoning or mix it with some paprika for a milder flavor while still maintaining a hint of heat. Perfectly Cooked Shrimp: Keep an eye on the shrimp while cooking; they cook quickly and are done when they turn opaque and curl slightly. Overcooked shrimp can become rubbery. Customize Your Toppings: Feel free to add other toppings such as diced tomatoes, jalapeños, or a squeeze of hot sauce for extra flavor and texture. {{image_4}} You can swap shrimp for chicken or fish. Both options work well with Cajun seasoning. For chicken, use boneless thighs or breasts. Cut them into bite-sized pieces. Cook until they are no longer pink. For fish, choose firm types, like tilapia or mahi-mahi. Season and cook them just like the shrimp. If you prefer a vegetarian option, try using black beans or grilled veggies. They add nice texture and flavor. Mix in some Cajun spices to keep the taste bold. You can enjoy the same fresh toppings with these choices too. You can change the seasoning mix for a different taste. Try a taco seasoning blend for a milder flavor. For a spicy kick, add cayenne pepper or diced jalapeños. You can also mix in some honey for a sweet touch. It pairs well with the spicy shrimp. Experiment with different herbs too. Fresh dill or parsley could add a fun twist. Each change can create a new taco experience. When it comes to taco styles, you can use hard or soft shells. Hard shells add a nice crunch, while soft tortillas feel more traditional. You can even try lettuce wraps for a low-carb option. Fusion styles are fun too! Use a Korean BBQ approach with kimchi or a Mediterranean twist with tzatziki sauce. Mixing cuisines can transform your tacos into something new and exciting. To store leftovers, place your tacos in an airtight container. Separate the shrimp and toppings from the tortillas. This keeps them fresh longer. The tacos will last in the fridge for up to 2 days. After that, the tortillas may get soggy, and the shrimp may lose their flavor. For the best reheating, use a skillet over medium heat. This method warms the shrimp gently, keeping them juicy. Avoid the microwave if you can; it can make shrimp rubbery. Heat for about 2 minutes on each side until warm. If you have leftover tortillas, warm them in a dry skillet for about 30 seconds. Yes, you can freeze cooked shrimp. Place the shrimp in a freezer-safe bag. Make sure to remove as much air as possible. You can freeze the shrimp for up to 3 months. For tacos, it’s best to freeze the shrimp separately. Assembled tacos may become soggy when thawed. To enjoy later, freeze the shrimp and store the tortillas and toppings separately. Cajun seasoning is a mix of spices that adds bold flavor. Common ingredients include: - Paprika - Garlic powder - Onion powder - Cayenne pepper - Oregano - Thyme You can buy Cajun seasoning at stores. Many brands offer good options. Making it at home is easy. Just mix the spices to your taste. This way, you can adjust the heat level. You can tell shrimp are done when they turn pink and opaque. They should also curl slightly. Cooking times depend on shrimp size: - Large shrimp: 2-3 minutes per side - Medium shrimp: 1-2 minutes per side Keep a close eye on them. Overcooking makes shrimp tough. Yes, you can prepare shrimp ahead of time. Here are some tips: - Cook shrimp and let them cool. - Store in an airtight container in the fridge for up to 2 days. When you are ready to serve, just reheat them gently. This keeps the flavor fresh and tasty. This blog covered how to make tasty shrimp tacos. We looked at the main ingredients like shrimp and Cajun seasoning. I shared tips for cooking shrimp just right and keeping tortillas soft. We explored ways to customize your tacos with fun toppings and variations. In short, these shrimp tacos are not only simple but also packed with flavor. Enjoy these delicious bites, and don’t hesitate to experiment with your favorite ingredients. Happy cooking!

Cajun Shrimp Tacos Flavorful and Easy Recipe

To make delightful English scones, you need a few simple items. Here is what you will need: - 2 cups all-purpose flour - 1/4 cup granulated sugar - 1 tablespoon baking powder - 1/2 teaspoon salt - 1/2 cup unsalted butter, chilled and cut into small cubes - 1/2 cup whole milk - 1 large egg These ingredients form the backbone of your scone. The flour provides structure, while the baking powder gives it lift. The sugar adds a touch of sweetness, and the butter keeps them tender. You can make your scones even better with a few extras. Consider these optional ingredients: - 1/2 cup raisins or currants - Zest of 1 lemon Adding raisins or currants gives a sweet burst. The lemon zest adds a fresh twist that brightens the scones. You can mix and match these options based on your taste. Using high-quality ingredients is key to great scones. Fresh flour and butter make a big difference. Chilled butter helps create a flaky texture. Whole milk adds moisture and richness. When you choose good ingredients, your scones will taste better and impress everyone. Remember, the heart of a good recipe lies in the ingredients you choose. Enjoy your baking! {{ingredient_image_2}} Start by preheating your oven to 400°F (200°C). This step is key for a perfect bake. While the oven heats, line a baking sheet with parchment paper. This helps to keep the scones from sticking. In a large mixing bowl, sift together the following ingredients: - 2 cups all-purpose flour - 1/4 cup granulated sugar - 1 tablespoon baking powder - 1/2 teaspoon salt Mixing these dry ingredients well ensures that the baking powder distributes evenly. This step helps your scones rise nicely. In a separate bowl, whisk together: - 1/2 cup whole milk - 1 large egg Once blended, pour this mix into the dry ingredients. Gently fold the mixture with a spatula. Mix until just combined. Avoid overmixing, as this keeps the scones light and fluffy. Turn the dough onto a floured surface. With floured hands, knead the dough gently just a few times. Shape it into a round disc about 1 inch thick. Use a floured cutter to cut out scones. Place them on the baking sheet with space between each. Bake the scones in the preheated oven for 15 to 20 minutes. They are done when lightly golden brown and well-risen. Keep an eye on them to avoid burning. Once baked, take the scones out of the oven. Let them cool for a few minutes on the baking sheet. Then, transfer them to a wire rack to cool completely. Serve the warm scones with clotted cream and jam for a classic touch. For a fancy tea, arrange them on a tiered stand with fresh berries. To get a light and fluffy scone, avoid overmixing the dough. Mix just until the wet and dry ingredients combine. This helps keep the scones airy. Use chilled butter; it helps create flaky layers. When rubbing butter into flour, aim for a coarse crumb, like sand. One common mistake is using warm butter. Always use chilled butter cut into small cubes. This helps achieve the right texture. Another error is overworking the dough. Knead gently and just enough to bring the dough together. Lastly, don’t skip the milk wash. Brushing the tops before baking gives the scones a lovely golden color. Check the scones after 15 minutes of baking. They should be lightly golden and well-risen. Gently press the top; it should feel firm and spring back. If they look pale or soft, give them a few more minutes. Always trust your eyes and touch for the best results. Pro Tips Keep Butter Cold: Ensure your butter is chilled before incorporating it into the flour mixture. This helps create flaky layers in the scones. Don't Overmix: When combining the wet and dry ingredients, mix just until incorporated. Overmixing can lead to tough scones. Flour Your Cutter: Dust your scone cutter with flour before cutting to prevent the dough from sticking and ensure clean edges. Adjust Baking Time: Keep an eye on the scones towards the end of the baking time; ovens can vary, and you want them golden brown but not overbaked. {{image_4}} You can add fun flavors to your scones. One popular choice is using raisins or currants. These tiny fruits add sweetness and a chewy texture. Just fold them in with the dry mix, and you'll have a delightful burst of flavor in every bite. You can also try dried cranberries or chopped apricots for a twist. If you want a fresh taste, add lemon zest too. It brightens the scones and makes them extra special. Savory scones are a great option too. You can use cheese, herbs, or even bacon bits. For cheese scones, add sharp cheddar or feta. Mix in fresh herbs like rosemary or thyme for a tasty aroma. These scones pair well with soups or salads, making them perfect for lunch. Just remember to adjust the salt if you add salty cheese or bacon. Don't be afraid to get creative! Lemon and poppy seeds make a refreshing combo. The lemon gives a zesty kick, while the poppy seeds add crunch. You can also try orange zest with cranberries or even chocolate chips for a sweeter treat. The key is to balance flavors and keep it simple. This way, you can enjoy unique scones that impress your family and friends. To keep your scones fresh, store them in an airtight container. This helps prevent them from drying out. Place a piece of parchment paper between layers if you stack them. This keeps them from sticking together. You can keep them at room temperature for up to two days. If you want to save them longer, refrigeration is an option. However, this may change their texture a bit. If your scones are a little stale, don't worry. You can bring them back to life with heat. Preheat your oven to 350°F (175°C). Place the scones on a baking sheet. Cover them with foil to prevent drying. Heat for about 10 minutes. If you want a crispier edge, remove the foil for the last few minutes. You can also use a microwave. Heat each scone for about 15 seconds. Just remember, they may not be as crisp. Freezing is a great way to save scones for later. First, let them cool completely. Wrap each scone tightly in plastic wrap. Then, place them in a freezer-safe bag. This helps prevent freezer burn. You can freeze them for up to three months. When you want to enjoy a scone, take it out of the freezer. Let it thaw at room temperature or reheat it directly in the oven. Enjoy fresh-baked taste anytime! Scones and biscuits differ mainly in texture and ingredients. Scones have a denser and crumblier texture. They often use cream or milk, while biscuits rely on butter. Scones usually include sugar and sometimes dried fruits. In contrast, biscuits are often savory. This sweetness makes scones great for tea time. Yes, you can make scones without baking powder, but they may not rise as much. You can use baking soda instead. If you do this, add an acid, such as buttermilk or yogurt. This will help the dough rise and keep it light. You can tell scones are ready when they are lightly golden brown. They should also feel firm and spring back when touched. If they look flat, they may need more baking powder next time. The inside should be soft and fluffy. Absolutely! You can swap regular flour for gluten-free flour. Use plant-based milk instead of whole milk for a dairy-free option. If you want to skip sugar, try using honey or a sugar substitute. These changes can still create tasty scones. You learned how to make authentic English scones. We covered essential ingredients, mixing steps, and baking tips. Quality ingredients and proper techniques are key to perfect scones. Don’t forget to experiment with flavors like fruity or savory options. Store your extras well to keep them fresh. Remember, practice makes perfect. Your scones will get better each time you bake them. Enjoy your scone journey!

Authentic English Scones Delightful and Simple Recipe

- 4 large potatoes (russet or Yukon gold), peeled and diced into 1-inch cubes - 1 cup cooked chickpeas (or substitute with white beans) for an added protein boost - 1 medium onion, finely chopped - 2 cloves garlic, minced - 4 cups vegetable broth (low-sodium recommended) - 1 cup unsweetened almond milk (or any milk of your choice) - 1 tablespoon olive oil - 1 teaspoon dried thyme - 1 teaspoon smoked paprika for depth of flavor - Salt and freshly ground black pepper to taste - Fresh chives or parsley, finely chopped for garnish To make a rich and nourishing protein creamy potato soup, you need simple yet powerful ingredients. Potatoes are the star of this dish. They give the soup a creamy base. Chickpeas add protein and make the soup filling. You can swap them with white beans if you wish. Onion and garlic bring a savory flavor. They add depth that you will love. Vegetable broth adds more richness. Almond milk keeps it creamy without dairy. Olive oil helps sauté the veggies and adds healthy fats. Seasonings like dried thyme and smoked paprika give it extra flavor. Don’t forget salt and pepper to taste. For a fresh finish, sprinkle chives or parsley on top. This combination creates a delightful soup that nourishes both body and soul. {{ingredient_image_2}} 1. Heat 1 tablespoon of olive oil in a large pot over medium heat. 2. Once the oil is hot, add 1 finely chopped onion. Sauté it for about 5 minutes. Stir occasionally until the onion is soft and clear. 3. Next, add 2 minced garlic cloves. Cook for 1 more minute. Stir often until the garlic smells good and turns a little golden. 4. Now, add 4 large peeled and diced potatoes and 1 cup of cooked chickpeas. Stir everything well. 1. Pour in 4 cups of vegetable broth, 1 teaspoon of dried thyme, and 1 teaspoon of smoked paprika. Mix it all together. 2. Bring the soup to a rolling boil. Once it boils, reduce the heat to a simmer. 3. Cover the pot and let it cook for 20 to 25 minutes. Check the potatoes with a fork; they should be soft and break apart easily. 1. After the potatoes cook, use an immersion blender to blend the soup until it is smooth. 2. If you don’t have an immersion blender, carefully blend small batches in a kitchen blender. Return the soup to the pot after blending. 3. Stir in 1 cup of unsweetened almond milk. Taste the soup and add salt and black pepper as you like. 4. Heat the soup gently for about 5 minutes until it's warm. Now, you can serve this creamy potato soup hot. Don't forget to sprinkle some fresh chives or parsley on top for a nice finish! To make your soup shine, use fresh herbs and spices. I love adding: - 1 teaspoon dried thyme for earthiness - 1 teaspoon smoked paprika to deepen the taste - Fresh chives or parsley for a bright finish You can also try other herbs like rosemary or basil. For a kick, add a pinch of cayenne pepper. If you want more protein, consider these alternatives: - Use cooked lentils instead of chickpeas. - Add diced firm tofu or tempeh for a different texture. The key to a smooth soup is blending well. Here are my tips: - Use an immersion blender for easy blending. - If you don’t have one, blend the soup in batches with a regular blender. After blending, check the soup's texture. If it feels too thick, stir in more almond milk or broth. For a thicker soup, blend a bit less. Taste your soup before serving. Adjust with salt and pepper to suit your liking. Enjoy every creamy bite! Pro Tips Choose the Right Potatoes: Russet and Yukon gold potatoes provide the best texture and flavor for a creamy soup. They break down nicely, creating a velvety consistency. Blend for Creaminess: Using an immersion blender allows you to achieve the perfect creamy texture without needing to transfer hot soup to another blender. It’s safer and easier! Experiment with Spices: Feel free to add other spices like cumin or curry powder for a unique twist on flavor. Adjust according to your taste preferences. Garnish for Presentation: A drizzle of extra almond milk and a sprinkle of smoked paprika not only enhances the flavor but also makes your soup visually appealing when serving. {{image_4}} You can easily swap out some ingredients in this soup. For milk, use any milk you like. Almond milk is great, but oat or soy milk works too. Just make sure it’s unsweetened. If you want to change the protein, chickpeas are not your only choice. You can use white beans instead. They add a nice creamy texture. Lentils are another good option, too. They cook fast and give a hearty feel to the soup. Want to add more veggies? Carrots and celery are great choices. Chop them up and toss them in with the onions. They will add more taste and nutrition. You can also try other greens like spinach or kale for extra color. For spices, think about mixing it up with curry powder. It can give the soup a warm, different flavor. A pinch of cumin or even chili powder can add a nice kick. Experiment with what you like best! To keep your protein creamy potato soup fresh, store it properly. - Refrigeration tips: Let the soup cool before putting it in an airtight container. It stays good in the fridge for up to three days. Label the container with the date, so you remember when you made it. - Freezing instructions: For longer storage, freeze the soup. Use freezer-safe bags or containers. Leave some space for the soup to expand as it freezes. It can last up to three months in the freezer. Just remember to label it! When it's time to enjoy your leftovers, reheating is key. - Best practices for reheating: Thaw frozen soup in the fridge overnight. For refrigerated soup, pour it into a pot. Heat it over medium heat, stirring often to prevent sticking. - Maintaining texture and flavor: If the soup seems too thick, add a splash of almond milk or broth while heating. This will bring back its creamy texture and boost the flavor. Always taste before serving to check the seasoning. Yes, this soup is gluten-free. The main ingredients, like potatoes and chickpeas, do not contain gluten. Always check your vegetable broth to ensure it is gluten-free. If you use gluten-free broth, you will have a safe dish for those with gluten allergies. You can make this soup ahead of time. It stores well in the fridge for about three days. To prepare, let the soup cool completely before you put it in a container. When you are ready to eat, just reheat it on the stove or in the microwave. This makes it great for meal prep and busy days. This soup pairs well with many sides. Here are some tasty options: - Crusty bread or rolls for dipping - A fresh green salad for crunch - Roasted veggies to add flavor - Grilled cheese sandwiches for a classic combo These sides will enhance your meal and make it even more enjoyable! This blog post covered a simple, creamy potato soup that is both tasty and nutritious. You learned about the key ingredients, how to cook, and blending for the right texture. Tips on enhancing flavors and adjusting ingredients make this soup unique. Storing and reheating your leftovers keeps your meal fresh. Remember, this soup is not just filling; it can fit many diets. I hope you try making it and enjoy the delicious results!

Protein Creamy Potato Soup Rich and Nourishing Recipe

To make this creamy Chicken Florentine, you need: - 2 boneless, skinless chicken breasts - 2 cups fresh spinach, finely chopped - 1 cup heavy cream - 1 cup grated Parmesan cheese - 2 cloves garlic, minced - 1 tablespoon olive oil - 1 teaspoon Italian seasoning - Salt and freshly ground black pepper to taste - 1 cup cherry tomatoes, halved (for garnish) - Fresh basil leaves, torn (for garnish) Each ingredient in this dish brings health benefits: - Chicken breasts are lean protein. They help build muscle and keep you full. - Spinach is packed with vitamins A and K. It supports your vision and bones. - Heavy cream provides healthy fats, which can aid in vitamin absorption. - Parmesan cheese delivers calcium for strong bones. It also adds flavor. - Garlic boosts your immune system and may reduce blood pressure. - Olive oil is rich in healthy fats and antioxidants. It can support heart health. - Cherry tomatoes are a great source of vitamin C. They help keep skin healthy. - Basil offers anti-inflammatory properties and adds a fresh taste. If you need to swap ingredients, here are some ideas: - Use chicken thighs instead of breasts for more flavor. - Substitute Greek yogurt for heavy cream to lower calories. - Try nutritional yeast in place of Parmesan for a dairy-free option. - Use frozen spinach if fresh is not available; just thaw and drain it first. - Replace olive oil with butter for a richer taste. - For a kick, add red pepper flakes to the sauce. This dish is simple, yet it offers a burst of flavor and nutrition. Enjoy making your Chicken Florentine! {{ingredient_image_2}} Season the chicken breasts with salt, pepper, and Italian seasoning. Heat olive oil in a large skillet over medium heat. Add the chicken breasts to the skillet. Cook for about 6 to 7 minutes on each side. The chicken should be golden brown and no longer pink inside. Once cooked, remove the chicken and cover it to keep warm. In the same skillet, add minced garlic. Sauté the garlic for about 1 minute, until it smells great. Be careful not to let it burn. Add the finely chopped spinach next. Stir often until the spinach wilts, which takes about 2 to 3 minutes. Turn the heat down to low. Pour in the heavy cream slowly, stirring to mix it well with the spinach and garlic. Gradually add the grated Parmesan cheese, stirring until the sauce is creamy and smooth. Taste it and add a little more salt or pepper if you want. Put the cooked chicken back in the skillet. Make sure the chicken is covered in the creamy spinach sauce. Let it simmer for about 2 to 3 minutes. This helps the chicken soak up all the yummy flavors. Using a spatula, place the Chicken Florentine on plates. For a pop of color, garnish with halved cherry tomatoes and torn basil leaves. Enjoy this creamy dish as a special treat! To make Chicken Florentine shine, start with fresh ingredients. Season your chicken well. Use salt, pepper, and Italian seasoning. Heat olive oil in a large skillet over medium heat. This gives the chicken a nice golden color. Cook the chicken for about 6 to 7 minutes on each side. Check for doneness; it should be juicy and not pink inside. For the spinach, use the same skillet. This adds extra flavor to your dish. To create a rich and creamy sauce, use heavy cream. Pour it in after cooking the garlic and spinach. Stir it slowly to mix well. Add the grated Parmesan cheese gradually. Keep stirring until it becomes smooth. If the sauce is too thick, add a splash of milk or broth. Taste it for seasoning, and adjust with salt and pepper as needed. This will give you a perfect creamy texture that clings to the chicken. To make your dish look great, use a clean plate. Place your chicken in the center, then spoon the creamy sauce on top. Add halved cherry tomatoes for color. They also add a nice sweet touch. Tear fresh basil leaves and sprinkle them over the dish. This gives a fresh aroma. Using vibrant colors makes it more appealing. A beautiful presentation will impress your guests and make the meal feel special. Pro Tips Use Fresh Spinach: Fresh spinach gives the best flavor and texture. Avoid using frozen spinach, as it can become watery and affect the cream sauce consistency. Perfect Chicken Cooking: Ensure your chicken breasts are even in thickness for uniform cooking. Consider pounding them slightly to achieve this. Adjust Creaminess: If you prefer a lighter sauce, you can substitute half of the heavy cream with chicken broth or a lower-fat cream alternative without sacrificing too much flavor. Garnish Wisely: Fresh basil and cherry tomatoes not only enhance the dish’s appearance but also brighten up the flavors. Add them just before serving for the best taste. {{image_4}} You can change the sauce in Chicken Florentine. Try a lemon-butter sauce for a zesty twist. Use a white wine sauce for a rich flavor. A garlic and herb sauce adds depth too. Each sauce brings a new taste to the dish. Mix it up based on your mood! Vegetables can boost the flavor and nutrients. You can add mushrooms or bell peppers. Zucchini or broccoli also work well. For added protein, try shrimp or salmon. These options make the dish heartier and more colorful. You get more tastes and textures in each bite! While pasta is a classic side, you can get creative. Serve it with rice for a filling meal. Quinoa adds a nice nutty flavor. Roasted potatoes or a fresh salad are great too. Each side brings its own charm to Chicken Florentine. Choose what fits your meal best! To keep Chicken Florentine fresh, let it cool first. Place it in an airtight container. Store it in the fridge for up to three days. Make sure to label the container with the date. This way, you'll know when to eat it. When you want to eat your leftovers, use the stove or microwave. On the stove, heat it on low. Stir it often so it warms evenly. If using the microwave, heat in short bursts. Check it every minute to avoid overcooking. This keeps the chicken and sauce creamy. You can freeze Chicken Florentine for up to three months. Use a freezer-safe container and remove as much air as possible. When you want to eat it, thaw it overnight in the fridge. Reheat it on the stove for the best taste. Avoid freezing the dish with the garnish. Add fresh tomatoes and basil after reheating for a bright touch. Chicken Florentine is a creamy dish with chicken and spinach. It features tender chicken breasts in a rich, cheesy sauce. The sauce combines heavy cream, garlic, and Parmesan cheese. This dish is both simple and elegant, perfect for any dinner. Yes, you can make Chicken Florentine ahead of time. Cook the chicken and prepare the sauce separately. Store them in the fridge for up to two days. When ready to serve, warm them gently on the stove. You can serve Chicken Florentine with various sides. Here are a few tasty options: - Pasta or rice for a filling meal - A crisp green salad for freshness - Garlic bread to soak up the sauce - Roasted vegetables for added flavor Chicken Florentine can be a healthy option. It includes lean chicken and spinach, which are both nutritious. Spinach is rich in vitamins and minerals. However, it does contain heavy cream and cheese, which add calories and fat. Balance it with lighter sides for a healthier meal. To make Chicken Florentine gluten-free, skip any flour in the recipe. The dish is naturally gluten-free when using gluten-free ingredients. Just ensure the chicken and cheese are certified gluten-free. Enjoy a creamy and delicious meal without worry! This blog post covered Chicken Florentine from start to finish. We explored key ingredients, their health benefits, and easy swaps. I outlined simple steps to prepare each part, from chicken to sauce. Tips for cooking and serving enhanced your dish, while variations offered creative options. Lastly, I shared storage tips to keep your leftovers fresh. By following these steps, you can enjoy a delicious meal that’s both healthy and flexible. Whether you stick to the classic recipe or experiment, Chicken Florentine will surely delight.

Chicken Florentine Delightful and Creamy Recipe

- Chicken and Vegetables - 1 lb boneless, skinless chicken breasts, cut into strips - 1 bell pepper (red or yellow), sliced into thin strips - 1 medium onion, sliced into thin rings - 2 garlic cloves, minced into a paste Chicken is the star here. It cooks fast and adds great flavor. I prefer using boneless, skinless chicken breasts for this dish. They stay tender and juicy. The bell pepper and onion bring color and crunch. Adding garlic gives it a nice kick. - Spices and Seasoning - 1 teaspoon ground cumin - 1 teaspoon smoked paprika - ½ teaspoon chili powder - Salt and freshly ground black pepper, to taste These spices create that classic fajita flavor. Cumin adds warmth, while smoked paprika gives a nice depth. Adjust the chili powder for your heat level. A little salt and pepper enhances all the flavors. - Base Ingredients - 1 can (15 oz) black beans, thoroughly drained and rinsed - 1 cup corn kernels (can use fresh or frozen) - 1 cup salsa (choose mild or spicy based on your preference) - 2 cups cooked rice (white, brown, or cauliflower rice works well) The black beans and corn add fiber and sweetness. Salsa ties it all together with moisture and zest. Use your favorite type of rice for the base. It soaks up all those tasty juices. - Cheese and Garnishes - 1 ½ cups shredded cheese (use cheddar or a Mexican blend for flavor) - Fresh cilantro, chopped, for garnish (optional) Cheese is essential for that gooey top layer. I love a mix of cheddar and Mexican blends for extra flavor. Cilantro adds freshness. You can skip it if you're not a fan, but it brightens the dish. {{ingredient_image_2}} - Preheat oven to 350°F (175°C). - Grease the casserole dish. - Cut chicken into strips and slice vegetables. - Heat olive oil in a large skillet over medium heat. - Add chicken strips and sauté for 5-7 minutes. - Once cooked, stir in bell pepper, onion, and minced garlic. - Cook until vegetables are tender, about 3-5 minutes. - Season with cumin, smoked paprika, chili powder, salt, and pepper. - Mix well to blend flavors. - In a large bowl, combine black beans, corn, salsa, and rice. - Gently fold in the chicken and vegetable mixture. - Transfer everything to the greased casserole dish. - Sprinkle shredded cheese evenly over the top. - Bake the casserole for 25-30 minutes. - Look for bubbly and lightly golden cheese. - Remove from oven and cool for 5 minutes before serving. - Optionally, garnish with chopped cilantro for added flavor. - Choosing the right chicken cuts Use boneless, skinless chicken breasts for a lean option. They cook evenly and stay juicy. You can also use chicken thighs for more flavor. - Tips for perfecting the sauté Heat your pan on medium heat before adding oil. This helps the chicken get a nice sear. Cook the chicken until it’s no longer pink, about 5-7 minutes. Stir it often for even cooking. - Cheese selection for better melting I recommend using cheddar or a Mexican cheese blend. These melt well and add great flavor. Grate your own cheese for the best results. - Overcooking the chicken Avoid cooking the chicken too long. It can dry out quickly. Check for doneness by cutting into a piece to see if it’s no longer pink. - Skipping the resting time Let the casserole rest for about 5 minutes after baking. This helps the flavors blend and makes serving easier. - Ignoring seasoning balance Don’t skip the spices! They add depth to your dish. Taste your mixture and adjust the salt and pepper as needed. Pro Tips Use Fresh Ingredients: Fresh bell peppers and onions enhance the flavor profile of your casserole, making it more vibrant and delicious. Customize Your Spice Level: Adjust the amount of chili powder in the recipe to suit your taste, or add diced jalapeños for an extra kick! Cheese Variations: Experiment with different cheese blends such as pepper jack or queso fresco for a unique twist on the traditional flavor. Make Ahead: Prepare the casserole in advance and store it in the fridge. Just bake it when you're ready for a quick meal! {{image_4}} Protein alternatives You can use different proteins in this dish. Ground turkey or beef works well. You might even try shrimp for a seafood twist. Tofu is great for a meatless option. Vegetable variations Feel free to change the veggies! Zucchini, mushrooms, or even spinach can add fresh flavors. You can also mix in some jalapeños for heat. The more colorful, the better! Different types of rice Rice is the base of this casserole. You can use white rice for a classic taste. Brown rice adds more fiber, while cauliflower rice is low-carb. Each type brings a unique texture to the dish. Spicy vs. mild salsas Choose your salsa wisely. If you love spice, go for a hot salsa. If you prefer mild, select a smooth salsa. You can also mix both for a balanced flavor. Adding beans or legumes Beans add protein and fiber. Black beans are a must, but pinto or kidney beans are great too. You can even use lentils for a different taste. Incorporating fresh herbs Fresh herbs add brightness. Cilantro is a favorite, but parsley or green onions also work. Just sprinkle them on top before serving for extra flavor. To store leftovers, let the casserole cool first. Place it in an airtight container. You can keep it in the fridge for up to three days. When you want to eat it again, just take it out and reheat. For reheating, use the oven or microwave. If using an oven, heat to 350°F (175°C) until warm. In the microwave, warm in short bursts. Stir often to heat evenly. To freeze the casserole, let it cool completely. Then, wrap it tightly in plastic wrap. After that, place it in a freezer-safe container. This helps keep it fresh. You can store it in the freezer for up to three months. When you want to eat it, take it out and let it thaw. The best way to thaw is in the fridge overnight. After thawing, reheat it in the oven or microwave. Make sure it is heated all the way through. You will know it’s ready when it is hot in the center. Enjoy your meal! To add heat, use spicy salsa or add diced jalapeños. You can also increase the chili powder or use a hot pepper blend. Adjust spices to your taste. The goal is to enhance flavor while keeping it enjoyable. Yes, leftover chicken works well. Just shred or chop it into small pieces. Make sure it is fully cooked and seasoned. This saves time and adds flavor to your casserole, making it even easier to prepare. Replace the chicken with extra beans or tofu. Use vegetable broth instead of chicken broth. Add more veggies like zucchini or mushrooms for texture. This keeps the dish hearty and satisfying without meat. Serve with a simple salad, guacamole, or tortilla chips. Mexican rice or corn on the side also complements the flavors. These options enhance the meal and create a fun dining experience. Store leftovers in an airtight container. Keep them in the fridge for up to three days. To reheat, use the microwave or oven until heated through. This way, you can enjoy the casserole again! Absolutely! Assemble the casserole a day ahead. Cover it and store it in the fridge. Bake it when you’re ready to eat. This makes meal prep easy and gives flavors time to blend nicely. You learned how to create a delicious Chicken Fajita Casserole. We covered the key ingredients, step-by-step instructions, and helpful tips. You now have variations to suit your taste and storage options to keep leftovers fresh. This dish is easy to make and perfect for any meal. Enjoy the fun of customizing your casserole and impress your family or friends. Cooking can be simple and enjoyable with the right recipes. Happy cooking!

Chicken Fajita Casserole Tasty and Easy Dish

- 8 oz pasta (fusilli or penne recommended) - 2 cups butternut squash, peeled and cut into 1-inch cubes - 2 cups Brussels sprouts, trimmed and halved lengthwise - 3 tablespoons extra virgin olive oil, divided - 3 cloves garlic, finely minced - 1 teaspoon dried thyme - Salt and freshly ground black pepper to taste - ½ cup vegetable broth - ¼ cup grated Parmesan cheese (or nutritional yeast for a vegan alternative) - Fresh parsley, finely chopped (for garnish) I love using fusilli or penne for this dish. They catch the sauce well. If you don't have them, any pasta works. For the butternut squash, fresh is best, but frozen cubes can work too. The Brussels sprouts should be fresh for the best crunch. For olive oil, you can use any good quality oil. If you want a vegan dish, swap Parmesan with nutritional yeast. - Pasta: Provides carbs for energy. Choose whole grain for more fiber. - Butternut Squash: Full of vitamins A and C. It's great for your skin and vision. - Brussels Sprouts: High in fiber, vitamins K and C. They support your immune system. - Extra Virgin Olive Oil: Rich in healthy fats. It’s good for heart health. - Garlic: Offers antioxidants. It helps reduce blood pressure and boosts immunity. - Thyme: Adds flavor and has antibacterial properties. - Salt and Pepper: Enhance taste. Use sparingly for health. - Vegetable Broth: Adds depth without extra fat. It’s low in calories. - Parmesan Cheese: Adds calcium and protein. Use in moderation for flavor. - Parsley: A great source of vitamins. It freshens the dish visually and taste-wise. This blend of ingredients not only makes the dish tasty but also packs a healthy punch! {{ingredient_image_2}} First, I set my oven to 400°F (200°C). This hot oven makes the veggies crispy. In a bowl, I mix the butternut squash and Brussels sprouts. I add 2 tablespoons of olive oil, salt, pepper, and thyme. I stir until all the pieces are covered. Then, I spread them out on a baking sheet. I roast them for 25-30 minutes. Halfway through, I stir them for even cooking. They should be soft and caramelized when done. While the veggies roast, I boil a large pot of water. I add a good amount of salt to the water. Once it bubbles, I add 8 oz of pasta. Fusilli or penne works best. I cook it according to the package instructions until it's al dente. Before I drain the pasta, I save ½ cup of the cooking water. After draining, I put the pasta back in the pot. Now, I add the roasted veggies to the pot with pasta. I also add minced garlic and vegetable broth. I gently stir everything over medium heat. I do this for a few minutes until the garlic smells good and everything is warm. If it seems dry, I splash in some of the reserved pasta water. Next, I sprinkle in the Parmesan cheese or nutritional yeast. I toss everything to mix well. I taste it and add more salt or pepper if needed. To get great flavor, roasting is key. First, cut the butternut squash and Brussels sprouts into even pieces. This helps them cook at the same rate. Use a large bowl to mix them with olive oil, salt, and pepper. Spread them out in a single layer on a baking sheet. This way, they roast evenly. Make sure to stir them halfway through cooking. This helps with browning and keeps them tender. Cooking pasta perfectly is simple. Use a large pot and boil water. Add salt to the water. This adds flavor. Cook your pasta until it is al dente, which means it is firm but cooked. Check the package for timing. Before draining, save some pasta water. This starchy water helps with the sauce later. Once drained, return the pasta to the pot quickly. You can add more flavor to your dish easily. Fresh garlic adds a strong taste. Cook it with the veggies for a rich aroma. Consider adding fresh herbs like parsley for a bright touch. If you want a kick, try red pepper flakes. Using cheese or nutritional yeast gives a creamy finish. Adjust the seasonings as needed. Taste your dish before serving to make sure it sings! Pro Tips Roasting Perfection: Ensure that the butternut squash and Brussels sprouts are cut into uniform sizes to achieve even roasting and caramelization. Al Dente Pasta: For the best texture, cook the pasta until al dente as it will continue to cook slightly when combined with the hot vegetables. Flavor Boost: Adding a pinch of red pepper flakes with the garlic can enhance the flavor and add a subtle heat to the dish. Make it Vegan: Substitute Parmesan cheese with nutritional yeast to keep the dish vegan-friendly while still adding a cheesy flavor. {{image_4}} You can easily make this dish vegan. Just swap the Parmesan cheese for nutritional yeast. Nutritional yeast adds a cheesy flavor without dairy. It also packs in vitamins and minerals, making your dish even healthier. Use about ¼ cup of nutritional yeast in place of cheese. This change keeps the creamy texture while being plant-based. If you need a gluten-free option, choose gluten-free pasta. Many brands offer pasta made from rice, corn, or lentils. These options cook well and taste great. Look for fusilli or penne shapes to keep the dish interesting. Follow the cooking instructions on the package for the best results. Want to add protein to your meal? You can easily include chicken, sausage, or tofu. For chicken, use cooked or grilled pieces. For sausage, slice and sauté it until browned. If you prefer tofu, press and cube it, then sauté until golden. Add your chosen protein when combining the ingredients. This will make your dish heartier and more filling. Store your Butternut Squash Brussels Pasta in an airtight container. Let it cool down first. Place it in the fridge for up to three days. This keeps the flavors fresh and tasty for later meals. When you are ready to eat, just take it out. You can freeze this pasta for a quick meal later. Allow the dish to cool completely. Use freezer-safe containers or bags. It can last up to three months in the freezer. When you're ready to enjoy it, just thaw it in the fridge overnight. Reheat the pasta on the stove for the best taste. Add a splash of water or broth to keep it moist. Heat over medium-low until warm. You can also use the microwave. Place it in a bowl, cover it, and heat for one to two minutes. Stir halfway through for even heating. Adjust the seasoning if needed. Yes, you can make this dish ahead. Cook the pasta and roast the veggies. Store them separately in the fridge. When ready to eat, just combine them and heat. This keeps the pasta from getting mushy. I recommend using fusilli or penne. These shapes hold the sauce well. They also catch bits of butternut squash and Brussels sprouts. If you prefer, you can try other types like rotini or farfalle. You can add more herbs like rosemary or sage for extra flavor. Try using red pepper flakes for a kick. If you like nuts, sprinkle some toasted walnuts or pine nuts on top. You can also swap the cheese for feta or goat cheese for a unique taste. This blog covered how to prepare a tasty dish with simple steps and helpful tips. We discussed the key ingredients, their measurements, and nutritional benefits. You learned about perfect cooking methods for both pasta and roasted veggies. In the end, remember that this dish is flexible. You can customize it to fit your taste. Enjoy experimenting with new flavors and ingredients. Your kitchen is a place for fun and creativity!

Butternut Squash Brussels Pasta Delightful and Easy

- 2 cups all-purpose flour - 1/4 cup granulated sugar - 1 tablespoon baking powder - 1/2 teaspoon salt - 1/2 teaspoon ground cinnamon - 2 large eggs - 3/4 cup whole milk - 1 teaspoon pure vanilla extract - 2 tablespoons unsalted butter, melted - Oil for frying (vegetable or canola) - Powdered sugar for dusting If you need gluten-free options, try using a gluten-free flour blend. Look for one that works well for baking. For dairy alternatives, you can use almond milk or oat milk instead of whole milk. These options will still give you tasty beignets. {{ingredient_image_2}} 1. Start with a large bowl. Add the dry ingredients: - 2 cups all-purpose flour - 1/4 cup granulated sugar - 1 tablespoon baking powder - 1/2 teaspoon salt - 1/2 teaspoon ground cinnamon Whisk these together. Make sure there are no lumps. 2. In another bowl, crack the two eggs. Whisk them until frothy. Then, add: - 3/4 cup whole milk - 1 teaspoon pure vanilla extract - 2 tablespoons unsalted butter, melted Stir until the mixture is smooth and blended. 3. Pour the wet mixture into the dry bowl. Use a spatula to mix gently. Stop when the batter is just combined. A few lumps are okay. This helps keep the beignets light and fluffy. 1. Get a deep pot or a large saucepan. Heat vegetable or canola oil over medium-high heat. You want to reach 350°F (175°C). To test the oil, drop in a spoonful of batter. It should bubble and float. 2. Use a spoon or cookie scoop. Drop about 2 tablespoons of batter into the hot oil. Do not overcrowd the pot. Fry each beignet for 2-3 minutes. They should turn golden brown. 3. When golden, remove the beignets with a slotted spoon. Place them on a plate with paper towels to absorb extra oil. 1. Let the beignets cool for a minute. Then, dust them with powdered sugar. Use a generous amount for a sweet touch. 2. For serving, place the warm beignets in a basket. Line the basket with parchment paper. Consider adding a small dish of chocolate sauce or caramel for dipping. Enjoy your delicious treats! - Overmixing the batter: Mixing too much makes the beignets tough. Mix just until combined. It's okay if some lumps remain. - Incorrect oil temperature: If the oil is too cold, the beignets soak up oil. Too hot, and they burn. Aim for 350°F (175°C) for best results. - Tips for light and fluffy beignets: Let the batter rest for a few minutes before frying. This helps the beignets puff up nicely. Also, make sure to fry in small batches. This keeps the oil hot and helps them cook evenly. - How to test for doneness: Check the color of your beignets. They should be golden brown. You can also use a toothpick; it should come out clean when inserted. - Adding spices or flavorings: Feel free to add a pinch of nutmeg or a splash of almond extract for extra flavor. Vanilla is great, but other spices can add depth. - Experimenting with fillings: Try adding fruit preserves or chocolate inside the beignets. Just make a small hole and fill them after frying. This makes each bite a tasty surprise! Pro Tips Temperature Control: Maintain the oil temperature at 350°F (175°C) for perfectly cooked beignets. Use a thermometer for accuracy. Resting Time: Allow the batter to rest for about 10 minutes before frying. This helps to enhance the texture and flavor. Variations: Experiment with different flavorings by adding citrus zest or spices such as nutmeg to the batter for a unique twist. Dusting Technique: Dust the beignets with powdered sugar while they are still warm for better adherence and a more indulgent treat. {{image_4}} You can fill your beignets with many tasty options. Fruit preserves add a sweet burst. Try raspberry or apricot for a fruity touch. Chocolate is always a hit. Melted chocolate inside gives a rich flavor. Custard is another great choice. A smooth vanilla custard makes each bite creamy. Toppings can change the whole look and taste. Chocolate sauce is a classic. Drizzle it on top for a sweet finish. Caramel is another yummy option. It adds a warm, rich flavor. You can even use icing for a fun twist. A light icing can give a nice shine. You can get creative with seasonal flavors. In fall, try pumpkin spice beignets. They add warmth and comfort. In summer, berry beignets are fresh and delightful. For special events, like birthdays, consider fun colors. Decorate with sprinkles for a party vibe. These themed beignets make any occasion special. To keep leftover beignets fresh, start by letting them cool completely. Place them in an airtight container. This helps keep moisture out. You can store them in the fridge for up to three days. If you want to keep them longer, consider freezing them. Always layer parchment paper between each beignet to prevent sticking. When reheating beignets, the oven is best. Preheat your oven to 350°F (175°C). Place the beignets on a baking sheet. Heat them for about 5-7 minutes. This method keeps them crispy. If you use a microwave, be careful. It can make them soft and chewy. If you must, heat them for just 10-15 seconds. To crisp them up, you can toss them in a hot skillet for a minute or two. To freeze uncooked beignets, first prepare the batter. Scoop dollops onto a baking sheet lined with parchment paper. Freeze them for about 1-2 hours until firm. Then, transfer them to a zip-top bag. For cooked beignets, let them cool first. Store them in a similar bag, removing as much air as possible. To thaw, leave them in the fridge overnight or at room temperature for a few hours. Always reheat before serving to enjoy their light and fluffy texture. Vanilla French beignets are light, fluffy pastries. They come from France and are often served warm. The word "beignet" means "fritter" in French. Traditionally, they are made with a dough that puffs up when fried. This gives them a soft, airy texture. You can dust them with powdered sugar for extra sweetness. Yes, you can prepare beignets ahead of time. Make the batter and store it in the fridge for up to 24 hours. Just remember to stir it gently before frying. If you want to freeze them, shape the beignets and place them on a tray. Freeze until firm, then transfer them to a bag. Fry them straight from the freezer, adding a minute or two to the cooking time. Freshly made beignets taste best the same day. They can last for about two days at room temperature. Store them in an airtight container to keep them fresh. If you need to keep them longer, refrigerate them for up to a week. Just know they might lose some crispness. Beignets pair well with many drinks. A hot cup of coffee is a classic choice. You can also enjoy them with hot chocolate or tea. For a fun twist, serve them with whipped cream or a rich chocolate sauce for dipping. They also go well with fresh fruit or a scoop of ice cream. In this post, we covered the key ingredients for beignets, including substitutions. I provided easy step-by-step instructions, tips to avoid mistakes, and ways to enhance flavor. We also explored fun variations, storage methods, and answered common questions. Making beignets can be fun and rewarding. Enjoy experimenting with different flavors and fillings. With practice, you’ll create delicious beignets for any occasion. Dive into this tasty treat and share it with friends!

Vanilla French Beignets Light and Fluffy Delight

- 2 cups cooked shredded chicken - 12 lasagna noodles - 2 cups ricotta cheese - 3 cups shredded mozzarella cheese - 1 cup grated Parmesan cheese - 3 cups fresh or frozen spinach (thawed and drained) - 2 cups Alfredo sauce (store-bought or homemade) - 1 teaspoon garlic powder - 1 teaspoon Italian seasoning - Salt and pepper to taste - 2 tablespoons olive oil To make creamy chicken lasagna, you need just the right mix of ingredients. The key is to have a balance of flavors and textures. Start with cooked shredded chicken. It adds protein and heartiness. The lasagna noodles are the base, so make sure they are not overcooked. Ricotta cheese gives your filling a creamy texture. I love using mozzarella cheese for its melting qualities. Parmesan cheese brings a sharp flavor that pairs well with the other cheeses. Spinach adds a pop of color and helps boost nutrition. For flavor, garlic powder and Italian seasoning will elevate your dish. Don't forget salt and pepper to taste. Lastly, olive oil helps keep everything moist and adds a nice flavor. These ingredients come together to create a dish that is creamy and comforting. {{ingredient_image_2}} - Preheat oven to 375°F (190°C). - Cook lasagna noodles al dente according to package instructions. Start by preheating your oven. This step is key for even cooking. While the oven heats, boil water in a large pot. Add the lasagna noodles, stirring often. Cook until they are al dente, which means they should still have a slight bite. Drain the noodles and set them aside. This prevents them from sticking together later. - Combine chicken, spinach, ricotta, and seasoning. In a large bowl, mix the cooked shredded chicken with spinach. I like to use fresh spinach, but frozen works too. Just make sure to thaw and drain it first. Next, add ricotta cheese, garlic powder, Italian seasoning, salt, and pepper. Stir everything well. You want a creamy filling that packs flavor. - Layer noodles, chicken mixture, Alfredo sauce, and cheeses. Grab a 9x13-inch baking dish. Start by spreading 1 cup of Alfredo sauce on the bottom. This will keep the noodles from sticking. Lay 4 noodles on top of the sauce. Spoon half of the chicken mixture over the noodles. Then, sprinkle a layer of mozzarella cheese. Repeat this process: sauce, noodles, chicken mixture, and mozzarella. For the last layer, add the final 4 noodles, cover with the rest of the Alfredo sauce, and top with mozzarella. Finish with Parmesan cheese for a nice crust. - Cover with foil and bake, then uncover for browning. Cover the dish tightly with aluminum foil. This helps the cheese melt without burning. Place it in your preheated oven for 25 minutes. After that, carefully remove the foil. Let the lasagna bake for another 15 minutes. This will make the top golden and bubbly. Once it’s done, let it cool for about 10 minutes. This cooling time helps with slicing. Enjoy the delicious layers! To make your lasagna creamy, use the right cheese ratios. I suggest 2 cups of ricotta, 3 cups of mozzarella, and 1 cup of Parmesan. This blend gives a rich and smooth texture. Taste your filling before baking. You can adjust the seasoning based on your preference. If you want more flavor, add extra garlic powder or Italian seasoning. Prevent sticking by using non-stick spray or olive oil. Coat your baking dish well before adding any sauce or noodles. This step helps the lasagna come out clean and allows for easy serving. No one enjoys lasagna that sticks to the pan! Let the lasagna cool for about 10 minutes before cutting. This cooling time helps the layers set and stay together. If you slice it too soon, it may fall apart. A sharp knife will give you clean, even pieces. Enjoy your beautiful lasagna! Pro Tips Use Fresh Herbs: Adding fresh basil or parsley as a garnish not only enhances the presentation but also adds a burst of flavor to each slice. Allow to Rest: Letting the lasagna sit for about 10 minutes after baking helps it set, making it easier to cut and serve without falling apart. Layering Technique: Ensure even distribution of ingredients in each layer for balanced flavor and texture throughout the lasagna. Cheese Variation: Experiment with different cheeses such as provolone or gouda to customize the flavor profile of your lasagna. {{image_4}} You can make this creamy chicken lasagna more colorful and healthy. Try adding mushrooms or zucchini for extra flavor. Both vegetables cook well and add nice texture. If you want a twist, swap spinach for kale or Swiss chard. These greens bring a different taste and boost nutrients. Cheese is key in lasagna. You can change the flavor by using different cheeses. Gouda adds a rich, smoky taste. Cheddar gives a sharp bite. Mix and match to find your favorite cheese combo. Don’t be afraid to experiment! While Alfredo sauce is creamy and rich, you can try making your own at home. A simple homemade Alfredo uses butter, cream, and Parmesan. If you're in the mood for something different, marinara can work well, too. This tomato-based sauce will give a nice contrast to the creamy layers. Store leftover creamy chicken lasagna in airtight containers. This keeps moisture in and prevents drying. Make sure to let it cool before sealing. Place it in the fridge if you plan to eat it within three days. For longer storage, freezing is a great option. You can freeze both unbaked and baked lasagna. To freeze unbaked lasagna, wrap it tightly in plastic wrap and then in foil. This way, it stays fresh for up to three months. If freezing baked lasagna, let it cool first. Then, cut it into portions, wrap each piece, and store them in freezer bags. To reheat lasagna, the oven works best. Preheat your oven to 350°F (175°C). Place the lasagna in an oven-safe dish and cover it with foil. Bake for about 25 minutes, or until it is heated through. You can also microwave individual pieces. Just use a microwave-safe plate and cover it loosely to avoid splatters. Yes, you can prepare this dish ahead of time. Here are some tips: - Assemble the lasagna: Layer it as directed, then cover it. - Refrigerate it: Keep it in the fridge for up to 24 hours. - Bake when ready: You may need to add a few extra minutes to bake time. - Freezing: You can freeze it before baking. Wrap it well and keep it for up to three months. You can tell when your lasagna is perfect by looking for these signs: - Bubbling cheese: The cheese should be hot and bubbling. - Golden top: A nice golden color on the cheese shows it is ready. - Warm center: Insert a knife in the middle; it should feel hot. Absolutely! Here are some tasty alternatives: - Homemade Alfredo: Make your own with butter, cream, and parmesan. - Marinara sauce: Use this for a different flavor profile. - White sauce: A simple béchamel can also work well. - Pesto: For a fresh twist, add basil pesto to your layers. You now have a step-by-step guide for making creamy chicken lasagna. We covered ingredients, instructions, tips, and variations. Whether you want to add veggies or switch up the cheese, creativity is welcome. Always remember to store and reheat your lasagna correctly for the best taste. Enjoy trying this recipe! Cooking can be fun and rewarding. It’s time for you to share this delicious dish with your family or friends.

Creamy Chicken Lasagna Easy and Flavorful Recipe

PREV 1 … 44 45 46 47 NEXT
meal plan mapper

explore

DessertsDinnerAppetizersDrinks

Our Policies

  • Cookie Policy
  • Copyright Policy
  • Disclaimer
  • GDPR Policy
  • Terms Of Use
Back to Top
  • About
  • Contact Us
  • Privacy Policy
© 2025 meal plan mapper