FREE DINNER EBOOK! Get your copy!
  • Cookie Policy
  • GDPR Policy
  • Disclaimer
  • Terms Of Use
  • Visit my other site: Fun Cookie Recipes
meal plan mapper
  • Home
  • Dinner
  • Desserts
  • Drinks
  • Appetizers
  • Contact
  • About
  • Privacy Policy
  • Home
  • Dinner
  • Desserts
  • Drinks
  • Appetizers
  • Contact
  • About
  • Privacy Policy
  • Cookie Policy
  • GDPR Policy
  • Disclaimer
  • Terms Of Use
Visit my other site: Fun Cookie Recipes

HOME / CATEGORIES /

Latest

For a tasty peanut butter banana smoothie bowl, gather these key ingredients: - 2 ripe bananas, frozen and sliced - 1 cup almond milk (or your favorite milk alternative) - 2 tablespoons natural peanut butter - 1/2 teaspoon vanilla extract These ingredients create a creamy and rich base for your smoothie bowl. The frozen bananas add sweetness and texture. You might want a touch of sweetness. If so, consider adding: - 1 tablespoon honey or maple syrup Adjust this based on your taste. If you prefer a less sweet bowl, skip the sweetener. The bananas and peanut butter are sweet on their own. Toppings make your smoothie bowl fun and flavorful. Here are some great options: - Fresh banana slices - Crunchy granola - Chia seeds - Shredded coconut - Assorted berries (like strawberries or blueberries) - A generous drizzle of peanut butter These toppings add texture, color, and more taste to your bowl. Experiment with different combinations for variety! {{ingredient_image_2}} Start by gathering your frozen banana slices. The bananas should be ripe for the best flavor. Place them in your blender. This is the key ingredient that gives the smoothie its creamy texture. Then, pour in one cup of almond milk. You can also use any milk you prefer. Next, add two tablespoons of natural peanut butter. This adds a rich, nutty flavor. If you like your smoothie sweet, include one tablespoon of honey or maple syrup. Finally, add half a teaspoon of vanilla extract for a nice touch of flavor. Now it’s time to blend! Turn your blender on high speed. Watch as the ingredients mix together. Blend until the mixture is smooth and creamy. You may need to stop a few times to scrape down the sides. This helps ensure everything blends well. If the mixture is too thick, add a little more milk. Blend again until you reach that perfect creamy texture. This step is crucial for a delightful smoothie bowl. Once your smoothie is ready, carefully pour it into a wide, shallow bowl. This allows you to show off your beautiful creation. Now comes the fun part: toppings! Arrange fresh banana slices on top. Add a sprinkle of crunchy granola for texture. You can also add chia seeds and shredded coconut for extra flavor. Toss in some fresh berries for a pop of color. Finally, drizzle some extra peanut butter on top. This adds richness and ties all the flavors together. Enjoy this energizing boost with a spoon! To get a creamy smoothie, use frozen bananas. They help create a thick base. If your smoothie is too thick, add more almond milk. Blend until smooth. Keep the blender on high for best results. Scrape the sides to mix all ingredients well. The right texture makes a big difference! Store ripe bananas at room temperature. If they become too ripe, freeze them. Just peel and slice them first. Other ingredients, like almond milk, should go in the fridge. Check the expiration date on your milk alternative. Keep peanut butter in a cool, dry place to avoid spoilage. Presentation is key for a smoothie bowl. Start by pouring the smoothie into a wide bowl. Use fresh banana slices and arrange them neatly on top. Add a sprinkle of granola for crunch. Chia seeds and shredded coconut add nice texture. Finish with berries for color and extra flavor. Drizzle peanut butter on top to tie it all together. Serve right away for a fresh look! Pro Tips Use Frozen Bananas: Using frozen bananas not only gives your smoothie bowl a creamy texture but also keeps it cool and refreshing, perfect for hot days. Choose Your Milk Wisely: Experiment with different milk alternatives such as oat milk or coconut milk to find your preferred flavor and creaminess level. Garnish with Color: Adding colorful toppings like berries or edible flowers not only enhances the visual appeal of your bowl but also boosts its nutritional value. Make it a Meal: To turn this smoothie bowl into a more substantial meal, consider adding protein-rich toppings like Greek yogurt or a scoop of protein powder to the smoothie mix. {{image_4}} You can easily make this smoothie bowl dairy-free. Use almond milk, oat milk, or soy milk as your base. For nut-free options, try sunflower seed butter instead of peanut butter. This keeps the creamy texture and flavor while making it safe for those with nut allergies. Feel free to get creative with your toppings! Here are some ideas: - Sliced strawberries or blueberries for sweetness - Granola for crunch - Pumpkin seeds for a boost of protein - A sprinkle of cinnamon for warmth - A spoonful of yogurt for creaminess Mix and match these toppings to suit your taste. The options are endless! Take advantage of seasonal fruits to enhance your smoothie bowl. In spring and summer, add fresh berries or peaches for a juicy twist. In fall, consider adding diced apples or pears. In winter, use citrus fruits like oranges or grapefruits for a refreshing zing. Seasonal ingredients not only taste great but also provide a variety of nutrients. If you have leftover smoothie bowl, store it in an airtight container. This helps keep it fresh. The smoothie will stay good in the fridge for up to 24 hours. However, it may lose some creaminess. Stir it well before enjoying it again. You can freeze the smoothie base for later use. Pour the blended smoothie into ice cube trays or freezer bags. This way, you can make quick smoothies later. Just thaw the cubes in the fridge or blend them frozen for a slushy drink. To keep your ingredients fresh, store bananas at room temperature. Avoid putting them in the fridge until they are ripe. For almond milk, keep it sealed and in a cool place. Check expiration dates often. This helps ensure your smoothie bowl tastes great every time. Yes, you can use fresh bananas. However, your smoothie bowl will not be as cold or thick. Frozen bananas make the smoothie creamy and frosty. If you use fresh bananas, add some ice cubes. This will help you get a chill and a nice texture. To make it vegan, choose plant-based milk. Almond milk is a great option. Use maple syrup instead of honey for sweetness. Check that your peanut butter is pure and dairy-free. With these swaps, you can enjoy a tasty vegan treat. Peanut butter is rich in protein and healthy fats. It helps keep you full longer. Bananas provide energy and are high in potassium. This helps your muscles and heart stay strong. Together, they make a great snack. They can boost your mood and give you energy for the day. You learned how to make a tasty smoothie bowl with fresh ingredients. I shared tips for blending, presenting, and storing your bowl for the best taste. You can switch out ingredients for different flavors or diets, like dairy-free options. Keeping your ingredients fresh makes a big difference. Enjoy creating your own unique smoothie bowls!

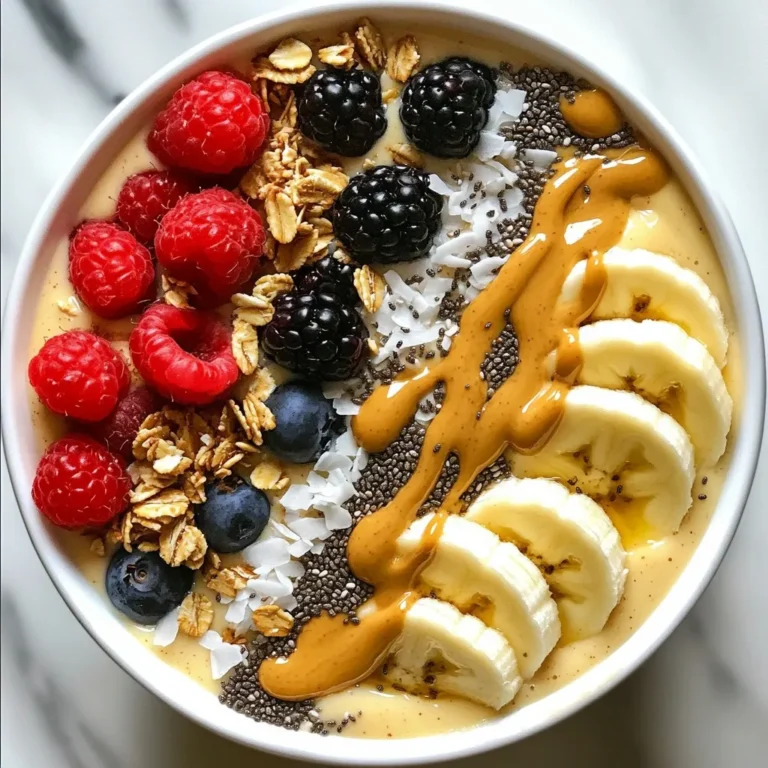
Peanut Butter Banana Smoothie Bowl Energizing Boost

- 2 cups cooked chicken, shredded - 1 cup mozzarella cheese, shredded - 4 large flour tortillas - 4 cloves garlic, minced - 1 tablespoon extra virgin olive oil - 1 teaspoon dried oregano - 1/2 teaspoon red pepper flakes (optional) - 1/2 cup fresh spinach leaves - Salt and black pepper, to taste - Fresh parsley, chopped (for garnish) You can swap the chicken with other options. Try rotisserie chicken for speed, or use tofu for a veggie choice. For cheese, mozzarella is great, but cheddar or pepper jack adds nice flavor. Vegan cheese works too if you want a dairy-free wrap. {{ingredient_image_2}} 1. Heat 1 tablespoon of extra virgin olive oil in a medium skillet over medium heat. 2. Once hot, add 4 minced garlic cloves. Sauté for about 1 minute until fragrant. 3. Next, add 2 cups of shredded cooked chicken to the skillet. Mix in 1 teaspoon of dried oregano and 1/2 teaspoon of red pepper flakes if you want heat. 4. Season with salt and black pepper to taste. Stir well and cook for 3-4 minutes until the chicken is hot. 5. Remove the skillet from heat. Add 1 cup of shredded mozzarella cheese to the chicken mix. Stir until the cheese melts and combines. 1. Take a large flour tortilla and lay it flat on a clean surface. 2. Spoon a generous amount of the melty chicken mixture into the center of the tortilla. 3. Add a handful of fresh spinach leaves on top of the chicken mix. 4. Fold the sides of the tortilla inward over the filling. 5. Start rolling the tortilla tightly from the bottom. Make sure it is secure to prevent spillage. 1. Heat a clean skillet over medium heat. 2. Place the wraps seam side down in the skillet. Cook for 2-3 minutes on each side. 3. Look for a beautiful golden-brown finish. 4. Once cooked, take the wraps out and let them rest for a minute. 5. Slice them in half to show off the tasty filling inside. 6. Garnish with fresh chopped parsley for a nice touch before serving. How to avoid dry chicken in the wrap To keep your chicken juicy, always use cooked chicken that is moist. If you use leftover chicken, add a splash of broth or water when heating. This helps steam the chicken. When you mix it with garlic and spices, it gets even better. Ensuring even melting of cheese To melt the cheese well, shred it finely. This way, it melts faster and mixes better with the chicken. When you add cheese to the hot chicken, stir it quickly. This helps the cheese melt evenly and coat the chicken. Adding herbs or spices for customized taste You can add your favorite herbs like basil or thyme. If you want more heat, try adding more red pepper flakes or a dash of cayenne. Just a pinch can change everything. Get creative and find what you love. Suggestions for dipping sauces A great dip makes these wraps even better. Try creamy ranch for a cool taste. If you want a kick, zesty garlic aioli is perfect. You can also serve them with salsa or guacamole to add a fresh twist. Plating tips for an appetizing look To make your wraps look good, arrange them neatly on a big platter. Cut them in half to show off the melty filling. Place them in a fan shape or stack them for a fun look. Garnishes to elevate the dish A sprinkle of fresh parsley on top adds color and freshness. You can also add thinly sliced cherry tomatoes or lemon wedges on the side. These little touches make the dish look fancy and inviting. Pro Tips Use Fresh Garlic: Freshly minced garlic adds a vibrant flavor that powdered garlic cannot match. Always opt for fresh for the best taste. Perfectly Melty Cheese: For a gooey and melty texture, use mozzarella cheese that is freshly shredded rather than pre-packaged, which often contains anti-caking agents. Wrap it Up Right: To avoid spills, ensure you securely fold in the sides of the tortilla before rolling it tightly. This keeps all the delicious filling inside. Serving Suggestions: Pair these wraps with a dipping sauce like ranch or garlic aioli for an extra layer of flavor. Fresh herbs as garnish enhance both presentation and taste. {{image_4}} You can switch the chicken in this recipe for shrimp, beef, or a veggie mix. Each choice brings a new taste. - Shrimp: Use fresh or frozen shrimp. Cook until pink and tender. - Beef: Ground beef works well. Season it with garlic and spices. - Vegetarian: Try tofu or a mix of beans for a hearty option. Mix in different vegetables or sauces for a fun twist. Seasonal changes can also keep things fresh. - Vegetables: Bell peppers, onions, or mushrooms add great crunch. - Sauces: Ranch, barbecue, or spicy aioli can enhance the flavor. - Seasonal: Use zucchini in summer or roasted squash in fall. If you have dietary needs, there are easy swaps to make. - Gluten-free: Use gluten-free tortillas for those avoiding gluten. - Dairy-free: Try almond or coconut cheese instead of mozzarella. These options keep the wraps delicious and fun for everyone! To store leftover Melty Garlic Chicken Wraps, let them cool first. Wrap each one tightly in plastic wrap or aluminum foil. Place them in an airtight container. This way, they will stay fresh. They will keep in the fridge for up to three days. If you want to freeze the wraps, wrap each one in plastic wrap. Then, place them in a freezer bag. Try to remove as much air as you can. This helps keep them fresh. You can freeze them for up to three months. When ready to eat, thaw them in the fridge overnight. You can reheat the wraps in the oven or microwave. For the oven, preheat it to 350°F (175°C). Place the wraps on a baking sheet for about 10-15 minutes. This method helps keep them crispy. In the microwave, wrap them in a damp paper towel. Heat for about 1-2 minutes. This method is faster but can make them a bit soft. If you want to restore crispiness, finish them in a hot skillet for a minute or two. Melty Garlic Chicken Wraps last about 3 days in the fridge. Store them in an airtight container. Make sure they cool down before sealing. This keeps them fresh and safe to eat. If you see any signs of spoilage, throw them away. It’s better to be safe! Yes, you can make these wraps ahead of time. Prepare the chicken filling and store it in the fridge for 1-2 days. When ready to eat, just assemble and cook the wraps. Reheat the filling in a skillet before wrapping. This keeps the chicken warm and tasty. These wraps taste great with various sides. Here are some ideas: - Fresh garden salad: Crisp greens and veggies add crunch. - Sweet potato fries: They bring a nice sweetness to the meal. - Coleslaw: A creamy side adds a cool touch. - Fruit salad: Bright, fresh fruits offer a sweet contrast. Pairing these sides with your wraps will create a balanced meal. Enjoy the mix of flavors! In this article, we covered how to make Melty Garlic Chicken Wraps. We discussed the ingredients, preparation steps, cooking techniques, and storage tips. You can use various proteins and flavors, which makes these wraps fun and versatile. Try different substitutions and garnishes for a personal touch. Whether you enjoy them fresh or stored, they’re sure to delight. Your kitchen adventures just got a lot tastier!

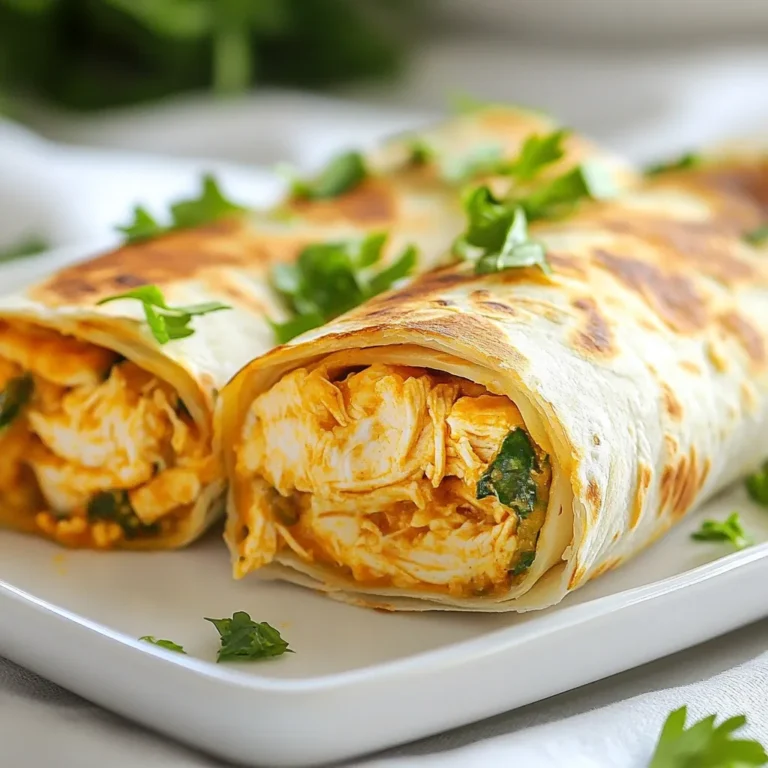
Melty Garlic Chicken Wraps Flavorful and Easy Recipe

For the Sparkling Winter Vodka Punch, you will need: - 4 cups sparkling water or club soda - 2 cups cranberry juice - 1 cup freshly squeezed orange juice - 1/2 cup freshly squeezed lime juice - 2 tablespoons honey (or adjust to taste) - 1 cup fresh mixed berries (strawberries, blueberries, raspberries) - 1 orange, thinly sliced - 1 lime, thinly sliced - Fresh mint leaves for garnish - Ice cubes You can easily swap ingredients if needed. Here are some ideas: - Use tonic water instead of sparkling water for a twist. - Substitute agave syrup for honey if you're vegan. - Any fruit juice can work in place of cranberry juice. - You can choose any seasonal berries you find. Always look for fresh, high-quality ingredients. Here are some tips: - Visit local farmers' markets for the best fruits and juices. - Choose organic produce when possible for better flavor. - Check your grocery store for fresh herbs, like mint. - Buy juices that are 100% fruit juice without added sugars. Using fresh ingredients makes your punch taste bright and lively. Enjoy the flavors as they come together! {{ingredient_image_2}} Start with a large pitcher. Pour in the cranberry juice, orange juice, and lime juice. Add the honey next. Use a whisk or spoon to mix well. Make sure the honey dissolves completely. This step helps blend the flavors nicely. It also makes the punch sweet and balanced. Now, it’s time to add the fizz! Slowly pour in the sparkling water or club soda. Stir gently to keep the bubbles. You want to mix without losing that sparkle. Next, toss in the fresh mixed berries. Add the thinly sliced orange and lime for extra flavor. This will make your punch look colorful and fun. If you want to serve it right away, fill each glass with ice cubes. Pour the punch over the ice to keep it cold. For better flavor, chill the punch for 30 minutes first. This lets the tastes blend well. When ready to serve, add fresh mint leaves on top. This adds a nice touch and a fresh smell. Use clear glasses to show off the vibrant colors. Serve with festive straws for a special feel. To create the best sparkling punch, start with fresh juices. Freshly squeezed orange and lime juice make a big difference. Use good quality cranberry juice too; it adds a rich flavor. Mix the juices first, then add the sparkling water gently. This keeps the fizz alive. Stir slowly to blend without losing bubbles. Chill the punch for 30 minutes to deepen flavors. If you want a sweeter drink, adjust the honey to your taste. You can boost the flavor in many ways. Try adding ginger for some spice. A splash of pomegranate juice can add a unique twist. Fresh herbs like basil or rosemary can also work well. They bring a fresh taste that pairs nicely with the fruits. Experimenting with different berries can change the drink’s flavor too. Use strawberries, blueberries, or blackberries based on what you like. Presentation is key to making your punch look festive. Serve the punch in clear glasses to show off the colors. Add fresh fruits like orange and lime slices for beauty. Use ice cubes to keep the punch cold, but don’t let them melt too fast. You can even freeze some mixed berries in the ice cubes. This keeps your drink cold and looks pretty too. Finish each glass with a sprig of mint for that special touch. Pro Tips Use Fresh Ingredients: Opt for freshly squeezed juices and in-season berries for the best flavor and nutritional value. Adjust Sweetness to Taste: Depending on your preference and the tartness of your juices, feel free to adjust the amount of honey. Chill for Enhanced Flavor: Allow the punch to chill in the refrigerator for at least 30 minutes to let the flavors meld together beautifully. Garnish Creatively: Experiment with different garnishes like citrus twists or edible flowers for an extra touch of elegance. {{image_4}} You can easily enjoy this punch without alcohol. Just skip the vodka and keep the other ingredients the same. The mix of juices and sparkling water still tastes great. This version is perfect for kids and anyone who doesn’t drink. It stays bright and festive, making it a hit at any party. You can add different flavors based on the season. For winter, try adding cinnamon sticks or a splash of pomegranate juice. In spring, fresh mint or cucumber slices bring a refreshing twist. In summer, use lemon or even watermelon for a fun taste. Each season brings new ways to enjoy this punch. Feel free to play with the fruits in your punch. Instead of berries, try diced apples or pears for a crunchy texture. You can also use citrus fruits like grapefruit or tangerines. Mixing fruits not only changes the taste but also makes the punch more colorful. Choose your favorites to make it special and unique. After enjoying your Sparkling Winter Vodka Punch, you may have leftovers. To store it, pour the punch into a clean container. Cover it tightly to keep out air. This helps maintain its fizz and flavor. Store it in the fridge for up to three days. The longer it sits, the less fizzy it becomes. If you want to keep it bubbly, drink it sooner rather than later. Use a glass pitcher or a food-safe plastic container. Glass is great because it won’t change the taste. A good seal is key to keeping your punch fresh. Avoid using metal containers, as they can react with the juices. If you plan to store your punch for a long time, consider using ice cube trays for the liquid. This way, you can freeze it and use it later in drinks. Don’t toss leftover fruit or mint! You can reuse them in other drinks. Add leftover berries to yogurt or oatmeal for a tasty snack. Use the mint leaves in tea or as a garnish for other drinks. You can even blend the leftover fruit into smoothies. This way, you reduce waste and enjoy more flavors. Yes, you can make this punch ahead of time. I suggest mixing the juices and honey first. Keep the sparkling water separate until you are ready to serve. This helps keep the bubbles fresh and lively. I recommend using a smooth vodka. A good choice is a classic or citrus-flavored vodka. These options blend well with the fruity flavors in the punch. You want a vodka that does not overpower the other tastes. Absolutely! You can adjust the sweetness to your liking. Start with the two tablespoons of honey. Taste it and add more if needed. You can also use a sugar substitute or agave syrup if you prefer. We explored how to make a delicious sparkling punch. We covered important ingredients and suggested swaps. You learned how to prepare, mix, and serve this drink with style. Tips for great flavor and beautiful presentation were shared. Seasonal variations and ways to store leftovers added depth. Remember, making punch can be fun and creative. Enjoy customizing your drink for any event!

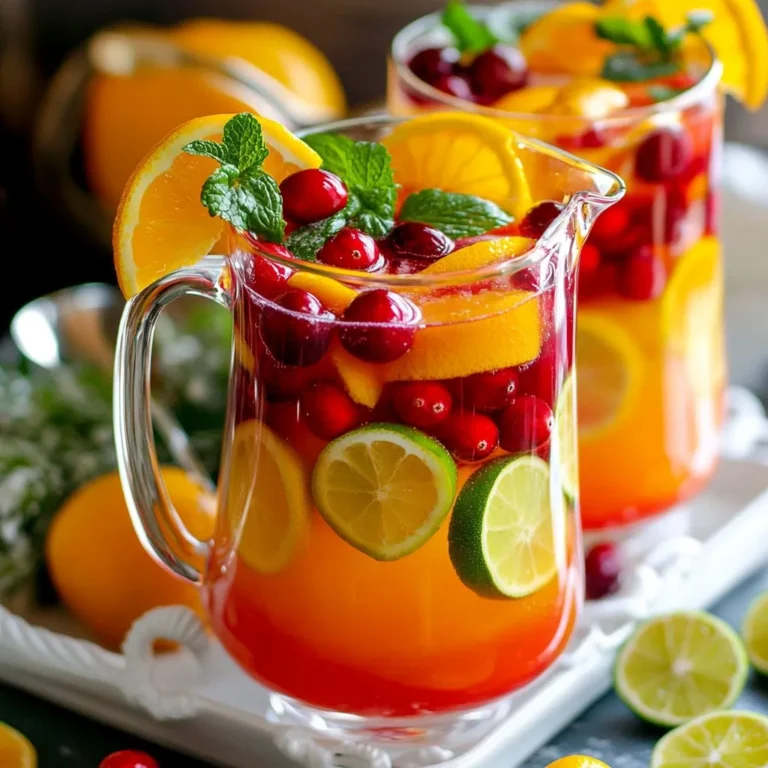
Sparkling Winter Vodka Punch Festive and Refreshing Drink

To make Sunrise Breakfast Sliders, you need: - 12 small slider buns - 6 large eggs - 1 cup fresh spinach, chopped - 1 cup cherry tomatoes, halved - 1/2 cup cheese, shredded (cheddar, mozzarella, or your choice) - 1 ripe avocado, sliced - 1 tablespoon extra virgin olive oil - Salt and freshly ground black pepper to taste - Optional: Your favorite hot sauce for serving These ingredients create a tasty mix of flavors. The eggs and spinach add protein and nutrients. The cheese gives a creamy touch, while the tomatoes add a burst of freshness. Each slider is a perfect bite! Choosing cheese can be fun! Here are some tasty options: - Cheddar: A classic choice that melts well. - Mozzarella: Soft and stretchy, it gives a mild flavor. - Pepper Jack: Adds a little spice to your sliders. - Feta: Crumbly and tangy, great for a unique twist. Feel free to mix and match your cheeses. Each type brings its own character to the dish. Seasoning makes your sliders pop! Here are my top picks: - Salt: Enhances the flavors of eggs and cheese. - Black Pepper: Adds warmth and depth. - Garlic Powder: A small pinch can elevate the taste. - Paprika: Gives a subtle smokiness and color. Don’t forget to taste as you go. Adjust the seasonings to fit your taste buds. Enjoy crafting your delicious Sunrise Breakfast Sliders! {{ingredient_image_2}} First, gather all your ingredients. You need 12 small slider buns, 6 large eggs, and 1 cup of fresh spinach, chopped. Don’t forget 1 cup of halved cherry tomatoes and 1/2 cup of your favorite cheese, shredded. Grab 1 ripe avocado to slice, 1 tablespoon of extra virgin olive oil, and salt and pepper for taste. Next, preheat your oven to 350°F (175°C). This step is key for baking your sliders to perfection. In a large skillet, heat the olive oil over medium heat. Once hot, add the chopped spinach. Sauté the spinach for about 2 minutes. You want it to wilt and become tender. While the spinach cooks, crack the eggs into a bowl. Whisk them well until they are fully combined. Add salt and freshly ground black pepper to the eggs for flavor. Pour the egg mixture into the skillet on top of the cooked spinach. Stir gently. Cook until the eggs are just set, which takes about 3-4 minutes. Once done, remove the skillet from heat. Slice each slider bun in half horizontally. Place the bottom halves closely together in a baking dish. Spoon the warm egg and spinach mix onto the bottom buns, spreading it evenly. Now, sprinkle the halved cherry tomatoes over the egg mixture. Add a generous amount of shredded cheese on top for extra flavor. Place the top halves of the buns on the sliders, creating little sandwiches. Transfer the baking dish to your preheated oven. Bake for about 10-12 minutes. You want the tops to turn golden brown and the cheese to melt beautifully. After baking, take the sliders out of the oven. Let them cool for a few minutes. Then, gently lift each slider and layer fresh avocado slices on top. Serve them warm with optional hot sauce on the side for that extra kick. Enjoy your tasty Sunrise Breakfast Sliders! To cook the perfect eggs, always use a non-stick skillet. This helps prevent sticking. Heat the skillet over medium heat. Once it’s hot, add olive oil to coat the bottom. Whisk the eggs well in a bowl. Add salt and pepper for flavor. Pour the eggs into the skillet with the cooked spinach. Stir gently and cook for about 3-4 minutes. Remove them when they are just set. This keeps them soft and fluffy. To get a golden bun top, preheat your oven to 350°F (175°C) before baking. Place the assembled sliders in a baking dish, making sure they are snug. Bake them for 10-12 minutes. Keep an eye on them to ensure they do not burn. The tops will turn golden and the cheese will melt beautifully. For extra color, you can brush the tops with a little olive oil before baking. Serve your Sunrise Breakfast Sliders warm for the best taste. Pair them with fresh fruit like berries or sliced melon. You can also add a side of crispy bacon or sausage for more protein. For a little kick, serve hot sauce on the side. Arrange the sliders on a colorful platter. Garnish with fresh herbs like cilantro or parsley for extra flair. This adds a nice touch to your breakfast table. Pro Tips Use Stale Buns: If you have stale slider buns, toast them lightly before assembling. This adds a delightful crunch and prevents sogginess from the egg mixture. Customize the Filling: Feel free to add other vegetables or meats, like bell peppers or bacon, to the egg mixture for extra flavor and texture. Make Ahead: Prepare the filling the night before and store it in the fridge. Assemble the sliders in the morning for a quick and easy breakfast. Experiment with Cheese: Try different types of cheese, such as feta or pepper jack, to give your sliders a unique twist that's sure to impress. {{image_4}} You can easily make these sliders vegetarian. Just skip the eggs and use a savory filling. Try sautéed mushrooms, zucchini, or bell peppers. You can also add more spinach for extra greens. For protein, use chickpeas or black beans. These options give you great flavor and texture. Want to boost the protein? You can add cooked bacon, sausage, or ham. Crumbled feta or goat cheese also works well. For a plant-based choice, try tempeh or tofu. These additions make your sliders hearty and filling. They keep you satisfied through the morning. Experiment with flavors by changing up your ingredients. Swap cherry tomatoes for sun-dried tomatoes for a tangy twist. Try adding pesto or even salsa for a kick. You can also use different cheeses, like pepper jack for heat or blue cheese for a bold taste. These variations keep breakfast fun and exciting! After enjoying your Sunrise Breakfast Sliders, store any leftovers in an airtight container. This keeps them fresh for a few days. I recommend placing a piece of parchment paper between layers to avoid sogginess. You can keep them in the fridge for up to three days. If you want to save them longer, consider freezing. To reheat your sliders, you have a few options. The oven works best for a crispy texture. Preheat it to 350°F (175°C). Place the sliders on a baking sheet and cover them with foil. Heat for about 10-15 minutes. If you’re in a hurry, you can also use the microwave. Just warm them for 30-60 seconds, but this may make the buns soft. Freezing is a fantastic option for meal prep. To freeze, wrap each slider in plastic wrap, then place them in a freezer bag. This keeps them fresh for up to three months. When you're ready to eat, thaw them in the fridge overnight. Reheat as mentioned above for the best taste and texture. Yes, you can make these sliders ahead. Prepare the egg mixture and fill the buns. Cover them tightly and store them in the fridge. When you're ready, just bake them for 10-12 minutes at 350°F. They will taste fresh and delicious! You can get creative with toppings! Here are some tasty ideas: - Crispy bacon or sausage - Fresh herbs like chives or basil - Sliced jalapeños for heat - Sautéed bell peppers or mushrooms - Different cheeses like feta or pepper jack Adjusting the recipe is easy! Here’s how: - For a vegetarian option, skip the meat and add more veggies. - Use egg substitutes or tofu for a vegan version. - Choose gluten-free slider buns if you're avoiding gluten. - Opt for dairy-free cheese to cater to lactose intolerance. Experiment with these ideas to fit your needs! These Sunrise Breakfast Sliders are easy to make and full of flavor. We covered the key ingredients, cooking steps, and handy tips. You learned about fun variations to suit your taste. Plus, we discussed how to store and reheat leftovers. Now you can enjoy these tasty sliders any time. Experiment to find your favorite mix. With the right tips, you can create the best breakfast sliders ever.

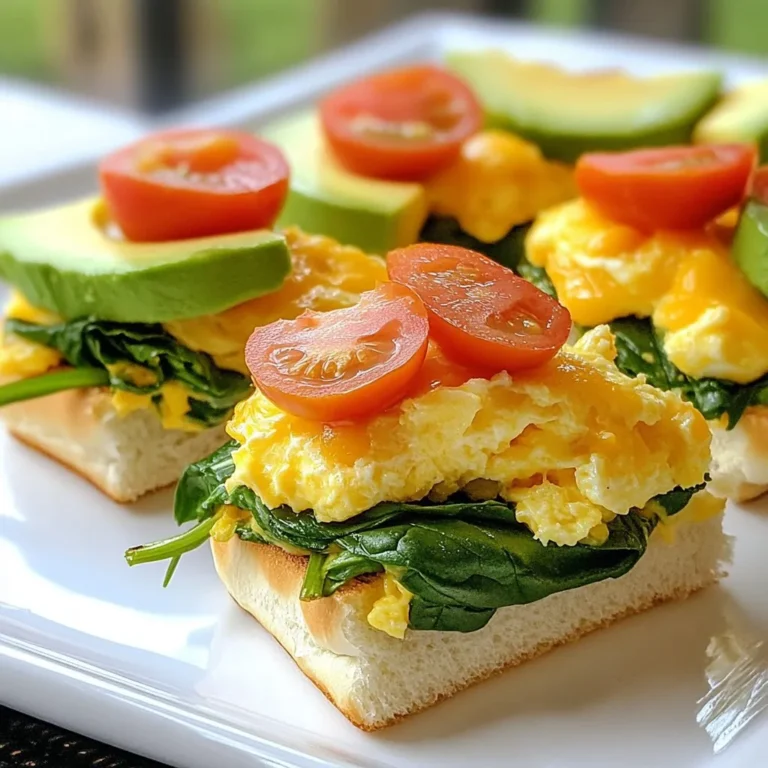
Savory Sunrise Breakfast Sliders for a Tasty Morning

For the best flavor, I use a mix of ground beef and ground pork. Each brings its own taste. The beef gives a rich, hearty base. The pork adds some fat and moisture. Use one pound of each for a balanced mix. This choice makes the meatloaf juicy and tender. Cheese makes the meatloaf extra special. I love using mozzarella for its meltiness. It creates a gooey center that everyone enjoys. You can also add Parmesan for a sharp bite. Mixing different cheeses can bring new flavors. Just keep the total cheese amount around one cup. Herbs and spices are key to flavor. I use garlic, oregano, and basil to give it a classic Italian taste. Garlic adds depth, while oregano and basil bring freshness. A bit of fresh parsley adds color and brightness. Don't forget salt and pepper to taste. These simple seasonings make a big difference in the final dish. {{ingredient_image_2}} First, gather your ingredients. You need 1 pound of ground beef and 1 pound of ground pork. This mixture gives the meatloaf great flavor and texture. Next, add 1 cup of breadcrumbs for binding. Then, mix in 1/2 cup of grated Parmesan cheese. This cheese adds a salty, nutty taste. Finely chop 1/4 cup of fresh parsley and add it for freshness. Now, add 2 cloves of minced garlic. Garlic gives a nice kick. Sprinkle in 1 teaspoon each of dried oregano and dried basil. These herbs bring the Italian flavor. Finally, mix in 2 beaten eggs and 1/2 cup of marinara sauce. Season with salt and pepper to taste. Use your hands or a wooden spoon to mix everything well. Once your mixture is ready, line a baking sheet with parchment paper. Transfer the meat mixture onto the sheet. Shape it into a rectangular loaf, about 1 inch thick. Make a small well in the center of the meatloaf. This well will hold the cheese. Now, take 1 cup of shredded mozzarella cheese and fill the well. Gently fold the sides of the meatloaf over the cheese. Make sure to seal it well. Adjust the shape of the meatloaf if needed. This step keeps the cheese hidden inside. Next, top the meatloaf with a generous layer of marinara sauce. This adds moisture and flavor. Preheat your oven to 350°F (175°C). Bake the meatloaf for 45-50 minutes. Use a meat thermometer to check the center. It should read 160°F (70°C) when done. After baking, let the meatloaf rest for 10 minutes. This helps the cheese set and makes slicing easier. You can now slice and serve your delicious stuffed Italian meatloaf! To get the best texture in your meatloaf, mix the meat gently. Too much mixing can make it tough. Use your hands or a spoon to combine only until mixed. Adding breadcrumbs keeps it moist and tender. The eggs help bind everything together. This balance gives you a soft but sturdy meatloaf. Marinara sauce is key for flavor and moisture. Spread a layer on top before baking. This adds taste and keeps the meatloaf juicy. Use your favorite store-bought sauce or make your own for extra zing. Consider adding herbs or spices to your marinara for a personal touch. It elevates the dish and makes it special. Let your meatloaf rest for ten minutes after baking. This helps the cheese set and makes slicing easier. Use a sharp knife for clean cuts. If you want even nicer pieces, dip the knife in hot water, then wipe it dry. This trick keeps your slices intact and lovely for serving. Pro Tips Use Fresh Herbs: Fresh parsley, oregano, and basil elevate the flavor of your meatloaf, making it taste vibrant and aromatic. Don’t Overmix: Mixing the meat too much can result in a dense texture. Combine the ingredients until just incorporated for a tender meatloaf. Rest Before Slicing: Allow the meatloaf to rest for at least 10 minutes after baking. This helps the juices redistribute and the cheese to set properly. Experiment with Cheese: While mozzarella is traditional, try adding provolone or fontina for a different flavor profile inside your meatloaf. {{image_4}} You can switch up the cheese in your stuffed Italian meatloaf. While mozzarella brings great stretch, you might love the tang of provolone or the creaminess of ricotta. For a sharper taste, try blue cheese or aged cheddar. Each cheese gives a unique twist to the flavor. Just remember to use cheese that melts well, so it stays gooey inside. Ground beef and pork are classic choices, but feel free to mix it up! Ground turkey or chicken works nicely for a leaner option. If you want something different, use ground lamb for a richer taste. Even plant-based crumbles can work for a vegetarian version. Just keep the seasoning strong to complement your chosen protein. If you need a gluten-free meatloaf, swap the breadcrumbs for gluten-free ones. You can also use crushed gluten-free crackers or oats. Make sure the marinara sauce is gluten-free, too. This way, everyone can enjoy a delicious, stuffed Italian meatloaf without worry! After making your stuffed Italian meatloaf, let it cool. Wrap it tightly in plastic wrap or foil. Place it in an airtight container. This helps keep the meatloaf fresh. Store it in the fridge for up to three days. Make sure the fridge is at or below 40°F (4°C) to prevent bacteria growth. You can freeze leftover meatloaf for later meals. First, let the meatloaf cool completely. Wrap it in plastic wrap, then in foil, or use a freezer-safe bag. This will prevent freezer burn. You can freeze it for up to three months. Label the bag or container with the date for easy tracking. When it's time to eat your leftovers, reheat them carefully. You can use the oven for best results. Preheat your oven to 350°F (175°C). Place slices of meatloaf in a baking dish. Add a splash of marinara sauce on top to keep it moist. Cover the dish with foil. Heat for about 20-25 minutes, or until warmed through. You can also use a microwave for a quicker option. Place slices on a microwave-safe plate and cover with a damp paper towel. Heat in short bursts, checking often. Enjoy your delicious stuffed Italian meatloaf! You can make stuffed meatloaf healthier by using lean meats. Choose ground turkey or chicken instead of beef and pork. You can also swap breadcrumbs with oats or crushed whole grain crackers. This change adds fiber. Using fresh herbs boosts flavor without extra calories. You can cut back on the cheese, too. Instead of a full cup of mozzarella, try half. Lastly, use low-sodium marinara sauce to reduce salt. Stuffed Italian meatloaf pairs well with many sides. Here are some great options: - Roasted vegetables: Carrots, zucchini, or bell peppers add color and nutrition. - Garlic mashed potatoes: Creamy potatoes complement the meatloaf's flavors. - Simple salad: A fresh green salad with vinaigrette adds crunch. - Steamed broccoli: This veggie is easy and adds a bright touch. - Pasta: A small serving of spaghetti with marinara works well. These sides balance the meatloaf's richness. Yes, you can prepare stuffed meatloaf in advance. Mix the meat and stuffing and shape it into a loaf. Cover it tightly with plastic wrap or foil. Place it in the fridge for up to 24 hours. You can also freeze it for longer storage. Just remember to thaw it in the fridge overnight before baking. This way, you save time on busy days. In this post, we explored how to create an amazing stuffed meatloaf. We covered choosing ground meat and cheese, as well as the best herbs. I shared step-by-step instructions for prepping, shaping, baking, and resting your meatloaf. You learned tips for texture, flavor, and serving. We also discussed variations based on your taste and how to store leftovers properly. Remember, stuffed meatloaf can be both fun and simple. Now, go ahead and make a delicious meal your family will love!

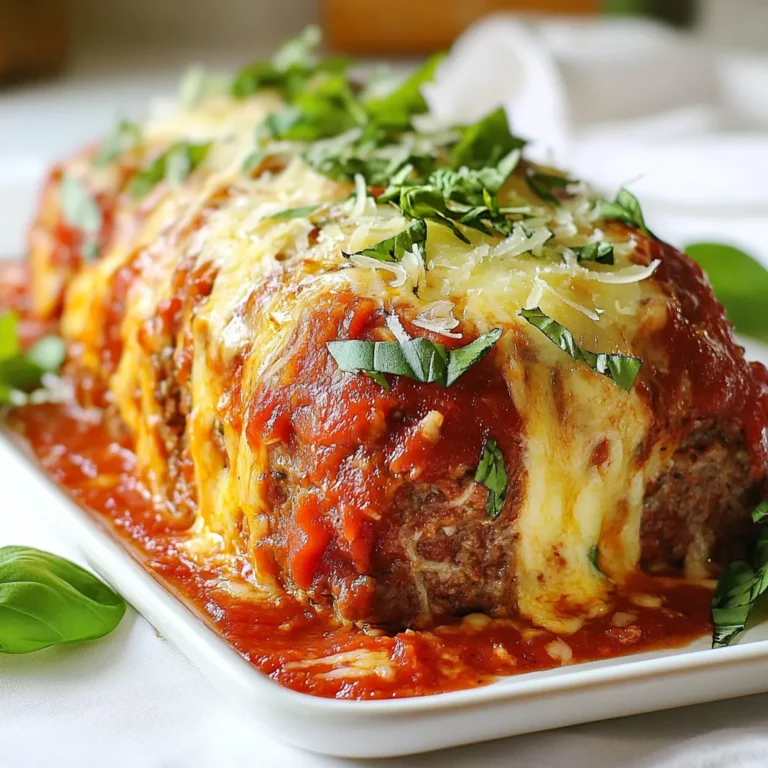
Stuffed Italian Meatloaf Flavorful Family Favorite Recipe

To make Minute Black Bean Soup, you will need: - 2 cans (15 oz each) black beans, drained and rinsed - 1 cup vegetable broth - 1 small onion, finely diced - 2 cloves garlic, minced - 1 teaspoon ground cumin - 1 teaspoon smoked paprika - ½ teaspoon cayenne pepper (adjust to preferred spice level) - 1 tablespoon olive oil - Juice of 1 fresh lime - Salt and pepper to taste You can make your soup even better with these toppings: - Fresh cilantro leaves - Slices of ripe avocado Here are some tools that will help you cook: - Medium-sized pot - Stirring spoon - Countertop or immersion blender - Measuring spoons - Knife and cutting board {{ingredient_image_2}} 1. Gather all your ingredients. You need two cans of black beans, a cup of vegetable broth, a small onion, two garlic cloves, and some spices: cumin, smoked paprika, and cayenne pepper. 2. Rinse and drain the black beans. This helps remove extra sodium and makes the soup cleaner. 3. Dice the onion finely. This makes it cook faster and blend well in the soup. 4. Mince the garlic. Fresh garlic adds great flavor. 1. Heat one tablespoon of olive oil in a medium pot over medium heat. Wait for it to shimmer. 2. Add the diced onion to the pot. Cook for about 3-4 minutes. The onion should turn soft and see-through. 3. Stir in the minced garlic. Cook for one more minute. The aroma will fill your kitchen. 4. Add one teaspoon each of cumin, smoked paprika, and ½ teaspoon cayenne pepper. Stir for about 30 seconds to wake up the spices. 5. Mix in the drained black beans and vegetable broth. Raise the heat until it boils. 6. Once boiling, lower the heat. Let it simmer for 5-10 minutes. This helps the flavors mix well. 7. Use a blender to puree the soup. You can blend it all for a smooth texture or just half if you want it chunky. 8. Squeeze in the juice of one lime. Taste the soup and add salt and pepper as needed. If it’s thick, add more broth until it’s just right. 9. Serve the soup hot in bowls. Top with fresh cilantro and avocado slices. - If using a countertop blender, blend in small batches to avoid spills. - For a smoother soup, blend longer until it’s creamy. - If you prefer some bits, just blend half the soup. This way, you get a nice mix of textures. To make your Minute Black Bean Soup even tastier, use fresh ingredients. Fresh garlic and onions add great depth. Toast the spices before adding beans to bring out their flavor. You can also add a splash of hot sauce for extra heat. A sprinkle of lime juice brightens the soup, giving it a fresh taste. Consider adding some corn for sweet crunch. Herbs like cilantro or parsley at the end add freshness. Avoid using dried black beans in this quick recipe. Canned beans save time and add convenience. Don't skip toasting the spices; it makes a huge difference in taste. If you add too much salt, the soup might taste too strong. Always taste before serving. Lastly, don't forget to blend! Blending gives a smooth texture that makes the soup feel rich and creamy. Don't have vegetable broth? You can use water or chicken broth instead. If you want to skip oil, sauté the onions in water. For spice, feel free to use chili powder instead of cayenne. You can replace lime juice with lemon juice for a similar tang. No fresh cilantro? Try parsley or green onions for garnish. Pro Tips Adjust the Spice Level: If you prefer a milder soup, reduce the amount of cayenne pepper or omit it entirely. You can always add hot sauce at the table for those who like it spicy! Make it Creamy: For an extra creamy texture, blend in a few tablespoons of cream or coconut milk after cooking. This will elevate the richness of your soup. Store Leftovers Properly: This soup can be stored in an airtight container in the fridge for up to 5 days. It also freezes well, so make a big batch and save some for later! Garnish for Extra Flavor: Consider adding a dollop of sour cream or Greek yogurt on top before serving for added creaminess and tangy flavor that complements the soup beautifully. {{image_4}} To spice things up, add more cayenne pepper. Start with an extra ½ teaspoon. You can also mix in some chopped jalapeños or a dash of hot sauce. This gives a fiery kick to your soup. If you enjoy bold flavors, try a pinch of chili powder as well. These additions will warm your taste buds and make the soup even more exciting. This soup is already vegetarian and vegan-friendly. To keep it that way, use vegetable broth as listed. If you want to add more protein, consider tossing in some cooked quinoa or lentils. These options make your soup heartier. You can also swap the olive oil for coconut oil for a different flavor. Feel free to customize your black bean soup! You can mix in corn for a sweet crunch. Chopped bell peppers or diced tomatoes add color and flavor. For a creamy texture, stir in some coconut milk. If you're in the mood for greens, add spinach or kale just before serving. This not only boosts nutrition but also adds a vibrant look to your dish. After enjoying your Minute Black Bean Soup, let it cool to room temperature. Pour it into an airtight container. You can store it in the fridge for up to three days. Make sure to label the container with the date. This way, you know when to eat it. To freeze your soup, use freezer-safe containers or zip-top bags. Leave some space at the top of the container. Soup expands when it freezes. Your soup can last in the freezer for up to three months. When you are ready to eat, thaw it overnight in the fridge. When it’s time to reheat, pour your soup into a pot. Warm it over medium heat. Stir often to ensure it heats evenly. If the soup is too thick, add a splash of vegetable broth or water. You can also microwave individual portions in a bowl. Just cover it with a microwave-safe lid. Heat in short bursts, stirring in between. Enjoy your soup warm, just like fresh! To make black bean soup from scratch, start with dried black beans. Soak them overnight in water. Drain and rinse them. In a pot, heat olive oil. Add diced onion and cook until soft. Stir in minced garlic. Add spices like cumin and paprika. Then, add the soaked beans and vegetable broth. Bring to a boil, then lower the heat. Simmer until beans are tender, usually about an hour. Blend to your liking, then add lime juice, salt, and pepper. Yes, you can use dried black beans. They are often fresher and more flavorful. However, they need more time to cook. Soak them overnight for best results. Use three cups of water for every cup of dried beans. After soaking, drain them. Cook them in a pot with broth and spices until soft. This might take an hour or more. Black bean soup pairs well with many sides. You can serve it with rice for a filling meal. Cornbread is another tasty option that adds a nice crunch. Top the soup with fresh avocado slices and cilantro. You can also add a dollop of sour cream or yogurt for creaminess. Enjoy it with tortilla chips for a fun crunch! You learned how to make black bean soup from scratch. We covered key ingredients, cooking steps, and useful tips to enhance flavor. Remember to avoid common mistakes and consider fun variations to fit your taste. Storing leftovers properly helps you enjoy this dish later, too. Whether you choose spicy or vegan options, making this soup allows room for creativity in your kitchen. Happy cooking and enjoy your delicious black bean soup!

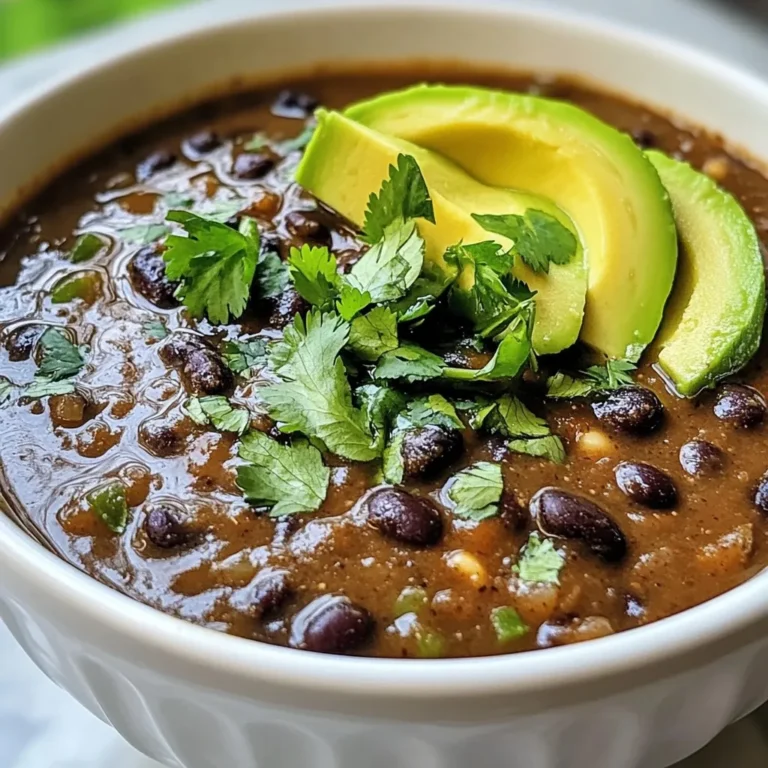
Minute Black Bean Soup Quick and Tasty Recipe

- 2 cups fresh cranberries, thoroughly rinsed - 2 medium apples, peeled and diced (Granny Smith offers a great tartness) - Zest and juice from 1 large orange - 1 cup granulated sugar (feel free to adjust for your desired sweetness) - 1/2 cup water - 1 teaspoon ground cinnamon - 1/4 teaspoon ground nutmeg - 1 tablespoon fresh lemon juice I love using fresh ingredients to make this jam. Fresh cranberries give a bright flavor. The tartness of Granny Smith apples balances well with the sweet cranberries. I always zest and juice a large orange for a fresh and zesty kick. When it comes to sugar, you can adjust it. If you want it sweeter, add a bit more. Keep in mind, the sugar helps with preserving the jam too. The half cup of water is needed to help the fruit cook down. Spices like ground cinnamon and nutmeg add warmth and depth. They make the jam taste cozy and inviting. Finally, the lemon juice brightens the flavors and adds a touch of acidity. By using these key ingredients, you create a tasty jam that is perfect on toast or as a gift. {{ingredient_image_2}} 1. Start by combining ingredients in a pot. Take a large pot and add 2 cups of fresh cranberries, 2 peeled and diced apples, the zest, and juice from one large orange. Add 1/2 cup of water. This mix will create a bright and tangy base for our jam. 2. Next, focus on the cooking process and simmering details. Place the pot over medium heat. As it heats, stir the mixture gently. When it begins to boil, lower the heat to low. Let it simmer for about 10 minutes. You will see the cranberries burst open and soften, releasing their juices. 3. Now, test for consistency. After simmering, add 1 cup of granulated sugar, 1 teaspoon of ground cinnamon, 1/4 teaspoon of ground nutmeg, and 1 tablespoon of fresh lemon juice. Stir well until the sugar dissolves completely. Continue to simmer for 20-25 minutes while stirring often. The jam will thicken and become glossy. 4. To ensure it’s ready, place a teaspoon of jam on a cold plate. Wait a minute, then run your finger through it. If it holds its shape, it’s perfect. 5. Remove the pot from the heat and allow the jam to cool slightly. Pour it carefully into sterilized jars. Seal them tightly to keep the jam fresh. 6. Let the jars cool completely at room temperature before storing them in the fridge. Enjoy your homemade cranberry apple orange jam! - Adjusting sweetness for taste: You can change the sugar amount. If you like it sweeter, add more sugar. If you prefer it less sweet, use less. Always taste as you go! - Tips for achieving the ideal consistency: The key is to simmer long enough. As it cooks, the jam will thicken. To check, place a spoonful on a cold plate. If it holds its shape, it’s perfect. - Preventing burning or sticking: Stir the jam often while it cooks. This keeps the fruit moving and helps prevent sticking. If you see any sticking, lower the heat or add a splash of water. Pro Tips Use Fresh Ingredients: Always opt for fresh cranberries and apples to enhance the flavor of your jam. Fresh ingredients yield a brighter taste and a more vibrant color. Adjust Sweetness: Taste the mixture before adding all the sugar. Depending on the tartness of your cranberries and apples, you may want to adjust the amount of sugar to suit your preference. Check Consistency: For a perfect jam consistency, do the plate test. If the jam wrinkles when pushed with your finger, it has reached the right thickness. Storage Tips: To ensure longevity, store the jam in sterilized jars and keep it refrigerated. For longer storage, consider water bath canning for shelf stability. {{image_4}} Want to take your cranberry apple orange jam to the next level? You can add more spice and flavor. Here are some ideas: - Additional spices to consider: Try adding allspice or cloves. They bring warmth and depth. Just a small amount can change the taste a lot. Cinnamon is great, but don’t be shy with other spices. - Adding other fruits: You can mix in other fruits too. Pears or peaches work well. They add sweetness and a nice texture. Be sure to chop them small so they blend in well. - Preserving techniques for different textures: If you want a smoother jam, blend it after cooking. For a chunkier version, just mash the fruit slightly. You can also try canning or freezing for longer storage. Each method gives a different feel, so choose what you like best. These variations make your jam unique and perfectly suited to your taste. Enjoy experimenting! To store your homemade jam safely, start with clean jars. Wash them in hot, soapy water. You can also run them through the dishwasher. This will kill germs. For best results, place the jars in a pot of boiling water for a few minutes. This extra step will help keep your jam fresh longer. Once your jam cools, pour it into the sterilized jars. Leave about half an inch of space at the top. This space helps the jam expand when it freezes or heats. Seal the jars tightly with their lids. If you do not seal them well, air can spoil your jam. After sealing, place the jars in the fridge. Homemade jam can stay fresh for about three weeks in the fridge. If you want to keep it longer, consider freezing it. Just make sure to use jars that can handle the cold. You should also leave more space at the top of the jar when freezing. This space allows the jam to expand. Homemade jam can last a while if stored correctly. In the fridge, it stays good for up to three weeks. If you freeze it, the jam can last for up to a year. Always check for signs of spoilage. If you see mold or smell something off, it’s best to toss it. Enjoy your tasty cranberry apple orange jam while it’s fresh! Yes, you can use frozen cranberries for this recipe. Just thaw them first. Drain any excess water before using them. This ensures your jam stays thick and flavorful. To make this jam without sugar, use natural sweeteners. Try honey or maple syrup. You can also use mashed bananas for sweetness. Remember to adjust the amount to taste, so your jam remains balanced. You can pair this jam with many foods. It tastes great on toast or fresh scones. Try it on pancakes or waffles for a sweet twist. You can also use it in yogurt or oatmeal. It adds a nice fruity flavor. You learned about the key ingredients for making Cranberry Apple Orange Jam, including fresh cranberries, apples, and flavor enhancers. We went through the step-by-step process, from mixing ingredients to cooking them for the right consistency. I shared tips to adjust sweetness and prevent sticking. You also discovered ways to enhance flavors and preserve texture. Finally, we talked about jarring, sealing, and storing your jam. Now you’re ready to create your own batch. This jam is sure to bring joy and flavor to your meals!

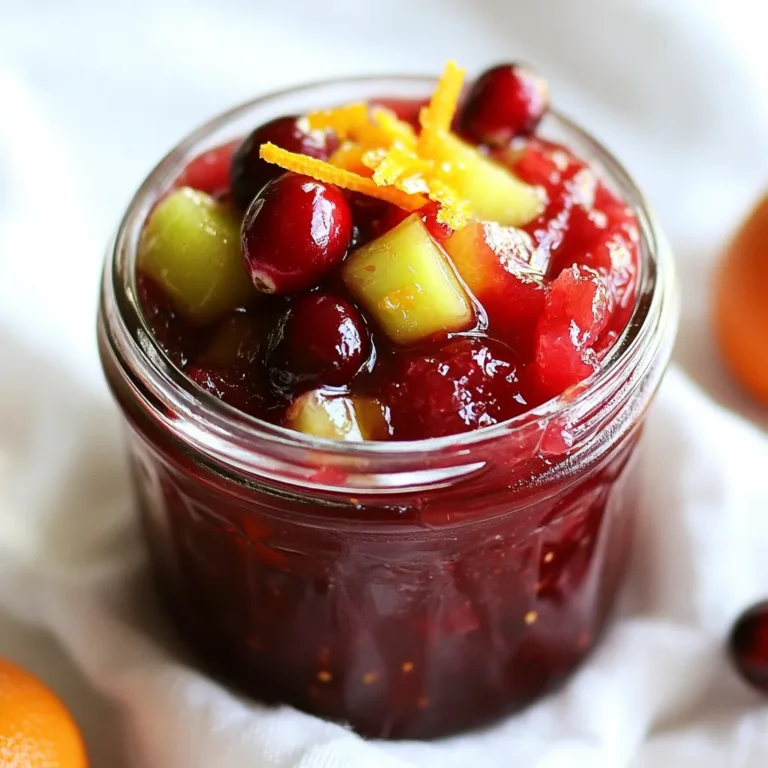
Cranberry Apple Orange Jam Tasty Homemade Delight

- 2 medium acorn squashes, halved and seeds removed - 1 cup quinoa, thoroughly rinsed - 2 cups vegetable broth - 1 small onion, finely chopped - 2 cloves garlic, minced - 1 cup dried cranberries - 1 cup walnuts, chopped and toasted - 1 teaspoon ground cinnamon - 1/2 teaspoon nutmeg - 1 tablespoon olive oil (plus more for drizzling) - Salt and pepper to taste - Fresh parsley, chopped, for garnish You can add some extra flavor with these options: - Feta cheese for a creamy twist - Spinach or kale for a green boost - Chopped apples for added sweetness - Different nuts like pecans or almonds When picking acorn squashes, look for these signs: - Choose squashes that feel heavy for their size. - Check for a firm skin without soft spots. - Look for a rich, dark green color. - A matte finish often means it is fresh. These tips will help you find the best acorn squashes for your dish. Enjoy the cooking process and let your flavors shine! {{ingredient_image_2}} 1. Preheat your oven to 400°F (200°C). 2. Cut the acorn squashes in half and scoop out the seeds. 3. Place the squash halves on a baking sheet, cut side up. 4. Drizzle olive oil on the squashes and sprinkle with salt and pepper. 5. Roast them for 25-30 minutes until tender. 6. While they roast, rinse the quinoa in a fine sieve. 7. In a medium pot, combine rinsed quinoa and vegetable broth. 8. Bring to a boil and then lower the heat. 9. Cover and simmer for about 15 minutes. 10. Heat olive oil in a large skillet over medium heat. 11. Add chopped onion and minced garlic, cooking until soft. 12. Mix in cranberries, walnuts, cinnamon, nutmeg, and cooked quinoa. 13. Season with salt and pepper, stirring well. 14. Once the squash is roasted, fill them with the quinoa mix. 15. Press the stuffing down lightly to pack it in. 16. Bake the stuffed squashes for 10-15 more minutes. 17. Remove them from the oven and add chopped parsley on top. - Roasting the squash takes about 25-30 minutes. - Cooking the quinoa takes around 15 minutes. - Baking the stuffed squash needs an extra 10-15 minutes. - Total time is about 1 hour to make this dish. - Use a bright plate for serving. - Arrange the stuffed halves neatly, cut side up. - Garnish with fresh parsley for color. - Add a drizzle of olive oil for shine. - Consider placing cranberries around the plate for a pop. To make quinoa fluffy, rinse it well. This helps remove any bitter taste. Use a ratio of 1 cup quinoa to 2 cups vegetable broth. Bring the broth to a boil, then lower the heat and cover. Cook it for about 15 minutes. After cooking, let it sit for 5 minutes. Fluff it gently with a fork. This method ensures each grain is light and airy. Seasoning your stuffing is key to great flavor. For a warm touch, use ground cinnamon and nutmeg. They pair well with quinoa and dried cranberries. You can also add garlic powder or onion powder for depth. If you like heat, try adding a pinch of cayenne pepper. Always taste your mixture before stuffing. This way, you can adjust the salt and pepper to your liking. When serving stuffed acorn squash, a beautiful presentation matters. Use a large serving platter to arrange the halves. Drizzle with olive oil for shine. Add fresh herbs like parsley on top for color. You can also sprinkle extra toasted walnuts for crunch. If you want, serve with a side of cranberry sauce. This adds a festive touch and extra flavor. Pro Tips Choose the Right Squash: Look for acorn squashes that are firm and heavy for their size. This ensures they are fresh and have the best flavor. Toast Your Walnuts: Toasting walnuts enhances their flavor and adds a delightful crunch to your stuffing. Just a few minutes in a dry skillet will do the trick. Make It Ahead: You can prepare the quinoa stuffing in advance and store it in the fridge. Just stuff the squashes and bake them when you’re ready to serve. Experiment with Spices: Feel free to get creative with the spices! Adding a pinch of cayenne or some fresh herbs can elevate the flavor profile of the stuffing. {{image_4}} You can easily make this dish vegan by swapping the vegetable broth for a homemade version. Use water and add spices for flavor. For gluten-free, ensure your quinoa is certified gluten-free. It naturally fits this diet. You can switch up the stuffing to add your favorite tastes. Try diced apples for sweetness or add bell peppers for crunch. Chickpeas can add protein and make it heartier. You can also use different nuts like pecans or almonds. Serve the stuffed squash on a bed of fresh greens. This adds color and freshness. You can also drizzle a balsamic glaze over the top for extra flavor. For a fun twist, serve with a side of roasted veggies or a grain salad. To store leftover stuffed squash, let it cool first. Then, place it in an airtight container. Make sure to cover it well. You can keep it in the fridge for up to three days. If you have more than you can eat, freezing is a great option. If you want to freeze stuffed squash, follow these steps. Wrap each half tightly in plastic wrap. Then, place them in a freezer bag or container. They can last in the freezer for up to three months. When you're ready to eat, thaw them in the fridge overnight for best results. To reheat stuffed squash, preheat your oven to 350°F (175°C). Place the squash on a baking sheet. Cover it loosely with foil to keep it moist. Bake for about 20 minutes or until heated through. You can also microwave it for a quicker option, but the oven gives the best taste. Enjoy your delicious leftovers! Yes, you can prepare stuffed acorn squash in advance. You can roast the squashes and make the filling the day before. Store them separately in the fridge. When you’re ready to serve, fill the squashes and bake them for a warm meal. Stuffed acorn squash pairs well with many dishes. Here are a few ideas: - A fresh green salad for crunch. - Roasted Brussels sprouts for a seasonal touch. - Mashed potatoes or sweet potatoes for comfort. - A warm bread roll to soak up flavors. You can tell the squash is done when it is tender. Use a fork to poke the flesh. It should slide in easily. The edges may also brown slightly, giving it a nice look. Enjoy this tasty dish! We explored delicious stuffed acorn squash, detailing key ingredients and cooking steps. I offered tips for fresh ingredients and cooking timing to ensure success. Customizing your dish lets you cater to tastes and diets. I shared storage tips to keep your leftovers fresh and tasty. With these insights, you can impress your family and friends with a fantastic meal. Enjoy the process and watch your skills grow. You can create amazing meals that everyone will love!

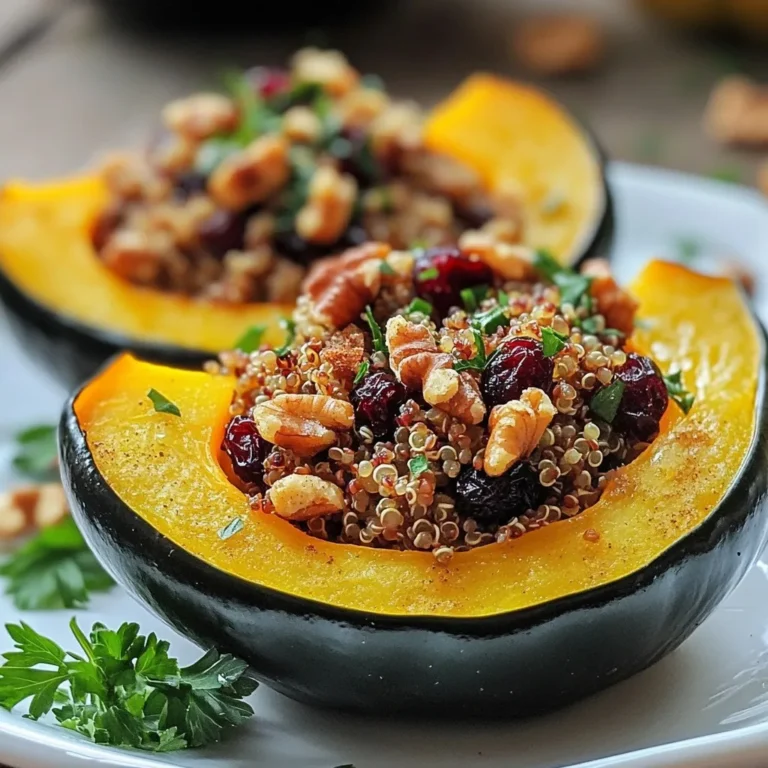
Thanksgiving Crowd-Pleaser Recipes for All Tastes

- 1 medium butternut squash, peeled and cut into 1-inch cubes - 2 medium sweet potatoes, peeled and diced into 1-inch pieces - 1 large onion, finely chopped - 3 cloves garlic, minced - 1-inch piece of fresh ginger, grated These main ingredients form the heart of the soup. Butternut squash brings a rich, sweet flavor. Sweet potatoes add creaminess and a hint of earthiness. The onion gives depth, while garlic and ginger add warmth and spice. - 1 tablespoon curry powder - 1 teaspoon smoked paprika - 1/2 teaspoon cayenne pepper (adjust according to your spice preference) - Salt and black pepper to taste Spices elevate the soup's flavor. Curry powder adds a warm, fragrant touch. Smoked paprika offers a subtle smokiness. The cayenne pepper gives it a spicy kick, while salt and black pepper balance the taste. - 1 can (14 oz) full-fat coconut milk - 4 cups vegetable broth (homemade or store-bought) - 2 tablespoons extra virgin olive oil Liquid ingredients bring everything together. Coconut milk gives the soup a creamy texture and a hint of sweetness. Vegetable broth adds depth and richness. Olive oil helps sauté the aromatics, enhancing the overall flavor. {{ingredient_image_2}} Start by heating the olive oil in a large pot over medium heat. Once the oil is hot, add the chopped onion. Sauté for about 5 minutes until the onion turns translucent. This step builds a great base for your soup. Next, add the minced garlic and grated ginger. Stir this mixture for one more minute. You want to smell that warm, spicy fragrance filling your kitchen. Now it's time to bring in the stars of the show! Carefully add the butternut squash and sweet potatoes to the pot. Sprinkle in the curry powder, smoked paprika, and cayenne pepper. This will coat the vegetables in a lovely mix of flavors. Don’t forget to season with salt and black pepper. Stir everything well so the spices hug each piece of vegetable. Pour the vegetable broth into the pot. Bring this mixture to a rolling boil. Once boiling, lower the heat and cover the pot. Let it simmer for 20 to 25 minutes. You want the squash and sweet potatoes to be tender. When they are ready, remove the pot from the heat. Use an immersion blender to blend the soup until it's smooth. If you don’t have one, carefully blend it in batches in a regular blender. Just let it cool slightly first to avoid splatters. After blending, stir in the coconut milk. Make sure it’s mixed in well. Taste the soup and adjust the seasoning. If you want more heat, add more cayenne. If it's too thick, add a bit more broth or water. Finally, warm the soup on medium heat for about 5 minutes. Stir occasionally until it’s heated through. Now, you're ready to serve! To make your soup just right, adjust the spice levels. If you love heat, add more cayenne pepper. For a milder taste, reduce it. Always taste as you go. This way, you can get the flavor perfect for you. Extra garnishes can brighten the soup. Fresh cilantro adds a burst of flavor. You might also try a drizzle of coconut milk on top. A sprinkle of smoked paprika can enhance the look and taste. This soup pairs well with crusty bread. A slice of sourdough or whole-grain bread makes it feel special. You can also serve it with a fresh salad for a complete meal. For presentation, use deep bowls. Ladle the soup in and top it with cilantro. Drizzle extra coconut milk over each bowl. This adds creaminess and makes it look great. A heavy-bottomed pot works best for this soup. It spreads heat evenly and prevents burning. An immersion blender is ideal for smooth soup. If you don’t have one, a standard blender works too. Just be careful when transferring hot soup. Let it cool a bit first to avoid splatters. Pro Tips Use Fresh Ingredients: For the best flavor, use fresh butternut squash and sweet potatoes. They will provide a richer taste than canned or frozen options. Adjust the Spice Level: Feel free to modify the amount of cayenne pepper according to your heat preference. Start with a smaller amount and add more as needed. Blend for Creaminess: For an ultra-smooth texture, ensure you blend the soup thoroughly. An immersion blender works well, but a stand blender can achieve a creamier consistency. Garnish Creatively: Enhance presentation by garnishing with toasted pumpkin seeds or a swirl of coconut milk. This adds visual appeal and texture to your soup. {{image_4}} You can play with spices in this soup. Try using different spice blends like garam masala or chili powder. You can also add a pinch of cinnamon for warmth. If you want a milder soup, skip the cayenne pepper. For more heat, add more cayenne or even fresh peppers. Feel free to swap out vegetables too. Carrots or parsnips can add sweetness. Roasted red peppers can give a nice depth of flavor. You can even add greens like kale for extra nutrients. For a vegan version, ensure your vegetable broth is plant-based. The soup is naturally gluten-free, so you are good there. To make it low-carb, reduce the sweet potatoes. You could use cauliflower instead. It will still add creaminess when blended. If you want a lighter option, use less coconut milk. Try half a can and add more broth instead. This will keep the soup rich but lower the calories. Bring global flavors into your soup! Add coconut aminos for a hint of umami. Or stir in some miso paste for a Japanese twist. You can also try adding lime juice for a bright finish. For a Mexican flair, mix in some black beans and top with avocado. Or use Thai ingredients like lemongrass and cilantro for a fresh taste. The choices are endless! To keep your spicy butternut sweet potato soup fresh, let it cool first. Pour the soup into an airtight container. This helps keep flavors intact. Store it in the fridge for up to five days. If you want to enjoy it later, make sure you label the container with the date. To freeze the soup, let it cool down completely. Transfer it to freezer-safe bags or containers. Remove as much air as possible to avoid freezer burn. The soup will stay fresh for about three months. When you are ready to eat it, thaw it in the fridge overnight. Reheat it on the stove over low heat. Stir it often to warm it evenly. Leftover soup is a great base for many dishes. Add cooked grains like rice or quinoa for a filling meal. You can also mix in some beans for extra protein. Try using it as a sauce for pasta or drizzling it over roasted vegetables. Serve it alongside a fresh salad or crusty bread for a complete dinner. Yes, you can make this soup ahead of time. It tastes great even after a day or two. To prepare, cook the soup as directed. Let it cool, then store it in an airtight container in the fridge. When you are ready to eat, simply reheat it on the stove over low heat. Stir often to prevent sticking. If it is too thick after reheating, add a splash of vegetable broth or water. To adjust the spice level, add more or less cayenne pepper. Start with a small pinch, then taste. If you want more heat, add cayenne gradually. For a milder soup, reduce the cayenne and skip the smoked paprika. You can also add a dollop of yogurt or sour cream to tone down the spice. You can use canned options, but fresh ingredients offer better flavor. Canned squash or sweet potatoes save time, but they may lack texture. If you choose canned, drain and rinse them to remove extra liquid and sodium. Add them to the pot just before blending. This way, they heat through without overcooking. This soup pairs well with crusty bread or warm naan. A simple green salad adds freshness. You can also serve it with grilled cheese for a comforting combo. For a fancy touch, add a sprinkle of pumpkin seeds or a drizzle of olive oil on top. This blog post covered how to make a rich butternut sweet potato soup. We explored key ingredients like butternut squash, sweet potatoes, and spices. I shared step-by-step instructions for cooking and blending the soup. You learned tips for flavor, serving, and storage options. In conclusion, this soup is warm and inviting. You can adapt it to suit your taste. Enjoy making it your own!

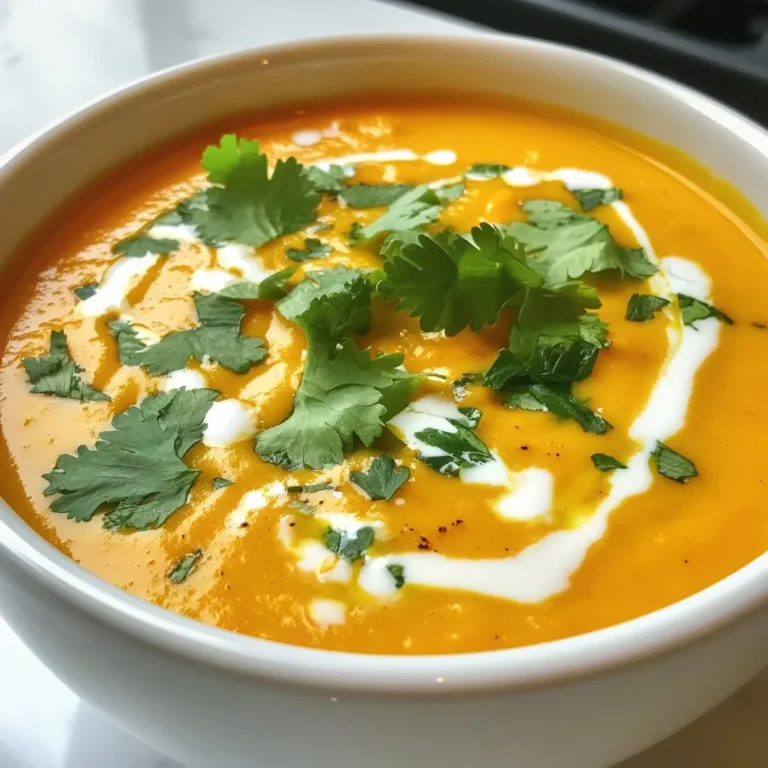
Spicy Butternut Sweet Potato Soup Comforting Delight

To make these delightful cinnamon roll cookies, you will need the following ingredients: - 2 cups all-purpose flour - 1 teaspoon baking powder - 1/2 teaspoon baking soda - 1/2 teaspoon salt - 1 teaspoon ground cinnamon - 3/4 cup unsalted butter, softened - 1 cup packed brown sugar - 1 large egg - 1 teaspoon pure vanilla extract - 1/4 cup granulated sugar (for rolling) - 1/2 cup powdered sugar (for glaze) - 1-2 tablespoons milk (to adjust glaze consistency) Each ingredient plays a key role. The all-purpose flour gives the cookies their structure. Baking powder and baking soda help them rise. Salt balances the sweetness, while ground cinnamon adds that warm, cozy flavor. Softened butter creates a rich texture, and brown sugar brings a deep sweetness. The egg helps bind everything together. Vanilla adds a lovely aroma, and the granulated sugar gives a sweet crust. Finally, the glaze, made with powdered sugar and milk, adds a finishing touch that makes these cookies stand out. {{ingredient_image_2}} Start by preheating your oven to 350°F (175°C). This step is key. A well-preheated oven helps the cookies bake evenly. While the oven heats, line your baking sheet with parchment paper. This lining helps with easy cookie removal after baking. Next, grab a medium bowl. In this bowl, whisk together the dry ingredients. Combine 2 cups of all-purpose flour, 1 teaspoon of baking powder, 1/2 teaspoon of baking soda, 1/2 teaspoon of salt, and 1 teaspoon of ground cinnamon. This mix provides the essential flavor and texture for your cookies. In a large bowl, use a hand mixer or stand mixer. Beat together 3/4 cup of softened unsalted butter and 1 cup of packed brown sugar. Mix them until the texture is light and fluffy, about 2-3 minutes. This step is important for a soft cookie. Now, add 1 large egg and 1 teaspoon of pure vanilla extract to the butter-sugar mix. Keep mixing until everything is smooth. This mixture should be well combined for the best flavor. Gradually fold the dry ingredient mixture into the wet mix. Use a spatula or wooden spoon to gently combine. Mix until a cohesive dough forms. Be sure there are no dry flour bits left. This ensures your cookies will have a great texture. Transfer the dough to a lightly floured surface. Roll the dough into a log, about 1.5 inches in diameter. Wrap this log in plastic wrap and refrigerate for at least 30 minutes. Chilling the dough helps maintain the shape during baking. After chilling, unwrap the dough. Slice it into 1/2-inch thick rounds. Roll each slice in granulated sugar for a sweet crust. Arrange them on your lined baking sheet, leaving space between each cookie. Bake them for 10-12 minutes until the edges are lightly golden. While your cookies cool, prepare the glaze. In a small bowl, whisk together 1/2 cup of powdered sugar and 1-2 tablespoons of milk. Adjust until you reach a smooth consistency. Once the cookies are cool, drizzle the glaze over them. Use a spoon or whisk for a nice touch. To bake perfect cinnamon roll cookies, keep a close eye on time and temperature. Preheat your oven to 350°F (175°C) for even baking. Bake the cookies for 10-12 minutes. Look for edges that are golden and set. If you bake too long, cookies can become dry. If underbaked, they may spread too much. Watch for a few common mistakes. First, don't skip the chilling step. Chilling the dough helps maintain shape during baking. Also, ensure you measure flour correctly. Too much flour can lead to dense cookies. Lastly, do not overcrowd the baking sheet. Give each cookie room to spread. For serving, arrange cookies on a pretty platter. This makes them look more inviting. You can sprinkle a bit of ground cinnamon on top for flair. A small mint leaf can also add a splash of color. Glazing cookies not only adds sweetness but also enhances their visual appeal. Drizzle glaze gently for a beautiful finish. Pro Tips Chill for Better Shape: Chilling the dough for at least 30 minutes helps the cookies maintain their shape during baking, preventing them from spreading too much. Perfect Sugar Coating: For an extra sweet touch, roll the cookie slices in granulated sugar before baking. This creates a delightful crust that enhances the flavor. Adjust Glaze Consistency: When making the glaze, add milk one teaspoon at a time to achieve your desired thickness—this allows for a perfect drizzle over the cookies. Storage Tips: Store cookies in an airtight container at room temperature for up to a week. For longer freshness, consider freezing them without glaze and adding it before serving. {{image_4}} To make gluten-free cinnamon roll cookies, you can use a gluten-free all-purpose flour blend. Look for a blend that has xanthan gum in it. If your blend does not include xanthan gum, add 1/2 teaspoon for each cup of flour. This will help bind the dough. Follow the same steps as in the original recipe, and you’ll enjoy delicious cookies without gluten. You can easily adapt this recipe for vegan diets. Replace the egg with a flax egg. To make a flax egg, mix 1 tablespoon of ground flaxseed with 2.5 tablespoons of water. Let it sit for about 5 minutes until it thickens. Use vegan butter instead of regular butter. You can also use plant-based milk for the glaze. Your cookies will still taste great! You can make your cinnamon roll cookies even more exciting. Try adding nuts like walnuts or pecans for a nice crunch. You can also mix in chocolate chips for a sweet twist. If you love spices, add a pinch of nutmeg or cardamom for extra flavor. These simple changes will make your cookies unique and fun! To keep your cinnamon roll cookies fresh, store them in an airtight container. This container helps prevent air from drying out the cookies. Place parchment paper between layers to avoid sticking. Keeping them in a cool, dark place works best. If you use a cookie jar, make sure it seals well. This keeps cookies soft and tasty for longer. You can freeze cookie dough or baked cookies. For freezing dough, shape it into a log and wrap it tightly in plastic wrap. Then, place it in a freezer bag. This way, you can bake fresh cookies later. For baked cookies, let them cool completely. After cooling, place them in an airtight container or freezer bag. They can last up to three months in the freezer. Cinnamon roll cookies stay good for about a week at room temperature. If you keep them in the fridge, they can last up to two weeks. Always check for any signs of mold or off smells before eating. For the best taste, enjoy them within the first few days. Yes, you can prepare these cookies ahead. Make the dough and chill it in the fridge. You can keep it for up to three days before baking. If you want to store them longer, freeze the dough. Wrap the log tightly in plastic wrap, then place it in a freezer bag. When ready, thaw it overnight in the fridge before slicing and baking. You can use coconut sugar instead of granulated sugar. It has a similar texture and sweetness. Brown sugar also works well but may change the flavor a bit. If you want a sugar-free option, try using monk fruit sweetener. Adjust the amount based on package instructions since some sweeteners vary in sweetness. Watch for the edges of the cookies turning golden brown. The center should look set, not doughy. You can also gently press the cookie with your finger. If it springs back, it's ready. Remember, the cookies will continue to firm up as they cool. Yes, you can use whole wheat flour for a nuttier flavor. Almond flour is another option, but it may change the texture. If using gluten-free flour, choose a blend made for baking. Adjust the liquid in the recipe, as different flours absorb moisture differently. If your dough is dry, add a little milk, one teaspoon at a time. Mix until the dough comes together. You can also add melted butter if the dough is too crumbly. Make sure not to add too much liquid; you want a soft but not sticky dough. To glaze cookies, whisk the powdered sugar with milk until smooth. Drizzle the glaze over the cookies using a spoon or whisk. You can also dip the tops of the cookies for a thicker glaze. Let the glaze set before serving for a beautiful finish. You can create delicious cinnamon roll cookies with simple ingredients and clear steps. Start by preheating your oven and mixing dry ingredients. Follow the steps for creaming butter and sugar, then incorporate the egg and vanilla. Shape, bake, and glaze for great results. Remember to avoid common baking mistakes and try variations for special diets. Store your cookies properly and enjoy them fresh. With these tips, you’ll master cookie baking in no time. Embrace your inner baker and have fun!

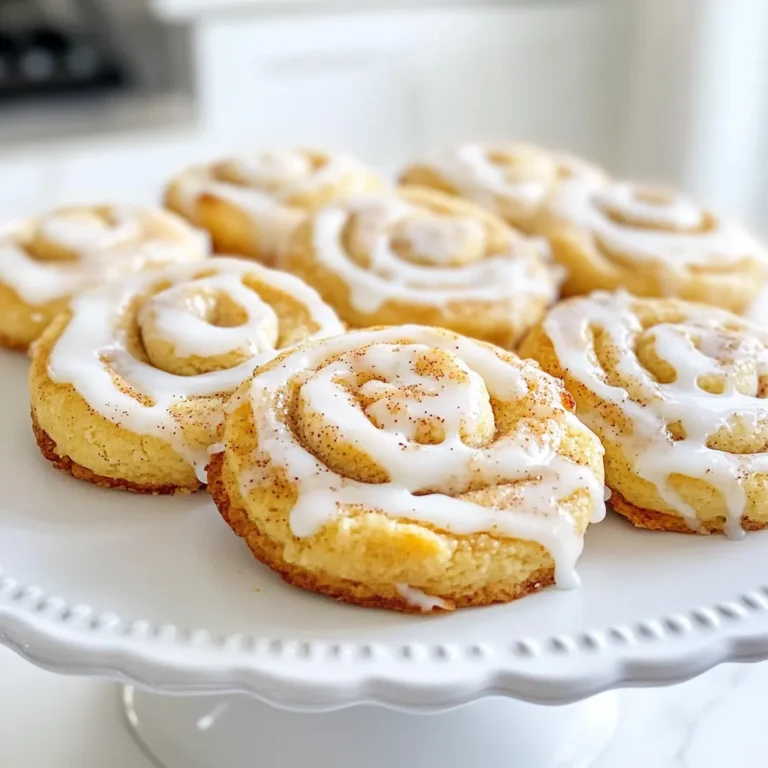
Cinnamon Roll Cookies Irresistible and Easy Recipe

PREV 1 … 45 46 47 NEXT
meal plan mapper

explore

DessertsDinnerAppetizersDrinks

Our Policies

  • Cookie Policy
  • Copyright Policy
  • Disclaimer
  • GDPR Policy
  • Terms Of Use
Back to Top
  • About
  • Contact Us
  • Privacy Policy
© 2025 meal plan mapper