FREE DINNER EBOOK! Get your copy!
  • Cookie Policy
  • GDPR Policy
  • Disclaimer
  • Terms Of Use
  • Visit my other site: Fun Cookie Recipes
meal plan mapper
  • Home
  • Dinner
  • Desserts
  • Drinks
  • Appetizers
  • Contact
  • About
  • Privacy Policy
  • Home
  • Dinner
  • Desserts
  • Drinks
  • Appetizers
  • Contact
  • About
  • Privacy Policy
  • Cookie Policy
  • GDPR Policy
  • Disclaimer
  • Terms Of Use
Visit my other site: Fun Cookie Recipes

HOME / CATEGORIES /

Latest

- 8 oz (225g) pasta (penne or fusilli) - 2 cups fresh broccoli florets - 1 tablespoon extra virgin olive oil - 3 cloves garlic, finely minced - 1 cup vegetable broth - 1 cup heavy cream (or coconut cream for dairy-free) - 1 cup freshly grated Parmesan cheese (or nutritional yeast for vegan) - 1 teaspoon freshly grated lemon zest - Sea salt and freshly cracked black pepper, to taste - Crushed red pepper flakes (optional, for added heat) - A handful of fresh basil leaves, for garnish I love using fresh ingredients in my cooking. Fresh broccoli adds a bright color and crunch to the dish. You can pick up a nice bunch from your local market. The extra virgin olive oil gives a rich flavor. I always choose a high-quality oil for the best taste. Garlic is a must. It adds a warm, savory note. Use fresh cloves for more flavor. The vegetable broth adds depth and makes the pasta cook perfectly. Heavy cream makes the sauce creamy and rich. If you want a lighter option, coconut cream works great too. Parmesan cheese is my go-to for a savory kick. For a vegan option, I recommend nutritional yeast. It offers a cheesy flavor without dairy. Lemon zest brightens up the dish. It gives a nice citrus touch. Don’t forget the seasoning! Sea salt and black pepper enhance all the flavors. If you like a bit of heat, add crushed red pepper flakes. Finally, fresh basil leaves make a lovely garnish. They bring freshness and color to your plate. Enjoy your cooking! {{ingredient_image_2}} Start by heating 1 tablespoon of extra virgin olive oil in a large pot over medium heat. Once the oil shimmers, add 3 cloves of finely minced garlic. Fry the garlic gently for 1-2 minutes. Stir it often to keep it from burning. This step brings out the garlic's flavor. Next, add 8 ounces of pasta to the pot. You can use penne or fusilli. Pour in 1 cup of vegetable broth at the same time. Bring this mixture to a gentle simmer. Stir occasionally to keep the pasta from sticking together. After 5 minutes, add 2 cups of fresh broccoli florets to the pot. This will cook for another 5-7 minutes. Keep an eye on the pasta and broccoli. You want the pasta al dente and the broccoli tender but bright green. Once the pasta and broccoli are cooked, lower the heat. Stir in 1 cup of heavy cream and 1 cup of freshly grated Parmesan cheese. Mix well until a rich, creamy sauce forms. This sauce will coat the pasta evenly, giving it a delightful taste. Now, add 1 teaspoon of freshly grated lemon zest for a fresh kick. Season the dish with sea salt, freshly cracked black pepper, and optional crushed red pepper flakes. Mix everything thoroughly so the flavors spread evenly. Remove the pot from the heat and let it rest for a couple of minutes. This helps the sauce thicken slightly. Serve the pasta warm. Garnish with fresh basil leaves and extra Parmesan cheese if you like. Enjoy this easy and tasty meal! For this dish, I recommend using penne or fusilli. These shapes hold the sauce well. They also cook evenly and have a great texture. If you want to try other types, consider rotini or farfalle. Each shape brings its own charm to the plate. To get a creamy sauce, pay attention to the heat level. Once you add the cream and cheese, keep stirring. If the sauce is too thick, add a bit more vegetable broth. If it's too thin, let it simmer longer. This will help the sauce thicken nicely. You can make this dish in a pressure cooker. Just add all the ingredients and cook for 5-7 minutes. If you prefer baking, transfer the mixture to a baking dish. Top with cheese and bake until bubbly. Both methods save time and give tasty results. Serve this pasta hot, garnished with fresh basil. A sprinkle of extra cheese adds flavor. Pair it with a simple green salad or garlic bread. This makes a complete meal that everyone will enjoy. You can also add grilled chicken or shrimp for extra protein. Pro Tips Perfect Pasta Cooking: Always cook pasta until al dente as it will continue to cook slightly once combined with the sauce. Broccoli Brightness: To keep broccoli vibrant and bright green, avoid overcooking it; add it to the pot just a few minutes before pasta is done. Cheese Choice: For a silky sauce, ensure the Parmesan cheese is finely grated so it melts smoothly into the cream. Flavor Boost: Enhance the flavor by adding a splash of white wine to the broth or a squeeze of fresh lemon juice just before serving. {{image_4}} You can make this dish vegan easily. Simply swap the heavy cream for coconut cream. Use nutritional yeast instead of Parmesan cheese. This change gives a cheesy flavor without dairy. Your creamy sauce will still taste amazing and rich! Want some heat? Add crushed red pepper flakes when you mix in the cream and cheese. You can also toss in some sliced jalapeños for extra spice. This will kick up the flavor and make your taste buds dance! Need to avoid gluten? Use gluten-free pasta. You can also replace vegetable broth with low-sodium chicken broth for more flavor. If you're avoiding dairy, stick to coconut cream and nutritional yeast. These swaps keep the dish tasty and enjoyable for everyone. To keep your One-Pot Creamy Broccoli Pasta fresh, store it in an airtight container. Make sure the pasta cools down before sealing it. This helps prevent extra moisture, which can lead to sogginess. You can keep the leftovers in the fridge for up to three days. If you want to enjoy it later, consider freezing. When you're ready to eat your leftovers, reheat them gently. You can use a microwave or a stovetop. If using a microwave, cover the container to keep moisture in. Heat it in short bursts, stirring in between. If using a stovetop, add a splash of vegetable broth or cream to help revive the creamy sauce. Stir often and heat until warm. To freeze your pasta, place it in a freezer-safe container. Make sure to leave some space at the top for expansion. It’s best to freeze it without the cheese added. The dish can last in the freezer for up to three months. When you're ready to eat, thaw it overnight in the fridge. Then, reheat it as mentioned above for the best results. Yes, you can use frozen broccoli. Frozen broccoli works well in this dish. It cooks quickly and still tastes great. Just add it to the pot along with the pasta. To make this dish gluten-free, choose gluten-free pasta. There are many options available, such as rice or quinoa pasta. Just cook it like regular pasta, and enjoy! You can add many herbs for extra flavor. Try thyme, oregano, or parsley. Fresh herbs can enhance the taste and make your dish even better. This dish lasts about 3-4 days in the fridge. Store it in an airtight container. Reheat it in a pot on low heat, adding a splash of broth or cream to keep it creamy. Yes, you can use different cheeses. Mozzarella or cheddar work well. For a vegan option, use nutritional yeast. It gives a cheesy flavor without dairy. This recipe combines simple ingredients and easy steps for a tasty dish. You learned how to make creamy pasta with broccoli, garlic, and cheese. We also covered tips for perfecting the sauce and variations for dietary needs. Feel free to customize this dish to match your taste. Remember, cooking is about having fun! Enjoy what you make and share it with others. Happy cooking!

One-Pot Creamy Broccoli Pasta Easy Dinner Recipe

- 1 lb ground beef - 1/2 lb ground turkey - 1 cup breadcrumbs - 1/2 cup grated Parmesan cheese - 1/2 cup chopped fresh parsley - 1 large egg, beaten - 3 cloves garlic, finely minced - 1 teaspoon onion powder - 1 teaspoon dried oregano - 1 teaspoon salt - 1/2 teaspoon freshly ground black pepper - 1 cup marinara sauce - 8 oz fresh mozzarella cheese, cut into sticks - 1/4 cup extra virgin olive oil for drizzling You can add different herbs like basil or thyme for extra flavor. Some cooks enjoy using ground pork or chicken instead of turkey. If you want a spicy kick, add red pepper flakes or chili powder. For a twist, try using different types of cheese, like cheddar or provolone. Measuring ingredients carefully helps keep the flavors balanced. Use a kitchen scale for the meats for best results. Chop the parsley finely, so it mixes well. When you prepare the mozzarella, make sure the sticks are even in size, so they melt nicely. Mix the meat ingredients until just combined. Over-mixing can make the meatloaf tough. {{ingredient_image_2}} Start by heating your oven to 350°F (175°C). This step ensures your meatloaf bakes evenly. In a large bowl, mix the following: - 1 lb ground beef - 1/2 lb ground turkey - 1 cup breadcrumbs - 1/2 cup grated Parmesan cheese - 1/2 cup chopped fresh parsley - 1 large egg, beaten - 3 cloves garlic, finely minced - 1 teaspoon onion powder - 1 teaspoon dried oregano - 1 teaspoon salt - 1/2 teaspoon freshly ground black pepper Use your hands or a spoon to combine everything well. This mixture should feel sticky and hold together. Next, transfer the meat mixture onto a clean counter. Shape it into a rectangle, about 1 inch thick. Flatten it evenly. Lay 8 oz of mozzarella cheese sticks down the center, leaving space at the edges. Now, roll the meat mixture around the cheese. Start from one side and tuck in the edges as you go. Make sure the cheese is fully enclosed. Shape it into a loaf, keeping the seam on the bottom. Place the meatloaf in a greased baking dish. Pour 1 cup of marinara sauce over the top. Let the sauce seep into the meatloaf. Drizzle 1/4 cup of extra virgin olive oil on top for extra flavor. Bake in the oven for 50 to 60 minutes. Check that the internal temperature reaches 160°F (70°C). The juices should run clear. After baking, let the meatloaf rest for about 10 minutes. This helps the cheese set, making it easier to slice. To keep your meatloaf moist, use a mix of ground meats. I like to blend ground beef and ground turkey. This mix gives great flavor and keeps it juicy. Always add breadcrumbs to absorb moisture and hold it in. A beaten egg acts as a binder, helping the loaf hold its shape. Don't forget to let the meatloaf rest before you slice it. This step helps the juices settle back in. When it's time to serve, use a sharp knife for clean cuts. Slice the meatloaf into thick pieces, about an inch wide. This keeps the melted mozzarella inside from spilling out. Arrange the slices on a nice platter for a great look. A sprinkle of fresh parsley adds color and taste. Serve with a bowl of marinara sauce on the side for dipping. It enhances the flavors and makes it fun to eat. For sides, I recommend simple options that balance the meatloaf. Roasted vegetables or a fresh salad work well. Garlic bread is a classic choice and adds a nice touch. If you want extra flavor, try serving with a tangy coleslaw. For sauces, marinara is a must, but you can also offer barbecue sauce for a smoky twist. These pairings make the meal more enjoyable and satisfying. Pro Tips Resting Time is Key: Allow the meatloaf to rest for at least 10 minutes after baking. This helps the juices redistribute, ensuring moist and flavorful slices. Cheese Variations: Experiment with different types of cheese for stuffing, such as cheddar or gouda, for a unique flavor twist. Seasoning Boost: Add some red pepper flakes or a dash of hot sauce to the meat mixture for a spicy kick that complements the cheesy filling. Leftover Magic: Use any leftover meatloaf in sandwiches or tacos for a quick and delicious next-day meal. {{image_4}} You can use many kinds of meat in this dish. Ground beef and turkey work great, but you can mix in pork or chicken too. Each meat adds a new flavor twist. Try ground lamb for a richer taste. If you want a lighter option, consider ground chicken or turkey. Cheese is another fun way to change up this meatloaf. Mozzarella gives a nice stretch, but you can experiment with other cheeses. Cheddar adds a sharp bite, while provolone brings a smoky flavor. For a gourmet touch, use goat cheese or feta. Each cheese will change the dish's taste and texture. Herbs and spices can change your meatloaf from basic to amazing. Feel free to get creative! Instead of oregano, try thyme or basil for a fresh flavor. A hint of rosemary can add depth. For a kick, add crushed red pepper flakes or chili powder. You can also switch up the fresh herbs. Chives and cilantro can add a new twist. Mix in some Italian seasoning for classic flavors or go bold with curry powder for a unique taste. If you need gluten-free options, there are several easy swaps for breadcrumbs. Ground oats or almond flour can work well. You can also use gluten-free breadcrumbs, which are now easy to find in stores. Another option is to use crushed rice crackers or cornflakes. These alternatives will keep the meatloaf moist while adding a nice crunch. Just be sure to adjust the amount based on the texture you desire. To keep your mozzarella stuffed meatloaf fresh, store it in an airtight container. Make sure it cools to room temperature before sealing. Leftovers can last up to three days in the fridge. If you want to enjoy it longer, freezing is a great option. To freeze your meatloaf, first slice it into portions. This makes it easy to reheat later. Wrap each slice tightly in plastic wrap and then place them in a freezer bag. Label the bag with the date. Your meatloaf will stay good for up to three months in the freezer. When you're ready to enjoy your frozen meatloaf, remove it from the freezer and let it thaw in the fridge overnight. To heat it, preheat your oven to 350°F (175°C). Place the slices in a baking dish and cover them with foil. Heat for about 20 minutes, or until warmed through. For a crispy top, remove the foil for the last five minutes. Enjoy your cheesy delight just as good as the first time! Cook Mozzarella Stuffed Meatloaf for about 50 to 60 minutes. The meatloaf is ready when the inside reaches 160°F (70°C). Use a meat thermometer to check the temperature. This step is key to ensure the meatloaf is safe to eat. Yes, you can make this meatloaf ahead of time. Prepare it and shape it into a loaf. Cover it well and store it in the fridge for up to 24 hours before baking. You can also freeze it for up to three months. Just thaw it overnight in the fridge before cooking. Pair this meatloaf with a fresh salad or roasted veggies. Mashed potatoes or garlic bread also make great sides. For a fun touch, serve extra marinara sauce for dipping. This will enhance the cheesy flavors and make the meal even more delicious. This post details how to make a tasty Mozzarella Stuffed Meatloaf. We covered the main and optional ingredients, measuring tips, and step-by-step instructions. You learned how to keep your meatloaf moist and serve it nicely. We also explored fun variations and smart storage tips. With these simple steps, you can impress anyone at dinner. Enjoy making this meal again and again!

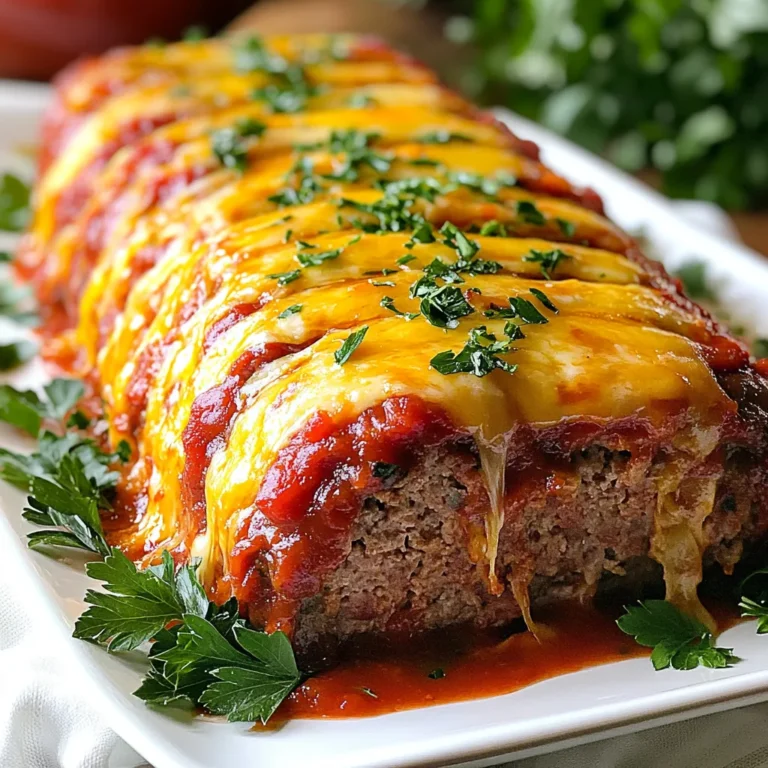
Mozzarella Stuffed Meatloaf Flavorful and Simple Dish

- 1 pound beef chuck, cut into 1-inch cubes - 2 tablespoons olive oil - 1 large onion, finely chopped - 2 cloves garlic, minced - 1 cup diced tomatoes (canned or fresh) - 2 cups beef broth - 1 teaspoon dried oregano - 1 teaspoon ground cinnamon - Salt and pepper to taste - 1 ½ cups orzo pasta - Fresh parsley, chopped (for garnish) - Grated feta cheese (optional, for topping) You can swap beef chuck for lamb or chicken. Use vegetable broth if you want a lighter taste. For a twist, try adding a splash of red wine to the broth. Fresh herbs like thyme or rosemary can add more flavor. If you don't have orzo, use rice or a similar pasta. Choose beef that has good marbling for more flavor. A bright red onion adds a nice sweetness. For tomatoes, go for the ripest ones or high-quality canned ones. Look for orzo that is firm and not broken. Fresh parsley should be vibrant green without wilting. If using feta, select a block for the best texture and taste. {{ingredient_image_2}} Start by heating olive oil in a large pot over medium-high heat. Pour in the oil and let it shimmer. Next, add the beef cubes in a single layer. Sear the beef for 5-7 minutes. Turn the cubes to brown all sides. Once browned, take the beef out and set it aside on a plate. This step builds great flavor for your dish. In the same pot, lower the heat to medium. Add your chopped onion and minced garlic. Sauté them for 3-4 minutes. Stir often until the onion becomes soft and clear. This process releases the sweet aroma of the onion and garlic, adding depth to your meal. Now, stir in the diced tomatoes, dried oregano, and ground cinnamon. Add a good pinch of salt and pepper too. Cook this mix for another 2-3 minutes. This helps the flavors blend nicely. After that, return the browned beef to the pot. Pour in the beef broth and stir gently. Bring this mix to a simmer. Once it bubbles, cover the pot and lower the heat. Let it cook for about 1 hour. The beef should become tender, and the flavors will meld beautifully. Next, add the orzo pasta directly into the pot. Stir well to spread the orzo evenly. Cover the pot again and let it cook for another 10-12 minutes. The orzo will soak up some broth and become al dente. If the mixture seems too thick, add a splash of broth or water to loosen it up. Finally, serve the dish hot, garnished with fresh parsley and feta cheese, if you like. Enjoy your hearty Beef Orzo Giouvetsi! To enhance the taste of your Beef Orzo Giouvetsi, use quality beef broth. A rich broth adds depth. I recommend using homemade broth if you have it. Fresh herbs also brighten the dish. Try adding fresh oregano or thyme for a flavor boost. Don't skimp on seasoning. Salt and pepper are key to bringing out all the flavors. For tender beef, choose chuck cuts. They have more fat, which adds flavor. Searing the beef first helps lock in juices. Make sure to brown the meat well on all sides. This step adds a nice crust and rich flavor. Slow cooking is essential here. Let the beef simmer until it's fork-tender. This usually takes about an hour. When adding orzo, keep an eye on the cooking time. You want it al dente, so check it around the 10-minute mark. Stir the pot well to ensure even cooking. If it seems too thick, you can add a bit more broth. This keeps the orzo from clumping together. Letting the dish rest briefly before serving helps the flavors meld beautifully. Pro Tips Choose the Right Cut: For the best flavor and tenderness, use beef chuck, which becomes incredibly tender during the slow cooking process. Enhance the Flavor: Add a splash of red wine to the pot after sautéing the onions and garlic for a deeper flavor profile. Perfect Orzo Cooking: Stir the orzo occasionally while it cooks to prevent sticking and ensure even absorption of the broth. Garnish for Freshness: Don't skip the parsley and feta cheese; they add a refreshing and flavorful touch to the finished dish. {{image_4}} To make a vegetarian version, swap the beef for mushrooms. Use a mix of portobello and cremini for a rich flavor. Replace beef broth with vegetable broth. The cooking steps remain the same. This dish will still be hearty and filling. You can try other meats in this recipe. Lamb works well, giving a different taste. Chicken also makes a lighter option. Just make sure to adjust the cooking time based on the meat you choose. For chicken, cook until it reaches an internal temperature of 165°F. Want to boost the flavor? Add a pinch of red pepper flakes for heat. Fresh herbs like thyme or rosemary can add brightness. A splash of lemon juice at the end can brighten up the dish too. Experiment to find your favorite mix! Store leftover Beef Orzo Giouvetsi in an airtight container. Let the dish cool down first. Place it in the fridge for up to three days. Keep it away from strong-smelling foods to avoid flavor changes. You can freeze Beef Orzo Giouvetsi for later use. Place it in a freezer-safe container. Make sure to leave some space at the top, as liquids expand when frozen. It will stay good for about three months. Label the container with the date to track freshness. When ready to eat, thaw the dish in the fridge overnight. Reheat it in a pot over low heat. Add a splash of beef broth or water if needed. Stir occasionally until it warms evenly. You can also use the microwave; just be sure to cover it to keep moisture in. Enjoy your meal! Giouvetsi is a Greek dish made with meat and pasta. It often uses orzo, a small rice-shaped pasta. You cook it slowly in a rich broth with spices and vegetables. The dish is hearty and flavorful, perfect for family meals. The blend of beef and orzo creates a warm comfort food. It is often served with a sprinkle of cheese and fresh herbs. Yes, you can make Beef Orzo Giouvetsi in advance. It holds well in the fridge for a few days. To do this, prepare the dish, let it cool, and store it in an airtight container. When you are ready to eat, just reheat it on the stove or in the microwave. The flavors may even improve overnight, making it taste even better! Beef Orzo Giouvetsi pairs well with many sides. You can serve it with a fresh Greek salad. A side of crusty bread works well, too, for dipping. Roasted vegetables add color and nutrition. You might also consider a dollop of yogurt for a cool contrast. Each option complements the dish's rich flavors beautifully. This blog post discussed the key ingredients for Beef Orzo Giouvetsi and how to select them. I shared step-by-step instructions for cooking, along with tips to enhance flavor and ensure the meat stays tender. You learned about vegetarian and meaty variations, plus storage methods for leftovers. Remember, the right ingredients and careful cooking will lead to a tasty dish. Enjoy experimenting and making this meal your own!

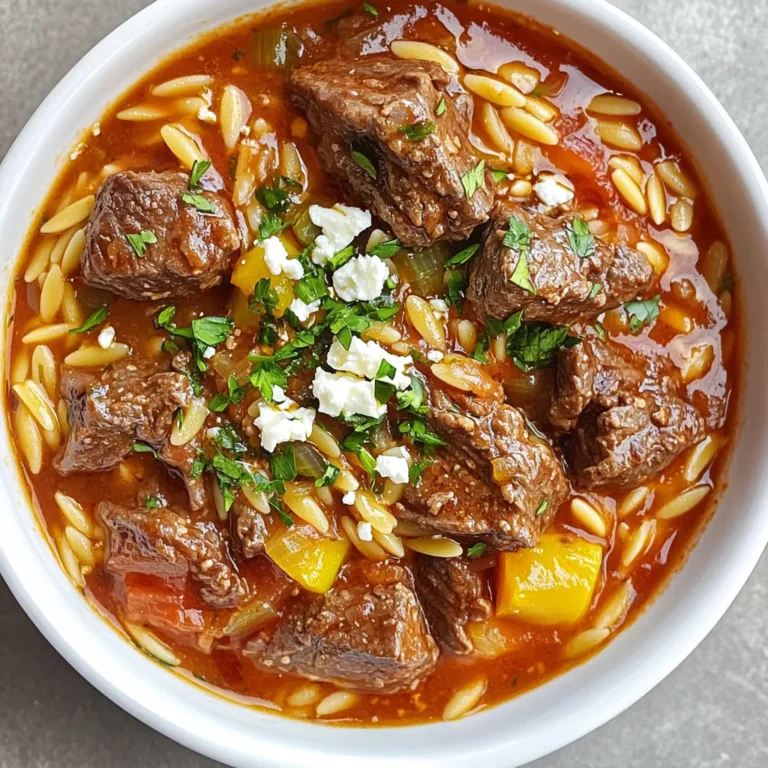
Beef Orzo Giouvetsi Flavorful and Hearty Recipe

- 12 oz fettuccine or pasta of choice - 1 cup pumpkin puree - 2 tablespoons unsalted butter - 1 tablespoon olive oil - 3 cloves garlic, minced - 1 small onion, finely chopped - 1 teaspoon fresh sage, chopped - ½ cup vegetable broth - ½ cup heavy cream (or coconut cream) - ½ cup grated Parmesan cheese (or nutritional yeast) - Salt and pepper to taste - Fresh sage leaves for garnish - Toasted pine nuts (optional) Pumpkin sage pasta is a simple yet rich dish. You need a few key ingredients to bring it to life. First, choose your pasta. Fettuccine works well, but any pasta you love will do. Next, pick up a cup of pumpkin puree. This gives the dish its creamy texture and warm flavor. Butter and olive oil help sauté the onion and garlic. The sweet aroma of garlic makes your kitchen smell great. You will also need fresh sage. It adds a wonderful herbal flavor. If you don’t have fresh sage, dried works too. For the sauce, vegetable broth adds depth. Heavy cream gives it a nice richness. You can use coconut cream for a vegan option. Don’t forget the cheese! Parmesan cheese or nutritional yeast adds a savory kick. Finally, season with salt and pepper. Fresh sage leaves and toasted pine nuts make lovely toppings. These add color and extra crunch. With these ingredients, you are ready to make a delightful meal! {{ingredient_image_2}} - Boil a large pot of salted water. - Add 12 oz of fettuccine or your favorite pasta. - Cook until al dente, which takes about 8-10 minutes. - Before draining, reserve about 1 cup of the pasta water. - Drain the pasta and set it aside in a colander. - In a large skillet, melt 2 tablespoons of unsalted butter with 1 tablespoon of olive oil over medium heat. - Add 1 small onion, finely chopped. Sauté for 3-4 minutes until it’s translucent. - Mix in 3 cloves of minced garlic and 1 teaspoon of chopped sage. Cook for 1 more minute until fragrant. - Stir in 1 cup of pumpkin puree and ½ cup of vegetable broth. - Mix well and let it simmer gently for 5 minutes. This helps the flavors meld. - Lower the heat and add ½ cup of heavy cream. - Stir continuously to mix it well. - Continue to simmer for another 3-4 minutes until it thickens. - Add the drained pasta to the skillet with the pumpkin sauce. - Toss well to coat the pasta evenly. - If the sauce is too thick, add some reserved pasta water until it reaches your preferred consistency. - Stir in ½ cup of grated Parmesan cheese. Mix until it’s fully incorporated. - Season with salt and pepper to taste, adjusting as needed. - Serve warm, garnished with fresh sage leaves and toasted pine nuts, if desired. To get the right sauce thickness, use the reserved pasta water. Add a little at a time. Stir well to mix. This makes the sauce creamy and smooth. Always taste your sauce before serving. Adjust the salt and pepper as needed. A little extra seasoning can make a big difference. Serve your pasta in rustic bowls for a cozy look. Drizzle a bit of olive oil on top. This adds flavor and a nice shine. For garnish, use fresh sage leaves. They look great and add a fresh taste. Toasted pine nuts make a tasty topping too. They add crunch and richness. Pair your pumpkin sage pasta with a light white wine. Choices like Sauvignon Blanc or Pinot Grigio work well. If you prefer a side salad, choose a simple green salad. A mix of fresh greens with a light vinaigrette complements the dish nicely. These pairings enhance the meal and balance the flavors. Pro Tips Choose Fresh Sage: Using fresh sage enhances the flavor profile significantly compared to dried sage. Look for vibrant green leaves for the best aroma and taste. Perfect Pasta Texture: Always cook pasta al dente. This will ensure a pleasant bite and that it holds up well when mixed with the creamy pumpkin sauce. Adjust Creaminess: If your sauce thickens too much, gradually add the reserved pasta water to reach your desired creamy consistency without diluting the flavors. Garnish Wisely: A sprinkle of toasted pine nuts adds a delightful crunch and nutty flavor that beautifully complements the creamy pumpkin sauce. {{image_4}} You can easily make this dish vegan. Just swap heavy cream for coconut cream. This change keeps the sauce rich and creamy. Instead of Parmesan cheese, use nutritional yeast. It adds a cheesy flavor without dairy. If you need a gluten-free option, choose gluten-free pasta. Rice or chickpea pasta works well. They have great texture and flavor. Just cook them according to the package instructions. Want to spice things up? Add cooked chicken or sausage to your pasta. You can also toss in extra spices. A pinch of red pepper flakes adds heat. Or try a dash of nutmeg for a warm touch. These additions make your dish even more exciting! To store leftovers of pumpkin sage pasta, let it cool first. Place the pasta in an airtight container. This keeps it fresh and safe. In the refrigerator, the pasta lasts for about three to four days. Make sure to check for any signs of spoilage before eating. Reheating is easy. You can use a microwave or a skillet. For the microwave, place the pasta in a bowl. Add a splash of water to keep it moist. Cover it loosely and heat in short bursts. Stir in between to warm evenly. If using a skillet, add a bit of oil or butter. Heat on low, stirring gently until warm. This keeps the texture nice and creamy. Yes, you can freeze pumpkin sage pasta! To freeze, let it cool completely. Portion it into freezer-safe bags or containers. Squeeze out the air before sealing. This helps prevent freezer burn. The pasta can stay in the freezer for up to three months. When you're ready to eat, thaw it in the fridge overnight and reheat as mentioned above. Enjoy your delicious pasta later! You can add red pepper flakes for heat. Start with a pinch, then taste. If you want more spice, add a little more. You can also use fresh chili peppers. Chop them finely and toss them in with the garlic. Yes, you can! First, cut the fresh pumpkin in half. Remove the seeds and stringy bits. Roast the halves at 400°F for about 40 minutes. Once they are soft, scoop out the flesh. Puree it until smooth for your recipe. You can try thyme or rosemary for a different taste. Both herbs add a nice earthiness. Parsley or basil can also work well. Each herb brings its own charm to the dish. Yes, it has many nutritional benefits. Pumpkin is high in fiber and vitamins. It can help support your immune system. The dish offers healthy fats from the olive oil and butter, too. Just be mindful of the cream and cheese if you watch your calories. Absolutely! Cook the pasta and sauce separately. Store them in airtight containers in the fridge. When ready to eat, just combine and heat gently. You can also make the sauce a day in advance. This lets the flavors deepen even more. This blog post explored how to make delicious pumpkin sage pasta. We discussed key ingredients, step-by-step cooking instructions, and tips for the best results. You learned how to make variations for vegan and gluten-free diets. Cooking can be fun and rewarding. Enjoy experimenting with flavors and sharing your dish. With these tips, your pumpkin sage pasta will impress friends and family. Happy cooking!

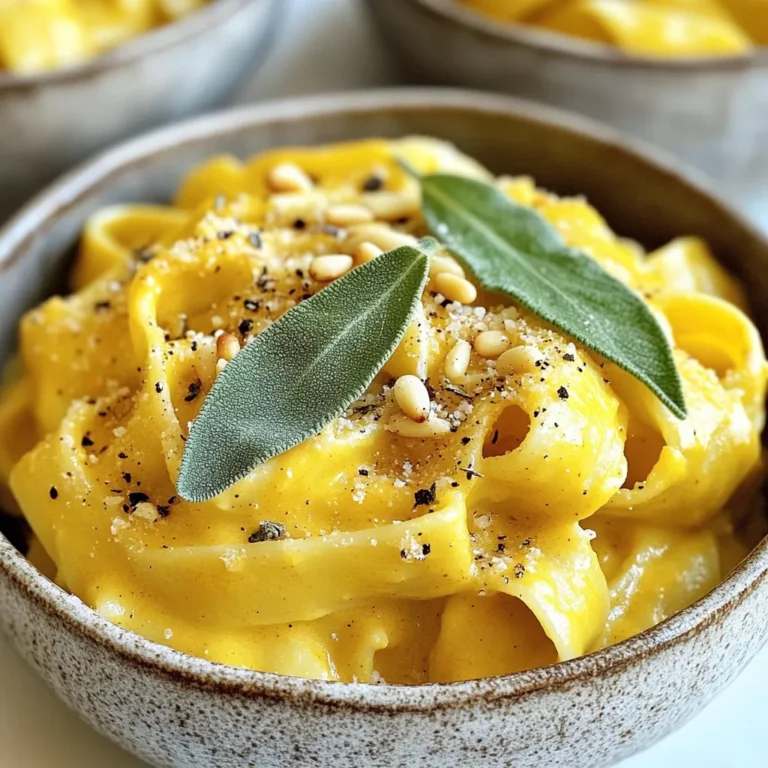
Pumpkin Sage Pasta Delightful and Simple Recipe

PREV 1 … 47 48
meal plan mapper

explore

DessertsDinnerAppetizersDrinks

Our Policies

  • Cookie Policy
  • Copyright Policy
  • Disclaimer
  • GDPR Policy
  • Terms Of Use
Back to Top
  • About
  • Contact Us
  • Privacy Policy
© 2025 meal plan mapper