FREE DINNER EBOOK! Get your copy!
  • Cookie Policy
  • GDPR Policy
  • Disclaimer
  • Terms Of Use
  • Visit my other site: Fun Cookie Recipes
meal plan mapper
  • Home
  • Dinner
  • Desserts
  • Drinks
  • Appetizers
  • Contact
  • About
  • Privacy Policy
  • Home
  • Dinner
  • Desserts
  • Drinks
  • Appetizers
  • Contact
  • About
  • Privacy Policy
  • Cookie Policy
  • GDPR Policy
  • Disclaimer
  • Terms Of Use
Visit my other site: Fun Cookie Recipes

HOME / CATEGORIES /

Latest

- Fresh blackberries - Fresh sage leaves - Honey or agave syrup - Freshly squeezed lemon juice - Sparkling water - Ice cubes - Additional blackberries and sage for garnish This mocktail shines with fresh, vibrant ingredients. First, fresh blackberries bring a sweet and tangy flavor. You can find them at local markets during summer. Next, fresh sage leaves add a unique herbal touch that enhances the drink's flavor. For sweetness, I use either honey or agave syrup. Both options work well, so pick what you like best. Freshly squeezed lemon juice brightens the mix and balances the sweetness. Sparkling water gives it that lovely fizz. You’ll want to use chilled sparkling water for a refreshing sip. Finally, don’t forget the ice cubes! They keep your drink cool and inviting. For garnish, add extra blackberries and sage leaves on top. They make the mocktail look pretty and add extra flavor. With these ingredients, you can create a delightful drink that is perfect for summer! {{ingredient_image_2}} Start by taking 1 cup of fresh blackberries and placing them in a blender. Add 6-8 fresh sage leaves, 2 tablespoons of honey (or agave syrup), and 2 tablespoons of freshly squeezed lemon juice. Blend everything until the mixture becomes a smooth paste. This step brings out the sweet and earthy flavors of the blackberries and sage. After blending, it’s time to strain the mixture. Use a fine mesh sieve and pour the blended mix into a bowl or pitcher. Press down gently with a spatula to help the liquid pass through. Discard any solids left in the sieve. This gives you a silky-smooth texture that feels great in your mouth. Now, get your serving glasses ready. Fill each glass with ice cubes to keep your drink nice and cold. Pour the strained blackberry-sage mixture halfway into each glass. Carefully add 2 cups of sparkling water to top off each drink. Use a spoon to stir gently, blending the flavors without losing the fizz. For a nice touch, garnish each glass with extra blackberries and a sprig of sage. This makes your mocktail look as good as it tastes! When you pick blackberries, look for ripe, dark ones. They should feel plump and firm. Avoid berries that are too soft or mushy. Fresh blackberries have a sweet and slightly tart taste. You can also check for a shiny skin, which shows they are fresh. If you can, buy organic blackberries. They are often tastier and free from pesticides. If you want your drink sweeter, try using honey or agave syrup. Both options work well in this mocktail. Start with the suggested two tablespoons. Taste the mixture, then add more if needed. You can also use simple syrup, made by mixing equal parts sugar and water. Heat the mixture until the sugar dissolves, then cool it down before adding it. To make your mocktail stand out, serve it in clear glasses. Fill the glasses with ice cubes to keep the drink cool. Pour the blackberry-sage mixture halfway up the glass, then top with sparkling water. For a fun twist, add extra blackberries and a sprig of sage on top. This adds color and makes your drink look fancy. Enjoy making your Blackberry Sage Mocktail a delight for the eyes! Pro Tips Use ripe blackberries: Ripe blackberries are sweeter and more flavorful, making your mocktail even more delicious. Experiment with honey alternatives: If you're looking for a different flavor profile, try using maple syrup or agave nectar instead of honey. Chill your glasses: For an extra refreshing drink, chill your serving glasses in the freezer for about 10 minutes before serving. Add a splash of citrus: For a tangy twist, consider adding a splash of lime juice along with the lemon juice for a more complex flavor. {{image_4}} You can add mint to your blackberry sage mocktail for an extra twist. Start by adding a few fresh mint leaves to the blender with the blackberries and sage. Mint adds a bright flavor that pairs well with the sweetness of blackberries. Blend it all together, then strain the mixture as normal. This version is cool and refreshing, perfect for hot days. Feel free to mix in other berries. You can use raspberries, blueberries, or strawberries. Each berry brings a different taste. Just swap out some blackberries for your favorite berry. The process remains the same. Blend, strain, and serve it bubbly. This way, you can create a new flavor each time you make it. If you want to enjoy an adult drink, add some gin or vodka. Use about one ounce of alcohol per glass. After you pour in the blackberry-sage mixture and sparkling water, gently stir in the alcohol. This change gives the drink a fun kick while keeping the fruity taste. Enjoy it responsibly! If you have leftover blackberry sage mixture, store it in a clean jar. Make sure the jar has a tight lid. Place it in the fridge. The mixture will stay fresh for about three days. When you're ready to drink, just stir it well before serving. To keep your blackberries and sage fresh, store them separately. Place blackberries in a container lined with paper towels. This keeps them dry and prevents mold. For sage, wrap it in a damp paper towel. Then, place it in a plastic bag. This method helps keep the leaves crisp for longer. When serving the stored mocktail, pour the mixture over ice. Add fresh sparkling water to bring back the fizz. You can garnish with new blackberries and sage. This adds a pop of color and flavor. Enjoy your refreshing drink as if it was just made! Yes, you can use frozen blackberries. They work well in this mocktail. Just let them thaw a bit before blending. This helps them blend smoothly. Frozen blackberries also add a nice chill to your drink. You can add more honey or agave syrup. Start with one extra tablespoon and taste. If it’s not sweet enough, add more until you like it. You could also use a sweet soda to boost the sweetness. This will change the flavor a bit, but it can be fun to try! Mint is a great choice with blackberries. It adds a fresh taste. You can also try basil or thyme for a unique twist. Each herb will change the drink’s flavor, so feel free to experiment! This blog post covered how to make a refreshing blackberry and sage mocktail. We discussed the key ingredients, step-by-step instructions, and useful tips to enhance your drink. You also learned about fun variations, storage methods, and answers to common questions. I hope you feel inspired to create your own tasty mocktail. With simple steps, you can impress friends and enjoy delicious flavors.

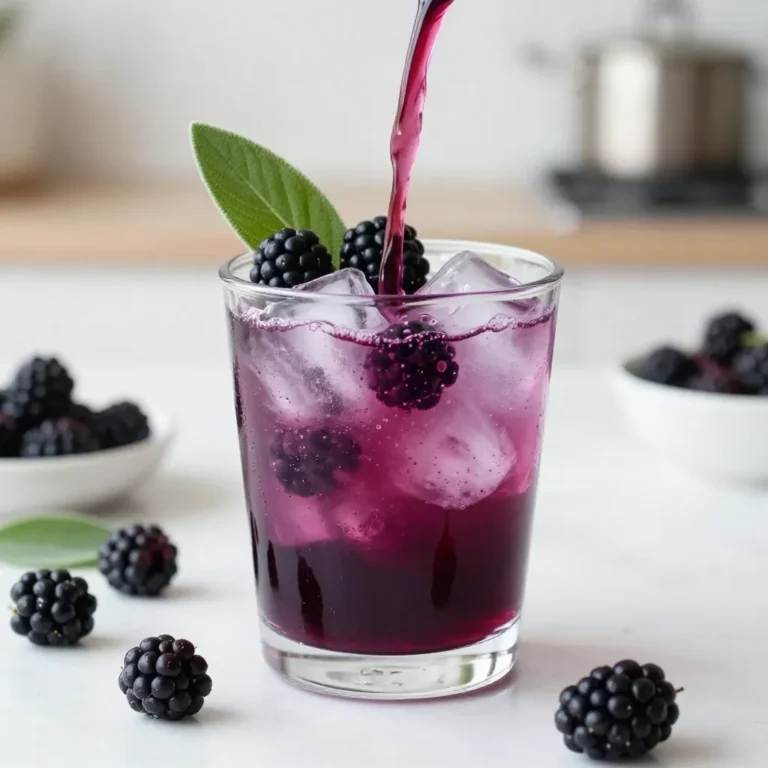
Blackberry Sage Mocktail Refreshing Summer Delight

- 8 oz spaghetti or linguine - 2 medium zucchinis - 1 lb large shrimp - 2 cups cherry tomatoes - 3 cloves garlic - 3 tablespoons olive oil - 1 teaspoon red pepper flakes - Salt and pepper - Fresh basil leaves, for garnish - Grated Parmesan cheese (optional) For this Tomato Zucchini Shrimp Pasta, I love using simple, fresh ingredients. The main ones are spaghetti or linguine, which gives a nice base. Zucchini adds a sweet crunch. Large shrimp not only taste great, but they also cook quickly. Next, I add cherry tomatoes that burst with flavor when heated. Garlic brings a lovely aroma and depth. Olive oil is the heart of this dish, helping to combine everything nicely. For a little kick, I use red pepper flakes. Salt and pepper are must-haves for basic seasoning. Finally, fresh basil leaves give a bright touch on top. If you love cheese, sprinkle some grated Parmesan for extra flavor. These ingredients come together to create a delightful, colorful dish. Each bite is a mix of flavors and textures that make dinner exciting. You can easily find these items at any grocery store. {{ingredient_image_2}} To start, fill a large pot with water. Add a generous amount of salt. Bring the water to a rolling boil. This usually takes about 10 minutes. Once boiling, add 8 ounces of spaghetti or linguine. Cook according to package directions until al dente. This means the pasta should be firm but not hard. Before draining, save half a cup of the starchy pasta water. This water helps to make the sauce creamy. Drain the pasta and set it aside. Next, heat 2 tablespoons of olive oil in a large skillet over medium heat. Wait until the oil is hot. Add 1 pound of peeled and deveined shrimp to the skillet. Cook the shrimp for 2 to 3 minutes. Stir occasionally until they turn pink and opaque. This color change shows they are cooked. Season them lightly with salt and pepper. Once done, remove the shrimp from the skillet and place them on a plate. Set them aside for later. In the same skillet, add 1 tablespoon of olive oil. Heat it until hot. Then, add 3 cloves of minced garlic and 1 teaspoon of red pepper flakes. Sauté for about 30 seconds. You want it fragrant but not browned. Next, add the sliced zucchinis and 2 cups of halved cherry tomatoes. Cook these for another 4 to 5 minutes. Stir occasionally until the zucchinis are tender but still bright in color. This keeps the dish fresh and appealing. To make this dish pop, adjust the seasoning to your taste. Start with salt and pepper. You can add more red pepper flakes for heat. A squeeze of lemon juice adds bright notes. Don’t forget the lemon zest! It brings a fresh aroma and flavor. Using reserved pasta water is key. The starchy water helps bind the sauce. If the pasta seems dry, add a little at a time until creamy. Stir well to mix everything. This technique keeps your pasta moist and smooth. For a lovely presentation, plate the pasta in shallow bowls. Drizzle a bit of olive oil on top. A twist of lemon on the side looks great. For extra flavor, sprinkle grated Parmesan cheese. Fresh basil leaves add color and taste. Pro Tips Fresh Ingredients Matter: Use the freshest shrimp and vegetables you can find for the best flavor and texture in your pasta dish. Customize the Heat: Adjust the amount of red pepper flakes to your taste; you can omit them entirely for a milder dish. Perfect Pasta Cooking: Make sure to cook the pasta al dente; it will continue to cook slightly when combined with the hot shrimp and vegetables. Enhance with Herbs: Don't hesitate to experiment with different herbs like parsley or oregano to add even more flavor to your dish. {{image_4}} You can easily swap shrimp for other proteins. Chicken or scallops work great. If you prefer a vegetarian option, try chickpeas or tofu. Just cook them until they are golden. This adds a nice texture to your dish. For pasta, you can use any type you like. Whole wheat or gluten-free pasta are good choices. They will change the flavor and texture slightly but still taste great. Just remember to adjust cooking times based on the pasta type. Adding more veggies can make this dish even better. Consider bell peppers, spinach, or asparagus. They will add color and crunch. You can mix and match based on what you like or have at home. To make this meal vegetarian-friendly, skip the shrimp and load up on extra veggies. You can use zucchini and cherry tomatoes as the base. This option is still tasty and filling. If you like heat, adjust the red pepper flakes. Add a little more for a spicy kick. You can also try using fresh chili peppers. They bring a different flavor and heat level. For herbs, basil is a classic choice. However, you can also use parsley or oregano. Fresh herbs add bright flavors and make your dish look beautiful. Just sprinkle them on top when serving. To keep Tomato Zucchini Shrimp Pasta fresh, store it in an airtight container. Allow the dish to cool to room temperature before sealing. This prevents moisture buildup inside the container. The pasta will last for about 3 days in the fridge. After that, the flavors and texture may change. When you’re ready to enjoy your leftovers, the best method is using a skillet. Heat it over medium-low heat. Add a splash of olive oil or reserved pasta water to keep it moist. Stir gently until warmed through. This way, the pasta stays creamy and the shrimp does not become rubbery. You can also use the microwave, but be careful not to overheat it. Yes, you can freeze this dish! However, it’s best to freeze the pasta and shrimp separately from the vegetables. This helps maintain texture. Place the cooled pasta in a freezer-safe bag or container. Use it within 2 months for the best taste. To reheat, thaw it overnight in the fridge, then use the skillet method for warming. Making Tomato Zucchini Shrimp Pasta takes about 30 minutes. You will spend 10 minutes prepping the ingredients. Cooking the pasta and shrimp takes the remaining 20 minutes. This dish is quick and perfect for busy weeknights. Yes, you can prepare some parts ahead of time. Chop the zucchini and tomatoes. You can also peel and devein the shrimp in advance. Store them in the fridge until you're ready to cook. When you are ready to eat, just follow the cooking steps. This saves time and makes dinner easy! You can use chicken or scallops instead of shrimp. For a vegetarian option, try chickpeas or tofu. Both are great choices and will change the dish's taste. You can also add more veggies like bell peppers or mushrooms for extra flavor. This blog post shows you how to make Tomato Zucchini Shrimp Pasta. We covered the key ingredients, from shrimp to zucchini, and provided easy step-by-step instructions. I shared tips to enhance flavor and texture. You learned about variations and storage options to keep it fresh. Cooking should be enjoyable. With this dish, you can impress family or friends. Try this recipe for a tasty meal that fits your taste and needs. Enjoy your cooking adventure!

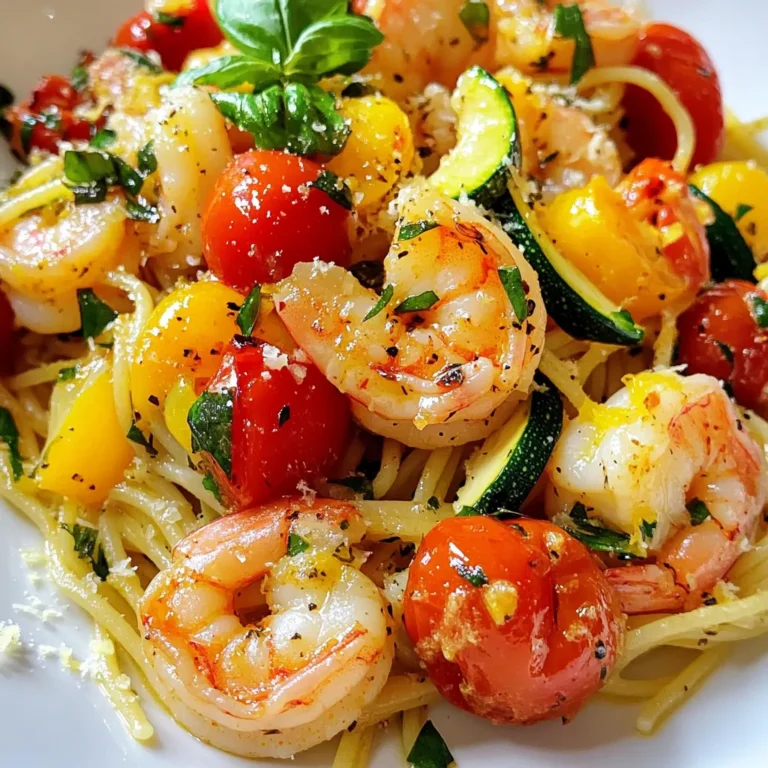
Tomato Zucchini Shrimp Pasta Flavorful and Easy Recipe

- 4 cups fresh corn kernels (about 6-7 ears of corn) Using fresh corn gives this dish a sweet taste. Shucking the corn is easy. Just peel back the husks and remove the kernels. You can use a sharp knife to cut the kernels off the cob. - 1/4 cup unsalted butter - 1/4 cup honey Butter adds richness, while honey brings natural sweetness. When you melt the butter and mix in the honey, it creates a tasty base for the corn. The blend makes every bite sweet and creamy. - 1 teaspoon garlic powder - 1/2 teaspoon smoked paprika - Salt and pepper to taste - Fresh parsley or chives, chopped (for garnish) Garlic powder adds a savory touch. Smoked paprika gives a hint of warmth. Adjust salt and pepper to fit your taste. For a pop of color, sprinkle fresh parsley or chives on top. This makes the dish look and taste even better. {{ingredient_image_2}} Start by shucking the corn. Take each ear and pull off the husks. Remove the silk strands too. Use a sharp knife to slice off the kernels. Aim for about 4 cups of fresh corn. Set the kernels aside in a bowl. This step is key for a tasty dish. In a large skillet, add 1/4 cup of unsalted butter. Turn the heat to medium. Watch as the butter melts. Swirl the pan to help it melt evenly. Once melted, pour in 1/4 cup of honey. Stir the mix for about a minute. You want it to bubble gently. Keep an eye on it to avoid burning. Now it's time to add the corn! Pour the fresh kernels into the skillet. Stir well so each kernel gets coated. Then, sprinkle 1 teaspoon of garlic powder and 1/2 teaspoon of smoked paprika over the corn. Mix thoroughly to blend the flavors. Cook the corn for about 8 to 10 minutes. Stir occasionally, watching it turn tender and caramelized. When the corn is done, season it with salt and pepper. Taste it to find the right balance for you. Carefully transfer the sweet corn to a serving dish. Leave any extra juices in the skillet. For a fresh touch, sprinkle chopped parsley or chives on top. This adds color and a hint of flavor to your dish. Enjoy your honey butter skillet corn! To get that sweet, golden color, use fresh corn. Fresh corn kernels caramelize better than frozen ones. Cook on medium heat, and stir often. This helps the corn cook evenly. If the corn sticks, add a little more butter. Watch for browning, but don't let it burn. You want a nice, rich color. You can change the taste easily! Add more garlic powder for a stronger flavor. If you love spice, try cayenne pepper or chili powder. For a smoky hint, increase the smoked paprika. Don't forget to taste as you go. Adjust salt and pepper to find your perfect balance. Also, consider adding a squeeze of lime for brightness. One big mistake is cooking on too high heat. This can burn the butter and corn. Always use medium heat for the best results. Another mistake is not stirring enough. Stirring helps the corn cook evenly and prevents burning. Lastly, don’t skip the seasoning. Salt and pepper bring out the flavors. Remember, taste is key! Pro Tips Use Fresh Corn: For the best flavor and texture, use fresh corn kernels. If fresh corn is not available, frozen corn can be a good alternative, but make sure to thaw and drain it well before cooking. Adjust Sweetness: Depending on your preference, you can adjust the amount of honey in the recipe. For a less sweet dish, reduce the honey to 2 tablespoons and taste as you go. Experiment with Spices: Feel free to customize the spices in this recipe. Adding a pinch of cayenne pepper can give it a nice kick, or you can try using fresh herbs like thyme or rosemary for added flavor. Perfect Garnish: For the freshest taste, add the chopped parsley or chives just before serving. This will ensure they retain their vibrant color and flavor, enhancing the overall presentation of your dish. {{image_4}} You can spice up your honey butter skillet corn easily. Try adding a pinch of cayenne pepper for heat. This will give your dish a nice balance of sweet and spicy. You can also use chili powder if you want a different flavor. If you enjoy herbs, consider adding fresh thyme or oregano. These will enhance the taste and make it more aromatic. While honey is the star, other sweeteners can also work. Maple syrup offers a rich, earthy sweetness. You can use agave nectar for a milder taste. If you prefer a sugar-free option, try stevia or monk fruit sweetener. Both will keep your dish sweet without added calories. This way, you can enjoy the dish, no matter your dietary needs. If you want a vegan option, swap the butter for vegan butter or coconut oil. Both will still give a creamy texture. Replace honey with agave nectar or maple syrup for sweetness. This way, you keep the dish delicious and suitable for everyone. You can enjoy honey butter skillet corn in many ways, making it a flexible side for any meal. Once you finish your honey butter skillet corn, let it cool. Place the leftovers in an airtight container. Store it in the fridge for up to four days. This keeps the corn fresh and flavorful. If you want to enjoy it later, make sure to seal it well. When you are ready to eat the leftover corn, you have a few options. You can use the microwave for quick heating. Place the corn in a microwave-safe bowl, cover it, and heat for 1-2 minutes. Stir halfway through to heat evenly. You can also reheat it on the stove. Just add a little butter in a skillet over medium heat. Stir the corn for about five minutes until it’s hot. For longer storage, you can freeze the honey butter skillet corn. First, let it cool completely. Then, place it in a freezer-safe bag or container. Remove as much air as possible to avoid freezer burn. It will keep well for up to three months. When you want to eat it, thaw the corn overnight in the fridge. Reheat it as mentioned above. Enjoy the sweet and smoky flavor even after freezing! Yes, you can use frozen corn for this recipe. Just thaw it before cooking. Frozen corn works well, but fresh corn has a better flavor and texture. If you use frozen corn, reduce the cooking time by a few minutes. This way, it warms through without getting mushy. Honey butter skillet corn lasts about 3-4 days in the fridge. Store it in an airtight container. When you want to eat it again, just reheat it on the stove or in the microwave. If you notice any off smells or colors, it's best to toss it out. You can serve honey butter skillet corn with many dishes. It goes great with grilled meats like chicken, steak, or fish. You can also pair it with tacos or a fresh salad. The sweet and smoky flavors make it a perfect side for barbecues and summer gatherings. Yes, this recipe is great for meal prep. You can make it ahead of time and store it in the fridge. The sweet corn adds flavor to your meals throughout the week. Just remember to reheat it gently to keep the corn tender and tasty. This post shared all you need to know about making honey butter skillet corn. We covered fresh corn kernels, sweeteners, fats, and seasonings. You learned step-by-step instructions for preparing and cooking the dish. Tips showed how to caramelize it just right and avoid common mistakes. You also discovered fun variations and storage tips. Now you can make this dish your own. Enjoy every bite and share it with friends. Happy cooking!

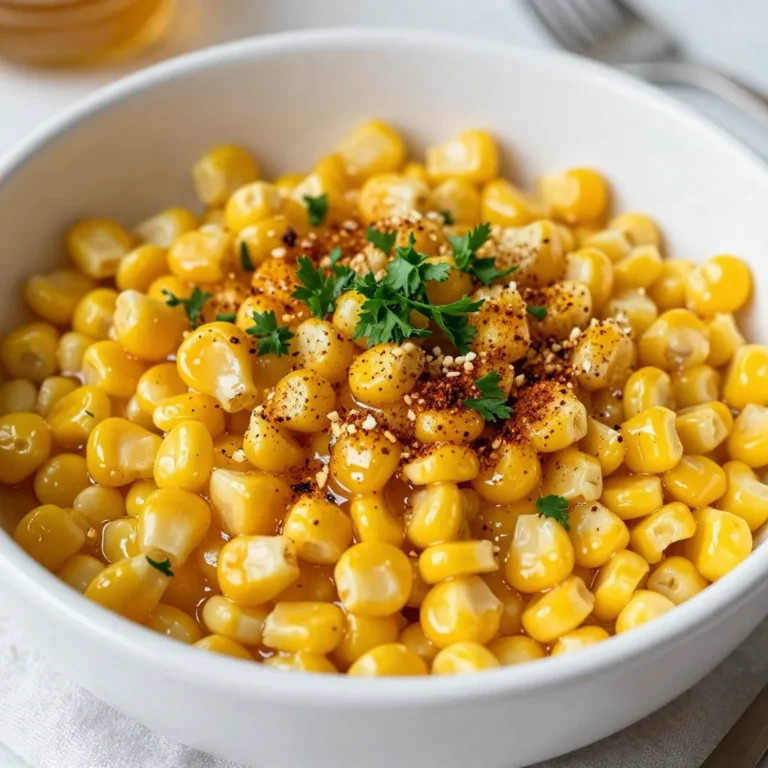
Honey Butter Skillet Corn Simple and Flavorful Side

- 2 cups all-purpose flour - 1 teaspoon baking powder - 1/2 teaspoon baking soda - 1/4 teaspoon salt - 1 teaspoon ground cinnamon - 1/2 teaspoon ground nutmeg These dry ingredients form the base of our cookies. The all-purpose flour gives the cookies structure. Baking powder and baking soda help them rise. Salt enhances the flavors. The spices, cinnamon and nutmeg, add warmth and holiday cheer. - 1/2 cup unsalted butter, softened - 3/4 cup powdered sugar - 1 large egg - 1 teaspoon pure vanilla extract - 1/4 teaspoon almond extract Using softened butter allows for better creaming with sugar. Powdered sugar gives a sweet taste and adds a nice texture. The egg binds everything together. Vanilla and almond extracts add a lovely aroma and flavor. - 1 cup mixed dried fruits (raisins, currants, candied orange peel) - 1/2 cup chopped nuts (almonds or walnuts) - 1/4 cup fresh lemon zest Mixed dried fruits bring sweetness and chewiness. Raisins and currants add flavor depth. Candied orange peel gives a burst of citrus. Chopped nuts add crunch, while lemon zest brightens the overall taste. These ingredients together create a delightful mix, perfect for holiday cheer. {{ingredient_image_2}} 1. Preheat the oven and prepare the baking sheet: Start by setting your oven to 350°F (175°C). Line a baking sheet with parchment paper. This helps the cookies not stick. 2. Mix dry ingredients in a bowl: In a medium bowl, whisk together these dry items: - 2 cups all-purpose flour - 1 teaspoon baking powder - 1/2 teaspoon baking soda - 1/4 teaspoon salt - 1 teaspoon ground cinnamon - 1/2 teaspoon ground nutmeg Mix until all is blended well. 3. Cream butter and sugar: In a large bowl, use an electric mixer. Cream together 1/2 cup softened unsalted butter and 3/4 cup powdered sugar. Beat this for about 2-3 minutes. The mix should look light and fluffy. 4. Incorporate eggs and extracts: Add 1 large egg, 1 teaspoon pure vanilla extract, and 1/4 teaspoon almond extract to the butter-sugar mix. Beat again until everything is smooth and well combined. 5. Fold in mix-ins, form and flatten cookies: Gradually add the dry mix to the wet mix. Stir gently with a spoon. Next, fold in: - 1 cup mixed dried fruits (like raisins, currants, and diced candied orange peel) - 1/2 cup chopped nuts (almonds or walnuts) - 1/4 cup fresh lemon zest Take a tablespoon of dough and roll it into a ball about 1 inch wide. Place these balls on the baking sheet, leaving space between them. Flatten each ball slightly with your hand. 6. Bake and cool cookies: Place the baking sheet in the oven. Bake for 12-15 minutes. The edges should be lightly golden. After baking, cool the cookies on the sheet for 5 minutes. Then transfer them to a wire rack to cool completely. Dust with more powdered sugar for a festive finish. To bake German Stollen Cookies perfectly, follow these steps: - Preheat your oven to 350°F (175°C). This step is key for even baking. - Line your baking sheet with parchment paper. This keeps cookies from sticking. - Use a cookie scoop for uniform sizes. Aim for 1-inch balls. - Space each cookie about 2 inches apart. This allows for spreading during baking. - Flatten each ball slightly with your palm. This helps them bake evenly. Adding spices and zests can boost flavors: - Consider adding a pinch of nutmeg or ginger. These spices add warmth. - Fresh lemon zest brightens the flavor profile. Use zest from one medium lemon. - Experiment with other nuts. Almonds and walnuts both work well in this recipe. Presentation elevates your cookies for the holidays: - Arrange cookies on a festive platter. A colorful plate makes them pop. - Dust the tops with powdered sugar for a snowy effect. This adds a lovely touch. - For added charm, place sprigs of evergreen or a cinnamon stick beside the cookies. Pro Tips Use Fresh Ingredients: Ensure your dried fruits and nuts are fresh for the best flavor. Stale ingredients can diminish the taste and texture of your cookies. Chill the Dough: For a firmer dough that’s easier to handle, consider chilling it for 30 minutes before forming the cookies. This helps maintain their shape while baking. Bake in Batches: If you have multiple trays of cookies, bake them in batches to ensure even cooking. Rotate the trays halfway through for consistent baking results. Experiment with Spices: Feel free to add more spices like cardamom or ginger to personalize the flavor profile of your Stollen cookies and make them your own. {{image_4}} German Stollen Cookies can change based on where you are. You can use many dried fruits. Try raisins, currants, or diced candied orange peel. Each option gives a unique taste. You can also mix different nuts. Almonds and walnuts are common, but pecans or hazelnuts work too. You can change the spices, too. Instead of cinnamon and nutmeg, try cardamom or ginger. These swaps can make your cookies special. Some people need different options. If you want gluten-free cookies, use a gluten-free flour blend. This will help keep the texture right. If you need vegan cookies, swap the egg for a flax egg. Mix one tablespoon of ground flaxseed with three tablespoons of water, then let it sit. Replace butter with coconut oil or a plant-based butter. These changes still give you a tasty cookie. For a festive twist, add chocolate or peppermint. You can mix in chocolate chips or use peppermint extract. This adds a fun flavor for the holidays. You can also try fun sugaring techniques. After baking, roll the cookies in powdered sugar. This gives a snowy look. You can also mix in colored sugar for a bright touch. These ideas make your Stollen Cookies perfect for any holiday gathering. To keep your German Stollen cookies fresh, use a container with a tight seal. This helps keep air out. A glass jar or a plastic container works great. You can also use a cookie tin for a fun look. Store cookies at room temperature. They stay soft and tasty this way. Avoid putting them in the fridge, as it can dry them out. You can freeze Stollen cookies for later. To do this, let them cool completely. Place them in a single layer on a baking sheet. Once frozen, transfer them to a freezer-safe bag or container. This keeps them safe from freezer burn. If you want to freeze the dough, shape it into balls first. Wrap each ball in plastic wrap before placing them in a bag. When you’re ready to bake, take them out and let them thaw in the fridge overnight. To thaw cookies, leave them at room temperature for a few hours. This helps keep the texture nice. You can also warm them in the oven for a few minutes for a fresh-baked taste. German Stollen cookies can last about one week at room temperature. Look for signs of spoilage, like a hard texture or off smell. If they feel dry or crumbly, it’s time to toss them. When you freeze them, they can last up to three months. Check for freezer burn, which looks like white spots. If you see this, the cookies may not taste good. Always enjoy your cookies while they are fresh for the best flavor! Stollen cookies are a fun twist on the classic German Stollen bread. Stollen has a rich history dating back to the 14th century in Germany. This bread often includes fruits, nuts, and spices, making it a festive treat. Stollen is usually shaped like a loaf, resembling a swaddled baby, representing the Christ child. Over time, bakers turned this festive bread into cookies, making it easier to share and enjoy during the holidays. To make your Stollen cookies soft, use room temperature butter. Softened butter blends better with sugar. This step helps create a lighter texture. Don't overmix the dough after adding the dry ingredients. Overmixing can lead to tough cookies. Also, adding fresh lemon zest adds moisture and flavor. Lastly, try baking them just until they are set and lightly golden. This keeps them tender and delicious. Yes, you can make Stollen cookies ahead of time! You can prepare the dough and chill it in the fridge for up to two days. This allows the flavors to meld. You can also freeze the dough for up to three months. Just scoop the dough into balls and freeze them on a baking sheet. Once frozen, store them in a container. When you’re ready to bake, no need to thaw; just add a few extra minutes to the baking time. For already baked cookies, store them in an airtight container at room temperature for up to a week. In this article, we explored the vital ingredients and steps to bake delicious Stollen Cookies. We covered essential dry and wet ingredients, flavorful additions, and tips for perfect baking. Remember to adjust flavors based on your taste and use proper storage methods for freshness. Stollen Cookies can bring joy to any season, whether for holidays or family gatherings. Baking is fun, so experiment with your favorite mix-ins and variations. Enjoy making your own tasty treats and impressing friends and family with your skills!

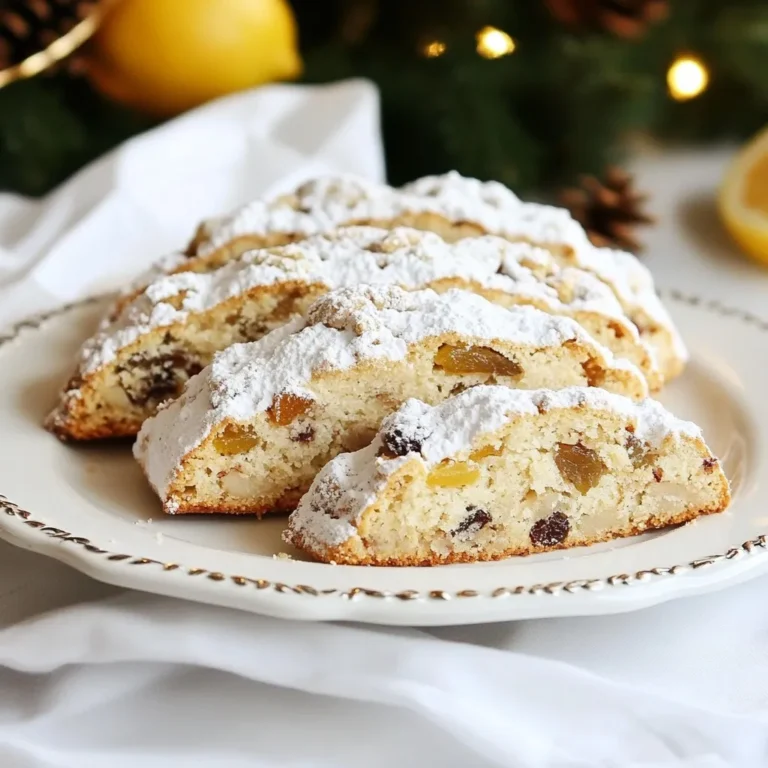
German Stollen Cookies Delightful Holiday Treats

To make these tasty Chocolate Peanut Butter Energy Bars, you'll need the following: - 1 cup rolled oats - 1/2 cup natural peanut butter - 1/3 cup honey or maple syrup - 1/4 cup unsweetened cocoa powder - 1/4 cup protein powder (optional for an extra boost) - 1/4 teaspoon salt - 1/2 teaspoon vanilla extract - 1/2 cup dark chocolate chips - 1/4 cup chopped nuts (choose from almonds, walnuts, or your preference) - 1/4 cup dried fruit (try raisins, cranberries, or chopped apricots) These ingredients blend together to create a chewy snack. Each one plays a key role. Rolled oats provide a hearty base. They give the bars structure and fiber. Natural peanut butter adds creaminess and healthy fat. It also brings a rich flavor. Honey or maple syrup serves as the sweetener. It binds the ingredients while adding a touch of sweetness. Cocoa powder brings the chocolate taste we love. If you want extra protein, the protein powder is perfect. A little salt enhances the overall flavor. Vanilla extract adds a subtle warmth, making the bars more inviting. Dark chocolate chips offer little bursts of rich chocolate. Chopped nuts add crunch and healthy fat. Lastly, dried fruit gives a sweet and chewy contrast. You can mix and match these ingredients to suit your taste. This list ensures a balanced and delicious snack. {{ingredient_image_2}} Start by getting an 8x8 inch baking pan. Line it with parchment paper. Leave some paper hanging over the edges. This helps lift the bars out later. Grab a big mixing bowl. Add 1 cup of rolled oats, 1/4 cup of cocoa powder, and 1/4 teaspoon of salt. If you want more protein, add 1/4 cup of protein powder. Stir everything together with a whisk or spoon until it blends well. Now, take a separate bowl that is safe for the microwave. In this bowl, mix 1/2 cup of natural peanut butter and 1/3 cup of honey or maple syrup. Heat it in the microwave on low for 20-30 seconds. This softens the mix. After heating, add 1/2 teaspoon of vanilla extract and stir until you have a smooth mix. Pour the peanut butter mix into the bowl with dry ingredients. Mix it all together until everything is coated. If it feels too dry, add a bit more honey or peanut butter. You want it to stick together well. Next, fold in 1/2 cup of dark chocolate chips, 1/4 cup of chopped nuts, and 1/4 cup of dried fruit. Make sure these goodies spread evenly. This way, each bite will be tasty. Transfer the mixture into your lined baking pan. Use a spatula or your hands to press it down firmly. Make sure it is even and packed tightly. This step is key to forming nice bars. Put the pan in the fridge for at least 1 hour. This helps the bars set and hold their shape. After chilling, lift the mixture out using the parchment paper. Place it on a cutting board. Cut it into squares or rectangles based on how big you want the bars. Enjoy these delicious energy bars anytime! To get the right mix, aim for a nice, thick dough. If it feels too dry, add a splash of honey or a spoonful of peanut butter. This extra touch makes the bars stick together better. You want them firm but not too crumbly. Mixing well is key! Feel free to swap ingredients to match your taste. Use almond butter instead of peanut butter. Try agave syrup instead of honey. For a crunch, add seeds like chia or flax. You can even mix in your favorite protein powder for a boost. Adding spices like cinnamon or nutmeg can change the flavor too! Make your bars look great! Wrap them in parchment paper. Tie them with twine for a homemade touch. You can stack them in a clear container for easy grabbing. They also make fun gifts for friends who enjoy healthy snacks. Enjoy these tasty bars anytime! Pro Tips Choose Your Sweetener Wisely: Depending on your preference, you can use honey for a milder sweetness or maple syrup for a vegan option. Adjust the quantity based on your sweetness preference. Experiment with Add-ins: Feel free to customize your energy bars by adding seeds, such as chia or flaxseeds, for extra nutrition, or swap out the nuts and dried fruit to match your taste. Storing Your Bars: Keep the energy bars in an airtight container in the refrigerator for up to a week. For longer storage, consider freezing them, wrapping each bar individually for convenience. Perfecting the Texture: If your mixture seems too crumbly, add more peanut butter or honey. Conversely, if it's too sticky, a sprinkle of oats can help achieve the right texture for pressing. {{image_4}} You can swap peanut butter for other nut butters. Almond butter gives a nice twist. Cashew butter is creamy and rich. Sunflower seed butter works well for nut-free options. Each choice changes the taste but keeps the bars healthy. Get creative with flavors! Add a teaspoon of cinnamon for warmth. A scoop of espresso powder brings out the chocolate. You can also mix in different extracts, like almond or coconut. Try adding zest from an orange or lemon for a fresh touch. The options are endless! Want to boost nutrition? Add chia seeds or flaxseeds for extra fiber. You can mix in a scoop of protein powder for more protein. Dried fruits like apricots or figs add natural sweetness and vitamins. Each enhancement makes the bars not just tasty but also good for you! To keep your chocolate peanut butter energy bars fresh, store them in an airtight container. This helps keep moisture out and protects the bars from drying out. You can place a piece of parchment paper between the layers to prevent them from sticking together. These bars last up to one week in the fridge. If you want to keep them longer, freeze them. Wrap each bar in plastic wrap, then place them in a freezer-safe bag. They will stay fresh for up to three months in the freezer. When you’re ready to eat, just take them out and let them thaw at room temperature. You usually won’t need to reheat these bars. They taste great cold or at room temp. If you prefer them warm, you can microwave them for about 10 seconds. This softens the chocolate and makes for a gooey treat. Enjoy your snack! You can use maple syrup in place of honey. Both options add sweetness and moisture. You could also try agave syrup for a similar taste. If you want a sugar-free option, use mashed bananas or applesauce. Yes, these energy bars are gluten-free! The main ingredient, rolled oats, is naturally gluten-free. Just make sure to choose certified gluten-free oats to avoid cross-contamination. To make these bars vegan, replace honey with maple syrup. Also, ensure the chocolate chips are dairy-free. Many brands offer plant-based chocolate options. Yes, you can use other sweeteners. Brown rice syrup or coconut nectar work well. You can also use stevia or monk fruit sweetener for a low-calorie option. After chilling, the bars should feel firm to the touch. They will hold their shape when cut. If they feel soft, chill them longer until they set properly. You now have a complete guide to making tasty energy bars. From choosing the right ingredients to following the step-by-step instructions, you are set up for success. Remember to mix and match flavors and textures to find what you love. Store your bars well for the best taste and freshness. Enjoy experimenting with variations and tips. These energy bars are easy and fun to make, providing great snacks for any time. Now, go ahead and make your first batch!

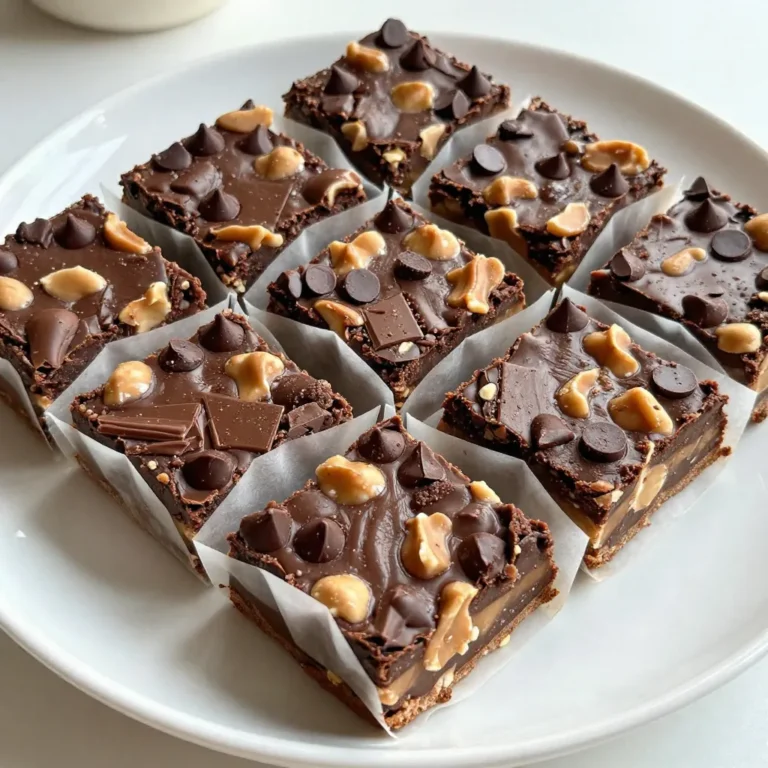
Chocolate Peanut Butter Energy Bars Quick Snack Recipe

- 2 cups cooked rice (white or brown) - 1 cup fresh broccoli florets, steamed - 1 cup sharp cheddar cheese, shredded - 1 cup cream of mushroom soup - 1/2 cup whole milk - 1/2 cup grated Parmesan cheese - Seasonings: garlic powder, onion powder, salt, and pepper For this recipe, you need a mix of fresh and creamy ingredients. The cooked rice serves as a base. You can use white or brown rice, based on your taste. The bright green broccoli adds color and nutrition. Steaming it keeps its crunch. The sharp cheddar cheese is key for a rich flavor. Freshly shredded cheese melts better and tastes great. Cream of mushroom soup adds creaminess. Whole milk makes it even smoother. Parmesan cheese gives a lovely nutty note. Don’t forget to spice it up! Garlic powder and onion powder add depth. Salt and pepper round out the flavors. If you want a crunchy topping, consider adding breadcrumbs, mixed with olive oil. This will create a wonderful texture contrast. Each ingredient plays a role in making the casserole tasty and comforting. {{ingredient_image_2}} 1. Preheat the oven to 350°F (175°C). This will get your oven ready for baking. 2. Combine cooked rice, broccoli, soup, milk, and cheeses. In a big bowl, mix these ingredients well. This helps the flavors blend together. 3. Season and mix evenly. Add garlic powder, onion powder, salt, and pepper. Stir until it is all mixed. 1. Transfer the mixture to a greased casserole dish. Spread it out evenly for the best cooking. 2. Optional: Prepare a breadcrumb topping. If you want a crunchy top, mix breadcrumbs with olive oil in a small bowl. Sprinkle this over the casserole. 3. Bake for 25-30 minutes until golden brown. Look for a bubbly, hot dish with a nice golden color. This dish is easy to make and perfect for any meal. Enjoy! - Using freshly shredded cheese for optimum melting: Freshly shredded cheese melts better than pre-packaged cheese. It gives a creamy and smooth texture to your casserole. I always prefer to shred my cheese right before cooking. - Steaming broccoli to maintain vibrant color and nutrients: Steaming keeps the broccoli bright green and crisp. It also locks in nutrients. I steam it just until tender, so it adds a nice crunch to the dish. - Adjusting seasonings to taste for personal preference: Everyone has different taste buds. Start with a pinch of salt and pepper. Then, taste and add more if needed. You can also add your favorite herbs for a unique twist. - Garnish with chopped parsley for color: A sprinkle of fresh parsley adds a pop of color and freshness. It makes the dish look great on the table. - Pairing with a light salad for a balanced meal: A crisp green salad complements the rich casserole well. It adds a refreshing balance to the meal. You can use mixed greens with a simple vinaigrette for a tasty side. Pro Tips Use Fresh Ingredients: Fresh broccoli and freshly shredded cheese will enhance the flavor and texture of your casserole significantly. Experiment with Cheeses: Feel free to mix in other cheeses like mozzarella or gouda for a unique flavor profile. Make it Ahead: Prepare the casserole a day in advance and refrigerate it. Just pop it in the oven when you're ready to bake. Check for Doneness: Ensure your casserole is cooked through by checking that it’s hot and bubbly in the center before serving. {{image_4}} You can change up the recipe with these fun swaps: - Rice Substitute: Use cooked quinoa instead of rice. Quinoa adds a nutty flavor and is a great protein source. - Cheese Choices: Try mozzarella or gouda for a different taste. These cheeses melt well and bring a creamy texture. - Soup Swap: Replace cream of mushroom soup with cream of chicken or make your own. Homemade soup can bring fresh flavors. If you have diet needs, here are some easy changes: - Gluten-Free Breadcrumbs: Use gluten-free breadcrumbs for a crunchy topping. This keeps everyone happy at the table. - Dairy-Free Options: You can replace cheese and milk with dairy-free versions. Almond milk or cashew cheese work great for a creamy feel. These variations and modifications make Cheesy Broccoli Rice Casserole fit for everyone. Enjoy making it your own! To keep your Cheesy Broccoli Rice Casserole fresh, place it in an airtight container. This method prevents moisture loss and keeps flavors intact. You can store it in the fridge for up to 3-4 days. Make sure to cool the casserole before sealing it away. This step helps avoid steam build-up, which can make it soggy. When you want to enjoy leftovers, you have two good options: the oven or microwave. - Oven Method: Preheat your oven to 350°F (175°C). Place the casserole in a baking dish and cover it with foil to retain moisture. Heat for about 20-25 minutes or until warm. This method keeps the casserole creamy and the topping crispy. - Microwave Method: If you are in a hurry, this is faster. Place a portion on a microwave-safe plate and cover it with a damp paper towel. Heat in short bursts of 30 seconds, checking often. This way, you avoid overcooking and keep the texture nice. To maintain the best flavor and texture, always cover your casserole while reheating. Enjoy every bite! Yes, you can make this casserole ahead of time. Prepare it up to the baking step. Cover it and store it in the fridge for a day. When ready, bake it straight from the fridge. It may need a few extra minutes in the oven. To keep the casserole moist, use enough cream of mushroom soup and whole milk. Freshly shredded cheese also helps with creaminess. Avoid overbaking, as this can dry it out. Check for a bubbly, golden top as your cue. This casserole pairs well with a crisp green salad. You can also serve it with grilled chicken or baked fish. These options add protein to your meal, making it balanced and filling. You now have a complete guide to making Cheesy Broccoli Rice Casserole. You’ve learned about the main ingredients, preparation steps, and helpful tips. This dish is easy to customize and perfect for any meal. Remember to follow the storage tips to keep leftovers fresh. Whether you serve it with a salad or try different cheeses, this casserole will surely delight. Enjoy making and sharing this comforting dish with family and friends. It’s both tasty and satisfying. Happy cooking!

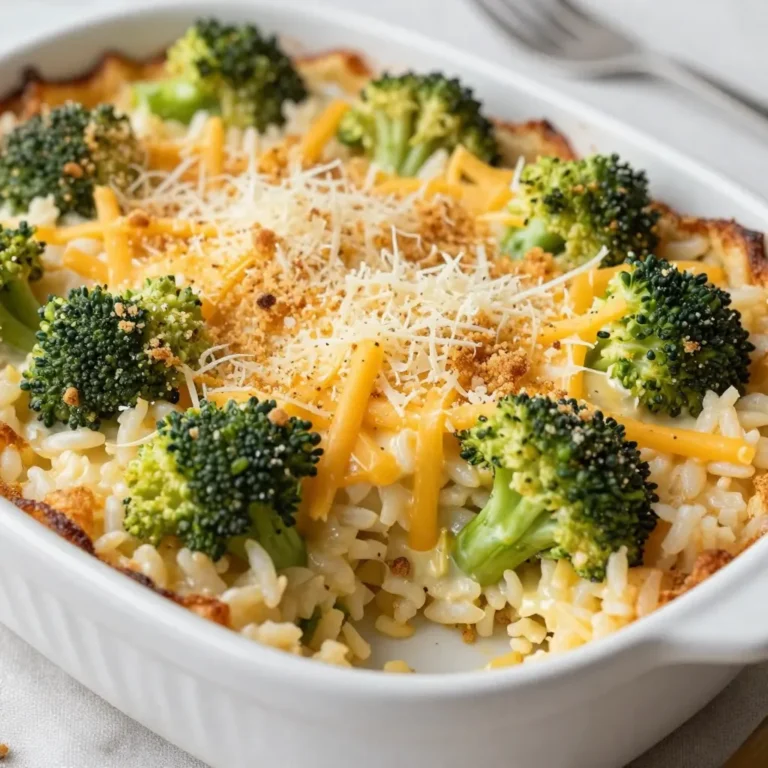
Cheesy Broccoli Rice Casserole Savory Comfort Dish

- 1 ½ cups chocolate cookie crumbs - ½ cup unsalted butter, melted - 2 cups cream cheese, softened - 1 cup granulated sugar - 1 teaspoon pure vanilla extract - 1 teaspoon peppermint extract - Green food coloring (optional) - Fresh mint leaves for garnish - 3 large eggs, room temperature - 1 cup sour cream - ½ cup semi-sweet chocolate chips For this Mint Chocolate Chip Cheesecake, you need a mix of flavors and textures. The chocolate cookie crumbs form a rich, crumbly crust. Melted butter brings everything together. Cream cheese provides the creamy base, and sugar adds sweetness. You can enhance the flavor with vanilla and peppermint extracts. The peppermint gives it that cool taste we love. If you want a pop of color, green food coloring works well. Fresh mint leaves on top add a nice touch when serving. You also need eggs for structure and sour cream for creaminess. Lastly, semi-sweet chocolate chips offer little bites of chocolate throughout the cheesecake. Each ingredient plays a key role in making this dessert delightful and memorable. {{ingredient_image_2}} - Preheat oven to 325°F (163°C). - Grease a 9-inch springform pan with butter or cooking spray. - In a bowl, mix 1 ½ cups chocolate cookie crumbs with ½ cup melted unsalted butter. - Press this crumb mix into the bottom of the pan to form a crust. - Bake the crust for 10 minutes and let it cool completely. - Use an electric mixer to beat 2 cups of softened cream cheese until smooth. - Gradually add 1 cup of granulated sugar, mixing until smooth. - Pour in 1 teaspoon of pure vanilla extract and 1 teaspoon of peppermint extract. Adjust to taste. - Add 3 large eggs one at a time, mixing on low speed after each addition. - Fold in 1 cup of sour cream until smooth. If you want, add a few drops of green food coloring for color. - Gently mix in ½ cup of semi-sweet chocolate chips until evenly spread. - Pour the filling over the cooled crust in the pan. - Bake for 55 to 65 minutes. The edges should be set, but the center should jiggle slightly. - Turn off the oven and crack the door open. Let the cheesecake cool in the oven for 1 hour. - Once cooled, move the cheesecake to the fridge. Chill for at least 4 hours or overnight for best results. - Avoid overmixing for a fluffy texture. This keeps your cheesecake light and airy. - Use room temperature ingredients for better mixing. Cold cream cheese can cause lumps. - Customize mint flavor with peppermint extract. Start with one teaspoon and taste. - Consider chocolate variations for added flavor. You can use dark chocolate chips for a richer taste. - Use fresh mint for an elegant finish. Place a few leaves on top before serving. - Add chocolate shavings or whipped cream for extra flair. These make the cake look special and inviting. Pro Tips Choose the Right Extract: Adjust the amount of peppermint extract based on your personal taste preference; start with a small amount and increase as desired for a stronger mint flavor. Prevent Cracking: Allow the cheesecake to cool slowly in the oven with the door ajar after baking. This helps prevent cracks from forming on the surface. Use Room Temperature Ingredients: Ensure all your dairy ingredients, especially cream cheese and eggs, are at room temperature. This helps achieve a smooth and creamy batter. Chill Overnight: For the best texture and flavor, refrigerate the cheesecake overnight before serving. This allows the flavors to meld and the cheesecake to firm up perfectly. {{image_4}} To create a chocolate mint swirl, start by making a chocolate ganache. Simply heat ½ cup of heavy cream until it simmers. Then, pour it over 1 cup of semi-sweet chocolate chips in a bowl. Stir until smooth. Once your cheesecake mixture is ready, pour half of it into your crust. Next, drizzle some ganache on top, then add the remaining cheesecake. Use a knife or skewer to swirl the ganache into the cheesecake. This technique adds a rich, chocolatey twist to your mint chocolate chip cheesecake. If you're looking for a lighter version, swap out regular cream cheese for low-fat cream cheese. You can also replace part of the sour cream with Greek yogurt. This change keeps the creamy texture while cutting down on fat and calories. You may need to adjust the sugar slightly since Greek yogurt can be tangy. This healthier option lets you enjoy the same great taste with fewer calories. For a no-bake cheesecake, use the same ingredients but change the method. Instead of baking, chill the cheesecake in the fridge. Start by mixing the cream cheese and sugar until smooth. Then, fold in the sour cream and chocolate chips. Pour this mixture over your crust and smooth it out. Let it set in the fridge for at least 4 hours. This method gives you a creamy, cool dessert without any baking involved. To store leftovers in the fridge, allow the cheesecake to cool completely. Cover it tightly with plastic wrap. You can also use an airtight container for better protection. This keeps the cheesecake fresh and prevents it from absorbing other fridge odors. To freeze your cheesecake, first, let it chill in the fridge for at least four hours. Then, wrap it well in plastic wrap. Place it in a freezer-safe container. This helps to maintain its taste and texture. When you want to enjoy it again, thaw it in the fridge overnight. This slow thawing gives the best results. Your mint chocolate chip cheesecake can last about 5 days in the fridge. After this, its quality may drop. If you see cracks, or it smells sour, throw it away. These signs mean it has gone bad. Always trust your senses when it comes to food safety. Yes, you can make some swaps for dietary needs. If you want a gluten-free crust, use gluten-free cookie crumbs. For a lower-sugar option, replace granulated sugar with a sugar substitute. You can also use vegan cream cheese for a dairy-free version. If you're out of sour cream, plain yogurt works well too. Making this cheesecake takes about 30 minutes of prep time. After that, it needs around 55 to 65 minutes to bake. Cooling in the oven takes an hour. Finally, chill it in the fridge for at least 4 hours before serving. Total time from start to finish is about 5 hours. Absolutely! This cheesecake stores well. You can make it a day or two in advance. Just keep it in the fridge, covered to prevent drying out. If you need to store it longer, you can freeze it. Just wrap it well and let it thaw in the fridge before serving. Serve this cheesecake chilled for the best taste. You can slice it and add a dollop of whipped cream. Fresh mint leaves on top add a nice touch. If you want more chocolate flavor, sprinkle chocolate shavings over each slice. Enjoy with a cup of coffee or tea for a perfect treat! This blog post provides a detailed guide to making a delicious cheesecake. We covered the main ingredients and how to mix, bake, and cool the cheesecake. You learned helpful tips and variations to enhance your dessert. Making your own cheesecake can be a fun and creative journey. Remember, practice makes perfect. Enjoy the process and share your sweet creations with friends and family.

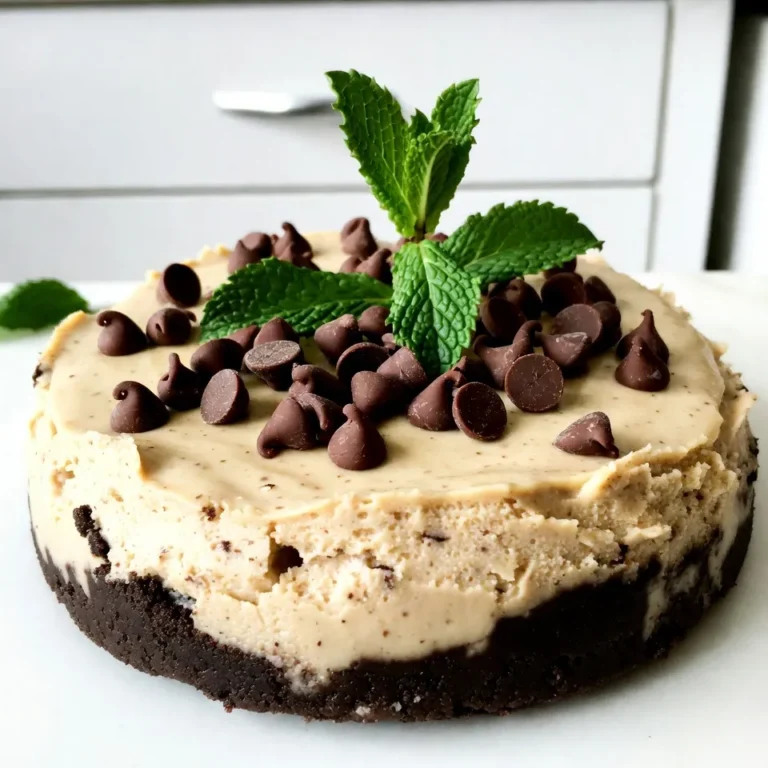
Mint Chocolate Chip Cheesecake Creamy Dessert Delight

- 4 packages (8 oz each) cream cheese, softened - 4 large eggs, at room temperature - 1 cup sour cream, at room temperature - 1 cup granulated sugar - 1 teaspoon vanilla extract The main ingredients create a rich, creamy cheesecake. Cream cheese gives the cheesecake its smooth texture. The eggs bind the mixture and add structure. Sour cream adds tang and creaminess. Sugar sweetens without overpowering the flavors. Vanilla extract enhances the overall taste. - 1 ½ cups graham cracker crumbs - ½ cup unsalted butter, melted - 2 tablespoons granulated sugar The crust is a key part of this cheesecake. Graham cracker crumbs provide a crunchy base. The melted butter helps bind the crumbs together. A bit of sugar adds sweetness to balance the flavors. This combination gives a delightful contrast to the creamy filling. - 1 cup fresh cranberries, rinsed and drained - ½ cup granulated sugar (for cranberry sauce) - 1 cup water - Zest of 1 orange (about 1 tablespoon) The cranberry topping adds a burst of flavor. Fresh cranberries give a tart taste that pairs well with the sweet cheesecake. The sugar helps to sweeten the sauce, while the water creates the right consistency. Orange zest brightens the flavor, making it festive and fresh. {{ingredient_image_2}} First, preheat your oven to 350°F (175°C). In a medium mixing bowl, mix 1 ½ cups of graham cracker crumbs, ½ cup of melted unsalted butter, and 2 tablespoons of granulated sugar. Stir until the mix looks like wet sand. Now, press this mixture into the bottom of a 9-inch springform pan. Make sure to pack it down firmly to form a solid crust. Bake for about 10 minutes or until it turns lightly golden. Once it's done, take it out and let it cool a bit. While your crust cools, grab a large mixing bowl. Use an electric mixer to beat 4 packages of softened cream cheese on medium speed. Mix for about 2 minutes until it’s smooth and creamy. Slowly add 1 cup of granulated sugar and mix well. Then stir in 1 teaspoon of vanilla extract until it’s fully blended. Next, add 4 large eggs, one at a time. Mix well after each egg to make sure it’s all combined. Scrape down the bowl as needed. Finally, gently fold in 1 cup of room temperature sour cream with a spatula. Mix until it’s smooth, but don’t overdo it. Now, let’s make the cranberry sauce. In a small saucepan, combine 1 cup of fresh cranberries, ½ cup of granulated sugar, 1 cup of water, and the zest of 1 orange. Cook this mixture over medium heat for about 10 minutes. You’ll know it’s ready when the cranberries burst and the mix thickens to a sauce-like consistency. Once it’s done, take it off the heat and let it cool a little. Pour the cheesecake batter over the cooled crust in the springform pan. Smooth the top with a spatula. Next, take the cranberry sauce and spoon it over the batter. Use a knife to gently swirl the sauce into the batter for a pretty marbled look. Carefully place the springform pan in the oven. Bake for 50 to 60 minutes. The center should be set but still jiggle slightly. After baking, turn off the oven and leave the cheesecake inside for 1 hour. This helps prevent cracks. Once an hour has passed, take the cheesecake out and let it cool to room temperature. After it cools, cover and refrigerate for at least 4 hours, or ideally overnight. This chilling time improves the flavor and texture, making every bite delicious! To get a smooth cheesecake, always use room temperature ingredients. Cold cream cheese can lead to lumps. Let the eggs and sour cream sit out for about 30 minutes before using. This simple step can change your texture from good to great. Avoid overmixing the batter. Mix just until combined. Overmixing can add too much air, which may lead to cracks. Keep it gentle and smooth for the best results. For a beautiful finish, garnish your cheesecake just before serving. Top it with fresh cranberries and a light dusting of powdered sugar. This adds a pop of color and looks festive. When serving, add a dollop of whipped cream on each slice. This extra touch makes each bite creamy and delightful. You can also serve it with a side of cranberry sauce for added flavor. To prevent cracks in your cheesecake, cool it gradually. After baking, turn off the oven and leave it inside for an hour. This helps it set without sudden temperature changes. Always check for doneness by gently shaking the pan. The center should jiggle slightly. If it shakes wildly, it needs more time. A perfectly baked cheesecake means a happy holiday season! Pro Tips Room Temperature Ingredients: Ensure that your cream cheese, eggs, and sour cream are at room temperature before mixing. This helps to create a smoother batter and prevents lumps. Swirling Technique: When adding the cranberry sauce to the cheesecake batter, use a knife or a skewer to gently swirl it in. This creates a beautiful marbled effect without fully blending the layers. Cooling Method: After baking, leaving the cheesecake in the turned-off oven for an hour allows it to cool gradually, reducing the risk of cracks on the surface. Overnight Chilling: For the best flavor and texture, chill the cheesecake overnight. This allows the flavors to meld and the cheesecake to set properly. {{image_4}} You can change the fruit on top of your cheesecake. Blueberries and raspberries make great choices. They bring a burst of flavor and color. Seasonal fruits like pears or pomegranates can be fun too. These options add variety and keep your dessert fresh. Want to spice things up? Try adding cinnamon or nutmeg to the batter. These spices add warmth to the cheesecake. You can also use flavored extracts like almond or orange. Just a few drops can change the whole flavor. Experimenting is key to making this cheesecake your own. If you need a gluten-free option, swap the graham crackers for almond flour or gluten-free cookies. For those who want a vegan version, use plant-based cream cheese and flax eggs. Coconut cream can replace sour cream too. These swaps allow everyone to enjoy this festive treat without worry. To keep your creamy cranberry holiday cheesecake fresh, you should store it in the fridge. The cheesecake needs to stay cool to maintain its texture and flavor. Cover it tightly with plastic wrap or foil to prevent it from absorbing any smells from the fridge. A sealed container can also work well. This way, your cheesecake stays tasty and fresh for days. If you want to keep the cheesecake for a longer time, you can freeze it. Wrap it well in plastic wrap and then in aluminum foil. This double layer protects the cheesecake from freezer burn. When you're ready to enjoy it, move the cheesecake to the fridge to thaw overnight. This method helps keep its creamy texture intact. Avoid using the microwave, as it can change the cheesecake's consistency. In the fridge, your cheesecake will last about 5 to 7 days. Always check for signs of spoilage before serving. If the cheesecake has a strange smell or looks discolored, it's best to toss it. A fresh cheesecake should have a creamy texture and a lovely cranberry topping. Enjoy your holiday treat while it's at its best! Yes, you can make this cheesecake a day in advance. Making it ahead helps the flavors blend better. After baking, let it cool completely. Then, cover it with plastic wrap. This keeps it fresh in the fridge. It can sit for up to three days before serving. Just remember to add any toppings right before you serve. If you need a substitute for cream cheese, try using Greek yogurt. It gives a nice creamy texture. Another option is mascarpone cheese. It has a similar taste and feel. For a vegan choice, use blended silken tofu. It works well when sweetened. Cracks in cheesecake often come from two main things. First, overbaking can cause cracks. Make sure to check it a little early. The center should jiggle slightly. Second, drastic temperature changes can lead to cracks. Always let the cheesecake cool in the oven after baking. This gradual cooling helps keep it smooth. You learned how to make a delicious cheesecake, from crust to topping. Using the right ingredients gives great flavor and texture. I shared tips to avoid common mistakes and how to make it your own. Whether you try new toppings or variations, you can impress anyone with your cheesecake skills. Enjoy sharing this tasty treat with friends and family, or savor it all for yourself. Just remember to store it well for the best taste. Happy baking!

Creamy Cranberry Holiday Cheesecake Festive Delight

- 1 can (15 oz) black beans, rinsed and drained - 1 cup corn (choose between fresh, frozen, or canned) - 1 red bell pepper, finely diced - 1 small red onion, finely chopped - 1 cup cherry tomatoes, halved - 1 ripe avocado, diced - 1/4 cup fresh cilantro, finely chopped The black beans form a hearty base. They give protein and fiber. Corn adds sweetness and crunch. You can use fresh, frozen, or canned corn based on what you have. The red bell pepper brings a bright flavor and color. The small red onion gives a nice bite. Cherry tomatoes add juiciness and a pop of flavor. The ripe avocado provides creaminess and makes the dish rich. Finally, fresh cilantro adds a burst of freshness. - Juice from 2 limes, freshly squeezed - 2 tablespoons olive oil - 1 teaspoon ground cumin - 1/2 teaspoon smoked paprika - Salt and freshly ground black pepper, to taste The dressing is key in this recipe. Lime juice gives a zesty kick. Olive oil adds smoothness and richness. Ground cumin brings warmth and depth. Smoked paprika adds a subtle smoky flavor. Adjust salt and pepper to your taste. - 1 jalapeño, finely chopped (for an added kick) If you like spice, adding jalapeño is a great choice. It gives heat and flavor. Adjust how much you use based on your spice level. {{ingredient_image_2}} - Mixing the base ingredients In a large bowl, add the rinsed black beans, corn, diced red bell pepper, and halved cherry tomatoes. Stir gently to mix these ingredients well. - Adding the onion and avocado Next, carefully add the finely chopped red onion and diced avocado. Be gentle so you keep the avocado pieces whole. This keeps the salad fresh and pretty. - Incorporating optional jalapeño If you want some heat, now is the time to add the finely chopped jalapeño. You can adjust the amount based on how spicy you like your food. - Whisking together the dressing ingredients In a small bowl, whisk the freshly squeezed lime juice, olive oil, ground cumin, smoked paprika, and a pinch of salt and pepper. Mix until everything is well combined. This dressing adds a zing to the salad. - Drizzling and tossing the salad Drizzle the dressing over the salad mixture. Toss gently to coat all the ingredients. Be careful not to mash the avocado, so it stays intact. Add the chopped cilantro and fold it in. Taste the salad and adjust the seasoning with more salt and pepper if needed. Let the salad rest for at least 10 minutes. This allows the flavors to blend and taste even better. Serve it in a large glass bowl for a colorful display. A garnish of cilantro and lime wedges adds a festive touch. To keep avocado from browning, use lime juice. The acid slows down oxidation. You can also store it in an airtight container. Cover it with plastic wrap, pressing it against the surface. To ensure even seasoning, mix your dressing well. Whisk the lime juice, olive oil, cumin, and paprika until smooth. Taste the dressing first. Adjust salt and pepper as needed before adding it to the salad. For a creative presentation, serve the salad in a large glass bowl. This showcases the bright colors of the ingredients. Garnish with extra cilantro and lime wedges for a festive touch. Pair this salad with proteins like grilled chicken or shrimp. The fresh flavors complement hearty meals well. You can also serve it as a side dish for tacos or burritos. To add more flavor, consider extra spices like chili powder or garlic powder. Start with a small amount. You can always add more. If you like heat, adjust the jalapeño. Add more for a spicier kick. Removing the seeds also helps control the heat level. Pro Tips Freshness Matters: Use fresh ingredients whenever possible, especially the corn and tomatoes, to enhance the flavor and texture of the salad. Perfect Avocado: Choose ripe avocados that yield slightly to pressure for the best creaminess without being overly mushy. Chill for Flavor: Refrigerate the salad for 30 minutes before serving. Chilling allows the flavors to meld together beautifully. Customization: Feel free to customize this salad with other ingredients like diced cucumbers or black olives for added flavor and texture. {{image_4}} If you want to switch things up, try different beans. Kidney beans or pinto beans work great. If you want more texture, black-eyed peas are a fun choice too. For corn, you can use fresh corn on the cob, sweet frozen corn, or canned corn. Each type brings its own taste and crunch. You can also change the dressing. A vinegar-based dressing adds a nice tang. Try apple cider vinegar or red wine vinegar. Adding fresh herbs like basil or parsley gives the salad a new twist. You can also sprinkle in spices like chili powder or garlic powder for extra flavor. This salad is easy to make vegan. Simply ensure that your dressing is free from animal products. For gluten-free options, check that all your ingredients are certified gluten-free. This makes the salad suitable for many diets while keeping it delicious and fresh. To store leftovers of your Fiesta Black Bean Corn Salad, place it in an airtight container. This keeps it fresh and prevents odors from other foods. I recommend using glass containers. They are sturdy and do not stain. Plus, it's easy to see the salad inside! This vibrant salad lasts about 3 to 5 days in the fridge. It may lose some crunch over time, but the flavors still shine. Just remember to check for any signs of spoilage before enjoying it again. You can freeze black bean corn salad, but it's not the best choice. The texture of the vegetables may change after thawing. If you still want to freeze it, store it in a freezer-safe container. Just know it may be better to enjoy it fresh! How to make black bean corn salad spicier? To give your salad some heat, add jalapeño. Chop it finely and mix it in. Start with a small amount to test the spice level. You can always add more! Can I use canned corn instead of fresh corn? Yes, you can use canned corn. Just rinse it well before adding to the salad. This saves time and still tastes great. What are the health benefits of this salad? This salad is packed with nutrients! Black beans are high in protein and fiber. Corn adds vitamins and antioxidants. Avocado gives healthy fats, while veggies boost flavor and health. Is this salad good for meal prep? Absolutely! This salad is perfect for meal prep. It keeps well in the fridge for a few days. Just store it in an airtight container. How many servings does the recipe yield? This recipe yields about 4 to 6 servings. It’s enough to share with friends or enjoy throughout the week. What other vegetables can I add to this salad? You can add many veggies! Try diced cucumbers, chopped carrots, or even corn salsa for more flavor. Get creative and use what you like. Can I add cheese to the salad? Yes, cheese can be a tasty addition! Feta or cotija cheese adds creaminess and a salty kick. Just sprinkle some on top before serving. This blog post covered how to make a delicious black bean corn salad. We discussed the key ingredients, dressing, and optional additions. You learned step-by-step instructions for preparation and serving, plus helpful tips and variations. Remember, you can tailor the salad to your taste and dietary needs. It’s easy to store and perfect for meal prep. Enjoy this fresh and vibrant dish knowing it’s packed with nutrients and flavor. Try it today and impress your family and friends!

Fiesta Black Bean Corn Salad Fresh and Flavorful Dish

- 2 salmon fillets (about 6 ounces each) - 1/2 cup fresh pomegranate seeds - 1 large orange (juiced and zested) - 2 tablespoons honey (preferably raw) - 1 tablespoon high-quality extra virgin olive oil - 2 cloves garlic (finely minced) - Salt and freshly ground black pepper to taste - Fresh parsley (roughly chopped) - Additional pomegranate seeds or orange slices In this dish, fresh salmon fillets shine. They provide a rich, healthy protein source. The pomegranate seeds add a sweet and tart burst of flavor. Orange juice and zest enhance the dish with bright citrus notes. Honey gives a touch of natural sweetness. Using high-quality olive oil not only adds flavor but also healthy fats. Minced garlic brings depth to the marinade. Seasoning with salt and pepper allows the ingredients to stand out. For a beautiful finish, garnish with parsley. It adds a pop of green and freshness. Extra pomegranate seeds or orange slices also make the plate inviting. These simple ingredients come together to create a flavorful and healthy dish that you will love! {{ingredient_image_2}} 1. Preheat the oven: Start by setting your oven to 400°F (200°C). This heat will make the salmon cook just right. 2. Prepare the marinade: In a small bowl, mix the orange juice, orange zest, honey, and minced garlic. Whisk until everything is combined well. 1. Coat the fillets with marinade: Place the salmon fillets in a shallow dish. Pour half the marinade over the fillets. Make sure each piece is coated evenly. 2. Marinate duration and tips: Let the salmon sit in the marinade for about 15 minutes. This time allows the flavors to soak in. If you have more time, you could marinate it longer for a richer taste. 1. Transfer and season the salmon: After marinating, move the salmon to a lined baking sheet. Season each fillet with salt and cracked black pepper. 2. Baking instructions: Drizzle olive oil over the salmon. Scatter pomegranate seeds on top, then pour the rest of the marinade over the fillets. Bake for 15 to 20 minutes. The salmon should flake easily with a fork when it’s done. 3. Resting the salmon after baking: Once baked, take the salmon out of the oven. Let it rest for a couple of minutes. This helps keep the juices inside, making every bite juicy and tender. To marinate salmon well, use fresh ingredients. I suggest letting the salmon soak in the marinade for about 15 minutes. This allows the fish to absorb all those tasty flavors. Make sure you cover the fillets evenly. If you have time, marinating longer boosts the taste even more. How do you know when salmon is cooked? The salmon should flake easily with a fork. It will also change from a bright pink to a lighter shade. Use a meat thermometer; the internal temperature should reach 145°F (63°C). If you follow these tips, you'll cook perfect salmon every time. To boost flavor, consider adding fresh herbs like dill or thyme. Both pair well with the sweetness of the pomegranate and orange. You can also sprinkle some chili flakes for a hint of heat. For added flavor, drizzle a bit of balsamic glaze over the cooked salmon. This adds depth and a touch of sweetness. Another option is to squeeze fresh lemon juice on top just before serving. It brightens the dish and balances the flavors. For plating, use a clean white plate to make the colors pop. Place each salmon fillet on a bed of fluffy quinoa or sautéed greens. This adds texture and brings a fresh taste. Get creative with garnishes! Use extra pomegranate seeds for color. Add some thin orange slices on the side for a bright touch. A sprinkle of chopped parsley on top adds freshness and looks beautiful. Enjoy your presentation as much as the meal itself! Pro Tips Marinate Longer for Depth: For even richer flavor, consider marinating the salmon for 30 minutes to an hour in the refrigerator. This allows the flavors to penetrate the fish more deeply. Use Fresh Pomegranate Juice: If possible, use freshly squeezed pomegranate juice in the marinade for an intensified flavor profile that perfectly complements the salmon. Check for Doneness: To ensure your salmon is perfectly cooked, use a meat thermometer. The internal temperature should reach 145°F (63°C) for safe and delicious results. Experiment with Herbs: Feel free to add other herbs like dill or thyme in addition to parsley for a unique twist on flavor and presentation. {{image_4}} You can swap out honey for maple syrup or agave nectar. This change keeps the dish sweet and tasty. If you want to try a different fish, use trout or tilapia. Both fish work well with the marinade and flavors. You can grill or bake the salmon. Grilling gives a nice smoky taste. Bake it for a simple, hands-off method. If you choose to pan-sear, heat oil in a skillet. Sear the salmon for a few minutes on each side. This method gives a crispy outside and a tender inside. Adding spices can change the taste a lot. Try cumin for warmth or smoked paprika for depth. You can also mix in fruits like mango or kiwi. These fruits add a fresh twist to the dish and pair well with the pomegranate and orange. To keep your salmon fresh, use airtight containers. Glass or plastic containers work best. Store your leftovers in the refrigerator. They will stay good for up to three days. Make sure to let the salmon cool before sealing. If you want to freeze salmon, wrap it tightly in plastic wrap. Place it in a freezer-safe bag. This keeps air out and prevents freezer burn. You can freeze the salmon for up to three months. When you're ready to eat it, defrost it in the fridge overnight. This keeps the fish safe and tasty. To reheat salmon, use the oven or a skillet. Set your oven to 250°F (120°C). Place the salmon on a baking sheet and cover it with foil. Heat for about 15 minutes. If using a skillet, add a little olive oil over low heat. This will help keep it moist. Avoid using a microwave, as it can make the salmon dry. The best way to cook salmon is to use the oven. Baking keeps the fish moist and tender. Here are some tips for different cooking methods: - Baking: Preheat your oven to 400°F (200°C). Bake for 15 to 20 minutes. - Grilling: Preheat the grill. Cook each side for about 4 to 6 minutes. - Pan-searing: Heat oil in a pan over medium heat. Cook skin-side down for 6 to 7 minutes. - Broiling: Set your oven to broil. Place the salmon about 6 inches from the heat and cook for 6 to 8 minutes. Each method brings out unique flavors and textures. Yes, you can use frozen salmon. Just follow these guidelines: - Thawing: Take the salmon out of the freezer and place it in the fridge for 12 to 24 hours. - Quick Thawing: If you're short on time, seal the salmon in a bag. Submerge it in cold water for about an hour. - Cooking from frozen: If you don’t thaw, add 5 to 10 extra minutes to your cooking time. Frozen salmon can still taste great when cooked properly. You can know when salmon is done by checking a few indicators: - Color: The salmon should change from a translucent pink to an opaque pink. - Flaking: Use a fork to gently flake the fish. If it flakes easily, it's done. - Internal temperature: The ideal internal temperature is 145°F (63°C). Keeping an eye on these signs ensures your salmon is perfectly cooked. This blog provided a clear path to making a delicious salmon dish. We covered key ingredients like salmon, pomegranate, and orange juice. Detailed steps for preparing, marinating, and cooking the salmon made it easy to follow. Tips on storage and variations added extra value. Try different herbs or spices to personalize it. Enjoy the beautiful presentation with garnishes. With these insights, you can create a tasty meal everyone will love. Happy cooking!

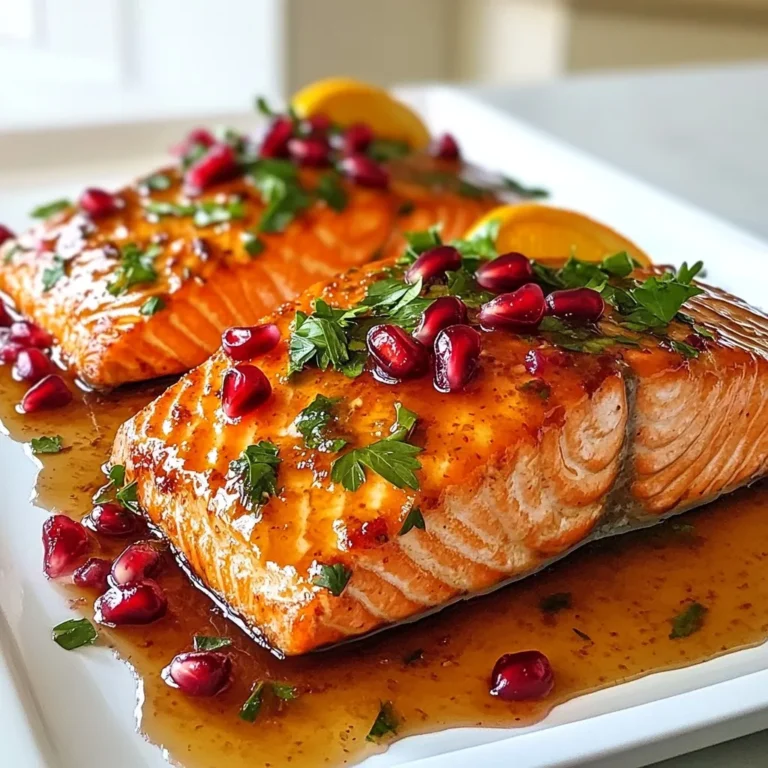
Pomegranate Orange Salmon Flavorful and Healthy Dish

PREV 1 … 4 5 6 … 47 NEXT
meal plan mapper

explore

DessertsDinnerAppetizersDrinks

Our Policies

  • Cookie Policy
  • Copyright Policy
  • Disclaimer
  • GDPR Policy
  • Terms Of Use
Back to Top
  • About
  • Contact Us
  • Privacy Policy
© 2025 meal plan mapper