FREE DINNER EBOOK! Get your copy!
  • Cookie Policy
  • GDPR Policy
  • Disclaimer
  • Terms Of Use
  • Visit my other site: Fun Cookie Recipes
meal plan mapper
  • Home
  • Dinner
  • Desserts
  • Drinks
  • Appetizers
  • Contact
  • About
  • Privacy Policy
  • Home
  • Dinner
  • Desserts
  • Drinks
  • Appetizers
  • Contact
  • About
  • Privacy Policy
  • Cookie Policy
  • GDPR Policy
  • Disclaimer
  • Terms Of Use
Visit my other site: Fun Cookie Recipes

HOME / CATEGORIES /

Latest

To make delicious banana Nutella swirl muffins, you need: - 3 ripe bananas, thoroughly mashed - 1/3 cup unsalted butter, melted - 1/2 cup granulated sugar - 1 large egg, lightly beaten - 1 teaspoon pure vanilla extract - 1 teaspoon baking soda - A pinch of salt - 1 cup all-purpose flour - 1/3 cup Nutella (chocolate-hazelnut spread) - Optional: 1/4 cup chopped walnuts or pecans for added crunch You can swap some ingredients based on what you have: - Use plant-based butter instead of unsalted butter for a dairy-free option. - Substitute brown sugar for granulated sugar for a richer flavor. - If you need an egg-free option, try 1/4 cup of unsweetened applesauce instead of the egg. - For gluten-free muffins, use a 1:1 gluten-free flour blend. To enhance your muffins, consider these add-ins: - Add 1/4 cup of chocolate chips for extra sweetness. - Mix in 1/2 teaspoon of cinnamon for a warm spice flavor. - You can even throw in some dried fruit, like raisins or cranberries, for a fruity twist. These ingredients and substitutions give you room to create your perfect banana Nutella swirl muffin! {{ingredient_image_2}} Start by preheating your oven to 350°F (175°C). Grease your muffin tin or line it with paper liners. This helps keep the muffins from sticking. In a large bowl, mash the ripe bananas. Add melted butter and mix until smooth. Next, stir in granulated sugar, the beaten egg, and vanilla extract. Mix until all ingredients are well combined. Now, sprinkle baking soda and a pinch of salt over the mixture. Stir well to mix everything together. Gradually fold in the all-purpose flour using a spatula. Mix gently until you no longer see dry flour. It’s okay if there are some lumps. If you want to add nuts, fold in the chopped walnuts or pecans now. Now comes the fun part: swirling in the Nutella. Use a spoon to divide the batter into the muffin cups, filling each about two-thirds full. Next, take a teaspoon and drop dollops of Nutella onto the batter. Use a toothpick or a skewer to swirl the Nutella into the batter. Make sure to create a beautiful marbled effect. Place the muffin tin in your preheated oven. Bake for 18 to 20 minutes. To check if they are done, insert a toothpick into the center. If it comes out clean, they are ready. Once baked, let the muffins cool in the tin for about 5 minutes. Then, transfer them to a wire rack to cool completely. Enjoy the delightful aroma filling your kitchen! Mixing is key to great muffins. First, mash your bananas well. This helps create a smooth batter. When you add butter, stir until it blends in. Next, add sugar and the beaten egg. Mix until smooth. Sprinkle in baking soda and salt afterward. Then, fold in the flour gently. Avoid overmixing; lumps are okay. If you add nuts, fold them in last. Baking times matter. Preheat your oven to 350°F (175°C). Use a greased muffin tin or paper liners to prevent sticking. Fill each cup about two-thirds full for the best rise. Keep an eye on your muffins as they bake. Check them at 18 minutes with a toothpick. If it comes out clean, they are ready! Serve your muffins warm for the best taste. Dust them lightly with powdered sugar. Pair them with a small bowl of Nutella for extra fun. You can also add fresh banana slices for a lovely touch. Arrange the muffins on a nice plate for a great look. Enjoy every sweet, chocolatey bite! Pro Tips Use Overripe Bananas: The riper the bananas, the sweeter your muffins will be. Look for bananas with brown spots for the best flavor. Don't Overmix: Mix the batter until just combined to keep your muffins light and fluffy. A few lumps are okay! Swirl Technique: For a beautiful swirl, use a toothpick to gently create a marbled effect with the Nutella. Don’t overdo it, or it will blend completely! Storage Tips: Store the muffins in an airtight container at room temperature for up to 3 days, or freeze them for longer storage. Reheat before serving for a fresh taste! {{image_4}} You can make these muffins gluten-free with simple swaps. Use gluten-free all-purpose flour instead of regular flour. Ensure the flour blend contains xanthan gum for the right texture. This swap keeps the muffins soft and moist. Mix in different flavors to change things up. Instead of Nutella, try creamy peanut butter or almond butter. You can also add chocolate chips or dried fruit for extra sweetness. Experimenting will give your muffins a unique twist that you'll love. For a nut-free option, skip the nuts entirely. You can replace chopped walnuts or pecans with seeds like pumpkin or sunflower seeds. These seeds add crunch without the allergens. Enjoy delicious muffins without the worry of nut allergies! To keep your muffins fresh, store them in an airtight container. This helps keep them moist. Place the container on the counter for up to three days. If you want to store them for longer, consider freezing them. To freeze, wrap each muffin in plastic wrap. Then, place them in a freezer-safe bag. Be sure to remove as much air as possible before sealing. You can freeze the muffins for up to three months. Label the bag with the date for easy reference. When you're ready to enjoy a muffin, you can reheat it easily. For the microwave, heat for about 15-20 seconds. Check to make sure it’s warm but not too hot to touch. For the oven, preheat to 350°F (175°C) and warm for about 5-10 minutes. This keeps the muffin soft and delicious! Yes, you can use frozen bananas. Just thaw them first. They should be soft and mushy. This helps you mix them easily. Frozen bananas also taste sweet and rich, perfect for muffins. To check if the muffins are done, use a toothpick. Insert it into the center of a muffin. If it comes out clean, they are ready. If it has batter on it, bake a few more minutes. Keep a close watch at the end of baking time. Absolutely! You can double the recipe. Just make sure you have a bigger mixing bowl. You may also need more muffin tins. This way, you can enjoy more muffins or share them with friends! We explored muffin making from start to finish. First, we covered all ingredients and substitutions, making it easy for you to customize. Next, I shared step-by-step instructions that guide you through mixing, swirling in Nutella, and baking. Tips to ensure your muffins turn out perfect followed. We discussed variations for different diets, plus how to store and reheat leftover muffins. In the kitchen, you have the tools to create delicious muffins. Enjoy the process and make it your own!

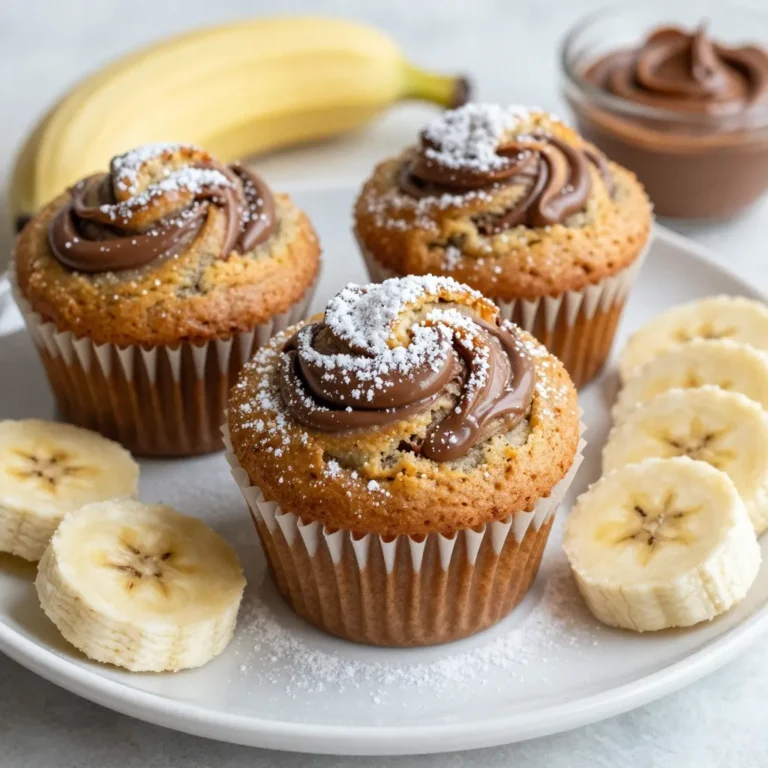
Irresistible Banana Nutella Swirl Muffins Recipe

To make Honey Sriracha Brussels sprouts, you will need a few simple items. These ingredients come together to create a dish that is both sweet and spicy. Here’s what you’ll need: - 1 pound Brussels sprouts, trimmed and halved - 2 tablespoons olive oil - 3 tablespoons honey - 2 tablespoons Sriracha sauce - 1 tablespoon soy sauce (or tamari for gluten-free) - 1 teaspoon garlic powder - Salt and black pepper to taste - 1 tablespoon sesame seeds (for garnish) - 2 green onions, thinly sliced (for garnish) Each ingredient plays a key role. The Brussels sprouts provide the main flavor. Olive oil helps them roast nicely. Honey adds a sweet touch, while Sriracha brings the heat. The soy sauce adds depth, and garlic powder gives a savory kick. Salt and pepper are crucial for seasoning. Finally, sesame seeds and green onions add a fresh crunch and color. Make sure to gather all these items before you start cooking. Having everything ready will make the process smooth and fun! {{ingredient_image_2}} Set your oven to 400°F (200°C). This high heat helps the Brussels sprouts roast well. A hot oven ensures they get crispy and golden. In a large bowl, add 1 pound of trimmed and halved Brussels sprouts. Pour in 2 tablespoons of olive oil. Season with salt and black pepper to taste. Toss the sprouts until they are well coated with the oil and seasoning. This step is key for flavor. Spread the Brussels sprouts on a baking sheet in one layer. This helps them roast evenly. Bake for 20-25 minutes. Stir them halfway through to make sure they cook well. You want them to be golden brown and crispy on the edges. To achieve golden brown and crispy edges, start by cutting the Brussels sprouts in half. This helps them roast evenly. Make sure to coat them well with olive oil, salt, and black pepper. Spread them out on a baking sheet in a single layer. Crowding them can lead to steaming instead of roasting. Roast them at 400°F for 20-25 minutes. Halfway through, stir them gently to ensure every sprout gets that perfect crisp. You can easily adjust the spice level and sweetness of your honey Sriracha sauce. If you like it spicy, add more Sriracha. For a milder flavor, use less. To sweeten the sauce, add more honey. You can even mix in other sauces, like teriyaki, for a unique twist. Just remember to taste as you go, so it fits your liking. Plating makes a big difference in how food looks. Serve the Brussels sprouts on a stylish platter. The bright green and golden colors pop! For a finishing touch, sprinkle sesame seeds and sliced green onions over the top. This adds crunch and freshness. Enjoy these sprouts as a side dish or a tasty appetizer. Your guests will love the presentation and flavor! Pro Tips Adjust the Heat Level: If you prefer a milder flavor, reduce the amount of Sriracha sauce or substitute it with a milder hot sauce to suit your taste. Even Roasting: Make sure the Brussels sprouts are spread out in a single layer on the baking sheet to ensure they roast evenly and achieve a crispy texture. Fresh Ingredients: Using fresh Brussels sprouts will enhance the flavor and texture of the dish. Look for bright green sprouts that feel firm to the touch. Garnish for Flavor: Don't skip the sesame seeds and green onions! They add a delightful crunch and freshness that balances the sweetness of the honey and the heat of the Sriracha. {{image_4}} If you need a gluten-free dish, use tamari instead of soy sauce. Tamari tastes great and has the same salty kick. It keeps the flavor while making sure everyone can enjoy this dish. Just swap it in at the same amount. For a vegan twist, replace honey with agave syrup. Agave gives a similar sweetness without any animal products. This change keeps the dish tasty and friendly for all diets. Use the same amount of agave as honey for the best results. You can customize the recipe with extra ingredients. Try adding nuts for crunch, like chopped almonds or walnuts. You can also mix in other veggies. Carrots or bell peppers roast well and add color. This keeps your meal exciting and full of flavor. To keep your Honey Sriracha Brussels sprouts fresh, store them in an airtight container. Place the container in the fridge. They will stay good for about 3 to 4 days. Make sure they cool down before you seal them. This helps avoid steam buildup, which can make them soggy. Reheating your Brussels sprouts can be tricky. You want them crispy, not mushy. The best way is to use the oven. Preheat it to 350°F (175°C). Spread the sprouts on a baking sheet in a single layer. Heat them for about 10 to 15 minutes. This helps restore their crunch. You can also use the stovetop. Heat a skillet over medium heat, add a bit of oil, and toss them until warm. If you want to freeze your Brussels sprouts, start by cooling them completely. Place them on a baking sheet in a single layer and freeze for 1 to 2 hours. Once frozen, transfer them to a freezer bag. Remove as much air as you can. They can last up to 3 months in the freezer. To thaw, simply place them in the fridge overnight. You can then reheat them as described above. Yes, you can use frozen Brussels sprouts. They are convenient and save time. However, fresh sprouts taste better. If you use frozen, thaw them first. Pat them dry to remove excess moisture. This helps them roast better. Roast them at the same temperature, but check for doneness. They may need a few more minutes. To lower the spice, use less Sriracha sauce. Start with one tablespoon instead of two. You can also add more honey to balance the heat. If you want, mix in some cream or yogurt after cooking. This will cool the dish and make it creamy. Taste as you go to find the right level of heat for you. These Brussels sprouts pair well with many dishes. Serve them beside grilled chicken or fish for protein. They also work great with rice or quinoa. Try them with a fresh salad for crunch. If you want a hearty meal, add mashed potatoes. The sweet and spicy flavors will enhance any dish you choose. These Honey Sriracha Brussels sprouts offer a tasty blend of sweet and spicy. We covered all the key steps, from choosing fresh ingredients to perfect roasting techniques. Remember, you can adjust the spice and sweetness as you like. Try serving them with your favorite sides to enhance the meal. Enjoy experimenting with variations, and don’t forget to store leftovers properly! Now, go ahead and make this dish. Your taste buds will thank you!

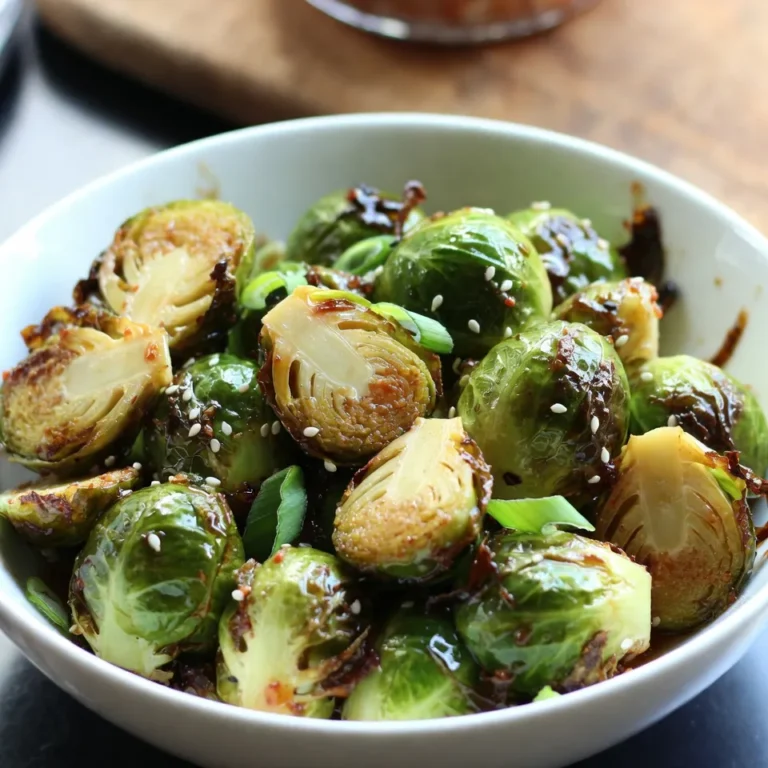
Honey Sriracha Brussels Sprouts Easy and Flavorful Dish

- 1 lb ground beef or ground turkey - 4 cups mixed salad greens (like romaine and spinach) - 1 cup cherry tomatoes, halved - 1 cucumber, thinly sliced - 1/2 red onion, thinly sliced - 1 cup pickles, sliced - 1/2 cup ketchup - 1/4 cup quality mustard - 1/4 cup mayonnaise - 1 tablespoon garlic powder - 1 teaspoon onion powder - Sea salt and freshly ground black pepper, to taste - 1 cup shredded cheddar cheese - 2 tablespoons extra-virgin olive oil In these burger bowls, ground beef or turkey serves as the star. I often choose turkey for a lighter meal. The mixed salad greens provide a fresh crunch to each bite. I love using a variety of greens like romaine and spinach for added flavor and nutrition. Toppings make these bowls fun. Halved cherry tomatoes add sweetness, while crunchy cucumbers and pickles bring a nice contrast. Thinly sliced red onion adds a bit of zing. For sauces, I use classic ketchup, mustard, and mayonnaise. They bring that beloved burger taste to the bowl. Garlic powder and onion powder enhance the meat's flavor. Don't forget the sea salt and pepper; they make everything pop! Optional extras, like shredded cheddar cheese, give a creamy twist. A drizzle of extra-virgin olive oil adds richness to the greens. These ingredients come together to create a meal that's both tasty and easy to make. In a mixing bowl, combine the ground beef or turkey with garlic powder, onion powder, sea salt, and black pepper. Use your hands or a spatula to mix well. Make sure all the spices coat the meat evenly. You can adjust the salt and pepper to fit your taste. Heat a skillet over medium-high heat and add olive oil. Wait until the oil shimmers but does not smoke. Shape the meat mixture into small patties, roughly the size of your palm. Place the patties in the hot skillet, leaving space between them. Cook for about 4-5 minutes on each side. They should be brown and cooked to your liking. Once done, transfer them to a plate to rest for a few minutes. This helps keep the patties juicy. Grab four serving bowls and layer mixed salad greens as the base. This adds color and crunch. Next, evenly distribute halved cherry tomatoes, sliced cucumber, thinly sliced red onion, and pickles on top of the greens. Sprinkle shredded cheddar cheese generously over the salad. Slice the rested burger patties into strips or bite-sized pieces and arrange them neatly on the fresh salad. Finally, drizzle ketchup, mustard, and mayonnaise over each bowl. For a fun touch, you can add fresh herbs like parsley or dill on top. Serve right away for a fresh, tasty meal! To cook your burger bowls perfectly, you can choose between ground beef or turkey. Ground beef gives your bowl a rich flavor. Turkey is leaner and lighter. The choice is yours! If you pick turkey, season it well. This will bring out the taste. After cooking, let the patties rest. Resting helps keep them juicy. If you skip this step, they may dry out. I recommend resting them for about five minutes. This small step makes a big difference. When it comes to presentation, think colorful. Use vibrant plates to make the bowls pop. Arrange each ingredient in sections. This creates a fun look. For extra flair, add sesame seeds or fresh herbs on top. These touches make your meal look gourmet. For busy weeknights, prep your ingredients in advance. Chop your veggies and store them separately. This keeps them fresh and crisp. You can make the patties ahead of time too. Cook them, let them cool, and freeze. When you're ready, just reheat and assemble your bowls. This saves time and makes dinner easy. With these tips, you can enjoy delicious burger bowls that are fun to make and eat! {{image_4}} For a tasty veggie twist, replace meat with black beans or lentils. These options add protein and keep it hearty. You can also try chickpeas for a different flavor. Top your veggie bowl with fresh avocado, diced tomatoes, and a sprinkle of cilantro. These add freshness and color, making the dish pop. If you're on a low-carb diet, swap salad greens for cauliflower rice. This keeps it light while staying low in carbs. Use sugar-free ketchup and mayonnaise to lower carb counts. You can also try avocado oil instead of olive oil for a different taste. These small swaps help keep your meal healthy and satisfying. Want to spice things up? Try a Mexican twist! Add jalapeños, corn, and avocado for flavor. A squeeze of lime juice brings it all together. For a Mediterranean theme, use feta cheese and kalamata olives. These unique toppings create a fresh and bold flavor. Don't be afraid to mix and match. Your burger bowl can be anything you want! For short-term storage, keep the assembled burger bowls in the fridge. Use airtight containers to keep them fresh. They last about 2-3 days in the fridge. The mixed salad greens can wilt, so eat them first. Store individual ingredients separately if possible. This method keeps everything fresh longer. You can freeze the burger patties for long-term storage. Wrap each patty in plastic wrap, then place them in a freezer bag. They can last up to 3 months in the freezer. For meal prep, cut veggies ahead of time. Store them in separate containers for easy assembly later. When reheating leftovers, use a microwave or a skillet. If using a microwave, cover the bowl to keep moisture in. Heat in short bursts to avoid overcooking. In a skillet, add a splash of water and cover for even heating. This helps keep the texture and flavor intact. Burger bowls are a fun twist on traditional burgers. Instead of a bun, you layer fresh salad greens with burger toppings. You can use ground beef or turkey. This dish is perfect for a light yet filling meal. It combines all the flavors of a burger in a healthy format. You can customize your burger bowl in many ways. Here are some ideas: - Protein swaps: Use grilled chicken, black beans, or lentils for variety. - Greens base: Try kale, arugula, or mixed greens for different tastes. - Toppings: Add avocado, jalapeños, or roasted red peppers for a flavor boost. - Cheese options: Use feta, goat cheese, or pepper jack for a twist. - Dressing: Experiment with ranch, balsamic vinaigrette, or a zesty yogurt sauce. Yes, you can prep burger bowls ahead. This saves time on busy days. Here are some tips: - Prep ingredients separately: Keep greens, proteins, and toppings apart for freshness. - Cook patties in advance: Grill or pan-fry the patties and store them in the fridge. - Assemble just before serving: Layer your bowls when you're ready to eat. You can serve a variety of sides with burger bowls. Here are some tasty options: - Sweet potato fries: Crispy and sweet, they pair well with the savory bowls. - Coleslaw: Adds crunch and a tangy flavor to balance the meal. - Fruit salad: A refreshing side that complements the savory elements. - Garlic bread: Offers a warm, crunchy contrast to the fresh salad. These sides will enhance your burger bowl experience and make your meal complete. Burger bowls offer a fun twist on traditional burgers. We explored key ingredients, from the patties to fresh toppings and sauces. I shared step-by-step instructions for mixing and cooking, ensuring you create the best burger bowls. Don’t forget the tips for meal prep, variations, and storage to make your cooking easier. Enjoy the freedom to customize each bowl to fit your taste. This dish makes meals exciting and can please many eaters. With simple ingredients and techniques, you can create delicious meals every week. Happy cooking!

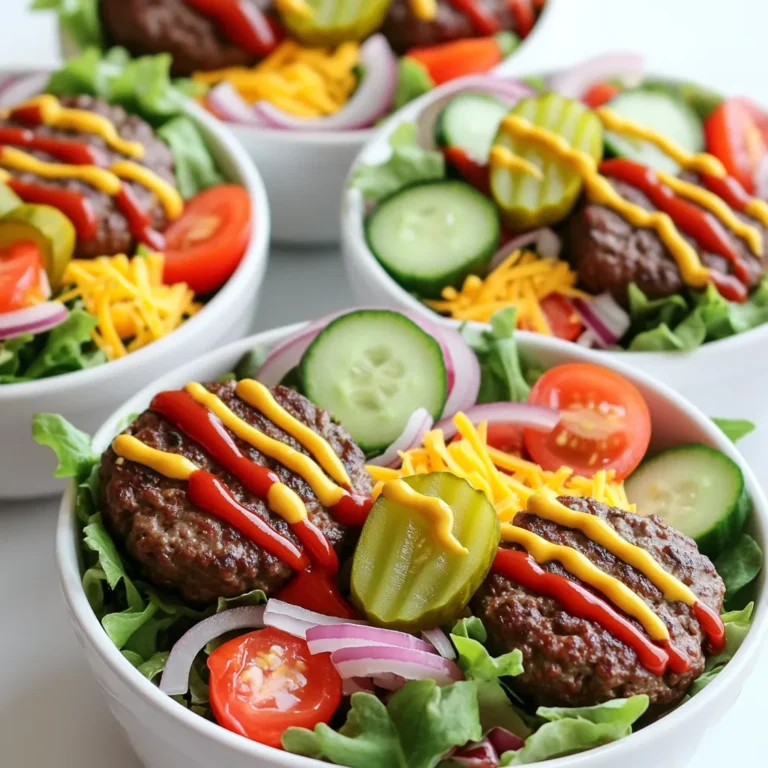
Burger Bowls Flavorful and Easy Meal Idea

- Sushi Rice: You need 1 cup of sushi rice. This rice helps create that sticky texture we love in sushi. - Sushi-Grade Tuna: Use ½ pound of sushi-grade tuna, diced into small cubes. This tuna adds fresh flavor. - Spicy Tuna Filling Components: - 2 tablespoons mayonnaise - 1 tablespoon Sriracha sauce (add more for heat) - 1 tablespoon soy sauce - 1 teaspoon sesame oil - 1 green onion, finely chopped - Optional Garnishes: - 1 sheet nori (seaweed), cut into small squares - Sesame seeds for a decorative touch - Thin avocado slices for serving (optional) These ingredients come together to create a dish that is not only tasty but also fun to make. You can adjust the spice to make it just right for your taste. If you want to explore other flavors, consider adding more herbs or different sauces. - Rinsing Techniques: Rinse your sushi rice under cold running water. Do this until the water runs clear. This step removes excess starch, helping your rice become sticky. - Cooking Method: In a medium saucepan, mix rinsed sushi rice with 1 ¼ cups water. Bring this to a boil over medium-high heat. Once boiling, lower the heat, cover, and let it simmer for 15 minutes. - Steaming and Resting: After 15 minutes, turn off the heat but keep the lid on for 10 more minutes. This allows the rice to steam and become fluffy. - Mixing Ingredients: In a bowl, combine ½ pound of diced tuna, 2 tablespoons of mayonnaise, 1 tablespoon of Sriracha, 1 tablespoon of soy sauce, 1 teaspoon of sesame oil, and 1 chopped green onion. Stir well to mix everything. - Adjusting Spice Levels: Taste your filling. If you want more heat, add extra Sriracha. This lets you control the spiciness to your liking. - Techniques for Encasing the Filling: When the rice is warm but cool enough to touch, wet your hands to avoid sticking. Take about 2 tablespoons of rice and flatten it in your palm. Put a spoonful of spicy tuna in the center. - Final Presentation Tips: Carefully fold the rice over the filling, sealing it inside. Roll the rice into a ball shape. Place sesame seeds on top for garnish. Add a square of nori on the side for extra flavor. Present your sushi balls on a platter, with avocado slices if you wish. - Rinsing Suggestions: Start by rinsing the sushi rice under cold water. This helps remove excess starch. Keep rinsing until the water runs clear. This step is key for sticky rice. - Cooking Time Adjustments: Cook the rice over medium-high heat. Once it boils, reduce the heat to low. Cover the pot and simmer for about 15 minutes. Let it sit for another 10 minutes after cooking to steam. - Varieties of Hot Sauce: Sriracha is a great choice for adding heat. Feel free to use other hot sauces like chili garlic or spicy mayo. Each sauce brings its own unique flavor. - Alternative Ingredients: You can add diced jalapeños for more spice. Avocado or mango can balance the heat with a creamy touch. - Best Practices for Rolling Sushi Balls: Wet your hands before shaping the rice. This prevents sticking and helps form a smooth ball. Make sure to securely encase the filling inside. - Serving Temperature Recommendations: Serve sushi balls warm or at room temperature. This helps enhance the flavors and texture. Enjoy them fresh for the best taste! {{image_4}} - Substituting Tuna: For a vegetarian option, use diced avocado or marinated tofu. Both options bring a creamy texture and absorb flavors well. You can also try using jackfruit, which mimics the texture of fish. - Innovative Fillings: Consider adding cucumber or pickled radish for crunch. A mix of carrots and bell peppers can also add color and taste. - Adding Fresh Vegetables: You can mix in shredded carrots, crunchy cucumber, or spicy radishes. These add a fresh bite and contrast nicely with the spicy tuna. - Specialty Sauces: Try drizzling your sushi balls with wasabi mayo or teriyaki sauce. These sauces can enhance the flavor and make each bite exciting. - Mini Sushi Balls for Appetizers: Make smaller balls for a fun party snack. They are perfect for finger food and easy to eat in one bite. - Larger Versions for Main Courses: If you want a hearty meal, form larger balls. You can serve them as a main dish with a side of soy sauce for dipping. To keep your spicy tuna sushi balls fresh, store them right. Here are a few tips: - Refrigeration Tips: Place the sushi balls in an airtight container. Keep them in the fridge for quick access. They taste best within a day of making. - Freezing Recommendations: If you want to store them longer, freeze the sushi balls. Wrap each ball in plastic wrap, then place them in a freezer bag. They can last up to a month in the freezer. Knowing how long your sushi balls last helps keep them tasty. Here’s what to remember: - Best Practices for Freshness: Always eat your sushi balls within 24 hours for the best flavor. Store them properly in the fridge or freezer to maintain freshness. - Signs of Spoilage: Check for any off smells or changes in texture. If the rice feels dry or hard, it’s time to toss them. Don’t eat sushi that looks or smells bad. If you need to reheat your sushi balls, do it safely. Here’s how: - Safest Methods to Reheat: The best way is to let them sit at room temperature for a bit. If you want to warm them, use a microwave on low power for 10-15 seconds. Avoid overheating. This keeps the rice soft and the filling tasty. You want sushi-grade tuna. It must be fresh and high quality. Look for yellowfin or bluefin tuna. These types have the right taste and texture. Always buy from a trusted source. Ask your fishmonger about the best options. They can guide you to the freshest catch. Yes, you can make these sushi balls ahead of time. Prepare the sushi rice and spicy tuna filling. Shape the balls and keep them in the fridge. However, they taste best fresh. Make sure to cover them with plastic wrap to avoid drying out. To adjust the spice, change the amount of Sriracha. Add more for extra heat. You can also mix in chili oil for a different flavor. Taste the filling before you shape the balls. This way, you can find the perfect heat for you. Yes, there are gluten-free soy sauce options. Look for tamari, a gluten-free soy sauce. Many brands offer this. Always check the label to make sure. This keeps your spicy tuna sushi balls safe for gluten-free diets. You can serve sushi balls with a variety of sides. Try thin avocado slices for creaminess. Pickled ginger adds a nice tang. You can also serve with soy sauce for dipping. These options enhance the flavors of your sushi balls. Now you have a complete guide to making spicy tuna sushi balls. From selecting the right ingredients to shaping your sushi, each step is simple. Remember to adjust spice levels to your liking and explore different flavors. You can create variations for everyone, and proper storage keeps your sushi fresh. Enjoy making this delicious dish and impressing friends and family. Dive into this fun cooking adventure and savor every bite. Your skills in sushi making will surely grow!

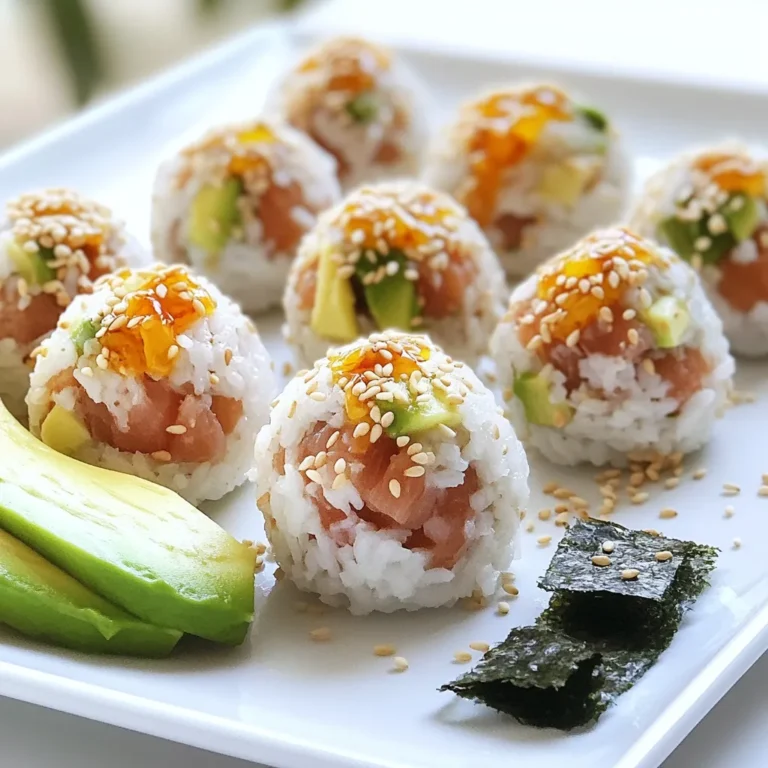
Spicy Tuna Sushi Balls Simple and Flavorful Recipe

- 1 can (14 oz) of whole cranberry sauce - 1/2 cup of freshly squeezed orange juice - 1/4 cup of packed brown sugar For this recipe, I use whole cranberry sauce. It gives a great base. Freshly squeezed orange juice adds a bright flavor. The brown sugar brings sweetness, balancing the tanginess of the cranberries. - 1 teaspoon of ground cinnamon - 1/4 teaspoon of ground ginger - 1/4 teaspoon of ground nutmeg - A pinch of salt Spices make this sauce shine. Ground cinnamon warms up the flavor. Ground ginger gives it a little kick. Ground nutmeg adds depth, while salt enhances all the tastes. - Chopped walnuts or pecans - Zest from 1 orange Garnishes bring a fun touch. Chopped walnuts or pecans add crunch. Orange zest not only looks good but gives a fresh burst. You can mix and match to fit your style! {{ingredient_image_2}} In a medium-sized saucepan, mix the whole cranberry sauce, freshly squeezed orange juice, and packed brown sugar. This blend forms the heart of your sauce and adds a sweet and tangy taste. The orange juice gives the sauce a fresh kick. Place the saucepan over medium heat. Stir the mixture continuously until the brown sugar fully dissolves. This step is key to a smooth sauce. Keep an eye on it so the sauce does not burn. Next, add the ground cinnamon, ground ginger, ground nutmeg, and a pinch of salt. Mix well to ensure all spices are evenly distributed. Slightly increase the heat and bring the mixture to a gentle simmer. Cook for about 5 to 7 minutes. Stir occasionally until the sauce thickens a bit. Remove the saucepan from the heat. Fold in the orange zest to add a burst of flavor. Let the sauce cool to room temperature. It will thicken more as it cools. When ready, transfer the sauce into a decorative bowl. If you like, sprinkle chopped walnuts or pecans on top for extra crunch and taste. To get the best taste from your cranberry sauce, use fresh orange juice. Fresh juice gives a bright, zesty flavor. You can squeeze oranges at home for the best results. Store-bought juice can work, but fresh is always better. It adds a special touch and makes it feel gourmet. Store any leftover cranberry sauce in an airtight container. Keep it in the fridge for up to one week. If you want to save it longer, you can freeze it. Just make sure to use a freezer-safe container. When you’re ready to eat it, thaw it overnight in the fridge. For a stunning presentation, serve the cranberry sauce in a pretty glass bowl. This shows off its rich color. Garnish with chopped walnuts or pecans for a nice crunch. A few whole cranberries and a sprig of mint add a festive look. These small touches make your dish stand out at any meal. Pro Tips Fresh Ingredients: Always use freshly squeezed orange juice for the best flavor. It brightens the sauce and enhances the overall taste. Adjust to Taste: Feel free to adjust the spices according to your preference. More cinnamon or nutmeg can give a warmer flavor profile. Cooling Factor: Let the cranberry sauce cool completely before serving. It will thicken more as it cools, achieving the perfect consistency. Garnishing Ideas: Consider adding a sprinkle of orange zest or a drizzle of honey on top for an added layer of flavor and visual appeal. {{image_4}} You can make your cranberry sauce special with spices. Try adding more ground cinnamon for warmth. A dash of allspice gives a unique twist. If you like heat, a pinch of cayenne pepper can add a fun kick. You can also experiment with herbs like rosemary or thyme. These will bring a new layer of flavor. If you want to change up the sweetness, consider using honey or maple syrup. Both add a different taste. Honey gives a floral note, while maple syrup adds a deep, rich flavor. Just replace the brown sugar with an equal amount of your chosen sweetener. Fruits can make your sauce even more exciting. Adding chopped apples or pears gives a nice texture. You can also mix in crushed pineapple for a tropical vibe. Dried fruits like raisins or cranberries can add sweetness. For a tart kick, try adding pomegranate seeds. Each fruit will change the flavor and feel of your sauce. You can keep your homemade cranberry sauce in the fridge. It lasts about one week. Store it in an airtight container. This keeps it fresh and tasty for your next meal. Freezing cranberry sauce is easy. First, let it cool completely. Then, pour the sauce into a freezer-safe container. Leave some space at the top as it will expand. Seal it tightly and label it with the date. You can freeze it for up to three months. To thaw, place it in the fridge overnight before serving. Reheating cranberry sauce is simple. You can use the microwave or a saucepan. For the microwave, heat it in 30-second bursts, stirring in between. If you use a saucepan, warm it over low heat, stirring often. This keeps it smooth and delicious. Enjoy your sauce warm for a cozy meal! Yes, you can use fresh cranberries. Fresh cranberries add a bright taste. To use them, start with 12 ounces of fresh cranberries. Rinse them well, then cook them in a pot with water and sugar. Use about 1 cup of water and adjust sugar to taste. Cook until they pop and soften. This method takes longer but gives a fresh flavor. To reduce sweetness, cut back on brown sugar. You can try using half the amount. Add more orange juice for balance. You can also add a splash of lemon juice. This will add a nice tartness. Taste the sauce as you go. Adjust until it fits your taste. Cranberry sauce pairs well with roasted turkey. It also complements ham perfectly. Try it with stuffing or on a turkey sandwich. It adds a sweet touch to savory dishes. For a twist, serve it with cheese. Cream cheese or brie work well. You can even spread it on crackers for a quick snack. This guide walked you through making a tasty cranberry sauce. You learned about the main ingredients and spices that add flavor. The step-by-step instructions made it easy to follow. You can customize the recipe with different fruits and sweeteners. In the end, this sauce is perfect for many dishes. It's fresh, flavorful, and simple to store. Enjoy making it your own this holiday season!

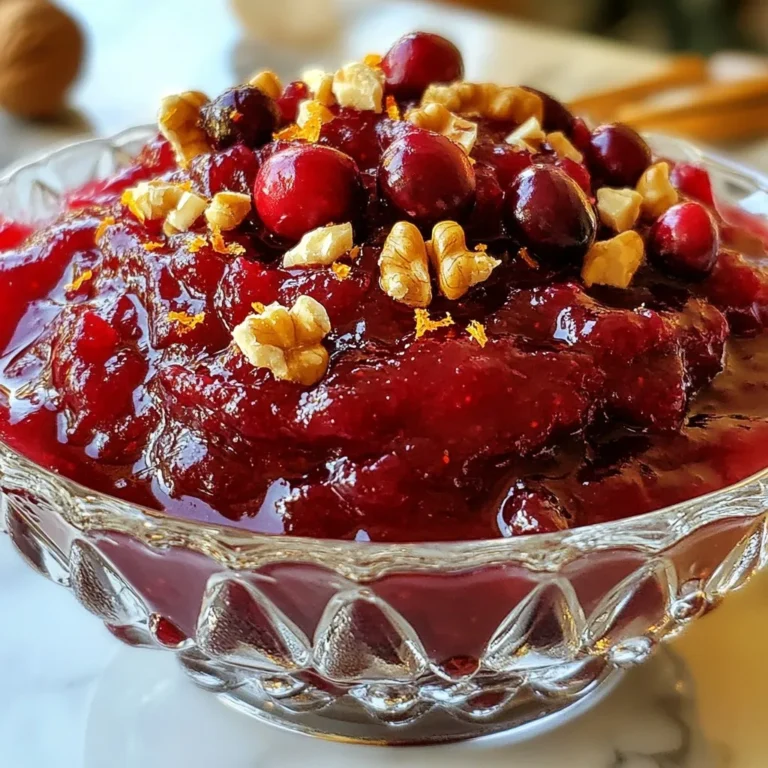
Canned Cranberry Sauce for Beginners Easy Homemade Recipe

- 2 packs of instant ramen noodles - 4 cups vegetable broth - 4 cloves garlic, finely minced - 1 tablespoon fresh ginger, grated - 2 tablespoons chili paste (adjust to your spice preference) - 1 tablespoon soy sauce The base of this dish is simple yet packed with flavor. Instant ramen noodles make this meal quick and easy. You start with vegetable broth, which adds depth and richness. The key flavors come from garlic and ginger, which I love to combine for an aromatic kick. Chili paste adds heat, while soy sauce gives that umami taste we all crave. - 1 cup baby bok choy, roughly chopped - 1 cup shiitake mushrooms, thinly sliced - 2 green onions, finely chopped - 1 soft-boiled egg (optional, for garnish) - Sesame seeds for garnish Fresh vegetables make this ramen vibrant. Baby bok choy adds crunch and nutrition. Shiitake mushrooms give a meaty texture that complements the noodles. Green onions not only add color but also enhance the flavor. A soft-boiled egg adds creaminess, and sesame seeds bring a lovely finish. - 1 teaspoon sesame oil - Additional flavorful ingredients Sesame oil is a must in this recipe. It gives a nutty flavor that ties everything together. I also suggest exploring other flavorful oils or ingredients, like chili oil or garlic-infused oil, to take your ramen to the next level. - Heat 1 teaspoon of sesame oil in a large pot over medium heat. - Add 4 cloves of finely minced garlic and 1 tablespoon of grated ginger. - Sauté for 1 minute until fragrant and lightly golden. - Mix in 2 tablespoons of chili paste and 1 tablespoon of soy sauce. - Cook for another 30 seconds to blend the flavors. - Slowly pour in 4 cups of vegetable broth, stirring gently. - Bring the broth to a simmer, cooking for about 5 minutes. - Add 1 cup of roughly chopped bok choy and 1 cup of thinly sliced shiitake mushrooms. - Let it cook for an additional 3-4 minutes to soften the veggies. - Boil 2 packs of instant ramen noodles in a separate pot for 3-4 minutes. - Drain the noodles and set them aside. - Divide the drained noodles into serving bowls. - Carefully ladle the hot, aromatic broth over the noodles. - If using, slice a soft-boiled egg and place it on top. - Finish with a sprinkle of sesame seeds and chopped green onions. To make Minute Garlic Chili Ramen your own, you can adjust the spice levels with chili paste. Start with 1 tablespoon. If you want more heat, add extra paste in small amounts. Always taste as you go. This helps you find the right balance for your palate. For proper broth seasoning, use soy sauce and sesame oil. These ingredients add depth and richness. Don't be afraid to tweak the amounts to suit your taste. When sautéing garlic and ginger, be mindful of the heat. Use medium heat to avoid burning. Stir them often and watch for a light golden color. This step is key for great flavor. For a perfect soft-boiled egg, bring a pot of water to a boil. Gently add the egg and cook for 6-7 minutes. After cooking, transfer the egg to an ice bath for a few minutes. This makes peeling easier and keeps the yolk creamy. Presentation matters when serving your ramen. Use deep bowls to hold the broth and noodles. Place the soft-boiled egg on top, cut in half, for a beautiful touch. Garnish with green onions and a sprinkle of sesame seeds. For side enhancements, offer lime wedges. A squeeze of lime adds a fresh twist. You can also serve extra chili paste for those who like it hot. {{image_4}} You can add protein to your ramen for extra flavor. Here are a few ideas: - Chicken: Cook bite-sized chicken pieces until golden. Add them to the broth for a hearty touch. - Tofu: Use firm tofu for a plant-based choice. Cube it and sauté until golden, then mix it into the ramen. - Shrimp: Peel and devein shrimp. Add them to the broth in the last few minutes of cooking for a quick and tasty boost. If you want a vegan meal, there are many great options. You can use plant-based proteins like: - Tempeh: Slice tempeh and sauté until crispy. It adds a nice texture to your dish. - Seitan: This wheat-based protein has a chewy texture. It absorbs flavors well and works great in ramen. - Chickpeas: Canned chickpeas are easy to add. They provide protein and a creamy texture. You can change up the veggies to suit your taste. Here are some tasty options: - Spinach: This leafy green wilts nicely into the broth. It adds color and nutrients. - Kale: Chop it into small pieces. Kale adds a hearty bite and is full of vitamins. - Mushrooms: Try other mushrooms like button or portobello for different flavors. Each type brings its unique taste to the dish. Feel free to mix and match these options. This way, you’ll make your Minute Garlic Chili Ramen truly your own! To keep your Minute Garlic Chili Ramen fresh, store the broth and noodles separately. Place the broth in an airtight container. Let it cool before sealing. For the noodles, keep them in a separate container or plastic bag. They can get mushy if you store them in the broth. Leftovers can last in the fridge for up to three days. When you're ready to enjoy your leftovers, reheat the broth first. Pour it into a pot and warm it on medium heat. Stir occasionally to avoid burning. For the noodles, you can either boil them quickly or microwave them with a splash of water. Once both are hot, combine them in a bowl. This method keeps the flavors fresh and the texture nice. You can freeze the broth for later use. Just pour it into a freezer-safe container and leave some space at the top for expansion. However, I do not recommend freezing the noodles. They don’t hold up well when thawed. Instead, cook fresh noodles when you are ready to eat. This way, you will have a great meal with the best taste and texture. You can use chicken broth if you want meat flavor. Water with a bit of soy sauce also works. For a richer taste, try mushroom broth. This adds umami without extra ingredients. To give your ramen more heat, add extra chili paste. You can also use fresh chopped chili peppers. For a different flavor, try adding a dash of hot sauce. Always taste as you go! Yes, you can prepare the broth ahead of time. Store it in the fridge for up to three days. Cook the noodles fresh before serving to keep them from getting soggy. Serve your ramen with edamame for a healthy snack. You can also pair it with a light salad. Gyoza or spring rolls make tasty additions too. Enjoy these sides to enhance your meal! This blog post covered how to make Minute Garlic Chili Ramen using easy steps and fresh ingredients. You can customize flavors and add your favorite proteins or vegetables. With tips on storing and reheating, your ramen can stay tasty. Remember, cooking should be fun and creative! Try different twists on this recipe. Soon, you'll have your own signature ramen dish. Enjoy your culinary adventure!

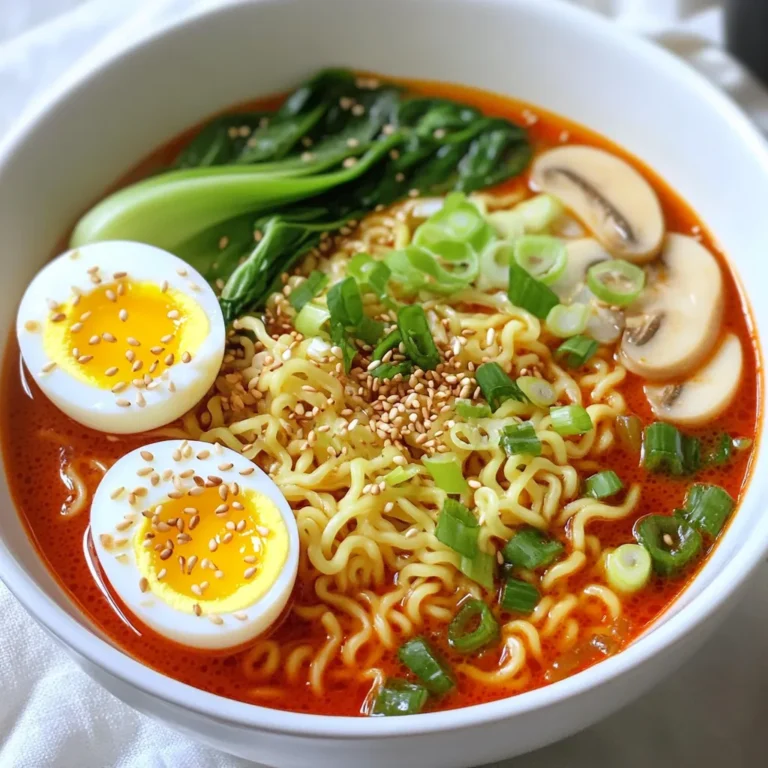
Minute Garlic Chili Ramen Flavorful and Simple Meal

- 4 tablespoons unsalted butter - 1 cup pumpkin puree - 1 teaspoon ground cinnamon - 1/2 teaspoon ground nutmeg - 1/4 teaspoon ground ginger - 1/2 teaspoon vanilla extract - 1/4 teaspoon salt - 10 oz mini marshmallows - 6 cups Rice Krispies cereal - Optional: 1/2 cup chopped pecans or walnuts To start, melt 4 tablespoons of unsalted butter in a medium saucepan over medium heat. Stir the butter often as it melts. Watch closely as it foams and turns a golden brown color. This process takes about 5-7 minutes. Brown butter gives our treats a nice nutty flavor. Once the butter is golden, remove the saucepan from the heat. Add in 1 cup of pumpkin puree, 1 teaspoon of ground cinnamon, 1/2 teaspoon of ground nutmeg, 1/4 teaspoon of ground ginger, 1/2 teaspoon of vanilla extract, and 1/4 teaspoon of salt. Stir until all the ingredients blend into a smooth, creamy mixture. Next, place the saucepan back on low heat. Add 10 ounces of mini marshmallows to the pumpkin mix. Stir constantly until the marshmallows melt and combine well. This step creates a velvety consistency that makes the treats extra special. Now, take the saucepan off the heat. Gradually fold in 6 cups of Rice Krispies cereal. Make sure all the cereal gets coated with the pumpkin mixture. If you want some crunch, mix in 1/2 cup of chopped pecans or walnuts at this stage. Quickly transfer the mixture into a greased 9x13 inch baking dish. Use a spatula or your lightly greased hands to press the mixture evenly into the dish. Let the Rice Krispies treats cool at room temperature for about 30-45 minutes. Once set, cut them into squares or rectangles for serving. To make great brown butter, watch it closely. You want it to turn a nice golden brown. Stir it often to help it cook evenly. The smell will change to a nutty aroma. This step adds a rich flavor to your treats. Be careful not to burn the butter. If it starts to smell bitter, you need to stop cooking it. The perfect brown butter should have a warm, nutty tone. This flavor lifts the whole dish. When you serve your Brown Butter Pumpkin Rice Krispies, make it look special. Use colorful fall-themed napkins for a fun touch. A wooden cutting board can add a rustic feel. For a sweet twist, drizzle melted white chocolate on top. This adds a nice shine and extra flavor. You can also sprinkle some chopped nuts on top for texture. To keep your treats fresh, store them in an airtight container. This helps prevent them from becoming hard. Keep them at room temperature for the best texture. If you have leftovers, try to eat them within a week. If you want to save them, you can freeze the treats. Just wrap them tightly in plastic wrap and place them in a freezer bag. When you're ready to enjoy, let them thaw at room temperature. {{image_4}} You can switch up the flavors in your Brown Butter Pumpkin Rice Krispies treats. Try using almond or hazelnut instead of regular nuts. These will give a nice twist to the taste. You can also add chocolate chips. They melt a bit and mix beautifully with the pumpkin flavor. Just fold them in after the marshmallows melt. This adds a rich, sweet touch. If you want gluten-free treats, use gluten-free Rice Krispies. They work just as well and taste great. For a vegan version, swap the butter for coconut oil. Choose vegan marshmallows too. This way, everyone can enjoy these tasty treats, no matter their diet. Make your treats festive by adding seasonal spices. Try a bit of allspice or cloves for a warm flavor. You can also present them in fun, Halloween shapes. Use cookie cutters for spooky designs. Add edible eyes or sprinkles for a fun look. These twists make the treats perfect for parties or family gatherings! Brown Butter Pumpkin Rice Krispies treats last for about one week. Store them in an airtight container. Keep the treats at room temperature for best taste. If you want to keep them longer, wrap them in plastic wrap before placing them in the container. This extra step keeps them fresh and tasty. Yes, you can freeze these treats. Wrap them tightly in plastic wrap. Then, place them in a freezer bag. They can last up to three months in the freezer. To thaw, take them out and leave them at room temperature for a few hours. You can also microwave them for a few seconds to enjoy them warm. If you do not have pumpkin puree, you can use applesauce. It gives a nice sweetness and moisture. Another option is to use butternut squash puree. It has a similar flavor. You can also try using sweet potato puree for a unique twist. - Brown Butter Treats Variations You can mix things up with different flavors. Try adding a splash of maple syrup or using almond extract instead of vanilla. You can even swap pumpkin for sweet potato or butternut squash for a twist. Each variation brings its own unique flavor to the table. - Other Seasonal Desserts Explore more fall-inspired treats. Think about baking spiced apple crisp or maple pecan pie. These desserts also use warm spices and seasonal ingredients. They make great companions to your Brown Butter Pumpkin Rice Krispies treats. - Visual Step-by-Step Guides Watching someone make these treats can be very helpful. Look for cooking videos that show each step. They often share tips on achieving that perfect brown butter. It's a fun way to learn and get inspired to try the recipe yourself. - Feedback from Those Who Have Tried the Recipe Many people love these treats! They rave about the rich flavor and crispy texture. Users often share their own twists and ideas. Reading their feedback can give you new ways to enjoy your Brown Butter Pumpkin Rice Krispies. Plus, it’s nice to see how others made the recipe their own. We explored the delicious world of Brown Butter Pumpkin Rice Krispies treats. We discussed important ingredients like butter, pumpkin puree, and spices. I shared step-by-step instructions for perfecting your treats and added tips for serving and storage. You learned about tasty variations, dietary modifications, and answers to common questions. Now, it’s your turn to create these tasty treats. Enjoy the fun and flavors they bring to your kitchen!

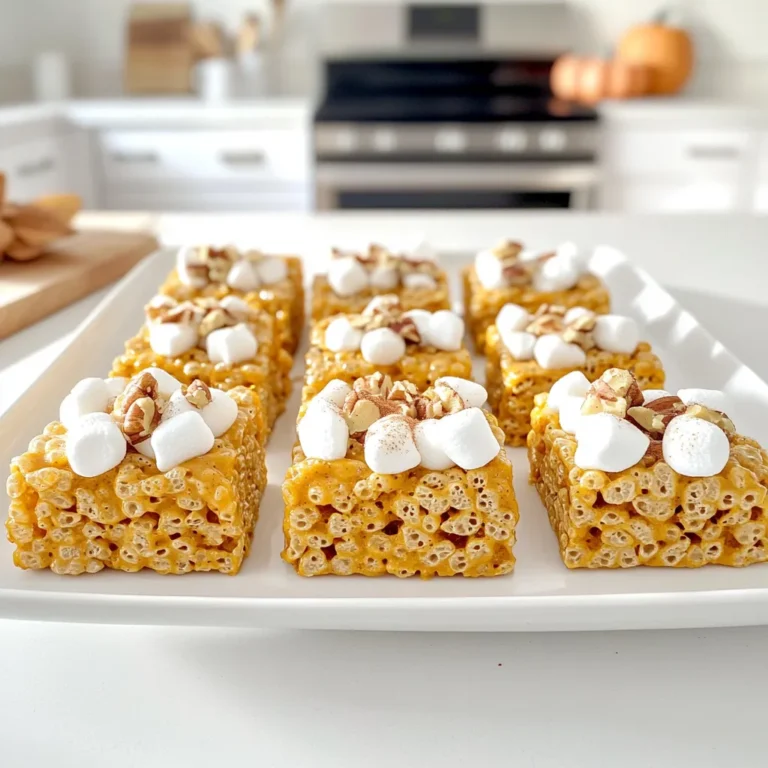
Brown Butter Pumpkin Rice Krispies Delightful Treats

Here’s what you need for these cookies: - 1 cup unsalted butter, softened to room temperature - 3/4 cup granulated sugar - 3/4 cup packed brown sugar, light or dark - 1 large egg - 2 teaspoons pure vanilla extract - 2 1/4 cups all-purpose flour - 1 teaspoon baking powder - 1/2 teaspoon salt - 1 cup semi-sweet chocolate chips - 1/2 cup chopped nuts (optional, walnuts or pecans recommended) - Additional sprinkles or colored sugar for garnish (optional) You can swap some ingredients if needed. Here are a few ideas: - Use coconut oil instead of butter for a dairy-free option. - Replace granulated sugar with coconut sugar for a lower glycemic index. - If you don’t have brown sugar, use an equal amount of granulated sugar mixed with a bit of molasses. - For a nut-free version, simply leave out the nuts or use seeds like pumpkin or sunflower. - Dark chocolate chips can replace semi-sweet for a richer taste. Using room temperature butter is key for this recipe. Here’s why: - It blends better with sugars, making the mix light and fluffy. - Soft butter helps trap air, which leads to a tender cookie. - Cold butter doesn’t mix well, leading to dense cookies. - To soften butter quickly, cut it into small pieces or microwave it for a few seconds. This step makes all the difference in texture and taste. Trust me; your cookies will shine! {{ingredient_image_2}} To start, gather your ingredients. You need unsalted butter, sugar, brown sugar, an egg, and vanilla. In a large bowl, cream the softened butter and sugars for about 2-3 minutes. You want it light and fluffy. Next, add the egg and vanilla, beating until smooth. In another bowl, whisk together flour, baking powder, and salt. Gradually mix this dry blend into the wet mix. Be careful not to overmix; it should just come together. Finally, fold in the chocolate chips and nuts if you like them. Once your dough is ready, divide it into two equal parts. Shape each part into a log, about 2 inches wide. Wrap each log tightly in plastic wrap. Refrigerate them for at least one hour. This step helps the dough firm up, making it easy to slice. If you’re in a hurry, try placing the logs in the freezer for 30 minutes instead. When your logs are firm, preheat your oven to 350°F (175°C). Line a baking sheet with parchment paper for easy cleanup. Unwrap the logs and slice them into 1/4-inch rounds. Place the slices on the prepared sheet, leaving space between each cookie. If you want, sprinkle colored sugar or sprinkles on top. Bake for 8-10 minutes. The edges should be golden, and the centers will look slightly soft. After baking, let them cool on the sheet for 3-5 minutes. Then, transfer the cookies to a wire rack to cool completely. Enjoy your fresh, homemade slice and bake cookies! To get the right texture in your cookies, start with room temperature butter. Softened butter mixes well, making your dough light. Cream the butter and sugars until fluffy. This step adds air, which helps cookies rise. Use a mixer for about 2-3 minutes. Make sure not to skip this. The right mixing time is key to great cookies. Mixing is important, but too much can ruin your cookies. Once you add the dry ingredients, mix gently. You want to combine them without overworking the dough. Overmixing makes cookies tough instead of soft. Stop mixing as soon as you see no dry flour. Fold in chocolate chips and nuts with care. This keeps your cookies light and tender. Having the right tools makes baking easier. Here are some must-haves for this recipe: - Electric mixer for creaming butter and sugars - Large mixing bowls for wet and dry ingredients - Sharp knife for slicing dough logs - Parchment paper for lining your baking sheet - Spatula for folding in chips and nuts These tools help you stay organized and make baking a breeze. Pro Tips Chill the Dough: Allowing the cookie dough to chill not only helps with slicing but also enhances the flavor and texture of the cookies. Use Fresh Ingredients: Ensure your baking powder is fresh for the best rise and texture. Expired baking powder can lead to flat cookies. Experiment with Mix-ins: Feel free to get creative with the mix-ins! Try different types of chocolate, dried fruits, or even spices like cinnamon for a unique twist. Monitor Baking Time: Ovens can vary in temperature; keep an eye on your cookies and remove them when the edges are golden but the centers are still soft for the perfect chewy texture. {{image_4}} You can add fun flavors to your slice and bake cookies. Try mixing in peppermint extract for a minty twist. A bit of orange zest makes the cookies fresh and bright. You could also use almond extract for a nutty flavor. These small changes can make your cookies unique and exciting! Nuts add crunch and flavor to your cookies. Walnuts or pecans work great, but you can swap them for other nuts. Try almonds or cashews if you prefer. You can even skip the nuts entirely for a nut-free treat. If you want, add dried fruits like cranberries or apricots for a chewy surprise! If you need gluten-free cookies, use a gluten-free flour blend instead of regular flour. For a vegan option, swap the butter for coconut oil and the egg for a flax egg. A flax egg is made by mixing one tablespoon of ground flaxseed with three tablespoons of water. Let it sit for a few minutes to thicken. These modifications keep the cookies tasty for everyone! To keep your cookies fresh, place them in an airtight container. This prevents air from getting in. You can also add a slice of bread to the container. The bread helps keep the cookies soft. Store them at room temperature for up to one week. If you want to keep them longer, consider freezing. Freezing cookie dough is easy. After shaping the logs, wrap them tightly in plastic wrap. You can also wrap them in foil. Place the wrapped logs in a freezer bag. Freeze for up to three months. When you want to bake, just slice and bake straight from the freezer. For baked cookies, let them cool completely first. Then, place them in an airtight container or freezer bag. Baked cookies can freeze for about three months too. These cookies taste best within a week. However, they can last longer if stored well. If you see any signs of mold or an off smell, throw them away. Always check the cookies before eating. For the best flavor, enjoy them fresh! Yes, you can use margarine instead of butter. However, the taste and texture may change. Butter gives cookies a rich flavor. Margarine might make them softer. If you choose margarine, use a stick form for best results. Check the edges of the cookies. They should be lightly golden. The centers might look soft but will set as they cool. If the edges are brown and the center is still doughy, they need more time. Bake for 8-10 minutes for best results. If the dough feels too soft, chill it longer. Wrap it tightly and place it back in the fridge for another 30 minutes. If it’s still too soft, you can add a bit more flour. Be careful not to add too much, or the cookies may become dry. Baking cookies is simple and fun. We covered ingredients, from room temperature butter to tasty swaps. Mixing the batter and shaping cookie logs ensures your treats will shine. You learned tips to get the right texture and a list of tools to help. Variations let you get creative, and proper storage keeps cookies fresh. Remember, a few simple steps can lead to delicious results every time. Baking brings joy, so enjoy sharing your cookies with friends and family!

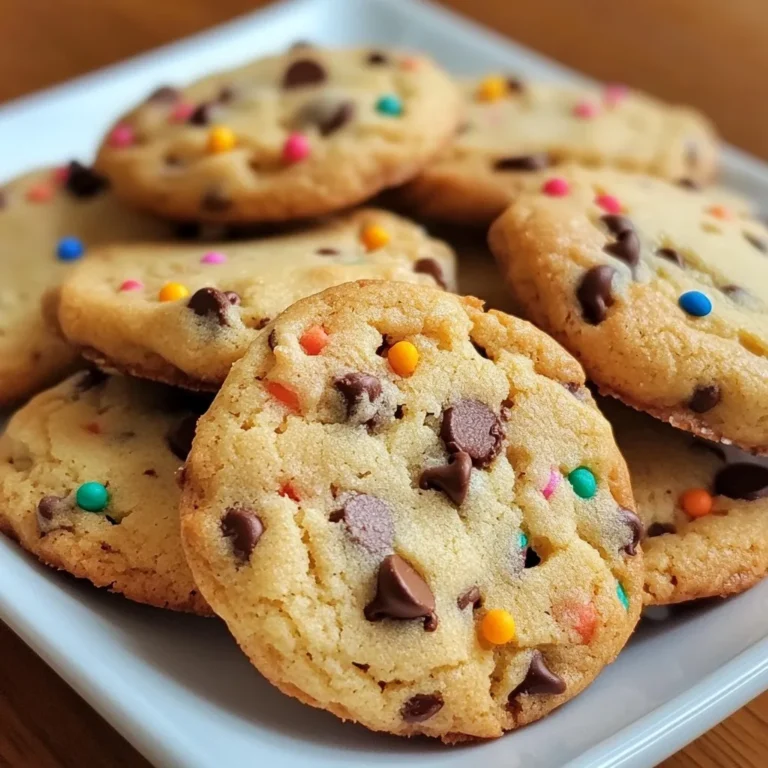
Easy Slice and Bake Cookies Simple and Fast Recipe

- 2 large apples (Honeycrisp or Fuji) - 1/2 cup granulated sugar - 1 tablespoon ground cinnamon - 2 tablespoons unsalted butter, melted - A pinch of sea salt You want to choose the right apple for your chips. Honeycrisp and Fuji apples are the best options. They have a sweet and juicy flavor that works well. Honeycrisp apples are crisp and slightly tart. Fuji apples are sweeter and very crunchy. Other good options include Gala and Braeburn, which also provide great taste and texture. You can adjust the sweetness to your liking. Try using honey or maple syrup instead of granulated sugar. This adds a unique flavor. If you want dairy-free options, replace the unsalted butter with coconut oil or a dairy-free butter. These swaps still give you tasty chips while accommodating different diets. {{ingredient_image_2}} First, preheat your oven to 200°F (95°C). This low heat is key for crisping the apple chips without burning them. While the oven warms up, grab a baking sheet and line it with parchment paper. This step helps prevent sticking and makes cleanup a breeze. Next, wash your apples thoroughly. This removes any wax or dirt. I recommend using Honeycrisp or Fuji apples for the best flavor. After washing, slice each apple into thin rounds, about 1/8 inch thick. A mandoline slicer works great for this, but a sharp knife will do. Keeping the slices even helps them bake uniformly and ensures they become crispy. In a small bowl, mix together the granulated sugar, ground cinnamon, and a pinch of sea salt. Stir well to combine. In another bowl, pour your melted unsalted butter over the apple slices. Toss the slices gently to coat them evenly. This butter adds flavor and helps the sugar mix stick. Now, lay the apple slices in a single layer on your prepared baking sheet. Make sure they don’t overlap; this is crucial for even baking. Once arranged, place the baking sheet in your preheated oven. Bake for about 2 to 3 hours. Check the chips after the first hour. They should turn a lovely caramel color and feel crisp when they are done. After baking, take the chips out of the oven and let them cool completely on the baking sheet. This cooling step is important. It helps the chips become even crispier. Once cooled, store them in an airtight container at room temperature. They will stay fresh for about a week. Enjoy your sweet and crunchy caramel cinnamon apple chips! To get that crunch, bake your apple chips just right. Start by adjusting the baking time. I suggest checking them after the first hour. Every oven is a bit different. If they are still soft, give them more time. Aim for about 2 to 3 hours total. You want them golden brown and crisp. Checking for doneness is key. Use your eyes and fingers. Gently touch a slice; it should feel hard and dry. If you see any moisture, keep baking. The goal is a perfect texture that stays crunchy even after cooling. Want to spice things up? You can add nuts or other spices to the apple chips. Try walnuts or pecans for a nice crunch. A sprinkle of nutmeg or ginger can bring warmth, too. Get creative with flavors that excite your taste buds. Drizzling with caramel sauce adds a sweet touch. After baking, let the chips cool. Then, pour warm caramel over them. This extra layer makes your apple chips extra special. When serving your apple chips, think about presentation. Use a chic bowl or a rustic wooden board. This makes the dish look inviting. A sprinkle of cinnamon on top adds flair. Pair your chips with dips for fun. Creamy yogurt or a light caramel dip works great. You can also serve them with a cheese platter. This mix of flavors makes for a tasty snack. Pro Tips Choose the Right Apples: Honeycrisp or Fuji apples are ideal for this recipe due to their crisp texture and sweetness, which enhances the flavor of the chips. Use a Mandoline: For even, thin slices, use a mandoline slicer. This ensures that all apple slices cook evenly and achieve that perfect crispiness. Monitor Baking Time: Baking times can vary based on your oven and the thickness of your slices. Check the chips after the first hour to prevent overbaking. Cool for Extra Crispiness: Allow the chips to cool completely on the baking sheet to ensure they become extra crispy before storing them. {{image_4}} You can add different flavors to your apple chips. Try mixing in cocoa powder for a rich taste. You can also add a splash of vanilla extract for a sweet hint. Experiment with spice blends like nutmeg or ginger for new twists. Apple chips are great as a snack. You can eat them on their own or use them in recipes. They make a crunchy topping for desserts like ice cream or yogurt. You can also sprinkle them over oatmeal for a sweet crunch. If you want to try other cooking methods, the air fryer works well. Set your air fryer to 300°F. Cook the apple slices for about 15-20 minutes, shaking the basket halfway through. For a quick treat, use the microwave. Place apple slices on a plate and cook for 5 minutes, checking every minute until crispy. To keep your caramel cinnamon apple chips fresh, use airtight containers. This helps keep moisture out. Store them at room temperature. Avoid refrigeration, as it can make them soggy. Homemade apple chips can last about one week. Look for signs of spoilage, like soft spots or a loss of crispness. If they feel chewy or look dull, it’s time to toss them. If your chips go stale, don’t worry! You can revive them. Place them on a baking sheet and bake at 200°F (95°C) for 10-15 minutes. This will help them regain their crunch. Enjoy your tasty snack! To make your apple chips sweeter, you can adjust the sugar content. Try increasing the sugar to 3/4 cup instead of 1/2 cup. You can also use brown sugar for a richer flavor. Mixing in a little honey or maple syrup works too. These options add sweetness and depth to your chips. Yes, you can use other fruits for chips! Some great choices are pears, bananas, and even sweet potatoes. Slice them thin, just like apples. Each fruit gives a unique flavor and texture. Experiment with your favorites to find new snacks you love. Each serving of caramel cinnamon apple chips has about 150 calories. They contain around 30 grams of carbs, 0 grams of protein, and 3 grams of fat. The sugar content is roughly 14 grams. These chips are a tasty treat but enjoy them in moderation. To make apple chips without added sugar, you can skip the sugar entirely. Focus on the natural sweetness of the apples. Sprinkle on cinnamon for flavor. You could also use a little lemon juice to enhance taste without sugar. Yes, these chips are great for kids! They are a healthy snack alternative to chips or candy. Apples offer fiber and vitamins. You can serve them as a fun snack or dessert. Pair them with yogurt for a tasty treat. In this blog post, we explored how to make delicious, crunchy apple chips. I shared the essential ingredients, like apples and cinnamon, and discussed how to get the best flavors. You learned step-by-step instructions on preparing, baking, and cooling your chips. We covered tips for achieving perfect crispiness and even offered serving ideas. Making apple chips is easy and fun. With these methods, you can create a tasty snack at home. Enjoy trying different flavors and variations!

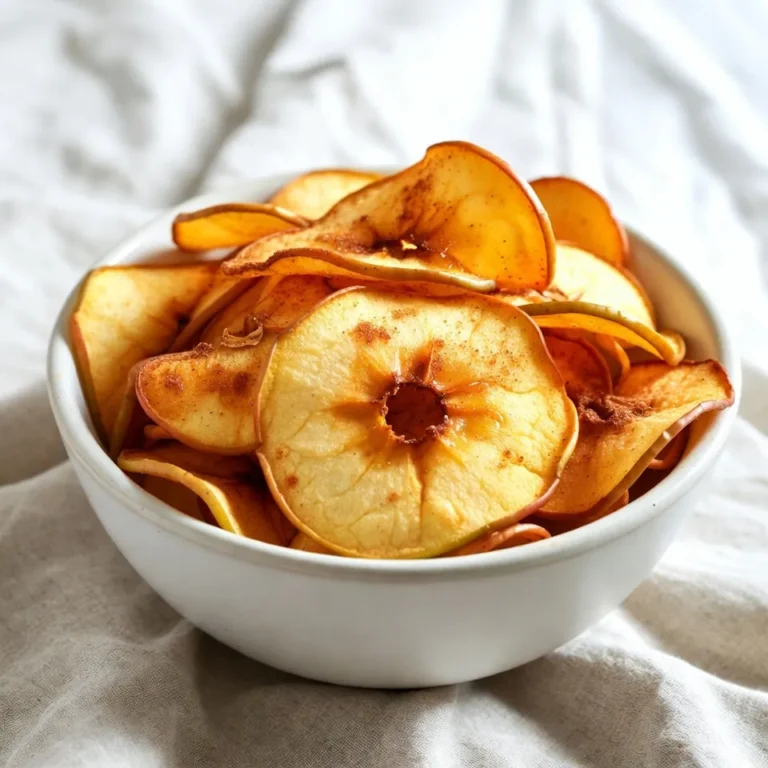
Caramel Cinnamon Apple Chips Sweet and Crunchy Treat

- 2 salmon fillets, skinless and boneless - 1 can (400ml) coconut milk - 2 tablespoons red curry paste - 1 tablespoon fish sauce - 1 tablespoon brown sugar - 1 cup vegetable broth The main ingredients create a rich, creamy dish. The salmon brings protein and healthy fats. Coconut milk adds creaminess while balancing the spices. The red curry paste provides warmth and flavor. Fish sauce offers a touch of umami. Brown sugar sweetens the dish, enhancing the flavors. Vegetable broth pulls it all together, creating a satisfying sauce. - 1 red bell pepper, sliced into thin strips - 1 cup green beans, trimmed and cut into 2-inch pieces - 1 cup fresh baby spinach - Fresh basil and cilantro leaves for garnish Adding vegetables makes the curry colorful and healthy. Red bell peppers add sweetness and crunch. Green beans give a nice texture. Baby spinach wilts down and adds nutrients. Fresh basil and cilantro bring freshness and aroma to the dish. These garnishes make your meal visually appealing and flavorful. - Cooked jasmine rice - Optional lime wedges Serving Thai Salmon Coconut Curry over jasmine rice is a must. The rice soaks up the flavorful sauce. It makes the meal filling and satisfying. You can also add lime wedges on the side. A squeeze of lime brightens the dish and adds a fresh kick. {{ingredient_image_2}} 1. Warm a drizzle of oil in a medium saucepan over medium heat. 2. Add 2 tablespoons of red curry paste. Sauté for about 1 minute. It should smell fragrant. 3. Gradually pour in 1 can of coconut milk and 1 cup of vegetable broth. Stir until smooth. 4. Let the mixture come to a gentle simmer. 1. Add 1 tablespoon of fish sauce and 1 tablespoon of brown sugar. Stir well until the sugar dissolves. 2. Once simmering, add the sliced red bell pepper and green beans. Cook for about 5 minutes. 3. Stir occasionally, and watch for the veggies to soften. 1. Carefully place 2 salmon fillets into the curry. Make sure they are submerged in the sauce. 2. Cook for 5 to 7 minutes. The salmon is ready when it flakes easily with a fork. 1. Fold in 1 cup of fresh baby spinach. Cook until the leaves are just wilted, about 1-2 minutes. 2. Remove the saucepan from heat. Stir in 2 tablespoons of fresh lime juice to brighten the flavors. 3. Serve over cooked jasmine rice. Garnish with fresh basil and cilantro leaves for a lovely touch. To make your curry just right, you can change the spice level. If you like it hot, add more red curry paste. For a milder dish, use less. Taste your curry as you cook. Adjust sweetness with brown sugar and saltiness with fish sauce. Small tweaks can make a big difference. To ensure the salmon cooks evenly, place it gently in the curry. Let it soak in the flavors. Cook it until it flakes easily, usually 5-7 minutes. Fresh ingredients are best for taste. Canned veggies can work, but fresh ones add more crunch and color. For a great look, serve in shallow bowls. This shows off the bright colors of your curry and veggies. Add jasmine rice on the side for a nice contrast. Use fresh basil and cilantro as garnishes. A lime wedge adds a pop of color and flavor. Pro Tips Fresh Ingredients: Use fresh herbs and vegetables for the best flavor in your curry. Fresh basil and cilantro will add a vibrant taste and aroma that dried herbs cannot replicate. Control the Heat: Adjust the amount of red curry paste according to your spice preference. Start with less and add more if you like it spicier! Perfectly Cooked Salmon: Keep an eye on the salmon while it cooks. Overcooking can lead to dry fish. It should flake easily when done, around 5-7 minutes in the curry. Balance the Flavors: Taste the curry before serving and adjust seasoning with more lime juice or sugar to balance the flavors to your liking. A little tweak can elevate the dish! {{image_4}} You can swap salmon for shrimp or chicken. Shrimp cooks fast and adds a nice bite. Chicken gives a hearty flavor. Both options work well with the curry sauce. For a vegan twist, use tofu. Firm tofu holds its shape in the curry. Just cut it into cubes and add it when cooking the vegetables. This change keeps the dish creamy and rich. Feel free to add your favorite veggies. Seasonal choices like zucchini or carrots can brighten the dish. They add texture and flavor. You can also use frozen vegetables if fresh ones are not available. Frozen veggies are quick and easy. Just add them when you add the salmon, and they will cook perfectly. Want to boost the taste? Try adding lemongrass. It adds a fresh, citrusy note. You can also use ginger for warmth and spice. For those who enjoy some heat, add sliced chilies. They bring a kick that balances the curry's creaminess. Adjust the amount to fit your taste. To keep your Thai salmon coconut curry fresh, store it in an airtight container. Glass or plastic containers work well. Let the curry cool to room temperature first. Then, seal the container tightly and place it in the fridge. It will stay good for about three days. Make sure to label it with the date! If you want to save the curry for later, freezing is a great option. Pour the cooled curry into freezer-safe bags or containers. Remove as much air as possible before sealing. This helps prevent freezer burn. You can freeze it for up to three months. When you're ready to eat it, thaw it in the fridge overnight. Reheat it gently on the stove or in the microwave. Stir well to make sure it heats evenly. In the fridge, your curry lasts about three days. In the freezer, it can last up to three months. Always check for signs of spoilage. If it smells off or has a strange color, toss it out. Keeping track of dates helps you enjoy your curry at its best! You can serve this dish with a few tasty sides: - Cooked jasmine rice - Steamed broccoli - Crispy spring rolls - Fresh cucumber salad - Thai-style noodles Each of these pairs well with the rich curry. The rice soaks up the sauce nicely. The spring rolls add a fun crunch. To add heat, try these tips: - Add more red curry paste. - Toss in some sliced fresh chilies. - Use a spicy fish sauce. - Serve with chili flakes on the side. Start small and taste as you go. You can always add more spice! Yes, you can use light coconut milk. The curry will have a lighter texture. It may taste less rich but still delicious. You can boost flavor by adding more curry paste or using extra veggies. Yes, this recipe is gluten-free. The main ingredients do not contain gluten: - Coconut milk - Fresh vegetables - Salmon Just ensure that your fish sauce is gluten-free. Many brands offer gluten-free options. Always check the labels for safety. Thai Salmon Coconut Curry blends rich flavors with fresh ingredients. You learned the main ingredients, from salmon and coconut milk to red curry paste and fresh veggies. The step-by-step guide simplifies the cooking process, ensuring a delicious dish every time. You now have tips to adjust flavors and present your meal beautifully. Try variations like using shrimp or tofu for a fresh twist. Remember to store leftovers properly for later enjoyment. Experiment and make this recipe your own, and enjoy a taste of Thailand at home.

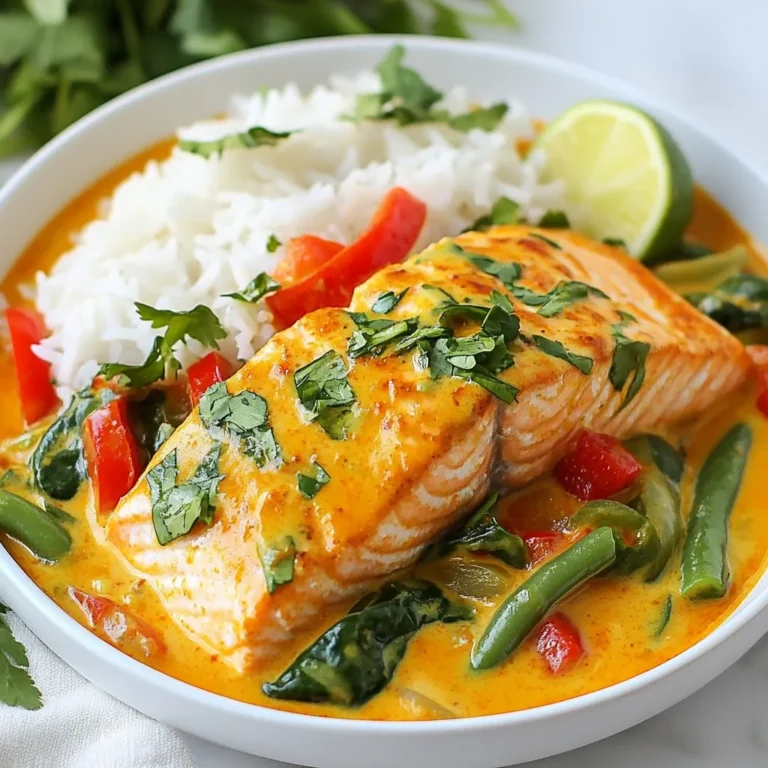
Thai Salmon Coconut Curry Flavorful Comfort Dish

PREV 1 … 5 6 7 … 47 NEXT
meal plan mapper

explore

DessertsDinnerAppetizersDrinks

Our Policies

  • Cookie Policy
  • Copyright Policy
  • Disclaimer
  • GDPR Policy
  • Terms Of Use
Back to Top
  • About
  • Contact Us
  • Privacy Policy
© 2025 meal plan mapper