FREE DINNER EBOOK! Get your copy!
  • Cookie Policy
  • GDPR Policy
  • Disclaimer
  • Terms Of Use
  • Visit my other site: Fun Cookie Recipes
meal plan mapper
  • Home
  • Dinner
  • Desserts
  • Drinks
  • Appetizers
  • Contact
  • About
  • Privacy Policy
  • Home
  • Dinner
  • Desserts
  • Drinks
  • Appetizers
  • Contact
  • About
  • Privacy Policy
  • Cookie Policy
  • GDPR Policy
  • Disclaimer
  • Terms Of Use
Visit my other site: Fun Cookie Recipes

HOME / CATEGORIES /

Latest

For this quick and tasty meal, gather these must-have ingredients: - 8 ounces of spaghetti or linguine - 1 pound of large shrimp, peeled and deveined - 3 tablespoons of unsalted butter - 4 cloves of garlic, finely minced - 1 teaspoon of red pepper flakes - Juice of 1 fresh lemon - 1/4 cup of chicken broth or vegetable broth - 1/4 cup of freshly chopped parsley - Salt to taste - Freshly cracked black pepper to taste - Grated Parmesan cheese for serving (optional) These extra ingredients can boost the flavor of your dish: - Fresh basil, chopped - Cherry tomatoes, halved - A splash of white wine - Capers for a briny kick - Zest of lemon for brightness Adding any of these can bring a new twist to your shrimp scampi pasta. You need a few basic tools to make this meal: - Large pot for boiling pasta - Large skillet for the shrimp scampi sauce - Colander for draining pasta - Wooden spoon or spatula for stirring - Measuring cups and spoons for accuracy Having the right equipment makes cooking smoother and more enjoyable. To start, fill a large pot with water. Make sure to add a generous amount of salt. This helps flavor the pasta. Bring the water to a rolling boil. Once boiling, add 8 ounces of spaghetti or linguine. Cook it as per the package instructions. You want it to be al dente, firm but not hard. Remember to save 1/2 cup of the pasta water before draining. Drain the pasta and set it aside for later. In a large skillet, melt 3 tablespoons of unsalted butter over medium heat. When the butter is melted, add 4 minced garlic cloves and 1 teaspoon of red pepper flakes. Sauté these for about 1 minute. You want to smell the garlic, but don’t let it brown. Next, add 1 pound of large shrimp, which should be peeled and deveined. Cook them for about 2-3 minutes. Turn them until they are pink and opaque. Season with salt and freshly cracked black pepper to taste. Pour in the juice of 1 fresh lemon and 1/4 cup of chicken broth or vegetable broth. Let the mix simmer for 1-2 minutes. This helps all the flavors blend well. Now it’s time to combine everything! Gently fold the drained pasta into the skillet. Toss it with the shrimp and sauce. If it looks too dry, slowly add the reserved pasta water. This will give it a creamy texture. After that, stir in 1/4 cup of freshly chopped parsley. Mix it well and taste. Adjust seasoning with more salt and pepper if needed. Serve hot and top with grated Parmesan cheese if you like. To get the best flavor in your shrimp scampi, use fresh ingredients. Fresh shrimp gives a sweet taste. Fresh lemon juice adds brightness. Use good quality butter for a rich flavor. Red pepper flakes bring a nice heat. Adjust the spice to fit your taste. If you want more depth, add a splash of white wine. Let the sauce simmer to let the flavors blend well. Cook shrimp quickly to keep them tender. Heat your skillet before adding shrimp. They take about 2-3 minutes to cook. Flip them as they turn pink. Overcooking makes shrimp tough. If you use frozen shrimp, thaw them first. This helps them cook evenly. Make your dish look amazing with simple touches. Use shallow bowls to serve pasta. This gives it an elegant look. Sprinkle extra parsley on top for color. Add a lemon wedge on the side. This not only looks nice but adds freshness. Serve with grated Parmesan cheese for extra flavor. {{image_4}} You can switch up the pasta type in this dish. Here are some ideas: - Fettuccine: This wide noodle pairs well with the sauce. - Penne: Its shape holds the sauce nicely. - Zoodles: For a low-carb option, try spiralized zucchini. - Whole Wheat Pasta: A healthy twist that adds fiber. Each choice gives a unique taste and texture to your meal. Feel free to mix in more flavors or change ingredients. Here are some fun ideas: - Vegetables: Add in spinach or cherry tomatoes for color and health. - Protein: Scallops or chicken can replace shrimp if you prefer. - Herbs: Fresh basil or thyme can add a new layer of flavor. - Cheese: Try feta or goat cheese for a creamy touch. These options let you create your own version of shrimp scampi pasta. Pair your pasta with sides that complement its rich taste. Here are some great choices: - Garlic Bread: Crunchy bread enhances the dish's flavors. - Caesar Salad: Crisp romaine and creamy dressing add freshness. - Roasted Vegetables: Carrots or broccoli bring color and nutrients. - Coleslaw: A tangy slaw balances the richness of the pasta. These sides make your meal more complete and enjoyable. After enjoying your shrimp scampi pasta, let it cool. Place leftovers in an airtight container. You can store it in the fridge for up to three days. To keep the flavors fresh, make sure to seal it tightly. If you plan to eat it later, avoid adding cheese until you reheat it. When you’re ready to enjoy the pasta again, use the stove for the best results. Add a splash of water or broth to a skillet. Heat it over low to medium heat. Stir gently until warmed through. This keeps the pasta moist. You can also use the microwave. Just cover it with a damp paper towel. Heat it in short intervals, stirring in between, to avoid drying it out. If you want to save the dish for longer, freezing is a great option. Place the cooled shrimp scampi pasta in a freezer-safe container. It can last up to two months in the freezer. For easy use, divide it into single portions. When you’re ready to eat, thaw it overnight in the fridge. Then, reheat as mentioned above. This way, you’ll always have a tasty meal ready to go. Yes, you can use frozen shrimp. Just thaw them first. Place the shrimp in cold water for about 15 minutes. This quick thaw helps keep them juicy. After thawing, peel and devein if needed. Then, you are ready to cook them in the recipe. To add spice, use more red pepper flakes. Start with an extra half teaspoon. You can also add a pinch of cayenne pepper for more heat. If you love spicy food, feel free to experiment with more. Remember, you can always add spice, but you can't take it away! You can replace butter with olive oil. It adds great flavor and keeps the dish healthy. Coconut oil is another option. It gives a nice taste too. Just use the same amount as butter. Your shrimp scampi will still be delicious! This blog post helped you learn the key ingredients and steps for Minute Shrimp Scampi Pasta. We covered essential cooking tips, flavor ideas, and ways to make it your own. I shared how to store and reheat leftovers, plus answered common questions. Now, you have the tools to create a simple yet tasty dish. Enjoy cooking, and don’t be afraid to try new flavors! Your kitchen is open for fun and delicious meals.

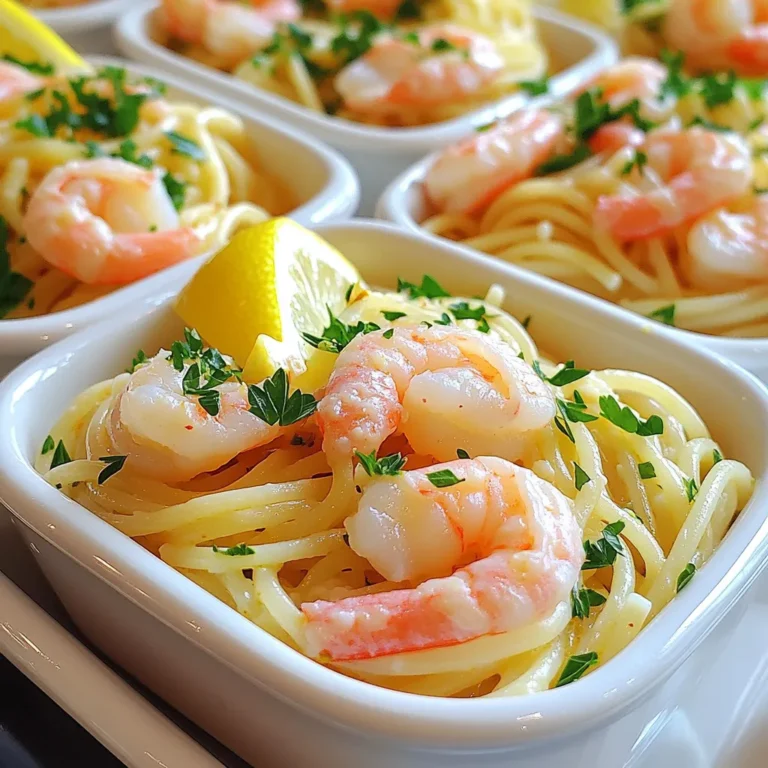
Minute Shrimp Scampi Pasta Quick and Tasty Meal

- 2 cups all-purpose flour - 1/2 cup granulated sugar - 1/4 teaspoon salt - 1 cup unsalted butter, cold and cubed - 1/2 cup brown sugar, packed - 2 cups Granny Smith apples, peeled and diced - 1 teaspoon ground cinnamon - 1/4 teaspoon ground nutmeg - 1 tablespoon fresh lemon juice - 1/2 cup caramel sauce (store-bought or homemade) - 1/2 cup rolled oats - 1/4 cup chopped pecans (optional) You can swap all-purpose flour with whole wheat flour if you want more fiber. For sugar, try coconut sugar for a lower glycemic index. If you don’t have Granny Smith apples, any tart apple works well, like Honeycrisp. You can use margarine instead of butter for a dairy-free option. For a nut-free version, skip the pecans or use sunflower seeds. Each bar contains about 200 calories. You get 10 grams of fat and 2 grams of protein. The bars have around 30 grams of carbs, and 1.5 grams of fiber. They also provide a good dose of vitamins from the apples, especially vitamin C. Enjoy your dessert while keeping these numbers in mind! 1. Preheat your oven to 350°F (175°C). This helps cook the bars evenly. 2. Grease a 9x13-inch baking dish. You can also use parchment paper for easy lifting. 3. In a large bowl, whisk together 2 cups of flour, 1/2 cup of sugar, and 1/4 teaspoon of salt. 4. Cut in 1 cup of cold, cubed butter. Use a pastry cutter or your fingers to mix until it looks like coarse crumbs. 5. Set aside 1 cup of this mixture. You will use it later for the topping. 6. Press the rest of the crumb mixture into the bottom of your baking dish. This forms the crust. 7. Bake the crust for 15 minutes. It should be lightly golden when done. 8. While it bakes, prepare your apple filling. In another bowl, mix 2 cups of diced Granny Smith apples, 1/2 cup of brown sugar, 1 teaspoon of cinnamon, and 1/4 teaspoon of nutmeg. 9. Add 1 tablespoon of lemon juice. Stir until the apples are well coated. 10. Once the crust is baked, spread the apple mixture over it. 11. Drizzle half of the 1/2 cup of caramel sauce on top for added sweetness. 12. For the topping, take the reserved crumb mixture and stir in 1/2 cup of rolled oats and chopped pecans if you like. 13. Evenly sprinkle this topping over the apple layer. 14. Return the baking dish to the oven. Bake for another 25-30 minutes. Look for a golden-brown topping and soft apples. 15. Once done, take it out and let it cool completely on a wire rack. 16. Drizzle the remaining caramel sauce over the top before serving. 17. Cut the cooled bars into squares. Serve them warm or at room temperature. Enjoy! - Use cold butter for the crust. This keeps the bars flaky and tender. - Choose Granny Smith apples. Their tartness balances the sweet caramel. - Press the crust firmly in the pan. This helps it hold its shape. - Bake until golden brown. A well-baked topping adds flavor and texture. - Drizzle caramel sauce just before serving. It looks nice and adds extra sweetness. - Don’t skip chilling the butter. Warm butter makes the crust dense. - Avoid overmixing the dough. This can lead to tough bars. - Don’t rush the cooling time. Bars need to cool completely to slice well. - Be careful with the caramel. Too much can make bars too sweet. - Forgetting to line the baking dish can lead to stuck bars. - A large mixing bowl for mixing ingredients. - A pastry cutter for blending butter into the flour. - A 9x13-inch baking dish for even cooking. - Parchment paper for easy removal of bars. - A wire rack for cooling the bars evenly. These tips and tools will help you make the best caramel apple pie bars. Enjoy every bite! {{image_4}} You can switch up the flavor of your caramel apple pie bars. For a fun twist, try using different apples. Honeycrisp apples add a sweet touch, while tart Granny Smith brings zing. You can also mix apples with pears for a lovely blend. Add spices like ginger or allspice to the apple filling for a pop of flavor. If you want a caramel chocolate treat, drizzle melted chocolate over the bars after baking. Need to make these bars fit your diet? You can use gluten-free flour instead of all-purpose flour for a gluten-free version. Swap out sugar for a sugar substitute like stevia or monk fruit if you want to cut calories. Instead of butter, try using coconut oil or vegan butter to make them dairy-free. You can also omit the pecans if you have nut allergies. Toppings can take your bars to the next level. For a crunchy topping, add a sprinkle of crushed graham crackers or granola. You could also use shredded coconut for a tropical feel. For a creamier touch, add whipped cream or a dollop of Greek yogurt on top. Don’t forget about that extra drizzle of caramel sauce! It makes everything better and adds sweetness. To store leftover caramel apple pie bars, let them cool completely. Place them in an airtight container. You can keep them at room temperature for up to three days. If you want them to last longer, store them in the fridge. This keeps them fresh for about a week. Make sure to separate layers with parchment paper to avoid sticking. You can freeze these bars for later enjoyment. First, cut the bars into squares and let them cool fully. Wrap each square in plastic wrap. Then, place the wrapped bars in a freezer-safe bag. They can stay in the freezer for up to three months. When you're ready to eat, let them thaw in the fridge overnight. To reheat, place the bars in a microwave-safe dish. Heat them in the microwave for about 15 to 20 seconds. This warms them up nicely without drying them out. For a crisp texture, you can also reheat them in the oven. Preheat the oven to 350°F (175°C) and heat the bars for about 10 minutes. This brings back that fresh-baked taste. You will know the bars are done when they turn a nice golden brown. The topping should be crisp, and the apples should feel soft when you poke them with a fork. This usually takes about 25-30 minutes after the first bake. Keep an eye on them to avoid burning. Yes, you can make these bars ahead of time. In fact, they taste even better after sitting for a while. Just let them cool completely, then cover and store them in the fridge. You can enjoy them for up to three days. If you don’t have pecans, you can use walnuts or almonds. Both add a nice crunch. If you prefer a nut-free option, you can leave them out altogether. The bars will still be delicious! These caramel apple pie bars last for about three days in the fridge. If you want to keep them longer, you can freeze them. Just wrap them well in plastic wrap. They will stay fresh for up to three months in the freezer. In this post, I shared how to make tasty bars from start to finish. We covered key ingredients, simple steps, and tips for the best results. Remember, using the right tools and avoiding common mistakes can improve your bars. Explore flavor variations and easy storage methods to make this recipe your own. With these insights, you can bake with confidence. Enjoy every bite!

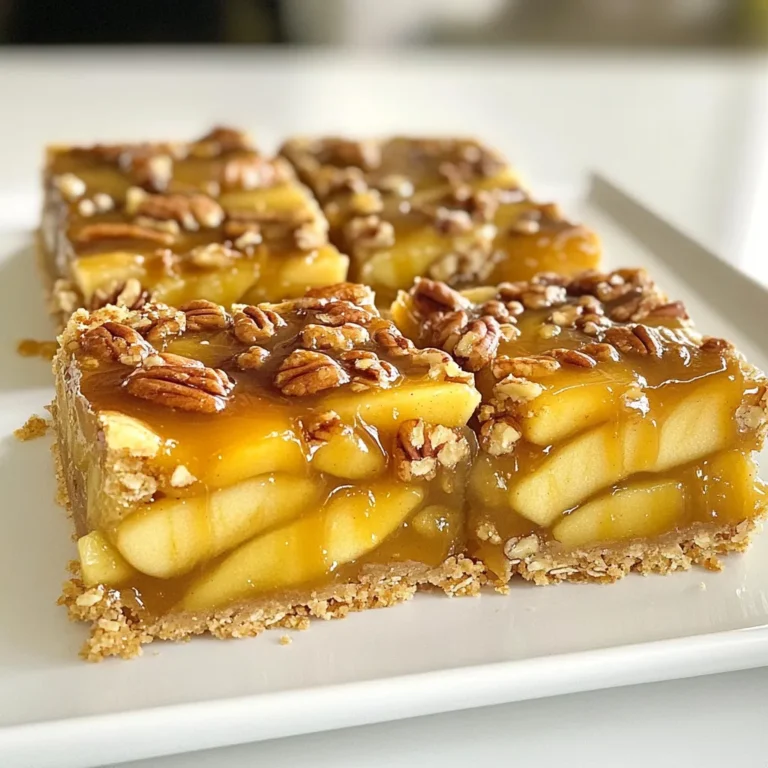
Caramel Apple Pie Bars Delightful Dessert Recipe

For Garlic Parmesan Roasted Cauliflower, gather these items: - 1 large head of cauliflower, cut into uniform florets - 4 tablespoons high-quality olive oil - 4 cloves of fresh garlic, finely minced - 1 teaspoon smoked paprika - ½ teaspoon sea salt - ½ teaspoon freshly cracked black pepper - ½ cup freshly grated Parmesan cheese - 2 tablespoons fresh parsley, finely chopped - 1 tablespoon freshly squeezed lemon juice Using high-quality olive oil is key. It adds rich flavor and depth to your dish. Look for oils that are cold-pressed and extra virgin. This type has a fruity taste and is less processed. A good olive oil enhances the dish, making each bite a delight. Fresh garlic makes a big difference. It adds a bright taste that dried garlic cannot match. Use cloves that are firm and smell strong for the best flavor. Now, let's talk about Parmesan. Always choose freshly grated cheese. Pre-grated cheese often contains anti-caking agents that dull its flavor. Freshly grated cheese melts better and gives a lovely texture to your dish. {{ingredient_image_2}} First, preheat your oven to 425°F (220°C). This high heat will help the cauliflower roast well. While the oven warms, take your large head of cauliflower and cut it into uniform florets. This step is key because even-sized pieces cook evenly. Place the florets in a large mixing bowl. Now, add 4 tablespoons of high-quality olive oil to the bowl. Follow this with 4 cloves of finely minced garlic, 1 teaspoon of smoked paprika, ½ teaspoon of sea salt, and ½ teaspoon of freshly cracked black pepper. Use your hands or a spatula to toss the florets. Make sure every piece is coated with the oil and spices. This ensures each bite bursts with flavor. Next, transfer the seasoned cauliflower to a large baking sheet. Spread the florets in a single layer. This will help them roast evenly and become golden brown. Place the baking sheet in the oven and roast for about 25-30 minutes. Remember to stir the cauliflower halfway through. This step promotes an even roast. In the last 5 minutes, sprinkle ½ cup of grated Parmesan cheese over the top. This will melt and create a delicious, crispy topping. Once done, remove the baking sheet from the oven. Drizzle with lemon juice and sprinkle with chopped parsley. Your dish is now ready to serve! To get that perfect crunch, start with dry cauliflower. Pat it with a towel. When you coat it in olive oil, use enough but not too much. Spread the florets in a single layer on the baking sheet. This helps them roast evenly. Give them space! Overcrowding makes them steam instead of crisp. Stir halfway through baking for even browning. You can play with flavors! Try adding a pinch of cayenne for heat. For a smoky taste, use smoked paprika, as I do. If you love herbs, add thyme or rosemary to the mix. A sprinkle of lemon zest can brighten the dish. Feel free to mix in other cheeses like feta or cheddar for fun twists. Make your dish pop! Serve your roasted cauliflower on a colorful plate or wooden board. A sprinkle of parsley adds freshness. For extra flair, place lemon wedges next to the cauliflower. This not only looks good, but it lets your guests add a splash of citrus if they like. Remember, we eat with our eyes first! Pro Tips Choose the Right Cauliflower: Select a cauliflower head that is firm and white, with tightly packed florets for the best texture and flavor. Don't Skip the Toss: Make sure to thoroughly coat each floret with the olive oil and spices. This ensures even roasting and flavor distribution. Experiment with Cheese: While Parmesan is delicious, feel free to mix in other cheeses like Pecorino Romano or Grana Padano for a different flavor profile. Adjust Roast Time: Keep an eye on the cauliflower during roasting; ovens vary, and you may need to adjust the time to achieve your desired level of crispiness. {{image_4}} You can change the cheese to match your taste. Try using Gruyère for a nutty flavor. Mozzarella offers a great melt and stretch. Feta gives a salty kick. Each cheese adds its own twist to the dish. Mix and match to find your favorite! If you like heat, add red pepper flakes. Start with a pinch and taste. You can also use cayenne pepper for a bolder flavor. For a milder version, just skip the spices. You control the heat in this dish! Not a fan of cauliflower? That's okay! You can use broccoli instead. It roasts well and tastes great with garlic and cheese. Brussels sprouts are another option. They offer a unique flavor and texture. Be creative and enjoy your favorite vegetables! Store leftover Garlic Parmesan Roasted Cauliflower in an airtight container. Let it cool before sealing. This keeps the flavors fresh and prevents sogginess. Place the container in the fridge. It stays good for up to three days. To reheat, use the oven for the best taste. Preheat the oven to 350°F (175°C). Spread the cauliflower on a baking sheet. Heat for about 10-15 minutes. This helps restore its crispy texture. You can also use a microwave if you're short on time. Just cover it to avoid drying out. You can freeze Garlic Parmesan Roasted Cauliflower for later use. First, let it cool completely. Then, place it in a freezer-safe bag or container. Remove as much air as possible to prevent freezer burn. It lasts up to two months in the freezer. When ready to eat, thaw it overnight in the fridge and reheat it in the oven for the best flavor. Roasting cauliflower takes about 25-30 minutes. Start by preheating your oven to 425°F (220°C). Place the cauliflower on a baking sheet in a single layer. Roasting time may vary based on your oven. Halfway through, stir the cauliflower for even cooking. You want it golden brown and tender. Yes, you can use frozen cauliflower, but fresh is best. If you use frozen, thaw it first. Drain any excess water to avoid soggy florets. Frozen cauliflower may need a bit more time to roast. Check for tenderness and adjust the cooking time as needed. Serve Garlic Parmesan Roasted Cauliflower as a side dish or appetizer. It pairs well with grilled meats and fish. You can also use it in salads or grain bowls. For a fun twist, mix it with pasta or serve it with a tangy dipping sauce. Add extra parsley and lemon wedges for a fresh touch. This blog post covered how to make Garlic Parmesan Roasted Cauliflower. We looked at the best ingredients, like high-quality olive oil, garlic, and Parmesan. You saw step-by-step instructions for preparing, coating, and roasting for perfect texture. I shared tips for crispiness and flavor tweaks. We explored tasty variations and smart storage tips. Finally, I answered common questions about roasting time and serving ideas. Now you can enjoy a healthy, tasty side dish that’s easy to prepare and perfect for any meal.

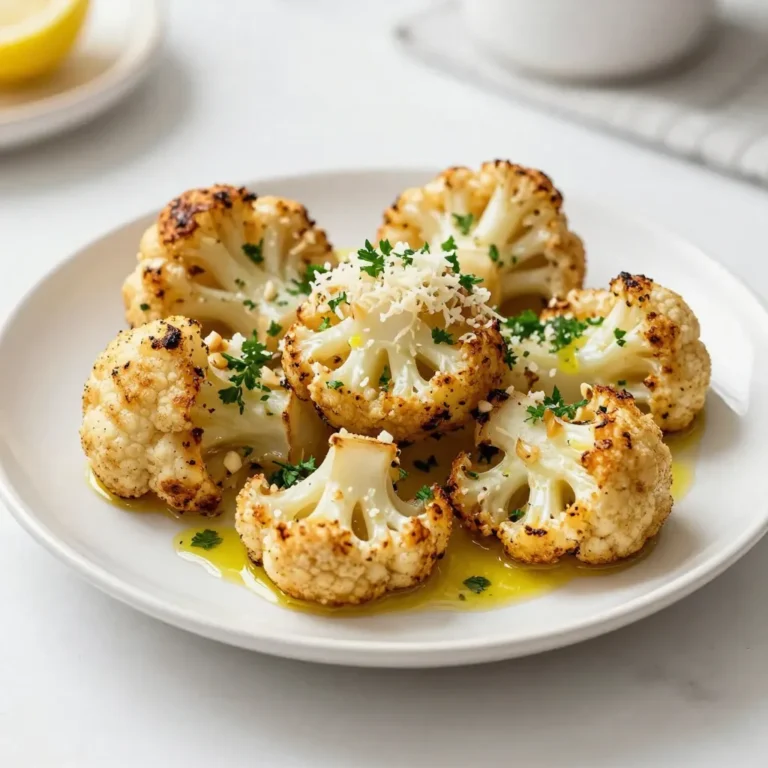
Garlic Parmesan Roasted Cauliflower Savory and Easy Dish

- 1 pound large shrimp, peeled and deveined - 2 cups cooked jasmine rice - 4 cloves garlic, finely minced - Zest of 1 lemon and juice from the same lemon - 2 tablespoons extra virgin olive oil - 1 teaspoon red pepper flakes (optional, for a spicy kick) - Sea salt and freshly cracked black pepper to taste - Fresh parsley, roughly chopped (for garnish) - 1 ripe avocado, thinly sliced (for topping) - A handful of baby spinach or arugula (for serving) This Lemon Garlic Shrimp Rice Bowl is simple yet bursting with flavor. I use large shrimp for a juicy bite. The jasmine rice provides a fluffy base that soaks up the rich lemon and garlic sauce. Garlic is key here; it gives a savory punch. The lemon zest and juice bring brightness to the dish. If you like a little heat, add red pepper flakes. Season with salt and pepper to taste. Fresh parsley adds a pop of color and freshness on top. For serving, I love to add ripe avocado. It adds a creamy texture that complements the shrimp. Baby spinach or arugula gives a nice crunch. These ingredients combine to create a balanced meal that looks as good as it tastes. - Heat a large, non-stick skillet over medium heat. Add 2 tablespoons of olive oil. - Once the oil is shimmering, add 4 cloves of finely minced garlic and 1 teaspoon of red pepper flakes. Sauté for about 30 seconds. You want the garlic fragrant but not brown. This step infuses the oil with rich flavor. - Take 1 pound of large shrimp, peeled and deveined. Season them with sea salt and freshly cracked black pepper. - Place the shrimp gently in the skillet. Cook for 2-3 minutes, stirring occasionally. The shrimp should turn pink and opaque. This means they’re cooked through. - Pour in the zest and juice of 1 lemon. Stir everything together to mix the flavors. - Let it cook for another minute. This lets the lemon and garlic meld into the shrimp. - Start with a base of 2 cups of cooked jasmine rice in each bowl. - Spoon the lemon garlic shrimp and its juices over the rice. This adds great flavor to the rice. - Add a handful of fresh baby spinach or arugula next to the shrimp. This adds color and freshness. - Layer thin slices of a ripe avocado on top. This gives your dish a creamy texture. - Finish by sprinkling chopped fresh parsley on top. This adds a bright touch and looks appealing. - Heat the skillet before adding oil. This helps the shrimp cook evenly. - Cook shrimp just until they turn pink and opaque. This keeps them tender. - Choose brightly colored bowls for a fun look. This makes the dish pop. - Add a lemon wedge on the side. It gives a fresh squeeze of flavor. - Change the amount of garlic and lemon to fit your taste. You can make it stronger or milder. - If you like heat, add more red pepper flakes. It gives the dish a nice kick. {{image_4}} You can swap shrimp for other proteins. Chicken works well and adds a hearty touch. Tofu is a great option for a plant-based meal. Just marinate it in the lemon garlic sauce for flavor. Scallops offer a sweet, tender bite. Fish like salmon or tilapia can also shine in this bowl. If you want a healthier rice option, try brown rice. It adds a nice nutty flavor and more fiber. Quinoa is another great choice. It's packed with protein and cooks quickly. For a low-carb option, consider cauliflower rice. It absorbs flavors well and adds great texture. To elevate the dish, try adding fresh herbs. Cilantro brings a bright taste, while dill adds a unique twist. You can also experiment with citrus fruits. Lime juice offers a tart kick, while orange zest gives a sweet note. Mixing these flavors can make your dish even more exciting. To keep your Lemon Garlic Shrimp Rice Bowls fresh, store leftovers in an airtight container. This helps seal in the flavors. You should refrigerate them within two hours of cooking. They will stay good for up to three days in the fridge. Make sure to cool the rice and shrimp before sealing the container. This prevents moisture buildup, which can spoil the dish faster. When you’re ready to eat, use gentle heat to reheat your rice bowls. The best method is to use a microwave. Place the rice and shrimp in a bowl and cover it with a lid or a damp paper towel. Heat it in short bursts of 30 seconds, stirring between each. This helps heat it evenly. To avoid mushy rice, add a splash of water before reheating. If you prefer, you can also use a skillet. Heat it on low heat, stirring often until warmed through. This keeps the shrimp tender and the rice fluffy. Enjoy your meal! You can tell shrimp are done when they turn pink and opaque. The shrimp should curl slightly. This usually takes about 2-3 minutes on medium heat. Avoid overcooking, as shrimp can become tough. Yes, you can prepare this dish ahead of time. Cook the shrimp and rice, then store them separately. This helps keep the rice fluffy and the shrimp tender. When ready to eat, just reheat in a skillet. Add a splash of lemon juice for freshness. You can serve many sides with this dish. A simple green salad complements the meal well. You can also add steamed vegetables like broccoli or snap peas. Garlic bread makes a nice addition too. To reduce carbs, you can swap jasmine rice for cauliflower rice. This keeps the dish light. You can also skip the rice altogether and serve the shrimp on a bed of greens. This way, you enjoy the flavors without the carbs. In this blog post, we explored a delicious Lemon Garlic Shrimp Rice Bowl. We covered the main ingredients like shrimp, jasmine rice, and garlic. I shared steps on cooking the shrimp and combining great flavors. You found tips on cooking and presentation, plus variations for proteins and rice. Finally, we talked about storage and reheating. This dish is easy to make and customizable to your taste. Enjoy trying it in your kitchen!

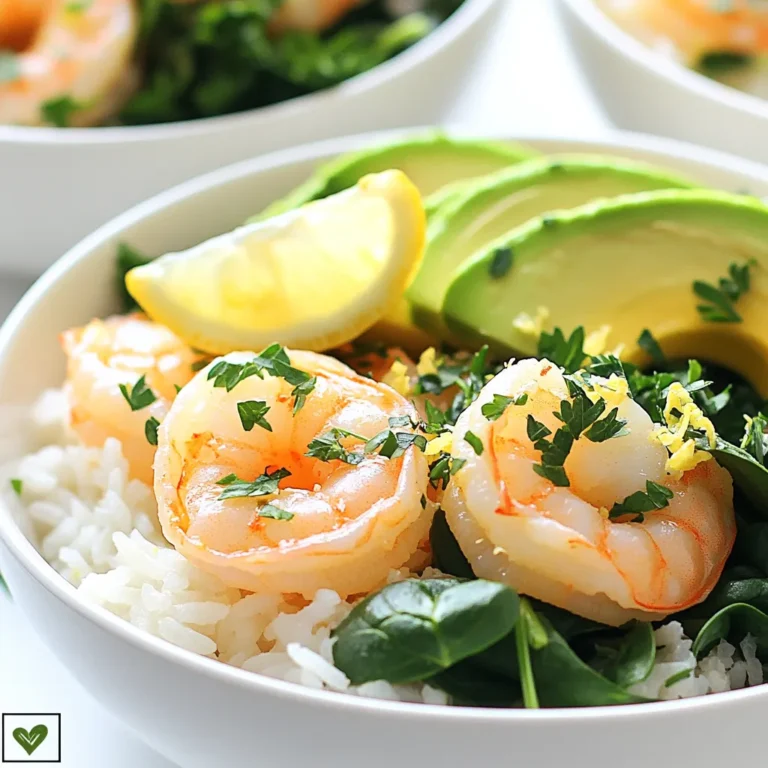
Lemon Garlic Shrimp Rice Bowls Flavorful and Simple Meal

To make a great Caramel Apple Milkshake, you will need simple, tasty ingredients. Here’s the list you will use: - 2 cups creamy vanilla ice cream - 1 cup rich whole milk - 1 medium sweet apple, such as Honeycrisp - 1/4 cup luscious caramel sauce - 1/2 teaspoon ground cinnamon - Whipped cream for topping - Optional: Crushed graham crackers Each ingredient plays a key role. The vanilla ice cream gives a rich base. Whole milk adds creaminess. The sweet apple brings freshness and texture, while the caramel sauce adds that irresistible sweetness. Ground cinnamon gives a warm flavor that ties everything together. Whipped cream on top makes it extra special. If you want a fun crunch, sprinkle crushed graham crackers over the whipped cream. Choosing quality ingredients matters. A fresh, sweet apple like Honeycrisp will make your milkshake taste even better. Use a thick caramel sauce for a rich finish. With these ingredients, you will create a delightful and creamy treat that everyone will love! - Step 1: Prepare the mixing ingredients Start by gathering all your ingredients. You will need 2 cups of creamy vanilla ice cream, 1 cup of rich whole milk, and 1 medium sweet apple, like Honeycrisp. Make sure to core and chop the apple. You’ll also need 1/4 cup of luscious caramel sauce and 1/2 teaspoon of ground cinnamon. - Step 2: Blend the mixture In a high-powered blender, combine the vanilla ice cream, whole milk, chopped apple, caramel sauce, and ground cinnamon. Blend on medium speed until the mixture becomes smooth and creamy. It’s okay to keep some apple chunks for added texture. - Step 3: Adjust sweetness if needed Taste your milkshake. If you want it sweeter, add more caramel sauce. Blend briefly to mix in the extra sweetness. - Step 4: Pour into serving glasses Carefully pour the milkshake mixture into two tall glasses. Leave about an inch of space at the top for the whipped cream. - Step 5: Add toppings and garnish Top each milkshake with a generous swirl of whipped cream. Drizzle extra caramel sauce over the top for a rich finish. If you want an added crunch, sprinkle crushed graham crackers over the whipped cream before serving. Enjoy this delightful treat! To boost the flavor of your milkshake, try adding more caramel. It makes each sip even sweeter. You can also mix in a pinch of sea salt. This salt brings out the caramel's sweetness. As for apples, I recommend using Honeycrisp. They are sweet and crunchy, perfect for a milkshake. Fuji apples also work well. Their natural sweetness adds to the overall flavor. For a creamy milkshake, blend the ice cream and milk on medium speed. This method gives you a smooth texture. Keep some apple chunks for fun bites in every sip. If you blend too much, you can lose that crunch. Just blend until the mixture is smooth but still has pieces of apple. For serving, tall glasses are the best choice. They show off the layers of your milkshake. You can use mason jars for a fun twist. Top the shake with a generous swirl of whipped cream. Drizzle extra caramel sauce on top for a sweet finish. If you want extra crunch, sprinkle crushed graham crackers over the whipped cream. It adds a nice texture and looks great too! {{image_4}} You can easily make a vegan version of this milkshake. Start by using dairy-free ice cream. Look for options made from coconut or almond milk. Instead of whole milk, use almond milk or oat milk. These swaps keep the creamy texture you love. Use vegan caramel sauce, which you can find in stores or make at home. This way, you still enjoy that sweet caramel flavor without animal products. Want a healthier milkshake? Try using low-calorie ice cream. Look for brands that use stevia or monk fruit as sweeteners. These choices cut down sugar without losing taste. You can also use unsweetened almond milk or skim milk. If you want to sweeten it naturally, try adding a ripe banana. This adds creaminess and sweetness without extra calories. You can bring the taste of fall into your milkshake. Add pumpkin spice or cinnamon for a cozy flavor. A pinch of nutmeg works well, too. Mix these spices in with your other ingredients. This simple change makes your milkshake feel festive and warm. It’s perfect for those chilly autumn nights! To keep your caramel apple milkshake fresh, store it in the fridge. Pour any leftover milkshake into a clean, airtight container. This helps to prevent air from getting in and keeps it tasty. It is best to consume stored milkshake within 24 hours for the best flavor. If you notice any separation, just give it a quick stir before enjoying it again. Freezing milkshakes is a great way to save them for later. To freeze, pour the milkshake into ice cube trays. Once frozen, transfer the cubes to a freezer-safe bag. This way, you can blend a few cubes with milk later to create a quick treat. When you want a milkshake, just blend the frozen cubes with a splash of milk until smooth. Enjoy a refreshing drink anytime! For milkshakes, I love using sweet apples. Honeycrisp apples work great. They add natural sweetness and a crisp texture. Tart apples can also shine, but they may change the flavor. If you prefer a tangy taste, try Granny Smith apples. Balance is key, so pick what you like. Mixing sweet and tart can give a fun twist to your milkshake. Yes, you can prepare some parts ahead of time. Chop the apples and store them in water with lemon juice. This stops them from browning. You can also mix the ice cream, milk, and caramel sauce early. Keep it in the fridge for later use. Just blend everything fresh before serving. This keeps the milkshake creamy and delightful. To make your milkshake thicker, use less milk. Start with half a cup and adjust later. You can also add more ice cream for creaminess. Another trick is to blend on low speed. This keeps some apple chunks intact. If you want it even thicker, freeze the milkshake for a bit before serving. Enjoy experimenting until you find your perfect thickness! In this post, I shared how to make a delicious caramel apple milkshake. We covered the main ingredients, step-by-step instructions, helpful tips, and tasty variations. You learned how to enhance flavors and achieve a creamy texture. Use the storage tips to keep your leftovers fresh. Remember, you can get creative with toppings and flavors. Whether you stick to the classic or try a new twist, enjoy every sip of your milkshake. This treat is sure to please anyone who loves sweet flavors and fun textures.

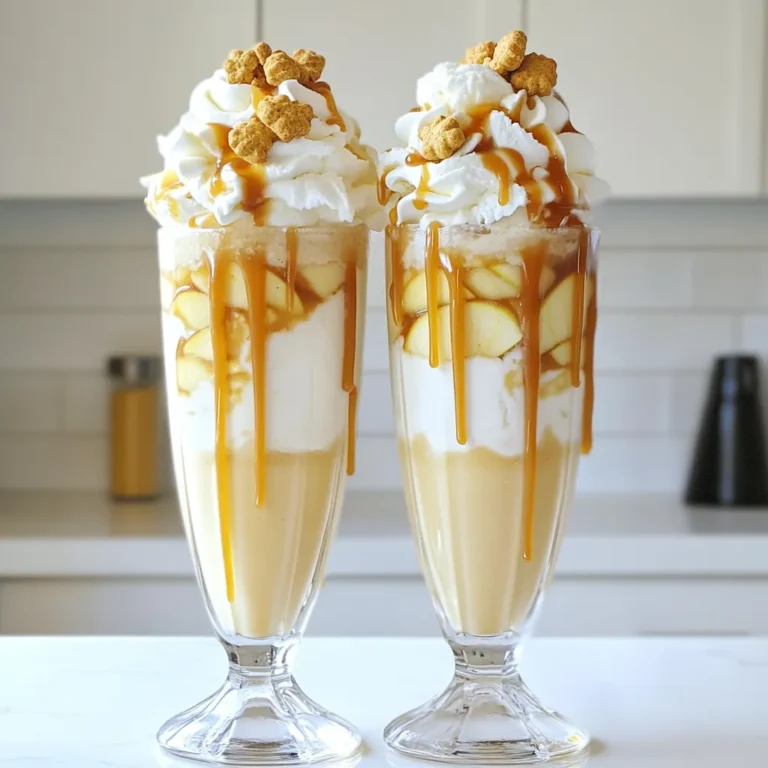
Caramel Apple Milkshake Delightful and Creamy Treat

To make these tasty bars, you will need: - 1 ½ cups all-purpose flour - ½ cup old-fashioned oats - ½ cup packed brown sugar - ½ cup cold butter, cubed - ½ teaspoon salt - 1 cup pumpkin puree - 1 cup sweetened condensed milk - 2 large eggs - 1 teaspoon vanilla extract - 1 teaspoon ground cinnamon - ½ teaspoon ground nutmeg - ½ teaspoon ground ginger - 1 cup pecans, chopped - Optional: whipped cream for serving You can switch some items if needed: - Use coconut oil instead of butter for a dairy-free option. - Substitute maple syrup for brown sugar for a different sweetness. - Gluten-free flour can replace all-purpose flour if you need it gluten-free. - If you don't have sweetened condensed milk, you can blend milk with sugar until thick. To make your bars even better, try these ideas: - Add whipped cream on top for a creamy finish. - Dust with powdered sugar for a nice look. - Serve with a scoop of vanilla ice cream for extra flavor. - Top with toasted pecans for added crunch and flavor. Start by preheating your oven to 350°F (175°C). Grab a 9x13-inch baking pan. Lightly grease it with butter or cooking spray. This step helps the bars not to stick. In a large bowl, mix together 1 ½ cups of all-purpose flour, ½ cup of old-fashioned oats, ½ cup of packed brown sugar, and ½ teaspoon of salt. Once mixed, add in ½ cup of cold, cubed butter. Use a pastry cutter or your fingers to mix this until it looks like coarse crumbs. It’s okay to leave some small chunks of butter. This will make the crust flaky. After the crust mixture is ready, press it firmly into the bottom of your pan. Use your fingers or the back of a measuring cup to spread it evenly. Bake it for about 10-12 minutes, or until it is slightly golden and set. While your crust bakes, you can prepare the pumpkin filling. In a medium bowl, whisk together 1 cup of pumpkin puree, 1 cup of sweetened condensed milk, and 2 large eggs. Add 1 teaspoon of vanilla extract, 1 teaspoon of ground cinnamon, ½ teaspoon of ground nutmeg, and ½ teaspoon of ground ginger. Whisk until the mixture is smooth and well combined. Once your crust is out of the oven, carefully pour the pumpkin filling over it. Use a spatula to spread the filling evenly across the crust. Next, sprinkle 1 cup of chopped pecans evenly on top of the pumpkin filling. This adds a nice crunch to your bars. Now, place the pan back in the oven and bake for another 25-30 minutes. The bars are done when the filling is set. You can check this by inserting a toothpick into the center. If it comes out clean, the bars are ready. After baking, remove the pan from the oven. Let the bars cool completely in the pan on a wire rack. This cooling time helps them hold together when you cut them. Once cool, slice them into squares or bars. If you like, top them with a dollop of whipped cream for extra flavor. To get a great crust, keep your butter cold. When you mix in the butter, leave small chunks. This makes the crust flaky. Press it firmly into the pan. Make sure it is even. Bake it until it is just golden. This step sets a nice base for the bars. For a smooth filling, start with room temperature ingredients. Mix the pumpkin puree, sweetened condensed milk, and eggs well. Whisk until there are no lumps. Incorporate the spices evenly. This ensures every bite has flavor. Pour the filling gently over the crust. Spread it with a spatula to keep it even. These bars are perfect for sharing. For a special touch, add whipped cream on top. You can also sprinkle toasted pecans for extra crunch. Dust with powdered sugar for a pretty finish. Serve them on a nice platter to impress guests. They make a great dessert for holidays or family gatherings. {{image_4}} You can make these bars gluten-free by swapping out all-purpose flour. Use a gluten-free flour blend instead. Make sure it has a good binding agent. This will keep your bars from falling apart. The taste remains rich and satisfying, just like the classic version. To make these bars vegan, replace eggs with flax eggs. Mix one tablespoon of flaxseed meal with three tablespoons of water. Let it sit for five minutes. For the sweetened condensed milk, use coconut cream or a vegan version found in stores. This will give you a creamy texture without animal products. Spice it up by adding more flavor! Try different spices like allspice or cardamom. You can also mix in chocolate chips for a sweet surprise. Chopped apples or cranberries can add a fruity twist. These small changes can make your bars unique and exciting. To keep your pumpkin pecan pie bars fresh, store them in an airtight container. This helps prevent dryness and keeps them tasty. Place a piece of parchment paper between layers if stacking. This way, they won't stick together. Store them at room temperature for up to three days. If you want them to last longer, refrigerate them for about a week. Freezing is a great way to save these bars for later. First, let the bars cool completely. Then, cut them into squares or bars. Wrap each piece in plastic wrap tightly. Place the wrapped bars in a freezer-safe bag or container. You can freeze them for up to three months. When you're ready to enjoy, simply thaw them in the fridge overnight. To reheat your pumpkin pecan pie bars, preheat your oven to 350°F (175°C). Place the bars on a baking sheet. Cover them with aluminum foil to keep moisture in. Heat for about 10-15 minutes until warm. This method helps keep the crust crisp and the filling soft. You can also enjoy them chilled or at room temperature if you prefer. Yes, you can prepare pumpkin pecan pie bars ahead of time. Make them a day or two before you plan to serve. Store them in the fridge after they cool. This helps the flavors blend and makes them even tastier. Just remember to cover them well to keep them fresh. If you need a substitute for sweetened condensed milk, try using coconut milk mixed with sugar. Combine one cup of coconut milk with two-thirds cup of sugar. Stir until the sugar dissolves. This mix gives a similar sweetness and adds a nice flavor twist. Pumpkin pecan pie bars can last up to five days in the fridge. Keep them in an airtight container to maintain freshness. If you want to keep them longer, consider freezing them. They can last up to three months in the freezer. Just thaw them in the fridge when you’re ready to enjoy! This article covered how to make delicious Pumpkin Pecan Pie Bars. We discussed the ingredients, step-by-step baking, and tips for the best results. You learned about variations, including gluten-free and vegan options, plus how to store and reheat leftovers properly. In conclusion, these bars are a tasty treat for any occasion. With the right tips, you can bake them perfectly. Enjoy your baking journey, and share these bars with friends and family!

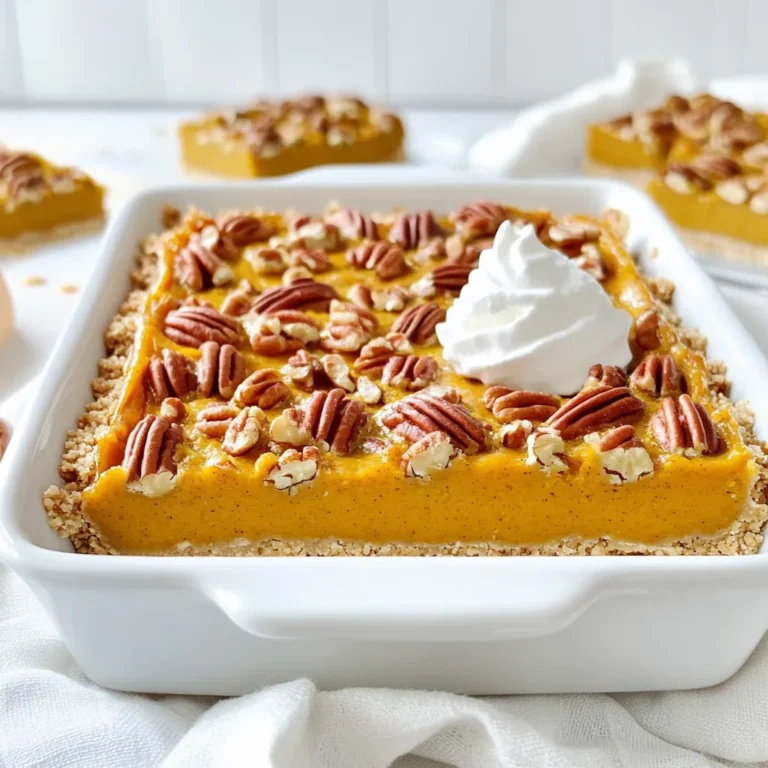
Pumpkin Pecan Pie Bars Simple and Delicious Treat

- 2 cups all-purpose flour - 1 cup granulated sugar - 1 tablespoon baking powder - 1 teaspoon baking soda - 1 teaspoon ground cinnamon - ½ teaspoon salt - 1 large egg - ½ cup unsweetened applesauce - ½ cup milk - ⅓ cup vegetable oil - 1 teaspoon vanilla extract - 2 medium Granny Smith apples, peeled, cored, and diced - ½ cup brown sugar - ½ cup rolled oats - ¼ cup cold butter, cut into small cubes - 1 teaspoon ground cinnamon I love using Granny Smith apples in these muffins. They have a nice tartness that pairs well with sweet cinnamon. The apples give a juicy burst with every bite. You’ll find that the all-purpose flour and baking powder help the muffins rise, making them fluffy. The sugar adds sweetness, while the baking soda gives them a nice lift. The applesauce not only adds moisture but also keeps the muffins tender. The egg binds everything together. Milk and vegetable oil keep the texture soft and rich. For the streusel topping, the brown sugar gives a deep flavor, while the oats add a lovely crunch. Mixing in cold butter makes the topping crumbly. Gather these ingredients, and you're ready to create a tasty treat! 1. Preheat the oven and prepare the muffin tin: Start by preheating your oven to 350°F (175°C). This step is key for even baking. Line a muffin tin with paper liners. This helps with easy cleanup and keeps muffins from sticking. 2. Mix the dry ingredients in a bowl: In a large mixing bowl, whisk together 2 cups of all-purpose flour, 1 cup of granulated sugar, 1 tablespoon of baking powder, 1 teaspoon of baking soda, 1 teaspoon of ground cinnamon, and ½ teaspoon of salt. Mixing dry ingredients well ensures that flavors blend evenly. 3. Whisk together the wet ingredients in another bowl: In a separate bowl, whisk together 1 large egg, ½ cup of unsweetened applesauce, ½ cup of milk, ⅓ cup of vegetable oil, and 1 teaspoon of vanilla extract. This creates a smooth mixture that adds moisture to the muffins. 1. Fold wet and dry ingredients together: Gently pour the wet mixture into the bowl with the dry ingredients. Use a spatula to fold the mixtures together carefully. Stop mixing once you see no dry flour. Overmixing can lead to tough muffins. 2. Gently add the diced apples: Next, fold in 2 medium Granny Smith apples that you have peeled, cored, and diced. This adds a fresh, fruity burst to each muffin. 1. Prepare and add the streusel topping: In a small bowl, mix ½ cup of brown sugar, ½ cup of rolled oats, and 1 teaspoon of ground cinnamon. Add ¼ cup of cold butter cut into small cubes. Use a fork or your fingers to blend until crumbly. This topping adds a crunchy finish. 2. Fill muffin cups and bake: Use a spoon or ice cream scoop to fill each muffin cup about ⅔ full with batter. Sprinkle the streusel topping generously over each muffin. Place the muffin tin in the oven and bake for 18 to 22 minutes. Check doneness by inserting a toothpick into the center. If it comes out clean, the muffins are ready. 3. Cooling the muffins: Let the muffins cool in the pan for 5 minutes. Then, transfer them to a wire rack to cool completely. This step helps the muffins stay light and fluffy as they cool. - Ensuring proper ingredient measurements: Use measuring cups for dry ingredients and liquid measuring cups for wet. This helps you get the right amounts. If your flour is packed, it can lead to heavy muffins. Always spoon flour into your cup, then level it off. - Avoiding overmixing for light muffins: Mix the wet and dry ingredients gently. Stir just until you see no dry flour. Overmixing makes muffins dense and tough. I like to fold the batter instead of stirring to keep it light. - How to store muffins for optimal freshness: Keep your muffins in an airtight container. This keeps them moist and fresh. If you want them to last longer, try placing parchment paper between layers to avoid sticking. - Reheating tips: To reheat, pop the muffins in a microwave for 10-15 seconds. You can also warm them in a toaster oven for a few minutes. This brings back their fresh-baked taste. - Serving suggestions and accompaniments: Serve your muffins warm. They pair well with coffee or tea. For a special touch, add whipped cream or a scoop of vanilla ice cream on the side. This makes them feel like a treat! - Adding decorative touches: Dust the muffins with powdered sugar for a lovely finish. You can also sprinkle a bit of cinnamon on top for extra flavor. A simple touch can make your muffins look fancy and inviting. {{image_4}} You can easily change the flavor of your muffins. Try adding nuts like walnuts or pecans for a crunchy bite. Dried fruits, such as raisins or cranberries, give a sweet surprise in each bite. You can also swap the apples for other fruits. Pears work great and add a nice twist to the recipe. If you need a gluten-free option, you can use gluten-free flour. This keeps the muffins light and fluffy. For a vegan version, replace the egg with a flaxseed meal or a banana. Use plant-based milk instead of regular milk. These changes let everyone enjoy these tasty muffins. You can play with the size of your muffins. Make mini muffins for bite-sized treats, or stick with standard muffins for a hearty snack. Another fun idea is to create muffin parfaits. Layer muffin pieces with yogurt and fresh fruit in a cup. This makes a fun and tasty breakfast or dessert. To keep your Apple Cinnamon Streusel Muffins fresh, use airtight containers. They help lock in moisture and flavor. Muffin tins can work, but they may let air in. Store muffins at room temperature for up to three days. If your home is warm, go for the fridge. For long-term storage, freeze your muffins. Place them in a freezer-safe bag or container. Make sure to remove as much air as possible. Thaw them by leaving them out at room temperature or microwaving them for a few seconds. These muffins stay good in the freezer for about three months. Always check for signs of freezer burn before baking. Storing them correctly helps keep that delicious taste intact! Yes, you can. You can try Honeycrisp, Fuji, or Braeburn apples. Each type adds its own taste. Choose a sweet apple for a nice flavor twist. To reduce sweetness, cut back on the sugar. Use ¾ cup instead of 1 cup. You can also add more apples for natural sweetness without extra sugar. If you don’t have applesauce, mash ripe bananas instead. You can also use yogurt or pureed pumpkin. These options keep the muffins moist and tasty. Insert a toothpick into the center of a muffin. If it comes out clean, they are done. The tops should look golden brown, and they should feel springy. Yes, you can make the batter ahead. Cover it and store it in the fridge for up to 24 hours. Just stir it gently before filling the muffin cups. You learned how to make delicious apple muffins step by step. We covered the key ingredients, like flour and cinnamon, and the tasty streusel topping. I shared tips for baking, storage, and fun variations to try. Baking these muffins is fun and rewarding. You can change flavors or make them fit your diet. Enjoy your baking and the great smell of fresh muffins in your kitchen!

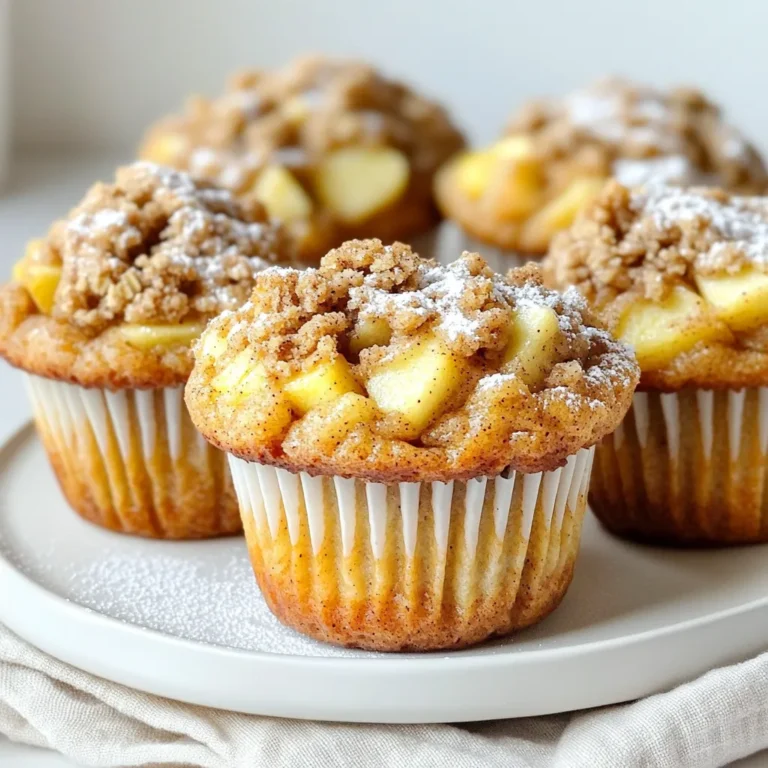
Apple Cinnamon Streusel Muffins Savory Delight Awaits

To make Blueberry Lemon Scones, gather these ingredients: - 2 cups all-purpose flour - 1/2 cup granulated sugar - 2 teaspoons baking powder - 1/2 teaspoon baking soda - 1/4 teaspoon salt - 1/2 cup unsalted butter, cold and cubed - 1 cup fresh blueberries - Zest of 1 lemon - 1/2 cup heavy cream - 1 large egg - 1 teaspoon vanilla extract - Optional: coarse sugar for sprinkling You can swap some ingredients for alternatives: - Use whole wheat flour for a healthier option. - Replace granulated sugar with brown sugar for a deeper flavor. - Use Greek yogurt in place of heavy cream for a lighter version. - If you don't have fresh blueberries, frozen ones work well too. Just toss them in flour to avoid sinking. - For a dairy-free option, try coconut milk instead of heavy cream and vegan butter instead of unsalted butter. When choosing blueberries, keep these tips in mind: - Look for plump, firm berries with a deep blue color. - Avoid any that are shriveled, soft, or moldy. - Check the container for juice stains, which can mean overripe berries. - If possible, buy local blueberries in season for the best flavor. - Store them in the fridge but wash them only before use to keep them fresh longer. {{ingredient_image_2}} Start by preheating your oven to 400°F (200°C). This step is vital for even baking. Next, line a baking sheet with parchment paper. This helps prevent the scones from sticking and makes cleanup easy. In a large bowl, whisk together the following dry ingredients: - 2 cups all-purpose flour - 1/2 cup granulated sugar - 2 teaspoons baking powder - 1/2 teaspoon baking soda - 1/4 teaspoon salt Make sure to mix them well. This ensures the baking powder and soda are evenly spread, leading to perfect rise and texture. Now it’s time to add the butter. Take 1/2 cup of cold, cubed unsalted butter. Use a pastry cutter or your fingers to mix it with the dry ingredients. You want the mixture to look like coarse crumbs. Some larger bits of butter should remain for flakiness. Gently fold in 1 cup of fresh blueberries. Take care not to crush them as you mix. In a smaller bowl, whisk together the wet ingredients: - 1/2 cup heavy cream - 1 large egg - 1 teaspoon vanilla extract Mix until everything is blended well. This step adds moisture and flavor to your scone dough. Transfer the dough to a lightly floured surface. With clean hands, knead it gently a few times until it holds together. Shape the dough into a circle about 1 inch thick. Use a sharp knife or a bench scraper to cut this circle into 8 equal wedges. Place the scones on your prepared baking sheet, leaving space between them. If you want your scones extra sweet, sprinkle some coarse sugar on top. Bake them in the oven for about 15-20 minutes. They are done when golden brown and a toothpick inserted in the center comes out clean. Let them cool on the baking sheet for a few minutes. Then, transfer them to a wire rack to cool completely. Enjoy your warm, fresh Blueberry Lemon Scones! To get scones that are light and flaky, the cold butter is key. When you cut the butter into the flour, you want to leave some small chunks. This helps create those lovely flaky layers. Don't rush this step. Take your time to mix until you see coarse crumbs with little bits of butter still visible. You can easily change how sweet your scones are. The base recipe uses 1/2 cup of sugar, which gives a nice balance with the tart blueberries and lemon zest. If you like sweeter scones, feel free to add a bit more sugar. Start with an extra tablespoon and taste the dough before baking. Remember, you want the sweetness to enhance the fruit, not overpower it. Mixing is important, but too much can hurt your scones. Overmixing makes the scones tough instead of soft. When combining wet and dry ingredients, stop as soon as they come together. The dough should still be a little sticky. This gives you a soft and tender scone. If you see lumps, that’s okay; they will bake out. Pro Tips Use Cold Ingredients: Ensure your butter and cream are cold before mixing. This helps create a flaky texture in the scones. Don't Overmix: Mix the dough just until combined to avoid tough scones. The dough should remain slightly sticky. Fresh Blueberries: Use fresh blueberries for the best flavor and texture. If using frozen, do not thaw them to prevent excess moisture. Cooling Time: Allow the scones to cool slightly on the baking sheet before transferring them to a wire rack. This helps maintain their shape. {{image_4}} You can switch up the blueberries with other fruits. Raspberries add a tart twist. Cranberries bring a nice pop of color and flavor. Use about 1 cup of any fruit you choose. Just be gentle when mixing to keep the fruit intact. You can also mix fruits for a fun flavor combo! If you want different flavors, try orange or lime zest. Both add a citrusy kick. Orange zest gives a sweeter taste, while lime offers a tangy bite. Use the same amount as lemon zest for balance. These changes can brighten your scones, making them unique. You can infuse your scones with extra flavors. A teaspoon of almond extract adds warmth and depth. You can also sprinkle in spices like cinnamon or nutmeg for a cozy touch. Start with a small amount and adjust to your taste. These flavors can make your scones feel special and festive. To store leftover scones, let them cool completely. Place them in an airtight container. They can stay fresh for about two days at room temperature. If you want to keep them longer, consider refrigerating them. This will keep them good for up to a week. To reheat scones, preheat your oven to 350°F (175°C). Place the scones on a baking sheet. Heat them for about 5 to 10 minutes. This warms them up and helps retain their soft texture. You can also microwave them for 10 to 15 seconds, but this may make them slightly chewy. If you want to freeze scones, do it right after baking. Let them cool, then wrap each scone tightly in plastic wrap. Place the wrapped scones in a freezer bag. They can stay frozen for up to three months. When you’re ready to enjoy them, thaw at room temperature or reheat straight from the freezer. Yes, you can make Blueberry Lemon Scones ahead of time. You can prepare the dough and shape it into wedges. Then, wrap the scones tightly in plastic wrap and store them in the fridge for up to 24 hours. When you are ready to bake, just pop them in the oven straight from the fridge. This method saves time and gives you fresh scones. If you need a substitute for heavy cream, you can use whole milk or half-and-half. For a thicker texture, mix two tablespoons of melted butter with milk to make 1 cup. This will mimic the richness of heavy cream. Another option is to use Greek yogurt mixed with a little milk for a creamy consistency. You can tell your scones are done when they are golden brown on top and firm to the touch. Insert a toothpick into the center; if it comes out clean, your scones are ready. Keep an eye on them during the last few minutes of baking to avoid overcooking. To boost the lemon flavor, you can add more lemon zest to the dough. Use the zest of two lemons instead of one for a bright taste. You might also add a bit of fresh lemon juice to the wet mixture. For an extra zing, drizzle a lemon glaze on top when they cool. This glaze is made from powdered sugar and lemon juice. In this article, we covered the essential ingredients for your Blueberry Lemon Scones and explored useful substitutions. You learned step-by-step instructions for making these delicious scones, along with tips for achieving that perfect texture. We discussed flavor variations and how to store your treats effectively. Remember, baking should be fun and creative. Don't hesitate to try new fruits or adjust sweetness. With practice, you'll master this delightful recipe and impress everyone with your skills. Enjoy the process and share these scones with your friends!

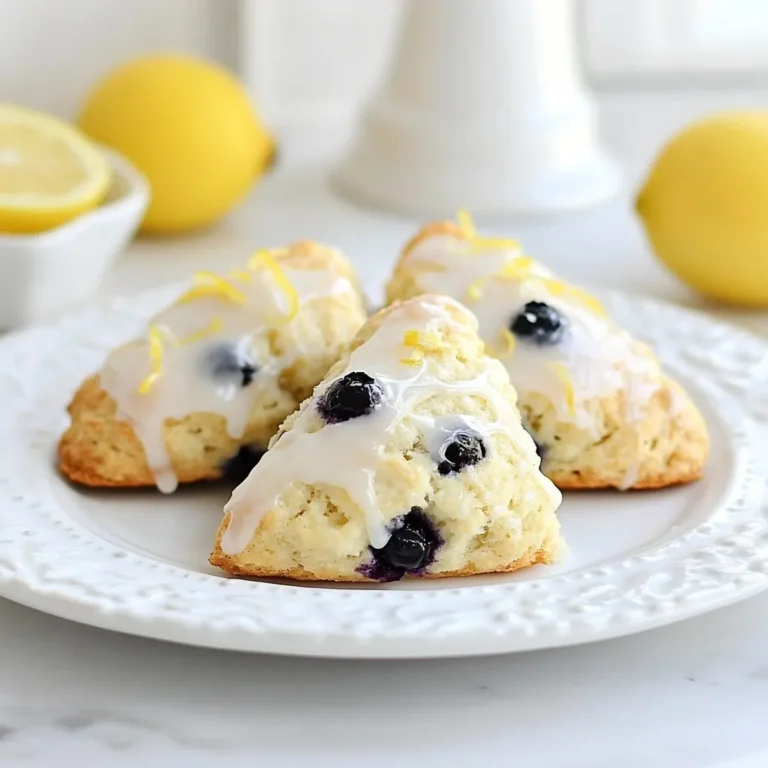
Blueberry Lemon Scones Simple and Flavorful Recipe

To make this dish, you need fresh and vibrant ingredients. Here’s what to gather: - 1 pound large shrimp, peeled and deveined - 3 tablespoons honey - 2 tablespoons soy sauce (or tamari for gluten-free) - 3 cloves garlic, finely minced - 1 tablespoon fresh ginger, finely minced - 1 cup assorted bell peppers (red, yellow, green), sliced - 1 cup snap peas, trimmed - 2 green onions, finely chopped - 2 tablespoons vegetable oil (canola or peanut oil works well) - Sesame seeds, for garnish - Salt and fresh ground black pepper, to taste These key ingredients bring the dish to life. The shrimp gives protein; honey adds sweetness, and garlic and ginger provide warmth. If you want to boost the taste, consider these optional items: - Red pepper flakes for heat - Fresh cilantro for a fresh note - Lime juice for a zesty kick These extras can make your stir-fry even more exciting. You can adjust them based on what you like. You can easily swap some ingredients if needed. Here are some ideas: - Use tamari instead of soy sauce to keep it gluten-free. - Swap shrimp for chicken, tofu, or beef for different proteins. - Use any colorful vegetables you have on hand, like broccoli or carrots. These substitutions let you customize the dish to fit your diet or preferences. Cooking should be fun and flexible! To make the honey garlic sauce, grab a small mixing bowl. Combine 3 tablespoons of honey, 2 tablespoons of soy sauce, 3 cloves of minced garlic, and 1 tablespoon of minced ginger. Whisk these ingredients together until smooth. This sauce is sweet, savory, and packed with flavor. Set it aside while you cook the shrimp and veggies. Next, take a large skillet or wok and heat 2 tablespoons of vegetable oil over medium-high heat. Wait until the oil shimmers, then add 1 pound of large shrimp. Lightly season the shrimp with salt and fresh ground black pepper. Sauté the shrimp for about 2-3 minutes. Stir them often until they turn pink and opaque. This shows they are perfectly cooked. Once the shrimp is ready, it’s time for the veggies. Add 1 cup of sliced bell peppers and 1 cup of trimmed snap peas to the skillet. Stir-fry these colorful vegetables for another 2-3 minutes. Keep them moving in the pan. You want them bright and tender-crisp, not soggy. Now, pour the honey garlic sauce over the shrimp and veggies. Stir well to coat everything evenly. Cook for an extra 1-2 minutes. This allows the sauce to thicken a bit. When done, remove the skillet from heat and fold in 2 chopped green onions for a fresh crunch. Serve your stir-fry right away. Garnish with sesame seeds for a nice touch. Enjoy your quick and tasty meal! To cook shrimp just right, remember these tips. First, choose large shrimp. They cook evenly and look great on the plate. Heat your oil until it shimmers before adding the shrimp. This keeps the shrimp juicy. Cook them for 2-3 minutes, stirring often. Look for a pink and opaque color. That shows they are done. Overcooking makes shrimp tough, so keep an eye on them. Stir-frying is quick and fun! Use a large skillet or wok to give your food space. Keep the heat high. This helps the shrimp and veggies cook fast. Add the shrimp first, then the veggies. This way, everything stays crisp. Stir constantly to avoid burning. You want bright colors and a fresh taste. Lastly, pour the sauce in at the end to keep flavors bright. Meal prep saves time! Chop your veggies and shrimp ahead of time. Store them in the fridge until you are ready to cook. You can make the honey garlic sauce in advance too. Just mix it in a jar and keep it in the fridge. When it's time to eat, heat your pan and cook! This dish takes only 15 minutes from start to finish. Perfect for a busy day! {{image_4}} To make your Honey Garlic Shrimp Stir-Fry even better, add more veggies. You can use broccoli, carrots, or zucchini. These vegetables not only add color but also boost nutrition. The crunch from these veggies pairs well with the shrimp. Try to choose a mix of colors for a beautiful dish. While honey garlic sauce is great, you can switch it up! Try teriyaki sauce for a sweeter taste. You can also use a spicy chili sauce for a kick. If you need a low-sodium option, pick a light soy sauce or coconut aminos. Each sauce gives a unique flavor twist to your stir-fry. You can easily swap shrimp for other proteins in this recipe. Chicken works well; just cut it into small pieces. Tofu is a fantastic option too, especially for a vegetarian meal. Cook it until golden for the best texture. You can even mix different proteins for a fun twist! To keep your leftover honey garlic shrimp stir-fry fresh, start by letting it cool. Place it in an airtight container. Store it in the fridge for up to three days. Make sure to label your container with the date. This helps you keep track of how long it has been stored. When you are ready to eat your leftovers, reheat them gently. You can use a skillet over medium heat. Add a splash of water or broth to keep the dish moist. Stir often to heat it evenly. If you prefer, you can use the microwave. Heat it in short bursts, stirring in between. This way, the shrimp stays tender, and the veggies stay crisp. If you want to save the stir-fry for later, freezing is a good option. First, let the dish cool completely. Then, divide it into portions. Use freezer-safe bags or containers. Remove as much air as possible to avoid freezer burn. Label the bags or containers with the date. You can freeze the stir-fry for up to three months. When you are ready to eat it, thaw it in the fridge overnight. Reheat it as mentioned before for the best results. Yes, you can make this dish ahead of time. Cook the shrimp and vegetables, then store them in the fridge. Keep the sauce separate until you are ready to serve. This way, you keep the stir-fry fresh. When it's time to eat, just add the sauce and heat everything in a pan until warm. You have many options to serve with Honey Garlic Shrimp Stir-Fry. Here are some ideas: - Steamed rice - Quinoa - Noodles - Cauliflower rice - Fresh salad These sides balance the meal and add variety to your plate. To make shrimp stir-fry without soy sauce, use these options: - Coconut aminos for a mild flavor - Teriyaki sauce for sweetness - A mix of vinegar and honey for tang Adjust the amount to your taste. You can also add spices for more flavor. Many sauces go well with shrimp stir-fry. Some of my favorites include: - Sweet chili sauce for a kick - Garlic sauce for more depth - Peanut sauce for creaminess Feel free to mix and match sauces to find your perfect flavor. You learned about the key ingredients and steps for making honey garlic shrimp stir-fry. I shared tips for perfect cooking and meal prep strategies. Variations allow you to customize the dish with different vegetables and proteins. Storing leftovers can help reduce waste and keep meals easy. Now, you can enjoy a quick, tasty meal that fits your needs. Happy cooking!

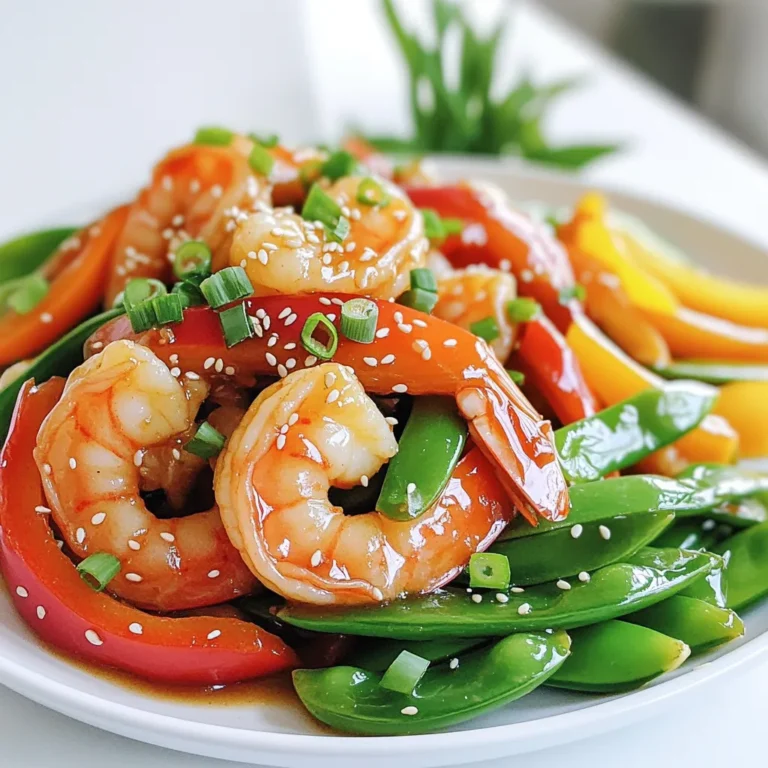
Honey Garlic Shrimp Stir-Fry Quick and Flavorful Meal

- 2 medium apples (Granny Smith or Honeycrisp recommended), peeled and thinly sliced - 1 tablespoon fresh lemon juice - 1/4 cup granulated sugar - 1/4 teaspoon ground cinnamon - 1/4 teaspoon ground nutmeg - 1 pre-made pie crust (store-bought or homemade) - 1/4 cup rich caramel sauce, with extra for drizzling on top - 1 tablespoon unsalted butter, cut into small cubes To make a great caramel apple galette, you need fresh apples. Granny Smith adds a tart taste, while Honeycrisp gives sweetness. Lemon juice keeps the apples bright. Sugar brings out the sweetness of the apples, while cinnamon and nutmeg add warmth and spice. A pie crust wraps it all up, holding the tasty filling inside. Rich caramel sauce gives that sweet, sticky finish, and butter adds a creamy touch. - Coarse sugar for sprinkling - 1 egg, beaten (for egg wash) You can sprinkle coarse sugar on top for crunch. An egg wash gives the crust a golden finish. Both are not necessary but can make your galette even nicer! 1. Preheat your oven to 400°F (200°C). This heat makes the crust nice and crisp. 2. Prepare your baking sheet. Line it with parchment paper. This stops the galette from sticking. 3. In a bowl, combine the apple slices with lemon juice, sugar, cinnamon, and nutmeg. Toss them well. 4. Let the apple mix sit for about 10 minutes. This helps the flavors blend and softens the apples. 1. On a floured surface, roll out the pie crust. Aim for about 12 inches wide. 2. Carefully move the crust to your baking sheet. Make sure it sits right in the center. 3. Place the apple mixture in the middle. Leave a 2-inch border around the edges. 4. Drizzle 1/4 cup of caramel sauce over the apples. Add cubes of butter on top for richness. 5. Fold the edges of the crust over the filling. Create nice pleats for a rustic look. 6. Brush the crust with the beaten egg. This gives it a lovely golden color. Optionally, sprinkle coarse sugar on the crust for sparkle. 1. Bake your galette for 25-30 minutes. Look for a golden crust and tender apples. 2. Once baked, take it out and drizzle more caramel sauce on top. It will soak into the warm apples. 3. Let it cool for a few minutes before slicing. Enjoy your delicious treat! Letting the apple mixture sit is key. This allows the flavors to blend. The apples soften a bit, making them sweeter. Use a sharp knife to slice your apples. Thin slices cook evenly and look nice. Aim for about 1/8-inch thick slices. This way, your galette will bake perfectly. Handling the pie crust right matters. Roll it out to about 12 inches wide. If it cracks, patch it with bits of dough. Keep your hands cool when working with the dough. Warm hands can make it tough. For a golden crust, use an egg wash. Brush the edges with the beaten egg. This gives a nice shine when baked. Serve your galette warm for the best taste. A scoop of vanilla ice cream pairs well. Whipped cream is another tasty option. For a fun touch, sprinkle cinnamon on top. You can also add grated chocolate for a sweet twist. These small details make your dish shine. {{image_4}} You can use many kinds of apples in your galette. Granny Smith apples are tart and crisp. Honeycrisp apples bring a sweet, juicy flavor. For a different taste, try Fuji or Gala apples. They add a nice sweetness. Seasonal options are great, too. Use any apples you find at your local market. The fresher the apple, the better the flavor. If you need a gluten-free galette, start with a gluten-free pie crust. Many stores sell ready-made gluten-free crusts. You can also make your own with almond flour or rice flour. For the filling, simply use the same recipe. Just make sure your sugars and spices are gluten-free. Everyone can enjoy this tasty treat! You can make your galette even better with some fun additions. Try adding chopped nuts like walnuts or pecans for crunch. Dried fruits like raisins or cranberries also add sweetness. Want to spice things up? Add a dash of ginger or allspice to your apples. These little changes can make your dessert unique and delicious! To keep your caramel apple galette fresh, store it in an airtight container. This helps lock in moisture and flavor. Place it in the fridge if you plan to eat it within a few days. If you want to keep it longer, consider freezing it. Wrap the galette well in plastic wrap, then place it in a freezer bag. This way, it stays tasty for up to three months. To enjoy your galette warm, reheating is key. The oven is the best method for keeping the crust crispy. Preheat your oven to 350°F (175°C). Place the galette on a baking sheet and cover it with foil. Heat it for about 10-15 minutes. If you’re in a hurry, the microwave works too. However, this method makes the crust soft. Heat slices for about 30 seconds, checking often to avoid overcooking. Enjoy your delicious galette just like fresh! How long does the galette last in the fridge? The galette stays fresh in the fridge for about three days. Make sure to cover it well. This keeps it from drying out. Can I make the galette ahead of time? Yes, you can prepare the galette a day in advance. Just store it in the fridge after baking. Reheat it in the oven for a warm treat. What are the best sides to serve with caramel apple galette? I love to serve this galette with vanilla ice cream or fresh whipped cream. A scoop of ice cream melts beautifully on a warm slice. Can I freeze the galette for later use? Absolutely! You can freeze the galette after baking. Wrap it tightly in plastic wrap and then foil. It can last for about two months in the freezer. Baking a caramel apple galette is simple and fun. You learned about essential and optional ingredients, from tasty apples to sweet spices. I shared step-by-step instructions for preparing, assembling, and baking. Tips helped perfect your galette, and variations let you explore flavors. Storing and reheating ensure leftover enjoyment. Remember, making this dessert is all about creativity and fun. Enjoy every bite of your warm, caramel apple galette!

Caramel Apple Galette Delightful and Simple Treat

PREV 1 … 6 7 8 … 47 NEXT
meal plan mapper

explore

DessertsDinnerAppetizersDrinks

Our Policies

  • Cookie Policy
  • Copyright Policy
  • Disclaimer
  • GDPR Policy
  • Terms Of Use
Back to Top
  • About
  • Contact Us
  • Privacy Policy
© 2025 meal plan mapper