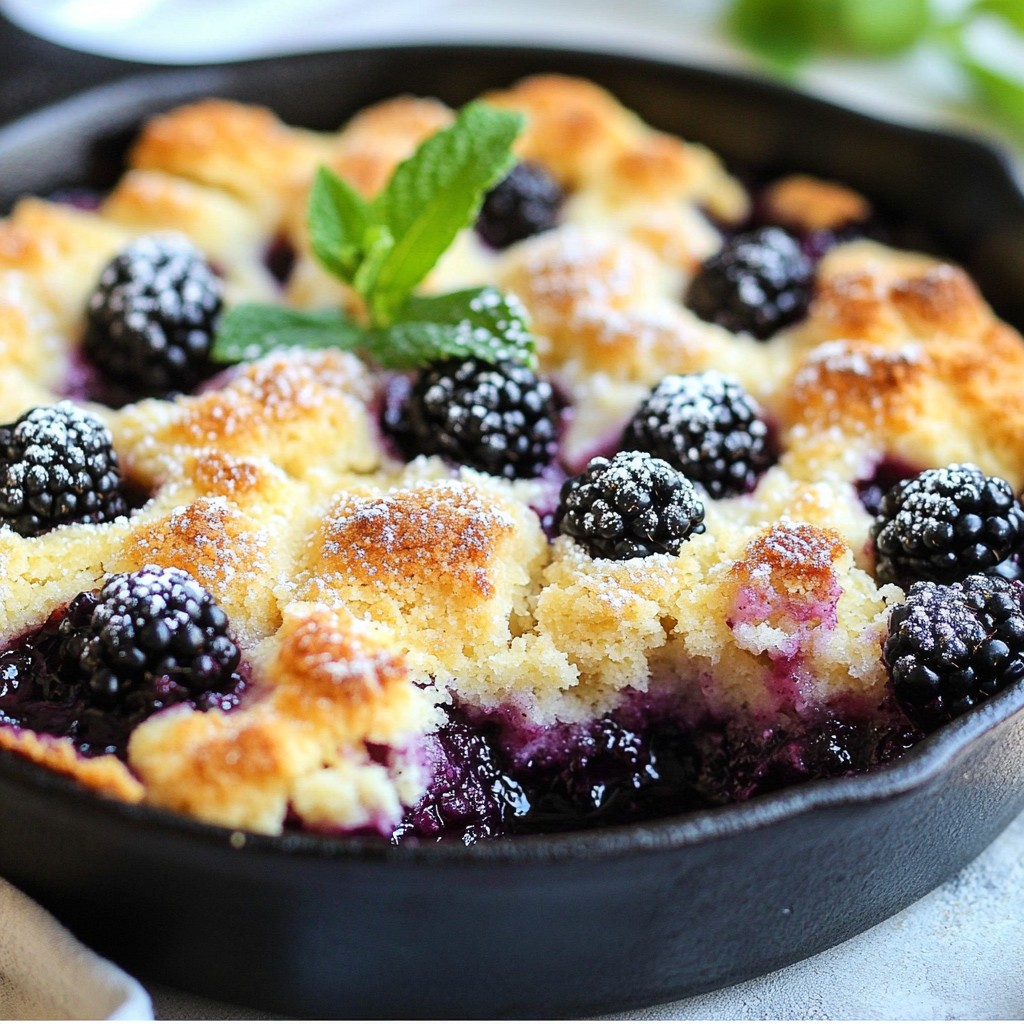
Are you ready to dive into a sweet treat that’s both simple and delightful? My Blackberry Cobbler Skillet is the perfect dessert for any occasion. With fresh blackberries and a buttery, golden crust, this dish is sure to impress. Whether you share it with friends or enjoy it solo, it’s a cozy way to satisfy your sweet tooth. Let’s get baking and turn these simple ingredients into a mouthwatering shortcut to happiness!
Why I Love This Recipe
- Deliciously Fruity: This cobbler highlights the natural sweetness and tartness of blackberries, making each bite a burst of flavor.
- Easy Preparation: With simple ingredients and straightforward steps, this recipe is perfect for bakers of all skill levels.
- One-Pan Wonder: Baking everything in a skillet not only makes for easy cleanup but also enhances the cobbler's rustic charm.
- Serve Warm: There's nothing quite like enjoying this cobbler warm from the oven, especially with a scoop of ice cream on top!
Ingredients
List of Ingredients
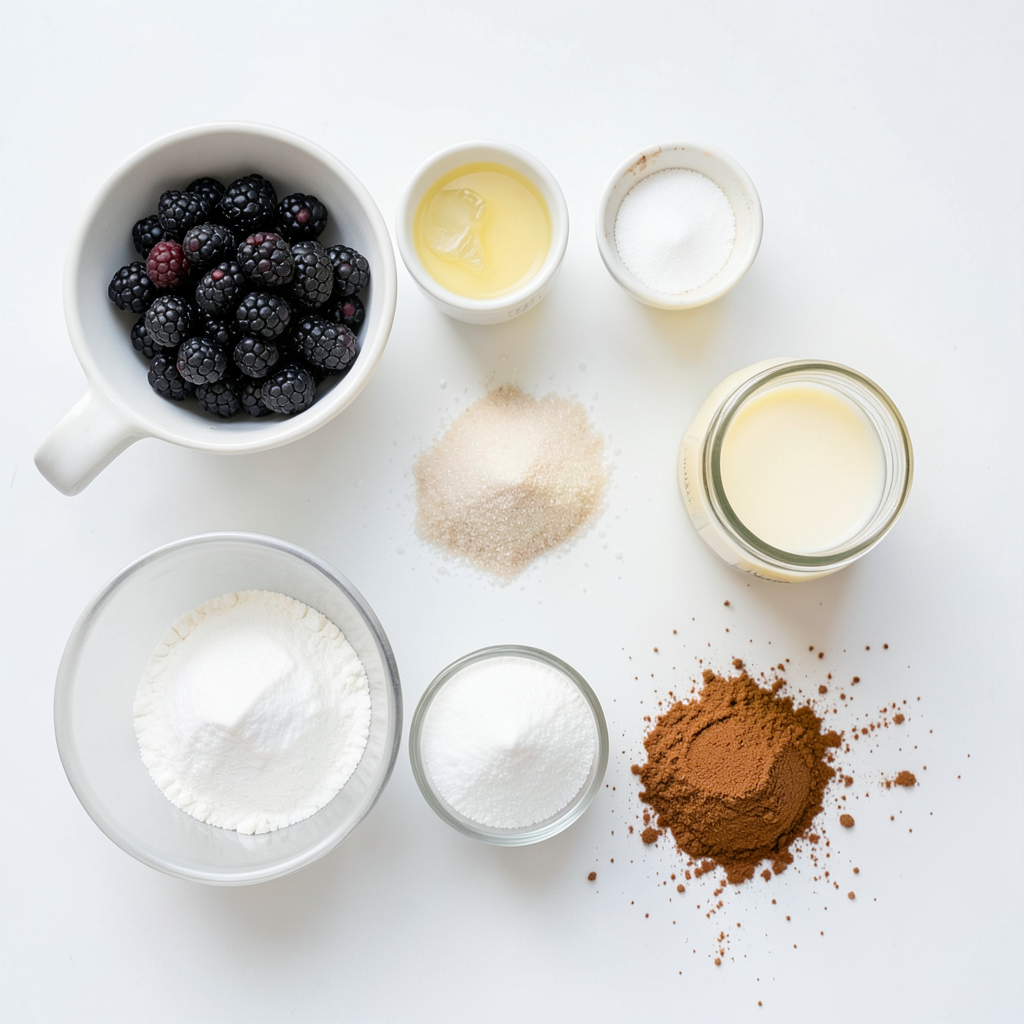
- 2 cups fresh blackberries (or use frozen)
- 1 cup granulated sugar, divided
- 1 tablespoon fresh lemon juice
- 1 cup all-purpose flour
- 1 tablespoon baking powder
- ½ teaspoon fine salt
- 1 cup whole milk
- ½ cup unsalted butter, melted
- 1 teaspoon pure vanilla extract
- 1 teaspoon ground cinnamon
- Vanilla ice cream or whipped cream, for serving (optional)
Gathering the right ingredients is key to making a perfect blackberry cobbler. Start with fresh blackberries, but frozen ones work too. If using frozen, let them thaw and drain. This helps avoid excess water in your cobbler.
You will need one cup of sugar, split into two parts. This sugar adds sweetness to both the blackberries and the batter. Fresh lemon juice brings out the best in the berries, making them bright and tangy.
For the batter, you will need flour, baking powder, salt, and cinnamon. These dry ingredients create a fluffy and tasty base. Whole milk and melted butter keep your cobbler moist. Lastly, pure vanilla extract adds rich flavor.
Don't forget the optional toppings! Vanilla ice cream or whipped cream makes this dessert even better. It adds creaminess and balances the sweet and tart flavors of the cobbler.
Now you have everything you need to make a delicious blackberry cobbler skillet. Each ingredient plays a big role in creating a tasty treat that everyone will love!
Step-by-Step Instructions
Preheat the Oven
Preheating the oven is key for baking. It helps the cobbler cook evenly. Set your oven to 350°F (175°C). This is the perfect temperature for a great cobbler.
Prepare the Blackberries
Start by tossing the blackberries with ½ cup of sugar and lemon juice. Gently mix them in a bowl. Let them sit for 10 minutes. This resting time helps the blackberries release their tasty juices. After that, spread them evenly in a 10-inch cast-iron skillet.
Make the Batter
In another bowl, combine the flour, the rest of the sugar, baking powder, salt, and cinnamon. Whisk them well to mix the dry ingredients. Next, add in the milk, melted butter, and vanilla extract. Whisk gently until just combined. Keep it lumpy! This keeps your cobbler light and fluffy.
Assembly and Baking
Now, pour the batter over the blackberries in the skillet. Make sure it covers the berries well. Place the skillet in the preheated oven. Bake for 35 to 40 minutes. The top should turn golden brown. A toothpick inserted should come out clean. Let the cobbler cool for a few minutes before serving. It tastes best warm!
Tips & Tricks
Achieving the Perfect Cobbler Texture
To get a great cobbler, avoid overmixing the batter. Overmixing makes the cobbler tough. You want to keep a lumpy texture. This helps the cobbler stay light and fluffy.
Resting the batter is also key. Allow it to sit for a few minutes before baking. This lets the ingredients blend, which helps the flavors come alive.
Serving Suggestions
Pair your blackberry cobbler with a scoop of vanilla ice cream or a dollop of whipped cream. The cold cream balances the warm cobbler perfectly.
For a pretty touch, garnish with fresh blackberries and a sprig of mint. This adds color and fresh flavor.
Common Mistakes to Avoid
Make sure your skillet is properly prepared. Grease it well to prevent sticking. A well-greased skillet helps the cobbler come out easily.
Watch your baking time carefully. Bake for 35 to 40 minutes. The top should be golden brown, and a toothpick should come out clean. If you bake too long, the cobbler can dry out.
Pro Tips
- Choose the Right Blackberries: When using fresh blackberries, look for plump, shiny, and deep-colored berries. If using frozen, ensure they are thawed and well-drained to avoid excess moisture in the cobbler.
- Don’t Overmix the Batter: It's essential to keep the batter lumpy for a light and fluffy cobbler. Overmixing can lead to a dense texture, so mix just until combined.
- Check for Doneness: To ensure your cobbler is perfectly baked, insert a toothpick into the center. It should come out clean or with a few moist crumbs, but no wet batter.
- Serve Warm: For the best experience, serve your cobbler warm directly from the skillet. Pair it with vanilla ice cream or whipped cream for an indulgent treat!
Variations
Fruit Substitutions
You can change up the berries in your cobbler. Raspberries, blueberries, and strawberries work well. Each berry gives a unique twist to the flavor. You can also use seasonal fruits. Try peaches in summer or apples in fall. This keeps your cobbler fresh and exciting.
Dietary Modifications
If you want a gluten-free version, swap all-purpose flour for almond or coconut flour. These options still make a tasty batter. For those reducing sugar, use honey or maple syrup instead. These natural sweeteners add flavor without too much guilt.
Flavor Enhancements
To make your cobbler even more special, add spices. A pinch of nutmeg or ginger can brighten the taste. You can also infuse citrus zest from lemons or oranges. This adds a fresh burst of flavor that makes each bite memorable.
Storage Info
Storing Leftovers
To keep your blackberry cobbler fresh, place it in the fridge. Use an airtight container or cover the skillet with plastic wrap. This helps prevent it from drying out. It will stay good for about three days in the fridge.
Reheating Tips
When you are ready to enjoy your cobbler again, reheating is key. The best way is to use the oven. Preheat the oven to 350°F (175°C) and place the cobbler inside for about 15 minutes. This keeps the top crisp and the filling warm. If you use a microwave, heat it in 30-second bursts to avoid sogginess.
Freezing the Cobbler
If you want to save some cobbler for later, freezing works well. First, let the cobbler cool completely. Then, wrap it tightly in plastic wrap and foil. This protects it from freezer burn. You can freeze it for up to three months.
To thaw, move it to the fridge overnight. After it's thawed, reheat it in the oven for best results. Enjoy your delicious cobbler just as if it were fresh!
FAQs
Can I use frozen blackberries?
Yes, you can use frozen blackberries. Just thaw and drain them first. This helps to avoid excess water in your cobbler. Frozen blackberries may be less sweet than fresh ones. If you use them, you might want to add a bit more sugar to balance the flavor.
How do I know when the cobbler is done?
Your cobbler is done when the top is golden brown. A toothpick inserted in the center should come out clean. You might also notice the edges pull away from the skillet. This means the batter is set and baked well.
Can I make this recipe ahead of time?
You can make this cobbler ahead of time. Store it in the fridge for a day or two. To reheat, place it in an oven at 350°F until warmed through. This keeps the texture nice and soft.
What other toppings can I use?
You can try different toppings like yogurt or cream cheese. Fresh fruits work well too. For a twist, consider a sprinkle of nuts or granola. These add crunch and flavor to your dish.
In this post, I shared a simple blackberry cobbler recipe. We discussed key ingredients and step-by-step instructions to create a delicious dessert. I also offered tips for the perfect texture and common mistakes to avoid. Furthermore, variations and storage tips ensure your cobbler stays tasty.
To sum up, this recipe is fun and easy, perfect for any occasion. You can enjoy it fresh or stored for later. Happy baking!