Caramel Apple Galette Delightful and Simple Treat

WANT TO SAVE THIS RECIPE?

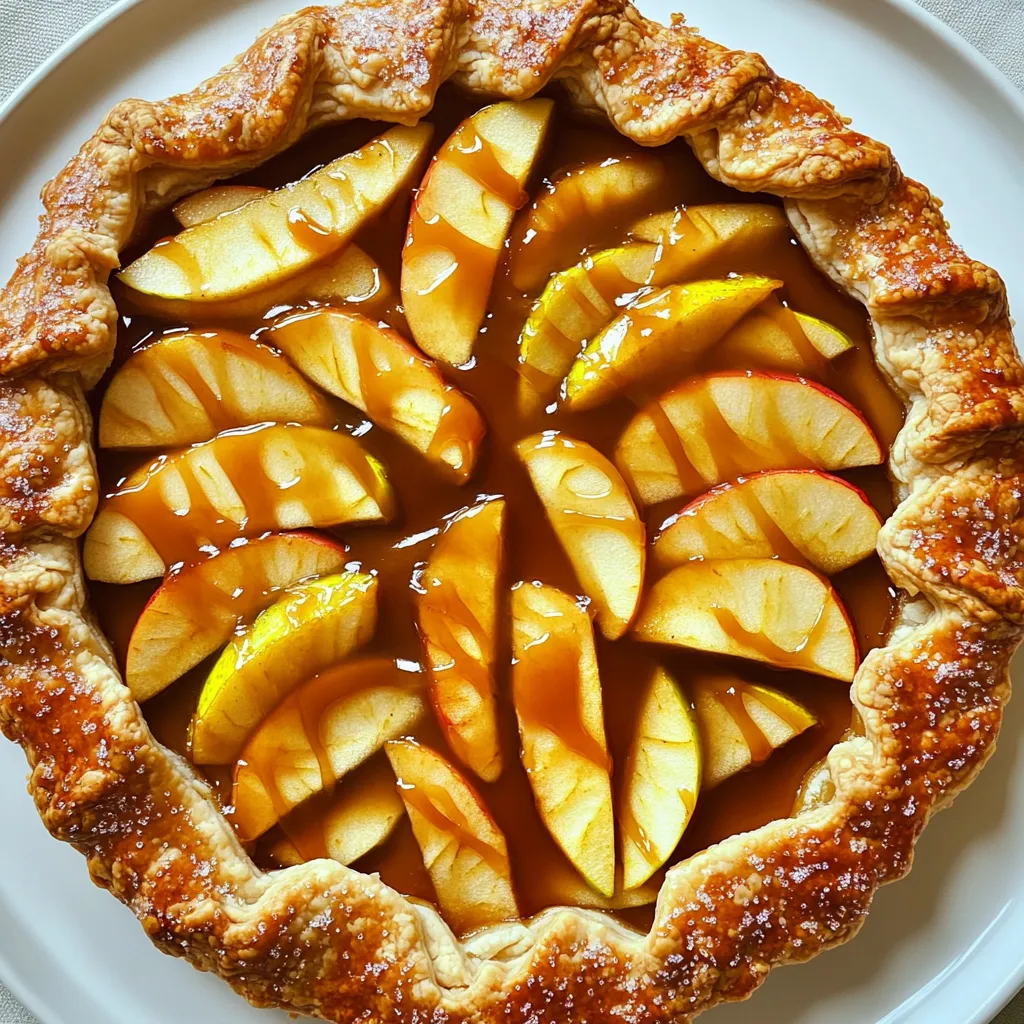
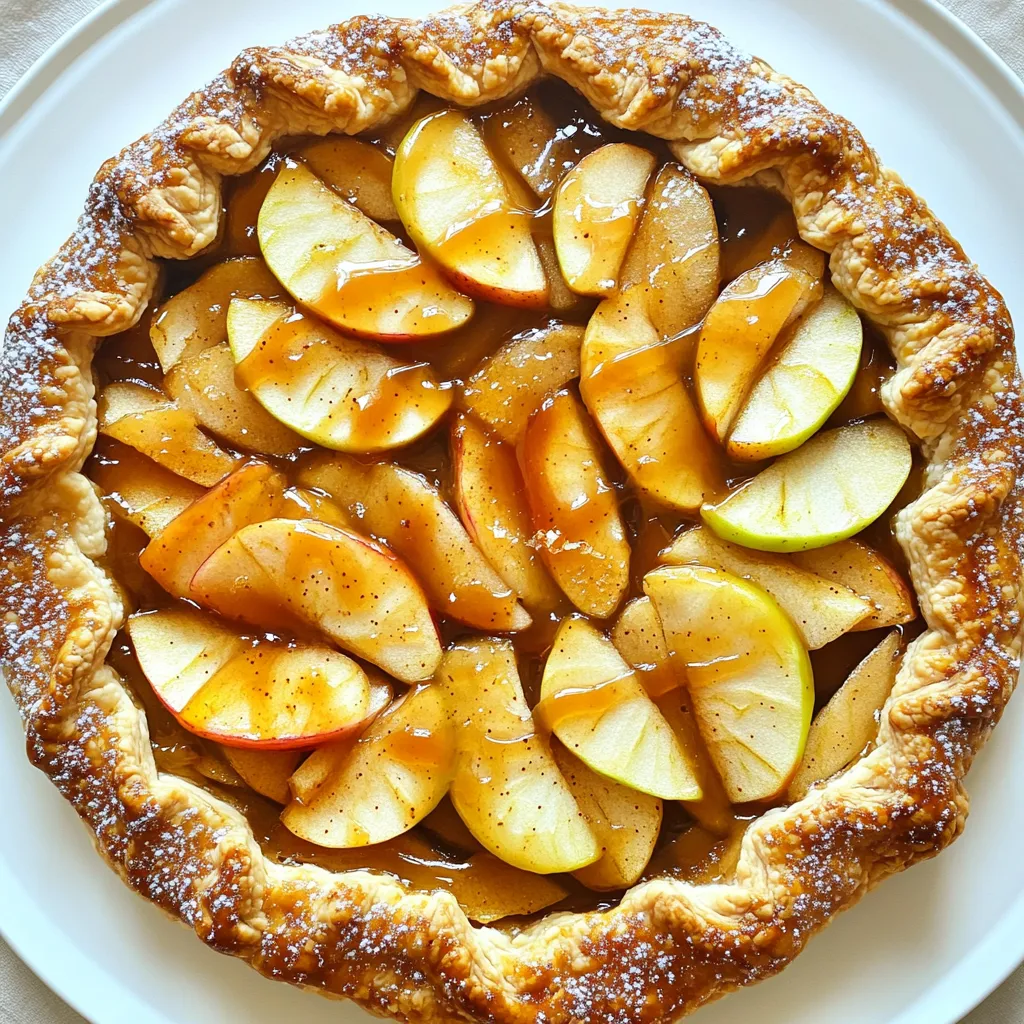
Are you ready to indulge in a dessert that’s as simple as it is delicious? This Caramel Apple Galette brings the warm flavors of fall right to your table. With sweet, spiced apples nestled in a flaky crust and drizzled with rich caramel, you’ll impress everyone with this treat. Follow my easy step-by-step guide to create a delightful dessert that’s perfect for any occasion. Let’s get baking!

- 2 medium apples (Granny Smith or Honeycrisp recommended), peeled and thinly sliced - 1 tablespoon fresh lemon juice - 1/4 cup granulated sugar - 1/4 teaspoon ground cinnamon - 1/4 teaspoon ground nutmeg - 1 pre-made pie crust (store-bought or homemade) - 1/4 cup rich caramel sauce, with extra for drizzling on top - 1 tablespoon unsalted butter, cut into small cubes To make a great caramel apple galette, you need fresh apples. Granny Smith adds a tart taste, while Honeycrisp gives sweetness. Lemon juice keeps the apples bright. Sugar brings out the sweetness of the apples, while cinnamon and nutmeg add warmth and spice. A pie crust wraps it all up, holding the tasty filling inside. Rich caramel sauce gives that sweet, sticky finish, and butter adds a creamy touch. - Coarse sugar for sprinkling - 1 egg, beaten (for egg wash) You can sprinkle coarse sugar on top for crunch. An egg wash gives the crust a golden finish. Both are not necessary but can make your galette even nicer! 1. Preheat your oven to 400°F (200°C). This heat makes the crust nice and crisp. 2. Prepare your baking sheet. Line it with parchment paper. This stops the galette from sticking. 3. In a bowl, combine the apple slices with lemon juice, sugar, cinnamon, and nutmeg. Toss them well. 4. Let the apple mix sit for about 10 minutes. This helps the flavors blend and softens the apples. 1. On a floured surface, roll out the pie crust. Aim for about 12 inches wide. 2. Carefully move the crust to your baking sheet. Make sure it sits right in the center. 3. Place the apple mixture in the middle. Leave a 2-inch border around the edges. 4. Drizzle 1/4 cup of caramel sauce over the apples. Add cubes of butter on top for richness. 5. Fold the edges of the crust over the filling. Create nice pleats for a rustic look. 6. Brush the crust with the beaten egg. This gives it a lovely golden color. Optionally, sprinkle coarse sugar on the crust for sparkle. 1. Bake your galette for 25-30 minutes. Look for a golden crust and tender apples. 2. Once baked, take it out and drizzle more caramel sauce on top. It will soak into the warm apples. 3. Let it cool for a few minutes before slicing. Enjoy your delicious treat! Letting the apple mixture sit is key. This allows the flavors to blend. The apples soften a bit, making them sweeter. Use a sharp knife to slice your apples. Thin slices cook evenly and look nice. Aim for about 1/8-inch thick slices. This way, your galette will bake perfectly. Handling the pie crust right matters. Roll it out to about 12 inches wide. If it cracks, patch it with bits of dough. Keep your hands cool when working with the dough. Warm hands can make it tough. For a golden crust, use an egg wash. Brush the edges with the beaten egg. This gives a nice shine when baked. Serve your galette warm for the best taste. A scoop of vanilla ice cream pairs well. Whipped cream is another tasty option. For a fun touch, sprinkle cinnamon on top. You can also add grated chocolate for a sweet twist. These small details make your dish shine. {{image_4}} You can use many kinds of apples in your galette. Granny Smith apples are tart and crisp. Honeycrisp apples bring a sweet, juicy flavor. For a different taste, try Fuji or Gala apples. They add a nice sweetness. Seasonal options are great, too. Use any apples you find at your local market. The fresher the apple, the better the flavor. If you need a gluten-free galette, start with a gluten-free pie crust. Many stores sell ready-made gluten-free crusts. You can also make your own with almond flour or rice flour. For the filling, simply use the same recipe. Just make sure your sugars and spices are gluten-free. Everyone can enjoy this tasty treat! You can make your galette even better with some fun additions. Try adding chopped nuts like walnuts or pecans for crunch. Dried fruits like raisins or cranberries also add sweetness. Want to spice things up? Add a dash of ginger or allspice to your apples. These little changes can make your dessert unique and delicious! To keep your caramel apple galette fresh, store it in an airtight container. This helps lock in moisture and flavor. Place it in the fridge if you plan to eat it within a few days. If you want to keep it longer, consider freezing it. Wrap the galette well in plastic wrap, then place it in a freezer bag. This way, it stays tasty for up to three months. To enjoy your galette warm, reheating is key. The oven is the best method for keeping the crust crispy. Preheat your oven to 350°F (175°C). Place the galette on a baking sheet and cover it with foil. Heat it for about 10-15 minutes. If you’re in a hurry, the microwave works too. However, this method makes the crust soft. Heat slices for about 30 seconds, checking often to avoid overcooking. Enjoy your delicious galette just like fresh! How long does the galette last in the fridge? The galette stays fresh in the fridge for about three days. Make sure to cover it well. This keeps it from drying out. Can I make the galette ahead of time? Yes, you can prepare the galette a day in advance. Just store it in the fridge after baking. Reheat it in the oven for a warm treat. What are the best sides to serve with caramel apple galette? I love to serve this galette with vanilla ice cream or fresh whipped cream. A scoop of ice cream melts beautifully on a warm slice. Can I freeze the galette for later use? Absolutely! You can freeze the galette after baking. Wrap it tightly in plastic wrap and then foil. It can last for about two months in the freezer. Baking a caramel apple galette is simple and fun. You learned about essential and optional ingredients, from tasty apples to sweet spices. I shared step-by-step instructions for preparing, assembling, and baking. Tips helped perfect your galette, and variations let you explore flavors. Storing and reheating ensure leftover enjoyment. Remember, making this dessert is all about creativity and fun. Enjoy every bite of your warm, caramel apple galette!

Ingredients

Essential Ingredients

– 2 medium apples (Granny Smith or Honeycrisp recommended), peeled and thinly sliced

– 1 tablespoon fresh lemon juice

– 1/4 cup granulated sugar

– 1/4 teaspoon ground cinnamon

– 1/4 teaspoon ground nutmeg

– 1 pre-made pie crust (store-bought or homemade)

– 1/4 cup rich caramel sauce, with extra for drizzling on top

– 1 tablespoon unsalted butter, cut into small cubes

To make a great caramel apple galette, you need fresh apples. Granny Smith adds a tart taste, while Honeycrisp gives sweetness. Lemon juice keeps the apples bright. Sugar brings out the sweetness of the apples, while cinnamon and nutmeg add warmth and spice. A pie crust wraps it all up, holding the tasty filling inside. Rich caramel sauce gives that sweet, sticky finish, and butter adds a creamy touch.

Optional Ingredients

– Coarse sugar for sprinkling

– 1 egg, beaten (for egg wash)

You can sprinkle coarse sugar on top for crunch. An egg wash gives the crust a golden finish. Both are not necessary but can make your galette even nicer!

Step-by-Step Instructions

Preparation Steps

1. Preheat your oven to 400°F (200°C). This heat makes the crust nice and crisp.

2. Prepare your baking sheet. Line it with parchment paper. This stops the galette from sticking.

3. In a bowl, combine the apple slices with lemon juice, sugar, cinnamon, and nutmeg. Toss them well.

4. Let the apple mix sit for about 10 minutes. This helps the flavors blend and softens the apples.

Assembling the Galette

1. On a floured surface, roll out the pie crust. Aim for about 12 inches wide.

2. Carefully move the crust to your baking sheet. Make sure it sits right in the center.

3. Place the apple mixture in the middle. Leave a 2-inch border around the edges.

4. Drizzle 1/4 cup of caramel sauce over the apples. Add cubes of butter on top for richness.

5. Fold the edges of the crust over the filling. Create nice pleats for a rustic look.

6. Brush the crust with the beaten egg. This gives it a lovely golden color. Optionally, sprinkle coarse sugar on the crust for sparkle.

Baking Instructions

1. Bake your galette for 25-30 minutes. Look for a golden crust and tender apples.

2. Once baked, take it out and drizzle more caramel sauce on top. It will soak into the warm apples.

3. Let it cool for a few minutes before slicing. Enjoy your delicious treat!

Tips & Tricks

Perfecting the Galette

Letting the apple mixture sit is key. This allows the flavors to blend. The apples soften a bit, making them sweeter. Use a sharp knife to slice your apples. Thin slices cook evenly and look nice. Aim for about 1/8-inch thick slices. This way, your galette will bake perfectly.

Achieving the Best Crust

Handling the pie crust right matters. Roll it out to about 12 inches wide. If it cracks, patch it with bits of dough. Keep your hands cool when working with the dough. Warm hands can make it tough. For a golden crust, use an egg wash. Brush the edges with the beaten egg. This gives a nice shine when baked.

Serving Suggestions

Serve your galette warm for the best taste. A scoop of vanilla ice cream pairs well. Whipped cream is another tasty option. For a fun touch, sprinkle cinnamon on top. You can also add grated chocolate for a sweet twist. These small details make your dish shine.

Variations

Different Types of Apples

You can use many kinds of apples in your galette. Granny Smith apples are tart and crisp. Honeycrisp apples bring a sweet, juicy flavor. For a different taste, try Fuji or Gala apples. They add a nice sweetness. Seasonal options are great, too. Use any apples you find at your local market. The fresher the apple, the better the flavor.

Gluten-Free Options

If you need a gluten-free galette, start with a gluten-free pie crust. Many stores sell ready-made gluten-free crusts. You can also make your own with almond flour or rice flour. For the filling, simply use the same recipe. Just make sure your sugars and spices are gluten-free. Everyone can enjoy this tasty treat!

Flavor Additions

You can make your galette even better with some fun additions. Try adding chopped nuts like walnuts or pecans for crunch. Dried fruits like raisins or cranberries also add sweetness. Want to spice things up? Add a dash of ginger or allspice to your apples. These little changes can make your dessert unique and delicious!

Storage Info

Storing Leftovers

To keep your caramel apple galette fresh, store it in an airtight container. This helps lock in moisture and flavor. Place it in the fridge if you plan to eat it within a few days. If you want to keep it longer, consider freezing it. Wrap the galette well in plastic wrap, then place it in a freezer bag. This way, it stays tasty for up to three months.

Reheating Instructions

To enjoy your galette warm, reheating is key. The oven is the best method for keeping the crust crispy. Preheat your oven to 350°F (175°C). Place the galette on a baking sheet and cover it with foil. Heat it for about 10-15 minutes.

If you’re in a hurry, the microwave works too. However, this method makes the crust soft. Heat slices for about 30 seconds, checking often to avoid overcooking. Enjoy your delicious galette just like fresh!

FAQs

Common Questions

How long does the galette last in the fridge?

The galette stays fresh in the fridge for about three days. Make sure to cover it well. This keeps it from drying out.

Can I make the galette ahead of time?

Yes, you can prepare the galette a day in advance. Just store it in the fridge after baking. Reheat it in the oven for a warm treat.

Serving Questions

What are the best sides to serve with caramel apple galette?

I love to serve this galette with vanilla ice cream or fresh whipped cream. A scoop of ice cream melts beautifully on a warm slice.

Can I freeze the galette for later use?

Absolutely! You can freeze the galette after baking. Wrap it tightly in plastic wrap and then foil. It can last for about two months in the freezer.

Baking a caramel apple galette is simple and fun. You learned about essential and optional ingredients, from tasty apples to sweet spices. I shared step-by-step instructions for preparing, assembling, and baking. Tips helped perfect your galette, and variations let you explore flavors. Storing and reheating ensure leftover enjoyment. Remember, making this dessert is all about creativity and fun. Enjoy every bite of your warm, caramel apple galette!

- 2 medium apples (Granny Smith or Honeycrisp recommended), peeled and thinly sliced - 1 tablespoon fresh lemon juice - 1/4 cup granulated sugar - 1/4 teaspoon ground cinnamon - 1/4 teaspoon ground nutmeg - 1 pre-made pie crust (store-bought or homemade) - 1/4 cup rich caramel sauce, with extra for drizzling on top - 1 tablespoon unsalted butter, cut into small cubes To make a great caramel apple galette, you need fresh apples. Granny Smith adds a tart taste, while Honeycrisp gives sweetness. Lemon juice keeps the apples bright. Sugar brings out the sweetness of the apples, while cinnamon and nutmeg add warmth and spice. A pie crust wraps it all up, holding the tasty filling inside. Rich caramel sauce gives that sweet, sticky finish, and butter adds a creamy touch. - Coarse sugar for sprinkling - 1 egg, beaten (for egg wash) You can sprinkle coarse sugar on top for crunch. An egg wash gives the crust a golden finish. Both are not necessary but can make your galette even nicer! 1. Preheat your oven to 400°F (200°C). This heat makes the crust nice and crisp. 2. Prepare your baking sheet. Line it with parchment paper. This stops the galette from sticking. 3. In a bowl, combine the apple slices with lemon juice, sugar, cinnamon, and nutmeg. Toss them well. 4. Let the apple mix sit for about 10 minutes. This helps the flavors blend and softens the apples. 1. On a floured surface, roll out the pie crust. Aim for about 12 inches wide. 2. Carefully move the crust to your baking sheet. Make sure it sits right in the center. 3. Place the apple mixture in the middle. Leave a 2-inch border around the edges. 4. Drizzle 1/4 cup of caramel sauce over the apples. Add cubes of butter on top for richness. 5. Fold the edges of the crust over the filling. Create nice pleats for a rustic look. 6. Brush the crust with the beaten egg. This gives it a lovely golden color. Optionally, sprinkle coarse sugar on the crust for sparkle. 1. Bake your galette for 25-30 minutes. Look for a golden crust and tender apples. 2. Once baked, take it out and drizzle more caramel sauce on top. It will soak into the warm apples. 3. Let it cool for a few minutes before slicing. Enjoy your delicious treat! Letting the apple mixture sit is key. This allows the flavors to blend. The apples soften a bit, making them sweeter. Use a sharp knife to slice your apples. Thin slices cook evenly and look nice. Aim for about 1/8-inch thick slices. This way, your galette will bake perfectly. Handling the pie crust right matters. Roll it out to about 12 inches wide. If it cracks, patch it with bits of dough. Keep your hands cool when working with the dough. Warm hands can make it tough. For a golden crust, use an egg wash. Brush the edges with the beaten egg. This gives a nice shine when baked. Serve your galette warm for the best taste. A scoop of vanilla ice cream pairs well. Whipped cream is another tasty option. For a fun touch, sprinkle cinnamon on top. You can also add grated chocolate for a sweet twist. These small details make your dish shine. {{image_4}} You can use many kinds of apples in your galette. Granny Smith apples are tart and crisp. Honeycrisp apples bring a sweet, juicy flavor. For a different taste, try Fuji or Gala apples. They add a nice sweetness. Seasonal options are great, too. Use any apples you find at your local market. The fresher the apple, the better the flavor. If you need a gluten-free galette, start with a gluten-free pie crust. Many stores sell ready-made gluten-free crusts. You can also make your own with almond flour or rice flour. For the filling, simply use the same recipe. Just make sure your sugars and spices are gluten-free. Everyone can enjoy this tasty treat! You can make your galette even better with some fun additions. Try adding chopped nuts like walnuts or pecans for crunch. Dried fruits like raisins or cranberries also add sweetness. Want to spice things up? Add a dash of ginger or allspice to your apples. These little changes can make your dessert unique and delicious! To keep your caramel apple galette fresh, store it in an airtight container. This helps lock in moisture and flavor. Place it in the fridge if you plan to eat it within a few days. If you want to keep it longer, consider freezing it. Wrap the galette well in plastic wrap, then place it in a freezer bag. This way, it stays tasty for up to three months. To enjoy your galette warm, reheating is key. The oven is the best method for keeping the crust crispy. Preheat your oven to 350°F (175°C). Place the galette on a baking sheet and cover it with foil. Heat it for about 10-15 minutes. If you’re in a hurry, the microwave works too. However, this method makes the crust soft. Heat slices for about 30 seconds, checking often to avoid overcooking. Enjoy your delicious galette just like fresh! How long does the galette last in the fridge? The galette stays fresh in the fridge for about three days. Make sure to cover it well. This keeps it from drying out. Can I make the galette ahead of time? Yes, you can prepare the galette a day in advance. Just store it in the fridge after baking. Reheat it in the oven for a warm treat. What are the best sides to serve with caramel apple galette? I love to serve this galette with vanilla ice cream or fresh whipped cream. A scoop of ice cream melts beautifully on a warm slice. Can I freeze the galette for later use? Absolutely! You can freeze the galette after baking. Wrap it tightly in plastic wrap and then foil. It can last for about two months in the freezer. Baking a caramel apple galette is simple and fun. You learned about essential and optional ingredients, from tasty apples to sweet spices. I shared step-by-step instructions for preparing, assembling, and baking. Tips helped perfect your galette, and variations let you explore flavors. Storing and reheating ensure leftover enjoyment. Remember, making this dessert is all about creativity and fun. Enjoy every bite of your warm, caramel apple galette!

Caramel Apple Galette

Indulge in the deliciousness of Caramel Apple Galette Delight with this easy recipe! Perfect for fall gatherings or cozy evenings, this dessert features tender apples wrapped in a flaky crust and drizzled with rich caramel. Discover the simple steps to create this stunning treat that will impress your guests. Click through for full instructions and tips that will make your galette shine! #CaramelAppleGalette #EasyDesserts #FallBaking #RecipeInspiration

Ingredients
  

2 medium apples (Granny Smith or Honeycrisp recommended), peeled and thinly sliced

1 tablespoon fresh lemon juice

1/4 cup granulated sugar

1/4 teaspoon ground cinnamon

1/4 teaspoon ground nutmeg

1 pre-made pie crust (store-bought or homemade)

1/4 cup rich caramel sauce, with extra for drizzling on top

1 tablespoon unsalted butter, cut into small cubes

1 egg, beaten (for egg wash)

Coarse sugar for a delightful sprinkle (optional)

Instructions
 

Preheat your oven to 400°F (200°C). Prepare a baking sheet by lining it with parchment paper to prevent sticking.

    In a medium mixing bowl, toss the sliced apples with lemon juice, granulated sugar, cinnamon, and nutmeg until well combined. Let this mixture sit for about 10 minutes to allow the flavors to meld and the apples to soften slightly.

      On a lightly floured surface, roll out the pie crust into a circular shape, approximately 12 inches in diameter. Carefully transfer the rolled crust to the prepared baking sheet.

        Position the apple mixture at the center of the crust, ensuring to leave a generous 2-inch border around the edges. Drizzle 1/4 cup of caramel sauce over the arranged apples, then scatter the small cubes of butter over the top for added richness.

          Gently fold the edges of the crust over the apple filling, creating pleasing pleats as you go for a charming rustic appearance.

            Brush the exposed crust with the beaten egg for a beautiful golden finish. If desired, sprinkle some coarse sugar over the edges for a touch of sparkle and added texture.

              Bake in the preheated oven for 25-30 minutes, or until the crust is a lovely golden brown and the apples are tender when pierced with a fork.

                Once baked, remove the galette from the oven and immediately drizzle with additional caramel sauce while it's still warm, allowing it to seep into the apples. Let it cool for a few minutes before slicing and serving.

                  - Presentation Tips: Serve the galette warm, perhaps with a scoop of vanilla ice cream on the side or a dollop of whipped cream. Garnish with a sprinkle of cinnamon or some grated chocolate for an extra treat!

                    Prep Time: 20 mins | Total Time: 50 mins | Servings: 6

                      WANT TO SAVE THIS RECIPE?