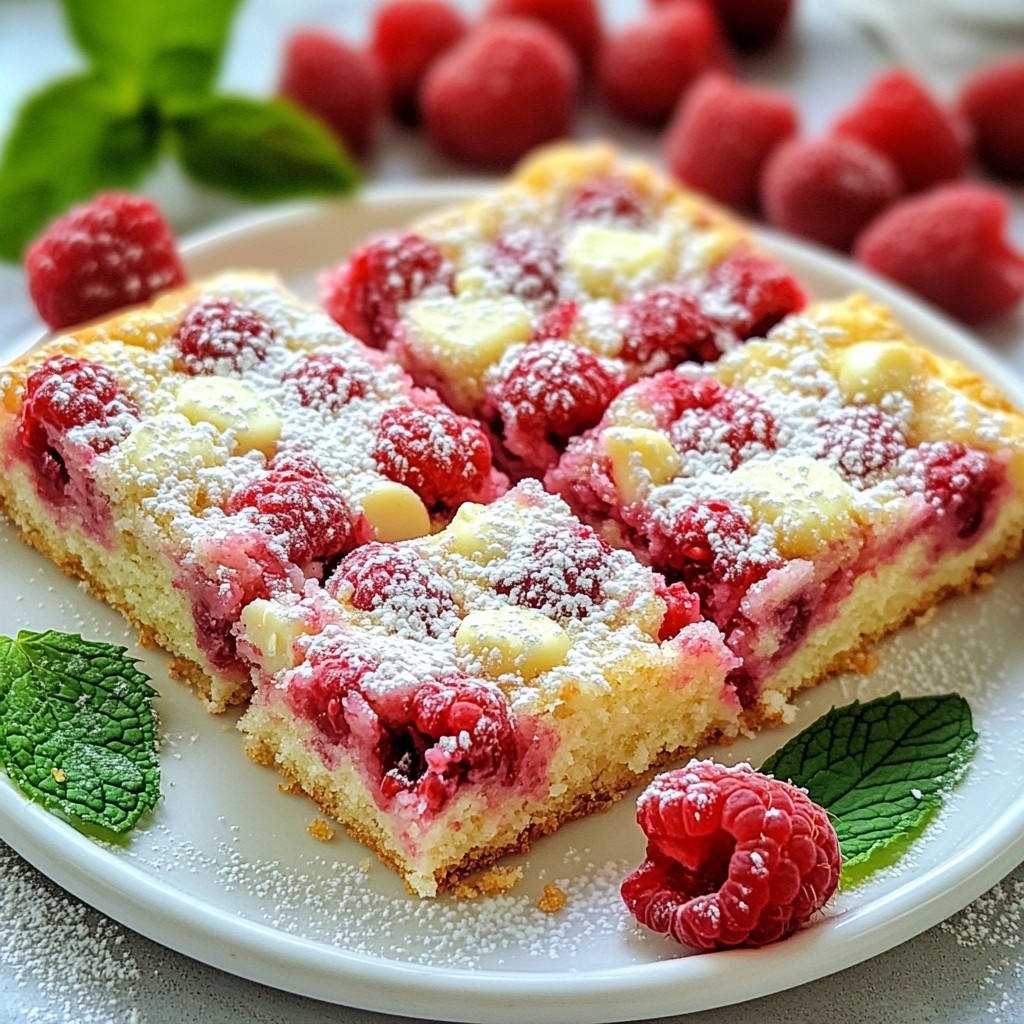
Are you ready to indulge in a treat that combines sweet and tart flavors perfectly? My Chewy Dessert Raspberry White Chocolate Bars will delight your taste buds and impress your friends. These bars are easy to make and full of deliciousness. In this post, I’ll guide you through every step, from gathering ingredients to achieving the perfect texture. Let's dive into this mouthwatering dessert!
Why I Love This Recipe
- Delicious Flavor Combination: The tartness of fresh raspberries perfectly complements the sweetness of white chocolate, creating a delightful balance that tantalizes your taste buds.
- Easy Preparation: This recipe requires simple ingredients and straightforward steps, making it perfect for both novice bakers and experienced chefs looking for a quick treat.
- Chewy Texture: The bars have a wonderfully chewy texture that is both satisfying and indulgent, ensuring that everyone will want seconds!
- Beautiful Presentation: With a dusting of powdered sugar and vibrant raspberries, these bars are visually appealing and make for an impressive dessert at any gathering.
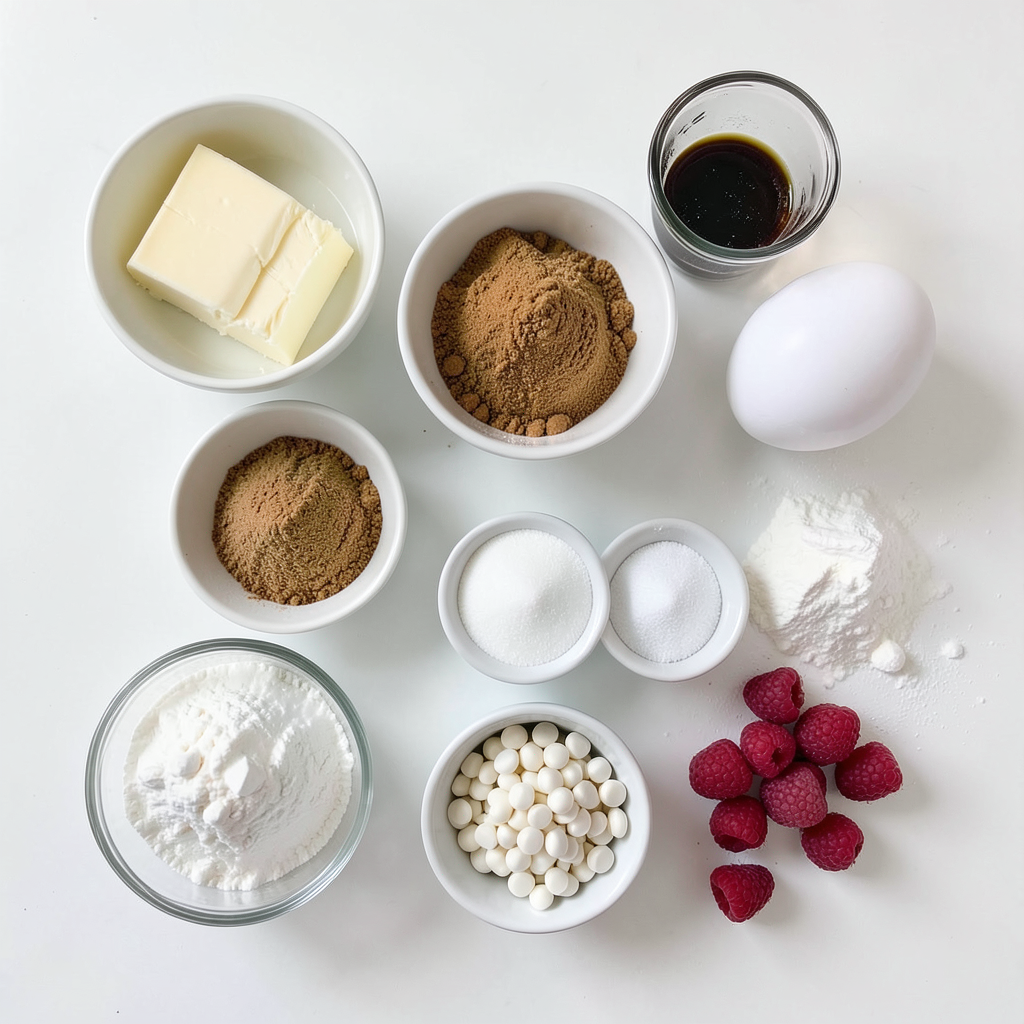
Ingredients
List of Ingredients
- 1 cup unsalted butter, softened to room temperature
- 1 cup packed brown sugar
- 1/2 cup granulated sugar
- 2 large eggs
- 2 teaspoons pure vanilla extract
- 2 cups all-purpose flour
- 1 teaspoon baking powder
- 1/2 teaspoon baking soda
- 1/4 teaspoon fine salt
- 1 cup white chocolate chips
- 1 cup fresh raspberries, gently rinsed and patted dry
- 1/4 cup powdered sugar, for dusting
Equipment Needed
To make these chewy dessert raspberry white chocolate bars, you will need:
- A 9x13 inch baking pan
- A large mixing bowl
- A whisk
- A spatula
- An electric mixer or a whisk for creaming
- Parchment paper (optional)
- A wire rack for cooling
Substitutions for Ingredients
You can change some ingredients if needed:
- Use salted butter instead of unsalted for a salty-sweet twist.
- Swap brown sugar for coconut sugar for a healthier option.
- Replace white chocolate chips with dark chocolate chips for a richer flavor.
- If you do not have fresh raspberries, frozen ones work too. Just thaw them first.
- Use gluten-free flour as a substitute for all-purpose flour to make these bars gluten-free.
Step-by-Step Instructions
Preparation Steps
To start, preheat your oven to 350°F (175°C). Grab a 9x13 inch baking pan. Lightly grease it or line it with parchment paper. This helps the bars come out easily after baking. In a large bowl, cream the softened butter with brown and granulated sugars. Mix until it’s light and fluffy, which takes about 2-3 minutes. Next, add the eggs one at a time, mixing well after each. Then, stir in the vanilla extract.
In another bowl, whisk together the flour, baking powder, baking soda, and salt. Gradually add this dry mix to the wet mixture. Stir gently until just combined. Be careful not to overmix! Now, fold in the white chocolate chips and fresh raspberries. Use a spatula to keep the raspberries whole.
Baking Time and Temperature
Pour your batter into the prepared pan. Spread it evenly to ensure it bakes nicely. Place the pan in the preheated oven. Bake for 25-30 minutes. The edges should turn golden brown. A toothpick inserted in the center should come out clean with a few moist crumbs. This moisture comes from the raspberries.
Cooling and Serving Suggestions
After baking, let the bars cool in the pan for about 10 minutes. If you used parchment paper, lift the bars out and set them on a wire rack to cool completely. Once cool, cut them into squares of your choice. Dust with powdered sugar for added sweetness. For a lovely display, arrange the squares on a platter. Garnish with whole raspberries and fresh mint leaves. You can also serve them with whipped cream for an extra treat!
Tips & Tricks
How to Achieve the Perfect Texture
To get those chewy bars just right, use room-temperature butter. This helps mix it well with the sugars. Cream the butter and sugars until they are light and fluffy. This adds air and makes them soft. When you mix in the flour, do not overmix. Stir until just combined. This keeps them chewy and not tough.
Common Mistakes to Avoid
One big mistake is overbaking. Keep an eye on the bars. They should be golden on the edges but soft in the center. If you forget to fold in the raspberries gently, they may break too much. This can make your bars less pretty. Lastly, do not skip the cooling time. Let them cool before cutting for neat squares.
Presentation Tips for Serving
For a stunning display, place your bars on a nice platter. Dust them with powdered sugar to add a sweet touch. Add whole raspberries around the bars for color. A few mint leaves can make it pop! You can serve them with whipped cream for extra yum. Making them look good can make them taste even better!
Pro Tips
- Store Properly: To maintain the chewy texture of the bars, store them in an airtight container at room temperature for up to a week. You can also refrigerate them for longer freshness.
- Raspberry Selection: Choose fresh, ripe raspberries for the best flavor. If using frozen raspberries, do not thaw them to prevent excess moisture in the batter.
- Mixing Technique: When folding in the white chocolate chips and raspberries, use a gentle hand to prevent breaking the berries and ensure an even distribution throughout the batter.
- Perfect Baking: For even baking, rotate the pan halfway through the baking time. This helps achieve that perfect golden brown edge while keeping the center moist and chewy.
Variations
Adding Nuts or Other Fruits
You can make these chewy bars even better by adding nuts or other fruits. Chopped nuts, like walnuts or pecans, add a nice crunch. They work well with the soft white chocolate and tart raspberries. If you prefer other fruits, try blueberries or strawberries. Just remember, if you add more fruit, reduce the raspberries a bit. This keeps the balance right.
Gluten-Free Adaptations
If you need a gluten-free option, you can still enjoy these bars. Simply swap the all-purpose flour for a good gluten-free blend. Look for blends that have xanthan gum in them. This helps the bars hold together well. Make sure your baking powder is gluten-free too. This way, everyone can enjoy a delicious treat.
Flavor Enhancements (e.g., lemon zest, coconut)
Adding new flavors can take these bars to the next level. A bit of lemon zest gives a fresh, bright taste. It pairs wonderfully with the raspberries. If you like coconut, try adding shredded coconut. Use sweetened or unsweetened, depending on your taste. Both options add a tropical twist to your dessert. Mixing in these flavors makes every bite exciting.
Storage Info
Best Ways to Store Leftovers
To keep your chewy dessert raspberry white chocolate bars fresh, store them in an airtight container. Place parchment paper between layers to prevent sticking. They will stay good for up to five days at room temperature. If you want them to last longer, the fridge is a great option, but they may become a bit firmer.
Freezing Instructions
Freezing these bars is easy. First, let them cool completely. Then, cut the bars into squares. Wrap each square in plastic wrap, and place them in a freezer-safe bag. You can freeze them for up to three months. When you want to eat them, just take out the squares and let them thaw at room temperature.
Reheating Tips
If you prefer warm bars, you can reheat them. Place a square on a microwave-safe plate. Heat it for about 10-15 seconds. Check if it’s warm enough; if not, heat a few more seconds. Enjoy them warm for that fresh-baked taste!
FAQs
Can I use frozen raspberries?
Yes, you can use frozen raspberries. Make sure to thaw and drain them first. This helps avoid extra moisture in your bars. Remember, frozen raspberries may break apart more easily, so handle them gently. The flavor will still be great!
How long do these bars last?
These bars last about five days when stored in an airtight container. Keep them at room temperature. If you want them to last longer, you can freeze them. They stay fresh for up to three months in the freezer.
What is the best way to cut the bars?
The best way to cut the bars is to use a sharp knife. Allow the bars to cool completely. This helps them hold their shape. For cleaner cuts, wipe the knife with a damp cloth between slices. You can cut them into squares or rectangles, whichever you prefer!
We explored all aspects of making these delicious bars. We covered ingredients, equipment, and easy substitutions. The step-by-step guide ensures perfect results every time. I shared tips for texture and common mistakes to avoid. You can try fun variations and learn storage methods for leftovers. Always remember to serve with thought to make it special. With this knowledge, you can confidently create and enjoy your own batch. Happy baking!