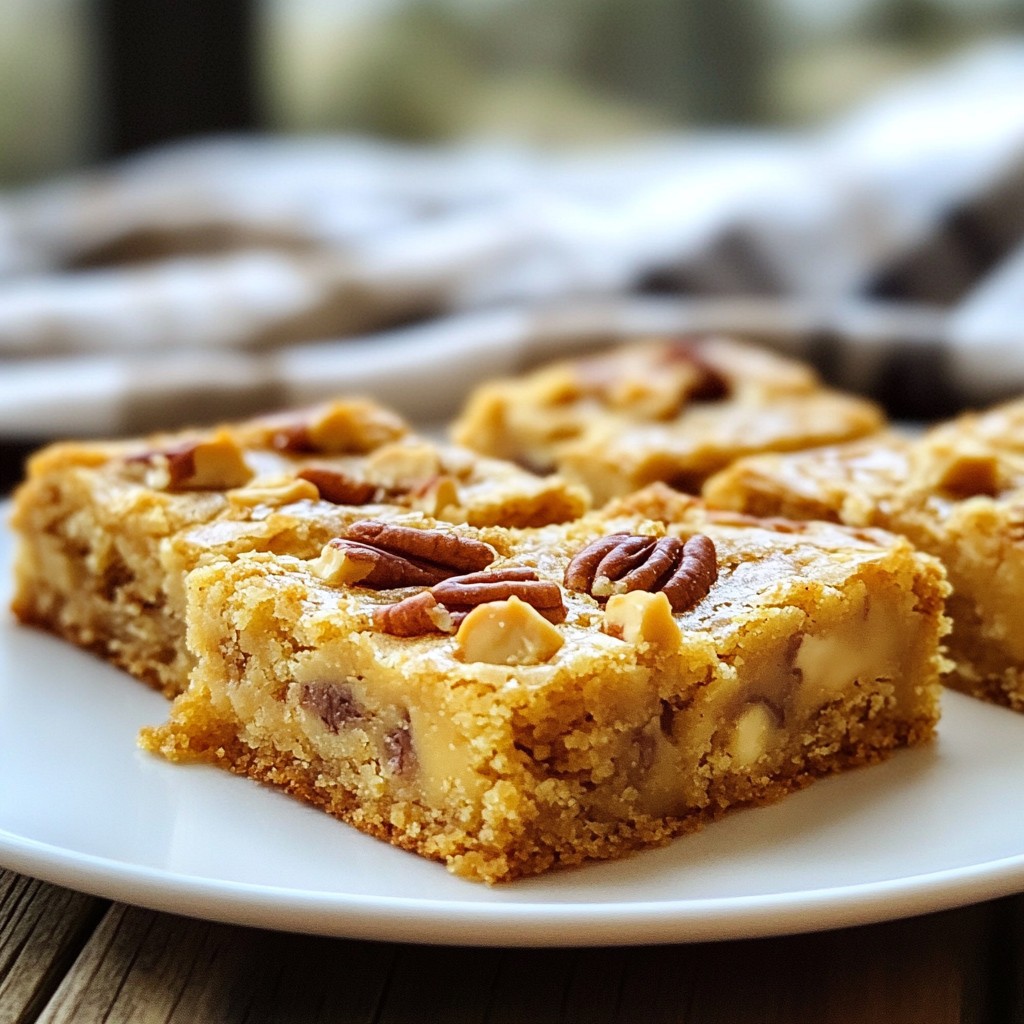
If you love sweet, chewy treats, you will adore my Chewy Sweet Butterscotch Blondie Bars! These delicious bars are packed full of rich butterscotch flavor and have a soft, melt-in-the-mouth texture. With just a few simple ingredients, you can create a delightful dessert that impresses friends and family. Ready to dive into a recipe that will sweeten your day? Let’s get baking!
Why I Love This Recipe
- Irresistible Flavor: The combination of buttery sweetness and rich butterscotch creates a delightful treat that’s hard to resist.
- Easy to Make: This recipe is straightforward and requires minimal prep time, making it perfect for bakers of all levels.
- Perfect for Sharing: With 24 bars, these blondies are great for parties, potlucks, or just sharing with friends and family.
- Customizable: You can easily add your favorite mix-ins like nuts or chocolate chips to make these blondies your own.
Ingredients
Main Ingredients
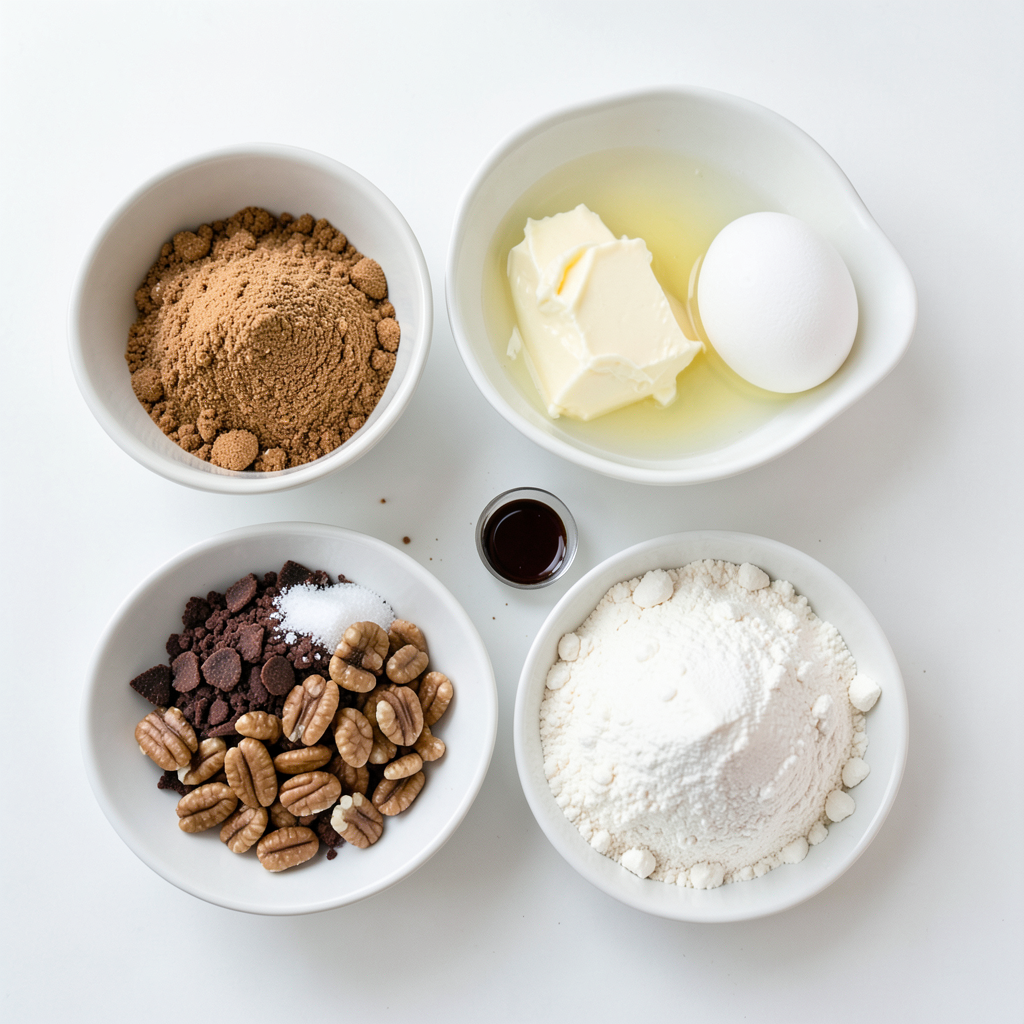
- 1 cup unsalted butter, melted
- 1 cup packed brown sugar
- 1/2 cup granulated sugar
- 2 large eggs
- 2 teaspoons vanilla extract
These ingredients form the base of my chewy sweet butterscotch blondie bars. The butter adds richness, while the brown sugar gives that lovely caramel flavor. I love using both types of sugar for the best texture. The eggs and vanilla help bind everything together.
Dry Ingredients
- 2 cups all-purpose flour
- 1/2 teaspoon baking powder
- 1/4 teaspoon salt
These dry ingredients help create the structure of the blondies. The flour is key for the right chewiness. The baking powder gives a little lift, making sure they don’t feel too dense. A pinch of salt balances the sweetness perfectly.
Mix-ins
- 1 cup butterscotch chips
- 1/2 cup chopped pecans (optional)
The butterscotch chips are the star of this recipe. They melt into gooey pockets of sweetness. If you like, add chopped pecans for crunch. They bring a nice nutty flavor that pairs well with the butterscotch.
Step-by-Step Instructions
Preparation Steps
- Preheat the oven to 350°F (175°C).
- Prepare the baking dish with grease or parchment paper.
Start by turning on your oven. This ensures it gets hot while you mix the batter. Greasing the dish helps your blondies come out easily. Parchment paper is a great option too. It makes lifting the bars out simple.
Mixing Steps
- Combine melted butter with brown and granulated sugars.
- Incorporate eggs and vanilla extract.
In a large bowl, mix melted butter with brown sugar and granulated sugar. Whisk them until smooth. This step blends the flavors well. Next, add the eggs one at a time. Mix well after each egg. Stir in the vanilla extract for a rich taste.
Combining Ingredients
- Sift together dry ingredients and mix with wet ingredients.
- Fold in butterscotch chips and pecans.
In another bowl, sift together the flour, baking powder, and salt. Sifting helps keep the batter light. Gradually add the dry mix to the wet ingredients. Stir gently. It’s okay if the batter has a few lumps. Finally, fold in the butterscotch chips and pecans. This adds a nice crunch.
Baking Steps
- Pour batter into the prepared dish and smooth the top.
- Bake for 25-30 minutes and check doneness.
Pour the batter into the dish. Use a spatula to smooth the top. This helps the bars bake evenly. Bake in the oven for 25-30 minutes. Check if they are done by inserting a toothpick in the center. It should come out with a few moist crumbs.
Cooling and Serving
- Allow to cool before slicing into bars.
Once baked, take the dish out of the oven. Let the blondies cool in the pan for at least 15 minutes. If you used parchment paper, lift the blondies out. Let them cool completely on a wire rack. Once cool, slice into 24 bars. Enjoy your delicious treats!
Tips & Tricks
Baking Tips
- Do not overmix the batter. Mixing too much can make your blondies tough. Stir just until the dry bits disappear.
- Use a toothpick to check doneness. Insert it in the center; moist crumbs mean they’re done.
Serving Suggestions
- Present your blondie bars on a pretty platter. Add a sprinkle of butterscotch chips or pecans on top for flair.
- Serve them warm with a scoop of ice cream or a dollop of whipped cream. This makes every bite extra special.
Storage Tips
- Store blondies in an airtight container. This keeps them fresh for days.
- To keep them soft and chewy, add a slice of bread in the container. The bread absorbs moisture, ensuring your blondies stay delicious.
Pro Tips
- Use Room Temperature Ingredients: Allow your eggs and butter to come to room temperature for better mixing and a smoother batter.
- Don’t Overmix: Mixing the batter too much can result in dense blondies. Stop mixing as soon as you see no dry flour.
- Experiment with Mix-Ins: Try adding different types of chips like chocolate or peanut butter, or even dried fruits for a unique twist.
- Store Properly: Keep the blondies in an airtight container at room temperature for up to a week to maintain their chewy texture.
Variations
Flavor Variations
You can make these blondies even more fun! Adding chocolate chips gives a nice balance to the sweet butterscotch. You could also use nuts like walnuts or pecans for a crunchy twist. If you want to change the flavor completely, try peanut butter or dark chocolate chips instead of butterscotch. Each option adds a new taste that you will love!
Dietary Variations
If you need gluten-free bars, swap all-purpose flour for almond or coconut flour. Both options work well and keep the bars soft. For a vegan version, use plant-based butter and flax eggs instead of regular eggs. Just mix one tablespoon of ground flaxseed with two tablespoons of water for each egg. These changes make the blondies tasty for everyone!
Seasonal Variations
You can add seasonal spices to match the time of year. For fall, sprinkle in some cinnamon or nutmeg for warmth. During winter, try a hint of ginger. These spices give the blondies a festive feel and a cozy taste. Each season offers a chance to try something new, making your blondies a year-round treat!
Storage Info
Short-term Storage
To store your blondies at room temperature, let them cool completely first. Then, place them in an airtight container. Keep them in a cool, dry spot. They will stay fresh for up to five days. If you want to keep them soft, layer parchment paper between the bars. This keeps them from sticking together.
Long-term Storage
For long-term storage, freezing blondies is a great option. Cut the cooled blondies into bars. Wrap each bar in plastic wrap. Then, place them in a freezer-safe bag or container. They can last up to three months in the freezer.
When you want to enjoy a blondie, simply take it out. Thaw it in the fridge overnight or at room temperature for a few hours. If you prefer them warm, pop them in the microwave for about 10 to 15 seconds. This will bring back their chewy goodness.
FAQs
Common Questions
What can I substitute for eggs in this recipe? You can use applesauce or mashed banana. Use 1/4 cup for each egg. This helps bind the blondies and keeps them moist.
How to ensure my blondies stay chewy? Do not overmix the batter. Bake just until the edges are golden. This keeps them soft and chewy.
Can I use salted butter instead of unsalted? Yes, you can use salted butter. Just cut back on the added salt in the recipe.
Baking Questions
Why are my blondies dry? Dry blondies often come from overbaking. Remove them when the edges are golden but the center is still soft.
How do I know when my blondies are done baking? Insert a toothpick into the center. It should come out with a few moist crumbs, not wet batter.
Serving Questions
Can I serve them warm? Absolutely! Warm blondies are gooey and delicious. They make a great dessert.
What should I serve with blondies? Serve with ice cream or whipped cream. A drizzle of chocolate sauce is also a tasty option!
This blog post covered how to make delicious blondies from scratch. We went through key ingredients, step-by-step mixing and baking, and tips for the best results. You learned about fun variations to try and how to store these treats.
Blondies are easy, tasty, and perfect for sharing. Use this guide to create your own batch that everyone will love. Enjoy experimenting with flavors and serving ideas!