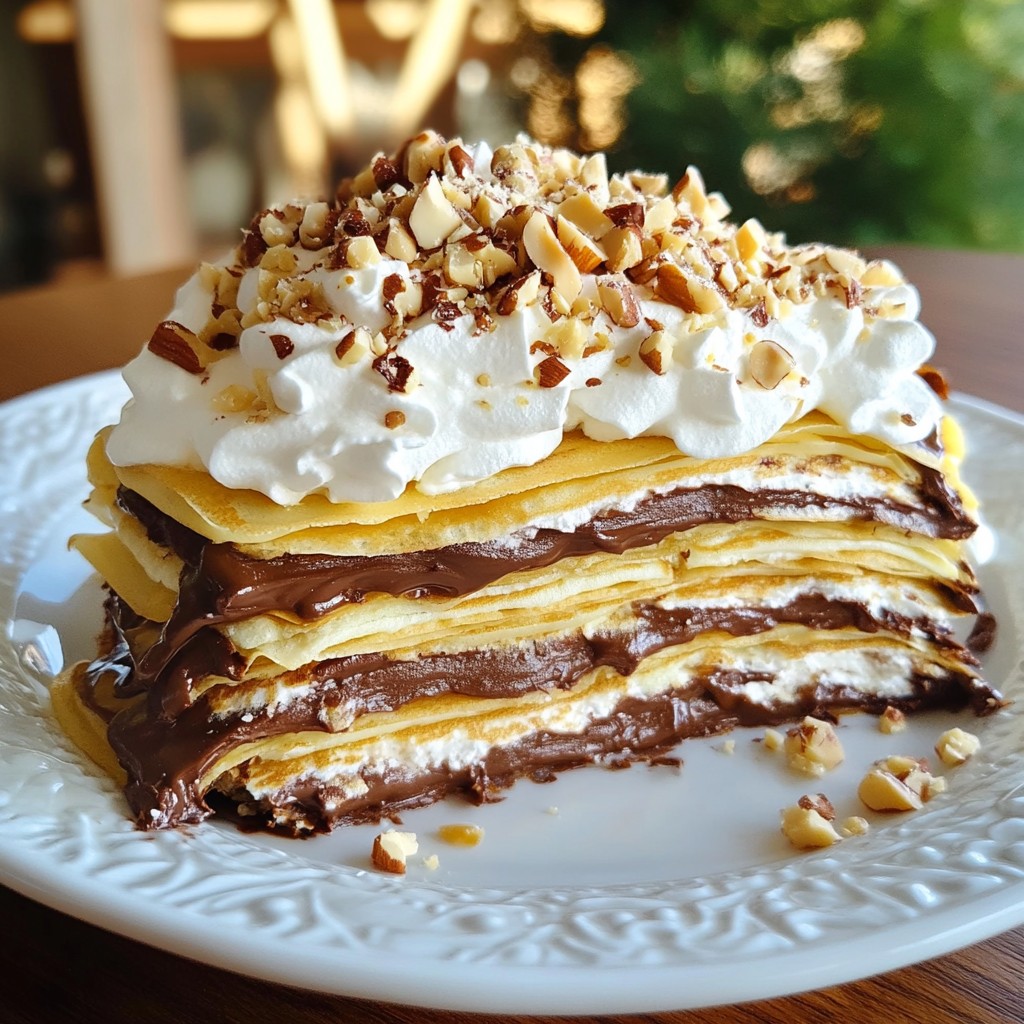
Imagine indulging in a dessert that's both delightful and simple to make: Chocolate Hazelnut Crepe Cake! This tasty treat layers soft crepes with creamy hazelnut spread, creating a dessert that pleases everyone. Whether you want to impress guests or enjoy a cozy family night, this cake is your answer. Get ready to dive into an easy recipe, perfect tips, and fun ideas to make it your own!
Why I Love This Recipe
- Decadent Flavor: This crepe cake combines the rich, creamy taste of chocolate hazelnut spread with the lightness of whipped cream, creating an indulgent dessert that is hard to resist.
- Elegant Presentation: The layered structure of the crepe cake makes it visually stunning, perfect for special occasions or to impress guests at a dinner party.
- Versatile Serving: It can be served chilled or at room temperature, making it a flexible dessert option that suits any gathering or celebration.
- Make Ahead Convenience: The chilling time allows flavors to meld beautifully, so you can prepare it in advance and enjoy a stress-free dessert experience.
Ingredients
List of Required Ingredients
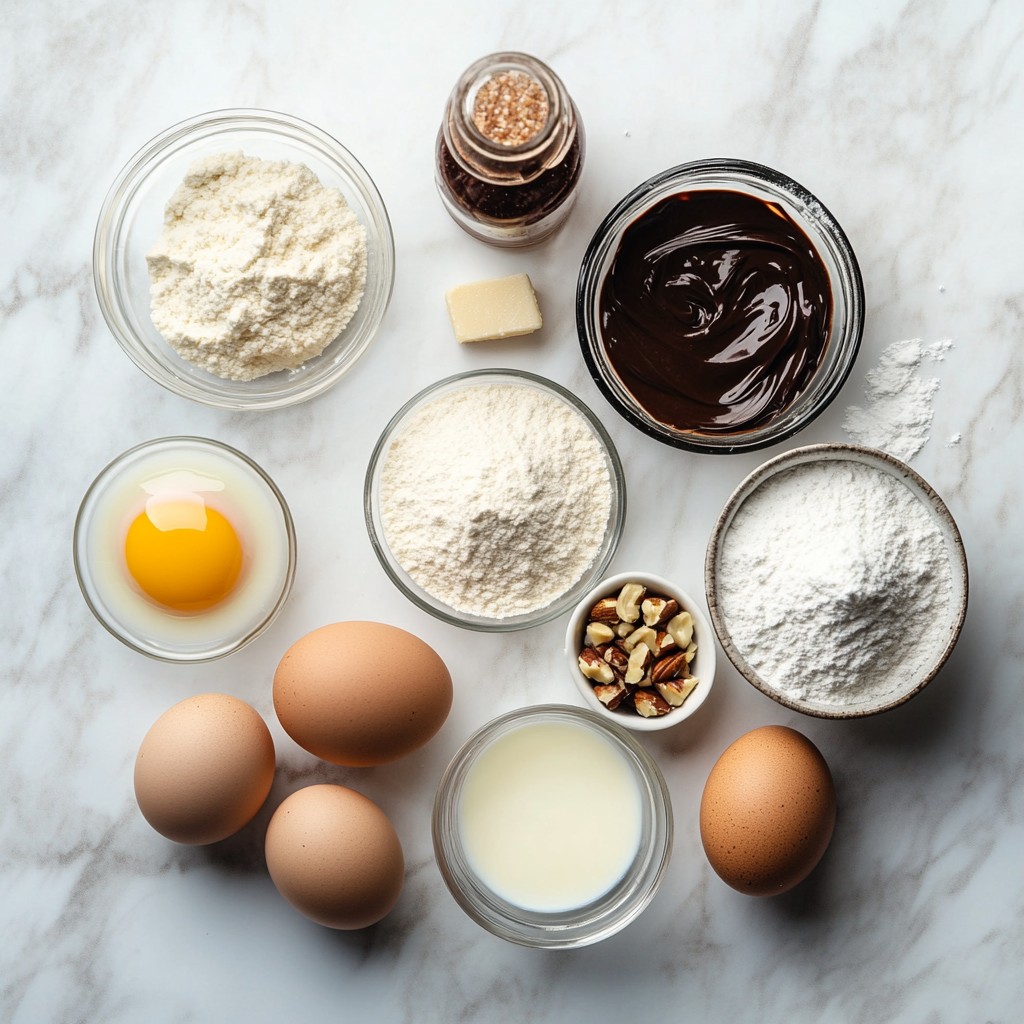
For a delightful Chocolate Hazelnut Crepe Cake, gather these key ingredients:
- 1 cup all-purpose flour
- 2 large eggs
- 2 1/2 cups milk
- 2 tablespoons melted butter
- 1 tablespoon granulated sugar
- 1 teaspoon vanilla extract
- 1 cup chocolate hazelnut spread
- 1/2 cup heavy whipping cream
- 1/4 cup powdered sugar
- 1/4 cup crushed hazelnuts
- A pinch of fine sea salt
Optional Toppings
You can customize your crepe cake with these tasty toppings:
- Fresh fruit like strawberries or bananas
- Chocolate shavings for extra richness
- A drizzle of caramel or chocolate sauce
Kitchen Tools Needed
Make sure you have these tools ready:
- Non-stick skillet for cooking crepes
- Mixing bowls for combining ingredients
- Spatula for flipping crepes
- Electric mixer for whipping cream
Step-by-Step Instructions
Preparing the Crepe Batter
First, gather all your ingredients. In a large bowl, combine:
- 1 cup all-purpose flour
- 2 large eggs
- 2 1/2 cups milk
- 2 tablespoons melted butter
- 1 tablespoon granulated sugar
- 1 teaspoon vanilla extract
- A pinch of fine sea salt
Whisk these together until the batter is smooth. It should not have lumps. Cover the bowl with a kitchen towel. Let the batter rest for about 30 minutes. This resting time is key. It helps the flour relax, making the crepes tender.
Cooking the Crepes
Next, heat a non-stick skillet or crepe pan over medium heat. Lightly coat the pan with butter. Pour about 1/4 cup of batter into the center. Immediately swirl the pan to spread it out. Cook for 1-2 minutes. Look for the edges to lift and the bottom to turn golden brown. Use a spatula to gently flip the crepe. Cook for another minute. Transfer the crepe to a plate. Keep stacking cooked crepes as you go.
Making the Whipped Cream
For the whipped cream, take a medium bowl. Add 1/2 cup of heavy whipping cream. Use an electric mixer to beat the cream on medium-high speed. Watch for soft peaks to form. Slowly add 1/4 cup of powdered sugar. Keep whipping until you see stiff peaks. Your whipped cream should be fluffy and stable. This cream will layer beautifully between the crepes.
Tips & Tricks
Perfecting Your Crepes
To make great crepes, start with smooth batter. If you see lumps, whisk more. Letting the batter rest for 30 minutes helps too. This step makes your crepes tender and easy to cook. If your crepes brown too fast, adjust the heat. A medium heat works best. For thin crepes, use just enough batter to cover the pan without pooling.
Layering for the Best Flavor
When assembling your cake, spread chocolate hazelnut evenly. Use a thin layer of whipped cream on top. This mix makes each bite delicious. Alternate layers to keep flavors balanced. Start with a crepe, then add chocolate, followed by cream. Repeat this until you use all your crepes. Finish with a crepe on top for a neat look.
Serving Suggestions
Slice the crepe cake into wedges for serving. Top each slice with extra hazelnuts for crunch. You can also drizzle chocolate sauce over the cake for more fun. Fresh fruit, like strawberries or bananas, adds color and flavor. Consider a dollop of whipped cream on the side too. This makes the dessert even more special.
Pro Tips
- Rest the Batter: Allowing the crepe batter to rest for at least 30 minutes helps to create a smoother texture and prevents the crepes from tearing during cooking.
- Use the Right Pan: A non-stick skillet or dedicated crepe pan is essential for easy flipping and preventing sticking. Make sure it’s properly heated before pouring in the batter.
- Layering Technique: When assembling the cake, use an offset spatula to spread the chocolate hazelnut spread and whipped cream evenly for a beautiful presentation and balanced flavor in each slice.
- Chill for Best Results: Let the assembled cake chill in the fridge for at least 2 hours. This allows the flavors to meld together and helps the whipped cream to set up nicely.
Variations
Flavor Combinations
You can change the flavors of your crepe cake easily. Swap chocolate hazelnut spread for peanut butter. Adding fruit spreads, like strawberry or raspberry, offers fun flavors too. Try mixing chocolate hazelnut spread with banana slices for a tasty twist. You can also layer in different jams or preserves for a fruity kick. The options are endless!
Dietary Adjustments
You can make this cake for different diets. To go gluten-free, use a gluten-free flour blend instead of all-purpose flour. For a dairy-free version, choose a plant-based milk and a dairy-free spread. You can also use coconut cream in place of heavy whipping cream for a vegan option. These swaps keep the cake just as delicious!
Seasonal Variations
Seasonal ingredients can make your cake even better. In spring, add fresh strawberries or rhubarb between layers. Summer is perfect for using peaches or blueberries. In autumn, try pumpkin puree mixed with spices for a cozy flavor. Winter is great for using citrus zest or pomegranate seeds. Adapting your cake to the seasons keeps it fresh and exciting!
Storage Info
Proper Storage Techniques
To keep your Chocolate Hazelnut Crepe Cake fresh, cover it tightly. Use plastic wrap or aluminum foil. This prevents air from drying it out. Store it in the fridge. It will stay fresh and tasty for a few days. If you don't plan to eat it soon, consider freezing it.
Freezing Instructions
To freeze your crepe cake, first let it cool completely. Wrap it tightly in plastic wrap. Then place it in an airtight container or a freezer bag. This helps avoid freezer burn. When you are ready to enjoy it, remove it from the freezer. Let it thaw in the fridge overnight. This keeps the texture nice and smooth.
Shelf Life
In the fridge, your crepe cake lasts about 3-5 days. If you freeze it, it can stay good for up to 2 months. Just remember, the sooner you eat it, the better it will taste. Enjoy your delicious creation!
FAQs
What is a crepe cake?
A crepe cake is a stack of thin crepes layered with filling. The filling can be sweet or savory. For this recipe, we use chocolate hazelnut spread and whipped cream. Each crepe adds a soft texture. The layers create a beautiful and tasty dessert.
Can I make the crepes ahead of time?
Yes, you can make the crepes ahead of time. Cook them and let them cool completely. Then, stack them with parchment paper between each crepe. Store the stack in the fridge for up to two days. This saves time when you are ready to assemble the cake.
How do I prevent the crepes from sticking?
To prevent sticking, use a non-stick skillet. Lightly coat the pan with melted butter before pouring in the batter. Make sure the pan is hot enough but not too hot, as this can burn the crepes. If a crepe sticks, gently run a spatula around the edges to loosen it.
In this blog post, you learned how to make a delicious crepe cake. We covered the key ingredients, from flour to hazelnut spread, and optional toppings for creativity. You also discovered the best cooking tips and storage methods to keep your cake fresh. Remember, experimenting with flavors and dietary options can enhance your cake. Enjoy the process of making and sharing this treat. Your crepe cake journey is just beginning, and there's always something new to try!