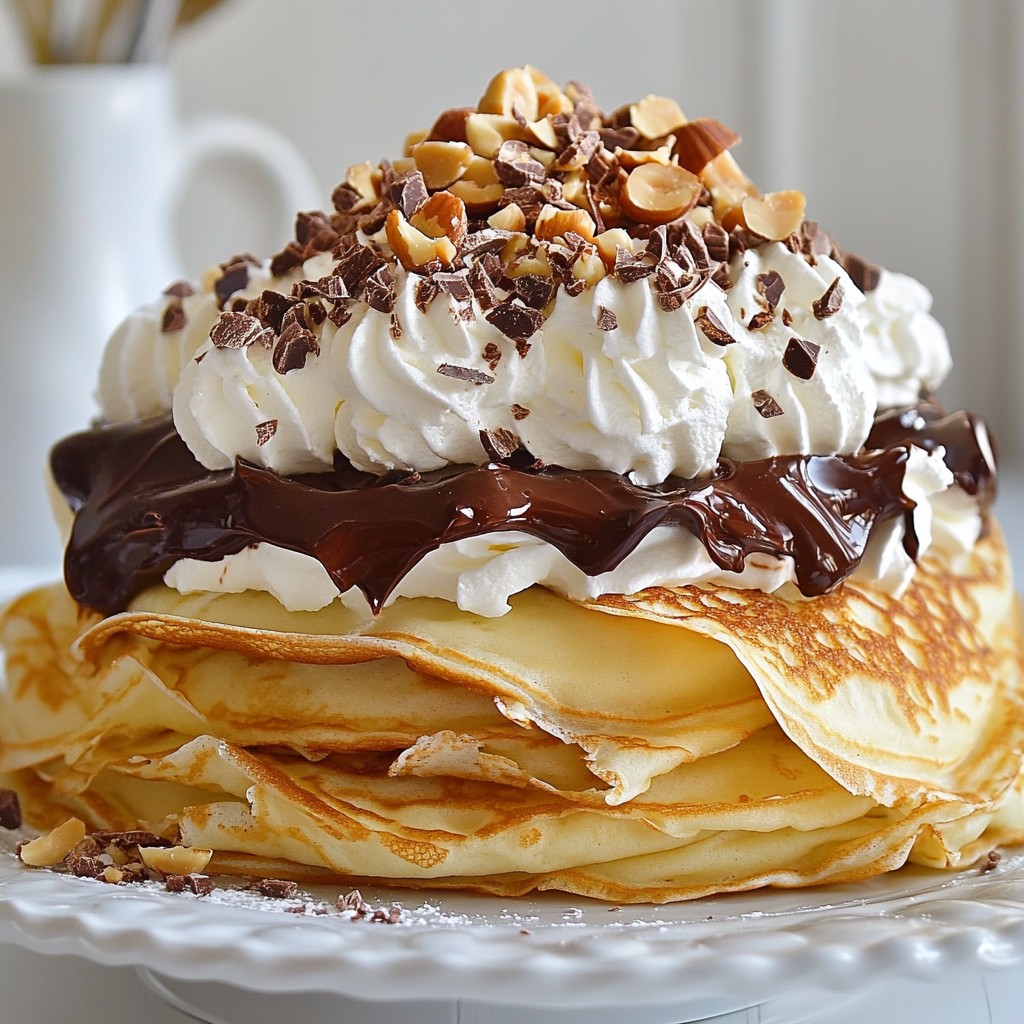
If you love chocolate and hazelnuts, you will adore this Chocolate Hazelnut Crepe Cake! This delightful layered treat combines smooth chocolate and nutty flavors in each bite. I’ll guide you through every step, from making the perfect crepes to yummy tips for toppings. Whether you're baking for a special occasion or just craving something sweet, this cake is sure to impress. Let’s dive into this sweet adventure!
Why I Love This Recipe
- Decadent Flavor: This crepe cake combines rich chocolate and nutty hazelnut flavors, creating a dessert that is both indulgent and satisfying.
- Beautiful Presentation: The layered design of the crepe cake not only tastes amazing but also looks stunning, making it perfect for special occasions.
- Versatile Layers: You can customize the filling with different spreads or add fruits, making it adaptable to various tastes and preferences.
- Easy to Make Ahead: This cake can be prepared in advance and chilled, allowing for stress-free entertaining when you have guests.
Ingredients
List of Required Ingredients
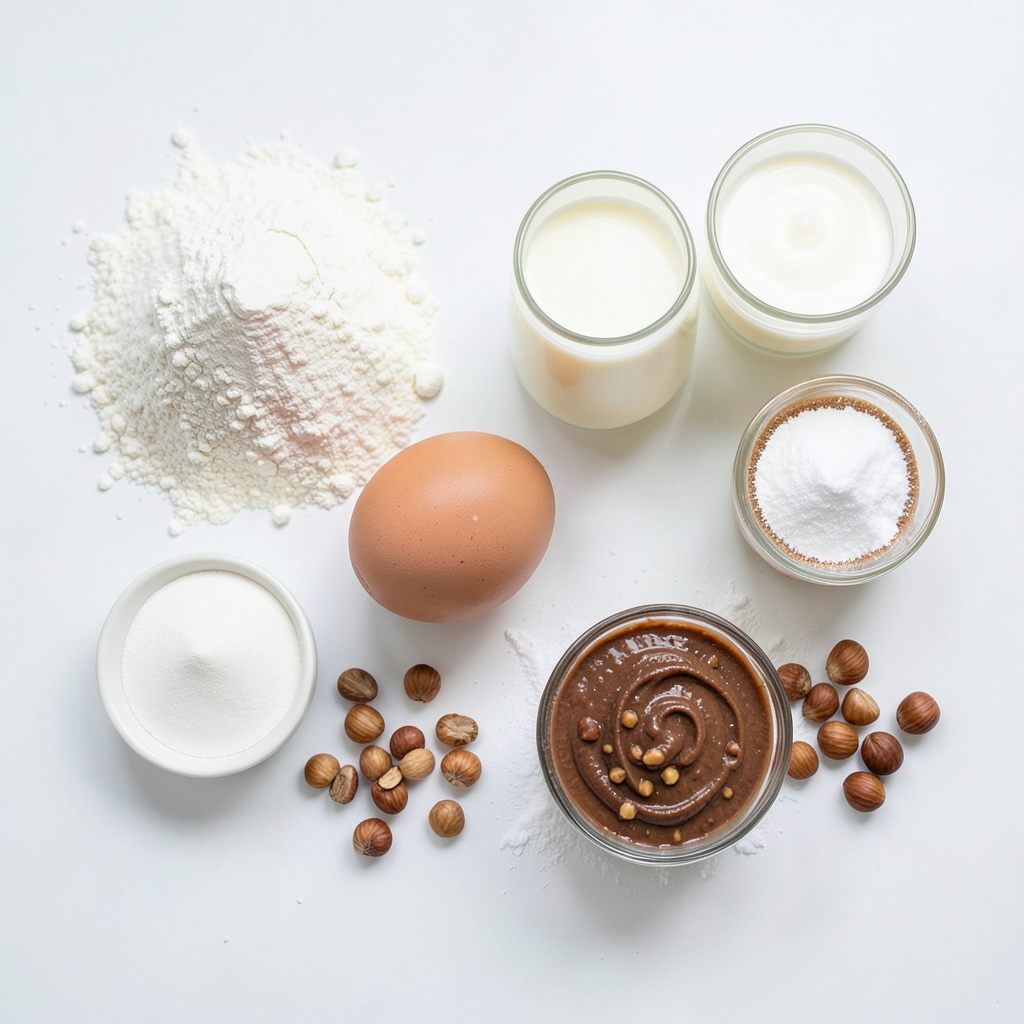
To make a delicious Chocolate Hazelnut Crepe Cake, you need:
- 2 cups all-purpose flour
- 4 large eggs
- 3 cups whole milk
- 1/4 cup granulated sugar
- 1/4 teaspoon salt
- 1/4 cup unsalted butter, melted
- 1 cup chocolate hazelnut spread
- 1 cup heavy cream
- 2 tablespoons powdered sugar
- 1/2 cup toasted hazelnuts, chopped
Optional Garnishes and Enhancements
For a touch of elegance, consider these optional garnishes:
- Chocolate shavings
- Extra whipped cream
- Fresh berries
These will add color and flavor to your cake, making it even more appealing.
Ingredient Substitutions
If you need alternatives, here are some ideas:
- Use whole wheat flour instead of all-purpose flour for a healthier option.
- Almond milk can replace whole milk if you want a dairy-free version.
- Coconut cream is a great substitute for heavy cream, giving a nice flavor.
- For a nut-free option, try sunflower seed butter instead of chocolate hazelnut spread.
These substitutions can help you customize this cake to fit your needs!
Step-by-Step Instructions
Preparing the Crepe Batter
To start, grab a large mixing bowl. Add 2 cups of all-purpose flour. Next, crack in 4 large eggs. Pour in 3 cups of whole milk and 1/4 cup of granulated sugar. Add 1/4 teaspoon of salt for flavor. Whisk everything together until smooth. This part is key for good crepes. Now, gently fold in 1/4 cup of melted unsalted butter. Let the batter rest for 30 minutes. This helps create light and tender crepes.
Cooking the Crepes
Next, heat a non-stick skillet over medium heat. Lightly grease it with a bit of butter. Pour 1/4 cup of the batter into the pan. Quickly swirl it to coat the bottom evenly. Cook for 1-2 minutes. Look for the edges to lift and a golden color on the bottom. Flip the crepe and cook for another minute. Once done, place it on a plate. Continue this with the rest of the batter. Stack the crepes with parchment paper between them to avoid sticking.
Making the Whipped Cream
Now, let’s make the whipped cream. Take a chilled mixing bowl. Add 1 cup of heavy cream and 2 tablespoons of powdered sugar. Using a hand mixer, whip the cream at medium speed. Stop when soft peaks form. This means the cream is light and fluffy, perfect for layering.
Assembling the Crepe Cake
Time to build your cake! Place one crepe on a serving plate. Spread a thin layer of chocolate hazelnut spread on top. Then, add a layer of whipped cream. Repeat this with the remaining crepes, alternating between the spread and cream. Keep layering until you use all the crepes. Aim for a tall and beautiful cake.
Chilling the Cake
Once you finish layering, cover the cake. Put it in the fridge for at least 1 hour. This chilling time is important. It helps the flavors mix and makes cutting easier.
Finishing Touches
Before serving, add any remaining whipped cream on top. Sprinkle with chopped toasted hazelnuts for crunch. If you want, add chocolate shavings for a fancy look. Slice into wedges and enjoy each delightful bite!
Tips & Tricks
Best Practices for Perfect Crepes
- Rest the batter: Let the crepe batter sit for 30 minutes. This helps make the crepes smooth and tender.
- Temperature control: Cook crepes on medium heat. Too hot will burn them; too low will make them chewy.
- Even pouring: Use a measuring cup for consistent crepe size. Pour 1/4 cup of batter for each crepe.
- Swirl quickly: After pouring, immediately swirl the pan to spread the batter evenly.
- Grease lightly: Use just a little butter to grease the pan each time you cook a crepe.
Serving Suggestions and Presentation Tips
- Layer beautifully: Stack the crepes with chocolate hazelnut spread and whipped cream in between.
- Garnish wisely: Top with whipped cream, chopped hazelnuts, or chocolate shavings for a stunning look.
- Use nice plates: Serve on decorative plates to enhance the cake's visual appeal.
- Add extra drizzle: Serve with a side of chocolate hazelnut spread for extra indulgence.
- Slice carefully: Use a sharp knife to cut clean slices for a perfect presentation.
Common Mistakes to Avoid
- Skipping the rest: Don’t skip the resting time for the batter. It’s key for great texture.
- Overcooking crepes: Watch the crepes closely. Overcooked crepes can become dry and tough.
- Using too much filling: Spread thin layers of chocolate hazelnut spread and whipped cream to avoid sogginess.
- Not cooling layers: Allow the crepe cake to chill well. This helps it hold together when slicing.
- Ignoring flavor balance: Balance chocolate with whipped cream and nuts for a rich yet light taste.
Pro Tips
- Rest the Batter: Allowing the crepe batter to rest for at least 30 minutes helps to relax the gluten, resulting in a more tender and delicate crepe.
- Even Cooking: Make sure your pan is evenly heated before adding the batter. This ensures that your crepes cook uniformly and achieve a perfect golden color.
- Layering Technique: When layering the crepes, spread the chocolate hazelnut spread and whipped cream evenly to prevent any sliding or instability in the cake.
- Chill Before Serving: Refrigerating the cake for at least an hour allows the layers to set, making it easier to slice and enhancing the overall flavor.
Variations
Flavor Variations
You can swap the chocolate hazelnut spread for different nut spreads. Almond butter or cashew cream adds unique flavors. Each option gives the cake a new taste. You can even try peanut butter for a fun twist. Use flavored spreads to make exciting combinations. Mix and match according to your taste.
Dietary Modifications
This cake can suit many diets. For a gluten-free version, use gluten-free flour. This keeps the texture light and fluffy. To make it vegan, replace eggs with flaxseed meal. Use almond milk instead of whole milk. Choose a plant-based cream for the whipped topping. These changes ensure everyone can enjoy this treat.
Creative Twists
Adding fruits can elevate the flavor. Fresh berries or banana slices add sweetness and color. You can layer in some fruit between the crepes. For a boozy twist, consider a splash of coffee liqueur. This adds a rich taste that pairs well with chocolate. Get creative with your toppings and mix-ins!
Storage Info
How to Store Leftovers
To keep your chocolate hazelnut crepe cake fresh, wrap it tightly in plastic wrap. You can also place it in an airtight container. This helps seal in moisture and keeps the flavors intact. Store it in the fridge for up to three days. If you notice any leftover whipped cream, it’s best to store that separately.
Freezing Instructions
If you want to save some for later, freezing is a great option. To freeze, slice the cake into individual pieces. Wrap each slice in plastic wrap and then place them in a freezer-safe bag or container. You can keep the crepe cake in the freezer for up to one month. Just remember to label the bag with the date!
Reheating Tips
When you're ready to enjoy your frozen chocolate hazelnut crepe cake, take it out of the freezer. Let it thaw in the fridge overnight. If you prefer it warm, you can reheat individual slices. Use a microwave for about 10-15 seconds, or place it in a preheated oven at 350°F for 5-7 minutes. Enjoy the delightful layers warmed up!
FAQs
What is a Chocolate Hazelnut Crepe Cake?
A Chocolate Hazelnut Crepe Cake is a sweet dessert made from layers of thin crepes. Each crepe is filled with chocolate hazelnut spread and whipped cream. The cake looks impressive and tastes rich. You can enjoy it on special occasions or as a treat.
How long does the cake last in the fridge?
The cake lasts about 3 to 5 days in the fridge. Store it in an airtight container. This helps keep the crepes soft and the flavors fresh. If you notice any changes in smell or texture, it’s best to discard it.
Can I make the crepes in advance?
Yes, you can make the crepes a day before. Store them in the fridge with parchment paper between each one. This prevents sticking. When you’re ready to assemble, just layer them with your spread and whipped cream.
What are the best toppings for a crepe cake?
Great toppings include whipped cream, chopped hazelnuts, and chocolate shavings. You can also drizzle extra chocolate hazelnut spread on top. Fresh berries can add a nice touch. These toppings enhance both flavor and look.
Is it possible to make this recipe without eggs?
Yes, you can make eggless crepes using a substitute. Try using mashed bananas or applesauce. Mix these with flour and milk to create the batter. The texture may differ, but it will still be delicious.
Making a Chocolate Hazelnut Crepe Cake is fun and rewarding. We covered the ingredients you need, step-by-step instructions, and tips for perfect results. You can also explore variations for different tastes and dietary needs. Remember to store and reheat your cake properly for the best experience.
Enjoy your delicious creation, and don’t hesitate to get creative with flavors and toppings. You’ll impress your friends and family with your skills. Happy cooking!