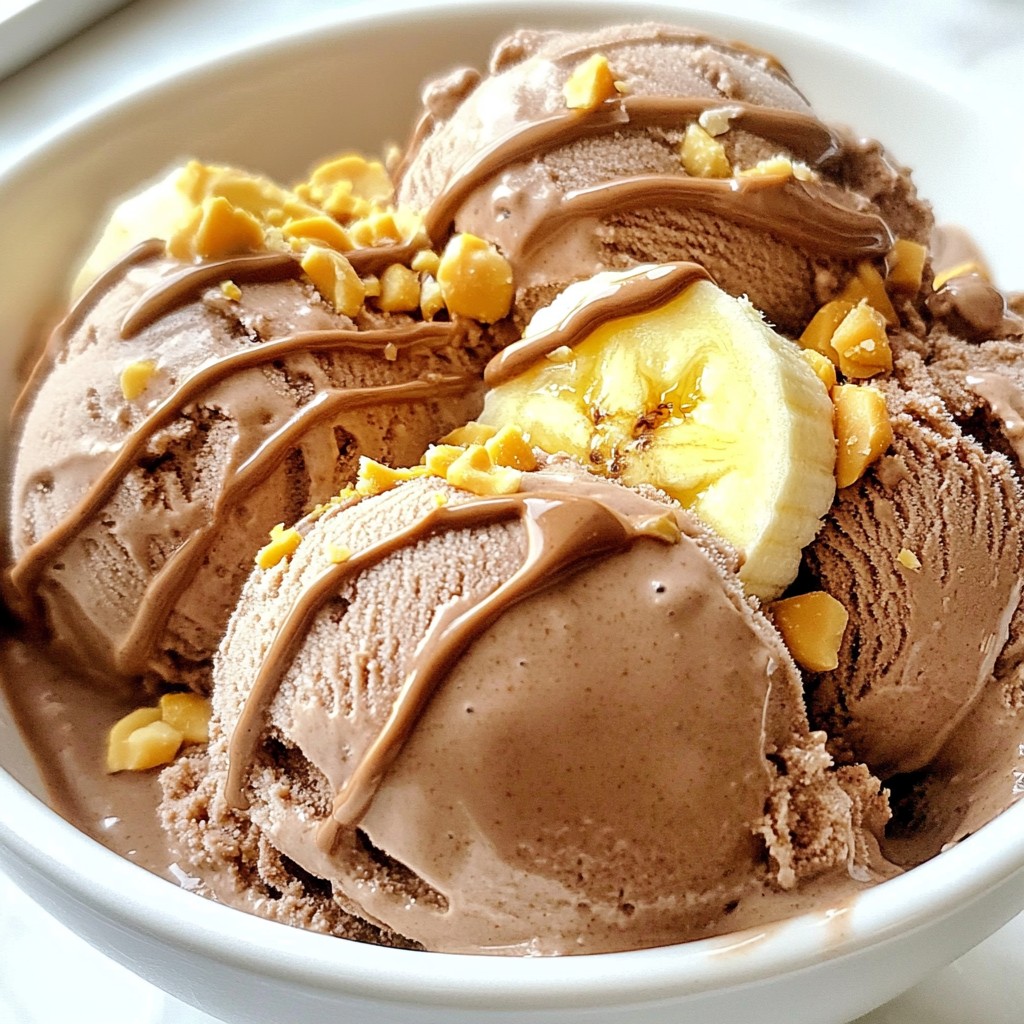
Welcome to a delicious journey where creamy chocolate meets nutty peanut butter and fresh bananas! This Chocolate Peanut Butter Banana Ice Cream Delight is not just a treat; it’s a healthy way to satisfy your sweet cravings. With just a handful of ingredients, you can whip up this easy, no-churn ice cream. Ready to dive into this delightful recipe? Let’s get started!
Why I Love This Recipe
- Deliciously Creamy: This ice cream is incredibly smooth and rich, thanks to the frozen bananas and creamy peanut butter, making it a truly indulgent treat.
- Healthy Ingredients: Made with wholesome ingredients like bananas and almond milk, this ice cream is a guilt-free dessert option that you can enjoy without the extra calories.
- Customizable Flavors: The recipe allows you to adjust the sweetness and add your favorite mix-ins, so you can make it your own every time you whip it up.
- Simple to Make: With just a few simple steps, this recipe is quick to prepare, making it a perfect choice for satisfying your sweet tooth without the hassle.
Ingredients
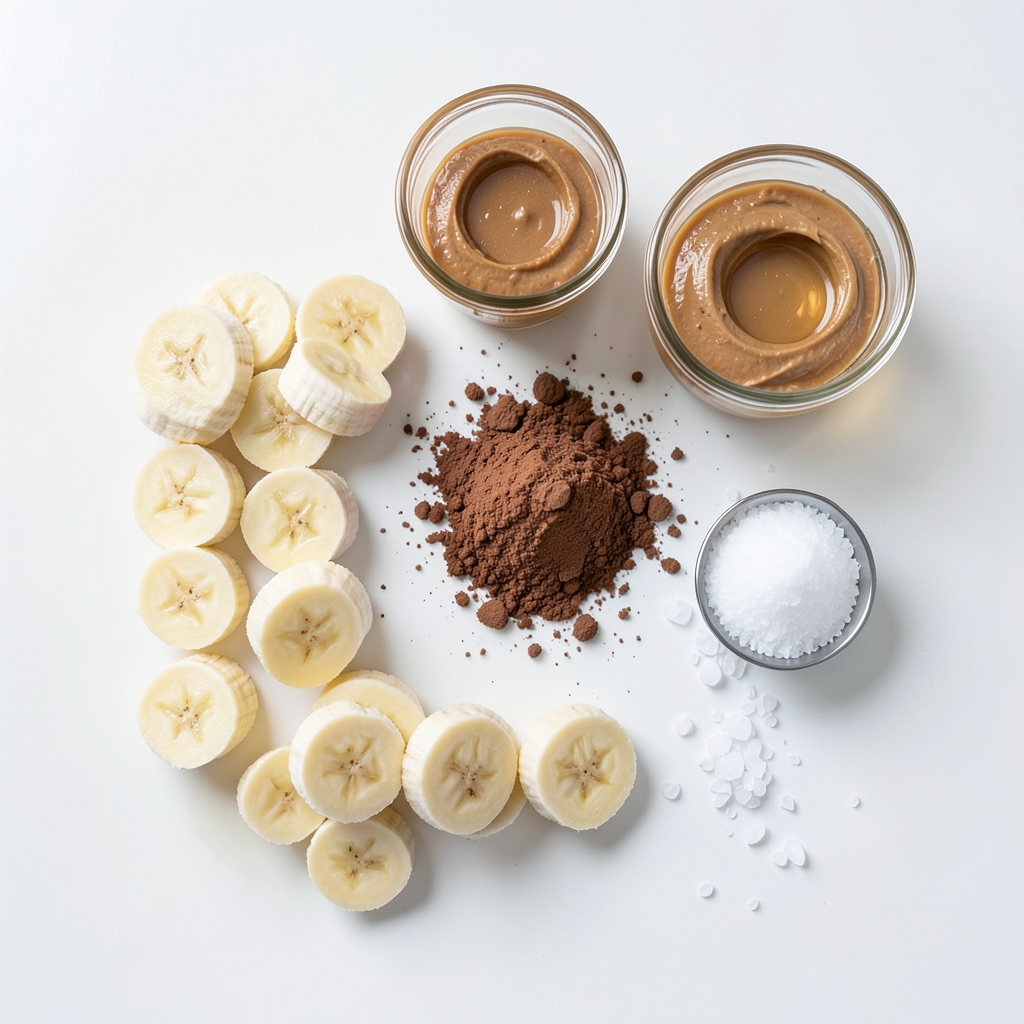
To make Chocolate Peanut Butter Banana Ice Cream, gather these simple ingredients:
- 4 ripe bananas
- ½ cup creamy peanut butter
- ¼ cup unsweetened cocoa powder
- ½ cup almond milk
- 2 tablespoons maple syrup (optional)
- 1 teaspoon vanilla extract
- Pinch of sea salt
These ingredients create a rich and creamy dessert. The ripe bananas serve as the base, giving the ice cream a smooth texture. Peanut butter adds a nutty flavor and creaminess. Cocoa powder provides that deep chocolate taste we crave. Almond milk keeps it light, while maple syrup brings a hint of sweetness. The vanilla extract adds warmth, and a pinch of sea salt balances the flavors beautifully.
Remember, you can adjust these ingredients based on your taste. Want it sweeter? Just add more maple syrup. Prefer a stronger chocolate flavor? Toss in a bit more cocoa powder. This recipe is flexible and fun, letting you create your perfect treat!
Step-by-Step Instructions
Preparation of Bananas
Start with ripe bananas. They should be sweet and soft. Peel and slice them into ½-inch rounds. Spread the banana slices in a single layer in a freezer-safe container. Make sure they do not touch or overlap. This helps them freeze evenly. Freeze the banana slices for at least 2-3 hours. You want them to be completely solid.
Blending Ingredients
Once the bananas are frozen, take them out. Place them in a high-powered food processor. Add the creamy peanut butter, cocoa powder, almond milk, and vanilla extract. If you want it sweeter, add the maple syrup too. Don’t forget the pinch of sea salt! Blend everything on high speed. It may take about 3-4 minutes. Stop to scrape down the sides, so all the ingredients mix well. Taste the mixture and adjust the sweetness if needed.
Freezing Process
After blending, transfer the ice cream mix to a loaf pan or an airtight container. Use a spatula to make the top smooth. Put it back in the freezer for 2 hours. This helps the ice cream harden.
- Insulating container options: You can use a metal loaf pan or a glass container. Both help keep the ice cream cold. If you want to avoid ice crystals, cover the top tightly with plastic wrap before sealing the lid.
Tips & Tricks
Achieving the Perfect Consistency
To get the best texture for your ice cream, freeze the banana slices well. Place them in a single layer in a container. This step is key. If they overlap, they will freeze together. After freezing, blend the bananas with the other ingredients on high speed. This action helps create a creamy texture. Pause to scrape down the sides of the food processor as needed. Blend for 3-4 minutes until smooth. If it seems too soft, freeze it longer.
Sweetness Adjustments
Taste the mixture before you freeze it. If you like it sweeter, add more maple syrup. Blend again to mix well. Remember, the right sweetness makes a big difference in flavor. Adjust to your liking to find that perfect balance. You can always add a little at a time. This way, you control how sweet it gets.
Presentation Suggestions
For serving, use cozy bowls for a nice touch. Drizzle extra peanut butter or chocolate sauce on top for flair. Add chopped nuts or chocolate chips for a delightful crunch. These toppings not only taste great but also look amazing. You can even layer the ice cream in a tall glass for a fun dessert. Let your creativity shine when you serve this delicious treat!
Pro Tips
- Use Ripe Bananas: The riper the bananas, the sweeter and creamier your ice cream will be. Look for bananas with plenty of brown spots for the best flavor.
- Experiment with Milk: While almond milk works great, feel free to try other milk alternatives like coconut milk or oat milk for a different flavor profile and texture.
- Chill Your Equipment: For an even creamier texture, chill your food processor bowl and blade before blending the ice cream mixture.
- Store Properly: To prevent ice crystals from forming, make sure your container is airtight. If possible, press a piece of parchment paper directly on the surface of the ice cream before sealing.
Variations
Flavor Additions
You can change the nut butter to make this ice cream your own. Try almond, cashew, or sunflower seed butter. Each type brings a new taste to the mix. Almond butter gives a light flavor, while cashew butter adds a creamy touch. Sunflower seed butter is great for nut-free options. Mix and match to find your favorite!
Dietary Adjustments
You can adjust this recipe to fit your diet. For a dairy-free choice, stick with almond milk. Other great options include coconut milk or oat milk. If you want a low-sugar treat, skip the maple syrup. The bananas are sweet enough on their own. You can also use a sugar substitute if you prefer.
Serving Suggestions
This ice cream pairs well with many desserts. Serve it with warm brownies for a mix of hot and cold. You can also add it to a fruit salad for a sweet twist. Try it in a parfait with layers of granola and berries. The options are endless, so get creative with your serving ideas!
Storage Info
Proper Freezing Techniques
To store your chocolate peanut butter banana ice cream, start with a clean, airtight container. This keeps the flavors fresh. You can also use a loaf pan, but cover it tightly with plastic wrap. Make sure the ice cream is smooth on top to reduce air exposure. This will help prevent ice crystals from forming.
Shelf Life of Ice Cream
Homemade ice cream can last up to 2 weeks in the freezer. After that, it may lose its creamy texture. To keep it tasting great, eat it within this time. If you notice any freezer burn or odd flavors, it is best to toss it out.
How to Re-freeze for Best Results
If your ice cream starts to melt, it is okay to refreeze it. Just follow these steps for the best results:
- Scoop out what you need and let the rest sit out for about 5 minutes.
- Smooth the surface before putting it back in the freezer.
- Make sure the lid is tight to keep air out.
By following these tips, you can enjoy your delicious chocolate peanut butter banana ice cream longer!
FAQs
Can I use frozen bananas?
Absolutely! Using frozen bananas is a great way to save time. You can skip the slicing and freezing step. Just grab your frozen bananas and blend them straight into the mix. The result will be just as creamy and delicious!
What other ingredients can I add?
You can get creative! Here are some fun options:
- Chopped nuts for crunch
- Dark chocolate chips for extra chocolatey goodness
- A dash of cinnamon for warmth
- A splash of coconut milk for a tropical twist
Feel free to experiment with flavors that you love!
How do I make this recipe vegan?
This recipe is already vegan-friendly! Use almond milk or any plant-based milk you prefer. Here are some great alternatives:
- Coconut milk for a rich taste
- Oat milk for a creamy texture
- Soy milk for added protein
These options will keep your ice cream delicious and dairy-free!
This blog walked you through making a delicious banana ice cream. You learned about the right ingredients and how to prepare them. We discussed tips for getting the perfect texture and ways to make this treat your own. You also discovered how to store it well for later enjoyment.
Making this ice cream is easy and fun. Experiment with flavors and toppings to enjoy it fully. Now, you can create this sweet delight whenever you crave a tasty treat!