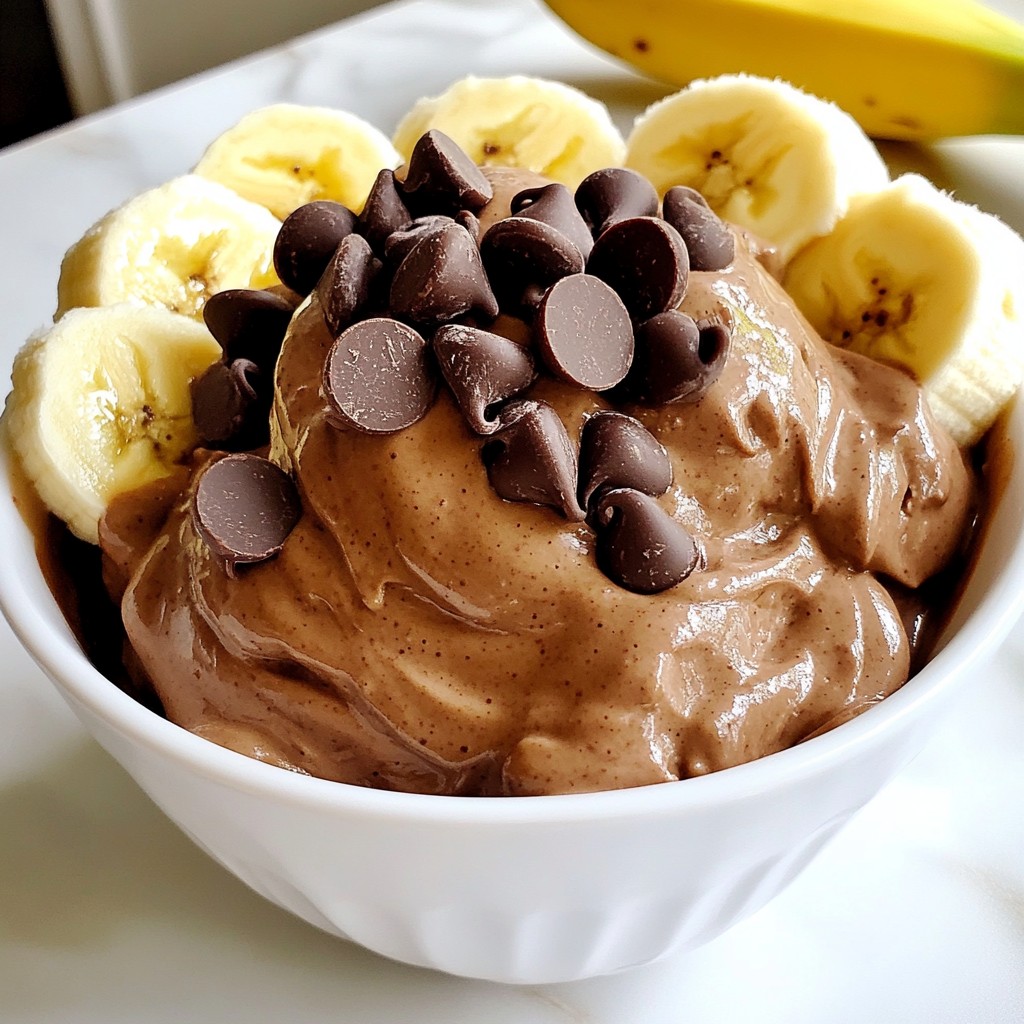
Craving a sweet treat that won’t wreck your diet? Let me introduce you to Chocolate Peanut Butter Nice Cream—a rich, creamy delight that's 100% guilt-free. With just a handful of simple ingredients, this recipe transforms ripe bananas into a heavenly dessert. Whether you want to impress guests or treat yourself, this easy guide will show you how to whip up a batch and enjoy every luscious bite. Are you ready to dive in?
Why I Love This Recipe
- Healthier Dessert Option: This nice cream is made from whole, natural ingredients, making it a guilt-free treat that satisfies your sweet cravings without the added sugars and preservatives found in traditional ice cream.
- Easy to Make: With just a few simple steps, you can whip up this delicious treat in no time. No ice cream maker is required, just a blender or food processor!
- Customizable: This recipe is versatile! You can adjust the sweetness, add additional flavors like vanilla or cinnamon, or even mix in your favorite nuts or fruits for added texture and taste.
- Perfect for Any Occasion: Whether it's a hot summer day or a cozy night in, this chocolate peanut butter nice cream is a delightful dessert that can be enjoyed year-round.
Ingredients
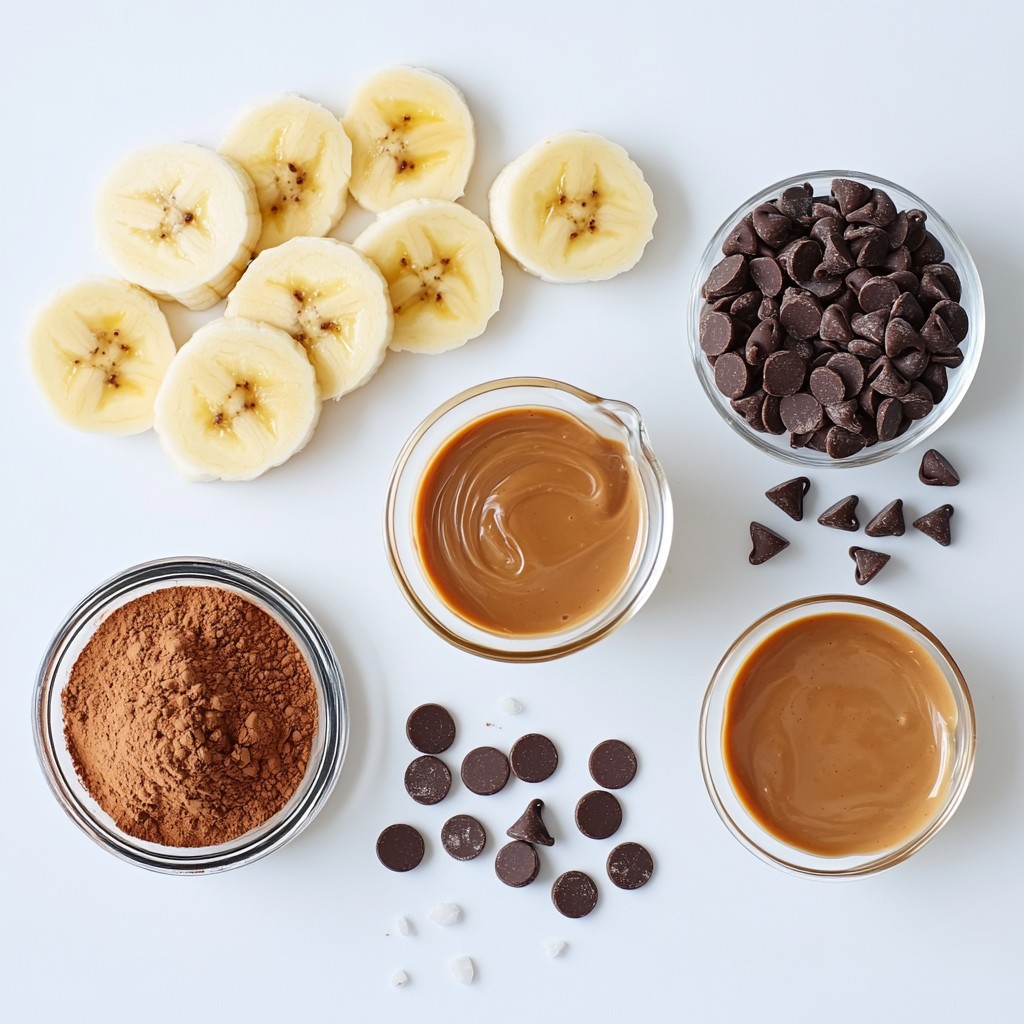
Detailed List of Ingredients
- 4 ripe bananas, sliced and frozen
- 1/2 cup unsweetened cocoa powder
- 1/2 cup creamy peanut butter
- 1/4 cup almond milk (or any non-dairy milk of your choice)
- 1 tablespoon maple syrup (optional, for additional sweetness)
- A pinch of sea salt
- Vegan chocolate chips (for garnish)
Importance of Ripe Bananas
Ripe bananas are key for this nice cream. They should be sweet and soft. When bananas ripen, their starch turns into sugar. This natural sweetness helps reduce the need for extra sugar. Use bananas that have brown spots. These spots mean they are ripe and perfect for blending. If you use unripe bananas, the nice cream will taste starchy and less sweet. This might not give you the creamy, dreamy texture you're after.
Substitutions for Allergy or Dietary Needs
You can easily adjust this recipe for allergies or diets.
- Nut-Free: Use sunflower seed butter instead of peanut butter.
- Dairy-Free: Almond milk is great, but you can use oat milk or coconut milk too.
- Sugar-Free: Skip the maple syrup. The ripe bananas provide enough sweetness.
- Gluten-Free: All the ingredients listed are naturally gluten-free.
Feel free to mix and match these options to fit your needs!
Step-by-Step Instructions
Preparing the Frozen Bananas
Start with ripe bananas. Peel and slice them into small pieces. Place the slices on a plate or tray. Freeze them for at least 2 hours. This step gives your nice cream a creamy texture. The colder the bananas, the better the nice cream will be.
Blending the Ingredients Together
Take the frozen banana slices from the freezer. Add them to a high-speed blender or food processor. Next, pour in the unsweetened cocoa powder, creamy peanut butter, and almond milk. Don't forget a pinch of sea salt for flavor! Blend everything on high speed until the mix is smooth. Stop to scrape down the sides if needed. This ensures a perfect blend of flavors.
Adding Sweetness and Adjusting Flavor
After blending, taste your nice cream. If it needs more sweetness, add the maple syrup. Blend again until you achieve a uniform texture. Taste again and adjust if necessary. Get the flavor just right! Once happy, scoop the nice cream into a loaf pan or container. Smooth the top for a nice finish. Let it sit for about 5 minutes at room temperature before serving. This step helps it soften a bit for easy scooping. Enjoy your chocolate peanut butter nice cream!
Tips & Tricks
Achieving the Perfect Creamy Texture
To make your nice cream super creamy, use very ripe bananas. They blend better and taste sweeter. When blending, pause to scrape the sides. This helps mix everything well. If it seems too thick, add a little more almond milk. Blend until smooth and creamy.
How to Store Leftover Nice Cream
Store any leftover nice cream in an airtight container. Cover the top with plastic wrap to prevent ice crystals. It can last up to one week in the freezer. When you want to eat it, let it sit out for a few minutes. This makes it easier to scoop.
Presentation Tips for Serving
Make your nice cream look fancy by using bowls or cones. Scoop it high for a fun look. Top with vegan chocolate chips for extra flair. You could also add sliced bananas or crushed nuts. These toppings not only add flavor but also make it pretty.
Pro Tips
- Ripeness Matters: Use very ripe bananas for the best sweetness and creaminess in your nice cream.
- Cocoa Quality: Opt for high-quality unsweetened cocoa powder for a richer chocolate flavor.
- Texture Tips: If your nice cream is too thick, gradually add more almond milk until you reach your desired consistency.
- Garnish Glee: Experiment with toppings like chopped nuts, shredded coconut, or fresh fruit for added texture and flavor.
Variations
Adding Nut Butters or Flavor Enhancers
You can change your nice cream by adding different nut butters. Try almond, cashew, or sunflower seed butter. These will give your nice cream a new flavor. You can also use flavored extracts. A splash of vanilla or a hint of coffee can really enhance the taste. Experiment until you find your favorite mix!
Mix-ins and Toppings for Extra Flavor
Mix-ins give your nice cream a fun twist. You can add chopped nuts, shredded coconut, or dried fruit. If you like a bit of crunch, toss in some granola or crispy rice cereal. Top your nice cream with vegan chocolate chips or nut butter for a treat! Get creative and let your taste buds lead the way.
Alternate Base Ingredients for Different Dietary Needs
If you have dietary needs, you can switch the base ingredients. For a nut-free option, use soy milk or oat milk instead of almond milk. You can also use other fruits as a base. Try frozen mango or strawberries for a fruity nice cream. Each choice opens up a new world of flavors!
Storage Info
Best Practices for Freezing Nice Cream
To keep your nice cream fresh, use an airtight container. This helps prevent ice crystals from forming. Always make sure to smooth the top before sealing. You can also cover it with plastic wrap for extra protection. If you want to enjoy it later, freeze it right after making it.
How Long It Lasts in the Freezer
Your chocolate peanut butter nice cream lasts up to two weeks in the freezer. After that, the texture might change. If you notice ice crystals, it’s still safe to eat. However, it may not taste as fresh.
Reheating Methods for Optimal Serving
To serve your nice cream, let it sit at room temperature for about five minutes. This softens it just enough for a perfect scoop. If you’re in a hurry, you can microwave it for about 10 seconds. Check it often to avoid melting. Enjoy your creamy treat!
FAQs
Can I make Chocolate Peanut Butter Nice Cream without bananas?
Yes, you can! If you want to skip bananas, use frozen avocado instead. It gives a creamy texture. You can also try coconut cream for a rich base. Just blend it with cocoa powder and peanut butter. Adjust the almond milk as needed for consistency.
How do I make it sweeter without using sugar?
You can use natural sweeteners like maple syrup or agave nectar. Just add a tablespoon of maple syrup to your mix. Blend it in to combine. Taste and add more if you want it sweeter. Overripe bananas also add natural sweetness without sugar.
What is the best way to serve nice cream?
To serve nice cream, scoop it into bowls or cones. Let it sit for five minutes to soften. This makes it smoother and easier to eat. Top with vegan chocolate chips for added fun. You can also add fresh fruit or nuts for extra flavor. Enjoy your treat!
In this blog post, we explored delicious nice cream made with ripe bananas. We discussed key ingredients, tips for the right texture, and fun variations. You can customize it to fit dietary needs. Remember to store it well for lasting freshness. Enjoy experimenting with flavors and toppings. This treat is simple, fun, and a great way to enjoy a healthier dessert. Your nice cream journey starts now—so get blending!