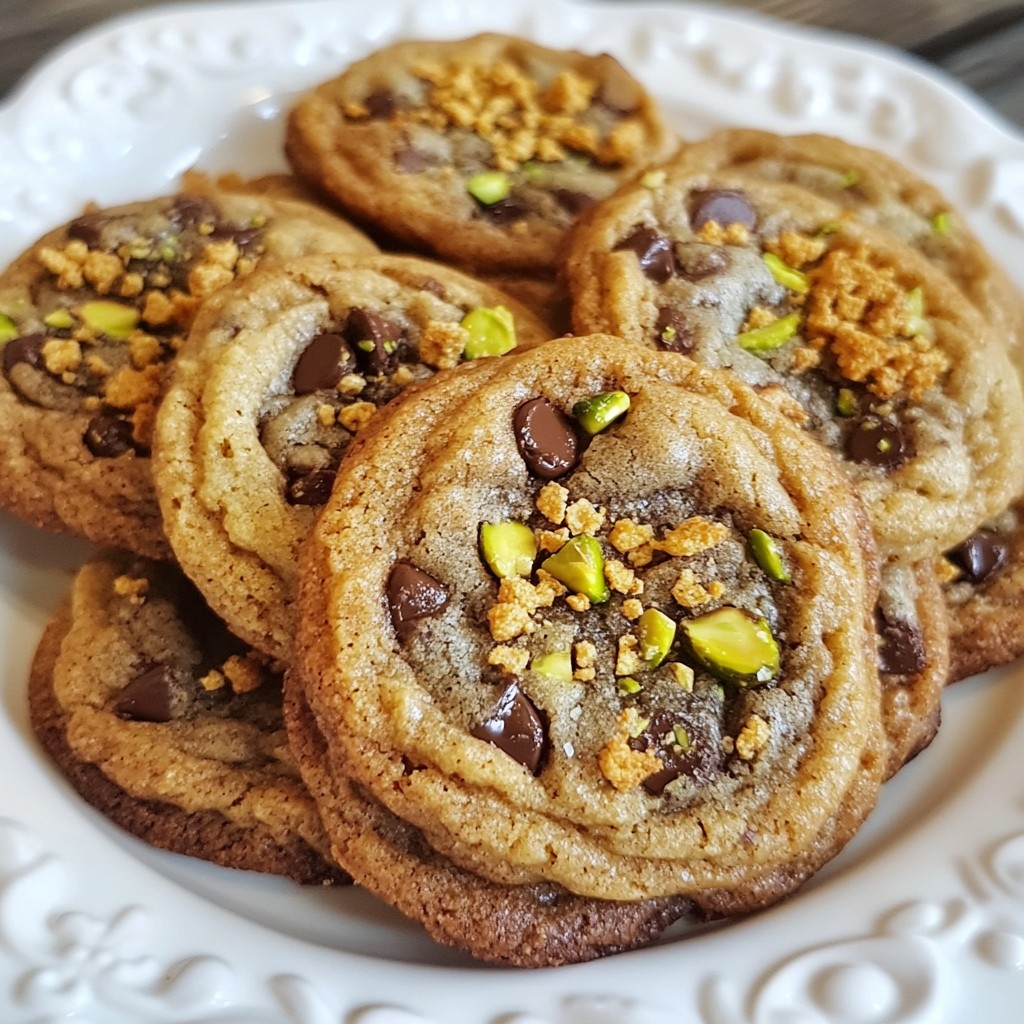
Get ready to indulge in a cookie that’s both crunchy and chewy! These Pistachio Chocolate Chip Cookies are perfect for any sweet tooth. With rich butter, a mix of nuts, and a secret ingredient—crushed cornflakes—they offer a delightful twist on a classic treat. Follow my simple guide to create cookies that will surprise and impress your friends. Let's bake something special!
Why I Love This Recipe
- Delicious Flavor Combination: The combination of rich chocolate, crunchy pistachios, and crispy cornflakes creates a unique texture and flavor profile that is irresistibly delicious.
- Easy to Make: This recipe requires simple ingredients and straightforward steps, making it perfect for both novice and experienced bakers.
- Perfect for Sharing: With about 24 cookies in one batch, they are ideal for sharing with friends, family, or at gatherings, ensuring everyone gets to enjoy a treat.
- Customizable: You can easily modify this recipe by adding different nuts or using various types of chocolate, allowing for personalization to suit your taste.
Ingredients
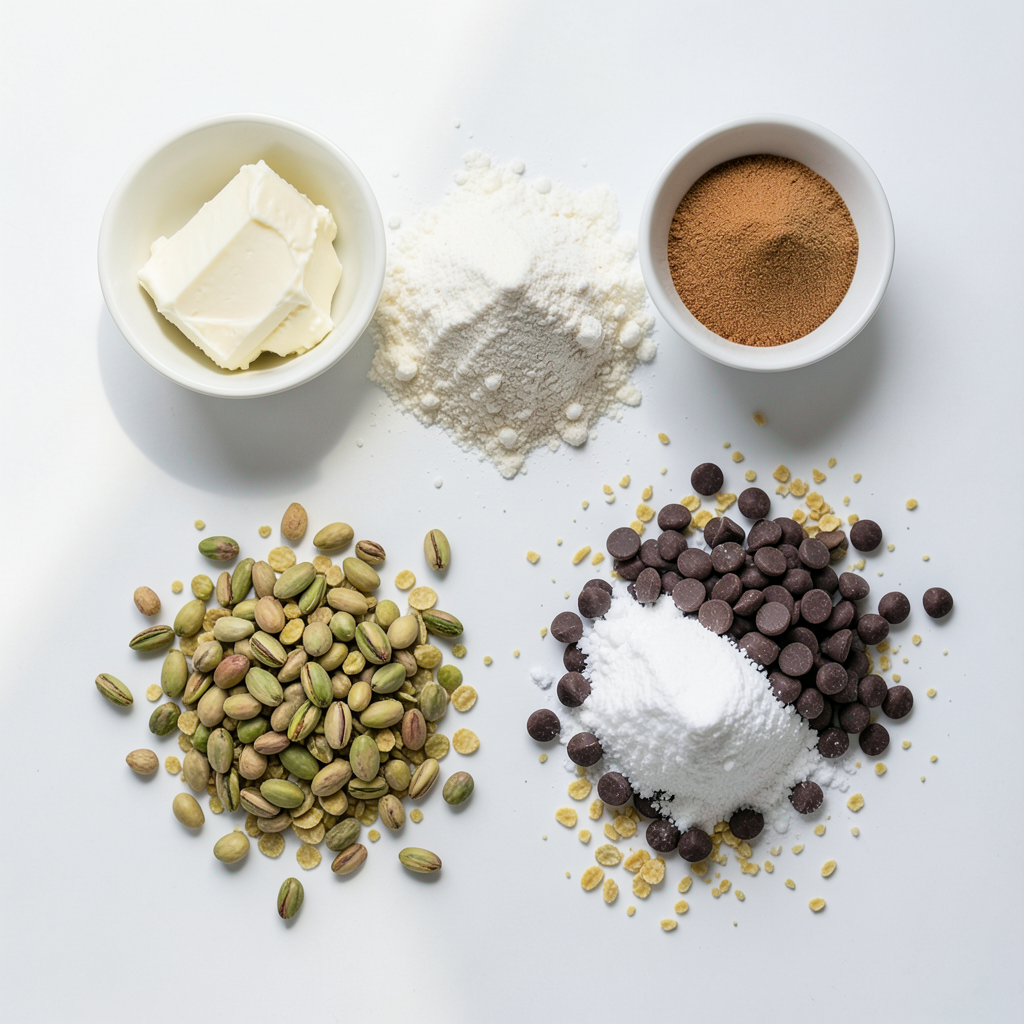
List of Ingredients
- 1 cup unsalted butter, softened
- 3/4 cup granulated sugar
- 3/4 cup brown sugar, packed
- 2 large eggs
- 1 teaspoon pure vanilla extract
- 2 1/4 cups all-purpose flour
- 1 teaspoon baking soda
- 1/2 teaspoon salt
- 1 cup semi-sweet chocolate chips
- 1/2 cup shelled pistachios, coarsely chopped
- 1/2 cup crushed cornflakes
These ingredients create a perfect balance of flavors and textures. The unsalted butter gives richness. Granulated and brown sugars add sweetness and depth. Eggs help bind everything together, while vanilla extract enhances the taste. Flour forms the base, and baking soda helps cookies rise.
Adding semi-sweet chocolate chips ensures every bite is a delight. The chopped pistachios provide a unique nutty flavor and a beautiful green color. The crushed cornflakes add an unexpected and satisfying crunch. This combo makes each cookie special and fun to eat.
When you gather these ingredients, make sure they are fresh. Fresh eggs and quality chocolate make a big difference in taste. This recipe is simple, yet it delivers big on flavor. You will love how this mix turns into cookies that everyone will enjoy.
Step-by-Step Instructions
Preparation of Ingredients
- Preheat your oven to 350°F (175°C). Line two baking sheets with parchment paper.
- In a big bowl, cream together 1 cup of softened unsalted butter, 3/4 cup of granulated sugar, and 3/4 cup of packed brown sugar. Use an electric mixer for about 2-3 minutes. The mix should look light and fluffy.
- In another bowl, whisk together 2 1/4 cups of all-purpose flour, 1 teaspoon of baking soda, and 1/2 teaspoon of salt until combined.
Combining Ingredients
- Add 2 large eggs to the creamed mixture, one at a time. Mix well after each egg. Then, stir in 1 teaspoon of pure vanilla extract until everything is blended.
- Gradually mix in the dry ingredients. Do this slowly to avoid overmixing. The dough should be just combined.
- Gently fold in 1 cup of semi-sweet chocolate chips, 1/2 cup of coarsely chopped shelled pistachios, and 1/2 cup of crushed cornflakes. Ensure they are evenly spread throughout the dough.
Baking Process
- Use a tablespoon or cookie scoop to drop rounded balls of dough on the prepared baking sheets. Leave about 2 inches between each cookie.
- Bake the cookies for 10-12 minutes. Watch for the edges to turn lightly golden and the centers to set but still be soft.
- Once baked, let the cookies cool on the sheet for about 5 minutes. Then, transfer them to a wire rack to cool completely. It helps keep them chewy.
For a beautiful display, arrange the cookies on a colorful platter. Garnish with more chopped pistachios if you like. Pair these cookies with a tall glass of cold milk for a perfect treat!
Tips & Tricks
Achieving Crunchiness
To make these cookies extra crunchy, crushed cornflakes are key. They add a lovely crunch that pairs well with the soft chocolate and pistachios. Make sure to use fresh cornflakes for the best texture. Adjust your baking time if you prefer a firmer cookie. If you want a crunchier bite, bake the cookies for an extra minute or two. Just keep an eye on them!
Avoiding Common Mistakes
A common mistake is overmixing the dough. This can make your cookies tough instead of soft. Mix until the dry ingredients are just combined. Another point to note is checking for doneness. The edges should be golden brown while the center stays soft. If you bake them too long, they may lose that wonderful chewy texture.
Enhancing Flavor
Using high-quality chocolate makes a big difference. The better the chocolate, the richer the flavor. Feel free to experiment with different nuts too! Almonds or walnuts can also work well if you want a change. Each nut adds its unique taste and texture, giving you a new cookie experience every time.
Pro Tips
- Chill the Dough: Refrigerating the dough for at least 30 minutes before baking can help the cookies maintain their shape and develop a richer flavor.
- Use Fresh Ingredients: Ensure your baking soda is fresh for the best rise and texture. Expired baking soda can lead to flat cookies.
- Experiment with Mix-ins: Feel free to substitute the pistachios with other nuts or add dried fruit for a unique twist on these cookies.
- Store Properly: Keep cookies in an airtight container at room temperature to maintain their chewy texture and crunchiness for longer.
Variations
Dietary Adjustments
You can make these cookies fit your diet. For gluten-free options, swap all-purpose flour with a gluten-free blend. The texture might change slightly, but they will still taste great. For a vegan version, replace the eggs with flax eggs. Mix one tablespoon of flaxseed meal with three tablespoons of water for each egg. Use vegan butter to keep the flavor rich and creamy.
Flavor Twists
Spices can add a fun twist to your cookies. Try adding a pinch of cinnamon or nutmeg to the dough. You can also use different extracts like almond or hazelnut instead of vanilla. For chocolate lovers, use dark or white chocolate chips for a new flavor. Each type of chocolate brings a unique taste.
Texture Modifications
Want a chewier cookie? Add oats! Just mix in a cup of rolled oats with the dry ingredients. This will give your cookies a hearty feel. If you want more crunch, swap the cornflakes for other cereals, like Rice Krispies or crushed granola. Each choice changes the texture and flavor of your cookies in a fun way.
Storage Info
Short-Term Storage
To keep your cookies fresh, place them in an airtight container. This helps to lock in moisture and flavor. I recommend using a container that fits the cookies snugly. You can stack them, but separate layers with parchment paper. This keeps them from sticking together.
Long-Term Storage
If you want to save cookies for later, freezing is a great option. Place cooled cookies in a freezer-safe bag or container. Be sure to remove as much air as possible. This prevents freezer burn. When you’re ready to eat them, thaw the cookies at room temperature. To enjoy them warm, pop them in the oven for a few minutes.
Shelf Life
At room temperature, these cookies last about one week. They will stay fresh if stored correctly. Look for signs of freshness loss. If they become hard or lose their flavor, it’s time to toss them. Always trust your senses!
FAQs
What can I substitute for butter in this recipe?
You can use coconut oil or margarine as a butter alternative. Both will work well. Make sure they are in the same amount, one cup. You can also try using applesauce for a lighter option. It will change the texture but can add moisture.
Can I use different nuts in these cookies?
Yes, you can use different nuts. Walnuts or almonds are great substitutes. Just remember to chop them coarsely. Each nut offers a unique flavor and crunch. You can even try pecans for a sweet taste.
How do I know when the cookies are done baking?
Check the edges of the cookies. They should be lightly golden brown. The centers might look soft. This is okay! They will firm up as they cool. Use a toothpick to test if needed. If it comes out clean, they are done.
Can I make the cookie dough ahead of time?
Absolutely! You can prepare the dough and store it in the fridge. Wrap it well in plastic wrap. It will stay fresh for up to three days. You can also freeze the dough. Just scoop it into balls and place them in a freezer bag. They can last for up to three months. When ready, bake straight from the freezer, adding a minute or two to the bake time.
This blog post covered a delicious cookie recipe with unique ingredients. We explored each step, from mixing to baking. You learned tips for crunchiness, avoiding mistakes, and enhancing flavors. Variations, storage info, and common questions also helped guide your baking journey. Remember, the right ingredients and techniques create the best cookies. Enjoy your baking and share these tasty treats with friends and family. Happy cooking!