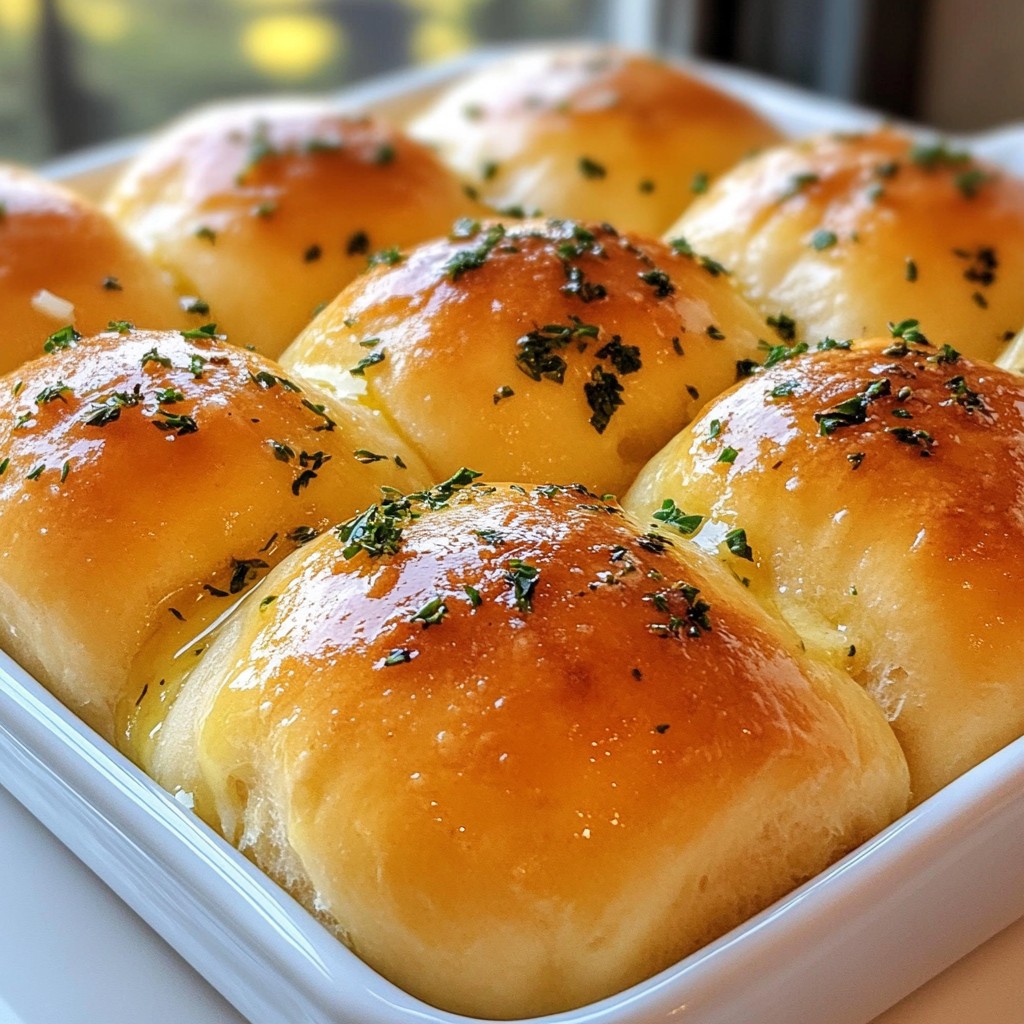
Get ready to enjoy the softest, most flavorful Garlic Herb Dinner Rolls you’ve ever tasted! With a blend of fresh garlic and herbs, these rolls will steal the show at any meal. I’ll guide you through each easy step, from mixing dough to baking the perfect rolls. Whether it’s for a family dinner or a cozy night in, these rolls are sure to impress. Let’s dive into the recipe!
Why I Love This Recipe
- Delicious Flavor: The combination of garlic and fresh herbs adds a mouthwatering aroma and taste that elevates these rolls beyond the ordinary.
- Easy to Make: This recipe is straightforward and requires minimal ingredients, making it perfect for both beginners and experienced bakers.
- Perfect for Any Occasion: These dinner rolls are versatile and can be served at family dinners, holidays, or alongside any meal, making them a great addition to your table.
- Warm and Comforting: There's nothing like the smell of freshly baked bread, and these rolls are soft, warm, and comforting, perfect for sharing with loved ones.
Ingredients
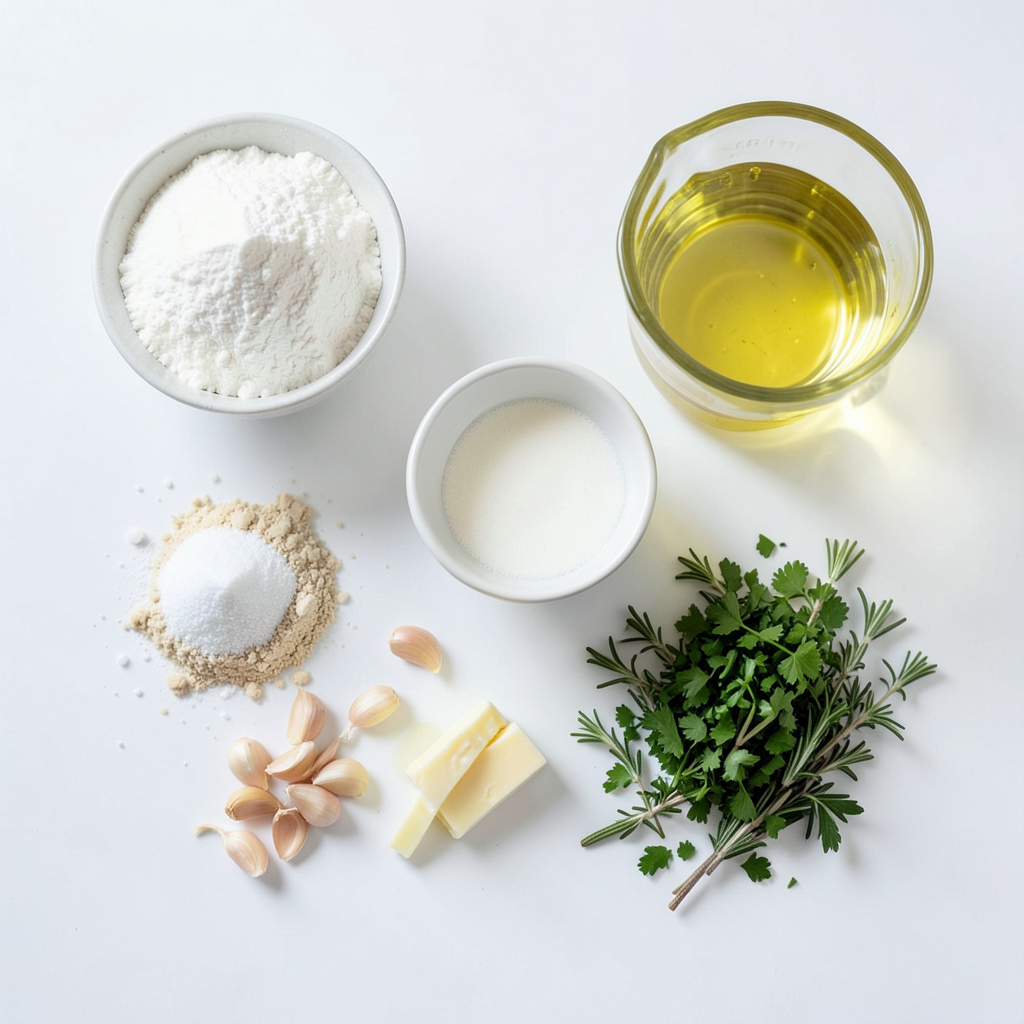
To make Garlic Herb Dinner Rolls, you need a few simple ingredients. Here’s what you will need:
- 3 cups all-purpose flour
- 1 packet (2 1/4 teaspoons) instant yeast
- 1 teaspoon granulated sugar
- 1 teaspoon salt
- 1 cup warm water (about 110°F)
- 3 tablespoons extra virgin olive oil
- 3 cloves garlic, finely minced
- 1 tablespoon fresh parsley, finely chopped
- 1 teaspoon fresh rosemary, finely chopped
- 1 teaspoon fresh thyme, finely chopped
- 2 tablespoons unsalted butter, melted (for brushing on top)
Each ingredient plays a key role. The flour gives structure, while the yeast makes the rolls fluffy. Sugar feeds the yeast, helping it rise. Salt adds flavor, and warm water activates the yeast. Olive oil keeps the rolls moist and rich. Garlic and herbs bring a burst of flavor. Lastly, melted butter gives the rolls a shiny finish and a touch of richness.
Gather these items before you start. Fresh herbs will make a big difference in taste. You can always adjust the herbs based on what you like. Enjoy the process of making these delicious rolls!
Step-by-Step Instructions
Preparing the Dough
- Activate the yeast: Begin by mixing 1 cup warm water, 1 teaspoon sugar, and 1 packet instant yeast in a large bowl. Let it sit for about 5 minutes. Watch for bubbles; that means the yeast is active!
- Combine wet and dry ingredients: Add 3 tablespoons olive oil and 1 teaspoon salt to the yeast mix. Stir in half of the 3 cups flour until it forms a thick batter.
- Knead the dough: Gradually add the rest of the flour. Knead the dough on a floured surface for 5-7 minutes until it feels smooth and elastic.
Adding Flavor
- Incorporating garlic and herbs into the dough: Mix in 3 minced garlic cloves, 1 tablespoon parsley, 1 teaspoon rosemary, and 1 teaspoon thyme. Knead again until the herbs and garlic are evenly spread throughout the dough.
Rising Process
- First rise: Place the dough in a greased bowl. Cover it and let it rise in a warm area for about 1 hour until it doubles in size.
- Shaping the rolls: After the first rise, punch down the dough to release air. Cut it into 12 equal pieces. Shape each piece into a round ball and place them in a greased baking dish, leaving space between each roll.
Baking Instructions
- Second rise: Cover the shaped rolls with a towel and let them rise for another 30 minutes until they look puffy.
- Preheating the oven: While the rolls rise, preheat your oven to 375°F (190°C).
- Baking the rolls: Brush the tops with melted butter for flavor. Bake for 20-25 minutes until golden brown and hollow-sounding when tapped. Enjoy the aroma filling your kitchen!
Tips & Tricks
Perfecting the Rolls
To make the best garlic herb dinner rolls, kneading is key. You should knead the dough for about 5-7 minutes. This helps build gluten, making your rolls soft and fluffy. Use your palms to push down and fold the dough. Turn it a quarter turn and repeat. A well-kneaded dough feels smooth and elastic.
Rising the dough in a warm place is also important. A good spot is near an oven or in a sunny window. The ideal temperature is around 75°F to 80°F. Cover the dough with a towel to keep it warm and moist. This helps the yeast work its magic, making your rolls rise perfectly.
Enhancing Flavor
For more flavor, you can add other herbs or spices. Try adding dried oregano or basil for a twist. If you love a spicy kick, add a pinch of red pepper flakes. You can also mix in some grated cheese for a rich taste.
If you don’t have fresh herbs, dried herbs work too. Just use less, as they are more potent. You can also swap the olive oil for melted butter for a different flavor. These small changes can give your rolls a unique touch.
Serving Suggestions
These rolls shine when served warm. You can brush them with more melted butter before serving. This adds a nice shine and flavor. Place them in a basket lined with a cloth to keep them warm.
These rolls pair well with many dishes. Serve them with soups, salads, or pasta. They also taste great with dips like hummus or garlic butter. Feel free to get creative and enjoy these rolls with your favorite meals!
Pro Tips
- Use Fresh Ingredients: Always opt for fresh herbs and garlic to enhance the flavor of your dinner rolls. Fresh ingredients will provide a more vibrant taste compared to dried ones.
- Temperature Matters: Ensure your warm water is around 110°F to activate the yeast properly. Too hot can kill the yeast, while too cold may not activate it effectively.
- Kneading Technique: When kneading the dough, aim for a smooth and elastic texture. This ensures that your rolls will have a light and fluffy crumb after baking.
- Cooling Process: Let your rolls cool slightly in the pan before serving. This helps them set and makes them easier to handle without losing shape.
Variations
Gluten-Free Options
You can enjoy these rolls without gluten! Use a gluten-free flour mix. Look for one that contains xanthan gum for the best texture. Instant yeast works great in gluten-free recipes too. Follow the same steps for mixing and rising. Your rolls will still be soft and tasty!
Different Flavor Profiles
Get creative with flavors! Adding cheese makes these rolls even more delightful. Try mozzarella, cheddar, or even feta. You can also swap out the herbs. Herbs like dill or oregano add a new twist. Experiment and find your favorite mix!
Adjusting Serving Size
Need more or fewer rolls? Scaling the recipe is easy! For more rolls, double the ingredients. For fewer, halve them. Make sure to keep an eye on the baking time. Larger rolls may take longer, while smaller ones may bake faster. Adjust as needed for perfect results!
Storage Info
Storing Leftover Rolls
To keep your garlic herb dinner rolls fresh, let them cool first. Place them in an airtight container. You can also wrap them in plastic wrap. This method keeps them soft and tasty for about 2-3 days at room temperature. If you want to store them longer, place the rolls in the fridge. They can last up to a week this way. For the best flavor, I recommend freezing them if you can’t eat them soon. Wrap each roll in cling film and place them in a freezer bag. They can stay fresh for up to three months in the freezer.
Reheating Instructions
When it’s time to enjoy the rolls again, reheating is easy. You can use the oven for the best results. Preheat your oven to 350°F (175°C). Place the rolls on a baking sheet. Cover them lightly with foil to keep them from drying out. Heat for about 10-15 minutes until warm. If you prefer a quicker method, use the microwave. Place a roll on a microwave-safe plate and cover it with a damp paper towel. Heat for about 10-15 seconds. Check if it's warm enough and enjoy that fresh taste again!
FAQs
How can I tell if my yeast is active?
To check if your yeast is active, mix it with warm water and sugar. Wait about five minutes. If the mixture becomes frothy, your yeast is good to use. This froth shows the yeast is alive and ready to help your rolls rise.
Can I make this dough in advance?
Yes, you can make the dough ahead of time. After kneading, let the dough rise until it doubles in size. Then, cover it and place it in the fridge. You can keep it there for up to 24 hours. When ready, let it come to room temperature and shape your rolls.
What are some common mistakes to avoid?
Avoid using water that is too hot. It can kill the yeast. Also, don't skip the first rise. This step is key to fluffy rolls. Lastly, ensure you don't over-knead the dough; it should be soft and smooth, not tough.
How do I achieve a crispy crust on my rolls?
To get a crispy crust, brush the tops with melted butter before baking. You can also add a small pan of water to the oven while baking. The steam helps create a nice crust. Bake until the rolls are golden brown and sound hollow when tapped.
You learned how to make delicious homemade rolls using simple ingredients and easy steps. From preparing the dough to adding flavor, the process is fun and rewarding. Remember to use fresh herbs for the best taste and store leftovers properly. With a few tips and tricks, you can adapt this recipe to suit your needs. Baking is all about experimenting, so feel free to try different flavors. Enjoy your rolls fresh out of the oven or as part of a meal. Happy baking!