High-Protein Chocolate Cottage Cheese Ice Cream Recipe

Craving ice cream but want to boost your protein intake? I’ve got just the recipe for you! My High-Protein Chocolate Cottage Cheese Ice Cream combines rich chocolate flavor with a creamy texture, all while packing in the protein. In this easy guide, I’ll share the simple ingredients, quick steps, and some handy tips to help you create a delicious treat that supports your health goals. Let’s dive in!

- 2 cups cottage cheese (low-fat or regular) - 1/4 cup unsweetened cocoa powder - 1/4 cup honey or maple syrup (adjust for sweetness) - 1/2 teaspoon vanilla extract - 1/2 cup milk (dairy or plant-based) - A pinch of salt These ingredients are key for a rich, creamy ice cream. Cottage cheese gives protein and a smooth texture. Cocoa powder adds that deep chocolate flavor you crave. Sweeteners like honey or maple syrup bring balance to the chocolate. Vanilla enhances the taste, while milk gives a creamy base. The pinch of salt rounds out the flavors perfectly. - Dark chocolate chips - Chopped nuts - Fresh berries Toppings take this dessert to the next level. Dark chocolate chips add richness and crunch. Nuts give a tasty and satisfying texture. Fresh berries add a burst of color and flavor. You can mix and match, so get creative! - Agave syrup - Stevia - Coconut sugar If you want to change the sweetness, try different options. Agave syrup is a great choice for a lower glycemic index. Stevia is a zero-calorie option if you want to cut calories. Coconut sugar offers a more caramel-like taste. Adjust the amount based on your sweetness level. Always taste to find your perfect balance! To start, take 2 cups of cottage cheese and put it in a blender. You can use low-fat or regular cottage cheese based on your taste. Next, add 1/4 cup of unsweetened cocoa powder for that rich chocolate flavor. Then, pour in 1/4 cup of honey or maple syrup. Adjust this amount if you like your ice cream sweeter. Now, add 1/2 teaspoon of vanilla extract. This will enhance the chocolate taste. Pour in 1/2 cup of milk. You can choose dairy or a plant-based milk. Finally, sprinkle in a pinch of salt. This helps to bring out all the flavors. Blend everything on high until it's smooth and creamy. Don't forget to stop and scrape down the sides for an even mix. Once blended, taste the mixture. If you want a stronger chocolate taste, stir in an extra tablespoon of cocoa powder. After you’re happy with the flavor, transfer the mixture to an airtight container. Make sure it is sealed tightly to keep the ice cream fresh. Place the container in the freezer for about 2-3 hours. This first freeze helps to set the ice cream. After the initial freeze, take the container out. Use a fork to stir the mixture. This step breaks up any ice crystals, making your ice cream creamier. Then, return it to the freezer for another 2-3 hours, or until it reaches your desired consistency. Before you serve, let the ice cream sit at room temperature for about 5 minutes. This softens it slightly, making it easier to scoop. For serving, use colorful bowls to make it look great. You can also add toppings like dark chocolate chips, chopped nuts, or fresh berries. These add flavor and texture, making your dessert more fun! To make your ice cream even better, try these tips. First, use good-quality cocoa powder. This choice boosts the chocolate taste. You can add a bit more vanilla extract for a richer flavor. If you want a creamier texture, blend longer. Make sure everything is smooth before freezing. Stir the mixture after the first freeze. This breaks ice crystals and improves texture. Avoid using too much sweetener. It can make the ice cream too sweet and hard. Also, don’t skip the salt. It helps balance the flavors. If you forget to stir while it freezes, the ice cream can become icy. Lastly, don’t rush the freezing time. Let it sit long enough for the best results. Serve your ice cream in colorful bowls. This adds fun to your dessert. You can top it with dark chocolate chips for crunch. Fresh berries add color and taste. Chopped nuts give a nice texture. A sprig of mint can make it look fancy. Enjoy your tasty treat! {{image_4}} To make this ice cream dairy-free, swap the cottage cheese for silken tofu. Silken tofu blends well and gives a creamy texture. Use almond milk or coconut milk instead of regular milk. For sweetener, maple syrup works great. You can enjoy a tasty vegan treat that packs protein while being kind to your diet. Want a richer chocolate flavor? Add an extra tablespoon of cocoa powder when blending. You can also mix in chocolate protein powder for added nutrition. For a fun twist, try adding a touch of espresso powder. It enhances the chocolate and gives a unique taste. Fruits and nut butters can elevate your ice cream. Add ripe bananas or frozen cherries during blending for natural sweetness. A scoop of almond or peanut butter adds creaminess and flavor. You can even mix in some chopped nuts for crunch. These additions make the ice cream fun and full of flavor. Store any leftover ice cream in an airtight container. Make sure it is sealed well. This keeps out air and prevents freezer burn. You can also cover the top with plastic wrap for extra protection. If you follow these steps, your ice cream will stay fresh longer. When freezing the ice cream, wait until it is fully set. This usually takes about 4-6 hours. If you want a creamier texture, stir it every few hours. To thaw, take it out of the freezer and let it sit for about 5 minutes. This makes it easier to scoop. Avoid using a microwave to thaw, as it can change the texture. Your high-protein chocolate cottage cheese ice cream can last for about 1 month in the freezer. However, it is best to eat it within 2 weeks for the best flavor and texture. Over time, ice crystals may form, affecting the creaminess. Always check for any off smells or changes in color before serving. Yes, you can use flavored cottage cheese. Flavored options can add extra taste. However, be careful with added sugars or strong flavors. Choose flavors that pair well with chocolate, like vanilla or even strawberry. Always taste the mix to check if the flavors fit your liking. To cut calories, swap honey or maple syrup for a sugar-free sweetener. You can also use low-fat cottage cheese instead of regular. If you prefer, reduce the amount of cocoa powder. This change keeps the chocolate taste but lowers calories. Cottage cheese is rich in protein, making this ice cream a filling treat. It has calcium, which is good for bones. Using it in ice cream means you get a sweet dessert that helps you feel full longer. It also has fewer carbs than regular ice cream. Yes, you can use an ice cream maker! After blending the ingredients, pour the mix into your machine. Follow the maker’s instructions for freezing time. This method may give you a creamier texture, as it churns the mix as it freezes. Enjoy your homemade ice cream! This blog post covered how to make high-protein chocolate cottage cheese ice cream. We talked about main ingredients, optional toppings, and variations for sweeteners. I shared step-by-step instructions to blend, freeze, and achieve the perfect texture. You also learned tips to enhance flavor and avoid common mistakes. Exploring dairy-free and vegan options broadened your choices. Lastly, we discussed storing the ice cream for the best taste and freshness. Now, you can enjoy a delicious treat without sacrificing health. Dive in and make this ice cream your own!

Ingredients

Main Ingredients for High-Protein Chocolate Cottage Cheese Ice Cream

– 2 cups cottage cheese (low-fat or regular)

– 1/4 cup unsweetened cocoa powder

– 1/4 cup honey or maple syrup (adjust for sweetness)

– 1/2 teaspoon vanilla extract

– 1/2 cup milk (dairy or plant-based)

– A pinch of salt

These ingredients are key for a rich, creamy ice cream. Cottage cheese gives protein and a smooth texture. Cocoa powder adds that deep chocolate flavor you crave. Sweeteners like honey or maple syrup bring balance to the chocolate. Vanilla enhances the taste, while milk gives a creamy base. The pinch of salt rounds out the flavors perfectly.

Optional Toppings for Serving

– Dark chocolate chips

– Chopped nuts

– Fresh berries

Toppings take this dessert to the next level. Dark chocolate chips add richness and crunch. Nuts give a tasty and satisfying texture. Fresh berries add a burst of color and flavor. You can mix and match, so get creative!

Suggested Variations for Sweeteners

– Agave syrup

– Stevia

– Coconut sugar

If you want to change the sweetness, try different options. Agave syrup is a great choice for a lower glycemic index. Stevia is a zero-calorie option if you want to cut calories. Coconut sugar offers a more caramel-like taste. Adjust the amount based on your sweetness level. Always taste to find your perfect balance!

Step-by-Step Instructions

Blending the Base Ingredients

To start, take 2 cups of cottage cheese and put it in a blender. You can use low-fat or regular cottage cheese based on your taste. Next, add 1/4 cup of unsweetened cocoa powder for that rich chocolate flavor. Then, pour in 1/4 cup of honey or maple syrup. Adjust this amount if you like your ice cream sweeter. Now, add 1/2 teaspoon of vanilla extract. This will enhance the chocolate taste. Pour in 1/2 cup of milk. You can choose dairy or a plant-based milk. Finally, sprinkle in a pinch of salt. This helps to bring out all the flavors. Blend everything on high until it’s smooth and creamy. Don’t forget to stop and scrape down the sides for an even mix.

Preparing and Freezing the Mixture

Once blended, taste the mixture. If you want a stronger chocolate taste, stir in an extra tablespoon of cocoa powder. After you’re happy with the flavor, transfer the mixture to an airtight container. Make sure it is sealed tightly to keep the ice cream fresh. Place the container in the freezer for about 2-3 hours. This first freeze helps to set the ice cream.

After the initial freeze, take the container out. Use a fork to stir the mixture. This step breaks up any ice crystals, making your ice cream creamier. Then, return it to the freezer for another 2-3 hours, or until it reaches your desired consistency.

Tips for Achieving the Perfect Consistency

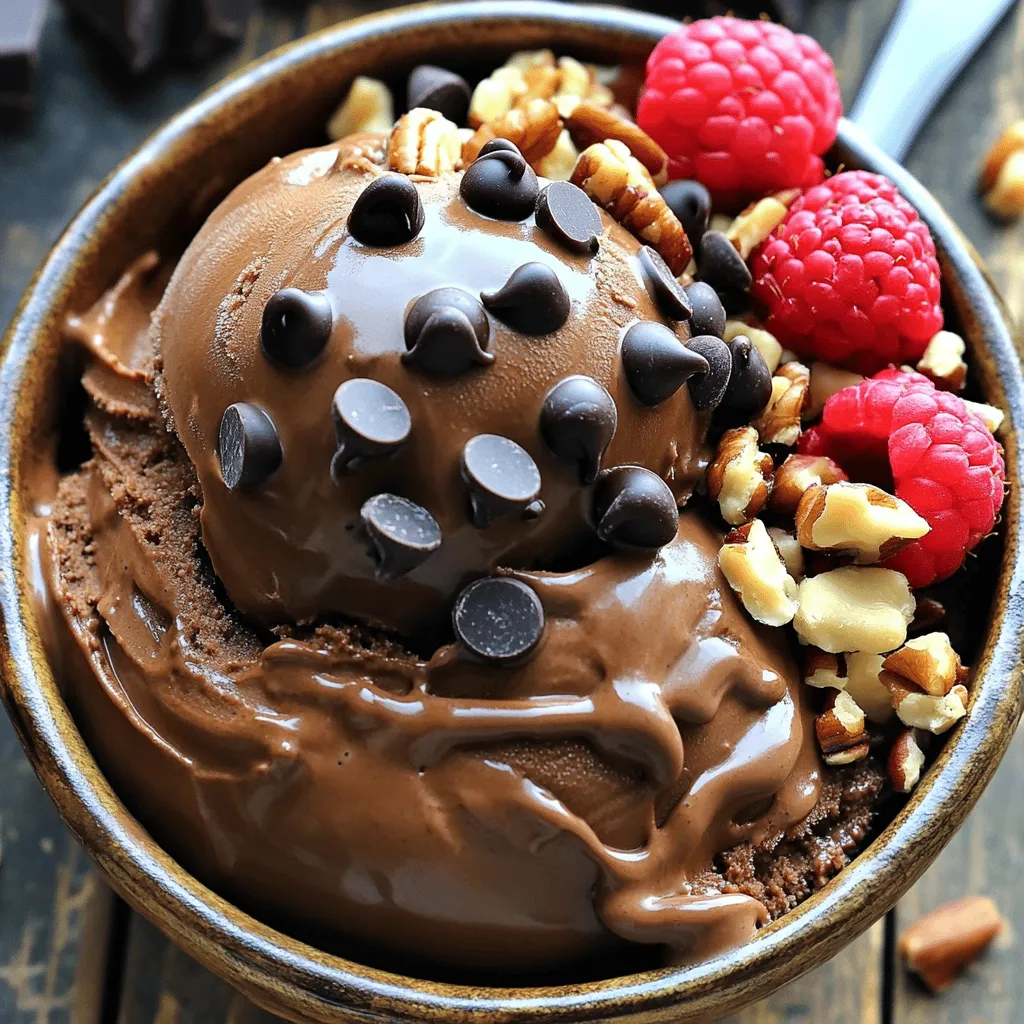
Before you serve, let the ice cream sit at room temperature for about 5 minutes. This softens it slightly, making it easier to scoop. For serving, use colorful bowls to make it look great. You can also add toppings like dark chocolate chips, chopped nuts, or fresh berries. These add flavor and texture, making your dessert more fun!

Tips & Tricks

Enhancing Flavor and Texture

To make your ice cream even better, try these tips. First, use good-quality cocoa powder. This choice boosts the chocolate taste. You can add a bit more vanilla extract for a richer flavor. If you want a creamier texture, blend longer. Make sure everything is smooth before freezing. Stir the mixture after the first freeze. This breaks ice crystals and improves texture.

Common Mistakes to Avoid

Avoid using too much sweetener. It can make the ice cream too sweet and hard. Also, don’t skip the salt. It helps balance the flavors. If you forget to stir while it freezes, the ice cream can become icy. Lastly, don’t rush the freezing time. Let it sit long enough for the best results.

Recommended Serving Suggestions

Serve your ice cream in colorful bowls. This adds fun to your dessert. You can top it with dark chocolate chips for crunch. Fresh berries add color and taste. Chopped nuts give a nice texture. A sprig of mint can make it look fancy. Enjoy your tasty treat!
Variations

Dairy-Free and Vegan Options

To make this ice cream dairy-free, swap the cottage cheese for silken tofu. Silken tofu blends well and gives a creamy texture. Use almond milk or coconut milk instead of regular milk. For sweetener, maple syrup works great. You can enjoy a tasty vegan treat that packs protein while being kind to your diet.

Chocolate Flavor Enhancements

Want a richer chocolate flavor? Add an extra tablespoon of cocoa powder when blending. You can also mix in chocolate protein powder for added nutrition. For a fun twist, try adding a touch of espresso powder. It enhances the chocolate and gives a unique taste.

Adding Fruits or Nut Butters

Fruits and nut butters can elevate your ice cream. Add ripe bananas or frozen cherries during blending for natural sweetness. A scoop of almond or peanut butter adds creaminess and flavor. You can even mix in some chopped nuts for crunch. These additions make the ice cream fun and full of flavor.

Storage Info

How to Store Unused Ice Cream

Store any leftover ice cream in an airtight container. Make sure it is sealed well. This keeps out air and prevents freezer burn. You can also cover the top with plastic wrap for extra protection. If you follow these steps, your ice cream will stay fresh longer.

Best Practices for Freezing and Thawing

When freezing the ice cream, wait until it is fully set. This usually takes about 4-6 hours. If you want a creamier texture, stir it every few hours. To thaw, take it out of the freezer and let it sit for about 5 minutes. This makes it easier to scoop. Avoid using a microwave to thaw, as it can change the texture.

Shelf Life of High-Protein Ice Cream

Your high-protein chocolate cottage cheese ice cream can last for about 1 month in the freezer. However, it is best to eat it within 2 weeks for the best flavor and texture. Over time, ice crystals may form, affecting the creaminess. Always check for any off smells or changes in color before serving.

FAQs

Can I use flavored cottage cheese?

Yes, you can use flavored cottage cheese. Flavored options can add extra taste. However, be careful with added sugars or strong flavors. Choose flavors that pair well with chocolate, like vanilla or even strawberry. Always taste the mix to check if the flavors fit your liking.

How do I make this recipe lower in calories?

To cut calories, swap honey or maple syrup for a sugar-free sweetener. You can also use low-fat cottage cheese instead of regular. If you prefer, reduce the amount of cocoa powder. This change keeps the chocolate taste but lowers calories.

What are the health benefits of using cottage cheese in ice cream?

Cottage cheese is rich in protein, making this ice cream a filling treat. It has calcium, which is good for bones. Using it in ice cream means you get a sweet dessert that helps you feel full longer. It also has fewer carbs than regular ice cream.

Can I make this in an ice cream maker?

Yes, you can use an ice cream maker! After blending the ingredients, pour the mix into your machine. Follow the maker’s instructions for freezing time. This method may give you a creamier texture, as it churns the mix as it freezes. Enjoy your homemade ice cream!

This blog post covered how to make high-protein chocolate cottage cheese ice cream. We talked about main ingredients, optional toppings, and variations for sweeteners. I shared step-by-step instructions to blend, freeze, and achieve the perfect texture. You also learned tips to enhance flavor and avoid common mistakes. Exploring dairy-free and vegan options broadened your choices. Lastly, we discussed storing the ice cream for the best taste and freshness.

Now, you can enjoy a delicious treat without sacrificing health. Dive in and make this ice cream your own!

- 2 cups cottage cheese (low-fat or regular) - 1/4 cup unsweetened cocoa powder - 1/4 cup honey or maple syrup (adjust for sweetness) - 1/2 teaspoon vanilla extract - 1/2 cup milk (dairy or plant-based) - A pinch of salt These ingredients are key for a rich, creamy ice cream. Cottage cheese gives protein and a smooth texture. Cocoa powder adds that deep chocolate flavor you crave. Sweeteners like honey or maple syrup bring balance to the chocolate. Vanilla enhances the taste, while milk gives a creamy base. The pinch of salt rounds out the flavors perfectly. - Dark chocolate chips - Chopped nuts - Fresh berries Toppings take this dessert to the next level. Dark chocolate chips add richness and crunch. Nuts give a tasty and satisfying texture. Fresh berries add a burst of color and flavor. You can mix and match, so get creative! - Agave syrup - Stevia - Coconut sugar If you want to change the sweetness, try different options. Agave syrup is a great choice for a lower glycemic index. Stevia is a zero-calorie option if you want to cut calories. Coconut sugar offers a more caramel-like taste. Adjust the amount based on your sweetness level. Always taste to find your perfect balance! To start, take 2 cups of cottage cheese and put it in a blender. You can use low-fat or regular cottage cheese based on your taste. Next, add 1/4 cup of unsweetened cocoa powder for that rich chocolate flavor. Then, pour in 1/4 cup of honey or maple syrup. Adjust this amount if you like your ice cream sweeter. Now, add 1/2 teaspoon of vanilla extract. This will enhance the chocolate taste. Pour in 1/2 cup of milk. You can choose dairy or a plant-based milk. Finally, sprinkle in a pinch of salt. This helps to bring out all the flavors. Blend everything on high until it's smooth and creamy. Don't forget to stop and scrape down the sides for an even mix. Once blended, taste the mixture. If you want a stronger chocolate taste, stir in an extra tablespoon of cocoa powder. After you’re happy with the flavor, transfer the mixture to an airtight container. Make sure it is sealed tightly to keep the ice cream fresh. Place the container in the freezer for about 2-3 hours. This first freeze helps to set the ice cream. After the initial freeze, take the container out. Use a fork to stir the mixture. This step breaks up any ice crystals, making your ice cream creamier. Then, return it to the freezer for another 2-3 hours, or until it reaches your desired consistency. Before you serve, let the ice cream sit at room temperature for about 5 minutes. This softens it slightly, making it easier to scoop. For serving, use colorful bowls to make it look great. You can also add toppings like dark chocolate chips, chopped nuts, or fresh berries. These add flavor and texture, making your dessert more fun! To make your ice cream even better, try these tips. First, use good-quality cocoa powder. This choice boosts the chocolate taste. You can add a bit more vanilla extract for a richer flavor. If you want a creamier texture, blend longer. Make sure everything is smooth before freezing. Stir the mixture after the first freeze. This breaks ice crystals and improves texture. Avoid using too much sweetener. It can make the ice cream too sweet and hard. Also, don’t skip the salt. It helps balance the flavors. If you forget to stir while it freezes, the ice cream can become icy. Lastly, don’t rush the freezing time. Let it sit long enough for the best results. Serve your ice cream in colorful bowls. This adds fun to your dessert. You can top it with dark chocolate chips for crunch. Fresh berries add color and taste. Chopped nuts give a nice texture. A sprig of mint can make it look fancy. Enjoy your tasty treat! {{image_4}} To make this ice cream dairy-free, swap the cottage cheese for silken tofu. Silken tofu blends well and gives a creamy texture. Use almond milk or coconut milk instead of regular milk. For sweetener, maple syrup works great. You can enjoy a tasty vegan treat that packs protein while being kind to your diet. Want a richer chocolate flavor? Add an extra tablespoon of cocoa powder when blending. You can also mix in chocolate protein powder for added nutrition. For a fun twist, try adding a touch of espresso powder. It enhances the chocolate and gives a unique taste. Fruits and nut butters can elevate your ice cream. Add ripe bananas or frozen cherries during blending for natural sweetness. A scoop of almond or peanut butter adds creaminess and flavor. You can even mix in some chopped nuts for crunch. These additions make the ice cream fun and full of flavor. Store any leftover ice cream in an airtight container. Make sure it is sealed well. This keeps out air and prevents freezer burn. You can also cover the top with plastic wrap for extra protection. If you follow these steps, your ice cream will stay fresh longer. When freezing the ice cream, wait until it is fully set. This usually takes about 4-6 hours. If you want a creamier texture, stir it every few hours. To thaw, take it out of the freezer and let it sit for about 5 minutes. This makes it easier to scoop. Avoid using a microwave to thaw, as it can change the texture. Your high-protein chocolate cottage cheese ice cream can last for about 1 month in the freezer. However, it is best to eat it within 2 weeks for the best flavor and texture. Over time, ice crystals may form, affecting the creaminess. Always check for any off smells or changes in color before serving. Yes, you can use flavored cottage cheese. Flavored options can add extra taste. However, be careful with added sugars or strong flavors. Choose flavors that pair well with chocolate, like vanilla or even strawberry. Always taste the mix to check if the flavors fit your liking. To cut calories, swap honey or maple syrup for a sugar-free sweetener. You can also use low-fat cottage cheese instead of regular. If you prefer, reduce the amount of cocoa powder. This change keeps the chocolate taste but lowers calories. Cottage cheese is rich in protein, making this ice cream a filling treat. It has calcium, which is good for bones. Using it in ice cream means you get a sweet dessert that helps you feel full longer. It also has fewer carbs than regular ice cream. Yes, you can use an ice cream maker! After blending the ingredients, pour the mix into your machine. Follow the maker’s instructions for freezing time. This method may give you a creamier texture, as it churns the mix as it freezes. Enjoy your homemade ice cream! This blog post covered how to make high-protein chocolate cottage cheese ice cream. We talked about main ingredients, optional toppings, and variations for sweeteners. I shared step-by-step instructions to blend, freeze, and achieve the perfect texture. You also learned tips to enhance flavor and avoid common mistakes. Exploring dairy-free and vegan options broadened your choices. Lastly, we discussed storing the ice cream for the best taste and freshness. Now, you can enjoy a delicious treat without sacrificing health. Dive in and make this ice cream your own!
High-Protein Chocolate Cottage Cheese Ice Cream

Indulge in a guilt-free treat with this high-protein chocolate cottage cheese ice cream recipe! It's easy to make with just a few simple ingredients and packs a delicious chocolate punch. Perfect for a satisfying snack or dessert, this creamy delight is not only healthy but also customizable with your favorite toppings. Click through to explore the full recipe and treat yourself to a delightful, protein-packed dessert today!

Ingredients
  

2 cups cottage cheese (choose between low-fat or regular)

1/4 cup unsweetened cocoa powder

1/4 cup honey or maple syrup (adjust to your desired sweetness)

1/2 teaspoon vanilla extract

1/2 cup milk (dairy or your preferred plant-based alternative)

A pinch of salt

Optional toppings: dark chocolate chips, chopped nuts, or fresh berries

Instructions
 

Begin by placing two cups of cottage cheese into a blender or food processor.

    Add in 1/4 cup of unsweetened cocoa powder, followed by 1/4 cup of honey or maple syrup (use more or less depending on how sweet you want it).

      Pour in 1/2 teaspoon of vanilla extract, along with 1/2 cup of milk and a pinch of salt.

        Blend on high speed until the mixture is completely smooth and creamy, making sure to stop occasionally to scrape down the sides for an even blend.

          Taste the mixture to see if it meets your sweetness preference. Feel free to stir in an extra tablespoon of cocoa powder for a more intense chocolate flavor if desired.

            Transfer the smooth chocolate mixture into an airtight container, ensuring it is sealed tightly.

              Place the container in the freezer and let it freeze for approximately 2-3 hours initially.

                Once the initial freezing time is up, remove the container and use a fork to stir the mixture. This helps to break up any ice crystals that may have formed, resulting in a creamier texture.

                  Place the ice cream back into the freezer for an additional 2-3 hours or until it reaches your ideal consistency.

                    Before serving, take the ice cream out of the freezer and let it sit at room temperature for about 5 minutes to soften slightly for easier scooping.

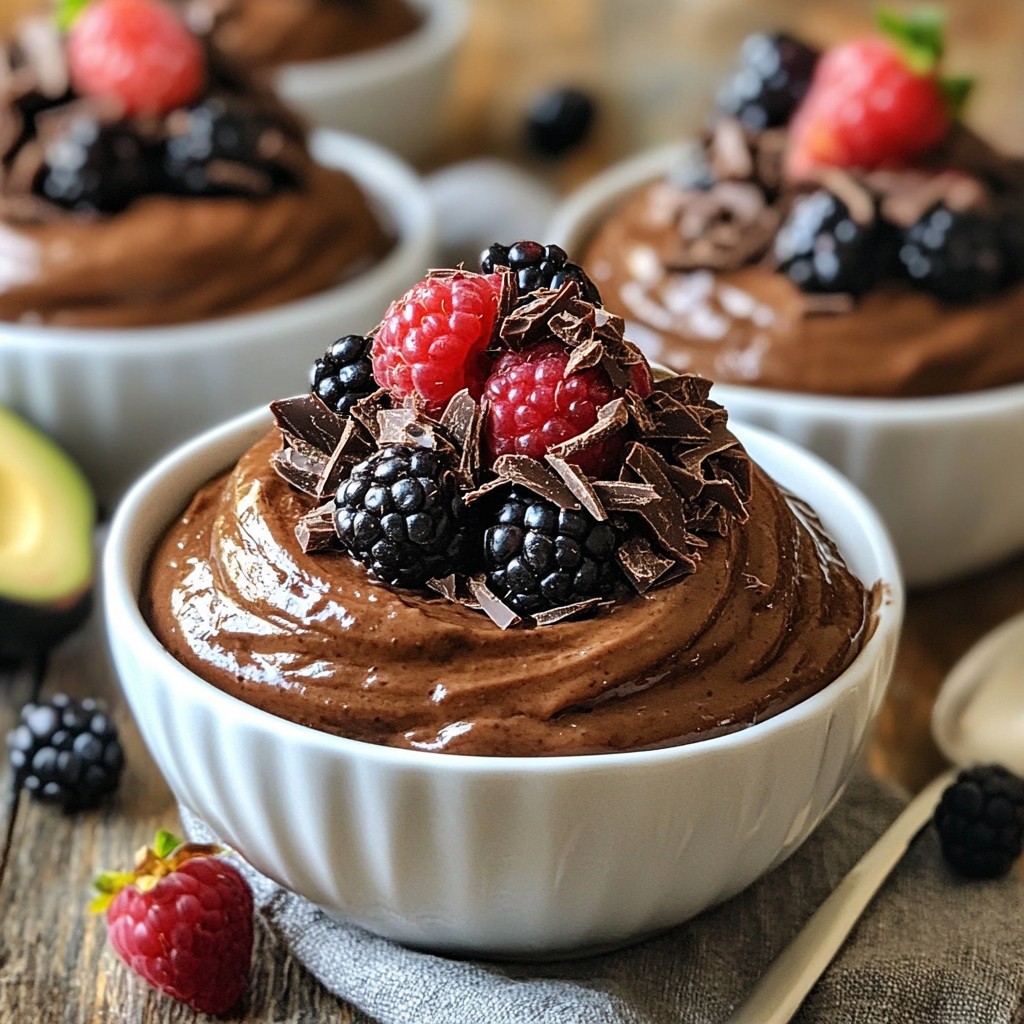
                      Scoop generous portions into bowls and sprinkle with your choice of dark chocolate chips, chopped nuts, or fresh berries for an extra burst of flavor and delightful texture.

                        Prep Time: 15 minutes | Total Time: 5-6 hours | Servings: 4

                          - Presentation Tips: Use colorful bowls to serve the ice cream, and arrange the toppings artistically on top for a visually appealing dessert. Consider topping with a sprig of mint for added freshness!