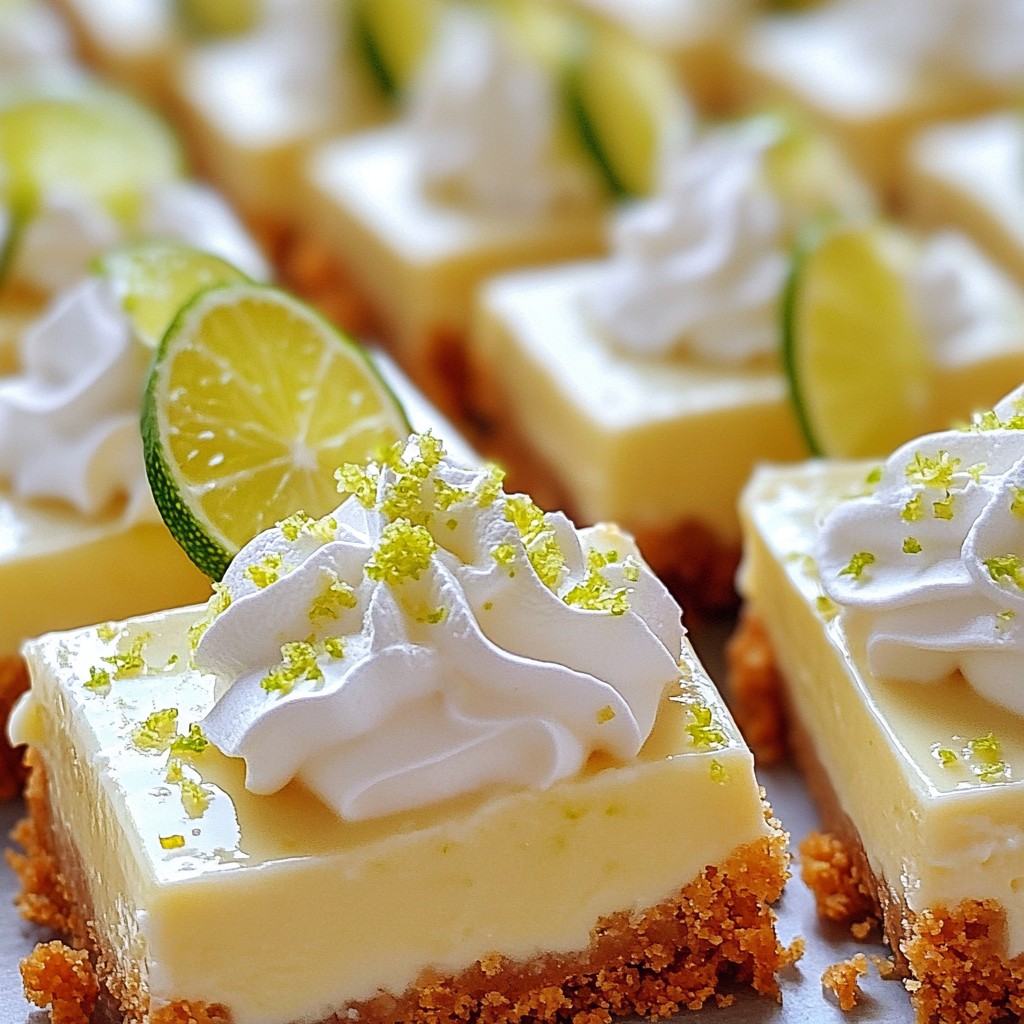
Key Lime Pie Bars are a bright and refreshing treat you can easily make at home. I love how simple they are to prepare, yet they pack a zesty punch that everyone will adore. In this post, I’ll guide you through the key ingredients for a perfect crust and a tangy filling. Plus, I’ll share tips, variations, storage info, and answers to common questions. Let’s dive in and create this delightful dessert!
Why I Love This Recipe
- Refreshing Flavor: The combination of fresh lime juice and zest gives these bars a bright and zesty taste that is perfect for warm days.
- Easy Preparation: This recipe is simple and straightforward, making it perfect for both novice and experienced bakers.
- Perfectly Balanced Sweetness: The sweetened condensed milk balances the tartness of the lime, creating a delightful contrast in every bite.
- Versatile Serving Options: These bars can be served as a dessert, a refreshing treat at a summer picnic, or even as a fun addition to a potluck!
Ingredients
Key Components for the Crust
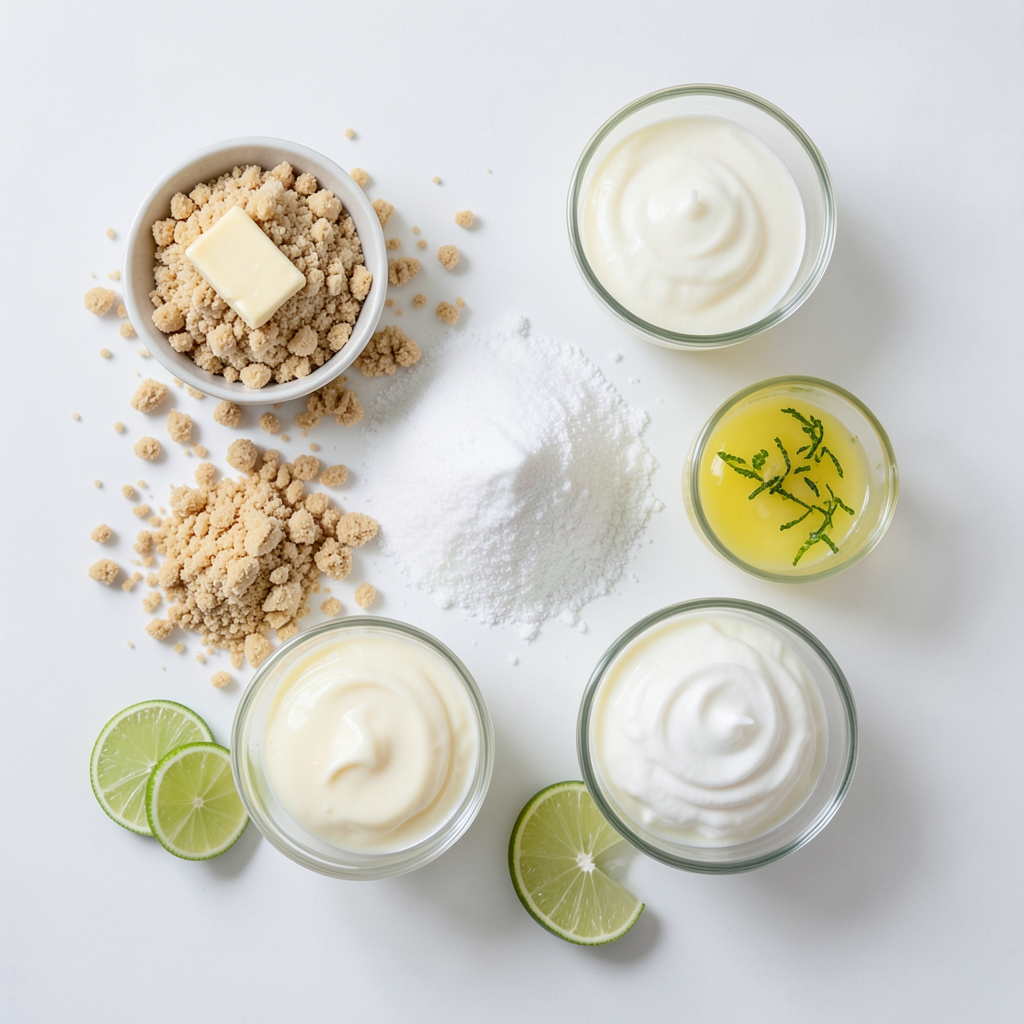
To create a tasty crust, you need:
- 1 ½ cups graham cracker crumbs
- ½ cup unsalted butter, melted
- ⅓ cup granulated sugar
This combination gives the bars a sweet and crispy base. The graham cracker crumbs provide texture, while the butter adds richness. The sugar sweetens it just right.
Essential Ingredients for the Filling
For the zesty filling, gather these ingredients:
- 2 cups sweetened condensed milk
- ½ cup fresh lime juice (about 4-5 limes)
- 1 tablespoon lime zest
- 3 large egg yolks
- ¼ teaspoon salt
This mix brings the classic key lime flavor. The sweetened condensed milk makes it creamy. The lime juice and zest add the tangy punch. Egg yolks help the filling set nicely.
Optional Toppings and Garnishes
When serving, you can enhance your bars with:
- Whipped cream
- Lime slices
These toppings add a nice touch. Whipped cream makes each bite creamy, while lime slices bring freshness. You can also sprinkle extra lime zest for fun!
Step-by-Step Instructions
Prepping Your Oven and Baking Pan
Start by setting your oven to 350°F (175°C). This step is key for getting the crust just right. While the oven heats, grab a 9x9 inch baking pan. Line it with parchment paper, letting some hang over the edges. This makes it easy to lift the bars out later.
Creating the Perfect Crust
In a medium bowl, mix 1 ½ cups of graham cracker crumbs, ½ cup of melted butter, and ⅓ cup of granulated sugar. Use a fork or spatula to blend until the mixture is even. Press this mix firmly into the bottom of your lined pan. Make sure it is compact and flat for a great base.
Making the Zesty Key Lime Filling
In another bowl, whisk together 2 cups of sweetened condensed milk, ½ cup of fresh lime juice, 1 tablespoon of lime zest, and 3 egg yolks. Add ¼ teaspoon of salt to balance the flavors. Keep whisking until the mix is smooth and shiny. No lumps should remain for the best texture.
Baking and Cooling the Bars
Pour the zesty filling over the crust in the pan. Use your spatula to spread it evenly. Bake for 15 to 20 minutes. The edges should firm up, but a slight jiggle in the center is okay. Once done, let the bars cool at room temperature for about an hour. Then, cover the pan and chill in the fridge for at least 2 hours. This step helps the bars set properly.
Tips & Tricks
Ensuring a Perfectly Firm Filling
To get a firm filling for your Key Lime Pie Bars, use fresh lime juice. Fresh juice gives the bars a bright flavor and helps them set well. Make sure to mix the filling until it is smooth. If the filling has lumps, it may not set correctly. Bake the bars until the edges firm up, but the center still jiggles a bit. This jiggle means they will cool to the perfect texture.
Variations for Additional Flavor
You can add fun twists to your Key Lime Pie Bars! Try adding coconut for a tropical flair. Mix in some crushed pineapple for a fruity taste. You can also add a bit of ginger for a spicy kick. If you want, use different citrus juices, like lemon or orange, to change the flavor. Each variation brings a unique taste!
Presentation Tips for Serving
Serving these bars can be as fun as making them! After cutting the bars, place them on a bright platter. This adds color to your table. Top each bar with a dollop of whipped cream. Add a slice of fresh lime on top for a pop of green. For an extra touch, sprinkle some lime zest over the whipped cream. This looks beautiful and adds more flavor.
Pro Tips
- Use Fresh Limes: For the best flavor, always use fresh lime juice and zest. The brightness of fresh limes elevates the taste of your key lime pie bars significantly.
- Chill Before Serving: Allow the bars to chill in the refrigerator for at least 2 hours to ensure they set properly. This not only helps them hold their shape but enhances the flavors.
- Graham Cracker Alternatives: If you're looking for a gluten-free option, substitute regular graham crackers with gluten-free graham crackers or almond flour for the crust.
- Decorative Touch: For a stunning presentation, add a sprinkle of lime zest over the whipped cream before serving. It adds a pop of color and a burst of citrus aroma.
Variations
Gluten-Free Key Lime Pie Bars
To make gluten-free key lime pie bars, swap regular graham crackers for gluten-free ones. Many brands offer gluten-free graham crackers that taste just as good. In fact, you can also use almond flour or crushed nuts for the crust. This option gives a nice crunch and a nutty flavor. Ensure all your other ingredients, like sweetened condensed milk, are gluten-free too.
Vegan Key Lime Filling Options
You can create a vegan filling by using coconut cream instead of sweetened condensed milk. Just chill a can of coconut milk overnight. Scoop out the solid cream and mix it with lime juice, lime zest, and a bit of maple syrup for sweetness. This swap gives you the same creamy texture and zesty flavor without any animal products. Don't forget to use a vegan egg replacer for the egg yolks.
Swapping Ingredients for a Unique Twist
Feel free to play with flavors! Try adding a splash of orange juice or zest for a citrus mix. You can also use honey or agave syrup instead of sugar for a natural sweetener. For a richer flavor, mix in some cream cheese or mascarpone with the filling. This adds a creamy depth and makes the bars taste even more indulgent. Mixing and matching can lead to your own signature key lime bars!
Storage Info
Properly Storing Leftover Key Lime Bars
To keep your key lime bars fresh, store them in the fridge. Place the bars in an airtight container. If you don't have one, cover the dish tightly with plastic wrap. This way, they won’t dry out or pick up other smells from the fridge. For best taste, enjoy the bars within three days.
Best Practices for Freezing
If you want to freeze your key lime bars, wait until they cool completely. Cut the bars into squares first, then wrap each piece in plastic wrap. After that, put them in a freezer-safe container. This helps protect them from freezer burn. You can freeze the bars for up to three months. When you’re ready to eat, thaw them in the fridge overnight.
Shelf Life of Key Lime Pie Bars
Key lime pie bars last about five days in the fridge. However, they taste best fresh. If you freeze them, they remain safe to eat for about three months. Just remember, the texture may change slightly after freezing, but they’ll still be tasty. Enjoy your bars at any time!
FAQs
What can I use instead of fresh lime juice?
You can use bottled lime juice. It works fine in this recipe. However, fresh lime juice adds a bright taste. If you use bottled juice, check the label for added sugars. This can change the sweetness of your bars.
Can I substitute the sweetened condensed milk?
You can use coconut milk for a dairy-free option. Use full-fat coconut milk for the best results. You can also make your own sweetened condensed milk. Mix 1 cup of milk with 1 cup of sugar and simmer until thickened.
How do I know when the bars are done baking?
Look for the edges to set. They should be firm, but the center can jiggle slightly. This means they are done baking. You can also insert a toothpick in the center. If it comes out mostly clean, the bars are ready.
Can I make Key Lime Pie Bars ahead of time?
Yes! You can prepare them a day in advance. Just make sure to chill them well before serving. This helps the flavors meld together. They taste even better after sitting overnight in the fridge.
Where can I find pre-made Key Lime Pie Bars?
You can find pre-made bars at many grocery stores. Look in the frozen dessert section. Some bakeries may also sell them fresh. Check local listings for nearby options.
You now know the key parts for making great Key Lime Pie Bars. We've covered the ingredients, step-by-step instructions, and tips to make them shine. Remember, whether you want gluten-free or vegan versions, there are options for everyone. Store any leftovers properly to keep them fresh. With what you've learned, you can make these tasty treats at home. Enjoy making and sharing them with friends and family!