Get ready to satisfy your sweet tooth with my Key Lime Pie Bars recipe! These bars blend delightfully tart lime flavor with a creamy filling, all nestled in a buttery graham cracker crust. You'll learn step-by-step how to create this crowd-pleaser, with tips for perfecting the filling and fun serving ideas. Whether you're hosting a party or craving a treat, these bars are a must-try!
Why I Love This Recipe
- Deliciously Tangy: The perfect balance of sweetness and tartness makes these bars incredibly refreshing and enjoyable, especially on a warm day.
- Easy to Make: This recipe requires minimal ingredients and simple steps, making it accessible for bakers of all skill levels.
- Great for Sharing: These bars are easy to cut into portions, making them perfect for parties, picnics, or family gatherings.
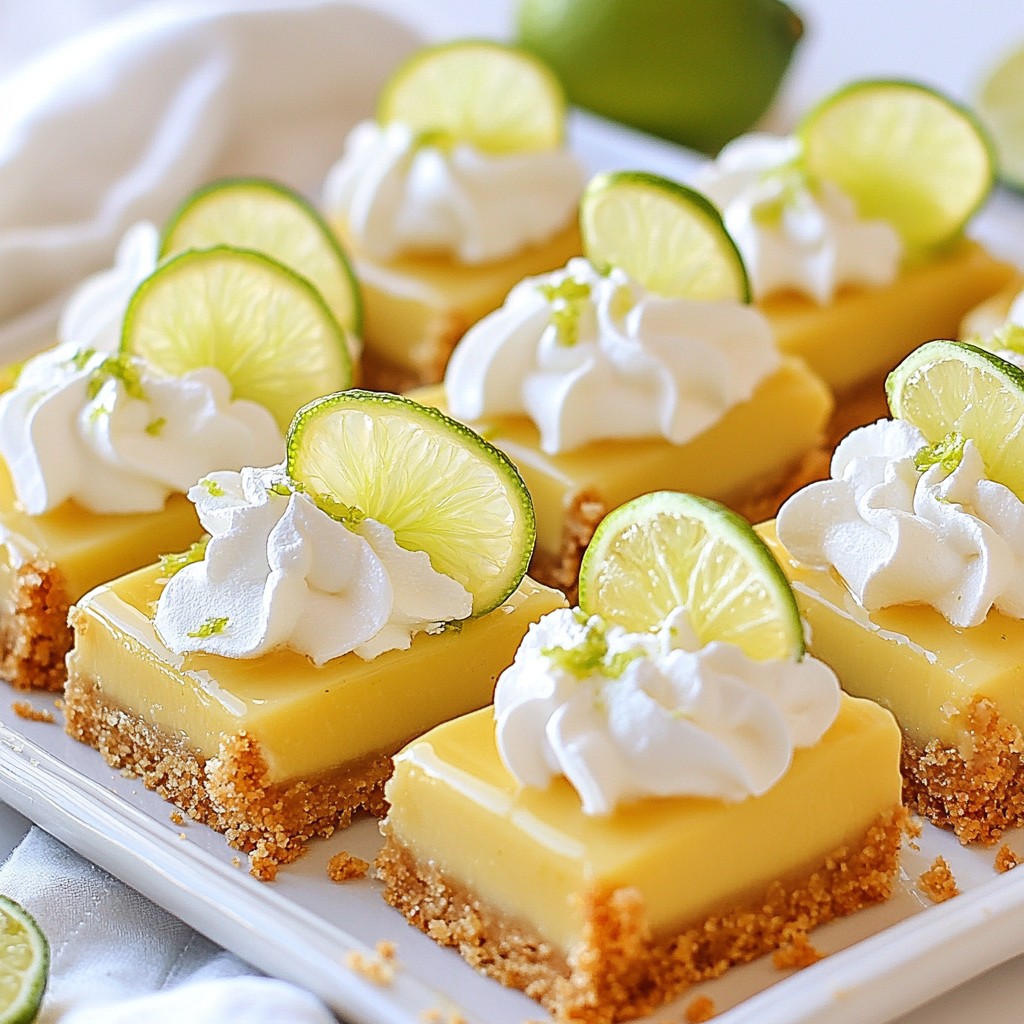
- Beautiful Presentation: With a topping of whipped cream and lime slices, these bars not only taste great but also look stunning on any dessert table.
Ingredients
Main Ingredients
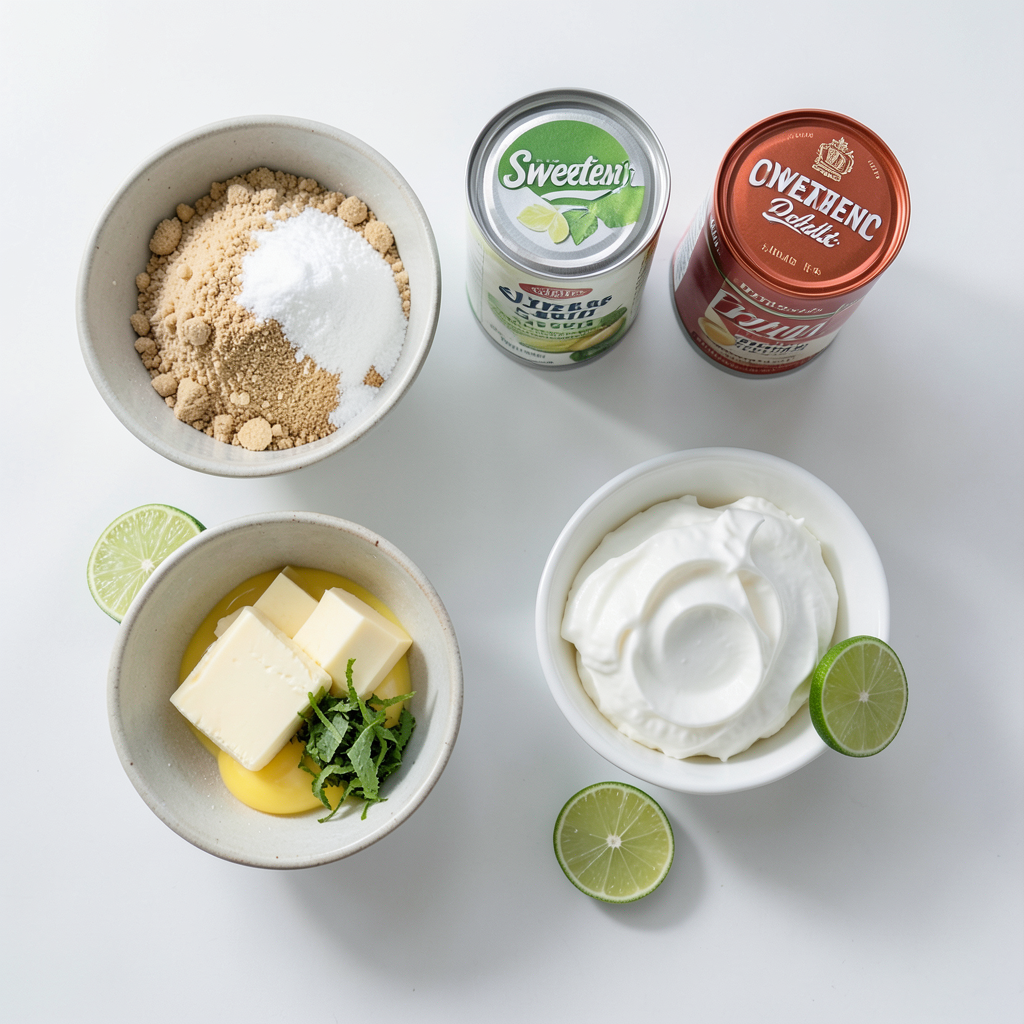
- 1 ½ cups graham cracker crumbs
- ½ cup granulated sugar
- ½ cup unsalted butter, melted
- 2 (14 oz) cans sweetened condensed milk
- ½ cup fresh lime juice (about 4-6 limes)
- Zest of 2 limes
- 4 large egg yolks
Key lime pie bars need a few key ingredients to shine. The graham cracker crumbs form a crunchy crust. The sweetened condensed milk adds creaminess and sweetness. Fresh lime juice and zest give the bars their bright, tart flavor. Unsalted butter holds the crust together, while egg yolks help set the filling.
Optional Toppings
- Whipped cream
- Lime slices for garnish
For an extra touch, you can add whipped cream on top of each bar. Fresh lime slices add a nice pop of color and a burst of flavor. These toppings make the bars even more appealing and tasty.
Step-by-Step Instructions
Preparing the Oven and Baking Dish
- Preheat the oven to 350°F (175°C).
- Grease or line the baking dish with parchment paper for easy removal.
Making the Graham Cracker Crust
- In a bowl, combine 1 ½ cups of graham cracker crumbs and ½ cup of sugar.
- Pour in ½ cup of melted unsalted butter and mix until it looks like wet sand.
- Press this mixture firmly into the bottom of the baking dish.
Preparing the Key Lime Filling
- In a large bowl, whisk together 2 cans of sweetened condensed milk, ½ cup of fresh lime juice, the zest of 2 limes, and 4 egg yolks.
- This mixture should be smooth and well combined.
- Carefully pour the filling over the cooled crust and spread it evenly.
Baking Process
- Bake the crust for 10 minutes, then remove it to cool slightly.
- Return the dish to the oven and bake the filling for 15-20 minutes.
- The filling should be set but still jiggles a bit in the center.
Cooling and Chilling
- Let the bars cool on a wire rack after baking.
- Once cool, place them in the refrigerator to chill for at least 2 hours.
Serving Instructions
- When ready to serve, lift the bars out of the dish using the parchment paper.
- Cut into squares or bars of your preferred size.
- Top each bar with whipped cream and a lime slice for a beautiful presentation.
Tips & Tricks
Achieving the Perfect Filling
Using fresh lime juice is key. It adds a bright and zesty flavor. I recommend squeezing 4-6 limes for about ½ cup of juice. Bottled juice lacks that fresh taste. For the right consistency, mix the sweetened condensed milk, lime juice, and egg yolks until smooth. Avoid overmixing, as this can make the filling too airy. You want it creamy but not fluffy.
Crust Variations
Experiment with different types of cookies for the crust. You can use vanilla wafers or digestive biscuits for a twist. For a gluten-free option, try using almond flour or gluten-free graham crackers. These choices offer unique textures and flavors.
Presentation and Serving Suggestions
Garnish each bar with lime zest for a pop of color. A dollop of whipped cream on top adds creaminess. For special occasions, consider adding lime slices as a garnish. It makes the dish look festive and inviting. You can also place the bars on a decorative platter to impress your guests.
Pro Tips
- Chill Before Serving: For the best flavor and texture, be sure to chill the key lime pie bars for at least 2 hours before serving. This allows the filling to set properly and enhances the refreshing taste.
- Fresh Ingredients Matter: Use fresh lime juice and zest for an authentic and vibrant flavor. Bottled lime juice may lack the brightness that freshly squeezed juice provides.
- Customize Your Sweetness: Adjust the amount of sugar in the crust or filling based on your preference. You can reduce the sugar slightly if you enjoy a more tart flavor.
- Perfectly Cut Bars: For clean cuts, use a sharp knife and wipe it clean between cuts. This prevents the filling from sticking to the knife and keeps the edges of your bars looking neat.
Variations
Key Lime Pie Bars with Coconut
You can make your key lime pie bars even tastier by adding coconut. Shredded coconut brings a nice texture and flavor. Mix it into the crust for a crunch or into the filling for a creamy twist. Use about ½ cup of shredded coconut. It makes each bite a fun surprise. You could also toast the coconut lightly before adding it for extra flavor.
Mini Key Lime Pie Bars
Mini key lime pie bars are perfect for parties. To make these, use a muffin tin instead of a baking dish. Line each muffin cup with paper liners for easy removal. Press the crust mixture into the bottom of each cup, just like the larger bars. Then fill each cup with the lime filling. Bake for about 10-15 minutes. Cool and chill as usual. These mini treats are cute and fun!
Layered Key Lime Desserts
Layered key lime desserts add a new spin to the classic bars. You can create layers of graham cracker crust, key lime filling, and whipped cream. Use a clear glass or cup to show off the layers. Start with the crust at the bottom, add the filling, and top with whipped cream. You can even sprinkle lime zest on top for color. This dessert looks great and tastes even better!
Storage Info
Storing Leftover Bars
To keep your key lime pie bars fresh, store them in the fridge. Place the bars in an airtight container. This helps keep them from drying out. You can also cover them tightly with plastic wrap. If you have many bars, cut them into smaller pieces. This makes it easy to grab a treat later!
For long-term storage, freeze the bars. Wrap each bar well in plastic wrap. Then, place them in a freezer bag or container. This keeps them fresh for up to three months. When you want to enjoy them, thaw the bars in the fridge overnight. They will taste just as good!
Shelf Life
In the fridge, these bars last about a week. If you see mold or an off smell, throw them away. These signs mean the bars are no longer good. Keep an eye on your leftovers! Enjoying them fresh will give you the best taste.
FAQs
What is the difference between Key Lime Pie and Key Lime Bars?
Key Lime Pie is a classic dessert with a smooth filling in a round pie crust. It often has a meringue or whipped cream topping. Key Lime Bars, on the other hand, are cut into squares and have a crust made from graham crackers. Bars are easier to serve and eat, making them great for gatherings. Both share the same zesty lime flavor, but their forms make them unique.
Can I substitute other citrus for lime juice?
Yes, you can use other citrus fruits. Lemon juice gives a similar tart taste. Grapefruit juice adds a different flavor and is also delicious. Orange juice will make it sweeter and less tangy. Each option changes the taste slightly, so feel free to experiment!
Is it necessary to use fresh lime juice?
Using fresh lime juice is best for flavor. Fresh juice has a bright, zesty taste that bottled juice lacks. Bottled lime juice can be more convenient, but it may taste dull. For the best results, always choose fresh limes when making these bars.
How do I know when the bars are done baking?
To check if the bars are done, look for a slight jiggle in the center. The edges should be set, while the middle should still move a bit when you shake the pan. This means the filling is creamy and ready. Let them cool before slicing for the best texture.
You now have a clear guide to making delicious key lime bars. We covered the main ingredients, step-by-step instructions, helpful tips, and fun variations. Remember to use fresh lime juice for the best flavor. Don’t hesitate to get creative with toppings and crusts. Whether you serve them at a party or enjoy them at home, these bars will impress. Enjoy your baking adventure and savor every bite of this tasty treat!