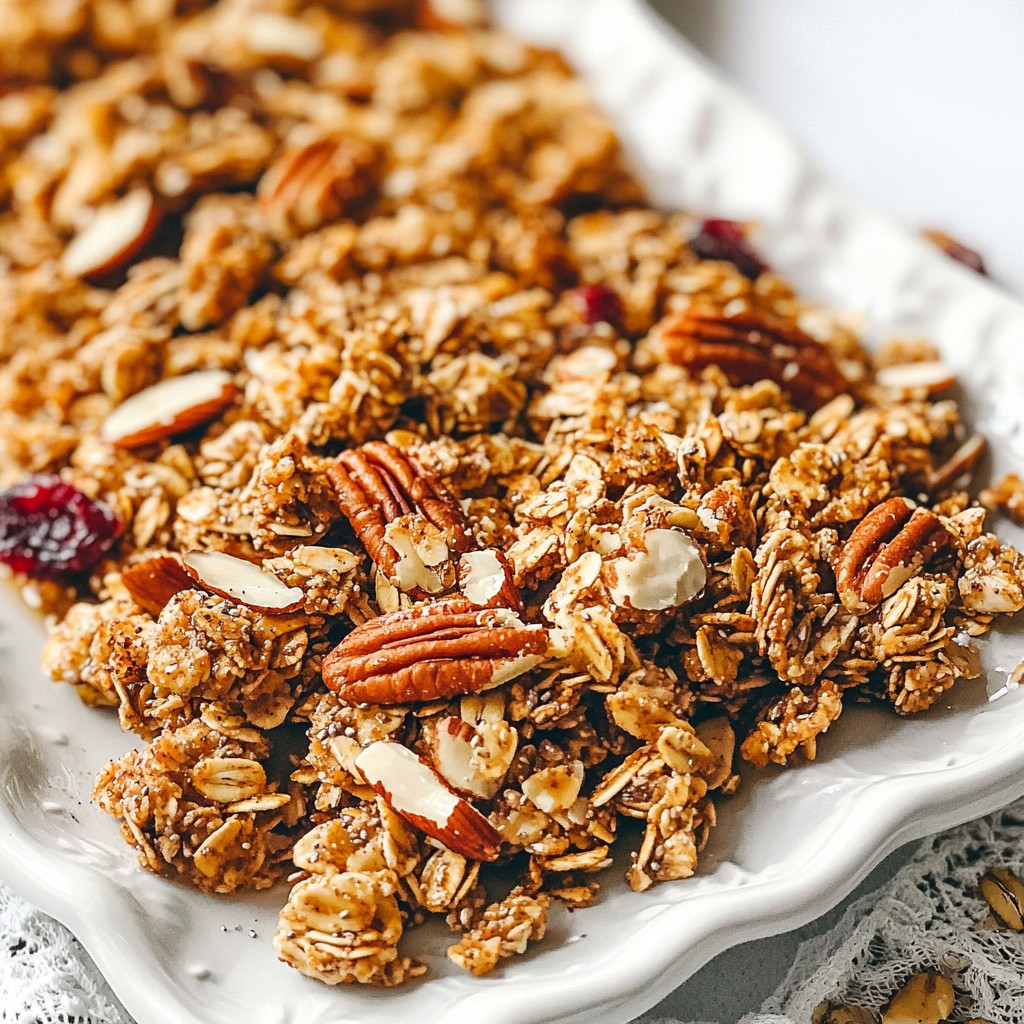
Looking for a snack that's both crunchy and healthy? You’re in the right place! In this post, I’ll show you how to make delicious Maple Pecan Granola Clusters. With simple ingredients like oats, pecans, and maple syrup, these clusters are a treat you can enjoy any time. Plus, they are perfect for a quick breakfast or an afternoon snack. Let's get started on your new favorite recipe!
Why I Love This Recipe
- Healthy Ingredients: This granola is packed with wholesome ingredients like oats, nuts, and seeds, making it a nutritious choice for breakfast or snacks.
- Customizable: You can easily swap in your favorite nuts, seeds, or dried fruits to personalize the recipe to your taste.
- Easy Preparation: The recipe is straightforward and requires minimal effort, perfect for busy mornings or meal prep.
- Delicious Clusters: The combination of maple syrup and coconut oil creates tasty clusters that are addictively crunchy and sweet!
Ingredients
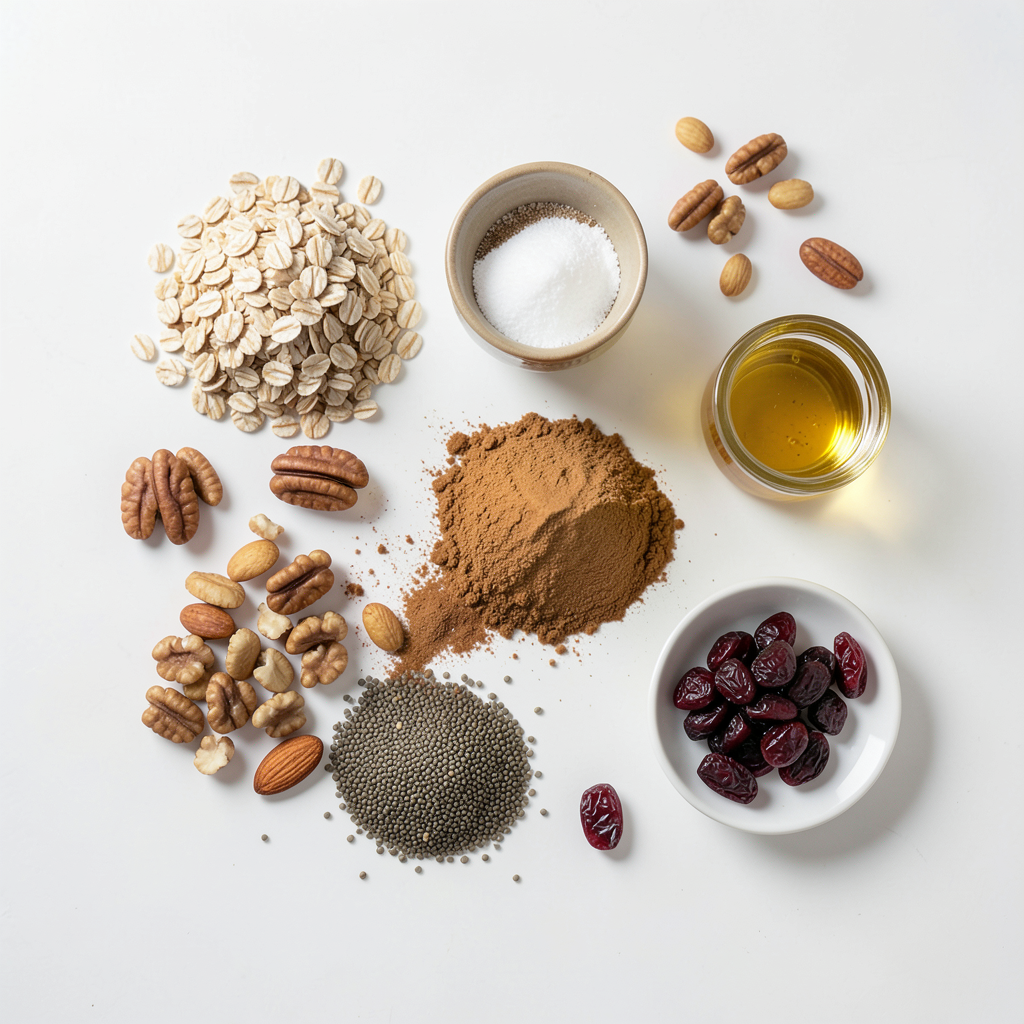
When making Maple Pecan Granola Clusters, you need simple and wholesome ingredients. Here’s what you will need:
- 3 cups rolled oats
- 1 cup pecans, roughly chopped
- 1/2 cup almond slices
- 1/4 cup chia seeds
- 1/2 teaspoon ground cinnamon
- 1/2 teaspoon sea salt
- 1/2 cup pure maple syrup
- 1/4 cup coconut oil, melted
- 1 teaspoon pure vanilla extract
- 1/2 cup dried cranberries or raisins (optional)
These ingredients blend well together to create crunchy and tasty clusters. The oats give a great base, while pecans and almonds add healthy fats. Chia seeds boost the nutrition, and maple syrup adds sweetness. You can use dried cranberries or raisins to add a chewy texture, but they are optional.
Make sure to use pure maple syrup. It has better flavor than the fake stuff. The same goes for vanilla extract. Always opt for pure vanilla for the best taste. This mix of ingredients makes your granola not just yummy but also healthy. Enjoy the process of gathering these items; each one plays a key role in the final crunch!
Step-by-Step Instructions
Preheat the Oven and Prepare the Baking Sheet
First, set your oven to 350°F (175°C). This step is key to getting a nice, crispy granola. Line a large baking sheet with parchment paper. This will stop the granola from sticking.
Mix Dry Ingredients
In a big bowl, add 3 cups of rolled oats, 1 cup of roughly chopped pecans, and 1/2 cup of almond slices. Then, toss in 1/4 cup of chia seeds, 1/2 teaspoon of ground cinnamon, and 1/2 teaspoon of sea salt. Mix these dry ingredients well. This helps the flavors blend.
Combine Wet Ingredients
In a smaller bowl, whisk together 1/2 cup of pure maple syrup, 1/4 cup of melted coconut oil, and 1 teaspoon of pure vanilla extract. Keep whisking until the mixture is smooth. This creates a sweet and rich flavor.
Combine Wet and Dry Ingredients
Pour the wet mixture over the dry ingredients. Use a spatula or your hands to mix everything gently. Make sure every piece is coated with the syrup. This step is vital for tasty granola clusters.
Bake the Granola
Spread the mixture evenly on the prepared baking sheet. Press down firmly to form a compact layer. Bake for 20 to 25 minutes. Stir halfway to ensure even browning. Look for a golden color and a nice crunch.
Cool and Break into Clusters
After baking, take the sheet out and let it cool. This cooling phase is crucial as it helps the granola harden. Once cool, break it into clusters of your choice. If you want, mix in 1/2 cup of dried cranberries or raisins for extra sweetness. Store the clusters in an airtight container for up to two weeks. Enjoy your healthy snack!
Tips & Tricks
Baking Tips for Perfect Clusters
To get the best granola clusters, follow these tips:
- Use fresh ingredients. Fresh oats and nuts give better flavor.
- Press the mixture down firmly on the baking sheet. This helps form clusters.
- Stir halfway through baking. This ensures even color and crunch.
- Watch the time. Bake until golden brown, about 20 to 25 minutes.
How to Store Granola Clusters
To keep your clusters fresh, store them in an airtight container. This keeps air out and helps maintain crunchiness. You can keep them at room temperature for up to two weeks. For longer storage, place them in the fridge or freezer. Just remember to let them come to room temp before enjoying.
Suggested Serving Sizes
You can enjoy these clusters as a snack or part of breakfast. A good serving size is about 1/4 cup. This size gives a nice crunch without overdoing it. You can also add them to yogurt or salads for extra flavor and texture.
Pro Tips
- Use Fresh Ingredients: Always opt for fresh nuts and seeds for the best flavor and crunch in your granola clusters.
- Customize Your Sweetness: Adjust the amount of maple syrup based on your sweetness preference or try substituting with honey for a different taste.
- Experiment with Add-ins: Feel free to add other dried fruits like apricots or figs, or even chocolate chips for extra flavor.
- Store Properly: Ensure your granola is completely cool before storing to prevent moisture buildup and maintain its crispiness.
Variations
Nut and Seed Variations
You can change the nuts and seeds easily. Try walnuts, almonds, or cashews. Each nut adds a different flavor. For seeds, use pumpkin or sunflower seeds. They give a nice crunch. You can mix and match to find your favorite blend. This lets you customize your granola.
Flavor Additions
Adding different flavors can make your granola unique. Consider adding cocoa powder for a chocolate twist. You can also try spices like ginger or nutmeg. For a fruity touch, add dried fruits like apricots or figs. Each addition changes the taste and makes it fun to explore.
Gluten-Free Alternatives
If you need a gluten-free option, use gluten-free oats. They taste just as good. Make sure your nuts and seeds are also gluten-free. This way, everyone can enjoy the snack. With these swaps, you can still make a tasty and healthy granola.
Storage Info
Best Ways to Store Granola Clusters
Store your Maple Pecan Granola Clusters in an airtight container. This keeps them fresh and crunchy. Place the container in a cool, dry place, like a pantry. Avoid storing them in a humid area. Keeping them in a clear jar can also help you see when you need to make more.
Shelf Life and Freshness
These granola clusters can last up to two weeks when stored properly. The clusters taste best when fresh. After a week, they may lose some crunch but will still be tasty. If you want them to last longer, consider freezing them. In the freezer, they can stay good for up to three months.
Reheating Instructions
If your granola clusters soften, you can quickly restore their crunch. Preheat your oven to 300°F (150°C). Spread the clusters on a baking sheet. Bake for about five to ten minutes until they are warm and crispy. Let them cool before enjoying again. This little trick helps bring back the delicious crunch you love!
FAQs
Can I use other nuts in the recipe?
Yes, you can use other nuts. Walnuts, almonds, or hazelnuts work well. Just chop them roughly. Mix them with the oats and chia seeds. You can even try mixed nuts for more flavor.
How long do homemade granola clusters last?
Homemade granola clusters last about two weeks. Store them in an airtight container at room temperature. This keeps them crunchy and fresh. If they last longer, they may lose their texture.
Can I make granola clusters without coconut oil?
You can replace coconut oil with other oils. Olive oil or avocado oil are good choices. They will still hold the clusters together while adding their own flavor. Just measure the same amount as the coconut oil.
What are some ways to enjoy granola clusters?
Enjoy your granola clusters in many ways. Sprinkle them on yogurt for a tasty breakfast. Use them as a topping for smoothie bowls. You can even eat them as a quick snack on their own. They are great for on-the-go munching!
This blog post covered how to make delicious granola clusters. You learned about the key ingredients and simple steps to bake them. I shared tips for perfect clusters and ways to store them. You also discovered fun variations for flavor.
Granola clusters are tasty and easy to make. You can adjust the recipe to fit your tastes. So, get baking and enjoy your homemade snacks!