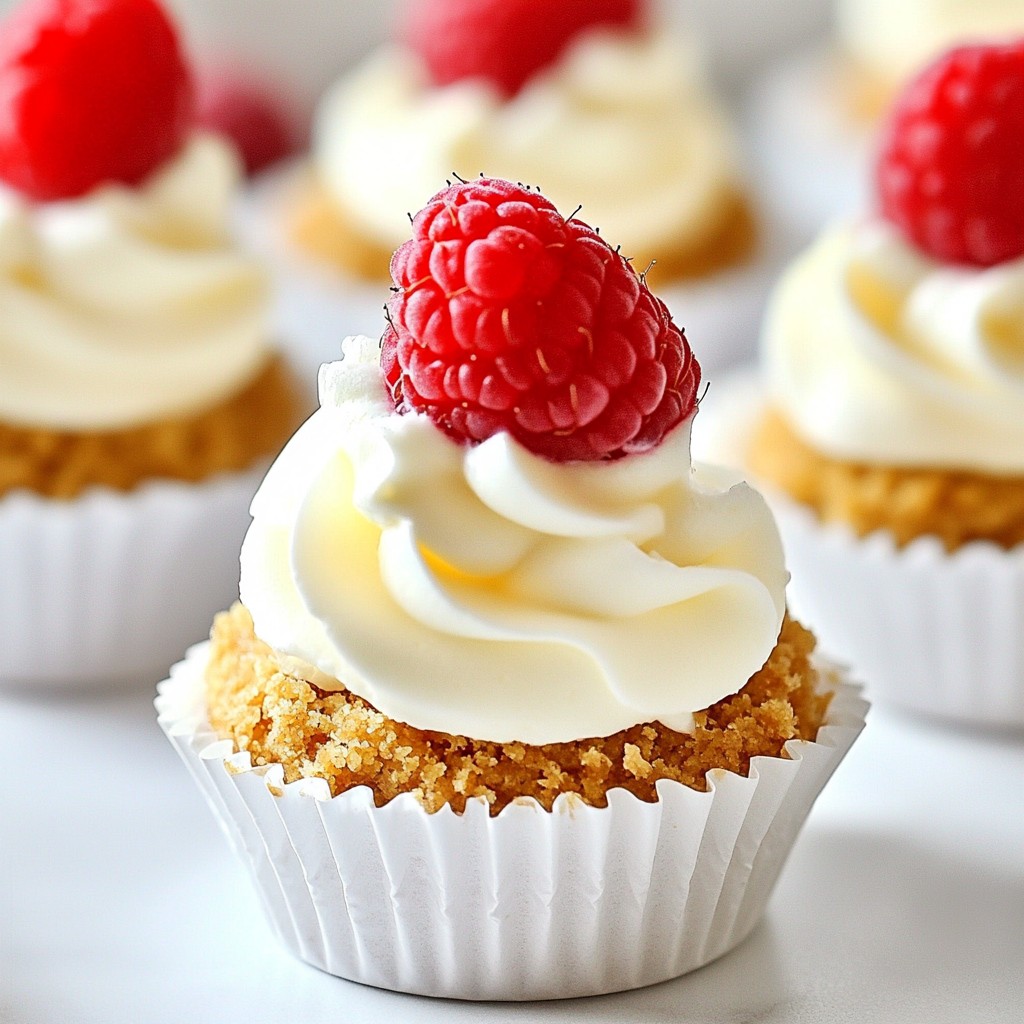
Get ready to treat yourself with my delightful Mini Cheesecake Bites recipe! These tasty little desserts combine smooth cream cheese and a crunchy graham cracker crust, making them a perfect treat for any occasion. In just a few easy steps, you’ll create bites that everyone will adore. Whether you're hosting a party or craving something sweet, these mini cheesecakes will impress. Let’s dive into the ingredients and start baking!
Why I Love This Recipe
- Quick and Easy: This recipe is simple to follow and takes just a short time to prepare, making it perfect for busy days or last-minute gatherings.
- Perfectly Portioned: Mini cheesecake bites are the ideal size for satisfying a sweet tooth without overindulging, making them great for parties.
- Customizable Toppings: With fresh raspberries as a topping, these bites can be easily customized to suit your taste preferences or seasonal fruits.
- Impressive Presentation: These mini cheesecakes look stunning on a platter, making them a show-stopping dessert that will impress your guests.
Ingredients
List of Ingredients
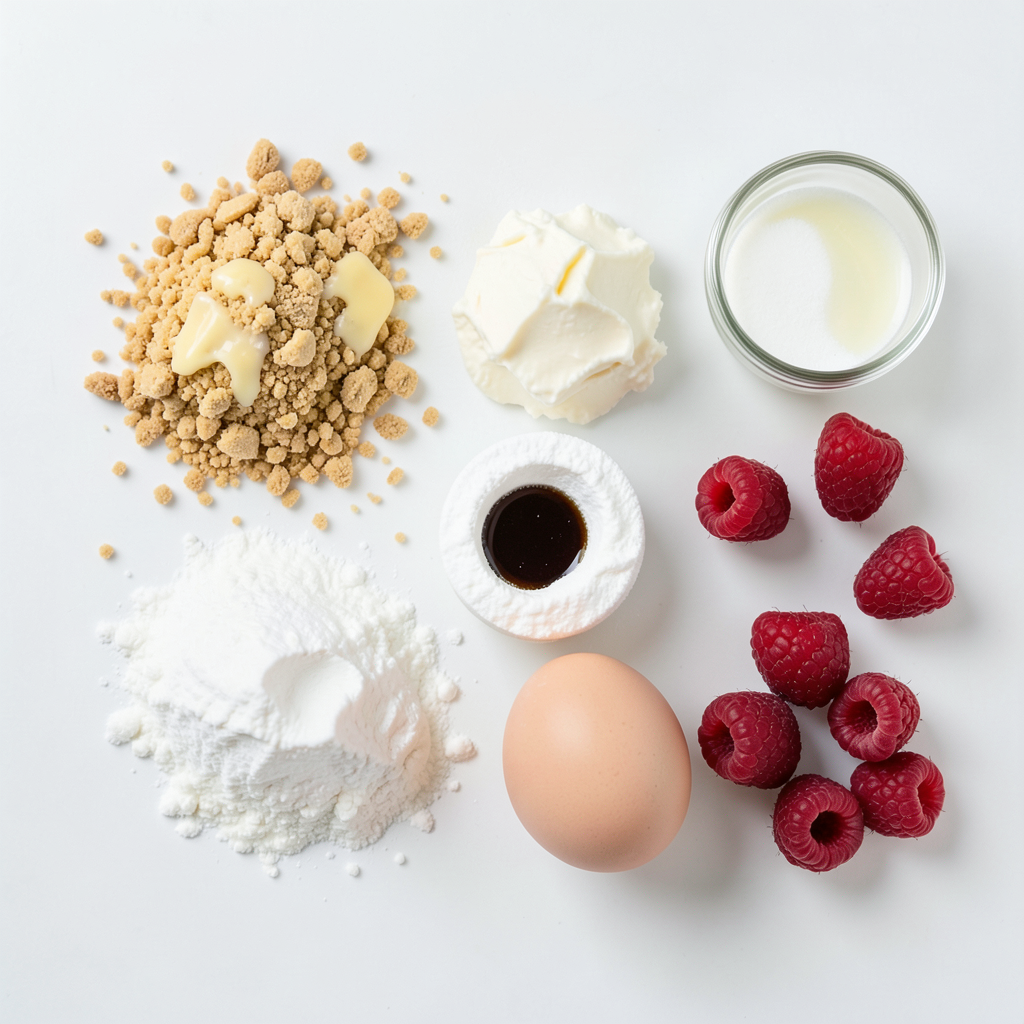
- 1 cup graham cracker crumbs
- 1/4 cup unsalted butter, melted
- 2 tablespoons granulated sugar
- 2 (8 oz) packages cream cheese, softened to room temperature
- 1/2 cup powdered sugar
- 1 teaspoon pure vanilla extract
- 2 large eggs, at room temperature
- 1 cup fresh raspberries (or your choice of fruit topping)
- Whipped cream for garnish (optional)
To make mini cheesecake bites, I use simple ingredients. The graham cracker crumbs form a crunchy base. I mix these with melted unsalted butter and granulated sugar. This mixture creates a tasty crust.
For the cheesecake filling, I use cream cheese as the main star. Softened cream cheese beats to a smooth texture, which is key. I blend in powdered sugar for sweetness. Pure vanilla extract adds flavor and warmth.
I crack in two eggs, one at a time. This step is crucial. It gives the filling its creamy richness.
Fresh raspberries top the bites with a burst of flavor. They add bright color and sweetness. You can also choose other fruits if you like. Whipped cream is optional but adds a delightful touch.
These ingredients come together to create delicious mini cheesecakes. They are easy to prepare and fun to enjoy!
Step-by-Step Instructions
Preparation Steps
1. Preheat your oven to 325°F (165°C). Grab a mini muffin tin and line it with mini cupcake liners. Set the tin aside for now.
2. In a medium bowl, mix together 1 cup of graham cracker crumbs, 1/4 cup of melted unsalted butter, and 2 tablespoons of granulated sugar. Stir until it feels like wet sand.
3. Take about a tablespoon of this mixture. Press it firmly into the bottom of each lined muffin cup. This will make a solid crust. Place the tin in the oven and bake for 5 minutes. After that, let it cool slightly.
Cheesecake Mixture Steps
4. In a large bowl, use an electric mixer to beat 2 packages of softened cream cheese. Mix until it’s smooth and creamy.
5. Gradually add 1/2 cup of powdered sugar and 1 teaspoon of vanilla extract. Mix well until everything is combined and no lumps remain.
6. Carefully add 2 large eggs, one at a time. Beat on low speed after each addition until fully mixed. Don't overmix; keep it silky.
Baking Process
7. Spoon the cream cheese mixture over the cooled crusts. Fill each cup about three-quarters full. This allows room for the cheesecake to rise.
8. Place the tin back into the oven. Bake for 15 to 18 minutes. They are done when the edges are set but the centers jiggle slightly.
9. After baking, remove the bites from the oven. Let them cool in the pan for about 10 minutes. Then, transfer them to a wire rack to cool fully. Refrigerate for at least 2 hours to set.
Tips & Tricks
Perfecting Your Mini Cheesecakes
To make perfect mini cheesecakes, you must avoid overmixing. When you add the eggs, mix just until they blend in. This keeps your cheesecake smooth and creamy. Overmixing can make the texture too airy, which isn't what you want.
Cooling and refrigerating your cheesecakes is also key. After baking, let them cool in the tin for about ten minutes. Then, transfer them to a wire rack to cool completely. Chill them in the fridge for at least two hours. This helps them set well and enhances their flavor.
Presentation Tips
Arranging the bites on a platter makes a big difference. Use a decorative plate to showcase your mini cheesecakes. This adds charm and invites guests to enjoy them.
Garnishing with fresh berries and mint elevates the look. Place a few raspberries on top of each cheesecake. Add a sprig of mint for a pop of color. You can even drizzle some berry coulis around the bites for an extra touch of elegance.
Pro Tips
- Chill the Cream Cheese: Ensure your cream cheese is softened to room temperature for a smooth mixture. If it's too cold, it will be lumpy and hard to blend.
- Don’t Overmix: When adding eggs, mix just until combined to maintain a light and airy texture in your cheesecake bites.
- Use Fresh Ingredients: Opt for fresh raspberries or seasonal fruits for the best flavor. They will elevate the taste and presentation of your bites.
- Cool Gradually: Allow the mini cheesecakes to cool in the pan before transferring them to a wire rack to prevent cracking.
Variations
Flavor Options
You can make mini cheesecakes in many fun flavors! Here are some tasty ideas:
- Chocolate mini cheesecakes: Add melted chocolate to the cream cheese mix. This gives a rich, sweet flavor.
- Fruit-flavored variations: You can use fruits like strawberry, blueberry, or even peach. Just blend the fruit into the cream cheese for a fruity twist.
- Swirled mini cheesecakes: Use chocolate or caramel sauce. Just swirl it into the top of the cheesecake mix before baking. It looks pretty and tastes great!
Alternative Toppings
Toppings can change your mini cheesecakes. Here are some yummy choices:
- Different fresh fruits: Top with berries, sliced bananas, or kiwi. Fresh fruit adds color and taste.
- Sauces and drizzles: Consider chocolate sauce, caramel sauce, or berry coulis. A drizzle makes each bite special.
- Whipped cream and chocolate shavings: Add a dollop of whipped cream. Sprinkle chocolate shavings on top for a classic look.
These variations and toppings keep your mini cheesecakes exciting and fun!
Storage Info
How to Store
To keep your mini cheesecakes fresh, refrigerate them right after cooling. Place them in an airtight container. They will stay tasty for up to five days. If you want to store them longer, freezing is a great option. Wrap each cheesecake bite in plastic wrap and place them in a freezer-safe bag. They can last up to three months in the freezer.
Reheating and Serving
When you're ready to enjoy the frozen bites, move them to the fridge overnight to thaw. For best flavor, serve them chilled. Before serving, top each cheesecake with fresh raspberries. You can also add a dollop of whipped cream for extra yum. Arrange the bites on a nice platter and add mint leaves for a pop of color. This makes them look even more inviting!
FAQs
What are mini cheesecake bites?
Mini cheesecake bites are small, creamy desserts made from cream cheese. They sit on a graham cracker crust and are perfect for parties. Each bite offers rich cheesecake flavor in a cute, easy-to-eat size.
How long do they last in the fridge?
These mini cheesecake bites last about 5 days in the fridge. Keep them covered to stay fresh. Their taste stays good, and they remain creamy.
Can I make them in advance?
Yes, you can make them one to two days in advance. Just bake and chill them, then add toppings before serving. This way, they stay fresh and tasty.
What substitutes can I use for cream cheese?
If you want to replace cream cheese, try Greek yogurt or ricotta cheese. These options can change the texture and flavor slightly, but they work well in desserts.
How do I know when they are done baking?
You can tell they are done when the edges are set, but the center jiggles a bit. This means they are cooked but still creamy inside.
Can I make these without a mixer?
Yes, you can make them without a mixer. Use a whisk or a fork to beat the cream cheese. It takes more effort, but you can still achieve a nice, smooth texture.
You learned how to create delicious mini cheesecakes, from crust to garnish. The steps are simple: mix, bake, and chill. Remember to cool the bites and store them right for the best taste. You can also try different flavors and toppings to make each batch unique. Mini cheesecakes are fun to share and easy to impress friends. So, gather your ingredients and make your next dessert special! Enjoy making these tasty treats.