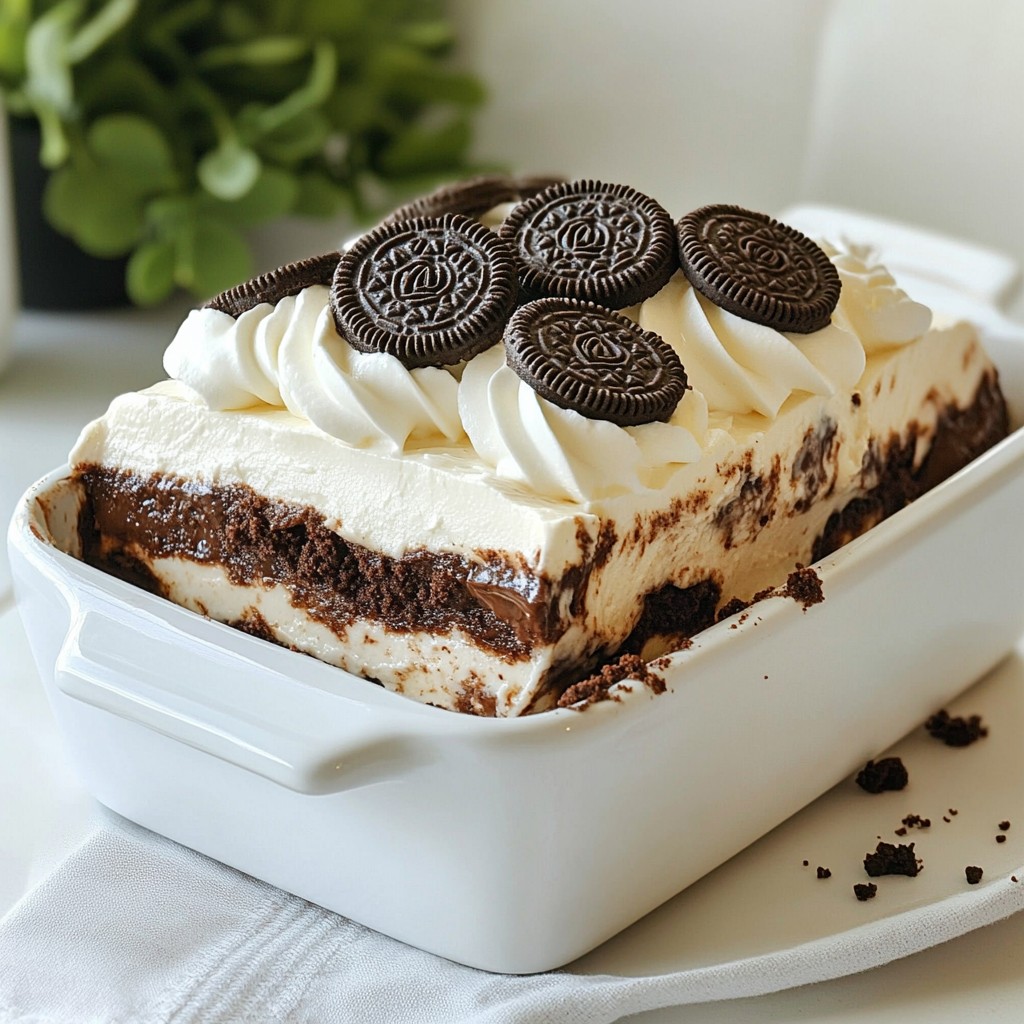
Are you ready to impress your friends with a fun and easy dessert? This Oreo No-Bake Lasagna is both tasty and simple to make! With rich layers of chocolatey goodness and creamy filling, it will be a hit at any gathering. In this post, I'll share all the ingredients, step-by-step instructions, and expert tips to create this delightful treat. Let’s dive into the sweet world of Oreo magic!
Why I Love This Recipe
- Easy Preparation: This no-bake lasagna comes together in just 20 minutes, making it a quick and hassle-free dessert option.
- Layered Delight: The combination of creamy filling, chocolate pudding, and crunchy Oreos creates a delightful texture that everyone loves.
- Chill Time Magic: Allowing the lasagna to set in the fridge enhances the flavors and makes it even more enjoyable when served cold.
- Perfect for Gatherings: With 12 servings, this dessert is ideal for parties, potlucks, or family gatherings, ensuring everyone gets a taste!
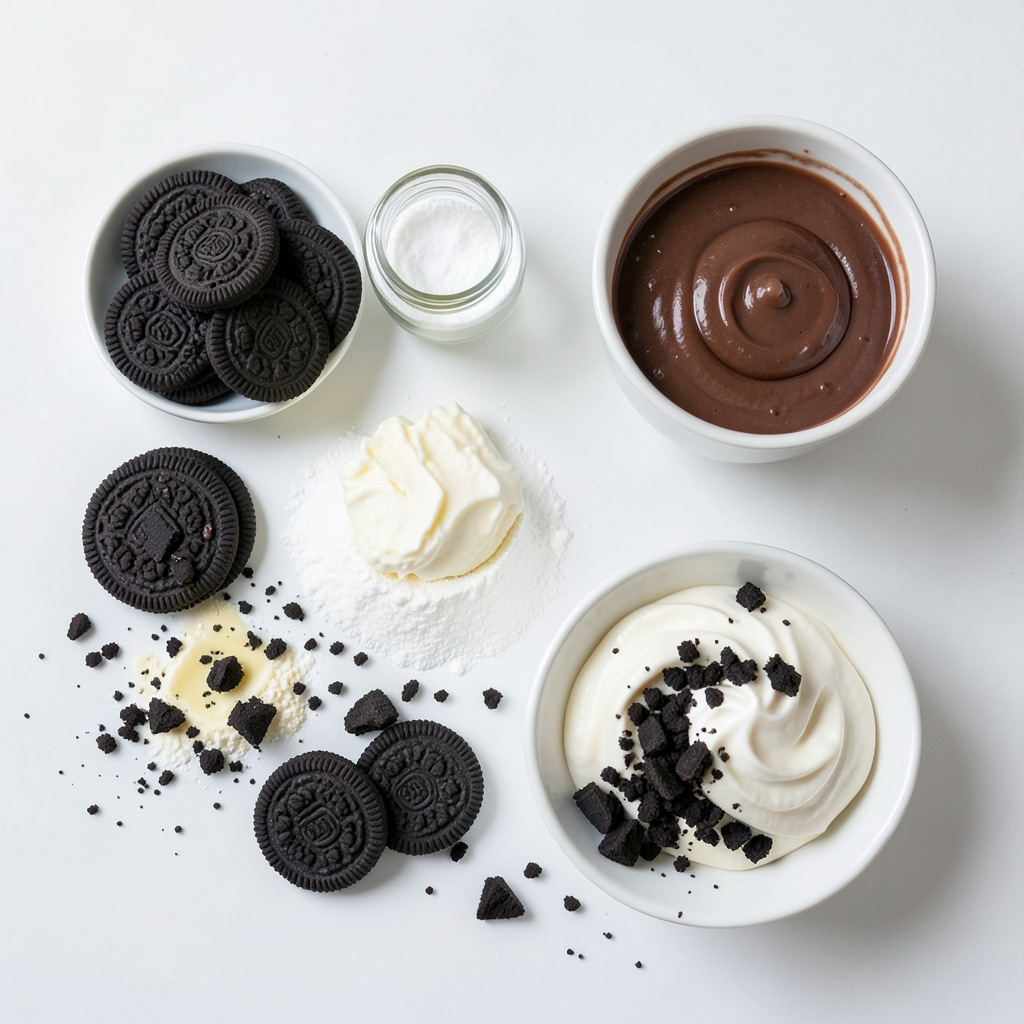
Ingredients
Complete Ingredient List
- 1 package (14.3 ounces) Oreo cookies, finely crushed
- 1/2 cup unsalted butter, melted
- 2 packages (8 ounces each) cream cheese, softened to room temperature
- 1 cup powdered sugar
- 1 teaspoon vanilla extract
- 2 cups whipped topping (such as Cool Whip)
- 1 cup chocolate pudding (instant or homemade)
- 1 cup cold milk
- Extra crushed Oreos for sprinkling on top
To make this Oreo No-Bake Lasagna, you need a variety of tasty ingredients. The main star is the Oreo cookies, which create a rich crust and delicious layers. You'll also need cream cheese for a smooth, creamy filling. The whipped topping adds a lightness that balances the dessert.
Optional Ingredient Variations
You can switch things up with different flavors. Try using peanut butter or mint-flavored Oreos for a twist. You can also add a layer of fruit, like sliced strawberries, for a fresh touch.
Ingredient Substitutions
No Oreos? No problem! You can use any chocolate sandwich cookies. If you want a dairy-free option, choose plant-based cream cheese and whipped topping. For a lighter dessert, use Greek yogurt instead of cream cheese. Just remember, these changes will alter the taste.
Step-by-Step Instructions
Preparing the Oreo Crust
To make the crust, you need Oreo cookies and melted butter. First, take one package of Oreo cookies and crush them finely. You can use a food processor or a zip-top bag and a rolling pin. Next, in a medium bowl, mix the crushed Oreos with half a cup of melted butter. Stir until the crumbs are well coated.
Now, take a 9x13 inch baking dish. Firmly press half of the Oreo mixture into the bottom. Make this layer even and flat. This crust will hold all the yummy layers above it.
Making the Cream Cheese Filling
For the cream cheese filling, gather two packages of softened cream cheese, powdered sugar, and vanilla extract. In a large mixing bowl, beat the cream cheese with an electric mixer until it is smooth. Add one cup of powdered sugar and one teaspoon of vanilla extract. Mix until it is creamy with no lumps.
Next, gently fold in one cup of whipped topping. Use a spatula for this step. You want to keep the mixture light and fluffy. This will make your filling taste great.
Layering the Dessert
Now it’s time to layer! Start by spreading half of the cream cheese mixture over the crust. Smooth it out to cover the crust completely. Then, in another bowl, whisk together one cup of chocolate pudding mix and one cup of cold milk. Keep whisking until it thickens, about two minutes.
Pour the chocolate pudding over the cream cheese layer. Spread it evenly. After this, add the rest of the cream cheese filling on top of the pudding, smoothing it out.
Next, add the remaining whipped topping over the cream cheese layer. Use a spatula to make it even. Finally, sprinkle extra crushed Oreos on top for a nice crunch.
Cover the dish with plastic wrap and chill it in the fridge for at least four hours, or overnight if you can wait. This helps all the layers set together nicely.
Tips & Tricks
Perfecting the Layering Technique
To make your Oreo No-Bake Lasagna look great, focus on even layers. Start with the crust. Press it firmly into the dish. This helps it hold shape. For the cream cheese filling, use a spatula to smooth it out. Spread it evenly over the crust. Then, pour the pudding layer gently. This keeps the layers from mixing. Repeat these steps for the final layer. Aim for neat, clean lines.
How to Achieve the Best Texture
Texture is key for this dessert. Use softened cream cheese for a smooth filling. Mixing well with the powdered sugar helps. Gently fold in the whipped topping to keep it light. This makes the filling airy and fluffy. Let the dessert chill for at least four hours. Chilling helps the layers set properly. If you can, let it sit overnight. This enhances the flavors and texture.
Serving Suggestions
When serving, cut the lasagna into squares. Place each square on a plate. Top with a dollop of whipped topping. Add a sprinkle of crushed Oreos on top. This adds a nice crunch and looks appealing. You can also pair it with fresh berries for a fruity touch. If you want more chocolate, drizzle chocolate sauce over the top. Enjoy this fun and tasty dessert with friends and family!
Pro Tips
- Chill for Best Results: Allowing the lasagna to chill overnight will enhance the flavors and help the layers set more firmly.
- Use Room Temperature Ingredients: Ensure that your cream cheese is softened to room temperature for a smooth and creamy filling without lumps.
- Layer Evenly: When spreading the cream cheese and pudding layers, use an offset spatula for a smooth and even finish.
- Customize Your Toppings: Feel free to get creative with toppings! Consider adding chocolate shavings, mini chocolate chips, or even a drizzle of chocolate sauce for extra flair.
Variations
Introducing Different Flavors
You can switch up the flavor of your Oreo No-Bake Lasagna easily. Try using different cookies like chocolate mint or peanut butter. These flavors add a fun twist. You can also replace chocolate pudding with vanilla or butterscotch pudding for a unique taste. Think about adding a layer of fruit, like strawberries or bananas, for freshness.
Unique Toppings and Add-ins
Get creative with your toppings! Instead of just crushed Oreos, use chopped nuts, sprinkles, or mini chocolate chips. You can drizzle caramel or chocolate sauce over the top for extra flavor. If you love whipped cream, add a layer of it between the cream cheese and pudding layers. You can even swap out whipped topping for homemade whipped cream to make it more special.
Gluten-Free Options
If you need a gluten-free dessert, you can still enjoy this lasagna! Use gluten-free Oreo cookies, which are available in many stores. Make sure to check the pudding mix too, as some brands are gluten-free. With these swaps, everyone can savor this tasty treat without worry.
Storage Info
Best Practices for Refrigeration
To keep your Oreo No-Bake Lasagna fresh, store it in the fridge. Use a tight lid or plastic wrap. This keeps it moist and tasty. It’s best to chill it for at least four hours. If you can wait overnight, that’s even better! The flavors mix together nicely as it sits.
Freezing Instructions
You can freeze Oreo No-Bake Lasagna if you want to save some for later. First, let it chill in the fridge for a few hours. Then, slice it into squares. Wrap each piece in plastic wrap and place it in a freezer-safe bag. This way, you can enjoy it later! It stays good in the freezer for up to two months.
How to Reheat or Serve from Refrigerated
When you're ready to serve, take the lasagna out of the fridge. If it’s frozen, let it thaw in the fridge overnight. You don’t need to reheat it, as it tastes great cold. Cut it into squares and serve. For a nice touch, add a dollop of whipped topping and some crushed Oreos on top before serving. Enjoy this yummy dessert with friends or family!
FAQs
Can I use other cookies besides Oreos?
Yes, you can use other cookies. Try chocolate wafers or graham crackers for a twist. They both add unique flavors to the dessert. Just crush them finely like Oreos. Experiment with what you like best!
How long can I store the Oreo No-Bake Lasagna?
You can store it in the fridge for up to five days. Just keep it covered with plastic wrap or a lid. The layers stay fresh and tasty during this time. After five days, the dessert may lose its flavor and texture.
Can this recipe be made ahead of time?
Yes, this recipe is great for making ahead! You can prepare it a day or two before serving. Just let it chill in the fridge. This way, the flavors will blend and taste even better. Plus, it saves you time on the day of your event!
This blog post covered how to make Oreo No-Bake Lasagna. We discussed the needed ingredients and provided variations and substitutions. I gave step-by-step instructions, along with tips for perfect layers and texture. You also learned different flavor options and storage practices.
Now, you can make a delicious dessert that everyone will love. Enjoy creating this easy treat for any occasion!