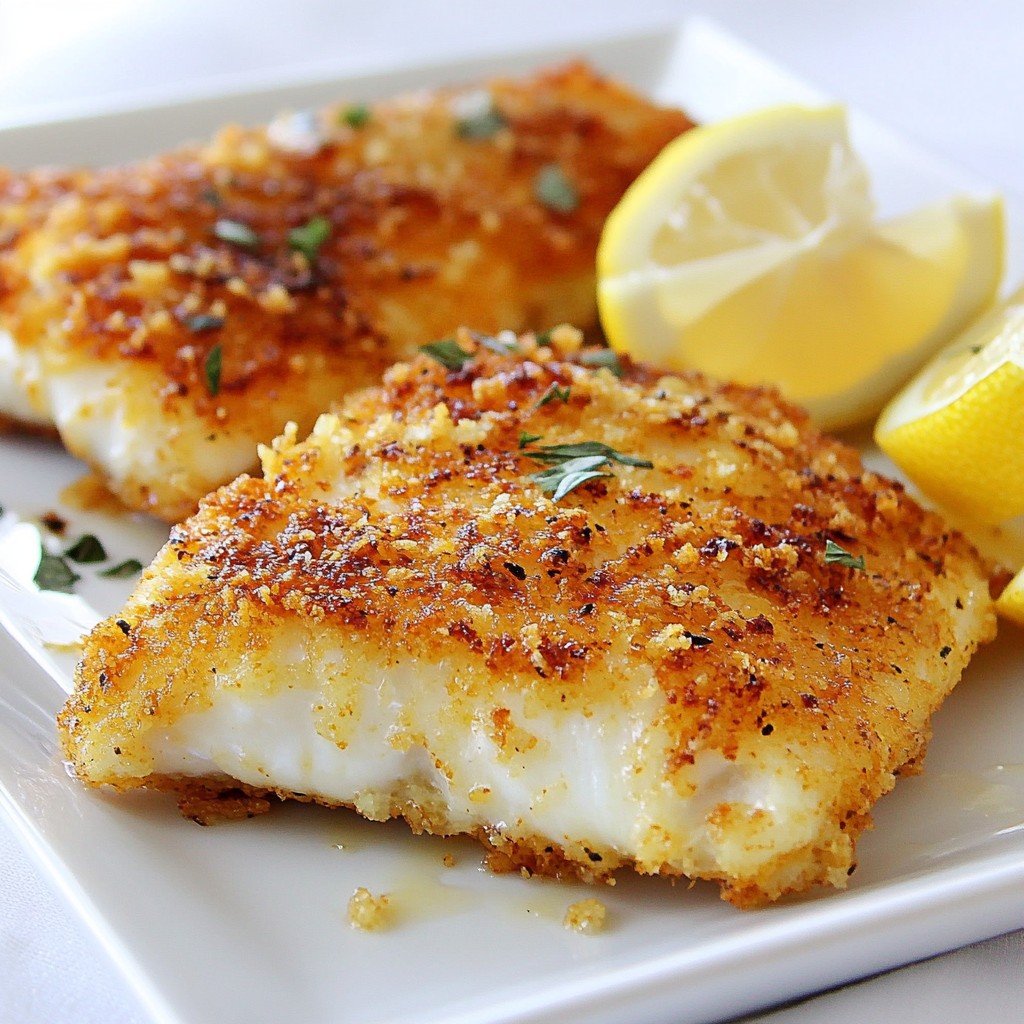
Looking for a quick and easy dinner idea? Parmesan Crusted Tilapia is your answer! This dish combines flaky fish with a crunchy, cheesy crust that’s sure to impress your family or guests. In this post, I’ll guide you through each simple step, from gathering your ingredients to serving suggestions. Let’s dive in and make a meal that’s tasty, satisfying, and perfect for any night of the week!
Why I Love This Recipe
- Quick and Easy: This recipe comes together in just 30 minutes, making it perfect for a weeknight dinner without sacrificing flavor.
- Crispy Texture: The combination of Parmesan cheese and panko breadcrumbs creates a deliciously crispy crust that elevates the tilapia.
- Healthy Option: Tilapia is a lean fish, and this recipe uses olive oil and minimal ingredients, making it a healthy choice.
- Versatile and Flavorful: The seasonings and lemon juice add a burst of flavor, making this dish easy to customize with your favorite spices.
Ingredients
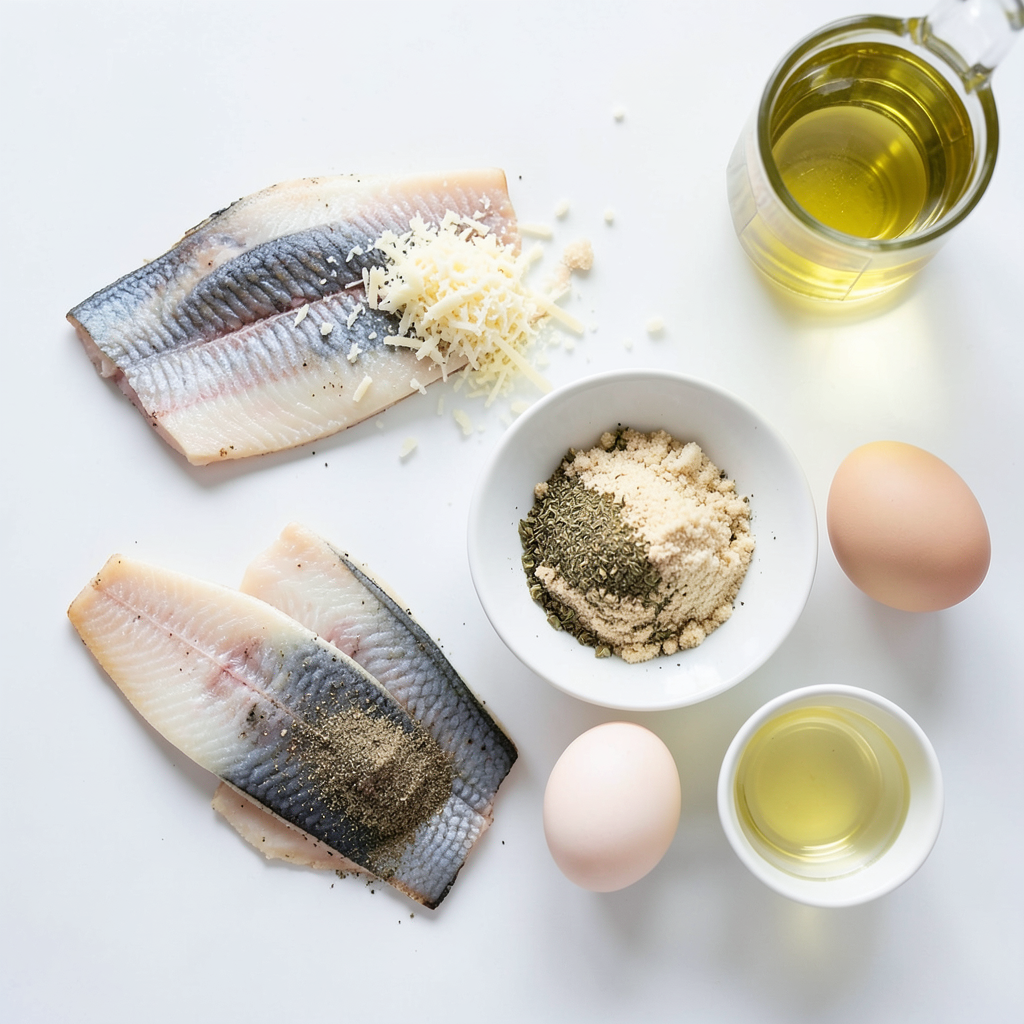
List of Ingredients
- Fresh tilapia fillets
- Parmesan cheese
- Panko breadcrumbs
- Seasonings and spices
- Eggs
- Lemon juice
- Olive oil
Gathering the right ingredients is key to making Parmesan crusted tilapia. You need fresh tilapia fillets, which are mild and flaky. The Parmesan cheese adds a rich, nutty flavor. Panko breadcrumbs give a nice crunch.
For seasonings, use garlic powder, onion powder, dried oregano, black pepper, and sea salt. These spices enhance the taste of the fish without overpowering it.
You will also need two large eggs for the egg bath. This helps the crust stick to the fish. Fresh lemon juice adds brightness and balances the flavors. Finally, use extra virgin olive oil for cooking. It gives a lovely taste and helps the crust crisp up nicely.
These simple ingredients come together to create a dish that is both tasty and easy to make. You can find most of these items at your local grocery store. Enjoy the process of cooking as you gather these essentials!
Step-by-Step Instructions
Preheat the Oven
Set your oven to 400°F (200°C). This temperature helps the fish cook evenly. Line a baking sheet with parchment paper. This step makes cleanup easy and keeps the fish from sticking.
Prepare the Crust Mixture
In a shallow dish, mix together the following:
- 1 cup finely grated Parmesan cheese
- 1/2 cup panko breadcrumbs
- 1 teaspoon garlic powder
- 1 teaspoon onion powder
- 1 teaspoon dried oregano
- 1/2 teaspoon freshly ground black pepper
- 1/4 teaspoon sea salt
Stir these ingredients well. This mixture gives the tilapia a tasty, crunchy crust.
Create the Egg Bath
In a separate bowl, combine:
- 2 large eggs, lightly beaten
- 2 tablespoons freshly squeezed lemon juice
Mix these until they blend well. This egg bath helps the crust stick to the fish.
Coat the Fish
Take each tilapia fillet and dip it into the egg mixture. Make sure it gets coated well. Then, press the fillet into the crust mixture. Ensure both sides are covered. This step adds flavor and texture.
Sear the Fillets
Heat 3 tablespoons of extra virgin olive oil in a skillet over medium heat. When the oil is hot, carefully add the crusted tilapia fillets. Cook each side for about 2-3 minutes. You want them golden brown and crispy.
Bake the Fillets
After searing, move the fillets to your prepared baking sheet. Bake them in the oven for 10-12 minutes. The fish should be cooked through and flake easily with a fork. This final step ensures the tilapia is tender and flavorful.
Tips & Tricks
Cooking Tips
- Keep oil at the right temperature. If it’s too cold, your fish will soak it up. If it’s too hot, the crust will burn. Aim for a shimmer on the surface.
- Avoid overcrowding the skillet. Cook in batches if needed. This helps the fillets fry evenly and stay crispy.
Presentation Tips
- Use colorful plates. Bright colors make the dish pop and look more inviting. A white plate can highlight the golden crust.
- Garnish with fresh herbs and lemon wedges. Parsley or basil adds a nice touch. The lemon gives a fresh zing that makes the dish shine.
Flavor Enhancements
- Consider adding herbs or spices to the crust mixture. A pinch of paprika or cayenne can add a kick. Fresh herbs like thyme or dill can also enhance the flavor profile. Don't be afraid to experiment; cooking is all about having fun!
Pro Tips
- Fresh Ingredients: Always use the freshest tilapia fillets you can find for the best flavor and texture. Fresh fish will have a mild scent and firm texture, which enhances the overall dish.
- Crunchy Texture: For an extra crunchy crust, consider adding a tablespoon of crushed cornflakes to the panko breadcrumb mixture. This will elevate the crunch factor significantly.
- Mind the Heat: When searing the fillets, make sure the olive oil is hot enough before adding the fish. A shimmering surface indicates the oil is ready, which helps achieve that perfect golden brown crust.
- Rest Before Serving: Allow the baked tilapia fillets to rest for a couple of minutes after removing them from the oven. This helps the juices redistribute, ensuring a moist and flavorful bite.
Variations
Different Types of Fish
You can use many types of fish for this recipe. Here are some great alternatives to tilapia:
- Cod
- Haddock
- Catfish
- Snapper
When you switch fish, adjust the cooking time. Thicker fish like cod may need a bit more time. Cook them for around 3-4 minutes per side. Always check that the fish flakes easily with a fork.
Gluten-Free Options
If you need a gluten-free option, don't worry! You can swap panko with gluten-free breadcrumbs. They work well and still give you that nice crunch. Always check the label to ensure they are truly gluten-free.
Flavor Modifications
Feel free to play with the flavors! You can add different seasonings to the crust. Try smoked paprika or cayenne for some heat. You can also add other cheeses to the mix.
- Mozzarella for a creamy taste
- Cheddar for a sharper flavor
These changes will make your dish even more exciting. Enjoy experimenting!
Storage Info
How to Store Leftovers
To store cooked tilapia, let it cool first. Place it in an airtight container. Refrigerate your tilapia within two hours of cooking. It stays fresh for up to three days. For best taste, eat it sooner.
Freezing Instructions
To freeze tilapia, wrap each fillet tightly in plastic wrap. Then, place the wrapped fish in a freezer-safe bag. Press out any air before sealing. You can freeze tilapia for up to three months. When ready to eat, thaw it in the fridge overnight.
Reheating Methods
To reheat tilapia, use an oven or air fryer for the best results. Preheat your oven to 350°F (175°C). Place the tilapia on a baking sheet and cover it with foil. Heat for about 10-15 minutes. If using an air fryer, set it to 350°F (175°C) and cook for 5-7 minutes. This keeps the crust crispy and the fish moist.
FAQs
How do I know when the tilapia is done?
You can tell tilapia is cooked when it flakes easily with a fork. The fish should turn a nice white color. A good rule of thumb is to cook it for about 10-12 minutes in the oven after searing. If you see the edges start to curl up, that’s a good sign too. Always check the thickest part of the fillet to be sure.
Can I use frozen tilapia fillets?
Yes, you can use frozen tilapia fillets. Just remember to thaw them first. You can do this by placing them in the fridge overnight or putting them in cold water for a quick thaw. Once thawed, pat them dry to remove excess moisture. This helps the crust stick better.
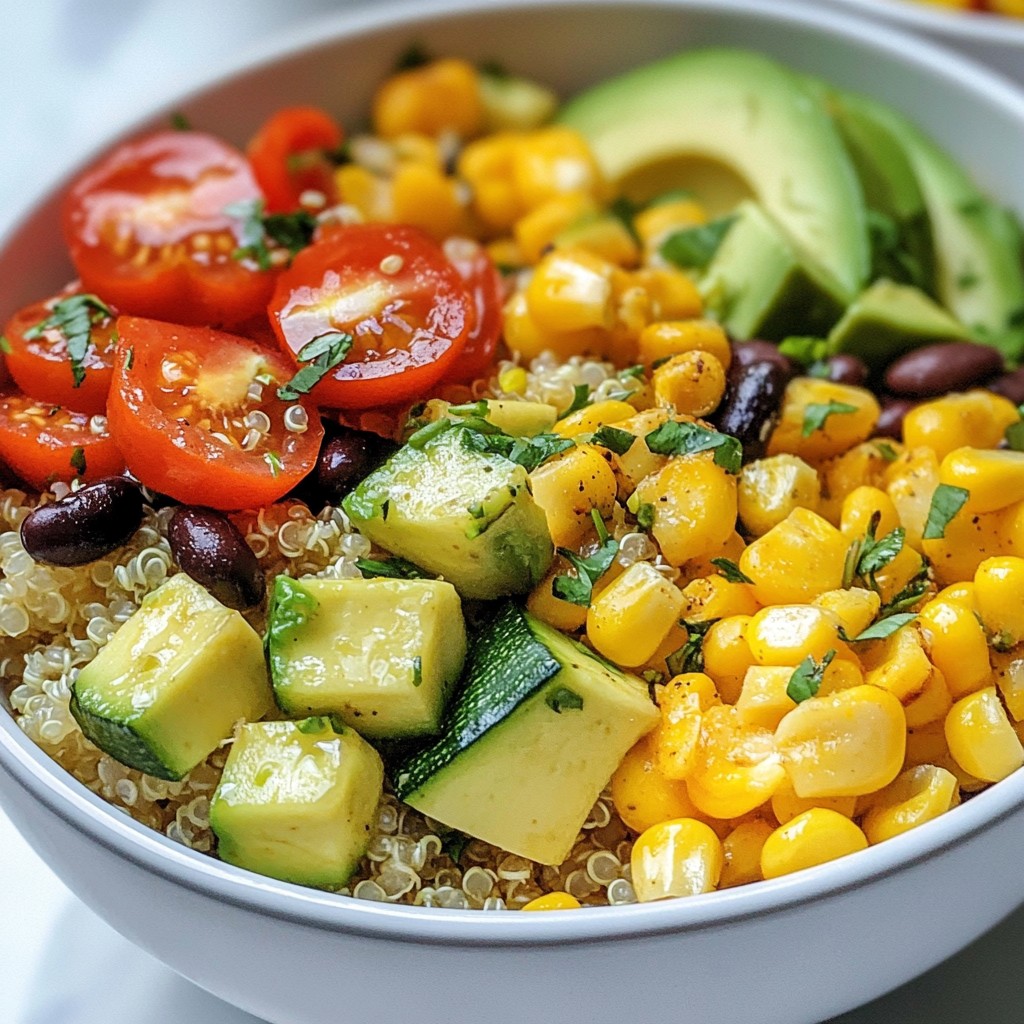
What can I serve with Parmesan crusted tilapia?
Parmesan crusted tilapia pairs well with many side dishes. Here are some tasty options:
- Steamed broccoli
- Garlic mashed potatoes
- Quinoa with herbs
- Simple green salad
- Roasted asparagus
These sides add color and make your meal more colorful and balanced. Enjoy experimenting with different combinations!
In this post, we covered how to make Parmesan crusted tilapia, from fresh ingredients to cooking tips. You learned how to prepare the fish, create a flavorful crust, and bake it to perfection. Remember to keep oil at the right heat and experiment with spices for a unique taste. Don't forget to store leftovers properly or try freezing any extras. Now, you can enjoy a delicious meal that’s easy and fun to make! Happy cooking!