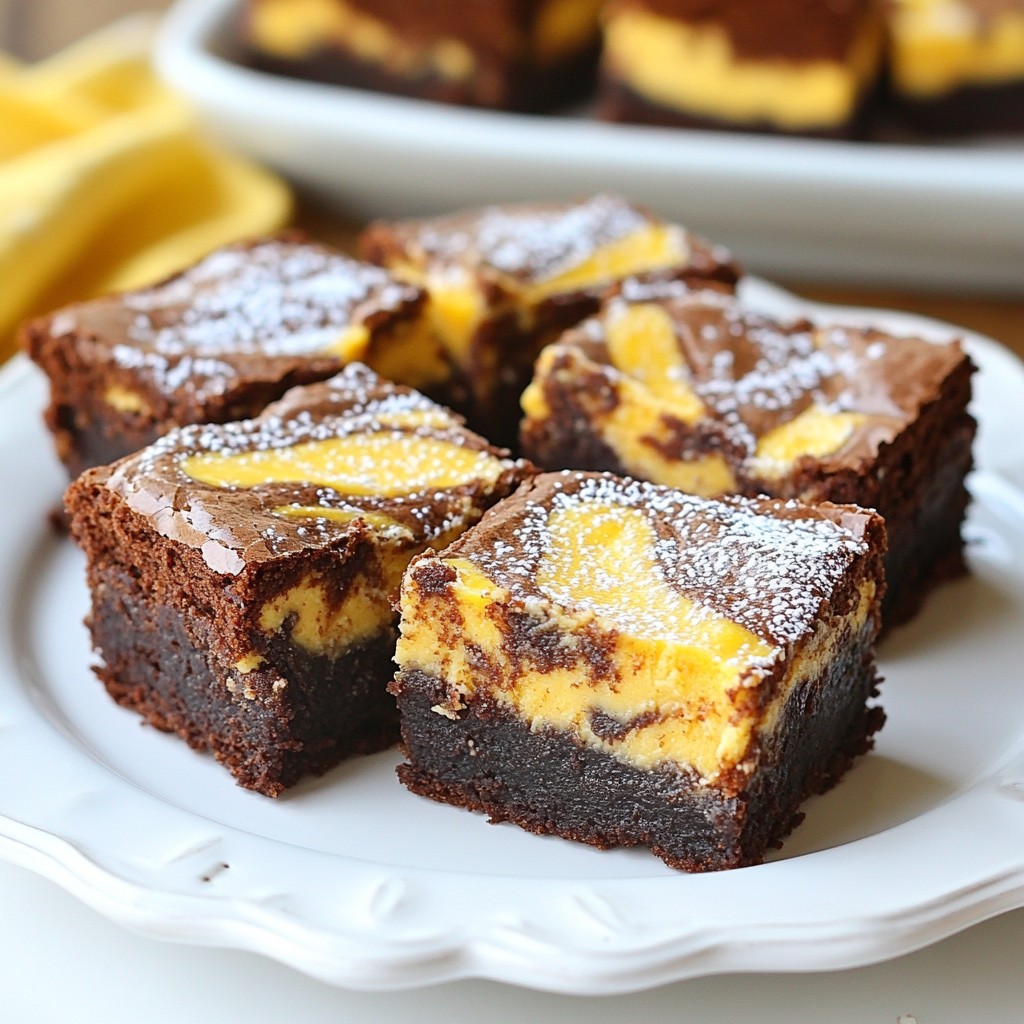
Craving a dessert that screams fall? Let’s dive into Pumpkin Cheesecake Swirl Brownies! These rich, fudgy treats combine chocolatey goodness with a creamy pumpkin swirl. You'll impress your friends and family with every bite. Plus, I'll guide you through each step, from mixing the batter to the final bake. Ready to make these irresistible brownies? Let’s get started!
Why I Love This Recipe
- Decadent Flavor: The combination of rich chocolate brownies with creamy pumpkin cheesecake creates a delightful contrast that is irresistible.
- Seasonal Delight: These brownies bring the warm, cozy flavors of fall to your dessert table, making them perfect for autumn gatherings.
- Easy to Make: With straightforward steps and simple ingredients, this recipe is approachable for bakers of all skill levels.
- Impressive Presentation: The marbled appearance of the brownies adds a touch of elegance, making them a showstopper at any event.
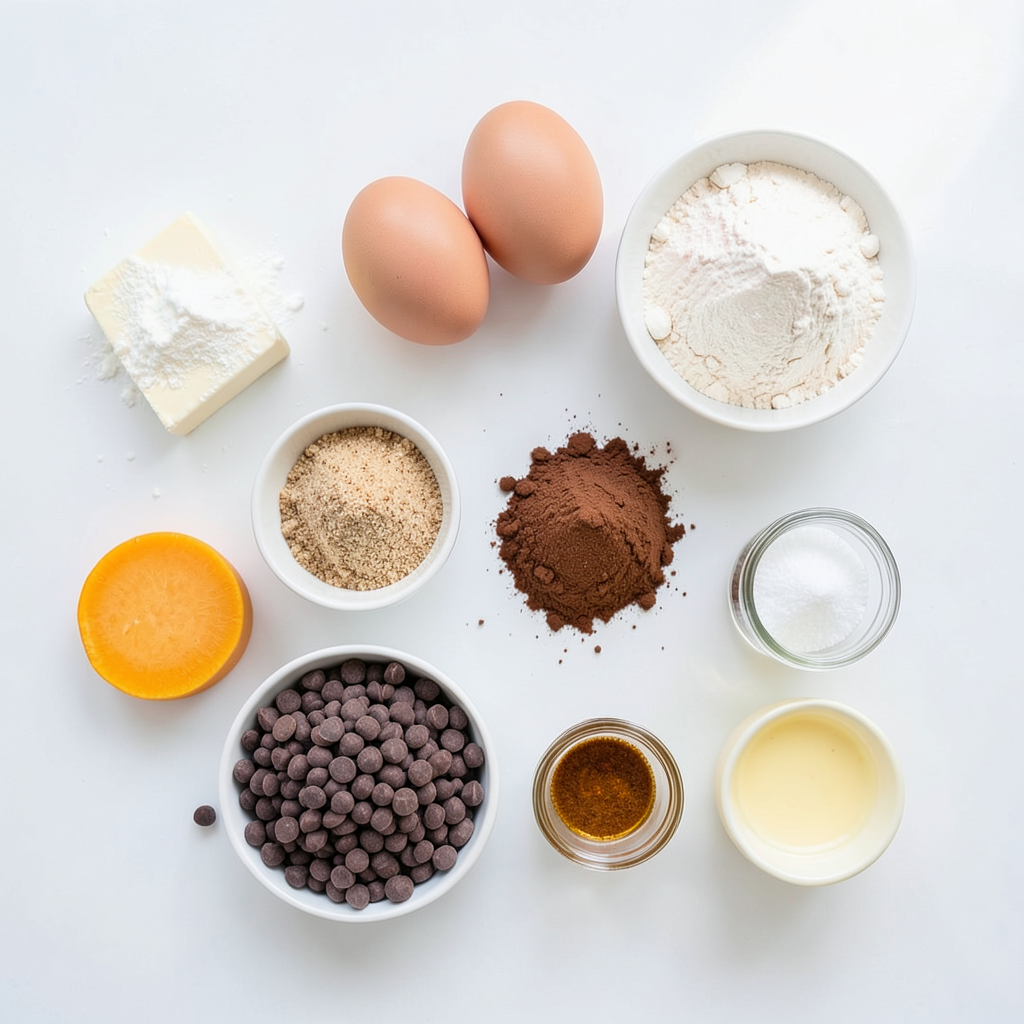
Ingredients
Main Ingredients for Brownies
- 1 cup unsalted butter
- 2 cups granulated sugar
- 1 cup packed brown sugar
- 4 large eggs
- 1 teaspoon vanilla extract
- 1 cup all-purpose flour
- 1 cup unsweetened cocoa powder
- 1 teaspoon baking powder
- 1/2 teaspoon salt
- 1 cup semi-sweet chocolate chips
Ingredients for Pumpkin Cheesecake Swirl
- 8 oz cream cheese
- 1/2 cup granulated sugar
- 1 large egg
- 1 cup pumpkin puree
- 1 teaspoon pumpkin pie spice
- 1 teaspoon vanilla extract
The key to making these brownies great is the balance of flavors. The rich cocoa in the brownie base pairs perfectly with the creamy pumpkin cheesecake. Each ingredient plays a role in creating that perfect bite.
The unsalted butter adds richness, while the sugars bring sweetness. The eggs help with structure and moisture. The flour and cocoa provide that fudgy texture.
For the pumpkin cheesecake swirl, cream cheese adds creaminess. The pumpkin puree not only gives flavor but also a lovely color. Pumpkin pie spice adds warmth and depth, making your taste buds dance.
Using fresh pumpkin is nice, but canned pumpkin works great too. It’s simple and saves time. Always remember to soften your cream cheese. This step ensures a smooth and creamy cheesecake layer.
Make sure to use high-quality chocolate chips. They enhance the brownie flavor and add a nice touch of sweetness. Each ingredient matters. They come together to create a treat that is truly irresistible.
Step-by-Step Instructions
Preparing the Baking Pan
Grease or line a 9x13 inch baking pan with parchment paper. This helps with easy lifting later. You want to make sure the pan is ready before mixing.
Making the Brownie Batter
1. Start by melting 1 cup of unsalted butter in a medium saucepan over low heat.
2. Once melted, mix in 2 cups of granulated sugar and 1 cup of brown sugar. Stir until smooth.
3. Next, beat in 4 large eggs one at a time. Make sure each egg is mixed in fully.
4. Add 1 teaspoon of vanilla extract and mix well.
5. In a separate bowl, sift together 1 cup of all-purpose flour, 1 cup of cocoa powder, 1 teaspoon of baking powder, and 1/2 teaspoon of salt.
6. Gradually add the dry mix to the wet mix. Stir gently until just combined.
7. Finally, fold in 1 cup of semi-sweet chocolate chips.
Preparing the Pumpkin Cheesecake Mixture
1. In a clean bowl, beat 8 ounces of softened cream cheese until smooth.
2. Mix in 1/2 cup of granulated sugar and 1 large egg.
3. Add 1 cup of pumpkin puree, 1 teaspoon of pumpkin pie spice, and 1 teaspoon of vanilla extract.
4. Mix until the cream cheese mixture is creamy and free of lumps.
Assembling the Brownies
1. Pour half of the brownie batter into the prepared pan. Spread it evenly.
2. Next, dollop the pumpkin cheesecake mixture over the brownie layer.
3. Use a butter knife or skewer to swirl the cheesecake into the brownie layer. This creates a marbled effect.
4. Pour the remaining brownie batter on top. Smooth it out to cover the cheesecake layer.
Baking Instructions
1. Preheat your oven to 350°F (175°C).
2. Bake the brownies for 35 to 40 minutes.
3. To check for doneness, insert a toothpick into the center. It should come out with moist crumbs. Avoid the cheesecake layer for accuracy.
Cooling and Serving
1. Let the brownies cool in the pan for at least 30 minutes.
2. This allows the cheesecake layer to set properly.
3. Once cooled, slice them into squares and serve.
Tips & Tricks
Ensuring the Perfect Brownie Texture
To get the best brownie texture, avoid overmixing. When you mix too much, your brownies can become tough. Stir just until the dry ingredients blend with the wet ones. This keeps them soft and chewy.
Check the temperature of your ingredients. Use room temperature eggs and cream cheese. This helps them mix better. Room temperature ingredients create a smoother batter and a great texture.
Enhancing Flavor
Want to boost the flavor? Add spices like nutmeg or ginger. These spices add warmth and depth to your brownies. You can also mix in some chopped nuts for crunch.
Choose high-quality chocolate for the best results. Using quality chocolate chips makes a big difference in taste. Look for brands with high cocoa content for rich flavor.
Presentation Ideas
Presentation matters, especially for special occasions. Arrange the brownies on a nice platter. Dust them lightly with powdered sugar for a festive touch.
For an extra special treat, top each brownie with whipped cream. A sprinkle of cinnamon adds a lovely finish. This makes your dessert look as good as it tastes!
Pro Tips
- Use Room Temperature Ingredients: Ensuring your eggs and cream cheese are at room temperature will help create a smoother batter and a creamier cheesecake swirl.
- Don't Overmix: When combining your wet and dry ingredients, mix until just combined to keep your brownies light and fudgy. Overmixing can lead to dense brownies.
- Check for Doneness Carefully: Use a toothpick to test the brownies, avoiding the cheesecake layer. You want it to come out with moist crumbs for the perfect texture.
- Chill Before Serving: Allow the brownies to cool completely in the pan. Chilling them in the refrigerator for a bit can make slicing easier and enhance the flavors.
Variations
Gluten-Free Option
You can easily make these brownies gluten-free. Simply replace the all-purpose flour with a gluten-free blend. Look for a blend that works well in baking. This change keeps the texture light and moist.
Vegan Adaptation
For a vegan version, swap the butter for coconut oil or vegan butter. Use flax eggs instead of regular eggs—mix one tablespoon of ground flaxseed with three tablespoons of water for each egg. For cream cheese, try a plant-based cream cheese. These swaps make the brownies dairy-free and egg-free.
Flavor Variations
You can add your favorite mix-ins to change the flavor. Try chopped nuts like walnuts or pecans for crunch. Use dark or white chocolate chips instead of semi-sweet for a twist. A splash of almond or peppermint extract can also add a fun flavor. Experiment with what you love!
Storage Info
Short-Term Storage
To keep your brownies fresh, place them in an airtight container. Make sure they cool completely before storing. This helps prevent moisture buildup. You can store them in the fridge for up to one week. The cool air keeps them moist and tasty. For best results, separate layers with parchment paper. This stops them from sticking together.
Long-Term Storage
If you want to keep your brownies longer, freezing is a great option. Cut the brownies into squares before freezing. Wrap each square tightly in plastic wrap. Then, place them in a freezer bag or container. This way, they stay fresh for up to three months. Label the bags with the date, so you know when you made them.
How to Reheat
To enjoy your brownies warm, reheating is simple. You can use a microwave or an oven. For the microwave, heat each brownie for about 10-15 seconds. Check to see if they are warm enough. If using an oven, preheat it to 350°F (175°C). Place the brownies on a baking sheet and warm them for about 5-7 minutes. Reheating brings back the soft texture and rich flavor.
FAQs
How do I achieve the best texture for brownies?
To get moist brownies, follow these tips:
- Use room temperature eggs.
- Melt your butter completely.
- Don’t overmix the batter.
- Check doneness with a toothpick; it should have moist crumbs.
Moist crumbs mean fudgy brownies, which is what we want!
Can I use fresh pumpkin instead of canned?
Yes, you can use fresh pumpkin! Pros:
- Fresh pumpkin has a bright flavor.
- It can be more nutritious.
Cons:
- It takes longer to prepare.
- You must cook and puree it first.
For ease, canned pumpkin works great and keeps the recipe simple.
How long do these brownies stay fresh?
These brownies stay fresh for about 4-5 days. Store them in an airtight container at room temperature. If you want them to last longer, put them in the fridge. They taste great chilled or at room temp!
Can I make these brownies ahead of time?
Yes, making these brownies ahead is easy! You can bake them 1-2 days in advance. Just store them in the fridge. Let them come to room temperature before serving. For longer storage, freeze them. Wrap each brownie tightly to keep them fresh.
Creating these Pumpkin Cheesecake Swirl Brownies combines rich flavors and a simple process. We explored essential ingredients, step-by-step instructions, and tips for perfect results. Remember, not overmixing ensures a great texture, and using high-quality chocolate can enhance the taste.
Whether you try a gluten-free option or garnish for a special occasion, these brownies are sure to impress. Enjoy baking, savor each bite, and share these treats with others!