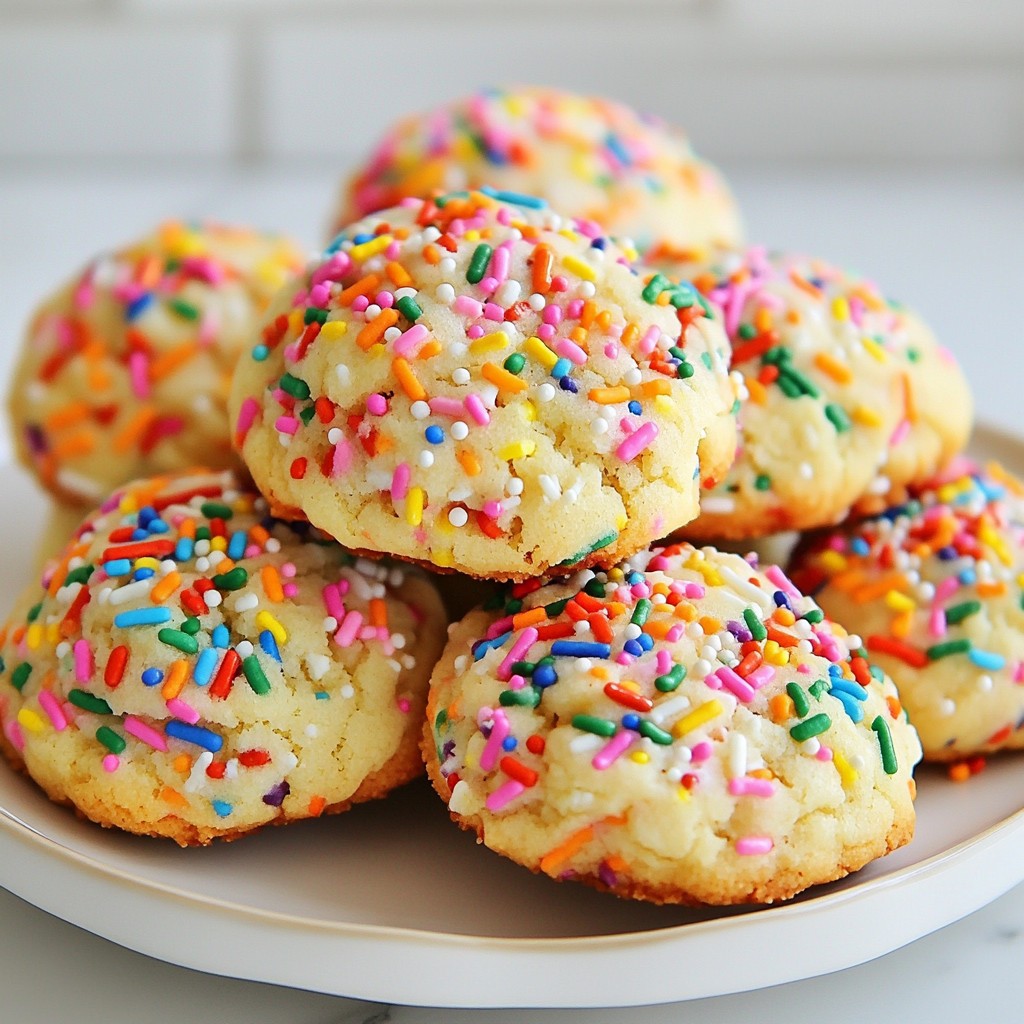
Get ready to bake a batch of joy with my Rainbow Sprinkle Birthday Cake Cookies! These cookies blend all the fun of a birthday cake into a delightful treat that will make anyone smile. I’ll walk you through easy steps, share clever tips, and even variations for special diets. You’ll soon have colorful, delicious cookies that are perfect for any celebration. Let’s dive in and create some sweet memories!
Why I Love This Recipe
- Festive Vibes: These cookies are perfect for celebrating any birthday with their bright colors and fun sprinkles!
- Soft and Chewy: The addition of yellow cake mix gives these cookies a delightful cake-like texture that melts in your mouth.
- Quick and Easy: With a total prep time of just 30 minutes, you can whip up a batch of cookies in no time!
- Customizable: Feel free to swap out the rainbow sprinkles for your favorite colors or themed decorations for any occasion.
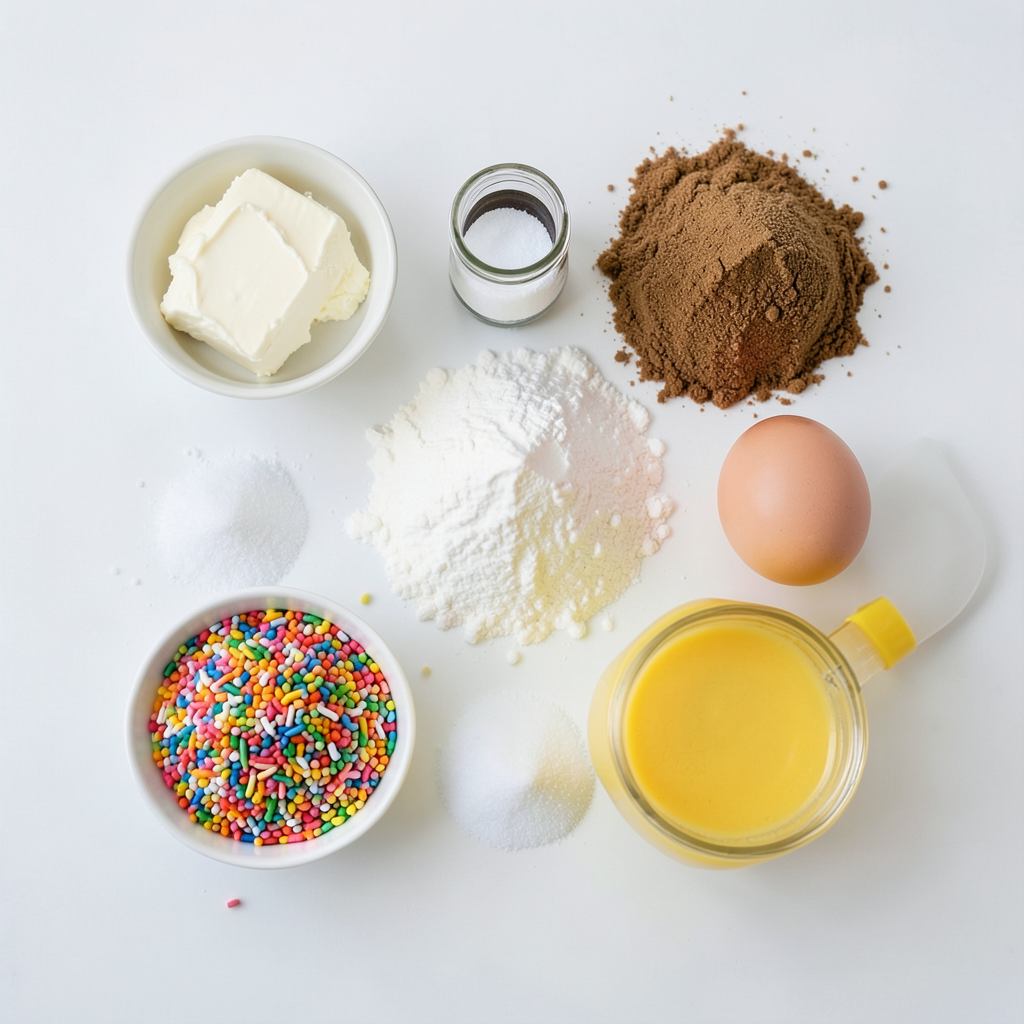
Ingredients
Main Ingredients for Rainbow Sprinkle Birthday Cake Cookies
To create these fun and tasty cookies, you need a few key ingredients:
- 1 cup unsalted butter, softened
- 1 cup granulated sugar
- 1 cup packed brown sugar
- 2 large eggs
- 1 tablespoon pure vanilla extract
- 3 cups all-purpose flour
- 1 teaspoon baking soda
- 1 teaspoon baking powder
- 1/2 teaspoon salt
- 1 cup rainbow sprinkles (plus extra for topping)
- 1/2 cup yellow cake mix
These ingredients work together to give your cookies a soft, cake-like texture and a delightful flavor.
Optional Toppings and Variations
You can get creative with toppings and variations for your cookies. Here are a few ideas:
- Add chocolate chips for a sweet twist.
- Use different types of sprinkles like chocolate or seasonal ones.
- Drizzle melted chocolate on top for extra sweetness.
- Mix in nuts for a nice crunch.
Feel free to test different combos to find your favorite!
Measurements and Substitutions
If you need to make adjustments, here are some helpful tips:
- Instead of unsalted butter, you can use salted butter. Just reduce the added salt.
- For a dairy-free option, substitute the butter with coconut oil.
- If you don’t have yellow cake mix, you can leave it out. The cookies will still taste great.
- Use gluten-free flour if you want to make them gluten-free.
These substitutions can help you adapt the recipe to your needs while keeping it delicious!
Step-by-Step Instructions
Prepping the Baking Sheet and Oven
First, set your oven to 350°F (175°C). This helps the cookies bake evenly. While the oven warms up, grab a baking sheet and line it with parchment paper. This step keeps the cookies from sticking. It also makes cleanup easier. You can use any size of baking sheet, but a standard one works great.
Mixing Wet Ingredients
In a large mixing bowl, add 1 cup of softened unsalted butter. Then, mix in 1 cup of granulated sugar and 1 cup of packed brown sugar. Use an electric mixer on medium speed for about 2-3 minutes. You want the mixture to be light and fluffy. Next, add 2 large eggs one at a time. Mix well after each egg. Finally, pour in 1 tablespoon of pure vanilla extract. Stir until everything is just combined.
Combining Dry Ingredients
Now, take a separate bowl. Whisk together 3 cups of all-purpose flour, 1 teaspoon of baking soda, 1 teaspoon of baking powder, 1/2 teaspoon of salt, and 1/2 cup of yellow cake mix. This mix gives the cookies a cake-like flavor. Whisking well ensures that the dry ingredients blend evenly. This step is key for good texture.
Forming and Baking the Cookies
Slowly add the dry mix to the wet mix. Stir gently until everything is just combined. Be careful not to overmix. This can make the cookies tough. Next, fold in 1 cup of rainbow sprinkles. Use a spatula to keep the sprinkles whole. Now, scoop rounded balls of dough onto the prepared baking sheet, spacing them about 2 inches apart. To make them look festive, sprinkle a few extra rainbow sprinkles on top of each ball before baking. Bake for 10-12 minutes. Watch closely! The edges should be golden, while the centers may seem a bit underbaked. They will firm up as they cool. After baking, let the cookies cool on the sheet for 5 minutes. Then, move them to a wire rack to cool completely. Enjoy your cookies!
Tips & Tricks
Achieving the Perfect Cookie Texture
To get that soft and chewy texture, follow these tips. First, make sure your butter is softened, not melted. This helps create a light and fluffy dough. Cream the butter and sugars well, mixing for 2-3 minutes. Air needs to get into the mix. Avoid overmixing the dough when adding flour. Stop mixing as soon as the flour blends in. This keeps the cookies from getting tough. Finally, let the cookies cool on a wire rack. This helps them firm up perfectly.
How to Store Leftover Dough
You might not bake all your dough at once. No worries! To store leftover cookie dough, scoop it into balls, and place them on a baking sheet. Freeze the balls for about an hour until firm. After that, transfer them to a zip-top bag. Label the bag with the date. You can keep them frozen for up to three months. When you're ready to bake, just add a few extra minutes to the baking time, and enjoy fresh cookies!
Best Practices for Spreading and Topping
To make your cookies look great, space them well on the baking sheet. Leave about 2 inches between each dough ball. This gives them room to spread while baking. Before baking, add extra rainbow sprinkles on top. This adds a fun touch and makes them extra festive. Keep an eye on your cookies as they bake. You want the edges to be golden and the centers soft. They will set as they cool, creating that perfect cookie bite.
Pro Tips
- Chill the Dough: For thicker cookies, chill the dough for at least 30 minutes before baking. This will help prevent spreading and give you a soft, chewy texture.
- Use Fresh Sprinkles: Ensure your rainbow sprinkles are fresh for the best color and taste. Old sprinkles can lose their vibrant color and may not provide the same crunch.
- Customize Your Flavor: Feel free to experiment with different extracts, such as almond or lemon, to give your cookies a unique twist that complements the sprinkles.
- Storage Tips: Store your cookies in an airtight container at room temperature for up to a week. For longer freshness, freeze them in a single layer and transfer to a zip-top bag.
Variations
Gluten-Free Rainbow Sprinkle Cookies
You can make these cookies gluten-free! Swap the all-purpose flour for a gluten-free blend. Look for blends that include xanthan gum. This ingredient helps mimic the gluten structure in regular flour. Use the same amount of the gluten-free blend as the recipe states. The rest of the steps remain the same. Your cookies will still taste great with the rainbow sprinkles!
Vegan Options for the Recipe
Want a vegan version? You can easily replace the eggs. Use 1/4 cup unsweetened applesauce for each egg. This helps bind the dough. Instead of butter, use vegan butter or coconut oil. Make sure the vanilla extract is also vegan. The cookies will still be delicious and colorful!
Flavor Twists: Adding Chocolate Chips or Nuts
You can add fun twists to your cookies. Mix in 1/2 cup of chocolate chips for a rich taste. Dark, milk, or white chocolate all work well. If you like nuts, try adding 1/2 cup of chopped nuts. Walnuts, pecans, or almonds add a nice crunch. You can adjust the sprinkles too. Just make sure to mix gently so the sprinkles stay bright!
Storage Info
Storing Baked Cookies
Store your baked cookies in an airtight container. This helps keep them soft and fresh. You can stack them, but place parchment paper between layers. They will stay tasty for up to one week at room temperature. If you want them to last longer, keep them in the fridge. Just remember to let them cool completely before storing.
Freezing Cookie Dough and Baked Cookies
Freezing cookie dough is easy. Scoop the dough onto a baking sheet, and freeze until firm. After that, transfer the dough balls to a freezer bag. They will last for about three months. When you want fresh cookies, bake them straight from the freezer. Just add a minute or two to the baking time.
You can also freeze baked cookies. Wrap each cookie in plastic wrap or foil. Place them in a freezer bag to avoid freezer burn. They will keep well for about three months, too.
Shelf Life and Best Practices for Freshness
For the best taste, eat your cookies within a week. To keep them fresh, avoid direct sunlight and heat. Make sure the container is sealed properly. If you notice them getting hard, place a slice of bread in the container. The bread will help keep the cookies soft. Enjoy your cookies at their best!
FAQs
Can I use other types of sprinkles?
Yes, you can use other types of sprinkles. You can try chocolate sprinkles, nonpareils, or even themed sprinkles for holidays. Each type adds its own twist to the cookies. Just ensure the sprinkles are colorful and fun!
How do I know when the cookies are done baking?
You can tell the cookies are done when the edges are lightly golden. The center may look a bit soft, but it will firm up as they cool. Keep a close watch during the last few minutes of baking.
What can I serve with Rainbow Sprinkle Birthday Cake Cookies?
These cookies pair well with milk, coffee, or hot chocolate. You could also serve them with ice cream for a fun dessert. They are great for parties or any festive occasion!
In this post, we covered how to make delicious Rainbow Sprinkle Birthday Cake Cookies. We went through key ingredients, step-by-step instructions, and tips to get the best texture. You also learned about tasty variations like gluten-free and vegan options. Finally, we discussed how to store your cookies and answered common questions.
These cookies are fun to make and share. Enjoy baking, and I hope you love every bite!